
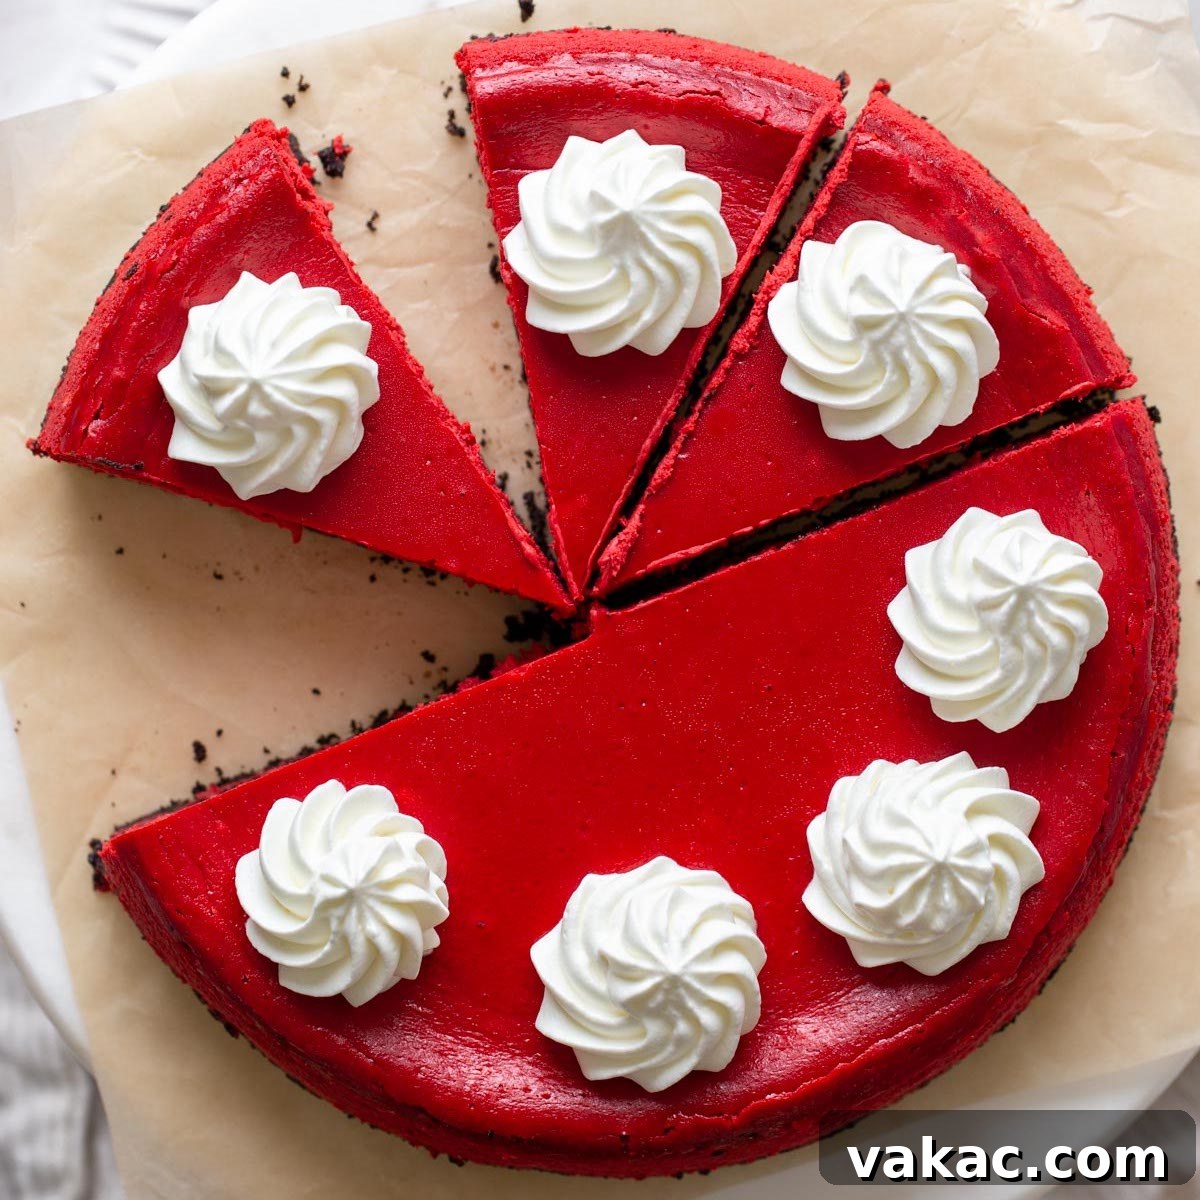
Craving a show-stopping dessert that combines two beloved classics? Look no further than this incredibly rich and vibrant red velvet cheesecake, complete with a delightful Oreo cookie crust. This isn’t just any cheesecake; it’s a celebration of flavor and texture, designed to impress with its striking crimson hue and unbelievably creamy consistency. Whether you’re planning a romantic Valentine’s Day treat, a festive Christmas dessert, or simply want to indulge in something truly special, this recipe is guaranteed to be a hit. Serve it as is for a pure, decadent experience, or elevate it further with a cloud of homemade whipped cream – the choice is yours, and either way, pure bliss awaits.
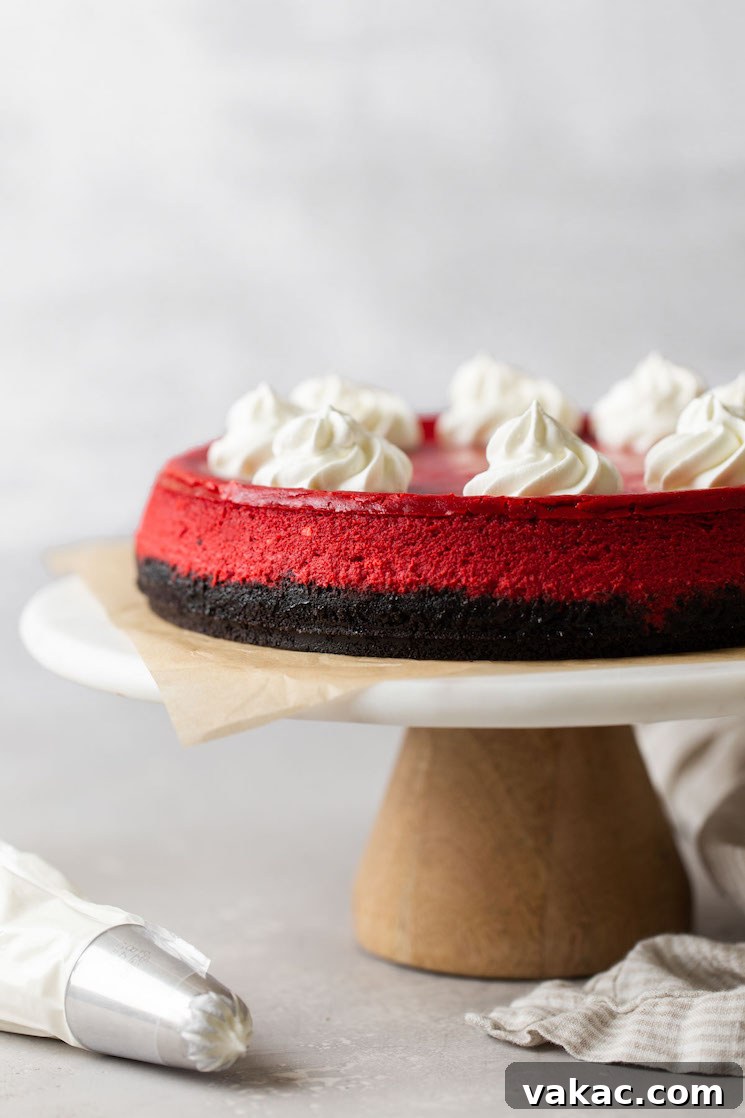
It’s no secret that I have an undeniable passion for cheesecakes. My culinary journey has led me to explore countless variations, and my blog is already home to a diverse collection of cheesecake recipes: from the timeless elegance of a classic baked cheesecake to delightful mini versions and even convenient no-bake options. You name a cheesecake style, and chances are, I’ve delved into creating a perfect recipe for it. Yet, there was one iconic flavor that remained conspicuously absent from my ever-growing repertoire: the magnificent red velvet cheesecake.
After numerous attempts, dedicated experimentation, and a few valuable lessons learned along the way, I am thrilled to finally share what I confidently believe is the ultimate red velvet cheesecake recipe. This creation is truly special: it requires fewer than ten staple ingredients, results in an ultra-creamy, melt-in-your-mouth filling, and features a decadent, crunchy Oreo crust that provides the perfect contrast to the smooth, rich cheesecake. Forget the intimidating rumors surrounding baked cheesecakes; while they certainly demand patience during the crucial cooling phase, the actual process of assembling this magnificent dessert—from crafting the simple crust to mixing the luscious filling—is surprisingly straightforward and incredibly rewarding.
In this comprehensive guide, I will walk you through every single step of making this red velvet cheesecake. My goal is to equip you with all the knowledge and confidence you need to recreate this masterpiece in your own kitchen. We’ll cover everything from ingredient selection and preparation to essential baking techniques, ensuring your cheesecake emerges from the oven perfectly baked, gloriously vibrant, and utterly delicious. Let’s embark on this delightful baking adventure together!
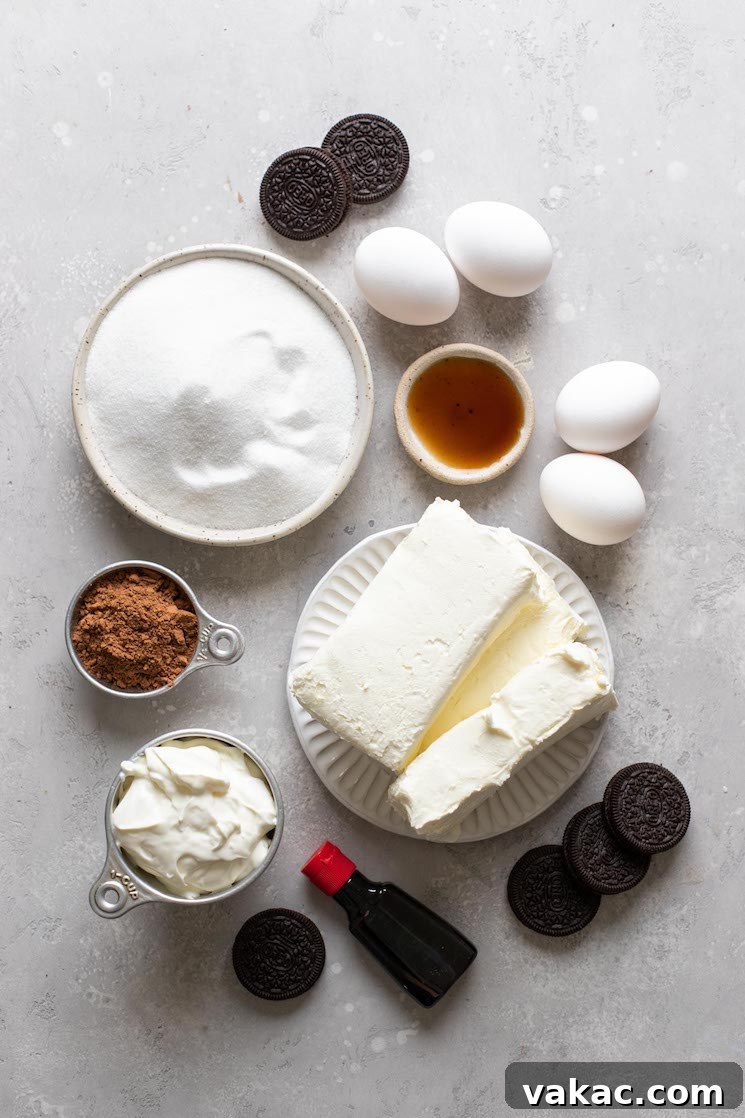
Essential Ingredients for Your Red Velvet Oreo Cheesecake
Crafting this exquisite red velvet Oreo cheesecake requires a carefully selected list of just nine ingredients. While the list is concise, the quality and preparation of each component are paramount to achieving that irresistibly smooth and creamy texture we all desire in a cheesecake. A critical tip before you begin: ensure all your ingredients are at room temperature. This step cannot be overstated, as it is the secret to a lump-free, perfectly blended, and supremely creamy cheesecake filling. Cold ingredients tend to curdle or create lumps, compromising the final texture.
Here’s a detailed look at everything you’ll need to create this festive and flavorful dessert:
- Oreos: The foundation of our spectacular crust! There’s no need to meticulously remove the cream filling from the Oreos. Simply toss the whole cookies into a blender or food processor and blitz them until they form fine, even crumbs. The filling adds extra flavor and helps bind the crust.
- Unsalted Butter: Butter is essential for binding the Oreo crumbs into a firm, flavorful crust. Always opt for unsalted butter in baking recipes. This allows you to control the exact amount of salt in your dessert, as the sodium content in salted butters can vary significantly between different brands, potentially altering the intended flavor profile.
- Full-Fat Brick-Style Cream Cheese: This is the star of our cheesecake filling. For the best results and a truly rich, dense, and creamy cheesecake, always use full-fat, brick-style cream cheese. Cream cheese sold in tubs or spreads is often too thin and has a higher water content, which can lead to a runny or less stable cheesecake that may not set properly.
- Sour Cream: A secret weapon in many cheesecake recipes! Sour cream serves several vital functions. It helps to break up the intense richness and density of the cream cheese, resulting in a lighter yet still incredibly smooth and luxurious filling. It also adds a subtle tang that perfectly balances the sweetness, enhancing the overall flavor complexity.
- Granulated Sugar: Our primary sweetener for the cheesecake filling. Granulated sugar not only provides the necessary sweetness but also plays a role in the cheesecake’s structure and helps to balance the inherent tanginess of the cream cheese and sour cream.
- Natural Unsweetened Cocoa Powder: For that authentic red velvet flavor profile! Red velvet is traditionally a very mild chocolate flavor, and cocoa powder is what provides this depth. Remember to sift the cocoa powder before adding it to your batter. This crucial step prevents any unsightly lumps from forming in your smooth cheesecake filling, ensuring a uniform texture.
- Red Liquid Food Coloring: This is where the “red” in red velvet comes from! To achieve that signature vibrant crimson hue, I recommend using an entire 1-ounce bottle of liquid red food coloring. Don’t be shy with the color; a bold red is part of the charm of this classic dessert.
- Pure Vanilla Extract: A cornerstone of almost any dessert, pure vanilla extract delivers a strong, aromatic flavor that complements both the chocolate and cream cheese notes beautifully. Avoid artificial vanilla for the best taste.
- Large Eggs: Eggs are crucial for binding the filling and providing structure to the cheesecake as it bakes. Just like the cream cheese, ensuring your eggs are at room temperature is important. If you forget to take them out ahead of time, a quick trick is to place them in a bowl of warm (not hot!) water for 5 to 10 minutes. This will gently bring them to the ideal temperature for blending seamlessly into your batter without over-mixing.
Step-by-Step Guide: Crafting Your Perfect Red Velvet Cheesecake
Making a beautifully baked cheesecake might seem daunting, but by following these detailed steps, you’ll achieve a smooth, creamy, and crack-free dessert. Preparation is key, so let’s get started:
Pre-Baking Preparation: The Water Bath
Before you even begin assembling the cheesecake, a crucial first step is to prepare your water bath. Set a large pot of water on the stove to boil. This hot water will be used later to create a steamy environment in your oven, which is essential for baking the cheesecake evenly and preventing cracks.
Crafting the Decadent Oreo Crust
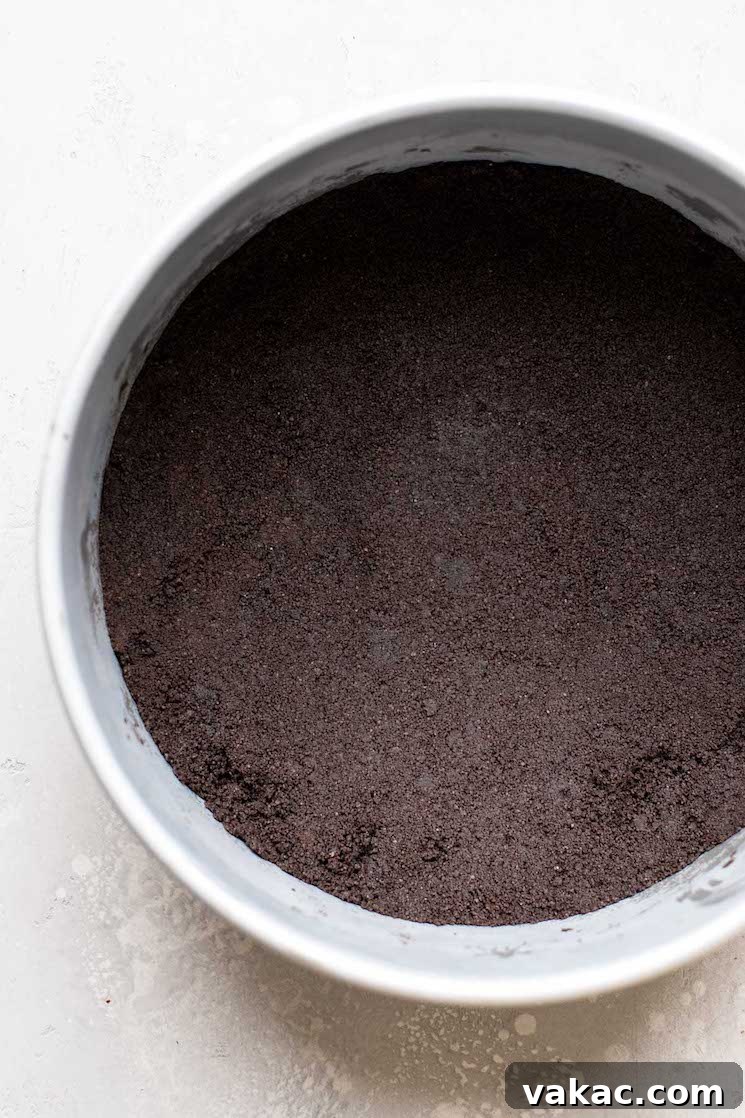
The foundation of our red velvet masterpiece is a rich, chocolatey Oreo crust. For this particular red velvet cheesecake recipe, I adapted my tried-and-true homemade Oreo pie crust recipe. I slightly reduced the amount of butter by one tablespoon compared to my standard recipe. This minor adjustment ensures the crust is perfectly firm and can withstand the moisture of the cheesecake filling without becoming soggy, providing a fantastic textural contrast.
The process of making an Oreo crust is remarkably simple:
- Start by finely crushing your Oreos. A blender or food processor works wonders for this, turning the cookies into uniform, fine crumbs.
- Transfer the crumbs to a mixing bowl and thoroughly combine them with the melted butter. The goal is to moisten all the crumbs, creating a mixture that resembles wet sand.
- Press this mixture firmly into the bottom of a 9-inch springform pan. To achieve a perfectly even and compact crust, I find that using the flat bottom of a measuring cup or a glass works exceptionally well. Press down firmly to create a solid base.
- Bake the Oreo crust in your preheated oven at 325°F (163°C) for 8 to 10 minutes. This pre-baking step helps to set the crust and makes it extra crisp. Once baked, remove it from the oven and set it aside to cool slightly while you prepare the vibrant red velvet filling.
Preparing the Luscious Red Velvet Filling
Now, for the star of the show – the creamy, ruby-red filling! Remember, all your ingredients should be at room temperature for the smoothest results.
- In the bowl of a stand mixer fitted with a paddle attachment (or using a large mixing bowl and a handheld electric mixer), add the softened cream cheese. Beat it on low to medium speed until it is completely smooth and free of lumps. This can take a few minutes.
- Next, incorporate the room temperature sour cream. Mix until it is fully combined with the cream cheese, ensuring the mixture remains silky smooth.
- Add the granulated sugar and the sifted cocoa powder to the bowl. Mix on low speed until these dry ingredients are fully incorporated. Stop the mixer and scrape down the sides and bottom of the bowl frequently to ensure everything is evenly blended and no dry pockets remain.
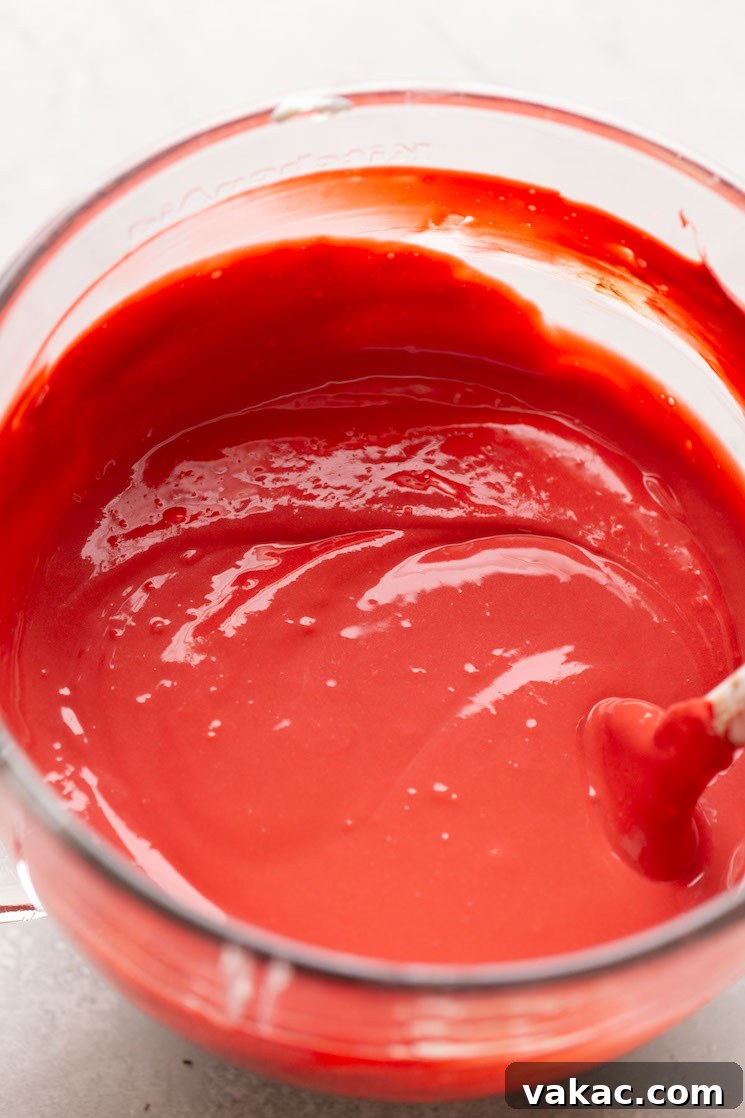
- Pour in the entire bottle of red liquid food coloring and the pure vanilla extract. Continue mixing on low speed until the color is uniformly distributed, creating that stunning red velvet hue, and the vanilla is fully incorporated. Again, scrape down the sides of the bowl to catch any unmixed ingredients.
- The eggs go in last, and this is a critical step to avoid over-mixing. Over-mixing eggs can incorporate too much air into the batter, which can cause the cheesecake to puff up excessively in the oven and then fall, leading to cracks. To prevent this, lightly beat the four room temperature eggs in a separate small bowl first, just until the yolks and whites are combined.
- Pour the lightly beaten eggs into the cheesecake filling and mix on the lowest speed possible, just until they are barely combined. The moment you see no streaks of egg, stop mixing. A few gentle turns with a rubber spatula can help ensure everything is incorporated without introducing excess air. Set the filling aside.
Assembling and Baking Your Cheesecake
With the crust baked and the filling ready, it’s time to prepare for the water bath and the baking process.
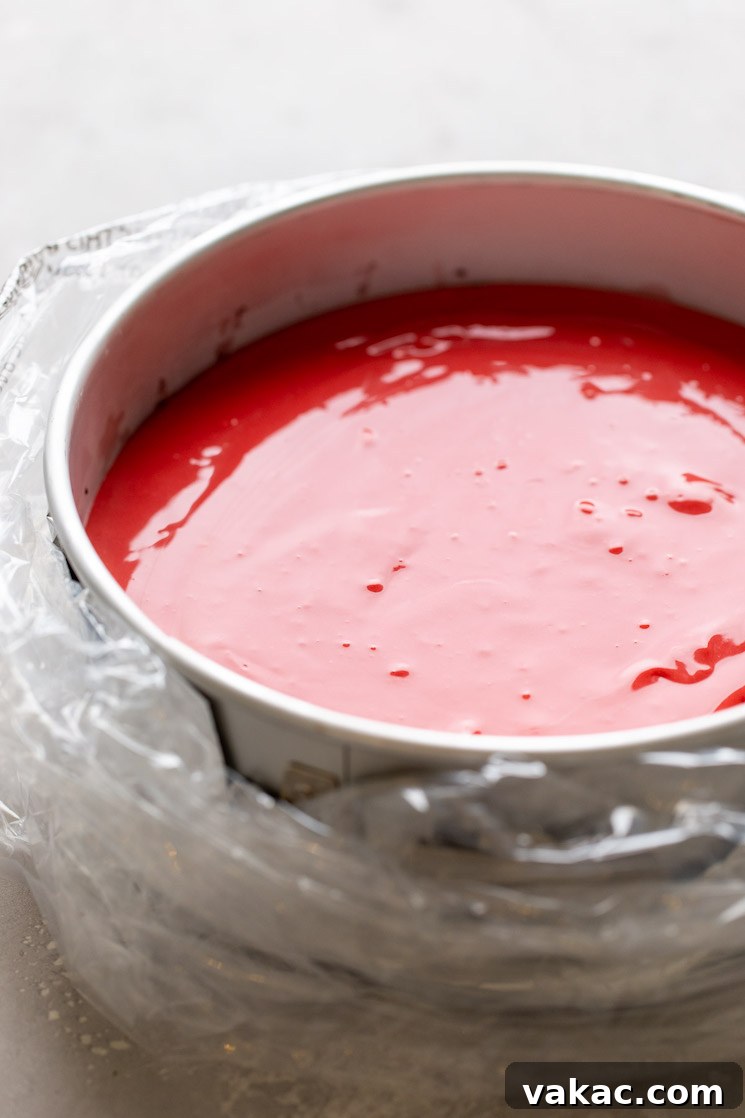
- Prepare the Pan: Before spooning the cheesecake filling into the Oreo crust, you need to properly prepare your springform pan for the water bath. Wrap the outside of the springform pan tightly with several layers of heavy-duty aluminum foil. For extra reassurance and to completely prevent any water from seeping into your crust, I strongly suggest placing the foil-wrapped pan into a large oven bag. Fold the excess oven bag material down around the sides of the springform pan.
- Fill the Pan: Carefully pour the red velvet cheesecake filling over the cooled, pre-baked Oreo crust in the prepared springform pan. Use an offset spatula or the back of a spoon to gently smooth out the top into an even layer.
- Release Air Bubbles: To remove any large air bubbles trapped in the batter, gently tap the pan a few times on the counter. You might see some bubbles rise to the surface. For any stubborn or large bubbles, use a toothpick or skewer to pop them and gently smooth the surface again.
- The Water Bath: Carefully place the wrapped springform pan into a larger roasting pan. Now, pour the boiling water you prepared earlier into the roasting pan, around the springform pan, until the water level is about 1 inch deep. Be careful not to splash any water into the cheesecake itself. The water bath ensures that the cheesecake bakes gently and evenly, creating that signature creamy texture and preventing it from cracking due to rapid temperature changes.
- Bake to Perfection: Transfer the roasting pan, with the cheesecake nestled inside, to your preheated oven. Bake at 325°F (163°C) for 60 to 65 minutes. The cheesecake is done when the edges appear set and firm, but the very center still has a slight, subtle jiggle when gently nudged. It should not be liquid or wobbly.
- Crucial Cooling Phase 1 (Oven): This step is paramount for preventing cracks! Once the cheesecake is baked, turn off the oven but leave the cheesecake inside. Crack the oven door slightly open (you can use a wooden spoon to keep it ajar) and allow the cheesecake to cool gradually in the warm oven for an additional hour. This slow cooling prevents sudden temperature shifts that can cause the cheesecake to contract too quickly and crack.
- Crucial Cooling Phase 2 (Wire Rack & Refrigerator): After the hour in the oven, carefully remove the cheesecake from the oven (and the water bath). Transfer the springform pan to a wire rack to cool completely to room temperature. This can take several hours. Once it’s fully cooled, cover the cheesecake tightly with plastic wrap and transfer it to the refrigerator to chill for at least 5 to 6 hours, or ideally, overnight. Chilling is essential for the cheesecake to fully set and achieve its perfect, firm, yet creamy consistency.
- Serve and Enjoy: Once thoroughly chilled, run a thin, sharp knife carefully around the outside edge of the cheesecake to loosen it from the pan. Then, gently release and remove the springform pan collar. Slice into beautiful pieces, serve, and prepare for rave reviews!
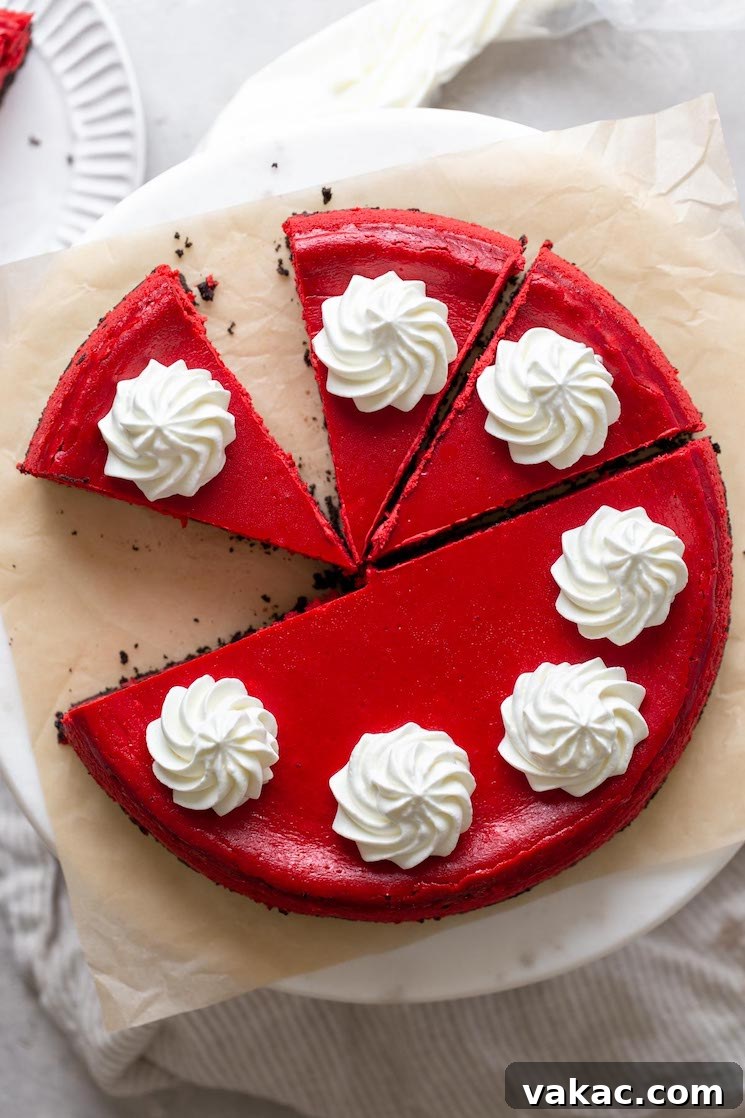
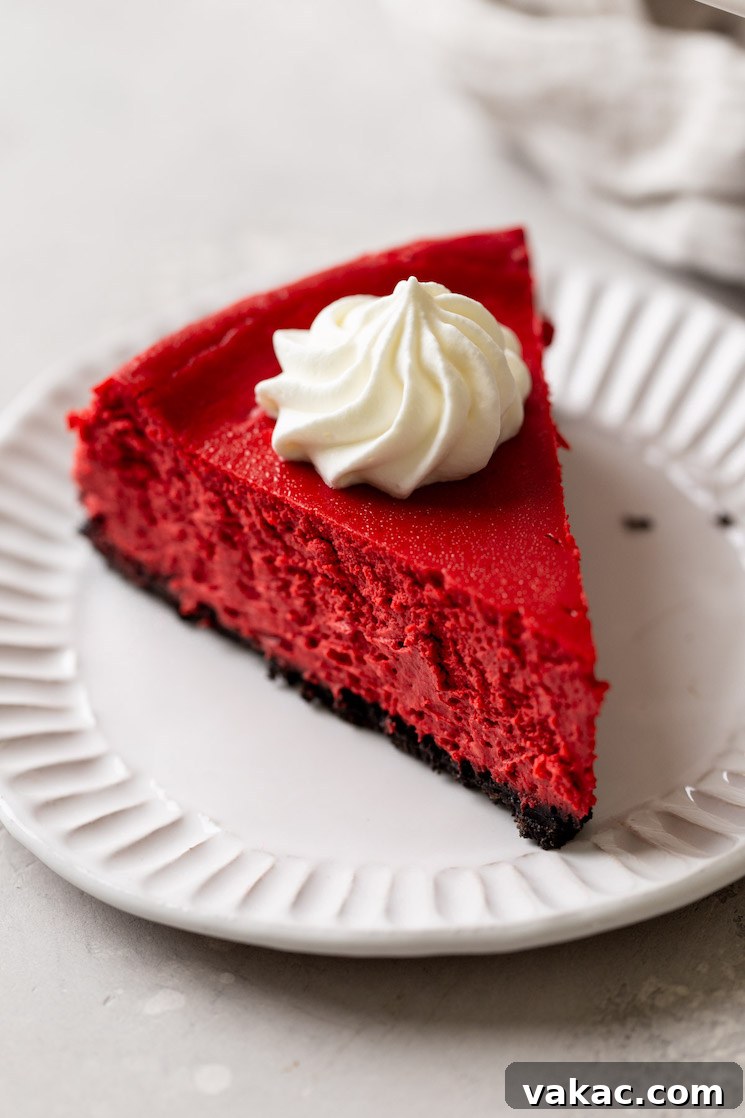
For the ultimate red velvet cheesecake experience, once it’s completely chilled and ready to serve, I highly recommend piping some homemade whipped cream on top. The light, airy sweetness of whipped cream beautifully complements the rich, tangy cheesecake. However, rest assured, this cheesecake is absolutely divine and incredibly delicious even when enjoyed plain!
Frequently Asked Questions About Baking Cheesecake
Cheesecakes can sometimes feel a bit mysterious, but a few common questions arise for bakers. Here are answers to some of the most frequently asked questions to help you master this red velvet delight:
How Can You Tell When Cheesecake Is Done Baking?
Knowing exactly when your cheesecake is perfectly baked is crucial for achieving that ideal creamy texture. You’ll know a cheesecake is done baking when the edges (about 1-2 inches in from the rim of the pan) appear set and slightly firm. The very center of the cheesecake, however, should still have a slight, gentle jiggle when you carefully nudge the pan. It shouldn’t be liquid or sloshy, but rather like a firm custard. Don’t worry if the center seems a bit soft; the cheesecake will continue to set and firm up significantly as it cools, first in the warm oven, and then in the refrigerator.
Why Does Cheesecake Crack?
Cheesecake cracks are a common frustration for bakers, but they are almost always preventable. Several factors can contribute to cracks appearing on the top surface of your cheesecake:
- Over-mixing the Eggs: This is one of the most common culprits. When you over-mix the eggs into the cheesecake filling, you incorporate too much air into the batter. This excess air causes the cheesecake to puff up too much during baking, and as it cools, it deflates and can crack. Always mix the eggs gently and only until just combined.
- Skipping or Insufficient Water Bath: A water bath (bain-marie) is not just a suggestion; it’s a vital technique for baked cheesecakes. It provides a moist, steamy environment in the oven that helps the cheesecake bake slowly and evenly, preventing the edges from baking faster and drying out before the center is done. If you skip the water bath or don’t fill it high enough, the uneven baking can lead to cracks.
- Sudden Temperature Changes: Cheesecakes are sensitive to abrupt temperature shifts. Removing a hot cheesecake directly from the oven into a much cooler room can shock the delicate custard, causing it to contract too quickly and crack. This is why the method of cooling the cheesecake gradually in the turned-off oven with the door ajar is so important.
- Over-baking: Baking the cheesecake for too long can also cause it to dry out and crack. Always look for that slight jiggle in the center to determine doneness, rather than relying solely on time.
How Long Does This Red Velvet Cheesecake Last in the Fridge?
This red velvet Oreo cheesecake is best enjoyed fresh, but it stores beautifully. If kept properly, it will last for up to four days in the refrigerator. Ensure it is stored in an airtight container to maintain its freshness, prevent it from absorbing odors from other foods, and keep it from drying out.
Can You Freeze This Red Velvet Cheesecake?
Absolutely! Cheesecake freezes exceptionally well, making it a fantastic make-ahead dessert. To freeze, ensure the cheesecake is completely cooled and chilled. You can freeze it whole or in individual slices. Wrap the cheesecake tightly first in plastic wrap, then again in aluminum foil to prevent freezer burn. Place the well-wrapped cheesecake in a large freezer bag or an airtight freezer-safe container. It can be stored in the freezer for up to 3 months. When you’re ready to enjoy a slice, simply transfer the frozen cheesecake to the refrigerator and allow it to thaw overnight before serving.
Pro Baking Tips for a Flawless Cheesecake
- Achieve Room Temperature Magic: This tip is worth repeating! For the smoothest, creamiest cheesecake filling imaginable, make it a habit to set all your cold ingredients (cream cheese, sour cream, eggs, butter for the crust) out on the counter at least an hour before you plan to start baking. Room temperature ingredients emulsify much better, resulting in a perfectly uniform batter without lumps.
- Embrace Full-Fat: While healthier alternatives exist, for a truly rich, decadent, and structurally sound cheesecake, I strongly recommend sticking to full-fat ingredients. Low-fat or non-fat cream cheese and sour cream often contain more water and less fat, which can lead to a thinner, less stable filling that may not set up as beautifully.
- Plan Ahead for Perfection: Cheesecake is one of those wonderful desserts that actually benefits from being made in advance. Preparing this recipe a day or two before you plan on serving it allows ample time for it to chill thoroughly in the refrigerator. This extended chilling period is crucial for the cheesecake to firm up, develop its full flavor, and become perfectly sliceable.
More Homemade Cheesecake Recipes to Discover!
If you’ve fallen in love with making cheesecake, or if this red velvet rendition sparks a new passion, be sure to explore some of my other cherished recipes:
- Classic Baked Cheesecake
- Mini Lemon Blueberry Cheesecakes
- Pumpkin Cheesecake
- Classic No-Bake Cheesecake
- Mini Oreo Cheesecakes
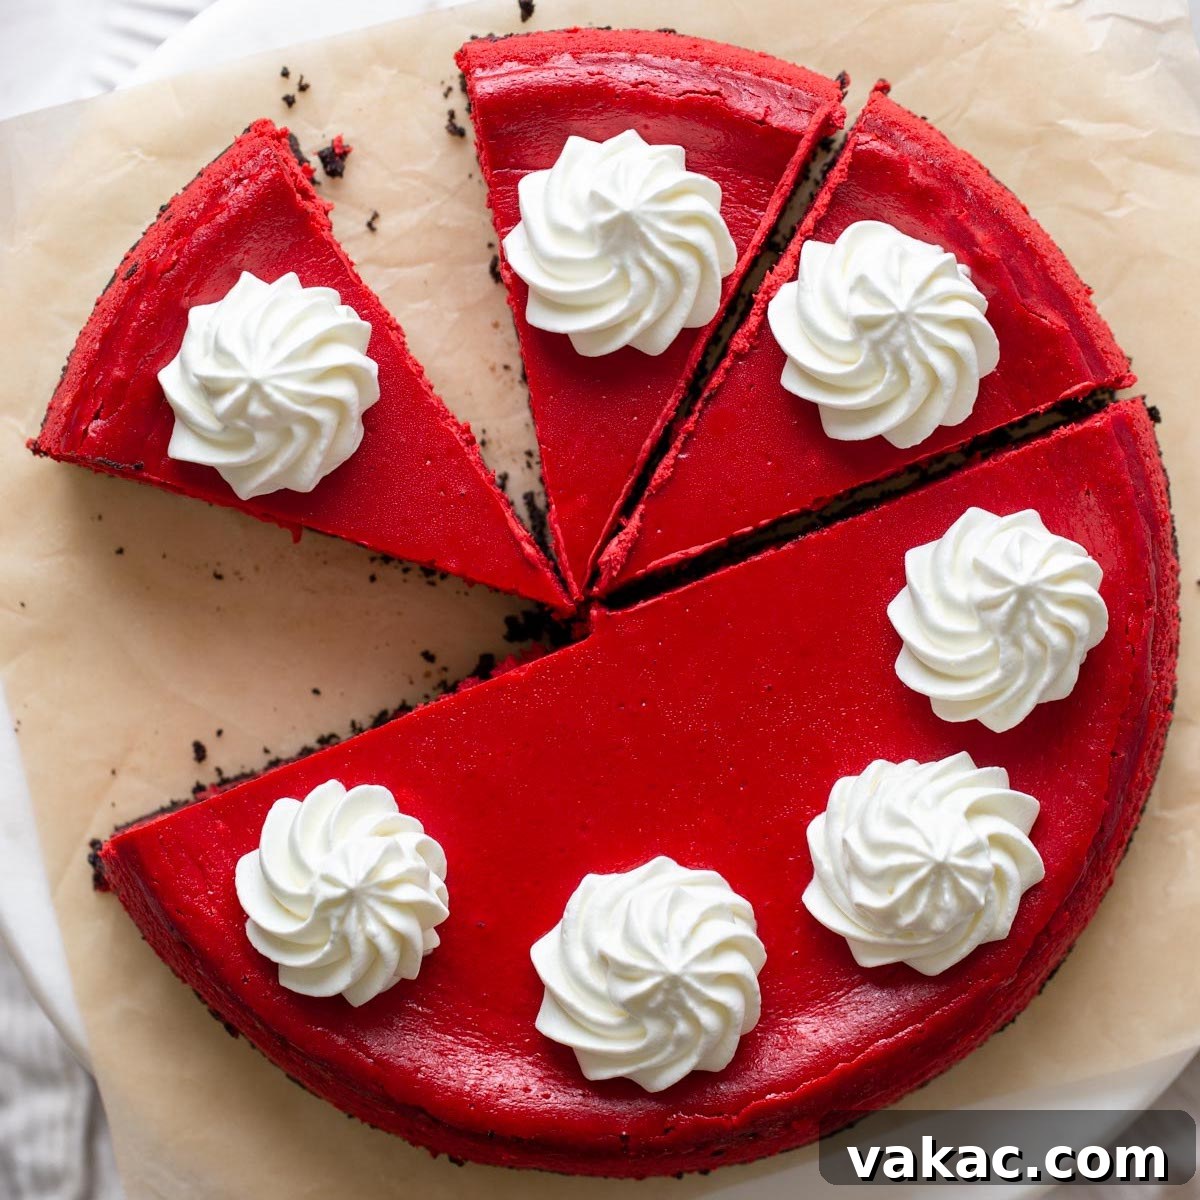
Red Velvet Cheesecake
This red velvet cheesecake recipe has an Oreo cookie crust. It can be enjoyed as is or topped with homemade whipped cream. Perfect for Valentine’s Day or Christmas!
Pin Recipe
Leave a Review
Ingredients
For the crust:
- 24 Oreos
- 3 tablespoons (45 grams) unsalted butter, melted and slightly cooled
For the cheesecake filling:
- 24 ounces (680 grams) brick-style cream cheese, softened to room temperature
- 1 cup (240 grams) sour cream, room temperature
- 1 ⅓ cups (270 grams) granulated sugar
- 3 tablespoons (16 grams) natural unsweetened cocoa powder, sifted
- 1 (1-ounce) bottle red liquid food coloring
- 2 teaspoons pure vanilla extract
- 4 large eggs, room temperature
Instructions
To make the Oreo crust:
- Preheat the oven to 325°F (163°C). Add the Oreos to a blender or food processor and process until you have fine crumbs. Scoop the crumbs into a mixing bowl and add the melted butter. Mix together until all of the crumbs are moistened.
- Scoop the mixture into a 9-inch springform pan and firmly press it down into an even layer on the bottom of the pan.
- Bake at 325°F (163°C) for 8 to 10 minutes, then remove from the oven and set aside to cool slightly while you make the filling.
To make the cheesecake filling:
- Set a large pot of water to boil for the water bath before getting started with the filling.
- In the bowl of a stand mixer fitted with the paddle attachment, or in a large mixing bowl using a handheld mixer, beat the cream cheese on low-medium speed until smooth. Add the sour cream and mix until fully combined. Add the granulated sugar and cocoa powder and mix until well combined, then mix in the red food coloring and vanilla extract until fully combined, stopping to scrape down the sides of the bowl as needed.
- In a separate small mixing bowl, lightly beat the eggs. Add the beaten eggs to the mixing bowl with the cheesecake filling and mix on low speed until just combined. Use a rubber spatula to turn the filling a few times to make sure everything is fully mixed together. Set aside.
- Wrap the springform pan with the pre-baked Oreo crust in aluminum foil, then place into a large oven bag. Fold the oven bag down the sides of the springform pan.
- Pour the cheesecake filling into the springform pan and smooth it out into one even layer. Tap the pan on the counter a couple of times to bring any air bubbles to the top, then use a toothpick or skewer to remove any large air bubbles and smooth them out.
- Carefully place the wrapped springform pan into a large roasting pan. Slowly add the boiling water you started before the filling into the roasting pan until it is about 1-inch deep.
- Transfer the roasting pan with the cheesecake to the oven and bake at 325°F (163°C) for 60 to 65 minutes or until the edges of the cheesecake are set and the center is still slightly jiggly. Turn the oven off, crack the oven door slightly, and allow the cheesecake to cool in the warm oven for 1 hour.
- After the cheesecake has cooled for 1 hour in the oven, remove it from the oven and transfer to a wire rack to cool completely. Once cooled, cover tightly and transfer to the refrigerator to chill for 5 to 6 hours or overnight.
- Run a thin knife around the outside of the cheesecake to loosen it from the pan, carefully release the springform pan, then slice into pieces, serve, and enjoy!
Notes
Storage Instructions: Store cheesecake in an airtight container in the refrigerator for up to 4 days.
Freezing Instructions: Cheesecake may be wrapped tightly and stored in a large freezer bag in the freezer for up to 3 months. Thaw overnight in the refrigerator.
Room Temperature Ingredients: I highly recommend setting all of your ingredients out ahead of time so that they can come to room temperature. This will ensure a much smoother, creamier cheesecake filling.
Oreos: You will be using the whole Oreo, no need to remove the filling.
Cream Cheese: Make sure to use brick-style cream cheese for this recipe. Cream cheese spread in a tub is much too thin.
Eggs: If you forget to set your eggs out ahead of time, simply place them in a bowl of warm water for 5 to 10 minutes.
Did you make this recipe?
Mention @livewellbakeoften on Instagram or tag #livewellbakeoften.