
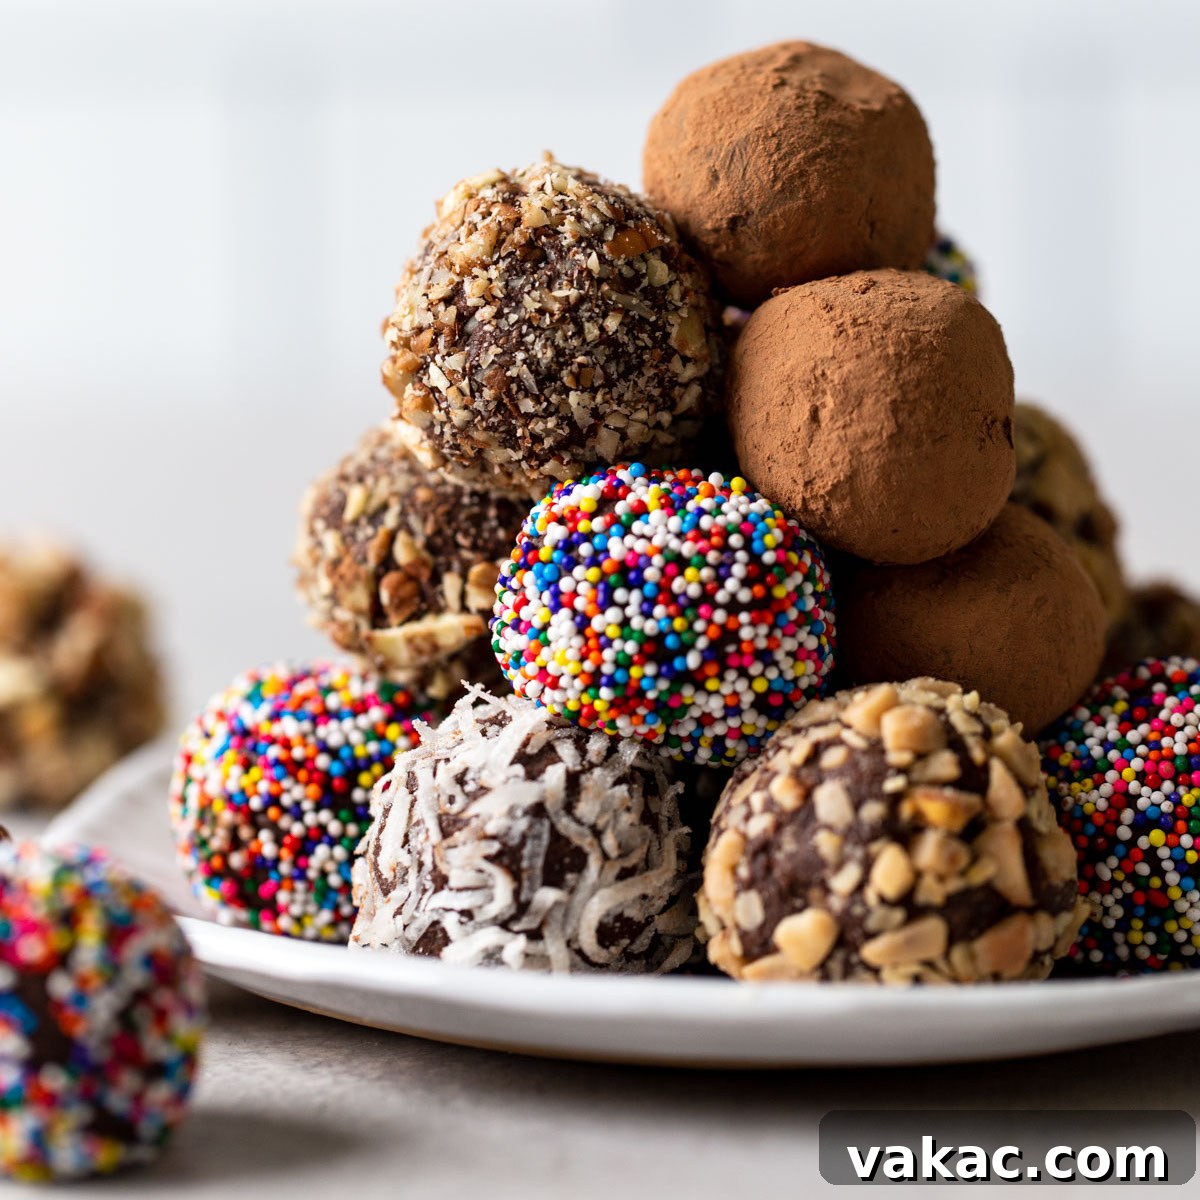
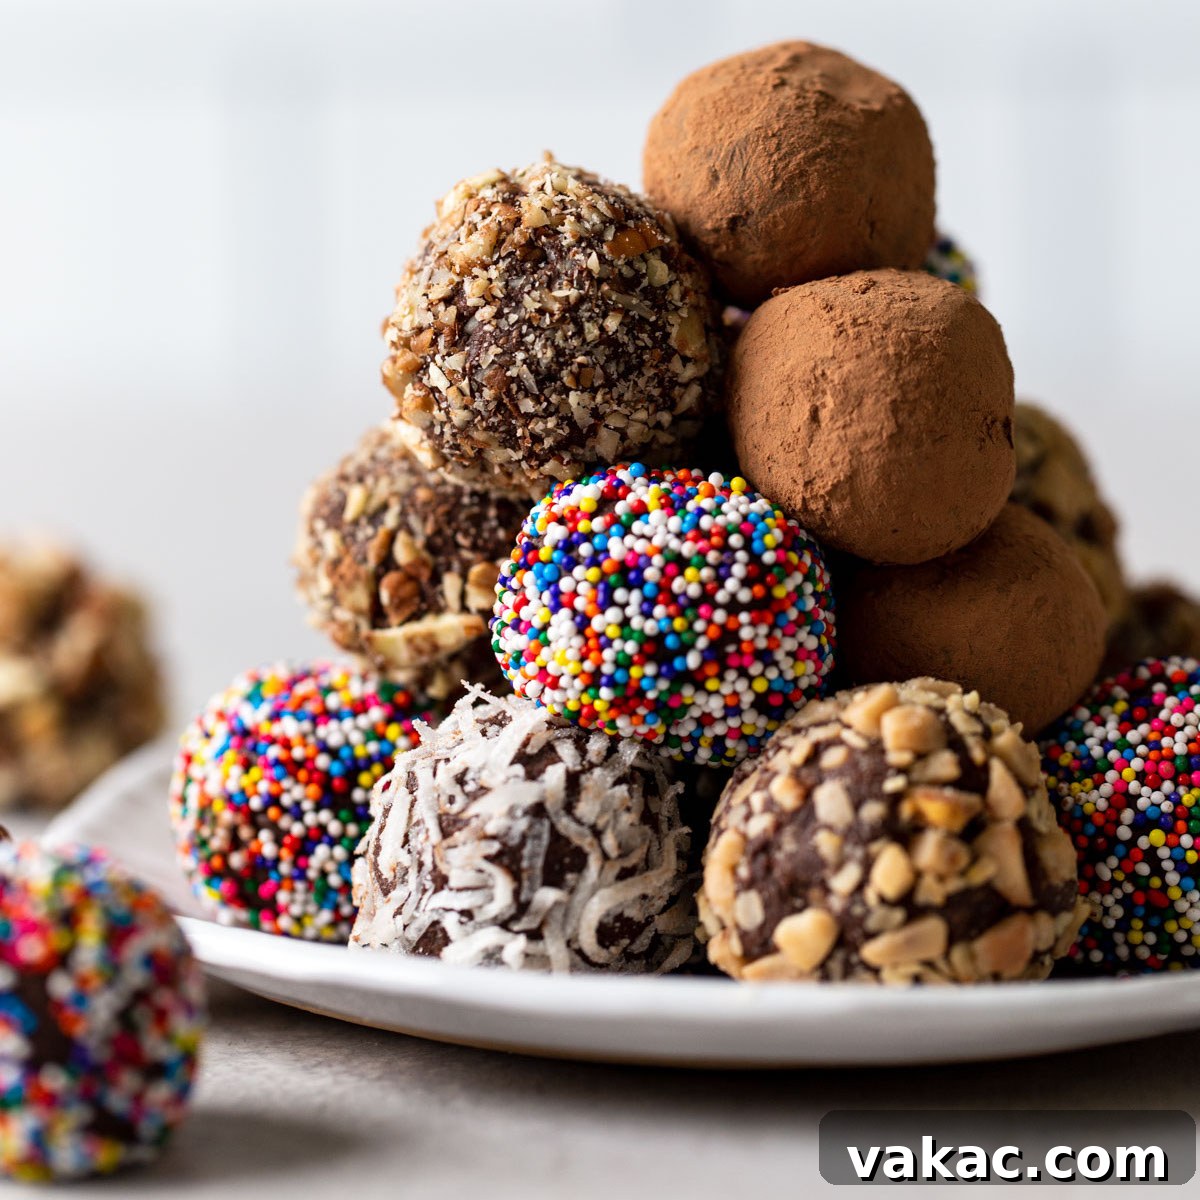
Indulge in the simplest yet most exquisite treat with our homemade chocolate truffles! Requiring just two basic ingredients, this recipe transforms ordinary chocolate and cream into a luxurious, melt-in-your-mouth delight. Whether you prefer them plain or rolled in a variety of tempting coatings like rich cocoa powder, crunchy nuts, or flaky coconut, these truffles are effortlessly impressive and utterly delicious. Forget overpriced store-bought confections; elevate your dessert game with this easy-to-follow guide to creating perfect, customizable chocolate truffles right in your own kitchen.
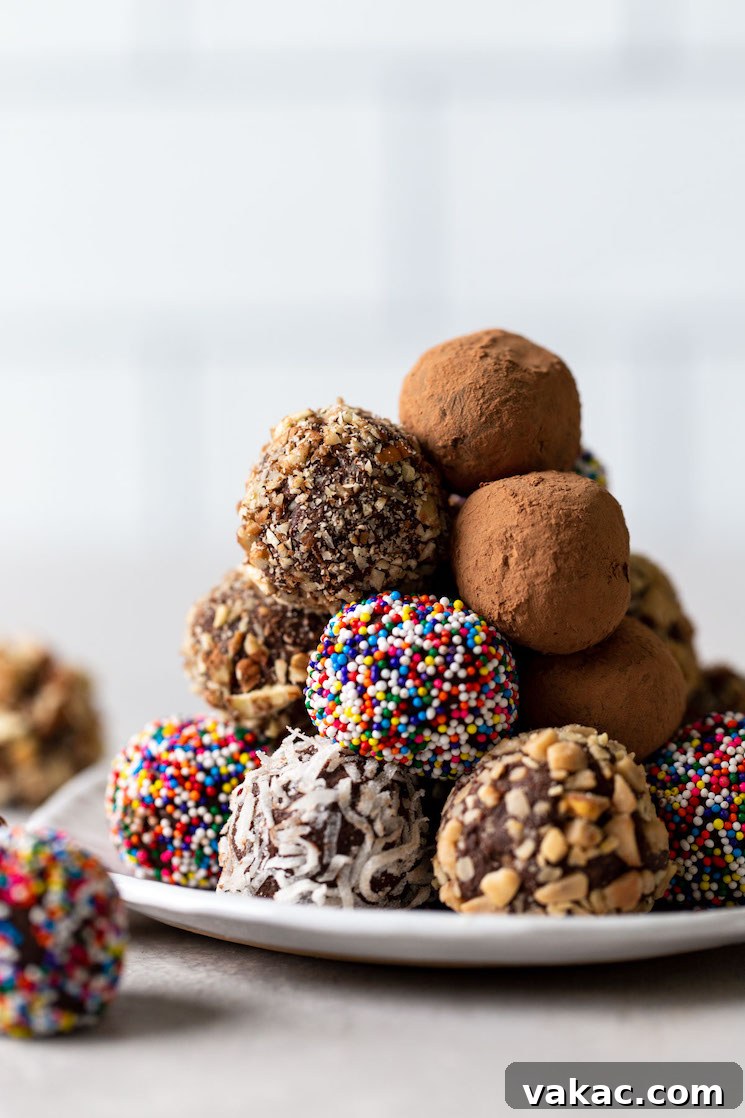
Why Homemade Chocolate Truffles Are a Game Changer
There’s something undeniably special about receiving a box of fine chocolates, especially on occasions like Valentine’s Day, anniversaries, or even just as a thoughtful gesture. However, the premium price tag often associated with gourmet chocolates can be a deterrent, and sometimes, the taste doesn’t quite live up to the expectation. This is where the magic of homemade chocolate truffles truly shines.
Making your own truffles isn’t just about saving money; it’s about control over quality, flavor, and presentation. With this incredibly simple recipe, you can create confections that not only look professionally made but taste infinitely better than anything you’d find on a store shelf. They are remarkably easy to prepare, requiring minimal ingredients and equipment, yet yield results that are sophisticated and utterly delightful. The ability to customize every aspect – from the type of chocolate to the diverse range of coatings – means you can tailor these treats to perfectly suit any palate or occasion. Gifting a box of these handcrafted delights shows a level of care and thoughtfulness that no store-bought item can truly replicate. Prepare to impress everyone, including yourself, with these decadent, easy-to-make chocolate truffles.
Essential Ingredients: The Magic Duo
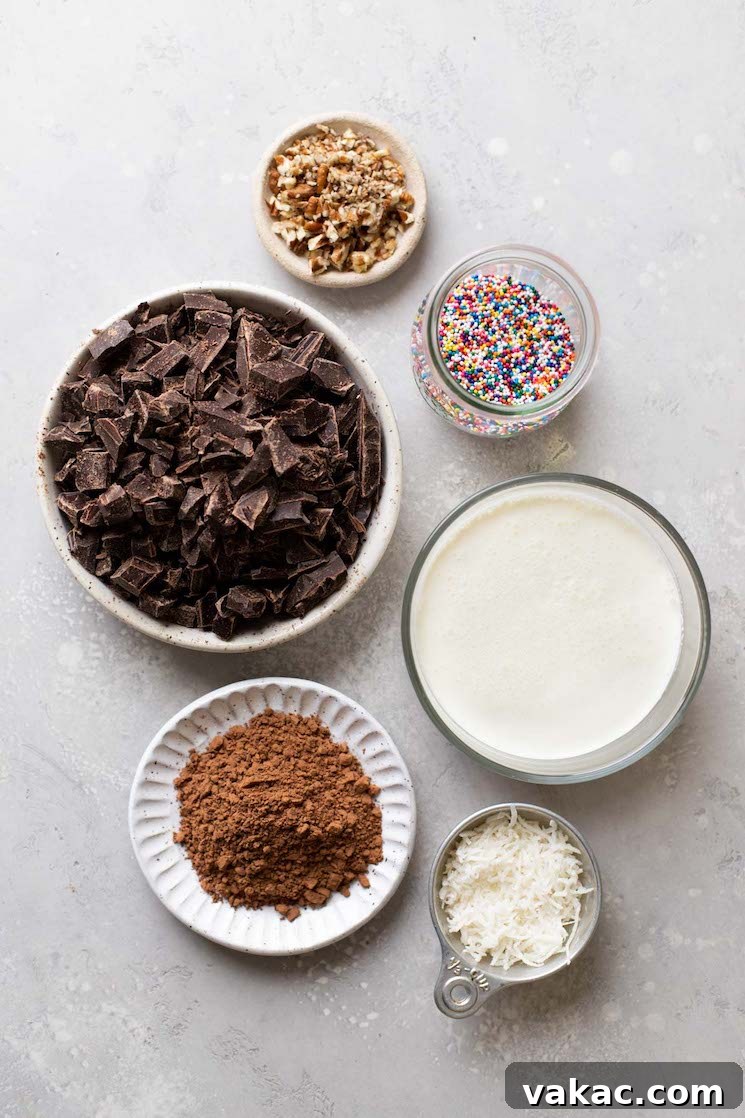
The beauty of this chocolate truffle recipe lies in its sheer simplicity. You truly only need two core ingredients to create the luscious, foundational ganache. Here’s a detailed look at what you’ll need and why each component is crucial:
- High-Quality Chocolate: The star of the show! For the best results, always opt for chocolate bars or blocks rather than chocolate chips. Chocolate chips often contain stabilizers that prevent them from melting smoothly, which can lead to a grainy or clumpy ganache. Semi-sweet or dark chocolate (around 60-70% cacao) works perfectly, providing a rich, balanced flavor that isn’t overly sweet. Brands like Baker’s, Ghirardelli, or Lindt are excellent choices for their consistent quality and smooth melting properties. You will need 12 ounces (approximately three 4-ounce bars) to achieve the ideal truffle consistency and yield. While milk chocolate can be used, it may result in a softer truffle due to its higher sugar and milk fat content, so chilling times might need to be adjusted. White chocolate, being technically not chocolate but a confection, requires specific handling and is generally not recommended for this two-ingredient recipe due to its different melting properties and fat composition.
- Heavy Cream: This is the other essential component that transforms solid chocolate into a silky, moldable ganache. Also known as heavy whipping cream, it’s crucial to use a cream with at least 36% milk fat. The high fat content is what allows the ganache to emulsify properly and set into a firm, yet creamy, truffle consistency when chilled. Lower fat alternatives like half-and-half or light cream will not work as they lack the necessary fat to create the stable emulsion needed for truffles, often resulting in a runny or greasy mixture.
Optional Coatings for Customization
While plain chocolate truffles are a pure delight, adding a coating elevates their texture and visual appeal. This is where you can truly let your creativity shine! Gather a variety of these before you start rolling your truffles:
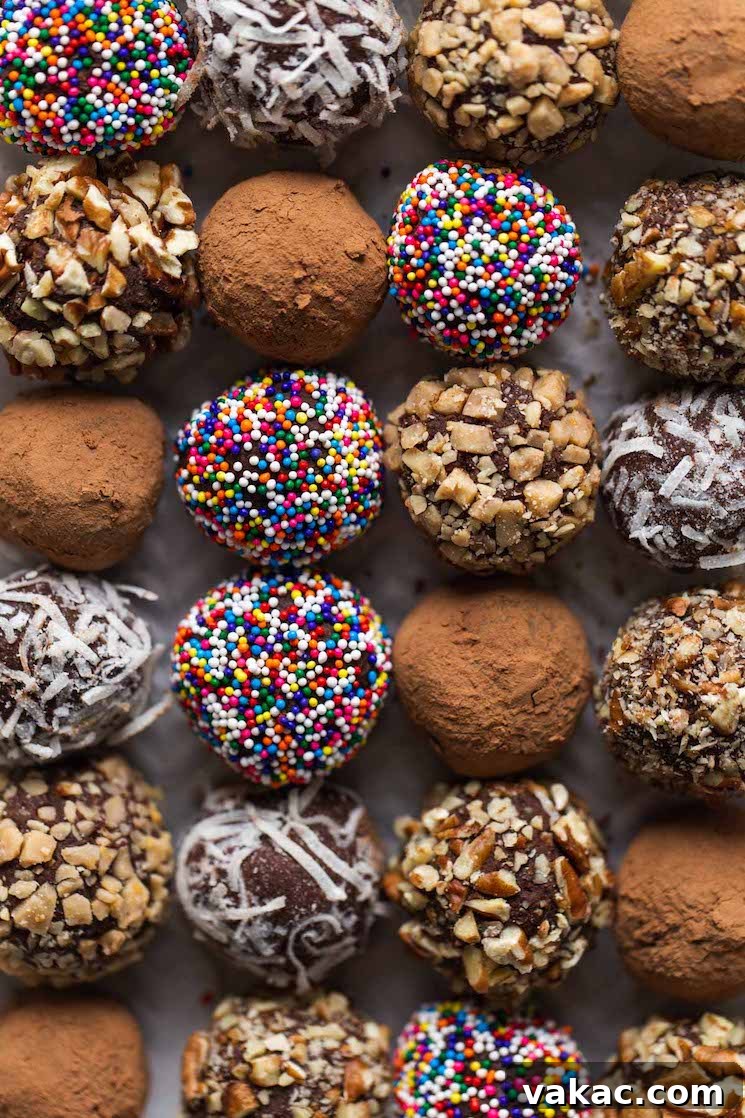
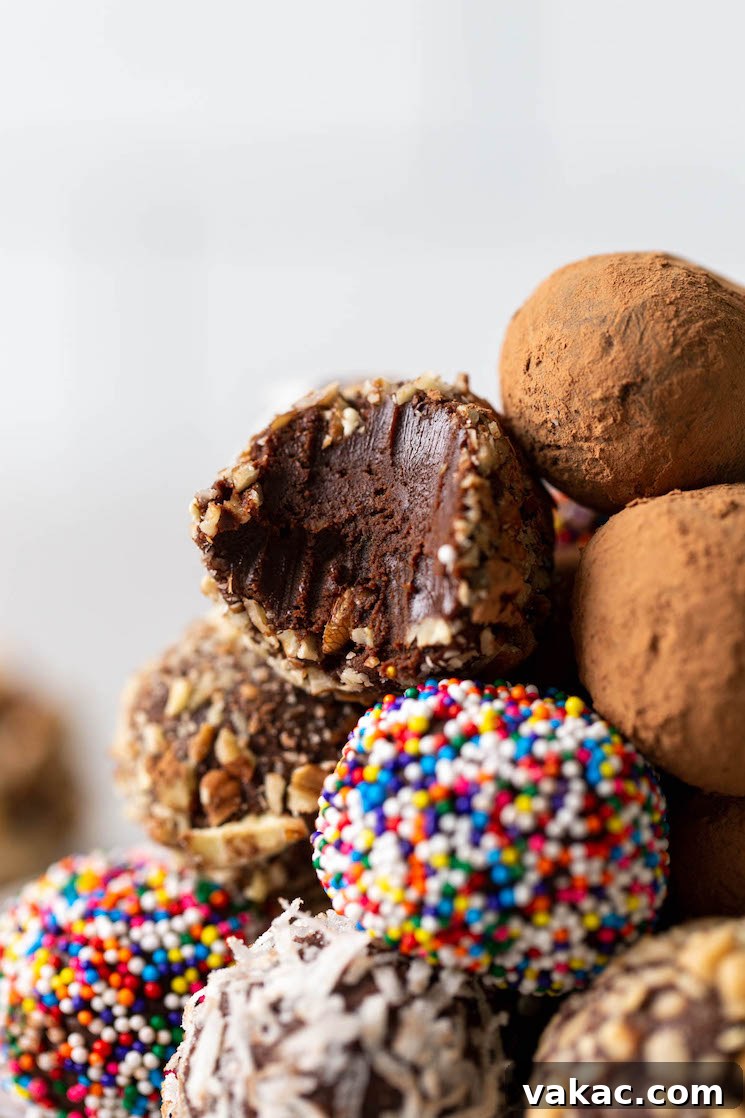
- Unsweetened Cocoa Powder: A classic choice that adds a sophisticated, slightly bitter contrast to the sweet chocolate interior.
- Finely Chopped Nuts: Almonds, walnuts, pecans, or pistachios add a wonderful crunch and nutty flavor. Ensure they are finely chopped so they adhere well to the truffle surface.
- Shredded Coconut: Toasted or untoasted, coconut flakes offer a tropical twist and delightful texture.
- Colorful Sprinkles: Perfect for making truffles festive and fun, especially for holidays or birthdays.
- Melted Chocolate: For an extra layer of chocolatey goodness, dip chilled truffles in melted semi-sweet, milk, or white chocolate. You can drizzle them with a contrasting chocolate for an elegant finish.
- Powdered Sugar: For a delicate, sweet exterior.
- Espresso Powder: A subtle bitter note that enhances the chocolate flavor.
- Sea Salt Flakes: A sprinkle of flaky sea salt creates a delightful sweet and salty contrast.
- Crushed Cookies: Oreos, graham crackers, or shortbread cookies, finely crushed, make a fun and textured coating.
- Spices: A pinch of cinnamon, chili powder, or cardamom can add an unexpected and intriguing flavor dimension.
How to Craft Your Delicious Chocolate Truffles: A Step-by-Step Guide
Creating these elegant chocolate truffles is surprisingly straightforward. Follow these steps for a smooth process and perfect results:
- Prepare the Chocolate: Begin by finely chopping your chocolate bars. This is a crucial step as smaller pieces melt more evenly and quickly, preventing any scorching and ensuring a silky-smooth ganache. Place all the finely chopped chocolate into a large, heat-proof bowl.
- Warm the Cream: Pour the heavy cream into a microwave-safe measuring cup or a small saucepan. Heat the cream until it’s very warm and just beginning to simmer around the edges, but do not let it come to a rolling boil. In a microwave, this typically takes 60 to 90 seconds, depending on your microwave’s power.
- Combine and Steep: Immediately pour the warm heavy cream over the chopped chocolate in the bowl. Ensure all the chocolate is submerged by the cream. Do not stir yet! Let the mixture sit undisturbed for at least 3 minutes. This allows the heat from the cream to gently soften the chocolate, preparing it for the emulsification process.
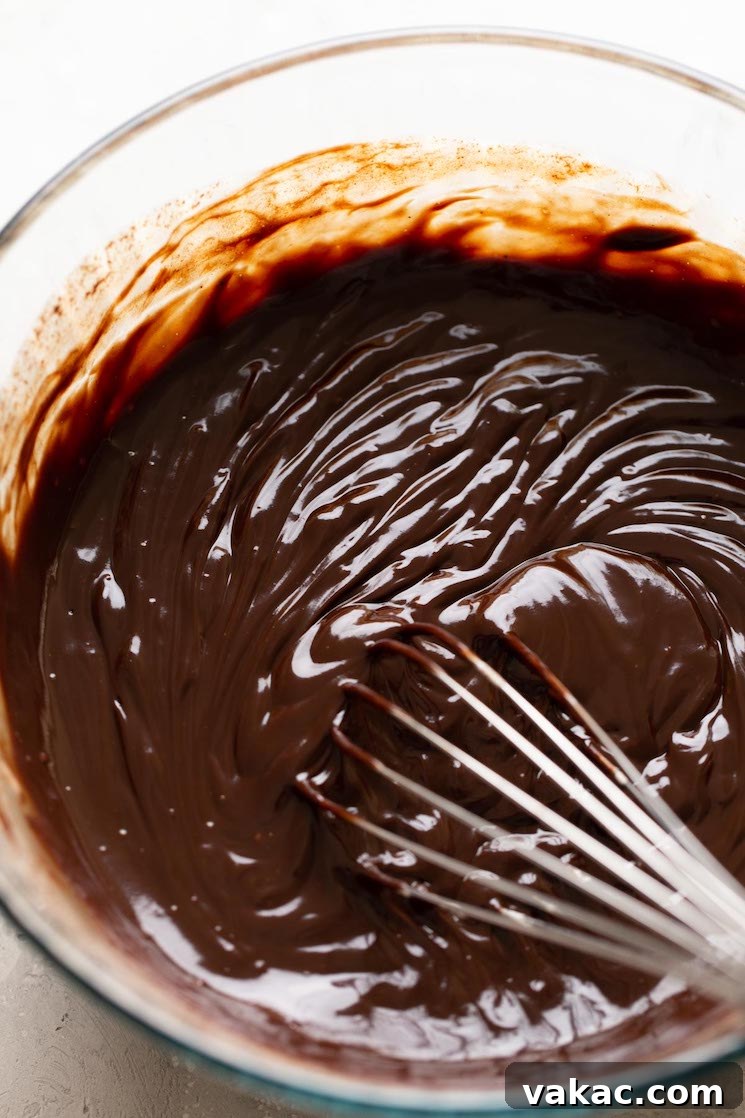
- Whisk to Perfection: After 3 minutes, begin whisking the mixture slowly, starting from the center of the bowl. Continue whisking gently in one direction, gradually expanding your circles until all the chocolate and cream are thoroughly combined and the mixture is completely smooth, glossy, and uniform. If you notice any stubborn unmelted chocolate pieces, you can microwave the mixture in short 15-20 second increments, stirring vigorously after each increment, until it reaches a perfectly smooth consistency.
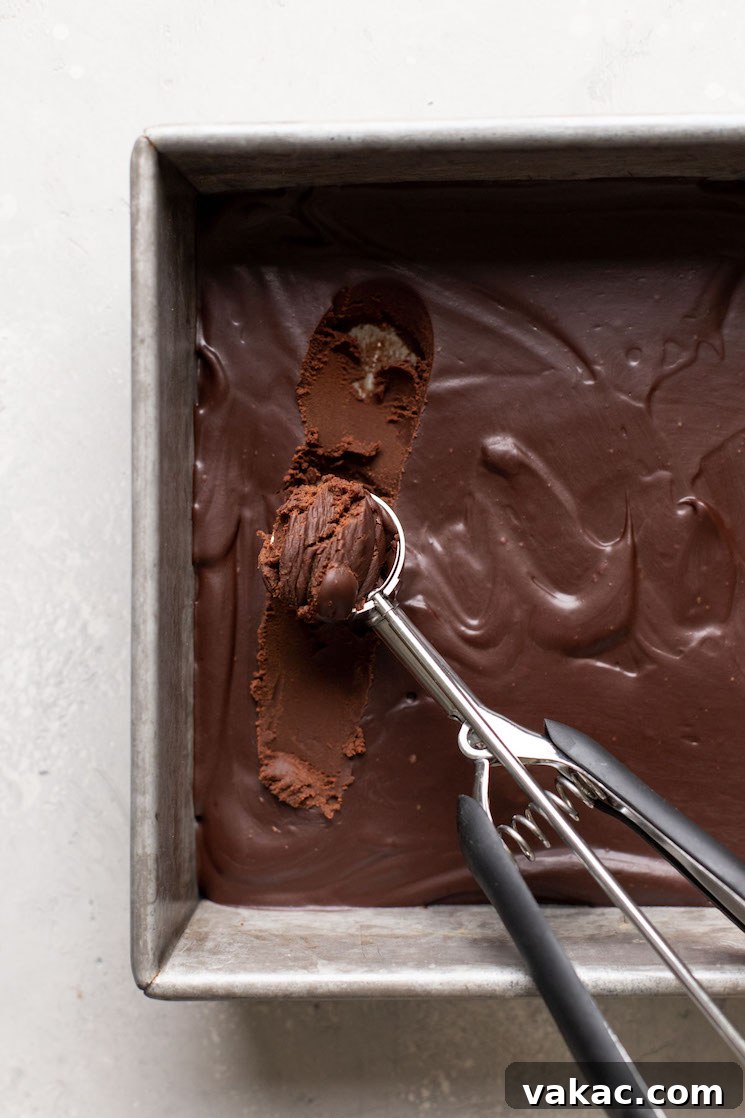
- Chill the Ganache: Pour the warm ganache into a shallow dish, such as an 8-inch square baking pan or a similar-sized platter. Spread it out into an even layer, which helps it chill more uniformly. Refrigerate the uncovered ganache for a minimum of 2 hours, or until it is firm to the touch. This firmness is essential for the next step – scooping and rolling.
- Prepare for Rolling: While the ganache chills, line a large baking sheet with parchment paper. Prepare your chosen coatings by placing each in a separate shallow dish or bowl.
- Scoop and Roll: Once the ganache is firm, remove it from the refrigerator. Using a 1-tablespoon cookie scoop or simply a spoon, scoop out portions of the truffle mixture. Working quickly, gently roll each portion between your palms to form smooth, round balls. It’s important to work swiftly, as the warmth from your hands can cause the chocolate to soften and become sticky. If the ganache becomes too soft, simply return it to the fridge for a few minutes to re-firm. Place the rolled truffles onto your prepared baking sheet.
- Second Chill: After all the truffles are rolled, transfer the baking sheet back to the refrigerator for another 20 to 30 minutes. This second chill helps them firm up completely, making them easier to coat and ensuring they hold their shape. If you plan to dip them in melted chocolate, chilling them in the freezer for 15-20 minutes at this stage can help prevent the chocolate coating from melting the truffle’s interior.
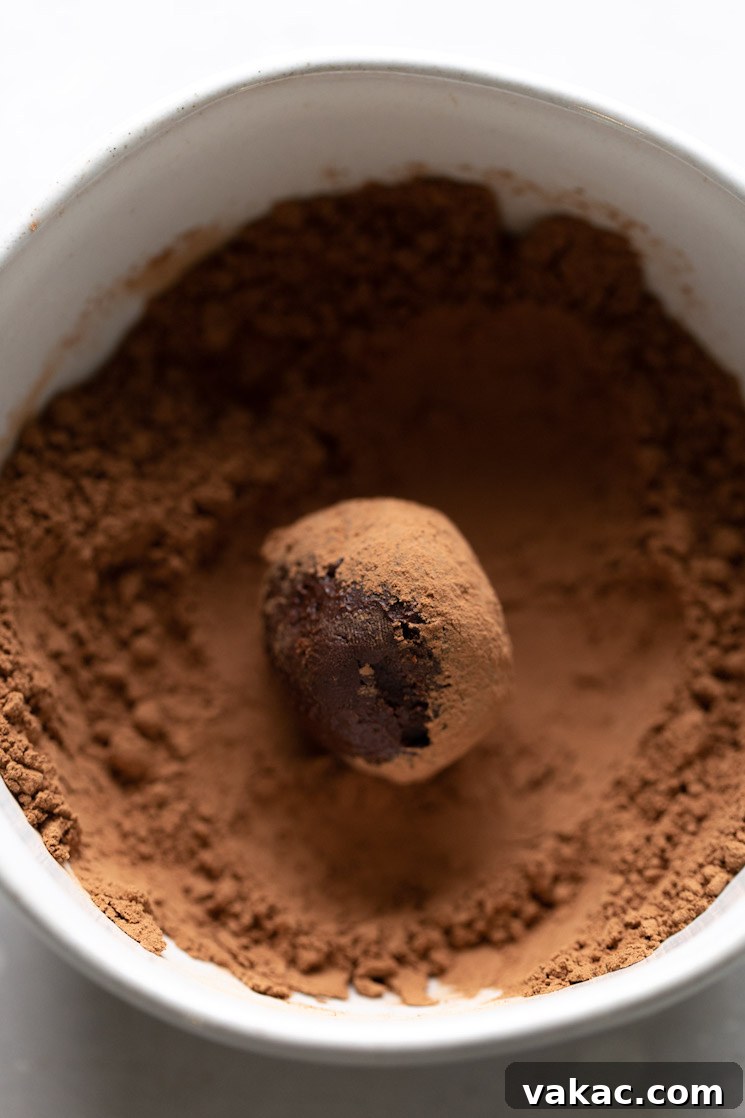
- Coat and Finish: Remove the well-chilled truffles from the fridge. Roll each truffle in your desired coating(s). For melted chocolate coatings, allow the chocolate to set completely, refrigerating if necessary, before serving. Arrange your beautifully coated truffles on a serving platter or pack them for gifting.
Expert Tips for Perfect Truffles Every Time
- Chill Before Rolling and Coating: Truffle ganache is naturally sticky and soft when warm. Adequate chilling is absolutely essential before you attempt to scoop, roll, or coat them. The ganache needs to be firm enough to hold its shape. If it’s too soft, it will be messy and difficult to work with, resulting in misshapen truffles. Don’t rush this step!
- Heavy Cream is Non-Negotiable: As mentioned, this recipe strictly calls for heavy cream (with at least 36% milk fat). Substituting with half-and-half, light cream, milk, or any other lower-fat dairy product will significantly alter the final texture of your truffles. The ganache simply won’t firm up correctly, leaving you with a runny or oily mess instead of a luxurious, solid truffle.
- Customize Coatings Creatively: The beauty of truffles is their versatility. Enjoy them plain for a pure chocolate experience, or get creative with coatings. If you’re using nuts, ensure they are very finely chopped. This allows them to adhere easily and evenly to the truffle, creating a uniform and pleasant texture rather than large, chunky pieces that might fall off.
- Temperature Control is Key: When rolling truffles, work quickly. The heat from your hands can cause the chocolate to melt. If the ganache starts to get too soft, place it back in the refrigerator for 10-15 minutes to firm up again before continuing.
- Finely Chop Chocolate: The finer you chop your chocolate, the more quickly and evenly it will melt when the hot cream is poured over it. This helps create a perfectly smooth, lump-free ganache.
- Gentle Whisking: When combining the chocolate and cream, start whisking from the center and move outwards gently. Over-aggressive whisking can incorporate too much air, which can lead to a less dense ganache.
- Clean Hands: To minimize sticking when rolling, you can slightly dampen your hands with cold water or wear food-safe gloves.
Common Questions About Homemade Truffles
What kind of chocolate is best for truffles?
Semi-sweet or dark chocolate bars (with 60-70% cacao) are ideal. They offer the best balance of flavor and structural integrity for truffles. Avoid chocolate chips as they contain stabilizers that prevent smooth melting, leading to a grainy texture.
Can I use milk chocolate for truffles?
Yes, you can use milk chocolate, but be aware that it has a higher sugar and milk fat content, which can make the ganache softer. You might need to adjust the cream ratio slightly (use a little less cream) or increase chilling time to achieve the desired firmness.
My ganache is grainy, what went wrong?
A grainy ganache often happens if the chocolate wasn’t finely chopped enough, or if the cream wasn’t hot enough to melt the chocolate completely. It can also occur if the mixture was microwaved too aggressively or if cheap chocolate chips were used. Ensure your chocolate is finely chopped and your cream is adequately heated.
My ganache is too runny and won’t set, what do I do?
This usually indicates that the cream-to-chocolate ratio is off, or you didn’t use heavy cream (at least 36% fat). If it’s too runny, you can try adding more finely chopped chocolate and gently melting it into the mixture, then re-chilling. Alternatively, ensure you’re using actual heavy cream.
Can I add flavorings to my truffles?
Absolutely! Once your ganache is smooth and before chilling, you can stir in various flavorings. Consider a teaspoon of vanilla extract, a splash of liqueur (such as rum, brandy, Kahlúa, or Grand Marnier), a pinch of cayenne pepper for a spicy kick, or some orange zest for a citrusy note. Add flavorings after the initial whisking and ensure they are well combined.
How do I store homemade truffles?
Store truffles in an airtight container in the refrigerator. They will last for up to 5 days. For longer storage, see the freezing instructions below.
Storage & Freezing Instructions
- Refrigerator Storage: Once coated, homemade chocolate truffles should be stored in an airtight container in the refrigerator. Properly stored, they will maintain their freshness and delicious texture for up to 5 days. Allow them to come to room temperature for about 10-15 minutes before serving for the best flavor and texture.
- Freezing Instructions: For longer enjoyment, truffles can be frozen for up to three months. Place the uncoated (or fully set, coated) truffles in a single layer on a parchment-lined baking sheet and freeze until solid. Once firm, transfer them to a freezer-safe bag or an airtight freezer container. When you’re ready to enjoy them, simply thaw the truffles overnight in the refrigerator. They can then be brought to room temperature before serving for optimal taste and texture.
More Irresistible No-Bake Chocolate Desserts!
If you loved the simplicity and deliciousness of these chocolate truffles, you’ll surely enjoy exploring other no-bake chocolate treats:
- Classic No-Bake Cookies: A nostalgic favorite, quick and easy.
- Mint Chocolate Truffles: A refreshing twist on the classic truffle.
- Decadent Chocolate Mousse: Light, airy, and intensely chocolatey.
- Chocolate Peanut Butter Balls: The ultimate combination of sweet and savory.
- Oreo Cookie Balls: A fan-favorite, incredibly simple and addictive.
Chocolate Truffles
45 mins
2 hrs 30 mins
3 hrs 15 mins
Made with just two simple ingredients, these homemade chocolate truffles couldn’t be easier to make! Enjoy the truffles as is, or roll them in cocoa powder, nuts, coconut, and more.
Ingredients
30 truffles
- 12 ounces (340 grams) semi-sweet chocolate, finely chopped
- 1 cup (240 ml) heavy whipping cream
- Optional: Unsweetened cocoa powder, semi-sweet chocolate, chopped walnuts, sprinkles, shredded coconut for coating
Instructions
- Add the finely chopped chocolate to a large heat-proof bowl and set aside.
- Add the heavy cream to a microwave-safe measuring cup and microwave for 60 to 90 seconds or until the cream is warm.
- Pour the warm heavy cream over the chocolate, making sure all of the chocolate is fully covered with the cream, and let it sit for 3 minutes.
- Start whisking slowly in the middle of the bowl and continue whisking in one direction until the mixture is well combined and smooth. If the chocolate isn’t fully melted, microwave in 20-second increments, stirring well after each increment, until the mixture is smooth.
- Pour the mixture into an 8-inch square baking pan and spread it out into one even layer. Refrigerate uncovered for two hours.
- Line a large baking sheet with parchment paper.
- Remove the truffle filling from the refrigerator and scoop out 1 tablespoon-sized balls of the mixture (a one tablespoon cookie scoop works well) and place onto the prepared baking sheet.
- Roll each one into a ball and return to the prepared baking sheet. Make sure to work quickly because the chocolate will start to soften as you roll it between your hands.
- Transfer to the refrigerator and chill for 20 to 30 minutes (or freeze for 20 to 30 minutes if coating with melted chocolate).
- Once the truffles are firm, remove from the refrigerator, coat in unsweetened cocoa powder, melted semi-sweet chocolate (refrigerate for 20 to 30 minutes after coating in chocolate), chopped walnuts, or sprinkles. Store in the refrigerator until ready to serve.
Notes
Storage Instructions: Truffles may be stored in an airtight container in the refrigerator for up to 5 days.
Freezing Instructions: Store truffles in a freezer bag or freezer-friendly storage container for up to 3 months. Thaw overnight in the refrigerator.
Chocolate: I recommend using bars of semi-sweet chocolate (Bakers or Ghirardelli bars work well).
American
Dessert
Danielle Rye
Conclusion: Your New Go-To Dessert
These homemade chocolate truffles are a testament to the fact that extraordinary desserts don’t need to be complicated. With just two ingredients and a few simple steps, you can create a truly indulgent treat that rivals any gourmet confection. The rich, smooth ganache, combined with your choice of delightful coatings, makes for a versatile dessert perfect for any occasion – from a casual family gathering to an elegant dinner party, or simply as a well-deserved personal indulgence. They’re also an ideal homemade gift, expressing thoughtfulness and culinary skill without demanding hours in the kitchen. So, gather your chocolate and heavy cream, and prepare to delight your senses with these effortlessly impressive and utterly delicious homemade chocolate truffles. Happy making!