
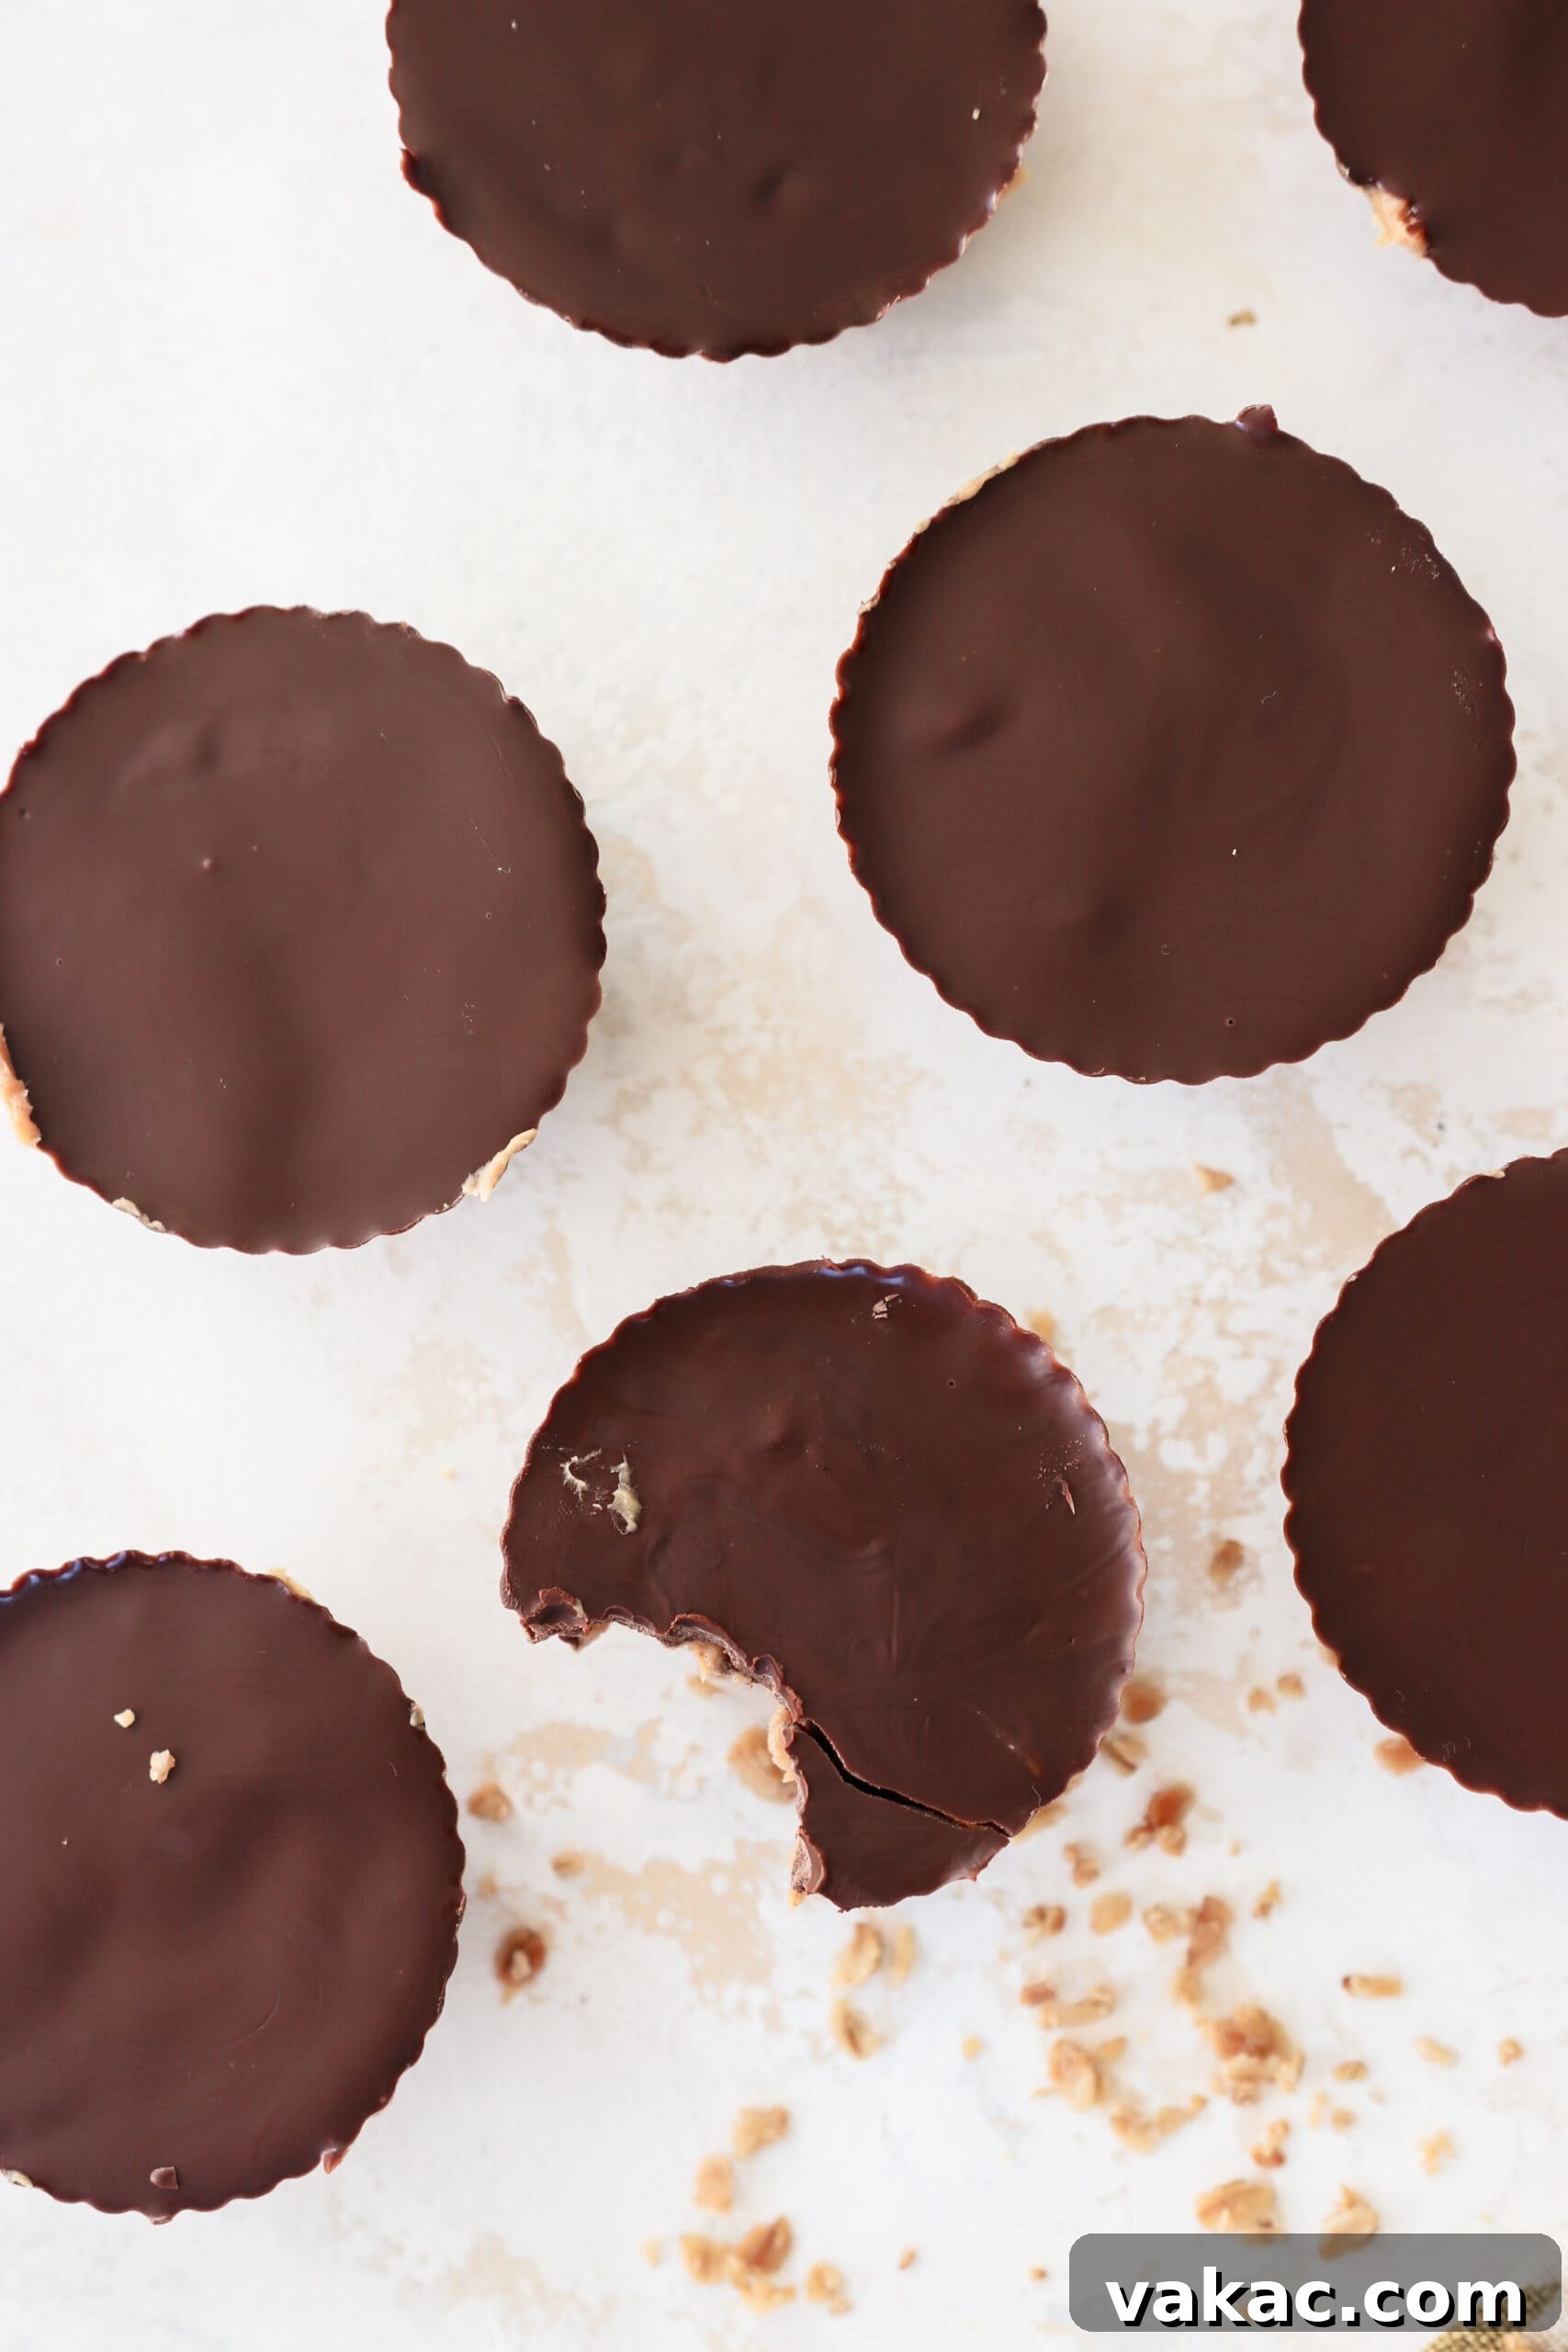
Homemade Peanut Butter & Baked Oat Cups: Your Ultimate Guide to a Delicious and Nutritious Snack
Craving a wholesome, satisfying treat that perfectly fits your on-the-go lifestyle? Look no further than these delightful homemade peanut butter and baked oat cups! More than just a simple snack, these cups are a true game-changer for anyone seeking a quick energy boost without compromising on nutrition. Imagine having a batch of these readily available in your fridge or freezer, a convenient solution for those hectic mornings, afternoon slumps, or whenever hunger strikes between meals. Each cup is thoughtfully crafted to be a powerhouse of protein, fiber, and healthy fats, a combination specifically designed to promote steady blood sugar levels and keep you feeling full, energized, and balanced throughout your busy day. Say goodbye to fleeting cravings and welcome sustained vitality with every delicious bite.
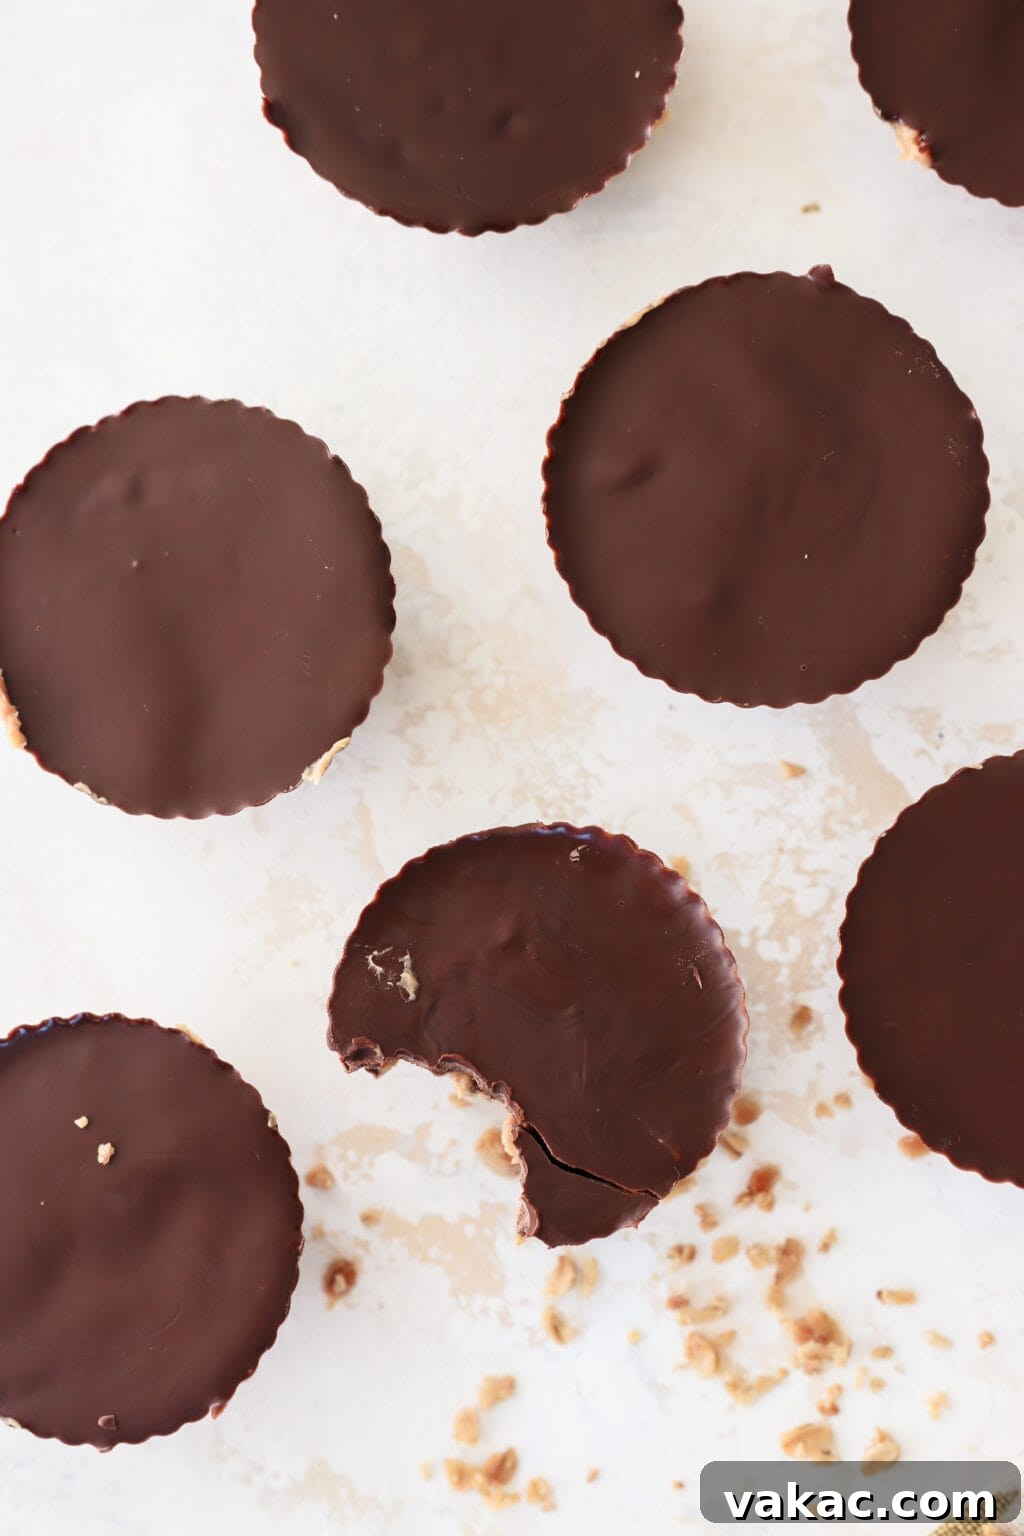
Embracing Mindful Snacking: An Intuitive Eating Approach
As an Intuitive Eating Registered Dietitian, the topic of snacking is one that frequently comes up in discussions about healthy eating habits. My philosophy, centered around intuitive eating, is less about restriction and more about enrichment – focusing on what nourishing elements you can *add* to your diet. Incorporating one or two well-chosen snacks into your daily routine is an incredibly effective strategy for maintaining consistent energy levels, enhancing your mood, and effectively curbing those pesky cravings that can derail your healthy intentions. Rather than viewing snacks as an indulgence, consider them essential fuel stops that support your body’s needs. Whether you choose to add a flavorful oat flour pumpkin muffin, some refreshing lemon coconut energy balls, or these incredibly satisfying homemade peanut butter and baked oat cups, you’ll discover the immediate and profound benefits of fueling your body regularly and thoughtfully. It’s about listening to your body’s signals and responding with nourishing choices that bring both satisfaction and vitality.
Why These Peanut Butter Oat Cups Are a Family Favorite
It’s not every day you stumble upon a recipe that receives unanimous approval from every member of the family, but these peanut butter and baked oat cups certainly hit the mark! They quickly became a celebrated staple in our household, earning rave reviews from both kids and adults alike – even the pickiest eaters. Their popularity stems from several key factors that make them truly exceptional. First, their simplicity is unparalleled: you only need a standard muffin tin and five core ingredients that are likely already stocked in your pantry. This eliminates the need for any fancy equipment or obscure items, making them accessible for even novice bakers. Second, their incredible versatility and longevity are a huge plus for meal prep. These cups keep exceptionally well in both the refrigerator and freezer, meaning you can whip up a big batch and have wholesome snacks ready for weeks. This convenience is a lifesaver for busy parents and professionals. Finally, the irresistible combination of nutty peanut butter, wholesome oats, and a decadent dark chocolate shell creates a flavor profile that’s universally loved. Be warned, though: they tend to disappear quickly, so you might want to consider doubling the recipe right from the start!
Crafting Your Peanut Butter & Baked Oat Cups: A Step-by-Step Guide
These delightful peanut butter and baked oat cups are ingeniously structured in three irresistible layers. They begin with a robust and flavorful crust, inspired by our popular Gluten-Free Oat Cheesecake Crust. This forms the perfect foundation for a rich and creamy peanut buttery filling, all beautifully encased and held together by a crisp, dark chocolate shell. The process is straightforward, ensuring that even beginners can achieve delicious results.
Essential Ingredients: Simple & Wholesome
To bring these fantastic treats to life, you’ll need just a handful of pantry staples:
- Rolled Oats: The heart of our wholesome crust, providing fiber and a satisfying texture. Choose certified gluten-free if needed.
- Honey: A natural sweetener and binder that helps create that delightful, granola-like crunch. Maple syrup works as a vegan substitute.
- Melted Coconut Oil: Crucial for binding the crust ingredients and giving the chocolate shell a smooth, snappy finish.
- Dark Chocolate: The luscious outer layer, offering rich flavor and beneficial antioxidants. Chips or chopped bars work well.
- Peanut Butter: The star of the creamy filling, delivering protein, healthy fats, and that classic, comforting taste.
The Perfect Baked Oat Crust: Golden and Crunchy
The journey begins with our signature oat crust, a recipe I particularly adore because its flavor and texture beautifully evoke the comforting taste of honey granola. It’s incredibly versatile too, making it simple to adapt for various dietary needs. For those following a gluten-free diet, just ensure you opt for certified gluten-free rolled oats. If you’re aiming for a vegan version, a direct substitution of maple syrup for honey works wonderfully without compromising on flavor or binding. This crust is the secret to a sturdy yet tender base that holds up perfectly to the creamy filling.
Here’s how to create this irresistible base:
- Begin by preheating your oven to 350°F (175°C). Prepare a baking sheet by lining it with parchment paper, and get your muffin tin ready by lining each cup with paper or silicone liners. This preparation ensures easy removal and clean-up.
- In a small, microwave-safe bowl, melt 6 tablespoons of coconut oil. This should take approximately 30 seconds in the microwave.
- In a medium-sized mixing bowl, combine the rolled oats, honey, and 3 tablespoons of the freshly melted coconut oil. Stir thoroughly until all the oats are evenly coated with the sticky, sweet mixture.
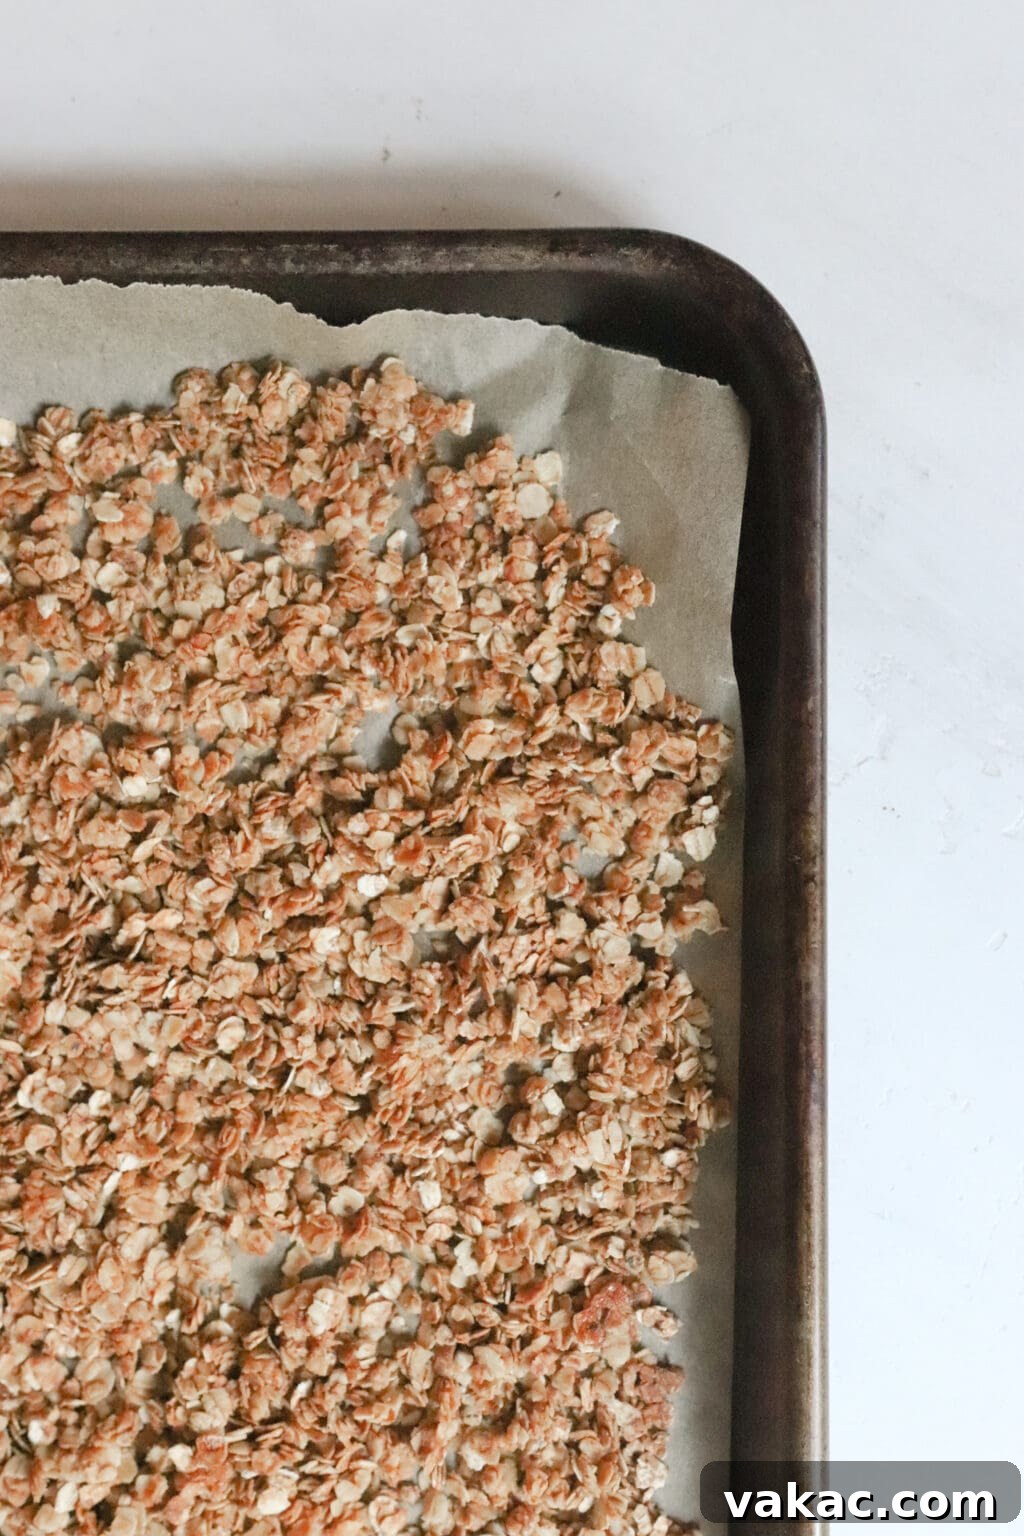
- Spread this oat mixture in a single, even layer onto the prepared baking sheet. Bake for 15 minutes, or until the oats turn a beautiful golden brown and become fragrant. Keep an eye on them to prevent over-browning.
- Once golden, remove the oats from the oven and carefully transfer them to a food processor. Pulse for about 30 seconds; this breaks down the oats slightly, creating a finer, more cohesive texture for the crust.
- Return the pulsed oats to a clean bowl. Coat them with the remaining 3 tablespoons of melted coconut oil, ensuring every oat particle is evenly glistening. This extra oil is key for binding the crust and giving it structure.
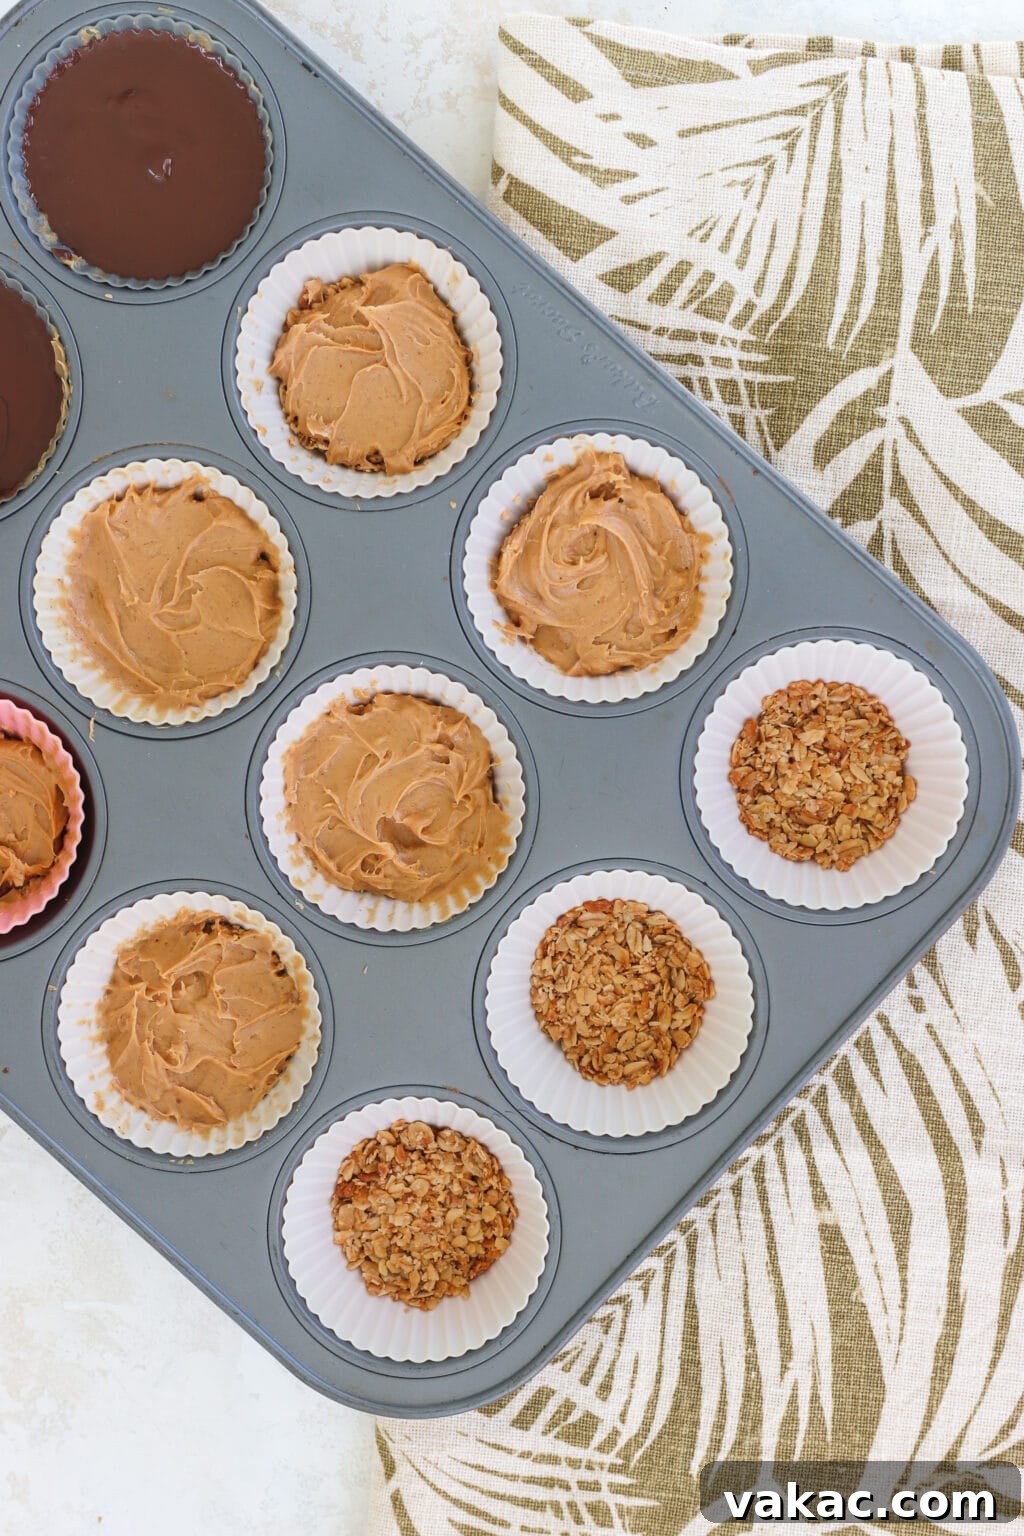
- Distribute the coated oat mixture evenly among the 12 muffin tins. Using the back of a spoon or the bottom of a small cup, firmly press the mixture down into each liner to form a compact, solid crust.
- Return the muffin tin to the oven and bake for an additional 5 minutes. This final bake helps set the crust, making it sturdy enough to hold the filling.
Crafting the Creamy Filling and Decadent Chocolate Shell
Once your oat crusts are beautifully baked and ready, it’s time to move on to the heart of these cups: the luscious peanut butter filling and the irresistible chocolate topping. This stage is quick and incredibly satisfying.
- When the oat crusts are fresh out of the oven and still warm, generously add one heaping tablespoon of creamy peanut butter to the center of each individual crust in the muffin tin. The warmth from the baked oats is a secret weapon here, as it helps the peanut butter soften and spread effortlessly and evenly across the crust, creating a smooth layer.
- For the chocolate shell, grab another small, microwave-safe bowl. Combine 1 1/2 cups of dark chocolate chips (or finely chopped dark chocolate) with 2 tablespoons of melted coconut oil. Microwave this mixture in short 30-second intervals, stirring diligently in between each interval. This careful approach is crucial to achieving a perfectly smooth, glossy consistency without burning the chocolate. Keep stirring until it’s completely melted and uniform.
- Now, pour the melted chocolate mixture evenly over each peanut butter-filled oat cup in the muffin tin, making sure to completely cover the peanut butter layer. Gently tap the muffin tin a couple of times on the counter to help the chocolate settle smoothly and release any air bubbles.
- Finally, the patience test! Pop these delectable snacks into the fridge or freezer for at least one hour. This chilling time allows the chocolate to harden and the cups to fully set. Once firm, carefully remove each cup from its muffin tin.
- Store your finished peanut butter and baked oat cups in an airtight container in either the fridge or the freezer. They remain fresh and delicious, ready for you to grab and enjoy whenever you desire a healthy, satisfying treat!
Unlocking the Nutritional Powerhouse: Benefits of Oats and Peanut Butter
The synergy between oats and peanut butter in these cups isn’t just a flavor match made in heaven; it’s a nutritional powerhouse. Together, they offer an impressive array of benefits that contribute significantly to your overall well-being. Let’s delve deeper into why this combination is so celebrated.
Peanut Butter Perks: More Than Just Delicious
Oh, how I adore peanut butter! Its creamy texture adds a delightful richness to countless recipes, making it incredibly versatile in both sweet and savory applications. While most people are aware that peanut butter is an excellent source of protein and healthy monounsaturated and polyunsaturated fats – key nutrients that promote satiety and keep you feeling full and satisfied for longer – its nutritional profile extends far beyond. Did you know it’s also packed with essential micronutrients like magnesium, which is crucial for muscle and nerve function, blood sugar control, and blood pressure regulation? It also provides potassium, an important electrolyte for maintaining fluid balance, and vitamin E, a powerful antioxidant that helps protect your cells from damage. Choosing natural peanut butter with minimal added sugars and oils ensures you get the most nutritional punch.
Oats: The Versatile Grain for Sustained Energy
Oats are an undeniable staple in our household, and for good reason! Their incredible versatility allows them to transform into a myriad of dishes. I love how effortlessly they can be turned into a nourishing breakfast in 10 minutes or less, like these warming turmeric and apple stovetop oats. They also serve as an exceptional base for healthy desserts or snacks, as seen in these delightful pumpkin pie energy bites, or can be blended into oat flour for gluten-free baking. But beyond their culinary flexibility, oats are nutritional champions. They are exceptionally rich in fiber, particularly beta-glucan, a soluble fiber known for its cholesterol-lowering effects and its ability to promote gut health. Furthermore, oats contribute a good amount of plant-based protein, magnesium for energy production, and various B vitamins essential for metabolism. This makes oats a truly invaluable pantry staple, effortlessly enhancing the nutritional value of almost any meal or snack.
The combination of peanut butter and oats is truly special. Both are typically found in most pantries, making them accessible and easy to incorporate into your diet. In a recipe like these oat cups, they work synergistically to provide a fantastic balance of protein, fiber, and healthy fats – what I affectionately call the “PFF combo!” This powerful trio is the secret to a truly satisfying and blood sugar-friendly snack.
The PFF Snack Combo: Your Key to Balanced Energy
As an intuitive eating dietitian, I am passionate about developing snacks that thoughtfully adhere to the PFF combo principle. So, what exactly is the PFF combo? It stands for Protein, Fiber, and Fat – three macronutrients that, when consumed together, create a powerful synergy within your body. This strategic combination plays a crucial role in slowing down your digestion. When digestion slows, nutrients are absorbed more gradually, which means you’ll experience a sustained feeling of fullness for a significantly longer period. Beyond satiety, the PFF combo is particularly adept at influencing how sugars are released into your bloodstream. Instead of rapid spikes and subsequent crashes in blood sugar, which often lead to increased cravings, irritability, and mood swings, the PFF combo ensures a steady, gradual release of glucose. This promotes stable energy levels, better focus, and a more balanced mood throughout your day.
These delicious peanut butter and baked oat cups perfectly exemplify the PFF combo! They deliver ample protein from the creamy peanut butter, healthy fats from both the peanut butter and the coconut oil, and a generous dose of fiber from the wholesome oats. This makes them an ideal choice for a snack that truly nourishes and satisfies. If you’re eager to explore more snack options that embody the fantastic PFF format, I highly recommend trying these homemade no-bake granola bars. They are absolutely delish and another excellent way to incorporate balanced nutrition into your day!
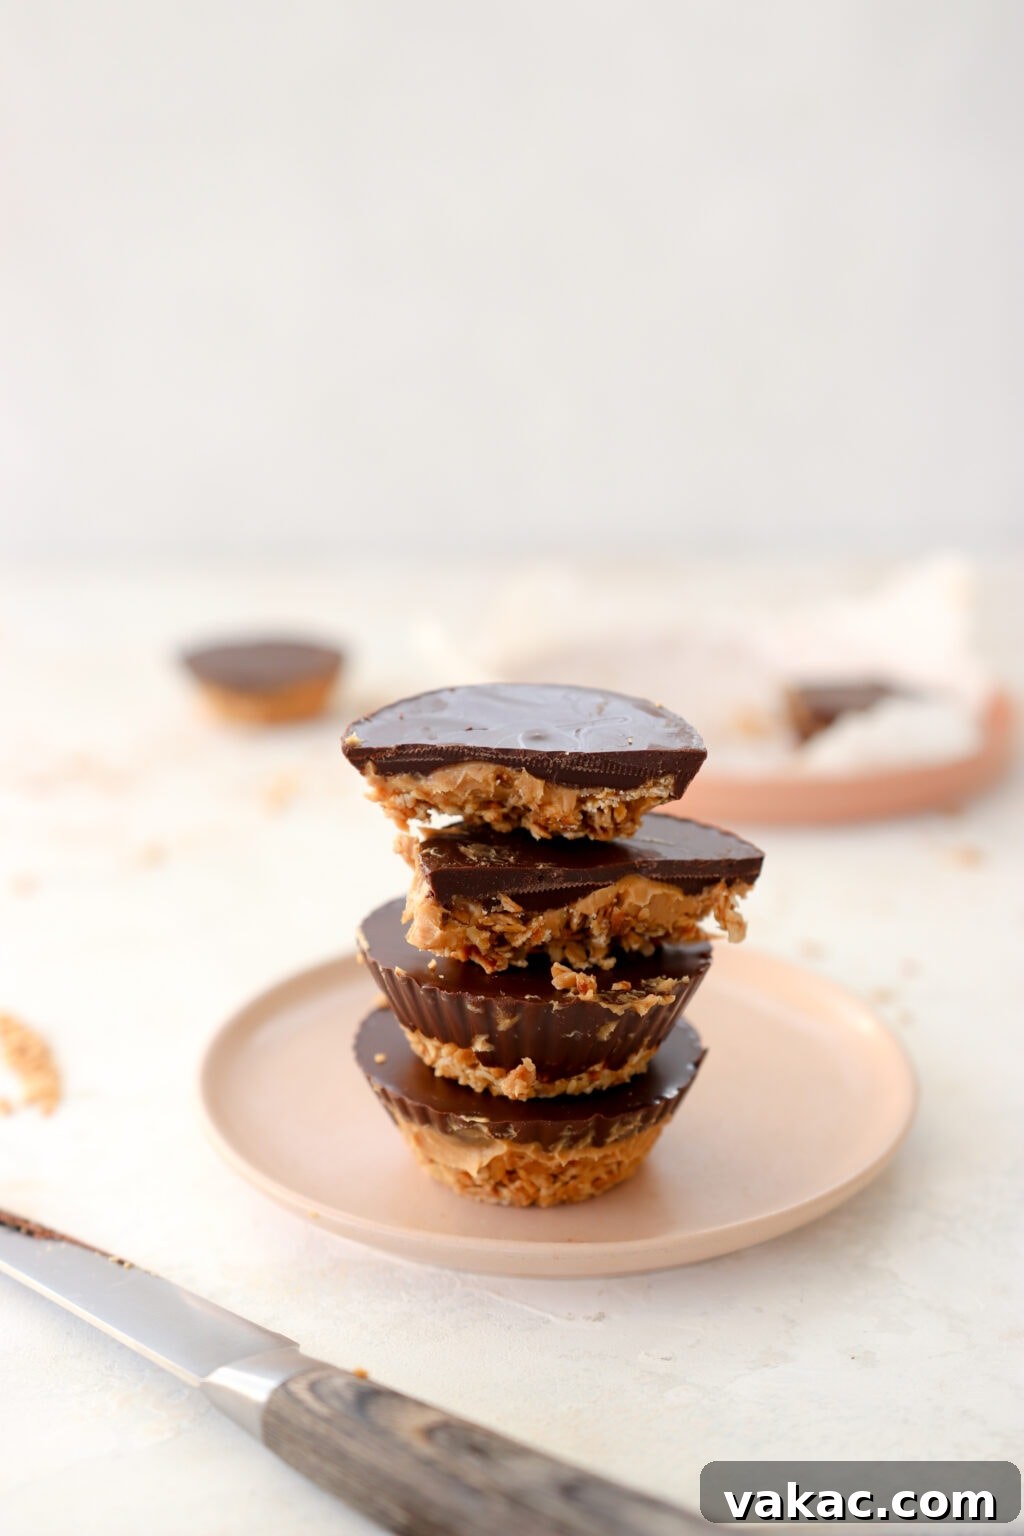
Endless Customization: Fun Fillings to Explore
While classic peanut butter offers an undeniable charm and is a universally loved filling for these oat cups, the beauty of this recipe lies in its remarkable versatility. You have the freedom to unleash your creativity and customize these treats to perfectly match your personal preferences or dietary needs. The possibilities are truly endless, allowing you to switch things up and discover new favorite combinations. Here are a few exciting ideas to inspire your next batch:
- Alternative Nut or Seed Butters: Easily swap out the peanut butter for any other type of creamy nut or seed butter you enjoy. Almond butter would lend a sophisticated, slightly sweeter note, while cashew butter offers an extra level of creaminess. For a nut-free, school-friendly option, sunflower seed butter (often called “sunbutter”) is an excellent and equally delicious choice, ensuring everyone can enjoy these delightful snacks.
- Fruity Jam Infusions: For a delightful sweet-tart burst, spoon a small dollop of your favorite fruit jam directly into the center of the oat cup before you add the melted chocolate layer. These cups would be absolutely heavenly with vibrant raspberry or sweet strawberry jam. Or, for an extra nutritional boost and a wonderful texture, try my ooey-gooey raspberry chia seed jam – its natural sweetness and added fiber are a fantastic complement.
- Protein-Packed Greek Yogurt: If you’re seeking an extra creamy, protein-rich filling, consider mixing some plain Greek yogurt with a touch of honey or maple syrup for sweetness. Spoon this mixture into the oat cups, but be aware that for the best texture and stability, particularly with the yogurt, it’s best to keep these specific variations stored in the freezer until ready to enjoy.
- Fresh Fruit Toppings: For a burst of freshness and natural sweetness, elevate your peanut butter oat cups by topping them with slices of fresh fruit. Vibrant berries like blueberries or raspberries add a lovely tang, while thinly sliced bananas create a classic, comforting pairing that’s hard to beat. Or, for an exotic twist, diced mango provides a juicy, tropical flavor. After all, what goes better with peanut butter than bananas? It’s a match made in culinary heaven!
These are just a handful of ideas to get your creative juices flowing, but remember, the true joy lies in experimenting and discovering your own perfect combination. Don’t be afraid to mix and match or invent entirely new fillings!
If you embark on the delightful journey of making this recipe, it would genuinely make my day to hear your thoughts! Please consider leaving a comment and/or a star rating below – your feedback is incredibly valuable and helps our community. And please, don’t hesitate to snap a pic of your delicious creations and tag me on Instagram @lindsaypleskot! It brings me immense joy to witness these recipes come to life in your kitchens and to see your unique versions. Happy baking! xo
The Feel-Good Meal Plan My Bestselling Cookbook is Now Available!
Discover a fresh perspective on meal preparation with over 100 incredibly nourishing and easy-to-follow recipes designed to feed your family with absolute ease and joy. This cookbook empowers you to create delicious, balanced meals without the stress, making healthy eating a seamless part of your daily life.
5-Ingredient Homemade Peanut Butter & Baked Oat Cups
- Author: Lindsay Pleskot
- Prep Time: 10 minutes
- Cook Time: 20 minutes
- Total Time: 30 minutes
- Yield: 12 1x
- Category: Dessert
- Method: Bake
- Cuisine: American
- Diet: Vegetarian
Description
These delightful homemade peanut butter and baked oat cups are the ultimate grab-and-go solution for healthy, satisfying snacking. Crafted with a balanced blend of protein, fiber, and healthy fats, they are designed to keep your blood sugar stable and energy levels consistent between meals. Easy to make with just 5 pantry staples, these cups are a family favorite, perfect for busy lifestyles.
Ingredients
3 Ingredient Crust
- 1 1/2 cups rolled oats
- 6 Tbsp melted coconut oil
- 3 Tbsp honey
Filling & Topping
- 3/4 cups creamy peanut butter
- 1 1/2 cups dark chocolate chips
- 2 Tbsp melted coconut oil
Instructions
- Preheat oven to 350F (175°C). Line a baking sheet with parchment paper and a 12-cup muffin tin with paper or silicone liners.
- In a small microwave-safe bowl, melt 6 tablespoons of coconut oil for approximately 30 seconds. In a large mixing bowl, combine the rolled oats, 3 tablespoons of the melted coconut oil, and the honey. Stir thoroughly until the oats are evenly coated. Transfer this mixture to the prepared baking sheet and spread it out evenly.
- Bake the oat mixture in the preheated oven for 15 minutes, or until the oats turn a beautiful golden brown. Stir the oats halfway through baking to ensure even toasting.
- Remove the oats from the oven and immediately transfer them to a food processor. Pulse for 30 seconds to break down the oats into a finer crumb. Mix in the remaining 3 tablespoons of melted coconut oil, ensuring the baked oats are thoroughly coated. This step is crucial for helping the crust hold its shape.
- Evenly spoon the oat mixture into the 12 muffin tins, pressing down firmly with the back of a spoon or the bottom of a cup to create a compact crust. Bake in the oven for an additional 5 minutes to set the crust.
- Remove the muffin tin from the oven. While the crusts are still warm, spoon one heaping tablespoon of creamy peanut butter onto each individual crust. The warmth of the crust will help the peanut butter spread smoothly and evenly.
- In another small, microwave-safe bowl, combine the dark chocolate chips and 2 tablespoons of coconut oil. Microwave in 30-second intervals, stirring well after each interval, until the chocolate is completely melted and has a smooth, uniform consistency. Be careful not to burn the chocolate.
- Evenly spoon the melted chocolate mixture over each peanut butter cup, ensuring the peanut butter is completely covered. Gently tap the muffin tin a couple of times to settle the chocolate.
- Place the muffin tin into the fridge or freezer for at least one hour, or until the chocolate has completely hardened. Once set, carefully remove each cup from the muffin tin and store them in an airtight container in your fridge or freezer. Enjoy your perfectly balanced and delicious homemade treats!