
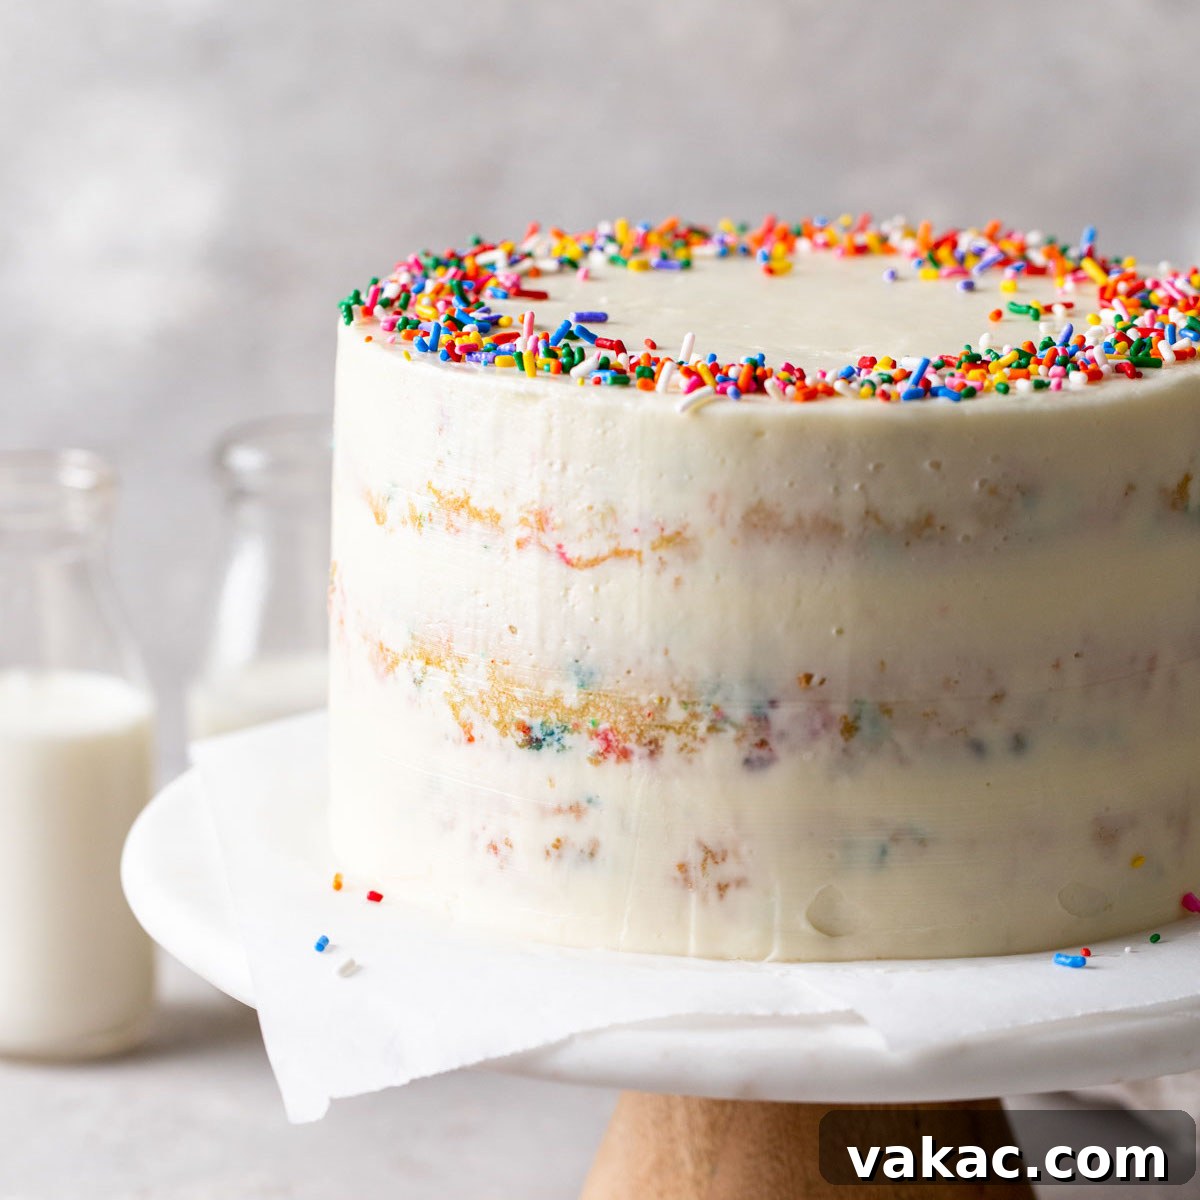
The Ultimate Homemade Funfetti Cake Recipe: Moist, Fluffy, and Full of Joy
There’s an undeniable magic to a funfetti cake. More than just a simple vanilla cake, it’s a vibrant celebration in every slice, bursting with colorful sprinkles that bring a smile to anyone’s face. Forget waiting for a special occasion – this ultimate homemade funfetti cake recipe is so delightful, you’ll want to bake it just because! It promises a perfectly moist and fluffy texture, infused with a hint of almond that evokes classic birthday cake nostalgia, and crowned with a light, silky Swiss meringue buttercream. Get ready to bake a masterpiece that’s surprisingly easy to make and guaranteed to be a crowd-pleaser.
We’ve crafted this recipe to ensure every bite is tender, moist, and airy, thanks to a thoughtful blend of buttermilk, oil, and delicate cake flour. While designed for a show-stopping layer cake, we’ll also guide you on how to adapt this versatile batter for a classic 9×13-inch sheet cake or delightful cupcakes. Prepare to transform your kitchen into a joyful bakery and create memories with this irresistible funfetti creation!
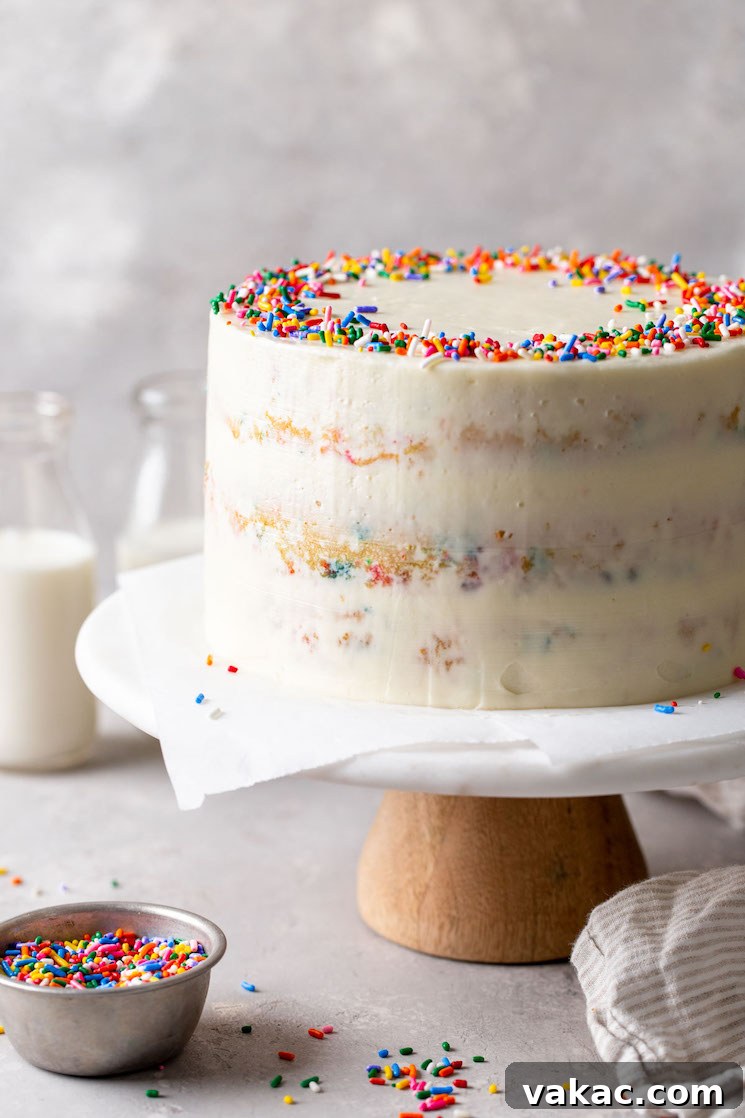
Why This Homemade Funfetti Cake Stands Out
What makes this funfetti cake truly special? It’s not just the sprinkles; it’s a combination of carefully chosen ingredients and techniques that elevate it far beyond a boxed mix. Here’s why this recipe will become your go-to for any celebration:
- Unmatched Moisture and Tenderness: The secret lies in the dynamic duo of buttermilk and a touch of neutral oil. Buttermilk reacts beautifully with the leavening agents, resulting in an incredibly tender crumb. Meanwhile, the oil ensures long-lasting moisture, keeping your cake wonderfully soft and fresh for days.
- Light and Fluffy Texture: The use of cake flour, with its naturally lower protein content, is paramount in preventing a dense or heavy cake. When combined with the proper creaming technique for butter and sugar, it incorporates ample air into the batter, leading to an exceptionally airy and delicate texture that practically melts in your mouth.
- Classic Birthday Cake Flavor: While pure vanilla extract forms the sweet foundation, the subtle addition of almond extract is the magical touch. It imparts that quintessential, nostalgic “birthday cake” taste that truly sets this funfetti creation apart and makes it feel extra special.
- Vibrant, Non-Bleeding Sprinkles: Nobody wants muddy-looking sprinkles! This recipe specifically calls for jimmie sprinkles (the longer, rod-shaped variety), which are known for holding their vibrant colors beautifully throughout the baking process. This ensures those cheerful rainbow flecks pop visually in every slice, adding to the festive appeal.
- Silky Swiss Meringue Buttercream: While various frostings can adorn a funfetti cake, our recommended Swiss meringue buttercream offers a luxurious, light, and less-sweet finish that perfectly complements the cake without overwhelming it. It’s remarkably stable, easy to work with, and creates a smooth, professional-looking exterior.
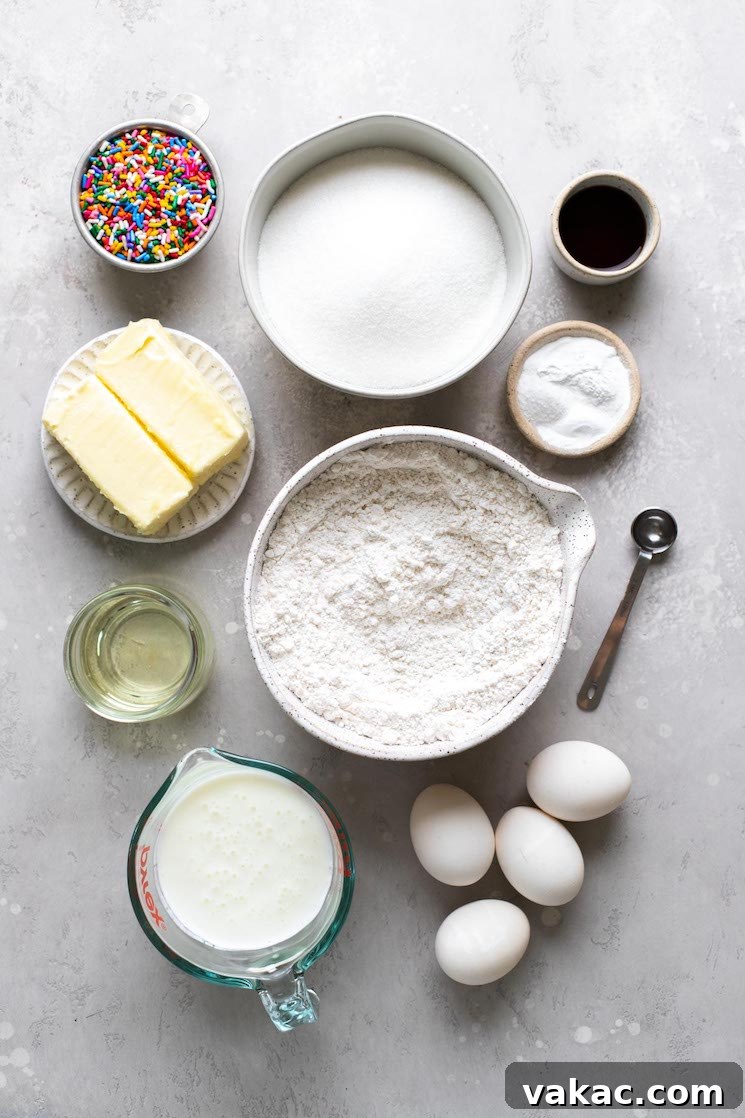
Essential Ingredients for Your Perfect Funfetti Cake
Crafting the best funfetti cake begins with understanding the role of each ingredient and ensuring they are prepared correctly. For optimal results, it is crucial that all cold ingredients, such as buttermilk, butter, and eggs, are at room temperature before you start. This allows them to emulsify properly, creating a smooth, uniform batter that rises beautifully.
- Cake Flour: This ingredient is a game-changer for achieving a genuinely light and tender cake. Cake flour has a lower protein content (typically 8-9%) compared to all-purpose flour (10-12%), which means less gluten development during mixing. Less gluten equates to a softer, more delicate, and finer crumb structure. If you don’t have cake flour readily available, you can easily make a suitable substitute at home.
- Baking Powder & Baking Soda: These two leavening agents are indispensable, working in perfect harmony to give the cake its impressive lift and airy texture. Baking powder provides an initial rise, while baking soda specifically reacts with the acidic buttermilk to create additional carbon dioxide bubbles, ensuring a beautifully risen, tender, and moist cake.
- Salt: Often underestimated, salt is a crucial flavor enhancer in baking. It masterfully balances out the sweetness of the sugar and significantly amplifies the nuanced flavors of both vanilla and almond extracts, making them more vibrant and pronounced. Do not omit this ingredient!
- Buttermilk: The unsung hero for unparalleled moisture and tenderness. Its inherent acidity not only activates the baking soda for optimal leavening but also plays a vital role in gently breaking down gluten strands, resulting in an exceptionally soft and delicate texture. While a homemade substitute can be used in a pinch, authentic buttermilk is always preferred for the absolute best results. Ensure it’s at room temperature for seamless integration into the batter.
- Oil (Canola or Vegetable): Unlike butter, which is solid at room temperature, oil remains liquid, contributing to a consistently moist cake that stays soft and fresh for a longer duration. Canola or vegetable oil are ideal choices due to their neutral flavor, allowing the delightful vanilla and almond notes to shine through unimpeded.
- Vanilla Extract & Almond Extract: Pure vanilla extract lays down the foundational sweet aroma and flavor. However, the addition of almond extract is the secret ingredient that imbues this cake with that distinct, comforting, and nostalgic “birthday cake” taste that makes funfetti so beloved. Together, they create a beautifully balanced and memorable flavor profile.
- Unsalted Butter: You’ll need softened unsalted butter for both the cake batter and for creating the luxurious Swiss meringue buttercream. Room temperature butter is essential for successful creaming with sugar, as it effectively traps air, which is fundamental for a light and airy cake structure.
- Granulated Sugar: Beyond merely adding sweetness, sugar is a critical component in tenderizing the cake crumb and contributing to its moisture retention. When properly creamed with butter, it helps to create the airy, fluffy texture we desire.
- Large Eggs: Eggs serve multiple vital functions: they provide essential structure to the cake, add richness, and aid in the leavening process. Similar to other dairy ingredients, eggs must be at room temperature to ensure they emulsify smoothly with the other components, preventing the batter from curdling. If you’re short on time, a quick warm water bath for 5-10 minutes will bring them to the correct temperature.
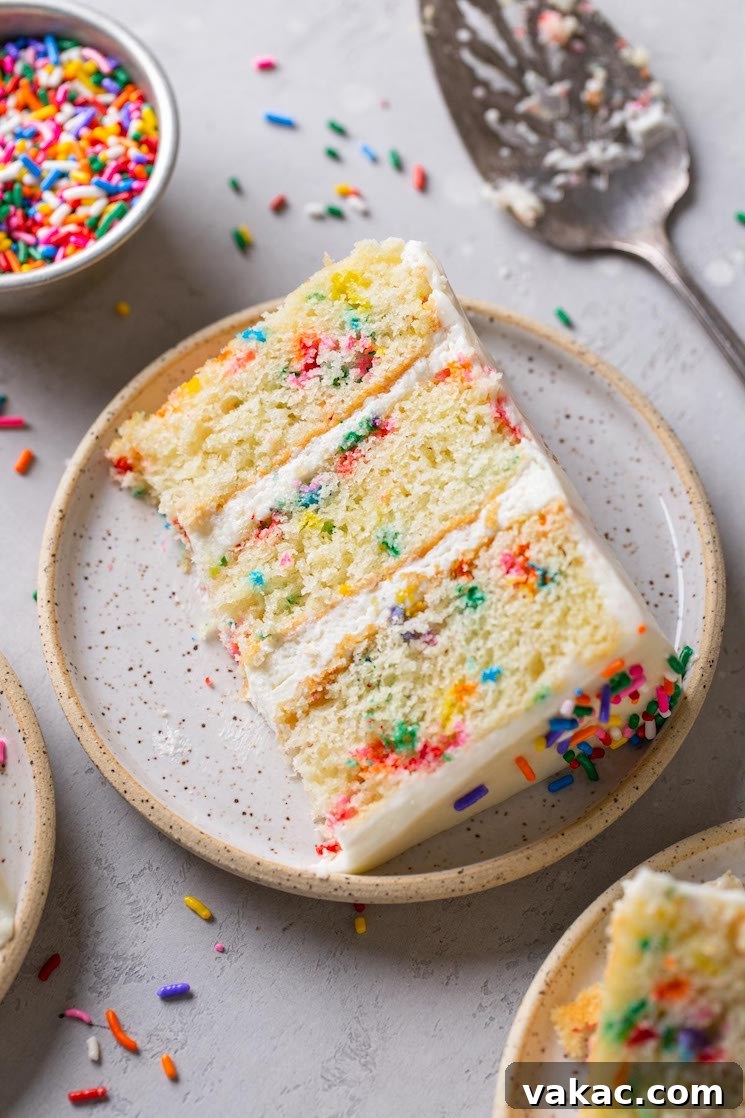
- Sprinkles (Jimmies): This specific detail is paramount! Always use longer, cylindrical sprinkles, commonly known as “jimmies” or “rod sprinkles.” Avoid round nonpareils or softer, dyed sprinkles, as these tend to dissolve and bleed their colors into the batter during baking, often resulting in a dull, unappetizing appearance. Jimmies are designed to maintain their vibrant hues, ensuring your cake bursts with distinct, cheerful rainbow flecks.
- Frosting (Swiss Meringue Buttercream): While a classic vanilla buttercream will certainly be delicious, our homemade Swiss meringue buttercream is highly recommended for its superior qualities. It is light, notably less sweet, incredibly smooth, and provides a remarkably stable and professional finish. If you opt for an easier route, a traditional vanilla buttercream frosting or even a playful rainbow chip frosting will work, but be mindful of quantities – you may need to double a standard recipe to adequately frost a three-layer cake.
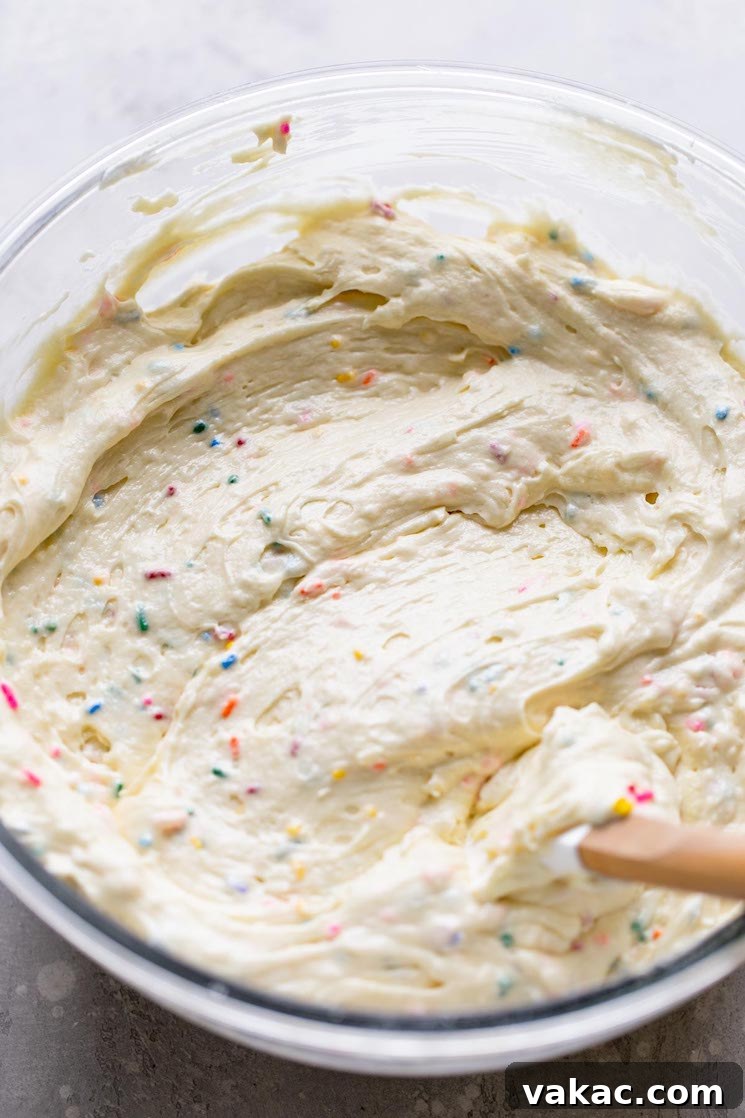
Step-by-Step Guide to Baking Your Dream Funfetti Cake
Creating a truly spectacular funfetti layer cake involves a few key steps, each contributing to its incredible texture and flavor. Follow these detailed instructions carefully for the best results and a cake that will impress everyone:
Part 1: Preparing the Funfetti Cake Layers
- Prepare Your Pans: Begin by preheating your oven to 350°F (180°C). Generously grease three 8-inch round cake pans with nonstick cooking spray. To ensure effortless removal and prevent any sticking, line the bottom of each pan with a perfectly cut round of parchment paper. Set these prepared pans aside.
- Combine Dry Ingredients: In a large mixing bowl, meticulously whisk together the cake flour, baking powder, baking soda, and salt. Whisking thoroughly is crucial here, as it ensures these leavening agents and flavor enhancers are evenly distributed throughout the mixture, which is vital for uniform rising and a consistent cake texture. Set this bowl aside for later use.
- Combine Wet Ingredients: In a separate medium mixing bowl or a large measuring cup, whisk together the room temperature buttermilk, canola or vegetable oil, pure vanilla extract, and pure almond extract until all components are thoroughly combined and homogenous. Set this liquid mixture aside.
- Cream Butter and Sugar: In the bowl of a stand mixer fitted with the paddle attachment (or using a large bowl and a robust handheld electric mixer), beat the softened unsalted butter on low speed until it becomes smooth and creamy. Gradually and slowly add the granulated sugar to the butter. Once all the sugar has been incorporated, increase the mixer speed to medium-high and continue beating for a significant 4 to 5 minutes. The mixture should transform, becoming visibly lighter in color and wonderfully fluffy in texture. This critical “creaming” step vigorously incorporates air into the butter and sugar mixture, which is absolutely essential for creating a light, tender, and airy cake structure.
- Incorporate Eggs: Reduce the mixer speed to low. Add the large eggs one at a time, ensuring you mix well after each individual addition until just combined. After adding each egg, remember to stop the mixer and use a rubber spatula to meticulously scrape down the sides and bottom of the bowl. This ensures that all ingredients are fully and evenly incorporated into the batter, preventing any unmixed pockets or lumps.
- Alternate Dry and Wet Mixtures: With the mixer set to its lowest speed to avoid overmixing, begin adding the dry ingredient mixture and the buttermilk mixture to the butter-egg mixture in alternating stages. Start with approximately one-third of the dry ingredients, mix gently until just combined. Then, add half of the wet ingredients, mix until just combined. Follow with another third of the dry ingredients, then the remaining wet mixture, and finally the last third of the dry ingredients. Mix each addition only until it’s barely incorporated. It’s imperative not to overmix the flour at this stage, as excessive mixing will overdevelop the gluten, leading to a tough, chewy, and undesirable dense cake.
- Fold in Sprinkles: Once your batter appears smooth and is just combined, use a rubber spatula to gently scrape down the sides and bottom of the bowl one last time to ensure everything is perfectly integrated. Then, with utmost care, gently fold in the sprinkles. Be particularly mindful not to overmix here either, as aggressive mixing can cause the sprinkles to break down or their vibrant colors to bleed prematurely into the batter.
- Divide and Bake: Evenly divide the prepared funfetti batter among your three greased and parchment-lined 8-inch cake pans. Use your spatula to gently spread the batter into an even layer in each pan, ensuring consistent baking. Bake for 25 to 30 minutes, or until a wooden toothpick inserted into the very center of the cakes emerges clean, indicating they are fully baked.
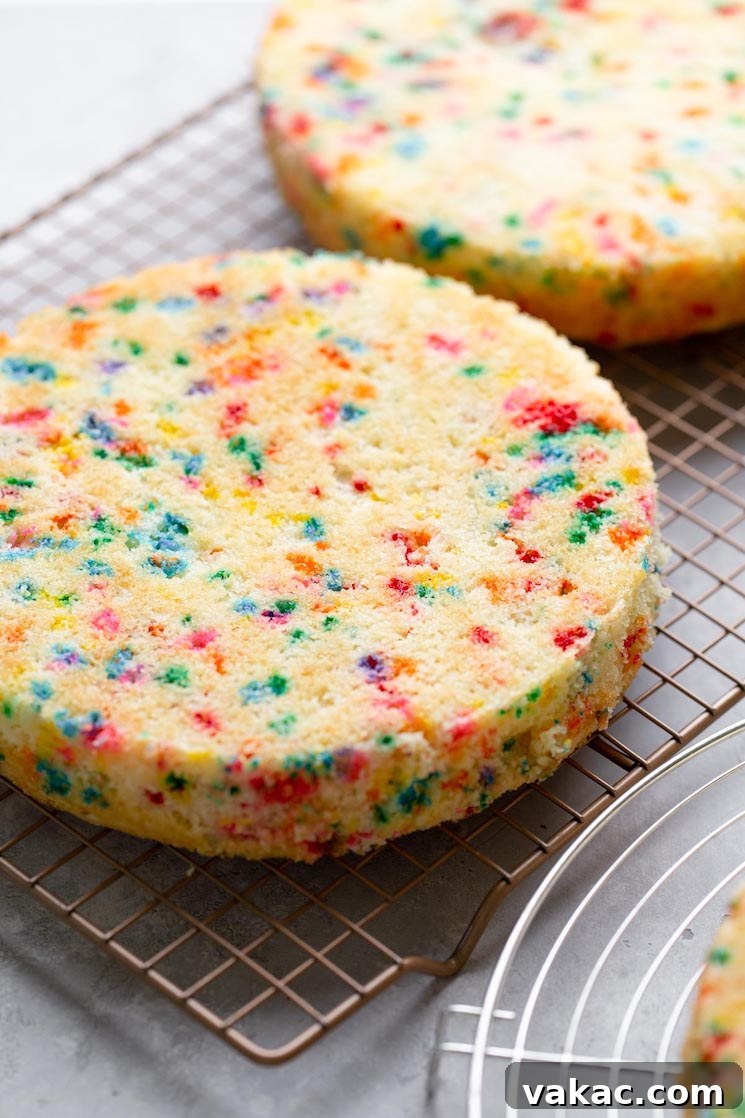
- Cooling the Layers: Once baked, promptly remove the cake pans from the oven and allow them to cool undisturbed in the pans for about 20 minutes. This crucial resting period allows the cakes to firm up slightly and finish setting before they are handled. After 20 minutes, carefully run a thin knife around the inner edges of each cake to gently loosen it, then invert the cakes onto a wire rack to cool completely to room temperature. It is absolutely vital that the cake layers are entirely cool before you attempt to apply any frosting; otherwise, your beautifully whipped buttercream will melt and slide right off, compromising the cake’s structure and appearance!
Part 2: Assembling and Frosting Your Funfetti Masterpiece
Once your funfetti cake layers are completely cool, it’s time for the truly fun and artistic part: assembly and frosting! For this recipe, we wholeheartedly recommend our homemade Swiss Meringue Buttercream, celebrated for its incredibly light texture, delicately less-sweet flavor, and remarkable stability, which makes it a dream to work with. If you prefer a simpler or quicker option, a rich classic vanilla buttercream or even a playfully nostalgic rainbow chip frosting would also be absolutely delicious – just be sure to prepare an ample amount, as doubling a standard recipe is often necessary for thoroughly frosting a three-layer cake!
- Level Your Cakes: Before you begin frosting, use a sharp serrated knife or a dedicated cake leveler to carefully trim any domed tops off each cake layer. The goal is to create perfectly flat, even surfaces. This crucial step ensures that your assembled cake will stand straight and stable, giving it a professional and polished appearance.
- Crumb Coat (Optional but Highly Recommended): Place your first leveled cake layer onto a cake stand, turntable, or your chosen serving plate. Using an offset spatula, apply a very thin, even layer of frosting (approximately ½ cup) over the top and sides of this first layer. This initial “crumb coat” is invaluable as it effectively traps any loose cake crumbs, preventing them from mixing into your final, pristine decorative frosting. Once applied, chill the cake in the refrigerator for 15-20 minutes to allow this crumb coat to firm up.
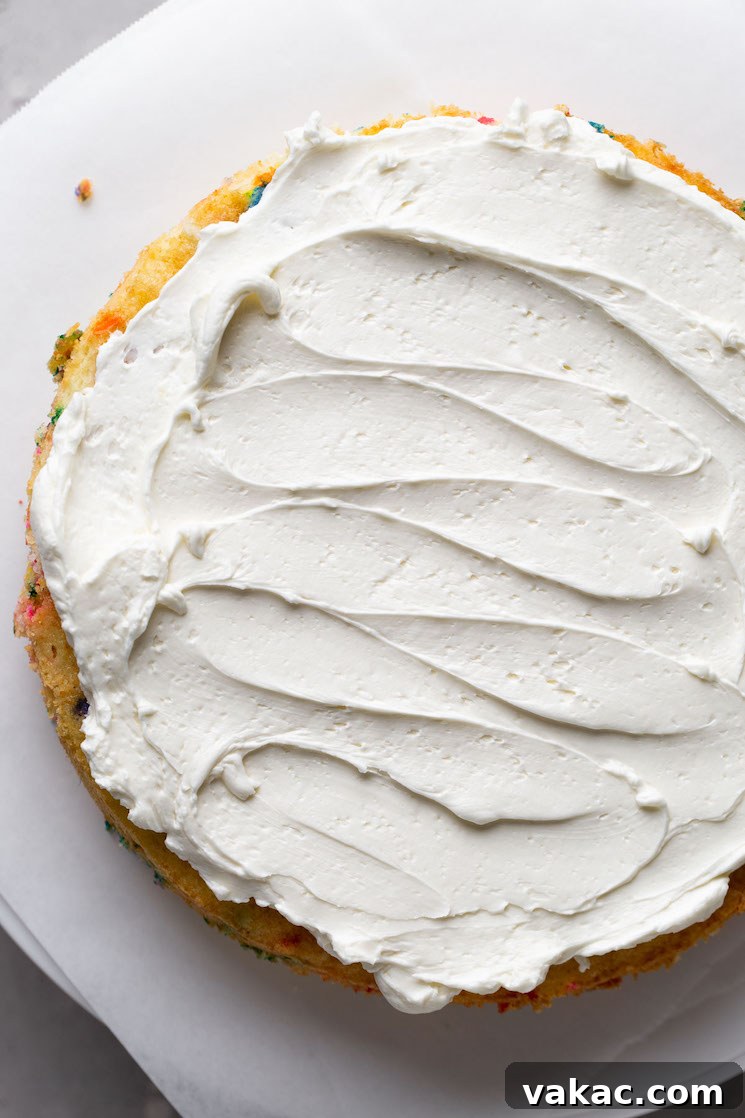
- Stack and Fill: Once the crumb coat is set (or if you’ve decided to skip it), place the first cake layer securely on your serving plate. Apply a generous ¾ cup to 1 cup of frosting and spread it evenly to the very edges of the layer. Carefully place the second cake layer directly on top, pressing gently but firmly to secure it in place. Then, repeat the frosting process with another ¾ cup to 1 cup of frosting on this second layer. Finally, carefully position the third and final cake layer on top.
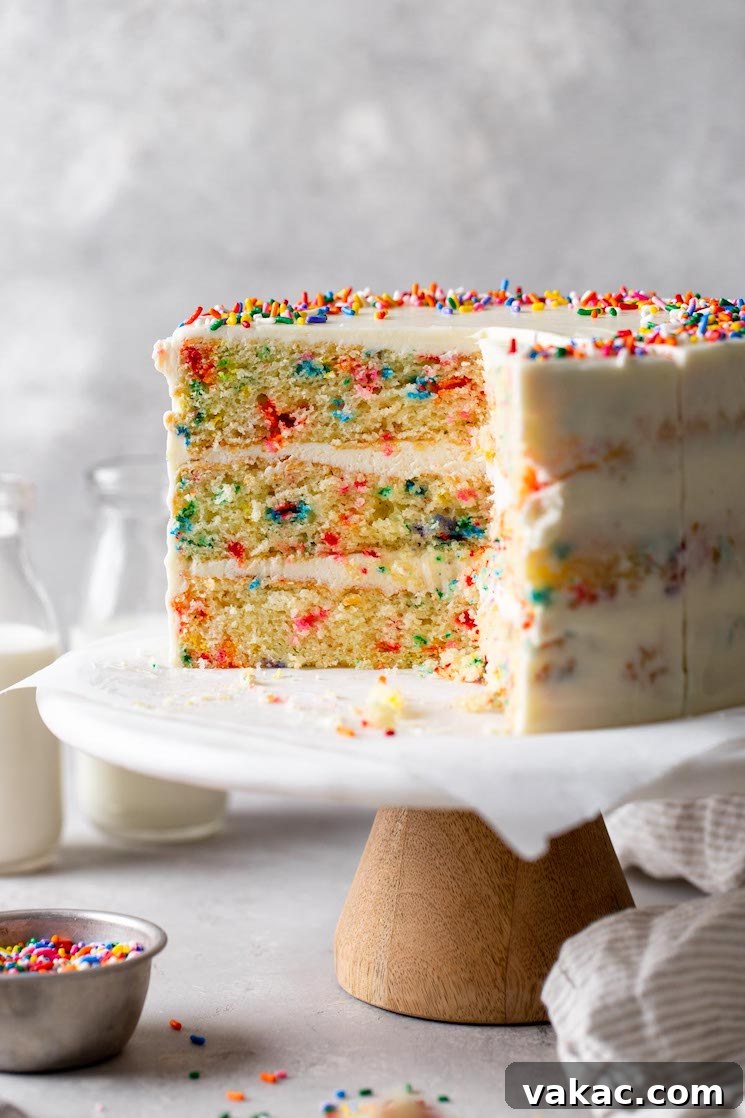
- Final Frosting and Decoration: With the remaining frosting, generously coat the entire top and all sides of your assembled cake. Use an offset spatula or a bench scraper to smooth the frosting to your desired finish – whether you prefer a perfectly smooth surface or a rustic, textured look. For that ultimate, celebratory funfetti appeal, do not be shy about adding a generous cascade of extra sprinkles to both the top and sides of the cake. After all, what’s a funfetti cake without an abundance of joyous, colorful sprinkles?
- Chill and Serve: For the cleanest possible slices and a firmer, more stable frosting, it’s highly recommended to chill the finished cake in the refrigerator for at least 30 minutes before cutting into it. Remember to allow the cake to come closer to room temperature for about 15-30 minutes before serving, as this brings out the best flavor and texture of both the cake and the buttercream.
Customizing Your Funfetti Creation: Pan Sizes & More
This wonderfully versatile funfetti cake batter isn’t solely destined for a grand, towering three-layer centerpiece! You can effortlessly adapt this recipe to suit a variety of different pan sizes and occasions, making it incredibly flexible for your baking needs. Here’s how to adjust the recipe for various forms, ensuring delicious results every time:
- For a Two-Layer Cake (9-inch round): If you prefer a slightly less towering cake or simply have only two 9-inch round cake pans available, this recipe still works beautifully. Divide the entire batter evenly between two thoroughly greased and parchment-lined 9-inch round cake pans. Since these layers will be slightly thicker, adjust the baking time to approximately 28 to 33 minutes, or until a wooden toothpick inserted into the center of each cake comes out completely clean. Remember to allow them to cool fully before proceeding with frosting.
- For a Classic 9×13-inch Sheet Cake: A 9×13-inch sheet cake is an excellent choice for potlucks, larger family gatherings, or whenever you desire a simpler, more straightforward presentation and easier serving. Generously grease a 9×13-inch baking pan with nonstick cooking spray and pour all the funfetti batter into it, spreading it out into one perfectly even layer with an offset spatula. Bake at 350°F (180°C) for a slightly longer duration, typically 35 to 40 minutes, or until a toothpick inserted into the center emerges clean. This size is incredibly convenient to slice and serve directly from the pan.
- For Delightful Funfetti Cupcakes: This recipe is fantastic for producing individual treats, yielding approximately 32 standard-sized cupcakes, making them perfect for children’s parties, bake sales, or personalized portions. Line your muffin tins with festive paper liners, then fill each liner about two-thirds of the way full to allow ample room for proper rising. Bake for a shorter duration, typically 16 to 20 minutes, or until a toothpick inserted into the center of a cupcake comes out clean. Let them cool completely on a wire rack before decorating with your favorite frosting and extra sprinkles.
Essential Baking Tips for Funfetti Success
Even seasoned bakers can benefit from a few tried-and-true tips to ensure their funfetti cake turns out perfectly every single time, from the moist crumb to the vibrant sprinkles:
- Always Use Room Temperature Ingredients: This tip is paramount and cannot be stressed enough! Room temperature butter, eggs, and buttermilk emulsify much more easily and thoroughly, creating a smoother, more uniform batter that is capable of holding more air. This ultimately results in a cake with a significantly lighter and fluffier texture. Cold ingredients can cause the batter to curdle, leading to an uneven texture.
- Measure Flour Correctly: Accurate flour measurement is critical. The “spoon and level” method is the gold standard: lightly spoon flour into your dry measuring cup until it overflows, then use a straight edge (like the back of a knife or an offset spatula) to level it off without compacting the flour. Do not scoop flour directly with the measuring cup, as this compresses it and can add up to 25% too much flour, leading to a notoriously dry and dense cake.
- Stick with Jimmie Sprinkles: As we’ve highlighted, jimmie sprinkles are the best choice for achieving vibrant, non-bleeding color in your funfetti cake. Their waxy coating is designed to withstand the baking heat, preventing color leaching into the batter. Avoid tiny round nonpareils or softer, intensely dyed sprinkles, as these are almost guaranteed to bleed.
- Do Not Overmix the Batter: This is one of the most common pitfalls in cake baking. Once you’ve added the flour to the wet ingredients, mix only until the ingredients are just combined and no streaks of dry flour remain. Overmixing vigorously develops the gluten in the flour, which will inevitably result in a tough, chewy, and dense cake, completely undermining the desired light and tender texture.
- Cool Cake Layers Completely: Patience is a virtue in baking! Attempting to frost cake layers while they are still even slightly warm is a recipe for disaster – your beautiful buttercream frosting will melt, slide right off, and make assembly a sticky mess. Ensure the cake layers are cooled completely to room temperature, or even slightly chilled, for easy handling and neat, stable frosting application.
- Parchment Paper is Your Friend: A simple yet effective trick for flawless cake removal is to line the bottoms of your cake pans with rounds of parchment paper. This ensures an easy release and reliably prevents your beautiful cake layers from sticking, preserving their perfect shape.
Frequently Asked Questions About Funfetti Cake
- How long does homemade funfetti cake last?
- When stored properly in an airtight container at room temperature, this cake will stay wonderfully fresh and delicious for 2-3 days. If refrigerated, it can extend its freshness for up to 4-5 days. For the absolute best flavor and texture, always allow slices to come to room temperature for about 15-30 minutes before serving.
- Can I make this funfetti cake ahead of time?
- Absolutely! This recipe is excellent for making ahead. The baked cake layers can be prepared one day in advance, cooled completely, individually wrapped tightly in plastic wrap, and stored at room temperature. The Swiss meringue buttercream can also be made a day or two ahead of time and stored in an airtight container in the refrigerator, then gently re-whipped with an electric mixer until smooth and fluffy before you are ready to frost the cake.
- What’s the difference between all-purpose flour and cake flour, and why is it important?
- The primary difference lies in their protein content. Cake flour has a significantly lower protein content (typically 8-9%) compared to all-purpose flour (which ranges from 10-12%). This lower protein level means that when cake flour is mixed, less gluten is formed. The result is a cake with a remarkably softer, finer, and more tender crumb structure that feels delicate in the mouth. While all-purpose flour can technically be used, your cake will inevitably be denser and less tender. For the optimal light and fluffy texture described, using cake flour is highly recommended for this recipe.
- Can I freeze funfetti cake?
- Yes, freezing is a fantastic way to extend the life of your funfetti cake! Baked and completely cooled cake layers can be individually wrapped tightly in plastic wrap, then further wrapped in aluminum foil, and frozen for up to 3 months. To use, thaw them overnight in the refrigerator before unwrapping and frosting. The Swiss meringue buttercream can also be frozen in an airtight container for up to 3 months; simply thaw it in the refrigerator and re-whip with an electric mixer until it returns to its smooth consistency before use.
- My sprinkles bled into the cake batter! What went wrong?
- The most common reason for sprinkles bleeding is using the wrong type. Tiny round nonpareils or softer, intensely dyed sprinkles tend to dissolve and release their colors into the moist cake batter during the baking process, often resulting in a muddy or dull appearance. To prevent this, always opt for “jimmie” sprinkles (the longer, rod-shaped ones). Their waxy coating is more resilient to heat, ensuring they maintain their distinct, vibrant colors throughout baking and keep your funfetti cake looking cheerful and bright.
More Irresistible Layer Cake Recipes to Explore!
- Classic Vanilla Cake
- Decadent Chocolate Cake
- Elegant White Cake
- Beautiful Marble Cake
- The Best Carrot Cake
Funfetti Cake Recipe
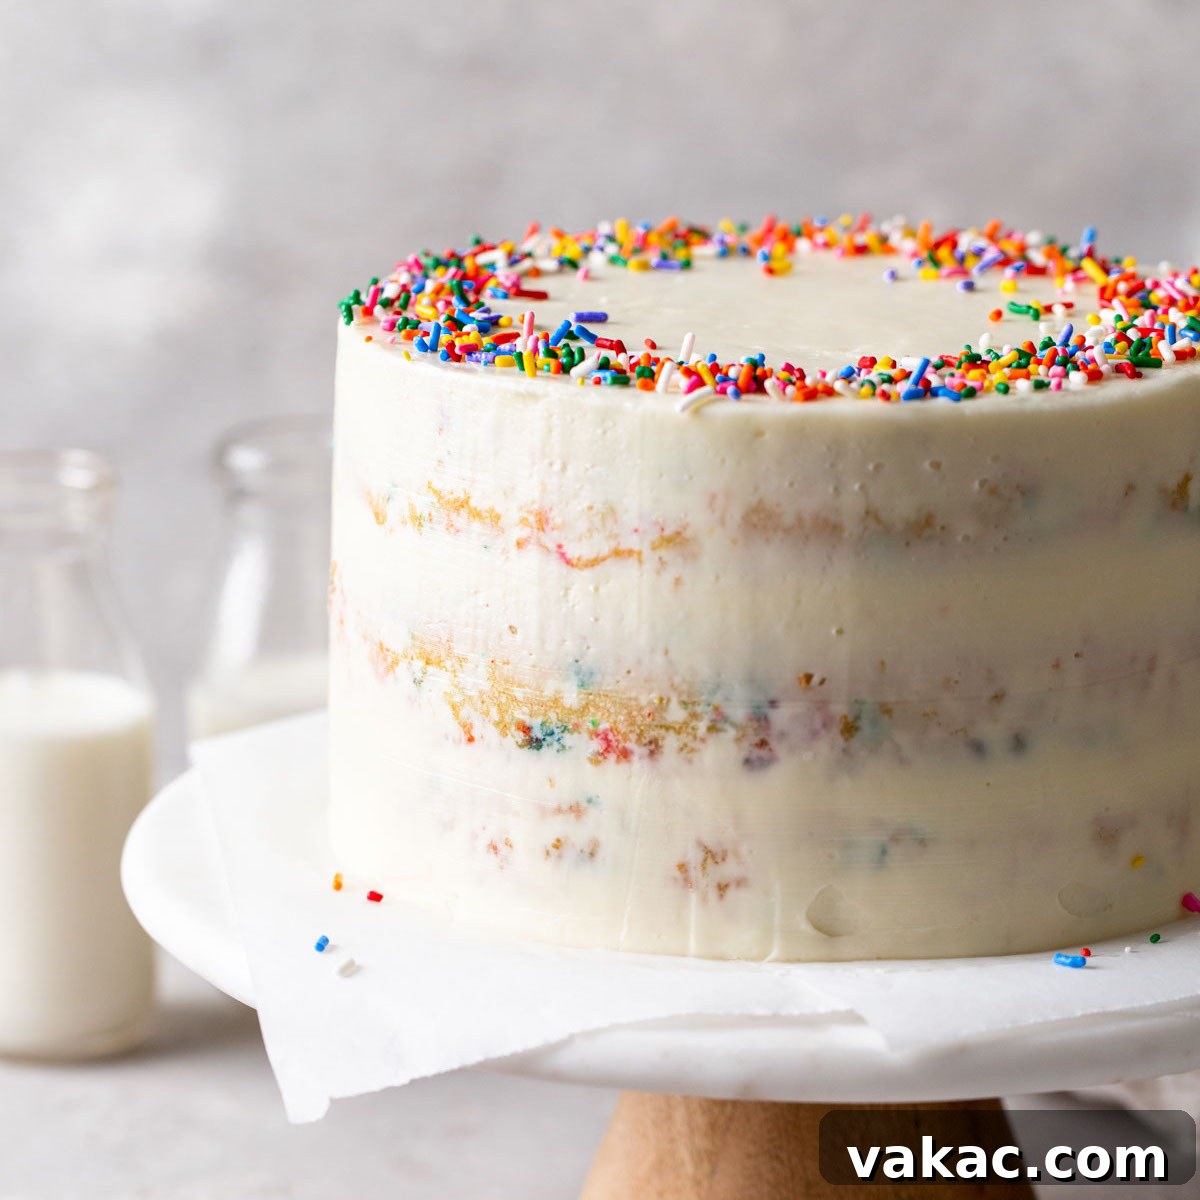
This homemade funfetti cake is wonderfully moist, incredibly fluffy, and generously topped with luxurious Swiss meringue buttercream and an abundance of festive sprinkles. It’s the perfect centerpiece for any celebration, bringing joy with every slice!
Prep Time: 1 hour 45 minutes
Cook Time: 30 minutes
Total Time: 2 hours 15 minutes
Yields: 10 slices
Ingredients
For the Funfetti Cake:
- 3 cups (345 grams) cake flour (spooned & leveled)
- 2 teaspoons baking powder
- ½ teaspoon baking soda
- ½ teaspoon salt
- 1 cup (240 ml) buttermilk (room temperature)
- ¼ cup (60 ml) canola or vegetable oil
- 2 ½ teaspoons pure vanilla extract
- ½ teaspoon pure almond extract
- 1 cup (2 sticks, or 230 grams) unsalted butter (softened to room temperature)
- 2 cups (400 grams) granulated sugar
- 4 large eggs (room temperature)
- ½ cup (100 grams) sprinkles (jimmies recommended for best results)
For the Swiss Meringue Buttercream:
- 6 large egg whites (198 grams)
- 2 cups (400 grams) granulated sugar
- ¼ teaspoon salt
- 2 cups (4 sticks; 1 pound) unsalted butter (softened to a cool room temperature)
- 2 teaspoons pure vanilla extract
Instructions
- To make the funfetti cake: Preheat your oven to 350°F (180°C). Prepare three 8-inch round cake pans by spraying them generously with nonstick cooking spray and lining the bottoms with parchment paper circles. Set these aside.
- In a large mixing bowl, whisk together the cake flour, baking powder, baking soda, and salt until thoroughly combined. This ensures even distribution of leavening agents. Set aside.
- In a separate large mixing bowl or a measuring cup, whisk together the room temperature buttermilk, oil, vanilla extract, and almond extract until well blended. Set aside.
- In the bowl of a stand mixer fitted with the paddle attachment (or using a large bowl and a powerful handheld electric mixer), beat the softened butter on low speed until it becomes smooth. Gradually and slowly add the granulated sugar to the butter, mixing until fully incorporated.
- Once all the sugar is added, increase the mixer speed to medium-high and continue beating for an additional 4 to 5 minutes, or until the mixture becomes visibly light in color and fluffy in texture. This step incorporates essential air for a tender cake.
- Reduce the mixer speed to low. Add the large eggs one at a time, mixing well after each addition until just combined. After each egg, pause to scrape down the sides and bottom of the bowl with a rubber spatula to ensure everything is evenly incorporated.
- With the mixer on its lowest speed, add the dry ingredients in three separate additions, alternating with the buttermilk mixture (always begin and end with the dry ingredients). Mix each addition only until it is just combined; be careful not to overmix the batter to avoid developing too much gluten, which can lead to a tough cake.
- Use a rubber spatula to give the batter a final scrape around the bottom and sides of the bowl, ensuring everything is perfectly combined. Then, gently fold in the sprinkles, being careful not to overmix to prevent color bleeding.
- Evenly divide the prepared batter among the three cake pans and gently spread it out into one even layer in each pan.
- Bake for 25 to 30 minutes, or until a wooden toothpick inserted into the center of the cakes comes out clean. Remove the pans from the oven and allow the cakes to cool in their pans for about 20 minutes. After this time, run a knife around the edges to loosen, then carefully invert the cakes onto a wire rack to cool completely to room temperature.
- To make the Swiss meringue buttercream: In a large heat-proof bowl, whisk together the egg whites, granulated sugar, and salt until they are well combined.
- Place this bowl over a pot of simmering water, ensuring the bottom of the bowl does not touch the water. Whisk constantly until the mixture reaches 160°F (71°C) on a digital thermometer.
- Remove the bowl from the heat and transfer the mixture to the bowl of a stand mixer fitted with the whisk attachment. Beat on medium-high speed until stiff, glossy peaks form (this typically takes 10 to 15 minutes). If the outside of the bowl is still warm to the touch at this point, allow it to cool completely (or refrigerate for 10-15 minutes) before proceeding.
- Switch from the whisk attachment to the paddle attachment. With the mixer on medium-high speed, add the softened butter 1 tablespoon at a time, ensuring each tablespoon is fully mixed in before adding the next. Once all the butter is added, continue mixing if necessary until the mixture transforms into a thick, smooth, and creamy buttercream.
- Scrape down the sides of the bowl, add the vanilla extract, and continue mixing on medium speed until fully combined (about 20 to 30 seconds).
- Adjust the mixer to the lowest speed and continue mixing for 5 to 7 minutes. This low-speed mixing helps to remove any excess air bubbles, resulting in an exceptionally smooth buttercream. If needed, a rubber spatula can be used to manually beat out any stubborn air bubbles.
- To assemble the cake: Use a serrated knife or a cake leveler to carefully level the tops of each cooled cake layer, creating flat surfaces. Place one cake layer on your chosen cake stand or serving plate. Top with approximately ¾ cup to 1 cup of frosting, spreading it smoothly into an even layer. Carefully place the second layer on top and repeat with another ¾ cup to 1 cup of frosting. Finally, place the third cake layer on top and use the remaining frosting to generously coat and frost the top and sides of the entire cake. Decorate with extra sprinkles as desired!
Notes
- Storage Instructions: Store your completed funfetti cake in an airtight container in the refrigerator for up to 4 days. For optimal taste and texture, allow the cake to come to room temperature for 15-30 minutes before serving.
- Freezing Instructions: Baked and cooled cake layers can be wrapped tightly in plastic wrap and then aluminum foil, and frozen for up to 3 months. Thaw them overnight in the refrigerator before unwrapping and frosting. The prepared Swiss meringue buttercream can also be stored in a large freezer bag and frozen for up to 3 months. Thaw it in the refrigerator and then re-whip it with an electric mixer until smooth before use.
- Cake Flour Substitute: If you find yourself without cake flour, you can easily make your own substitute at home using all-purpose flour and cornstarch.
- To make a 9×13-inch cake: Grease a 9×13-inch pan with nonstick cooking spray. Pour the entire batter into the pan and spread it out into one even layer. Bake at 350°F (180°C) for 35 to 40 minutes, or until a toothpick inserted into the center comes out clean.
- To make a two-layer cake: If you prefer a two-layer cake, divide the batter evenly between two 9-inch round cake pans. Adjust the baking time slightly to 28 to 33 minutes.
- To make cupcakes: This versatile recipe will yield approximately 32 standard-sized cupcakes. Line your muffin tins with paper liners and fill each liner about 2/3 of the way full. Bake for a shorter duration, typically 16 to 20 minutes, or until a toothpick inserted into a cupcake comes out clean.
Cuisine: American
Course: Dessert
Author: Danielle Rye