
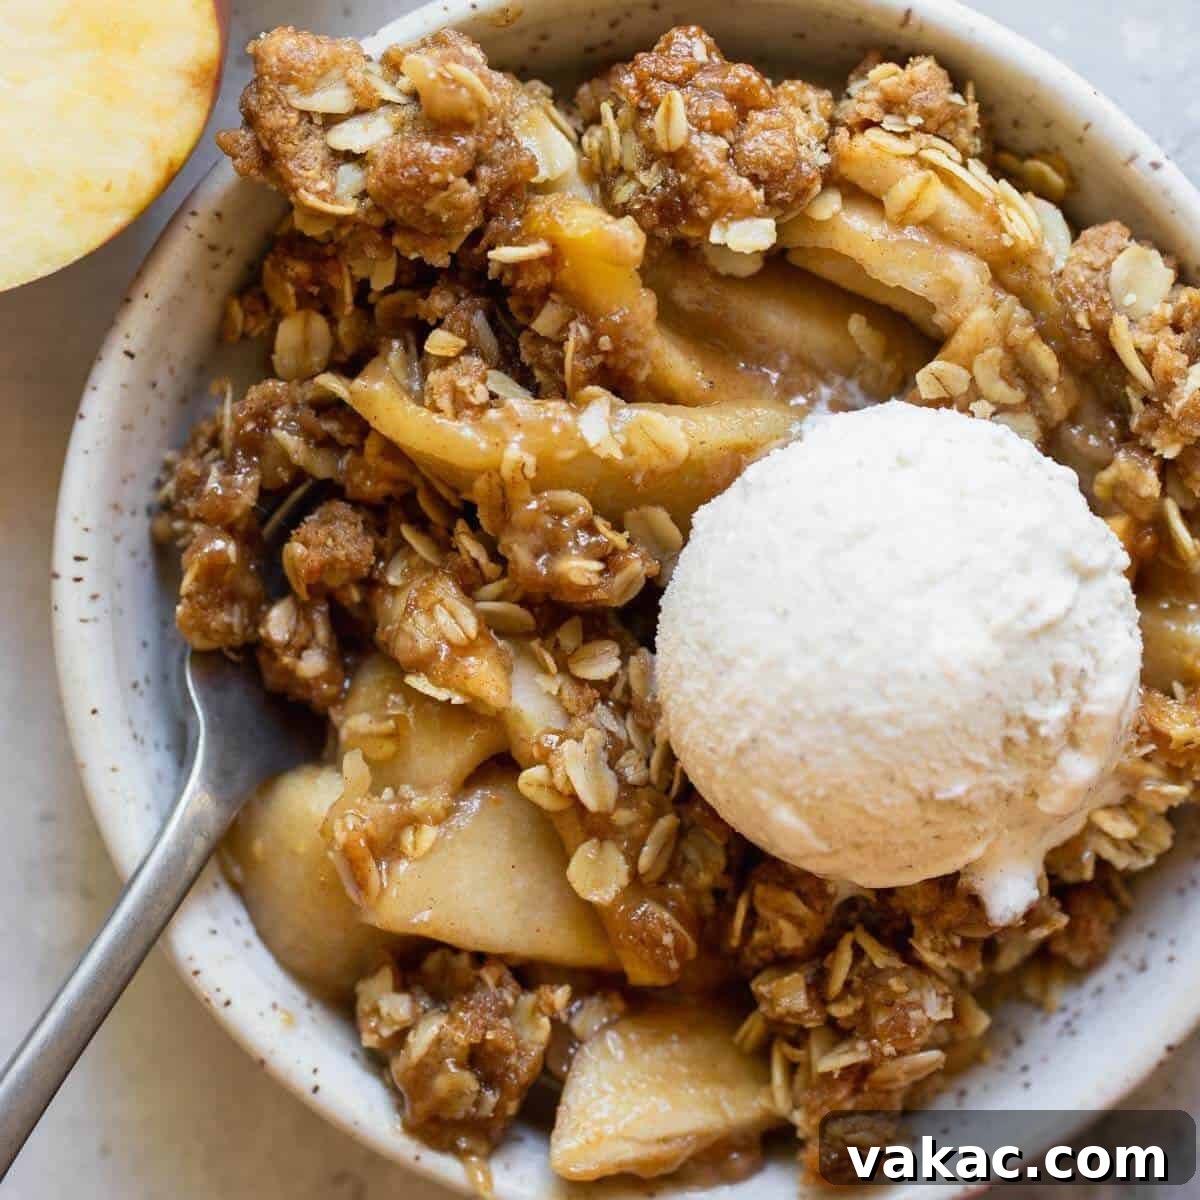
The Ultimate Easy Apple Crisp Recipe: Your Go-To Dessert for Any Season
An easy Apple Crisp recipe made with sliced apples and a crispy brown sugar oat topping. The perfect easy dessert for fall or any time of year!
There’s something incredibly comforting and undeniably delicious about a warm, bubbling apple crisp fresh from the oven, especially when generously topped with a scoop of melting vanilla ice cream. This beloved classic dessert perfectly balances the natural sweetness and subtle tartness of baked apples with a delightful, buttery, and irresistibly crispy oat topping. While apple crisp is often heralded as the quintessential fall dessert, its comforting flavors and simple preparation make it a true year-round delight, bringing warmth and a wonderful aroma to any home kitchen.
For years, I’ve been captivated by the simple yet profound magic of fruit crisps, ever since discovering the delightful combination of warm fruit filling and crunchy topping in a mixed berry crisp. The contrast between tender, spiced fruit and a golden-brown, crumbly topping is simply irresistible. This particular apple crisp recipe has quickly ascended to become a personal favorite, perfectly encapsulating the cozy essence of autumn in every spoonful, yet remaining light enough to be thoroughly enjoyed on a warm summer evening. It’s a versatile dessert that promises to please no matter the season or occasion.
Why This Easy Apple Crisp Recipe Is a Must-Try
What makes this specific apple crisp recipe stand out from the rest? It’s more than just a dessert; it’s an experience designed for ease, flavor, and pure comfort. Here’s what you can expect from this exceptional recipe:
- Abundantly Loaded with Apples: Each serving is jam-packed with perfectly sliced, tender apples that hold their shape beautifully and release their aromatic, sweet juices during baking, creating a luscious base.
- Infused with Warm, Inviting Spices: A carefully selected blend of ground cinnamon and nutmeg permeates the apple filling, imbuing it with a comforting, familiar, and undeniably delicious flavor that truly speaks of home.
- Irresistibly Crispy Brown Sugar Oat Topping: The crown jewel of this dessert is its golden-brown, buttery crumb topping, rich with brown sugar and old-fashioned oats. This topping delivers that essential textural contrast—a satisfying crunch in every bite that perfectly complements the soft apple filling.
- Effortless and Simple Preparation: This is a straightforward recipe that requires minimal fuss and no advanced baking skills. You’ll be pleasantly surprised at how quickly you can throw it together and get it into the oven, making it ideal for busy weeknights or impromptu gatherings.
- Versatile Enjoyment Year-Round: While it shines brightly during the fall season, this apple crisp is truly a dessert for any time of year. Its delightful flavors are perfect for a casual family dinner, a festive holiday meal, or simply as a comforting treat on a lazy afternoon.
Many home bakers find that the most time-consuming part of preparing this crisp is simply peeling and slicing the apples. But trust me, the minimal effort is profoundly rewarded! As an added, delightful bonus, your entire house will be filled with the most heavenly scent of baking apples and cinnamon as this crisp bakes in the oven, creating an atmosphere of warmth and homemade goodness that’s hard to beat.
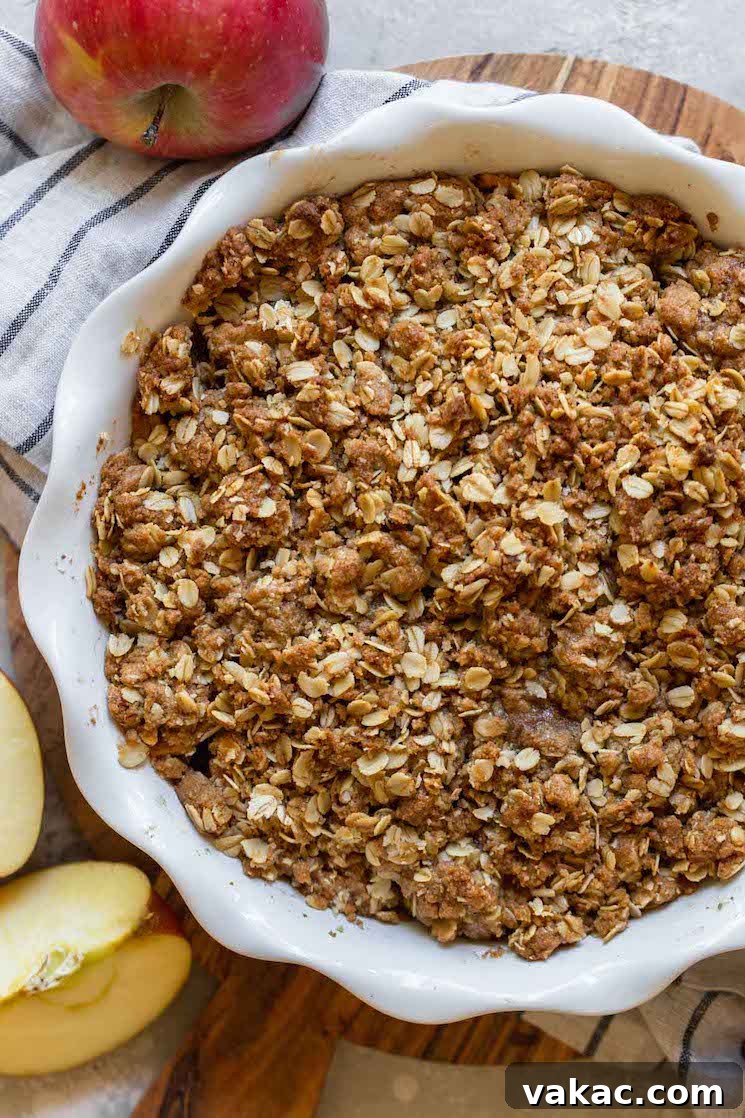
Mastering the Art of Apple Crisp: A Step-by-Step Guide
Creating the perfect apple crisp involves two main, equally important components: the rich, spiced apple filling and the crunchy, sweet oat topping. For optimal results and efficiency in your kitchen, I highly recommend starting with the topping. This strategy allows the butter in the topping to remain thoroughly chilled in the refrigerator while you meticulously prepare the apple filling, a crucial step for ensuring maximum crispiness during the baking process. Let’s dive into the detailed instructions for crafting each delicious part.
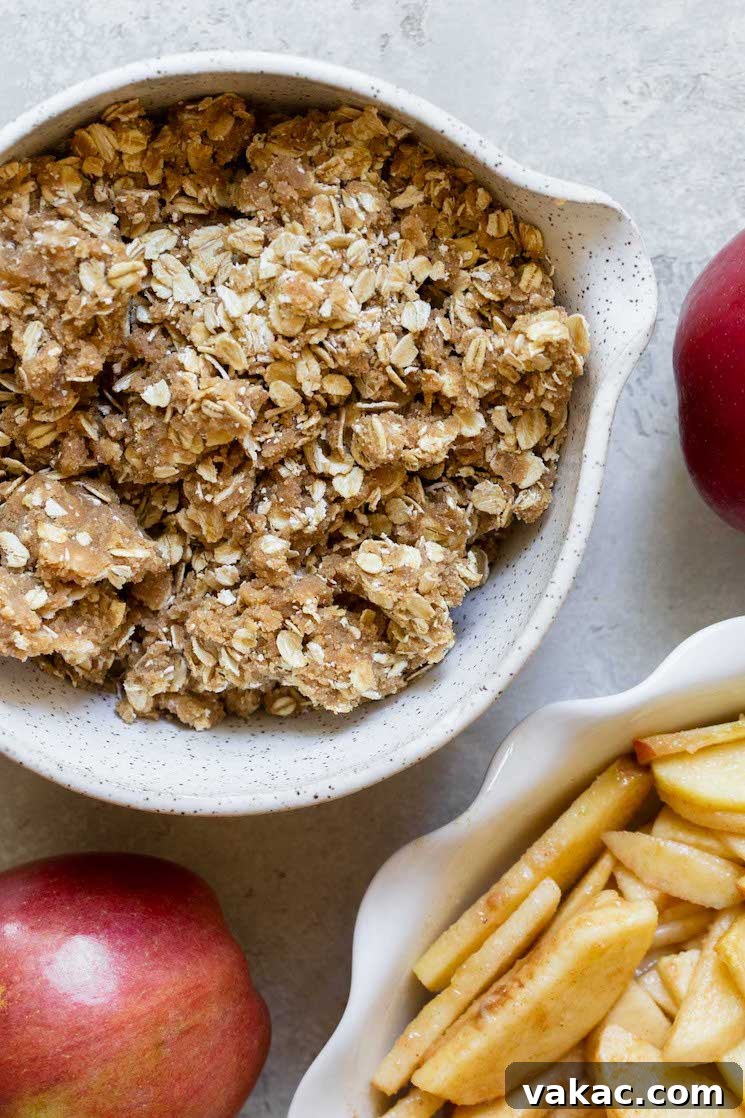
Crafting the Perfect Crispy Brown Sugar Oat Topping
The topping is arguably what elevates a simple baked apple dish into the realm of a truly satisfying apple crisp. It’s a harmonious and simple blend of essential pantry staples that comes together quickly and effortlessly. Here’s your comprehensive guide to making this essential, textural layer:
- Gather and Prepare Your Ingredients: You will need all-purpose flour, light brown sugar (packed), ground cinnamon, a pinch of salt, very cold unsalted butter (cubed into small, manageable pieces), and old-fashioned rolled oats. Each of these ingredients plays a critical and specific role in contributing to both the flavor profile and the desired texture of your topping.
- Thoroughly Combine Dry Ingredients: In a medium-sized mixing bowl, take your time to whisk together the all-purpose flour, light brown sugar, ground cinnamon, and salt until they are exceptionally well combined. This initial step is paramount for ensuring that the spices and sugar are evenly distributed throughout the topping mixture, preventing any clumps of brown sugar and guaranteeing consistent flavor in every bite.
- Precisely Incorporate the Cold Butter: Add the very cold, small-cubed butter directly into the dry mixture. Using a pastry cutter, your fingertips, or even a sturdy fork, work the butter into the flour mixture. The objective here is to break down the butter until the mixture primarily resembles coarse crumbs, with some distinct pea-sized pieces of butter still visible. The cold temperature of the butter is absolutely critical for this step; it is what creates tiny pockets of steam during the baking process, ultimately resulting in that wonderfully flaky and crispy texture that defines a perfect crisp topping. Be mindful to avoid overworking the mixture, as excessive handling can warm the butter too much, compromising the final texture.
- Gently Stir in the Rolled Oats: Once the butter has been adequately incorporated and the mixture is crumbly, gently fold in the old-fashioned rolled oats. Adding the oats at this stage prevents them from being unnecessarily pulverized by the pastry cutter or your hands, thereby allowing them to maintain their distinct shape and satisfying chewiness in the final baked product.
- Chill for Optimal Crispiness: Once the topping mixture is complete, cover the bowl securely with plastic wrap and transfer it to the refrigerator to chill while you prepare the apple filling. This cooling period is not just a suggestion; it is a vital step. Keeping the butter cold ensures that it will not melt too rapidly in the hot oven, which would cause the topping to spread and become greasy. Instead, the chilled butter will slowly melt, allowing the topping to brown beautifully, develop a rich flavor, and achieve its signature, coveted crispness.
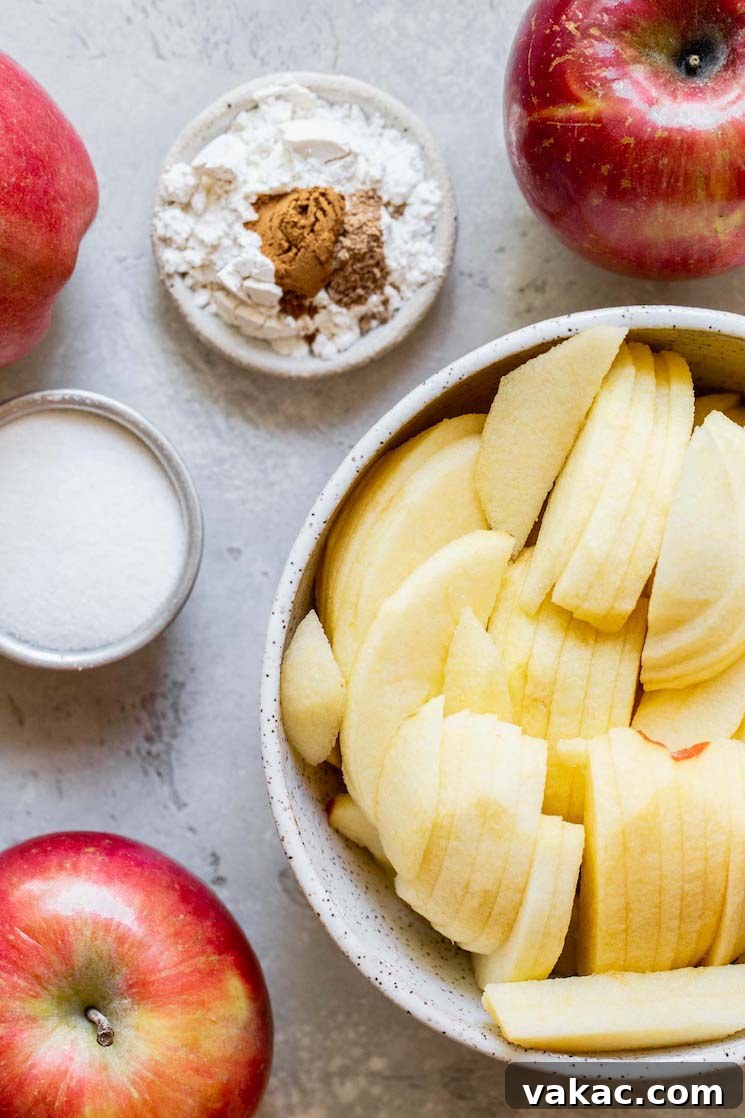
Preparing the Flavorful Apple Filling and Assembling Your Crisp
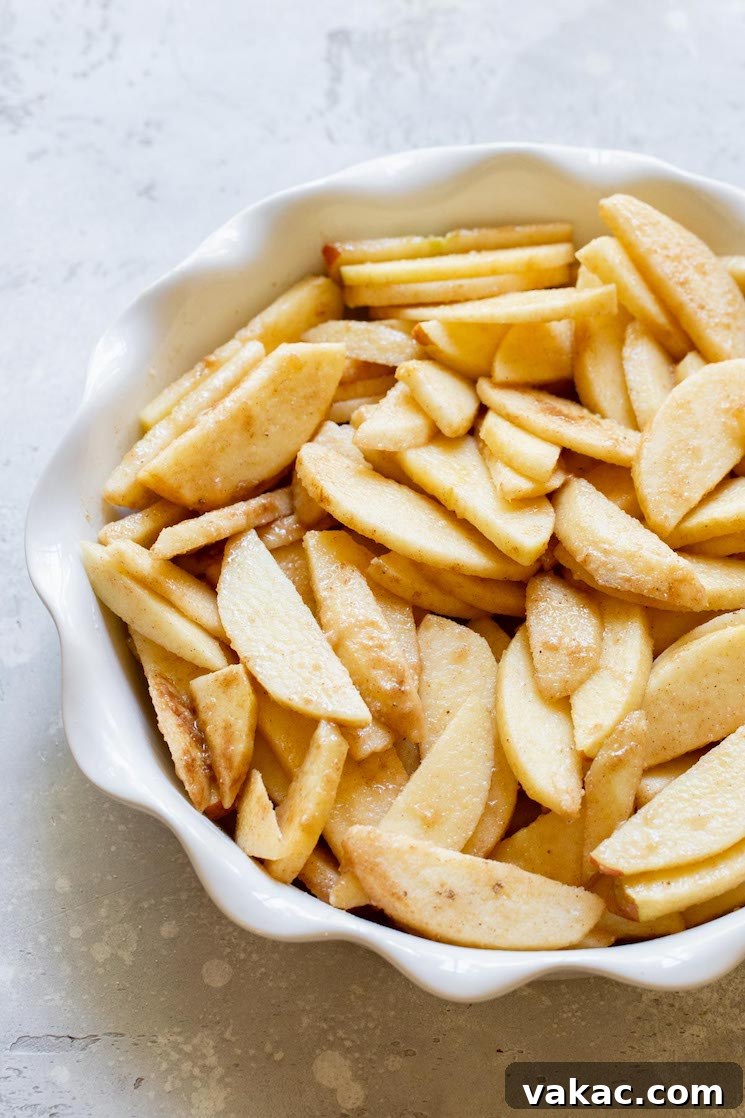
The apple filling forms the succulent heart of your crisp, and preparing it correctly ensures a tender, juicy, and perfectly spiced base that will melt in your mouth. This recipe utilizes a simple yet highly effective blend of freshly sliced apples, granulated sugar, a touch of flour, warm cinnamon, and aromatic nutmeg. Before you embark on preparing the filling, take a moment to preheat your oven to 350°F (177°C) and liberally grease a 9-inch pie dish or an 8 or 9-inch square baking dish with a good quality nonstick cooking spray. This crucial step will prevent any sticking and guarantee a seamless serving experience.
- Meticulous Apple Preparation is Key: Begin by carefully peeling, coring, and then slicing your chosen apples. I cannot stress enough the importance of slicing them to an approximate thickness of 1/4-inch. This precise thickness is absolutely crucial because if the apple slices are too thin, they are highly prone to turning mushy during the baking process, thereby losing their delightful and desirable texture. Conversely, if they are too thick, they might not soften sufficiently. While a mandoline slicer can certainly aid in achieving perfectly uniform slices, a sharp chef’s knife and a steady hand will work perfectly well.
- Seasoning the Apples to Perfection: In a generously sized mixing bowl, combine the meticulously sliced apples with granulated sugar, all-purpose flour, ground cinnamon, and ground nutmeg. The amount of granulated sugar included in this filling is intentionally modest (only 1/4 cup) for a specific reason: apples naturally contribute a significant amount of sweetness on their own. This deliberate restraint allows the vibrant, fresh apple flavor to truly shine through without being overpowered or masked by excessive sweetness. The flour, in this context, acts as an indispensable thickener, working diligently to ensure that the delicious juices released from the apples during baking create a rich, luscious, and syrupy consistency, rather than a thin, watery mess. Cinnamon and nutmeg, of course, are classic and essential companions to apples, enhancing their natural aroma and taste profile to create a truly comforting flavor.
- Ensuring an Even Coating: With your ingredients combined, stir the mixture thoroughly and patiently until every single apple slice is completely and uniformly coated with the dry ingredients. This step is critically vital for two key reasons: it guarantees that each individual bite of apple is perfectly sweetened and spiced, delivering a consistent burst of flavor, and it ensures that the flour is effectively distributed to properly thicken all the precious apple juices that will be released during baking. Take your time during this mixing phase, making sure to reach and coat all the apples, especially those settled at the bottom of the bowl.
- Layering into the Baking Dish: Once the apples are perfectly coated, transfer them into your prepared pie dish, spreading them out into an even and relatively uniform layer. Avoid piling them too high in the center, as an even distribution ensures uniform baking and consistent tenderness throughout the filling.
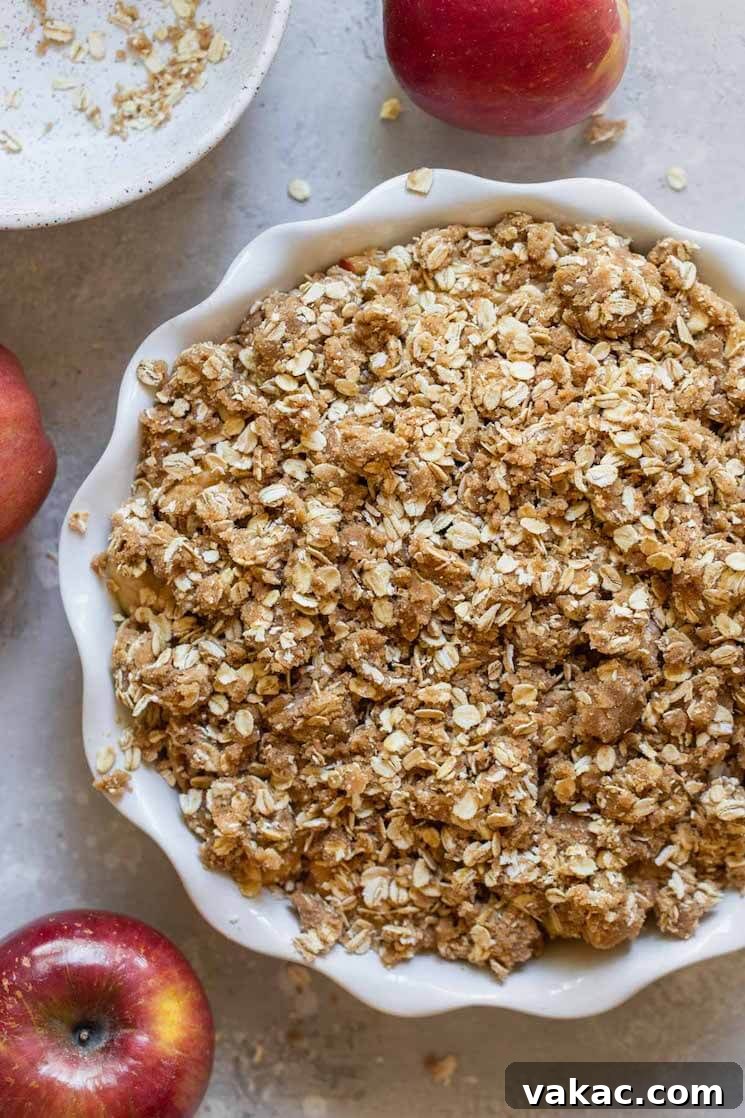
- Generously Top with the Chilled Mixture: Now, retrieve your perfectly chilled oat topping from the refrigerator. Evenly and generously sprinkle the entire topping mixture over the prepared apple filling in the baking dish. While it might appear to be a substantial amount of topping, trust the recipe! This generous layer is absolutely essential for guaranteeing that every single forkful of apple crisp has that wonderful, contrasting, and satisfyingly crunchy topping component.
- Bake to Golden Perfection: Carefully place the fully assembled crisp into your preheated oven. Allow it to bake for approximately 40 to 50 minutes. You will know your apple crisp is perfectly ready when the topping has achieved a beautiful golden-brown hue and you can visibly see the luscious apple juices bubbling enticingly around the edges of the dish. This vigorous bubbling is a clear indication that the filling has successfully thickened and the apples have become wonderfully tender.
The entire process, from start to finish, is incredibly straightforward, culminating in a truly show-stopping dessert that requires minimal fuss. Once baked, it’s important to allow the crisp to cool on a wire rack for about 20 to 30 minutes before you even think about serving it. This brief but crucial cooling period allows the fruit filling to set slightly, preventing it from being overly runny, while still ensuring it’s wonderfully warm, fragrant, and inviting for that first delicious bite.
Choosing the Best Apples for Your Apple Crisp
The type of apples you meticulously select can significantly influence both the flavor profile and the final texture of your apple crisp. While a wide array of apple varieties can work beautifully, the best baking apples are those that reliably hold their shape well throughout the cooking process and offer a delightful balance of inherent sweetness and refreshing tartness. Here is a curated selection of some excellent apple choices that consistently perform well in baked desserts like crisp:
- Fuji Apples: Renowned for their notably crisp texture and intensely sweet flavor, Fuji apples are a highly favored option for baking. They possess a remarkable ability to maintain their firmness even after baking, effectively preventing the filling from becoming mushy.
- Braeburn Apples: These apples offer a wonderfully pleasing and well-balanced blend of sweet and tart notes. Braeburns boast a firm flesh that stands up magnificently to the rigors of baking, becoming tender and yielding without ever descending into an applesauce-like consistency.
- Granny Smith Apples: The quintessential tart baking apple, Granny Smiths provide an invigorating tang that brilliantly cuts through the sweetness of the oat topping. This creates a far more complex and nuanced flavor profile, preventing the dessert from being overly sweet. They are also highly celebrated for consistently maintaining their firm texture even after extensive baking.
- Honeycrisp Apples: Living up to their evocative name, Honeycrisp apples are exceptionally crisp and incredibly juicy, boasting a delightful sweetness. They bake up wonderfully, transforming into a tender yet still slightly firm state, and their consistently crowd-pleasing flavor is always a welcome addition to any baked good.
- Pink Lady Apples (also known as Cripps Pink): These elegant apples are characterized by their perfect harmony of sweet and tart flavors, coupled with a firm, crisp flesh. They are exemplary at holding their shape perfectly during baking and contribute a lovely, subtle aromatic quality to your baked treats.
For achieving the most balanced and intricately interesting flavor in your apple crisp, I personally love and highly recommend utilizing a thoughtful combination of both sweet and tart apples. My tried-and-true go-to mix is typically a pairing of Granny Smith and Honeycrisp apples. The bright, sharp tartness of the Granny Smiths provides a lively counterpoint that truly brightens the crisp, while the Honeycrisps contribute a delightful, inherent sweetness and a pleasant textural element. However, please feel entirely free to experiment with any single variety or unique combination from the comprehensive list above, based purely on your personal preference, regional availability, and what’s freshest in season. Don’t hesitate to try different blends to discover your absolute favorite apple crisp combination!
Storing and Reheating Your Delicious Apple Crisp
While an apple crisp is undeniably at its peak when enjoyed warm and fresh from the oven, any delightful leftovers are certainly a treat in their own right. Proper storage is key to ensuring your crisp remains delicious and retains its quality for several days. Here’s a comprehensive guide on how to effectively store and later rewarm your homemade apple crisp, so you can savor its comforting flavors over time:
- Room Temperature Storage: For immediate enjoyment, you can comfortably leave the crisp at room temperature for a day or even up to two days, provided it is covered tightly. However, for extending its freshness, particularly to prevent the topping from becoming too soft or the fruit from spoiling, refrigeration is strongly recommended.
- Refrigeration: Once your apple crisp has cooled down completely to room temperature, cover it tightly and securely with plastic wrap or aluminum foil. Store it diligently in the refrigerator for a maximum of 3 days. This method is crucial for maintaining the optimal texture of both the tender baked apples and the crispy oat topping.
- Freezing (Optional for Longer Storage): Although not explicitly detailed in the original recipe, apple crisp is a dessert that can often be frozen for longer preservation. For the best possible results, I recommend freezing the crisp unbaked. Simply assemble the entire crisp in its baking dish (without baking it), then wrap it meticulously and tightly, first in plastic wrap and then in aluminum foil. It can be frozen for up to 3 months. When you’re ready to bake it, thaw the crisp overnight in the refrigerator and then bake as directed, potentially needing an additional 10-15 minutes of baking time since it starts from a chilled state. A baked crisp can also be frozen, though it’s worth noting that the topping may lose some of its initial crispness upon reheating.
Efficiently Rewarming Your Apple Crisp
Bringing a cold slice of apple crisp back to its warm, comforting glory is an easy process:
- For Individual Servings: Place a single serving of apple crisp in a microwave-safe bowl. Microwave it in short, 20 to 30-second increments, stirring gently between intervals, until it is thoroughly warmed through to your preferred temperature. Be cautious not to overheat, as this can cause the delicate oat topping to become chewy rather than crispy.
- For Rewarming the Whole Crisp: Preheat your oven to a moderate 300°F (150°C). Place the entire crisp (either uncovered, or lightly covered with aluminum foil if the topping has already achieved a very deep brown hue) directly into the preheated oven. Allow it to warm for approximately 15 to 20 minutes, or until the apple filling is warmly bubbling and inviting. If you notice the topping beginning to brown excessively before the filling is adequately warm, you can loosely tent the crisp with aluminum foil to protect it from further browning while the interior heats through. This oven method is highly effective at helping to revive some of the original crispness in the topping, making your leftovers feel almost as good as fresh.
Expert Baking Tips for a Flawless Apple Crisp Every Time
Achieving a consistently perfect apple crisp with a tender fruit filling and an incredibly crunchy topping is quite simple with a few key insights and smart techniques. Here are some essential baking tips to ensure your dessert turns out absolutely flawless and delicious every single time you bake it:
- The Importance of Oat Choice: While old-fashioned rolled oats are definitively preferred for their wonderfully chewy texture and their superior ability to hold their shape and integrity throughout the baking process, quick oats can certainly be used as an acceptable substitute if that’s all you have readily available. However, be aware that using quick oats will typically result in a slightly finer and less chewy topping texture. Nevertheless, the flavor will still be wonderfully delicious. It is generally advisable to avoid instant oats, as their texture is often far too fine and soft to create a satisfyingly crispy crisp topping.
- Precision in Apple Preparation: Always make it a practice to meticulously peel and core your apples before proceeding with slicing them. This foundational step ensures a smooth, consistent, and pleasant texture in the final fruit filling. As previously mentioned, a thoughtful mix of both naturally sweet and delightfully tart apples (such as the classic combination of Honeycrisp and Granny Smith) often yields the most balanced, complex, and intriguing flavor profile for your crisp. However, please feel completely free to stick to your single favorite apple variety if that’s your preference. The critical aspect here is to aim for consistently uniform 1/4-inch thick slices; this uniformity is crucial for ensuring that all the apples cook evenly and reach optimal tenderness at the same rate.
- Accurate Apple Measurement: A useful rule of thumb to keep in mind is that one standard medium-sized apple will typically yield approximately one cup of sliced apples. Therefore, for this specific recipe, which calls for 5 cups of sliced apples, you will generally need to prepare about 5 medium apples. However, since apple sizes can vary quite considerably, it is always best practice to measure your apples by volume (using a measuring cup) or, for ultimate precision, by weight using a kitchen scale.
- Strategies to Prevent a Soggy Bottom: To effectively prevent the unfortunate occurrence of a watery or soggy bottom layer (which can happen even without a pie crust, resulting in a mushy filling), it is absolutely essential to ensure that your apple slices are thoroughly and completely coated in flour. The flour acts as a powerful absorbent, diligently soaking up any excess moisture that the apples release during the baking process. While this recipe is thoughtfully designed to work beautifully without it, an advanced tip to consider for an extra layer of protection against sogginess is to pre-bake the apple filling on its own for about 10-15 minutes before you add the topping and complete the main bake.
- Techniques for Achieving Extra Crispiness: For an oat topping that is exceptionally crunchy and golden, ensure that your butter is kept very cold when you begin to cut it into the dry ingredients. You can even place your cubed butter in the freezer for a quick 10-15 minutes just before you start preparing the topping; this extra chill makes a significant difference. Additionally, if you notice that your topping isn’t browning or crisping up quite enough towards the end of the baking time, you can carefully move the crisp to the upper third of your oven for the final 5-10 minutes of baking. Remember to keep a very close eye on it during this time to prevent any accidental burning.
Serving Suggestions for Your Perfectly Baked Apple Crisp
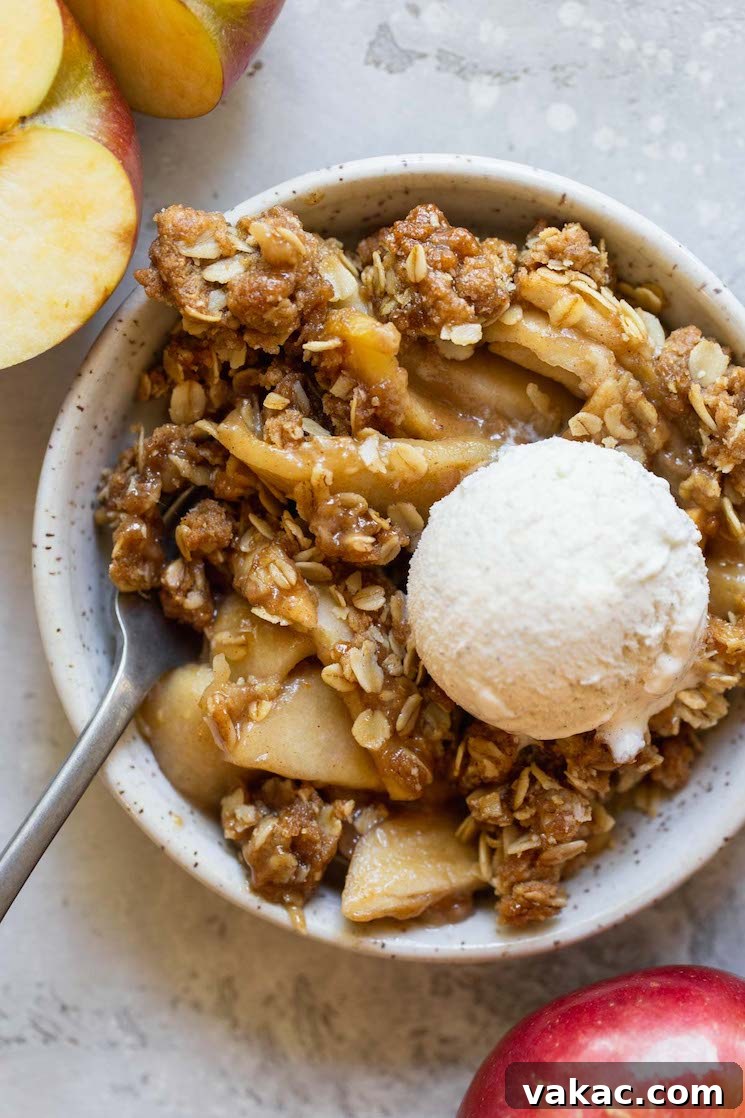
While a simple scoop of creamy vanilla bean ice cream remains the timeless and most celebrated accompaniment, do not feel limited in how you choose to serve your magnificent apple crisp! Here are several delightful ways to elevate your serving experience and impress your guests:
- Classic Vanilla Ice Cream: This is the undisputed champion pairing. The cold, rich, and creamy vanilla ice cream provides an exquisite temperature and textural contrast to the warm, tender, spiced apples and the crispy oat topping, creating a truly harmonious bite.
- Freshly Whipped Cream: For a lighter yet equally indulgent option, a generous dollop of freshly whipped cream adds a delightful airiness and a delicate richness that complements the crisp beautifully without being too heavy.
- Warm Caramel Sauce: A decadent drizzle of warm, gooey caramel sauce takes this already delicious dessert to an entirely new level of indulgence. Its buttery, sweet notes perfectly complement and enhance the natural flavors of the apple and oat topping.
- Aged Cheddar Cheese: For those with an adventurous palate who appreciate a sophisticated savory-sweet combination, a thin slice of sharp, aged cheddar cheese melting gently over a warm serving of apple crisp is a surprisingly traditional and utterly delicious pairing that adds a wonderful tang.
- Crème Fraîche: Offering a sophisticated, slightly tangy, and rich creaminess, crème fraîche provides a wonderful balance to the sweetness of the crisp, adding a touch of elegance and depth of flavor.
- Toasted Nuts: For an extra layer of crunch and nutty flavor, sprinkle some lightly toasted pecans or walnuts over the top just before serving.
More Delicious Apple Recipes to Explore
If you’ve fallen in love with the comforting and versatile flavors of apple in your desserts, then you’ll undoubtedly enjoy exploring these other fantastic apple-based recipes. Each one offers a unique and delightful way to savor this beloved fruit:
- Fresh Apple Cake
- Classic Apple Pie
- Cinnamon Apple Muffins
- Apple Hand Pies
Classic Apple Crisp Recipe
This easy Cinnamon Apple Crisp recipe features a generous amount of perfectly sliced, tender apples nestled delightfully under a sweet, crispy brown sugar oat topping. It’s the quintessential comforting dessert, ideal for any season and always a guaranteed crowd-pleaser that evokes warmth and happiness with every bite.
Prep Time: 25 mins
Cook Time: 45 mins
Total Time: 1 hr 10 mins
Yields: 6 servings
Ingredients
For the topping:
- ½ cup (65 grams) all-purpose flour, spooned & leveled
- ¾ cup (150 grams) light brown sugar, packed
- 1 teaspoon ground cinnamon
- ¼ teaspoon salt
- ½ cup (115 grams) cold unsalted butter, cubed into small pieces
- 1 cup (100 grams) old-fashioned rolled oats
For the filling:
- 5 cups (600 grams) sliced apples (about 5 medium apples, peeled, cored, and 1/4-inch thick)
- ¼ cup (50 grams) granulated sugar
- 2 tablespoons (15 grams) all-purpose flour
- ½ teaspoon ground cinnamon
- ¼ teaspoon ground nutmeg
Instructions
- Preheat your oven to 350°F (177°C). Lightly spray a 9-inch pie plate (or an 8 or 9-inch square baking dish) with nonstick cooking spray and set it aside, ready for assembly.
- To make the topping: In a medium mixing bowl, thoroughly whisk together the flour, brown sugar, cinnamon, and salt until they are exceptionally well combined. Add the very cold cubed butter. Using a pastry cutter or a fork, meticulously cut the butter into the dry ingredients until the mixture becomes wonderfully crumbly and starts to come together, resembling coarse meal with some pea-sized pieces of butter still visible. Gently stir in the old-fashioned rolled oats. Cover the bowl securely and transfer this topping mixture to the refrigerator to chill while you prepare the apple filling.
- To make the filling: In a large mixing bowl, combine the prepared sliced apples with the granulated sugar, 2 tablespoons all-purpose flour, 1/2 teaspoon ground cinnamon, and 1/4 teaspoon ground nutmeg. Stir thoroughly and patiently until all the apple slices are completely and evenly coated with the dry ingredients. This ensures consistent flavor and proper thickening.
- Carefully scoop the coated apples into the prepared baking dish, spreading them out into an even and level layer.
- Remove the chilled topping from the refrigerator and generously sprinkle it evenly over the apple filling in the baking dish, ensuring good coverage.
- Place the assembled crisp in the preheated oven and bake for approximately 40 to 50 minutes, or until the topping is a beautiful golden brown and the apple filling is visibly bubbling invitingly around the edges of the dish.
- Once baked to perfection, carefully remove the apple crisp from the oven and transfer it to a wire rack. Allow it to cool slightly for 20 to 30 minutes before serving. This crucial cooling time allows the fruit filling to set properly and prevents it from being too hot to enjoy immediately.
Notes
- Leftover apple crisp may be covered tightly with plastic wrap or aluminum foil and stored in the refrigerator for up to 3 days to maintain its freshness and quality.
- To rewarm individual servings: Place a single serving in a microwave-safe bowl and microwave in 20 to 30-second increments until thoroughly warmed through.
- To rewarm the full crisp: Preheat your oven to 300°F (150°C). Place the entire crisp in the oven for 15 to 20 minutes, or until warmed through. If the topping is already sufficiently browned, you may loosely cover the crisp with aluminum foil to prevent further browning while the interior heats.
- Oats: For the best possible texture and chewiness in the topping, old-fashioned rolled oats are highly recommended. However, quick oats can be used as a suitable substitute if needed, though they will typically result in a slightly less chewy topping.
- Apples: This specific recipe used a delightful and balanced mix of Granny Smith and Honeycrisp apples. Other excellent baking apple varieties that you may confidently use include Braeburn, Fuji, or Pink Lady apples. Feel absolutely free to use your preferred baking apple or any combination that you enjoy most.
Frequently Asked Questions About Apple Crisp
Can I make apple crisp ahead of time for entertaining?
Yes, absolutely! Making apple crisp ahead of time is a fantastic strategy for entertaining. You have a couple of convenient options. You can prepare both the apple filling and the oat topping separately and store them in airtight containers in the refrigerator overnight. Then, simply assemble and bake the crisp just before you plan to serve it to ensure maximum freshness and crispiness. Alternatively, you can fully assemble the entire crisp (without baking it) and refrigerate it for up to 24 hours. If baking from a chilled state, you might need to add an extra 5-10 minutes to the total baking time to ensure it cooks through perfectly.
What should I do if my apple crisp topping isn’t as crispy as I’d like?
The secret to achieving a truly crispy topping lies primarily in using very cold butter and avoiding overworking the dough during preparation. Ensure your butter is exceedingly cold when you cut it into the dry ingredients for the topping. If you find that your topping consistently comes out soft rather than crispy, it might be due to several factors: too much moisture released by the apples (make sure they are thoroughly coated with flour), or the butter warming up too much during the mixing process. To remedy this, you can try baking the crisp for a bit longer, or for the last few minutes, move it to a higher rack in the oven (closer to the heat source), always keeping a close eye on it to prevent any burning.
Is it possible to use frozen apples instead of fresh ones for apple crisp?
While fresh apples are generally preferred for their superior texture and vibrant flavor, you can certainly use frozen sliced apples if fresh ones are not available. If you opt for frozen apples, make sure to thaw them completely before use and thoroughly drain any excess liquid they may have released. After draining, toss them with the sugar and flour mixture as directed in the recipe. You might find it beneficial to add a touch more flour to the filling (typically an additional tablespoon) to account for any extra moisture that frozen apples tend to release during baking, ensuring your filling thickens properly.
Can I adapt this apple crisp recipe to be gluten-free or vegan?
Yes, this versatile apple crisp recipe can be successfully adapted for both gluten-free and vegan diets with a few simple substitutions. To make this recipe gluten-free, simply substitute the all-purpose flour called for in both the topping and the filling with a high-quality 1:1 gluten-free baking flour blend that specifically contains xanthan gum. For a delicious vegan version, replace the unsalted butter in the topping with a high-quality, plant-based butter substitute (stick form butter alternatives usually work best for texture) and ensure that your old-fashioned oats are certified vegan. The remaining ingredients in the recipe are naturally vegan, making these adaptations straightforward and effective.
Conclusion: Your New Favorite Apple Crisp!
This easy apple crisp recipe is more than just a delightful dessert; it’s a warm invitation to create a cozy atmosphere, comforting aromas, and delicious, lasting memories right in your own kitchen. With its perfect harmony of tender, warmly spiced apple filling and an utterly irresistible crispy brown sugar oat topping, it’s a dish that is guaranteed to impress everyone who tastes it. Whether you choose to enjoy it on a crisp autumn evening, as a festive holiday treat, or as a delightful pick-me-up any time of year, this apple crisp promises to be a reliable crowd-pleaser. So gather your freshest apples, roll up your sleeves, and get ready to bake a masterpiece that will have everyone reaching for seconds. Happy baking, and enjoy every comforting spoonful!