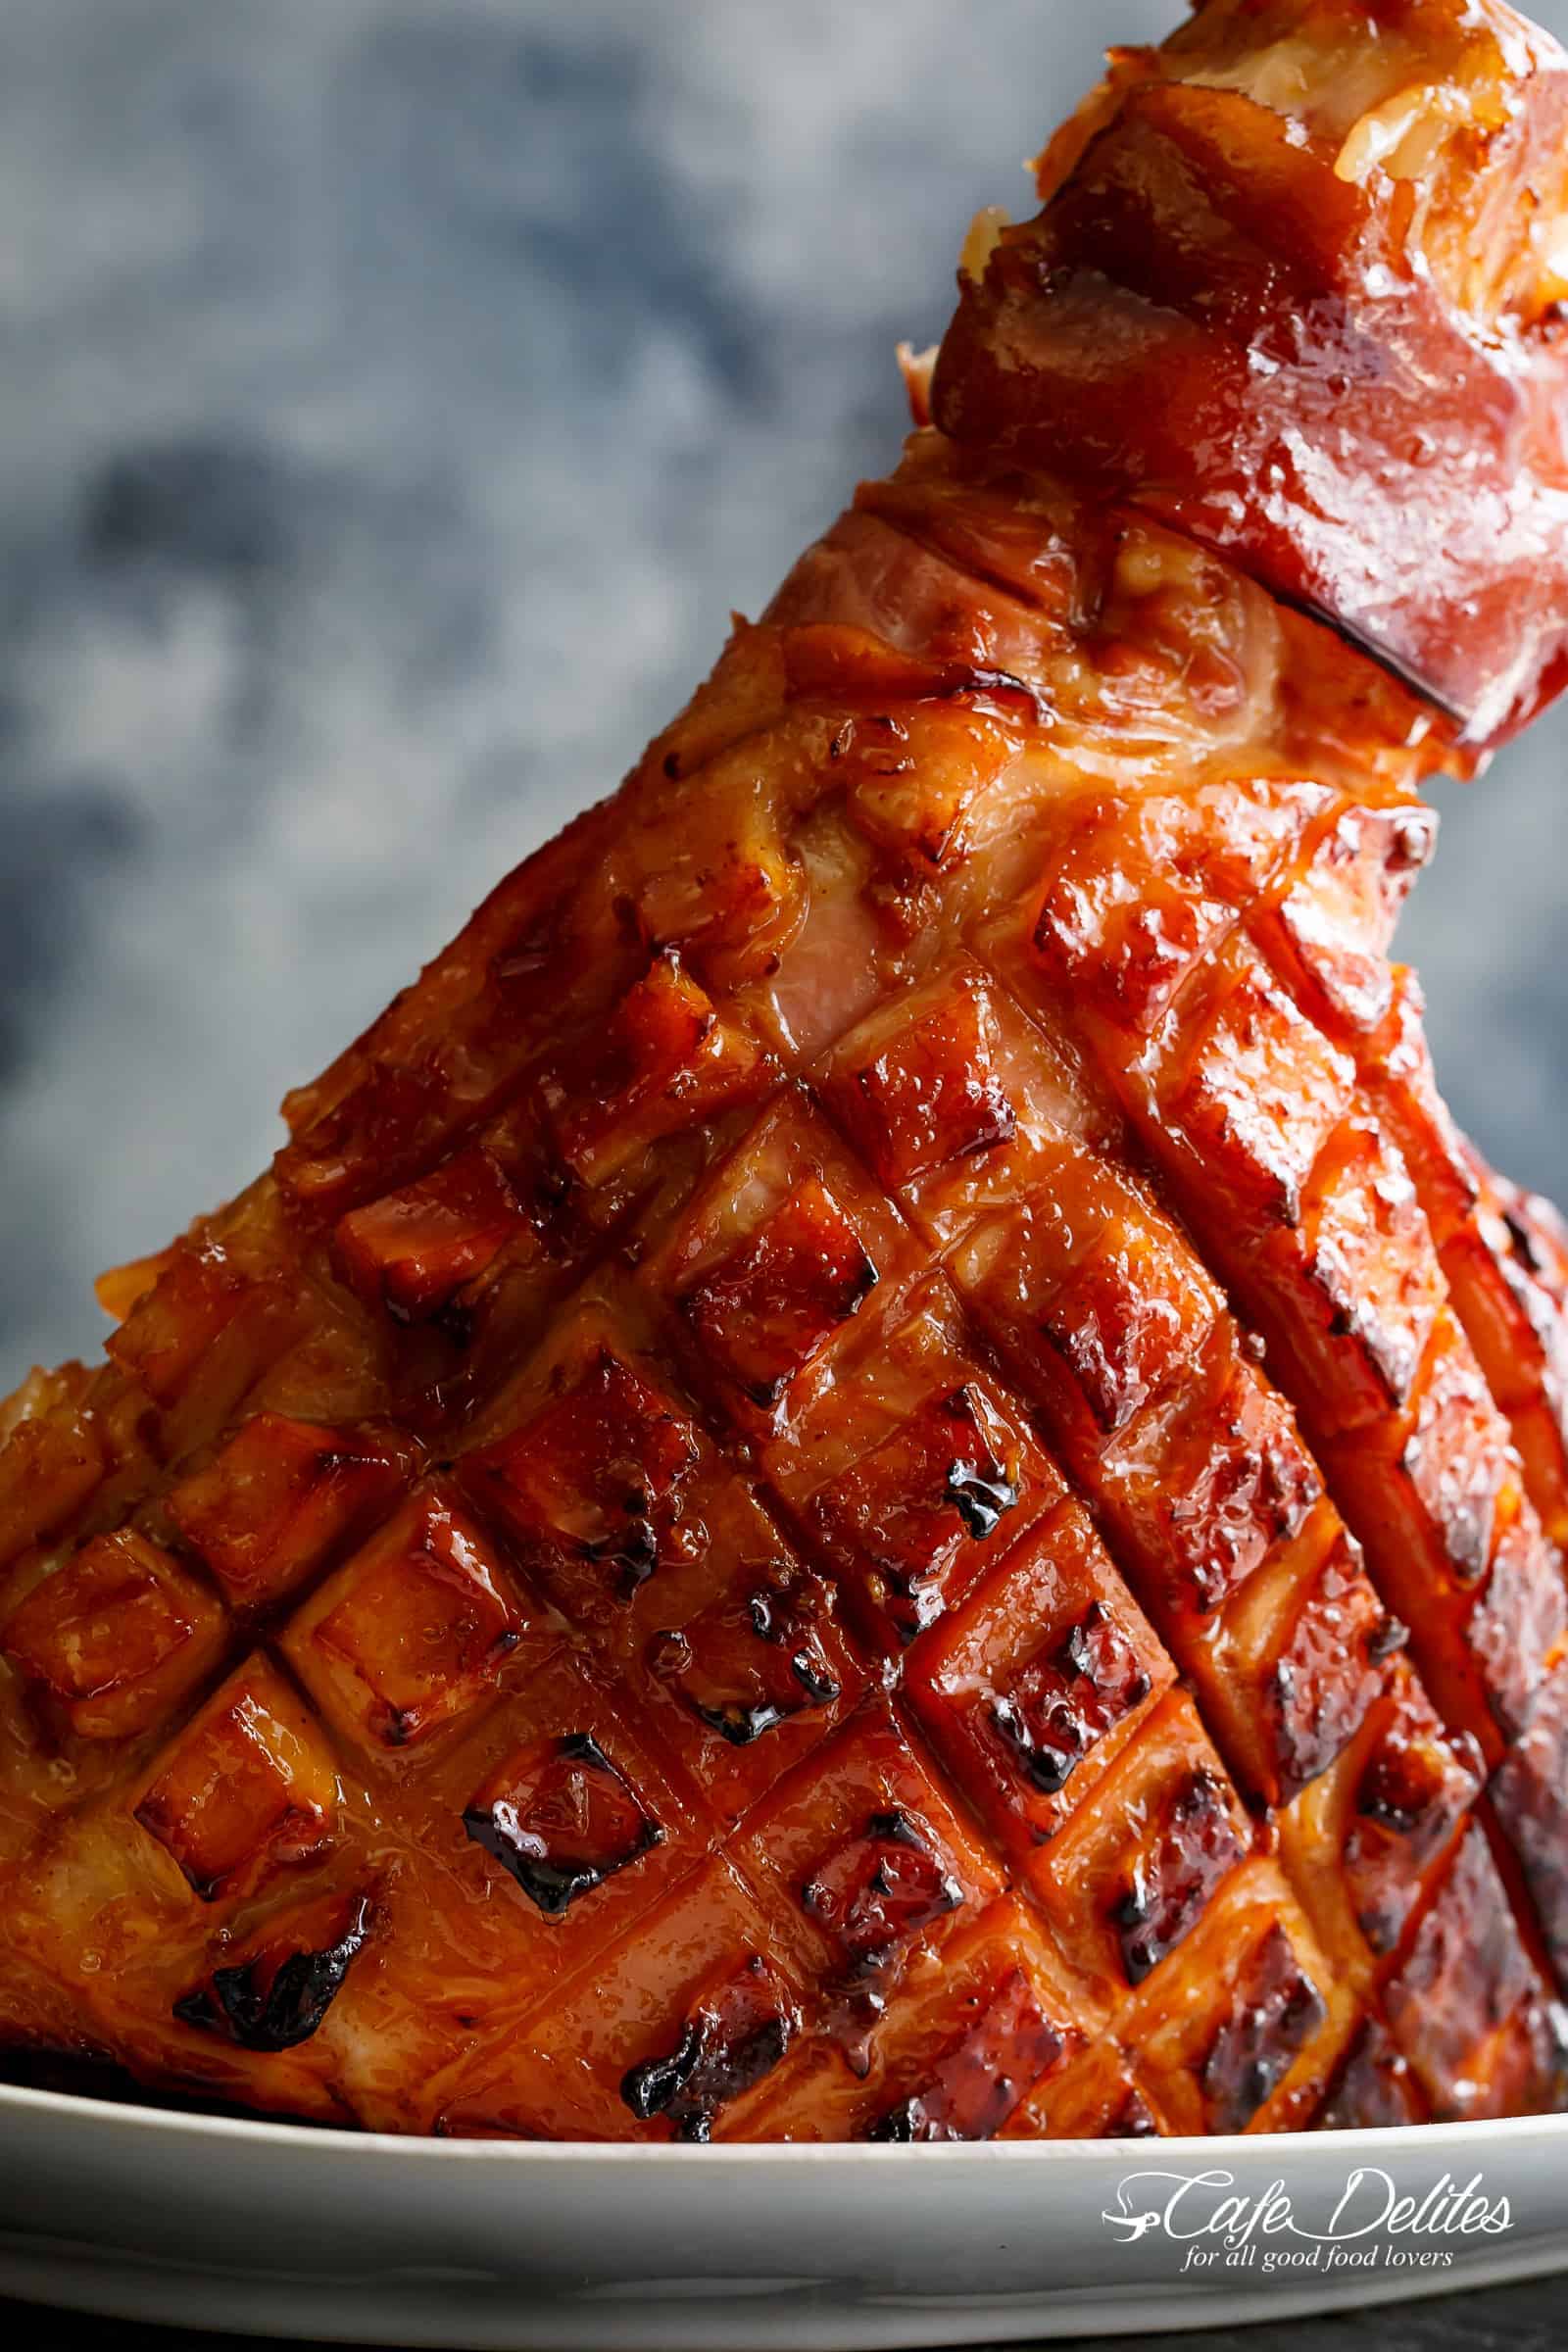
If you've ever wondered how to make a show-stopping centerpiece that tastes even better than it looks, this Glazed Ham is the answer. Think rich, juicy meat wrapped in a beautifully caramelized coating that happens when sweet maple syrup meets savory spices and a hint of tangy pineapple juice. This is the kind of maple glazed ham recipe that fills the room with irresistible aroma and makes everyone gather around the table.
Whether you're serving it for Christmas, Thanksgiving, Easter, or any extra-special dinner, this maple glazed ham with pineapple is both impressive and surprisingly easy. Even if you've never cooked ham before, this version walks you through each step so you can nail it with confidence.
Why This Recipe Works
Making a glazed ham can seem daunting, but once you understand a few key elements, it becomes totally doable. The glaze in this recipe isn't just sweet. The maple syrup, Dijon mustard, brown sugar, and warm spices create layers of flavor that balance sweetness with savory depth. Pineapple juice adds a touch of acidity that tenderizes the ham and keeps the meat juicy throughout cooking.
Scoring the fat surface of the ham helps the glaze penetrate deeper, giving you that sticky, richly colored crust that makes every slice look as good as it tastes. Plus, because this recipe starts with a fully cooked ham, the focus is on heating it through and building flavor instead of worrying about raw meat cooking.
What Goes Into This Recipe
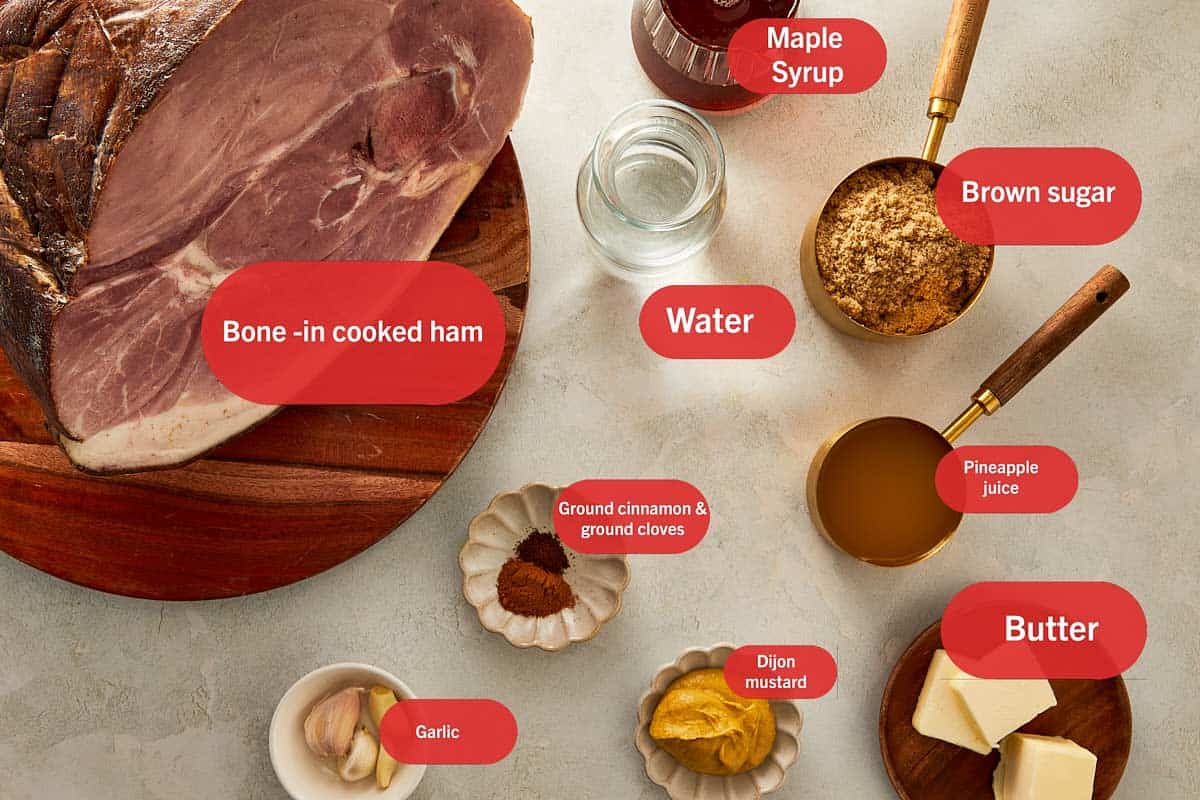
a reliable part about this glazed ham recipe? It's way easier than it looks. Sure, the steps might seem a little fancy at first (don't worry, we'll walk you through it), but everything that goes into this glazed ham with pineapple is simple, good, and totally doable.
- Pure Maple Syrup: Please, we beg you, use real maple syrup here! The imitation stuff is mostly corn syrup and water, which makes the glaze run off the meat. Real maple caramelizes at a higher temperature, giving you that dark, sticky finish.
- Pineapple Juice + Water: Many recipes use just water, but after testing both, we found the acidity in pineapple juice tenderizes the meat while it steams, cutting through the saltiness of the ham.
- Dijon Mustard: You need this acid to balance the sugar. Without it, the glaze is cloyingly sweet. The mustard seeds also add a tiny bit of texture to the crust.
Note: please see recipe card at the bottom for list of full ingredients and measurements
How to Remove Ham Rind
If it's your first time working with ham, you might not know how to remove the ham rind. Here we have a detailed guide on doing so. You can skip this section if you already know how to and you want to get straight to cooking.
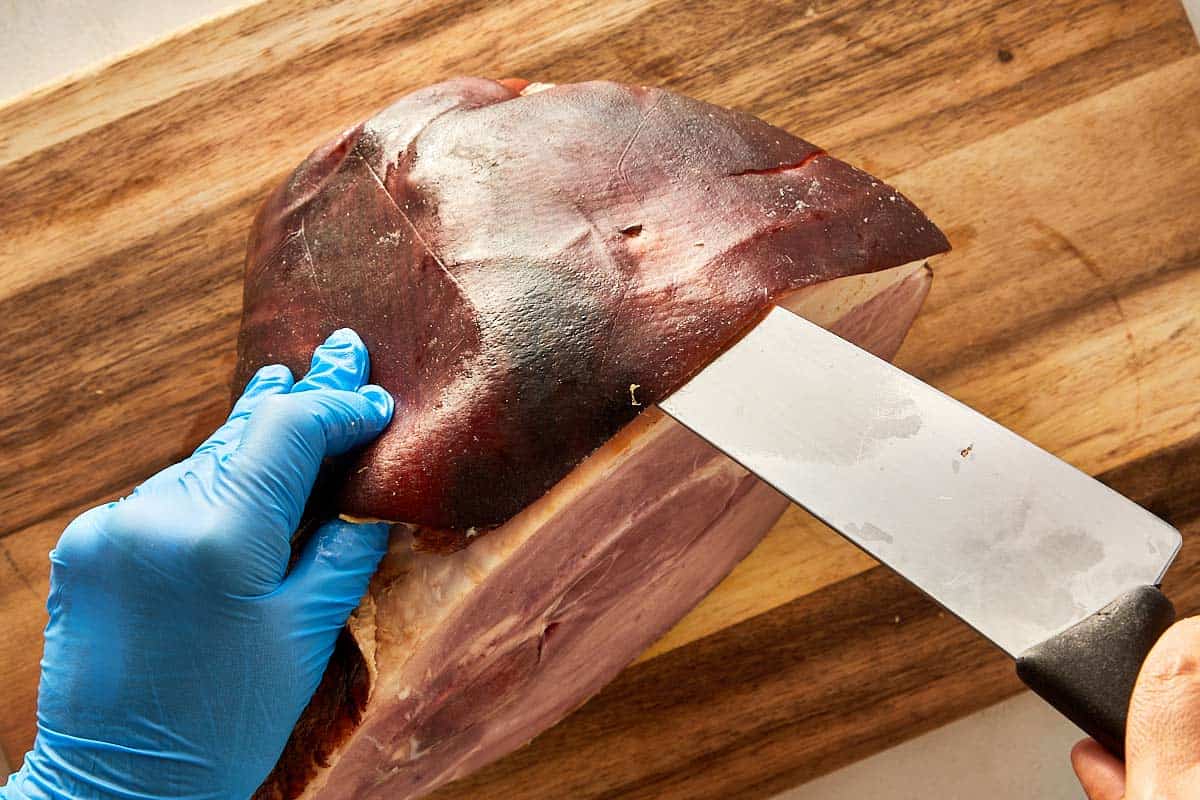
- Score the shank: Using a sharp knife, cut a line through the skin around the shank end of the ham to create a starting point for removing the rind.
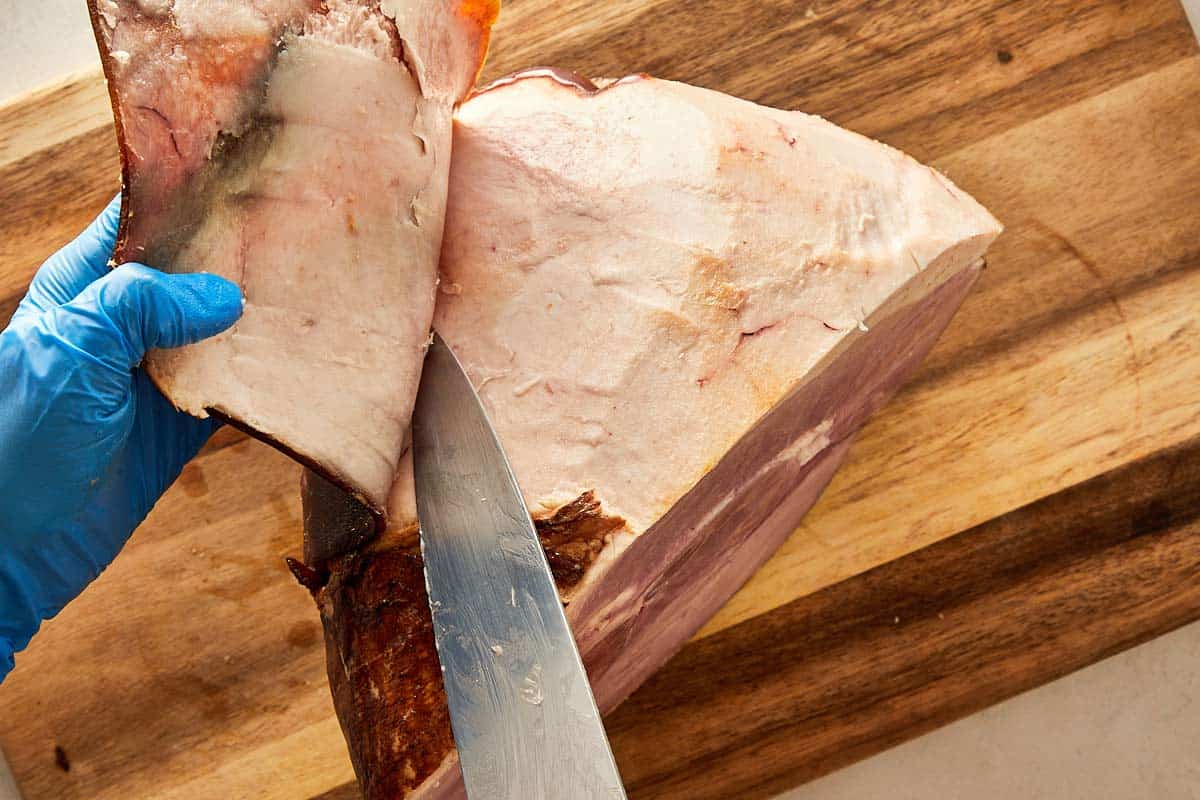
- Separate rind from fat: Slide the knife between the rind and fat to loosen them, then gently peel the rind away with your fingers and discard it.
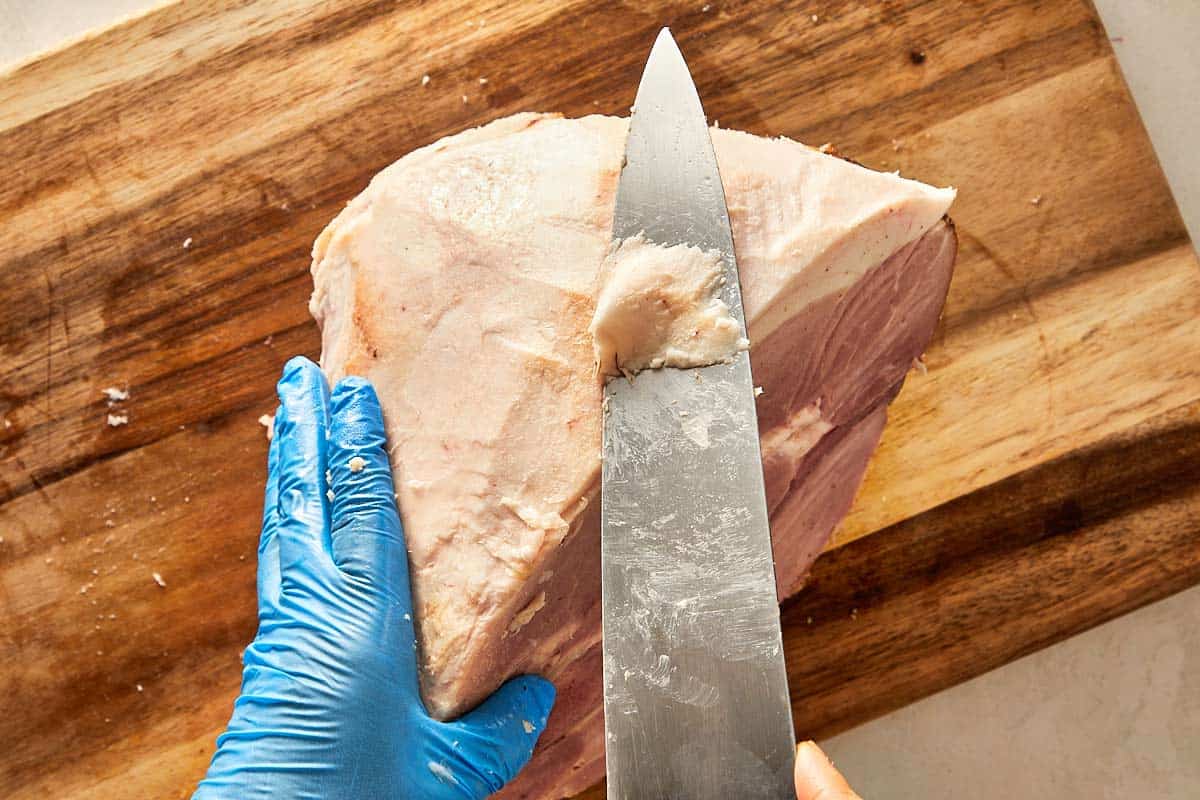
- Smooth the fat: Trim any uneven or rough spots from the fat layer using a knife to create a clean, even surface for scoring and glazing.
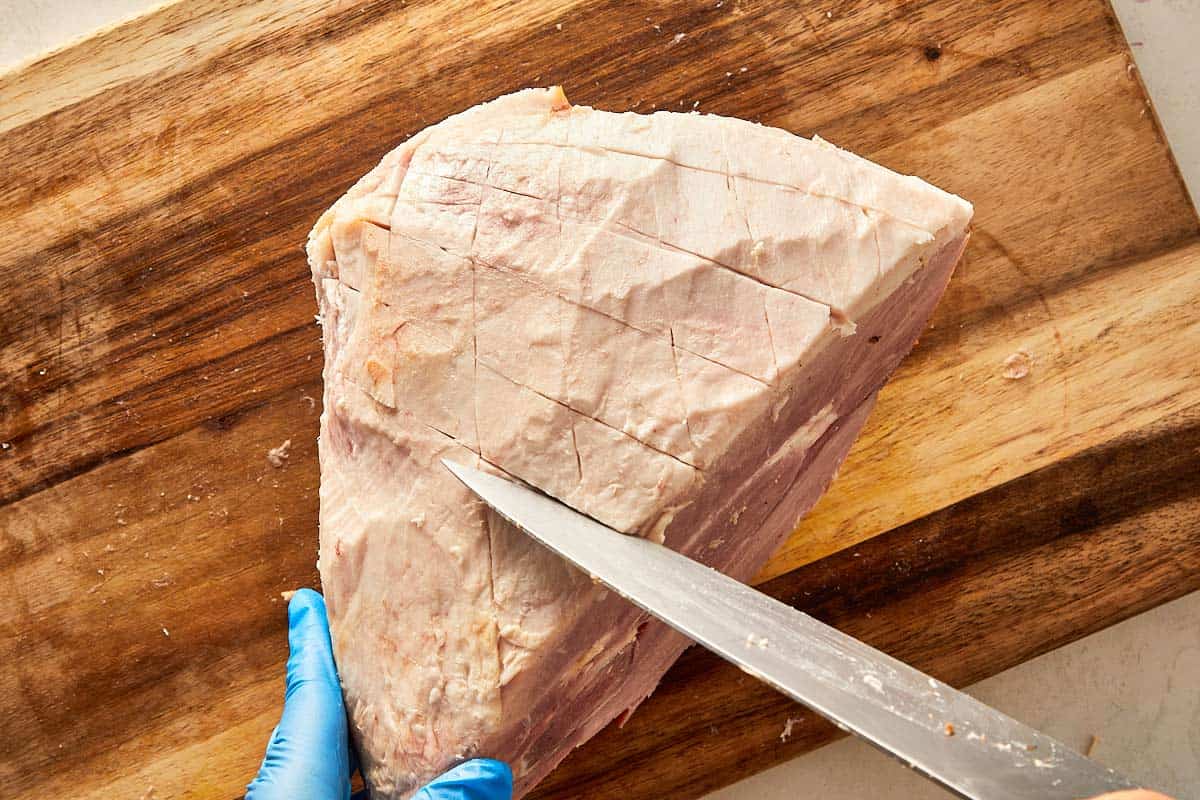
- Score the fat: Lightly cut a shallow diamond pattern across the fat, no deeper than 1/4 inch, to help the glaze stick and soak in during roasting.
On the stove
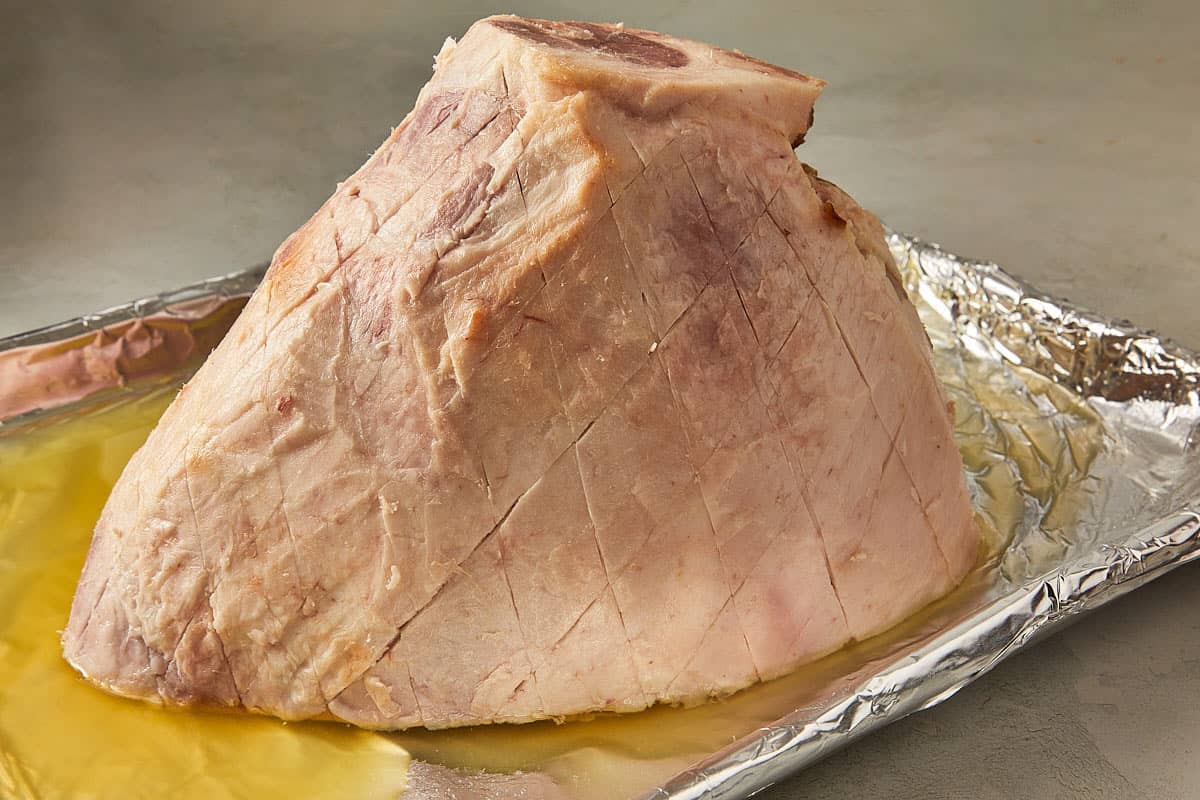
- Prep the ham: Remove the packaging and netting. Trim and discard the rind, leaving the fat intact. Let the ham rest at room temperature for 1–2 hours. Preheat your oven to 300°F (150°C) and position a rack in the lower third of the oven.
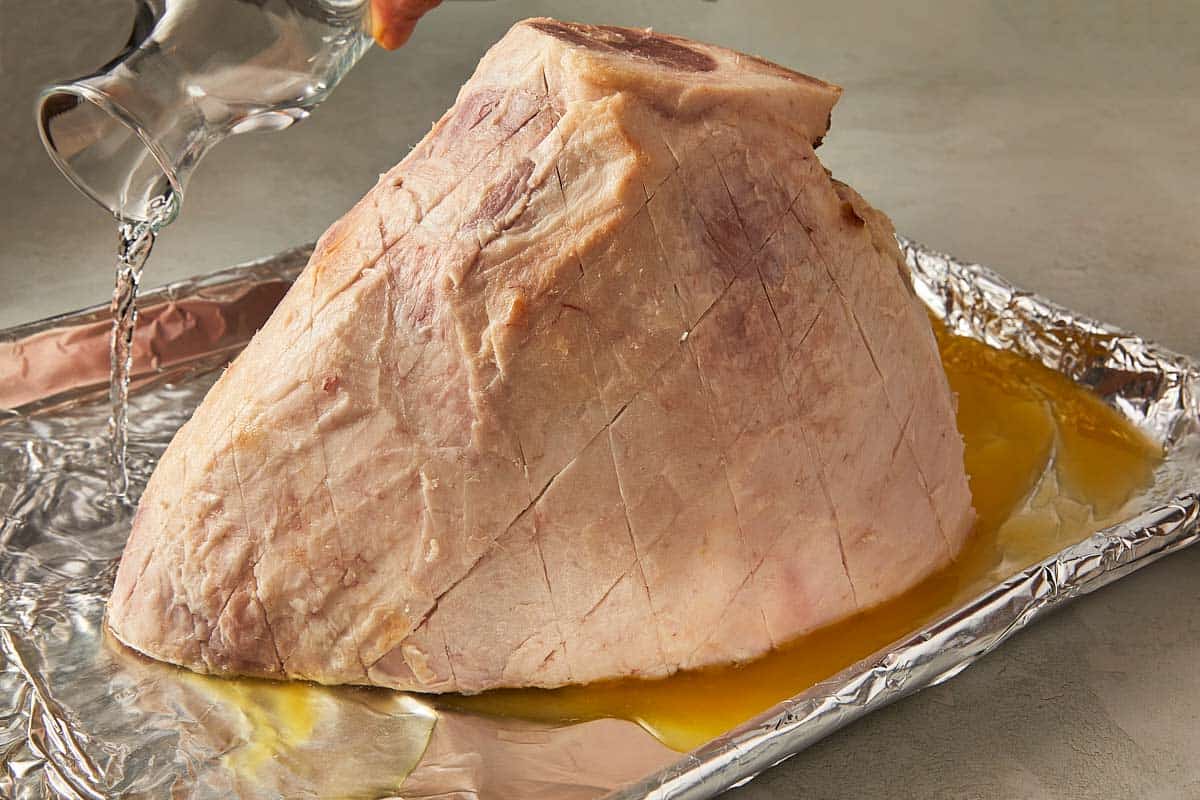
- Prepare the pan: Line a roasting pan with foil or parchment. Score a 1-inch diamond pattern into the fat, no deeper than 1/4 inch. Pour pineapple juice and water into the pan, place the ham fat-side up, and cover it with foil or parchment.
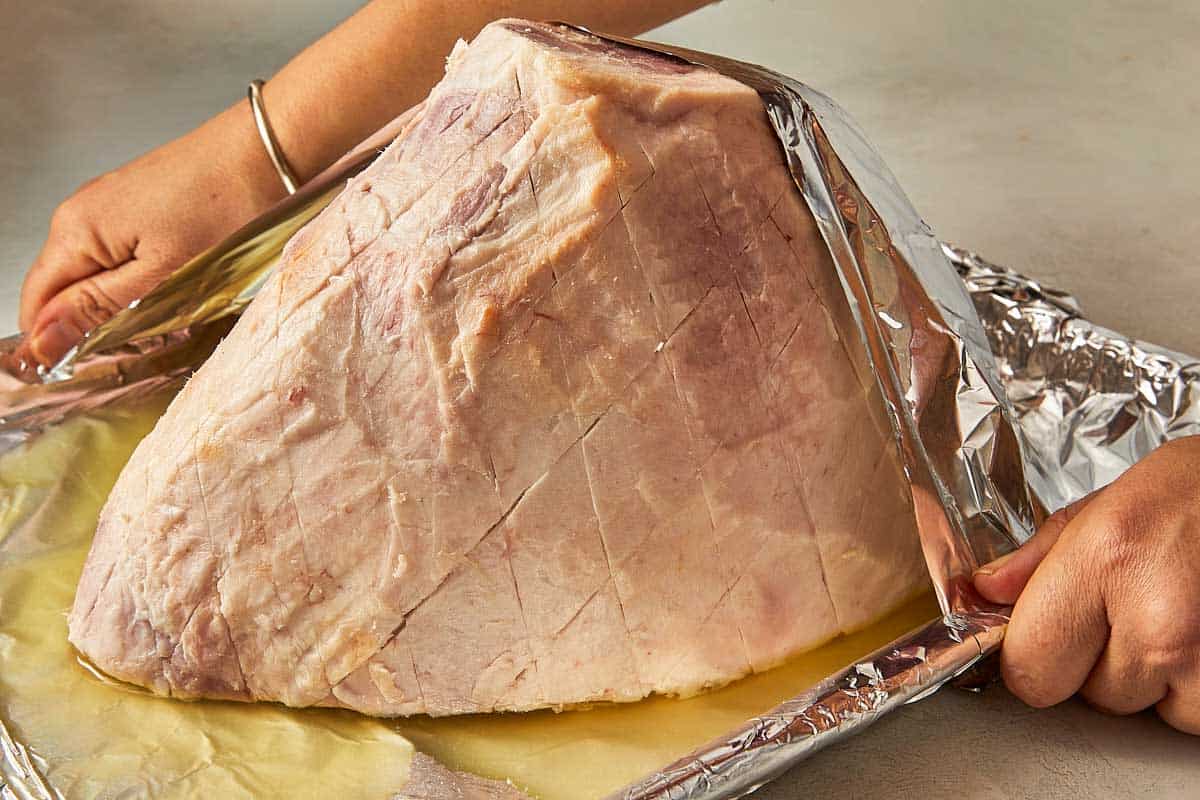
- Start baking: Place the covered pan in the oven and bake for 30 minutes. This helps the ham warm through gently while absorbing moisture from the pan liquids. It prevents drying and prepares the surface nicely for glazing and browning later on.
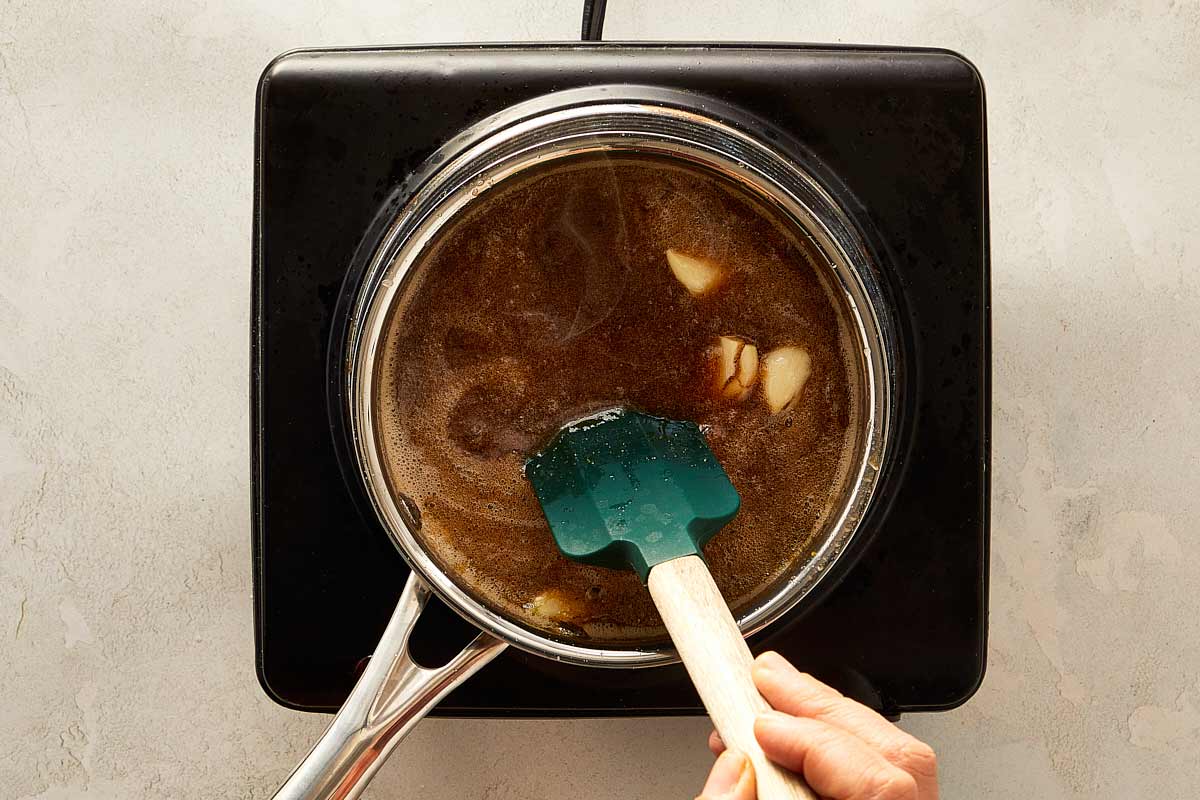
- Make the glaze: In a saucepan, melt the butter over medium heat. Stir in brown sugar, maple syrup, mustard, cinnamon, and cloves. Mix until the sugar dissolves fully. Reduce the heat, add garlic, simmer briefly, then remove from heat and let it cool to lukewarm.
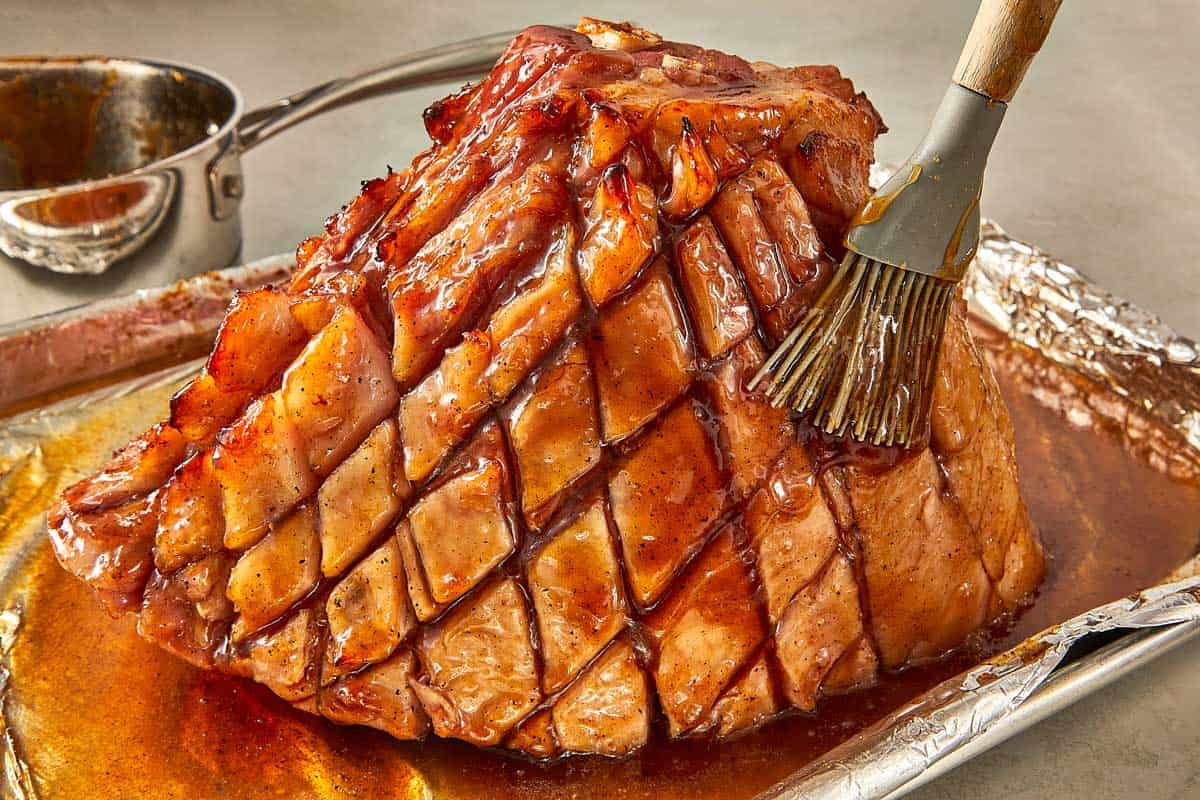
- Glaze and roast: Increase oven temperature to 425°F (220°C). Uncover the ham and brush on 1/3 of the glaze, pressing into the scored cuts. Bake uncovered for 15 minutes. Repeat glazing every 15 minutes, using the remaining glaze and pan juices.
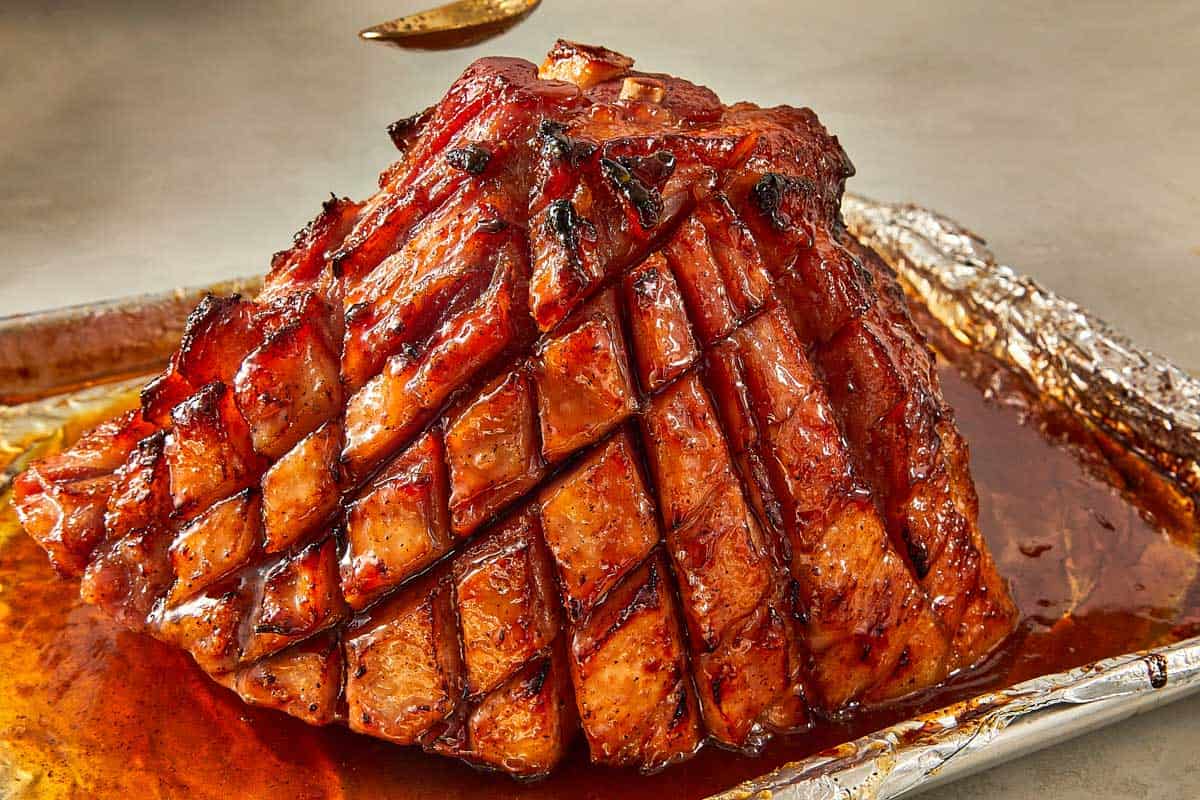
- Finish and serve: If needed, broil the ham for 2–5 minutes to enhance the crust, watching closely to avoid burning. Remove from oven and let rest for 10–20 minutes to seal in juices. Slice against the grain and serve warm with your choice of sides.
If you're a visual learner (like us!), make sure to check out the video tutorial. It walks you through every step so your ham turns out perfectly juicy and caramelized.
While this glazed ham is a dish on its own, we found it best paired with Buttery Sautéed Green Bean Recipe or Cheesy Roasted Green Beans. Basically, vegetable dishes are a reliable way to go with this savory glazed ham.
Leftover ham? Make creamy ham potato soup from the leftovers.
“Pro-Tips” for the good Crust
- The “Diamond” Score: When we score the fat, we aim for diamonds exactly 1 inch wide. Too small and the fat renders too fast; too big and the flavor doesn't penetrate.
- The “Tacky” Test: Don't just baste by the clock. We look for the “tacky” stage usually around the 45-minute mark, where the glaze starts to resist the brush slightly. That's when you know the sugars are locking onto the fat.
- Don't Skip the Rest: We know it smells good, but if you cut this ham before it rests for 15 minutes, all those juices will run out onto your cutting board instead of staying in the meat.
Recipe FAQ's
My glaze is too runny, what did we do wrong?This usually happens if the ham releases too much water during baking. Don't panic! Pour the pan juices into a small pot, simmer them on the stove for 5-7 minutes until reduced and syrupy, then brush that thickened glaze back onto the ham for the final 10 minutes of roasting.
What Is a reliable Type Of Ham To Buy?For a reliable flavor and texture, we've found the shank end (half leg) works best because it's easier to carve and still juicy. The butt end is a bit trickier since it has part of the hip bone and less meat, but it's still tender and full of flavor if that's what you have on hand.
Can we make this ahead of time?es! We often bake this the day before to save oven space. Bake it fully, let it cool, then slice it cold (it slices thinner when cold!). To reheat, layer the slices in a baking dish with a splash of water or leftover glaze, cover tightly with foil, and warm at 300°F (150°C) for about 20 minutes.
What you need
- 8-10 pound bone-in fully cooked ham
- 1/2 cup pineapple juice
- 1/2 cup water
- 1/2 cup unsalted butter
- 3/4 cup brown sugar
- 3/4 cup maple syrup
- 2 tablespoons Dijon mustard
- 1/2 teaspoon ground cinnamon
- 1/4 teaspoon ground cloves
- 4 cloves garlic cloves smashed
Method
- Preheat the oven to 300°F | 150°C and arrange a rack in the lower third. Remove any plastic packaging or netting from the ham. Trim away the rind and discard. Set the ham aside to rest at room temperature for 1-2 hours.
- Line a baking tray or dish with several sheets of aluminium foil or parchment paper if you prefer (it will make cleanup a lot easier).
- Remove the rind or skin of the ham (refer to steps in post), ensuring you leave the fat on. Using a sharp knife score a 1-inch-wide diamond pattern (don't cut more than 1/4 inch deep) over the entire ham. Place the ham in the baking tray; pour pineapple juice and water into the base of the pan and cover the ham with two pieces of foil or parchment paper and bake for 30 minutes.
- Meanwhile, heat the butter in a small pot or saucepan over medium heat until golden browned. Add in the brown sugar, maple syrup, mustard, cinnamon and cloves, stirring to mix together well until the brown sugar has completely dissolved, (about 2 minutes).
- Reduce heat to low, add the garlic and bring to a simmer. Set it aside and let cool to lukewarm (the glaze should be the consistency of room-temperature honey).
- After 30 minutes baking time, carefully remove the ham from the oven and increase the oven temperature to 425°F | 220°C. Discard the foil or parchment paper and pour 1/3 of the glaze all over the ham, brushing in between the cuts to evenly cover. Return to the oven and bake uncovered for 15 minutes.
- Remove from the oven, brush with another third of the glaze and some of the pan juices, and repeat again after 15 minutes more minutes of baking until a dark golden-brown crust has formed, (about 30 minutes total). For added depth of flavour, mix some of the ham pan juices together with the glaze in the pot which will help keep it runny enough for brushing. If your crust is still pink after the suggested baking time, turn on your broiler (or oven grill), and allow it to broil for 2-5 minutes, while keeping an eye on it so it doesn't burn from the sugar.
- Let the ham rest 10-20 minutes before slicing.
- Bone in Ham: In the step by step photos we had a ham with the bone cut off the top, however in the video the bone was still in the ham. You can use either types, the one with the bone cut off was easier to handle when placing in the oven. Make Ahead: You can make the glaze up to 3 days in advance. Store it in the fridge in a jar. You can also bake the ham the day before, slice it cold, and reheat covered with foil at a low temp (150°C/300°F) to keep it juicy.