

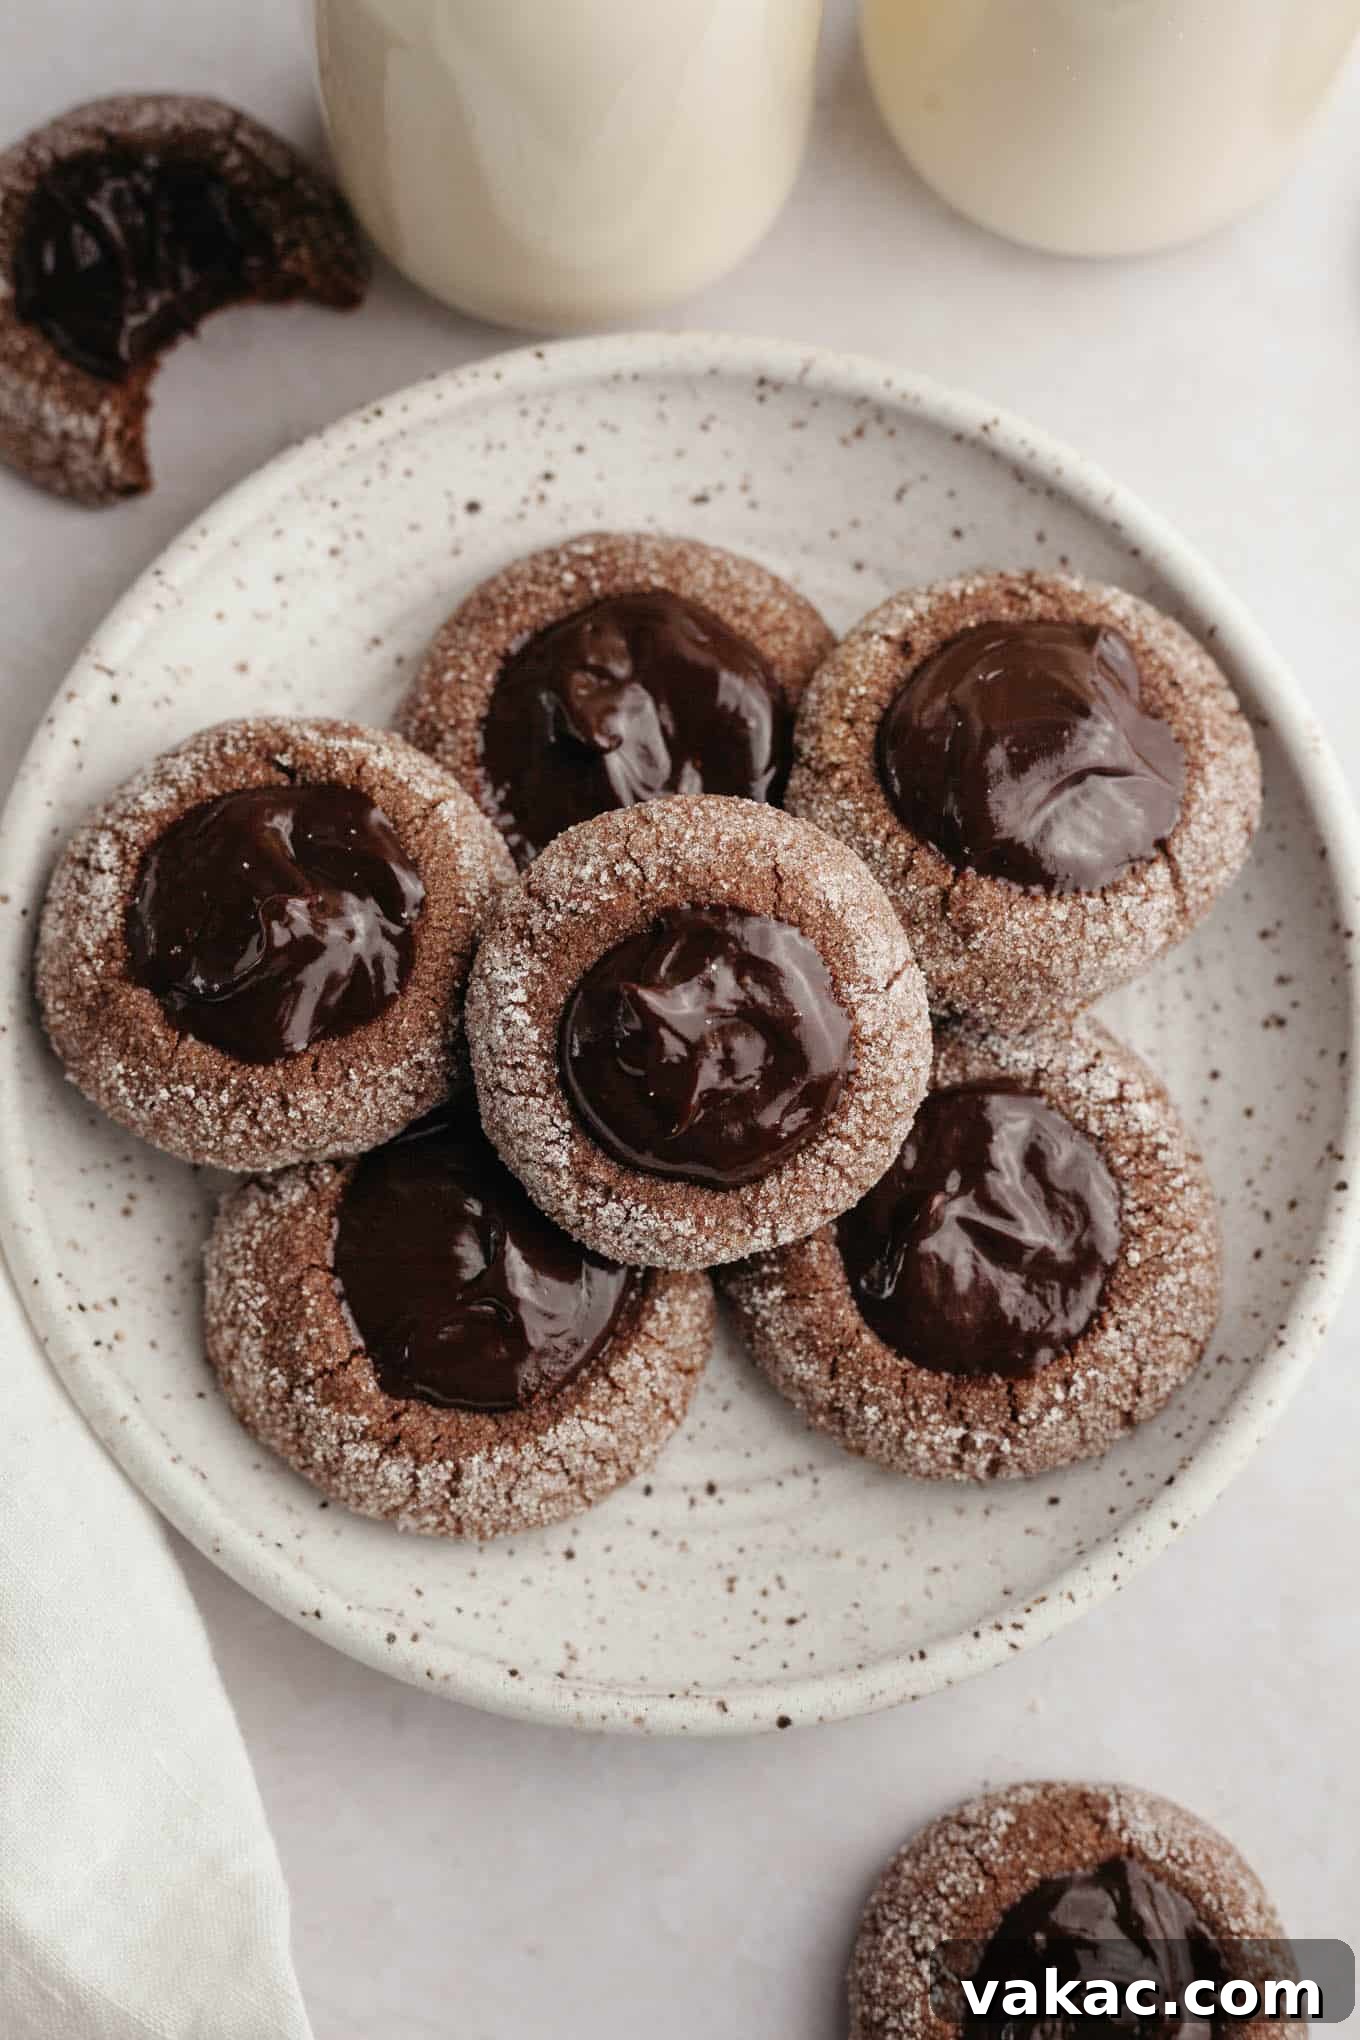
Welcome to the enchanting world of homemade delights, where rich chocolate takes center stage in a truly irresistible treat: **Chocolate Thumbprint Cookies**. These delightful confections boast a supremely soft, intensely chocolatey cookie base, lovingly cradling a pool of silky, decadent chocolate ganache. More than just a dessert, these cookies are a celebration – perfect for gifting during the festive holiday season, yet wonderfully straightforward to bake year-round whenever a chocolate craving strikes.
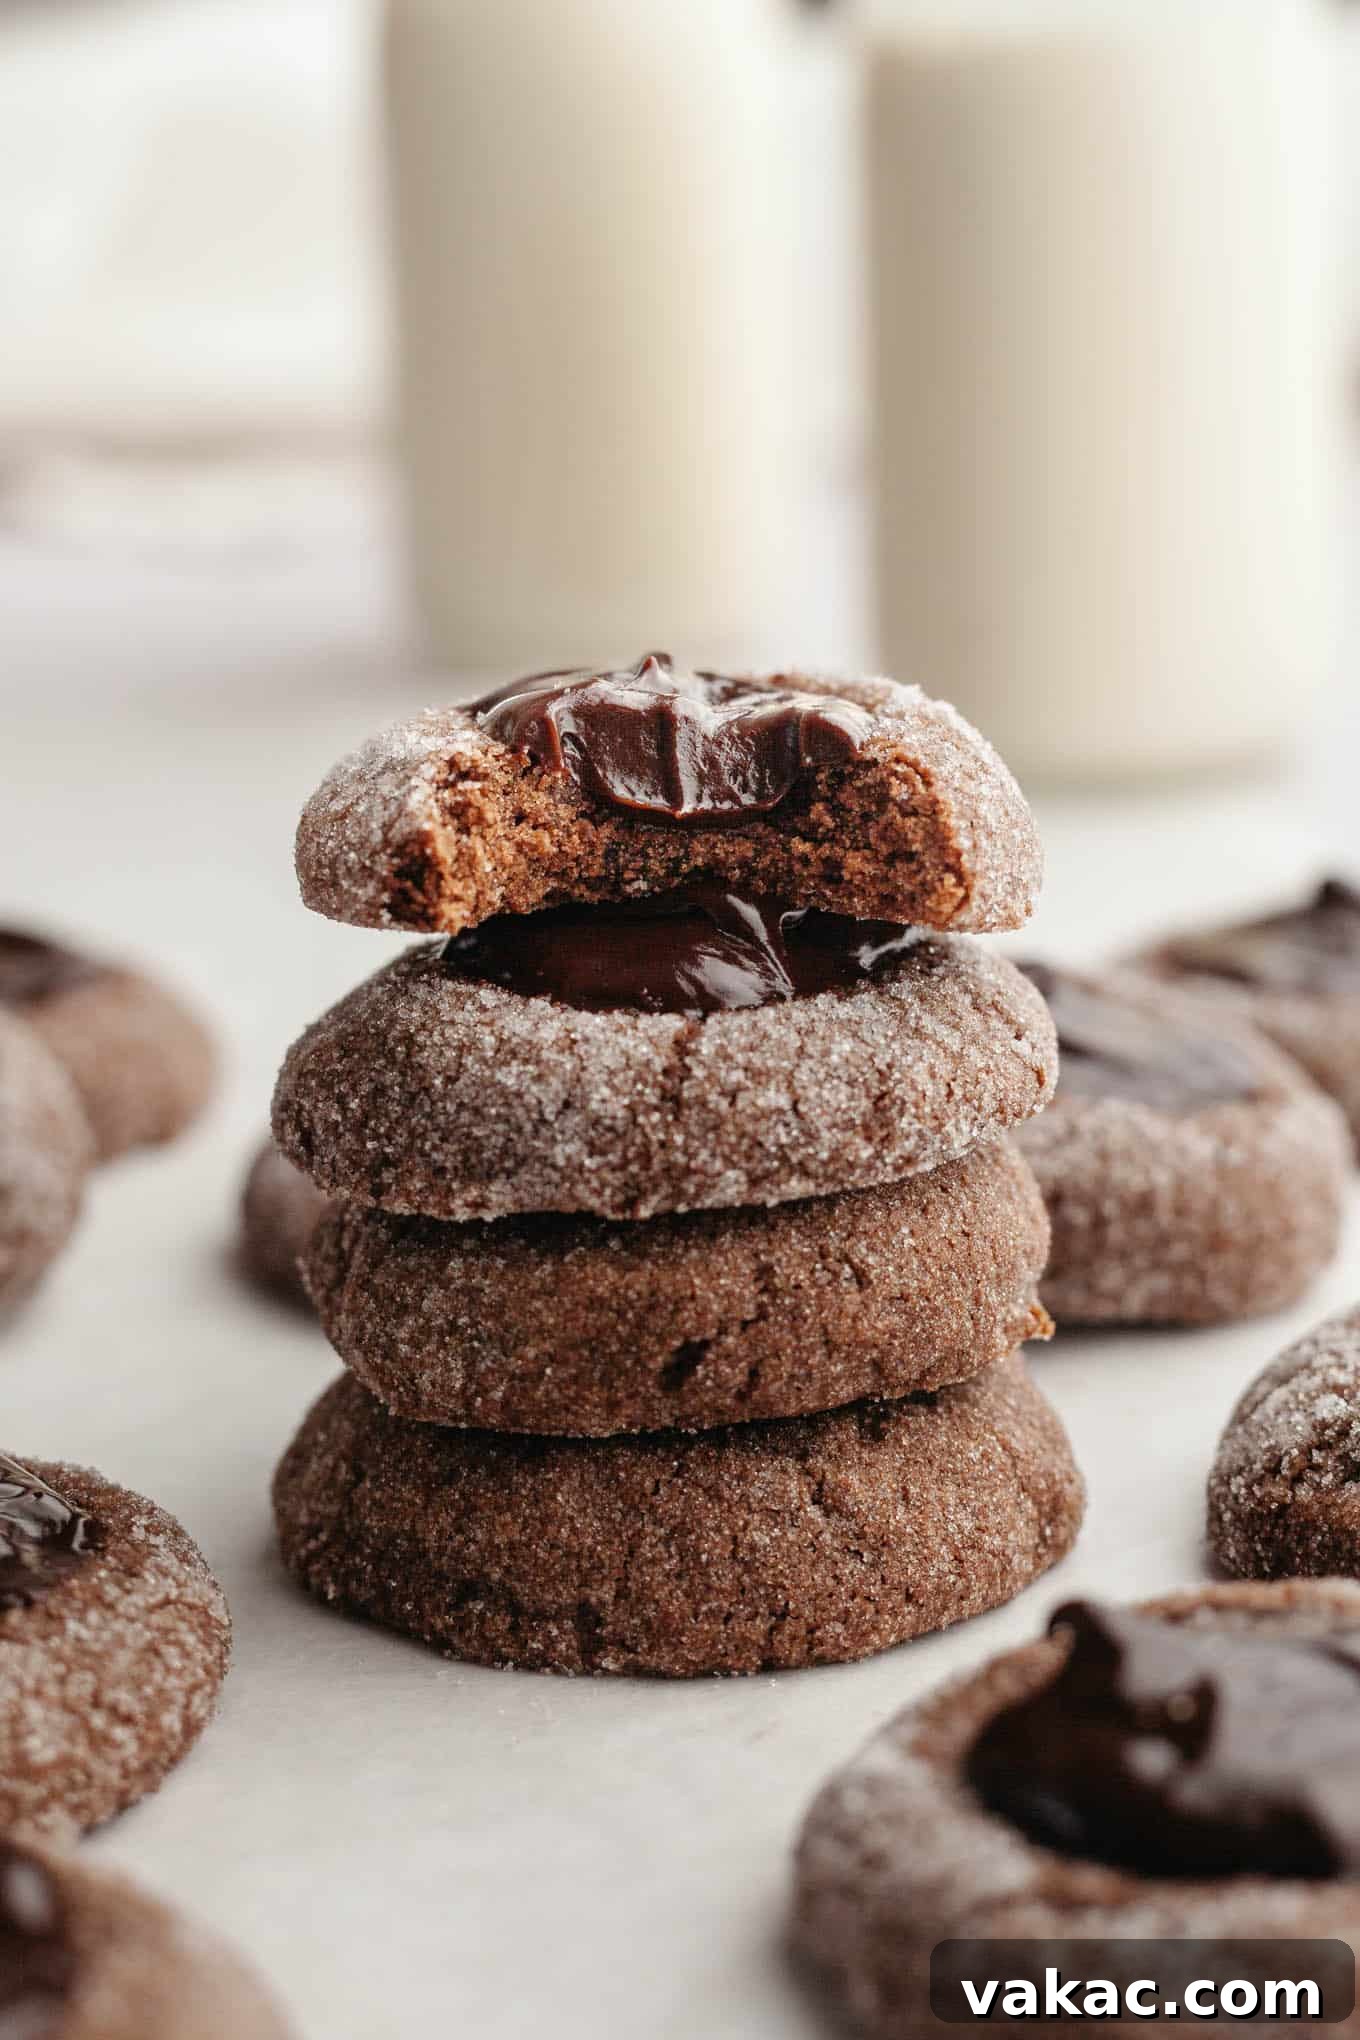
Stepping beyond the classic jam-filled varieties, our chocolate thumbprint cookies offer a sophisticated and deeply satisfying twist. This recipe elevates the beloved thumbprint cookie by infusing it with chocolate in two magnificent ways. First, the cookie dough itself is enriched with premium Dutch process cocoa powder, yielding a remarkably dark hue and a profound chocolate flavor. Second, once baked to perfection, each cookie receives a generous dollop of luscious, homemade chocolate ganache, creating a harmonious blend of textures and tastes.
The magic lies in the contrast: a tender, slightly chewy chocolate cookie embracing a creamy, melt-in-your-mouth ganache center. This combination ensures each bite is a luxurious experience – rich and deeply satisfying without being excessively sweet. They strike the perfect balance, making them an ideal candidate for any holiday cookie exchange or a cherished addition to your annual festive cookie boxes. Beyond the holidays, these cookies are a simple pleasure, ready to brighten any day with their comforting chocolatey charm.
Baking these cookies is not just about following a recipe; it’s about crafting moments. Whether you’re a seasoned baker or just starting your culinary journey, the process is designed to be enjoyable and rewarding. The simple ingredients transform into something truly special, making these chocolate thumbprints a standout addition to your baking repertoire. Prepare to impress friends, family, or simply treat yourself to the ultimate chocolate indulgence!
Essential Ingredients for Perfect Chocolate Thumbprint Cookies
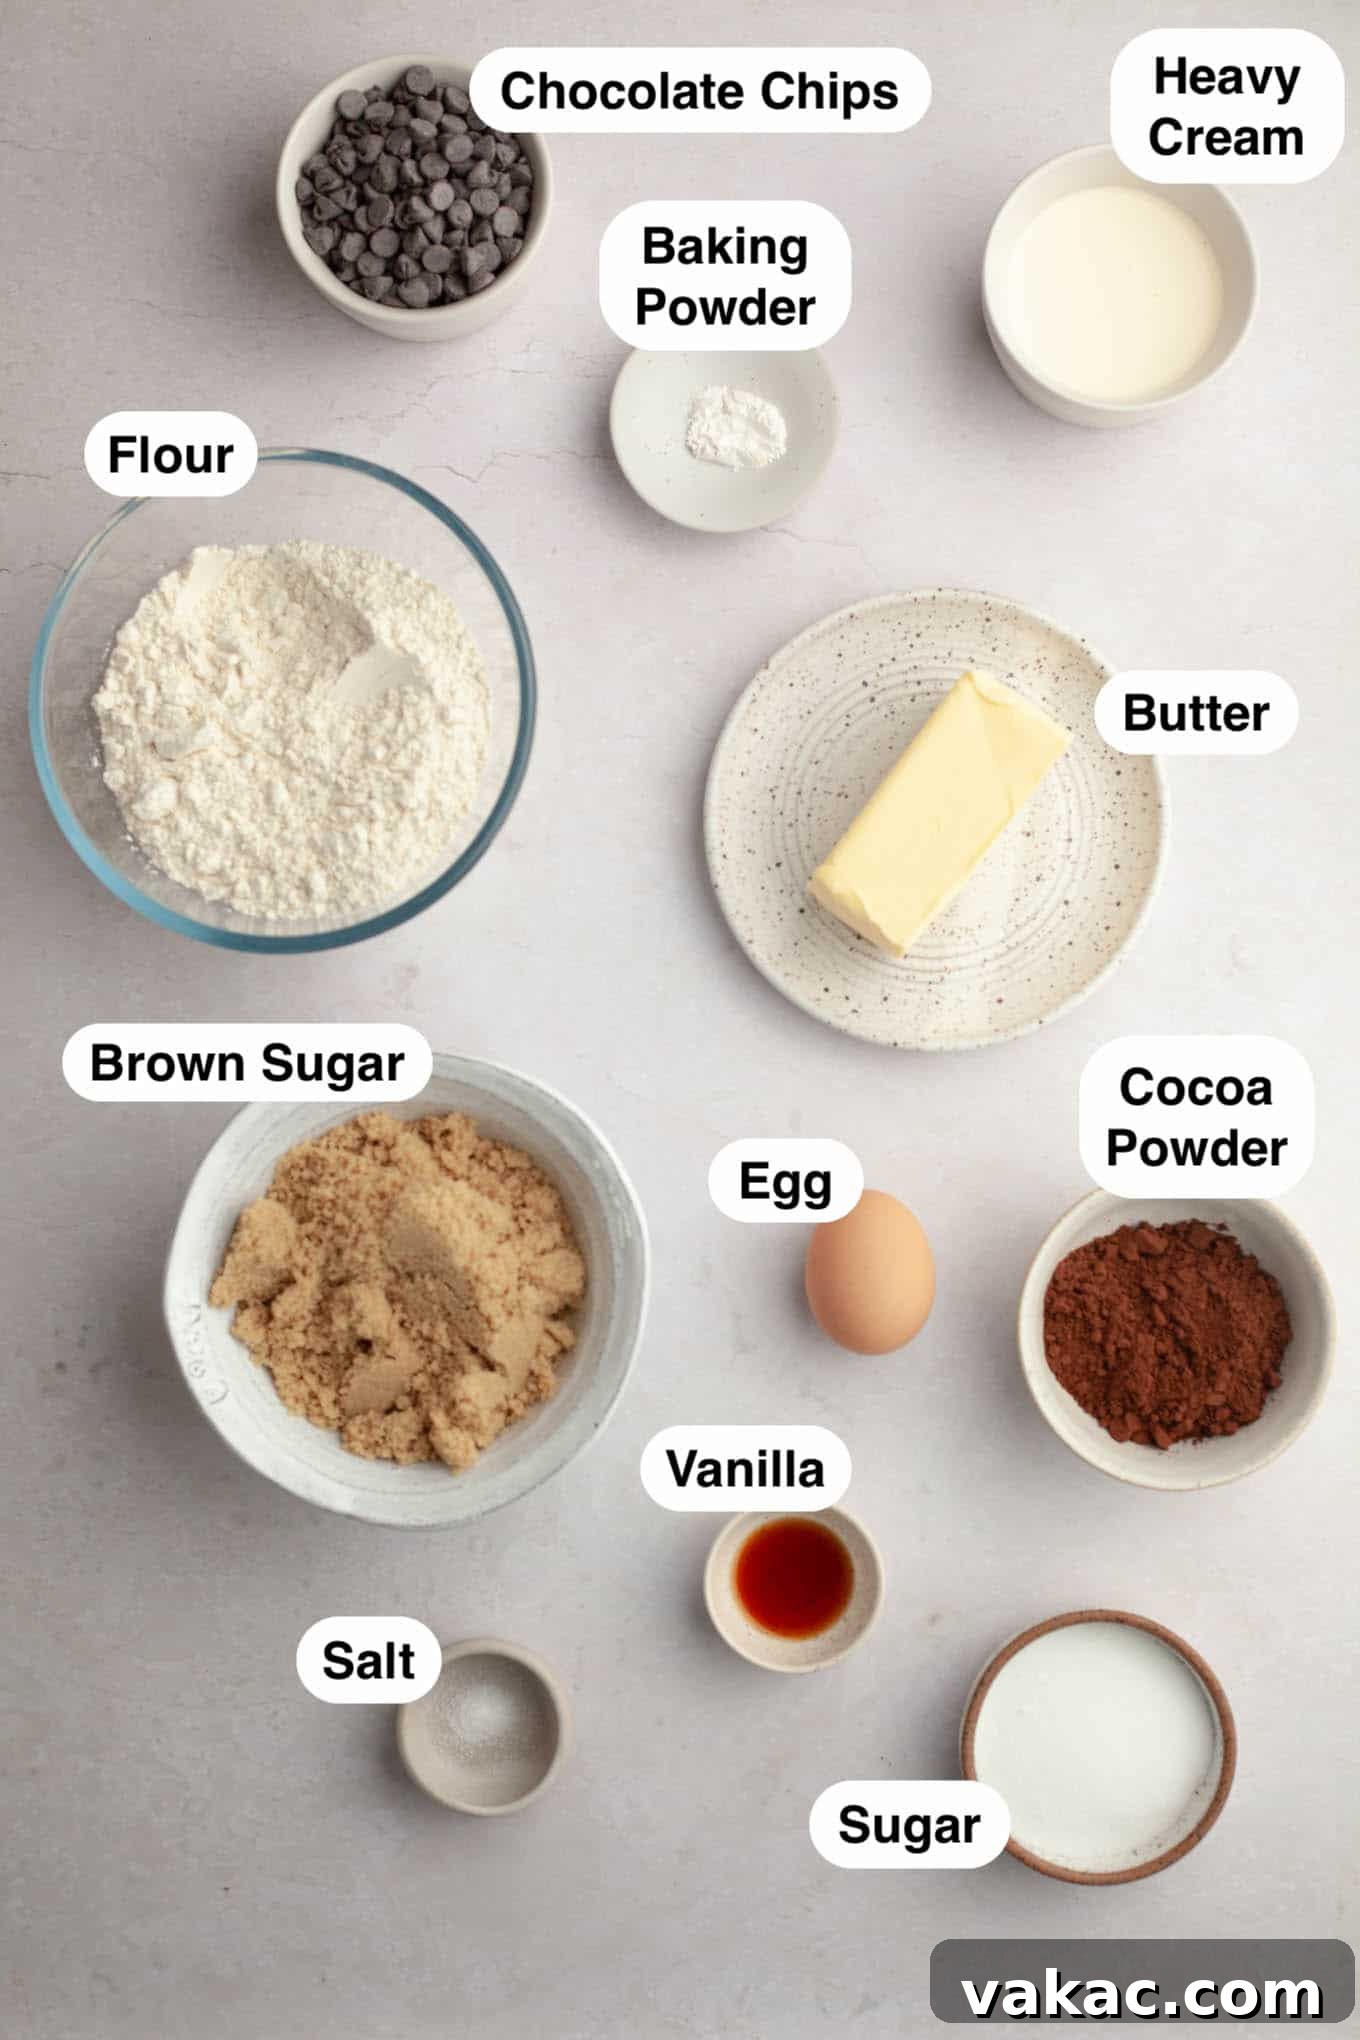
Crafting the perfect chocolate thumbprint cookie begins with selecting high-quality ingredients. Each component plays a vital role in achieving that desirable soft texture, deep chocolate flavor, and irresistible ganache filling. Here’s a closer look at what you’ll need and why each element is so important:
- All-Purpose Flour: This provides the fundamental structure for your cookies. For a consistent and tender result, it’s crucial to measure your flour correctly. Always fluff the flour by stirring it around in its container, then spoon it gently into your measuring cup, and level it off with the back of a knife. Packing too much flour can lead to dense, dry, or crumbly cookies, detracting from their delicate texture.
- Cocoa Powder: The key to a truly deep chocolate flavor and rich color in the cookie base. While natural cocoa powder can be used, we highly recommend Dutch process cocoa powder. Its unique processing gives it a less acidic profile, resulting in a darker, more intense chocolate flavor that perfectly complements the sweetness of the cookie and ganache. Since this recipe uses baking powder as the leavening agent (which doesn’t require an acid to activate), Dutch process cocoa is an excellent choice.
- Sugars: A combination of brown sugar for the cookie dough and granulated sugar for rolling the cookie balls. The **light brown sugar** is essential for keeping these cookies wonderfully moist and chewy, thanks to its molasses content. The outer coating of **granulated sugar** adds a delightful, subtle crunch and an extra touch of sweetness, making each cookie even more appealing.
- Unsalted Butter: As the foundation of many baked goods, butter contributes significantly to the cookie’s flavor and texture. Using unsalted butter allows you to precisely control the amount of salt in the recipe, ensuring the flavors are perfectly balanced. If you only have salted butter on hand, simply omit the additional salt called for in the cookie dough recipe to prevent them from becoming too salty. Ensure it’s softened to room temperature for optimal creaming.
- Large Egg: The egg acts as a binder, helping to hold the cookie dough together and providing structure. It also adds richness and moisture, contributing to the overall tender texture of the baked cookies. Always use a large egg at room temperature for the best results, as it incorporates more smoothly into the batter.
- Pure Vanilla Extract: A baking essential, vanilla extract enhances and complements the chocolate flavor, adding depth and warmth to the cookies. Don’t skip this ingredient, as it subtly rounds out the overall taste profile.
- Baking Powder: This is our chosen leavening agent, providing the lift needed to create soft, slightly puffy cookies. Ensure your baking powder is fresh for the best results; stale leavening agents can lead to flat or dense cookies.
- Salt: A pinch of salt is vital in baking. It balances the sweetness, enhances the chocolate flavor, and helps to bring out the complexity of all the other ingredients.
- Semi-Sweet Chocolate Chips: For the luxurious ganache filling, semi-sweet chocolate chips are a convenient and delicious choice. Their balanced sweetness pairs beautifully with the rich cocoa cookies. For an even more intense chocolate experience, you can chop up an equal amount of high-quality semi-sweet chocolate bars (about 6 ounces) instead.
- Heavy Cream: This is the essential ingredient for creating a smooth, rich, and perfectly set chocolate ganache. Make sure your heavy cream contains at least 36% milk fat. This high-fat content is crucial for the ganache to emulsify correctly and achieve its desired creamy consistency and ability to firm up.
Beyond these ingredients, make sure you have standard baking tools such as mixing bowls, a hand mixer or stand mixer, measuring cups and spoons, parchment paper, and baking sheets readily available. Proper preparation and attention to detail with your ingredients will set you up for baking success!
How To Master Chocolate Thumbprint Cookies: A Step-by-Step Guide
Creating these delightful chocolate thumbprint cookies is a joyous and rewarding process. Follow these detailed steps to ensure your cookies turn out perfectly soft, chewy, and brimming with rich chocolate ganache.
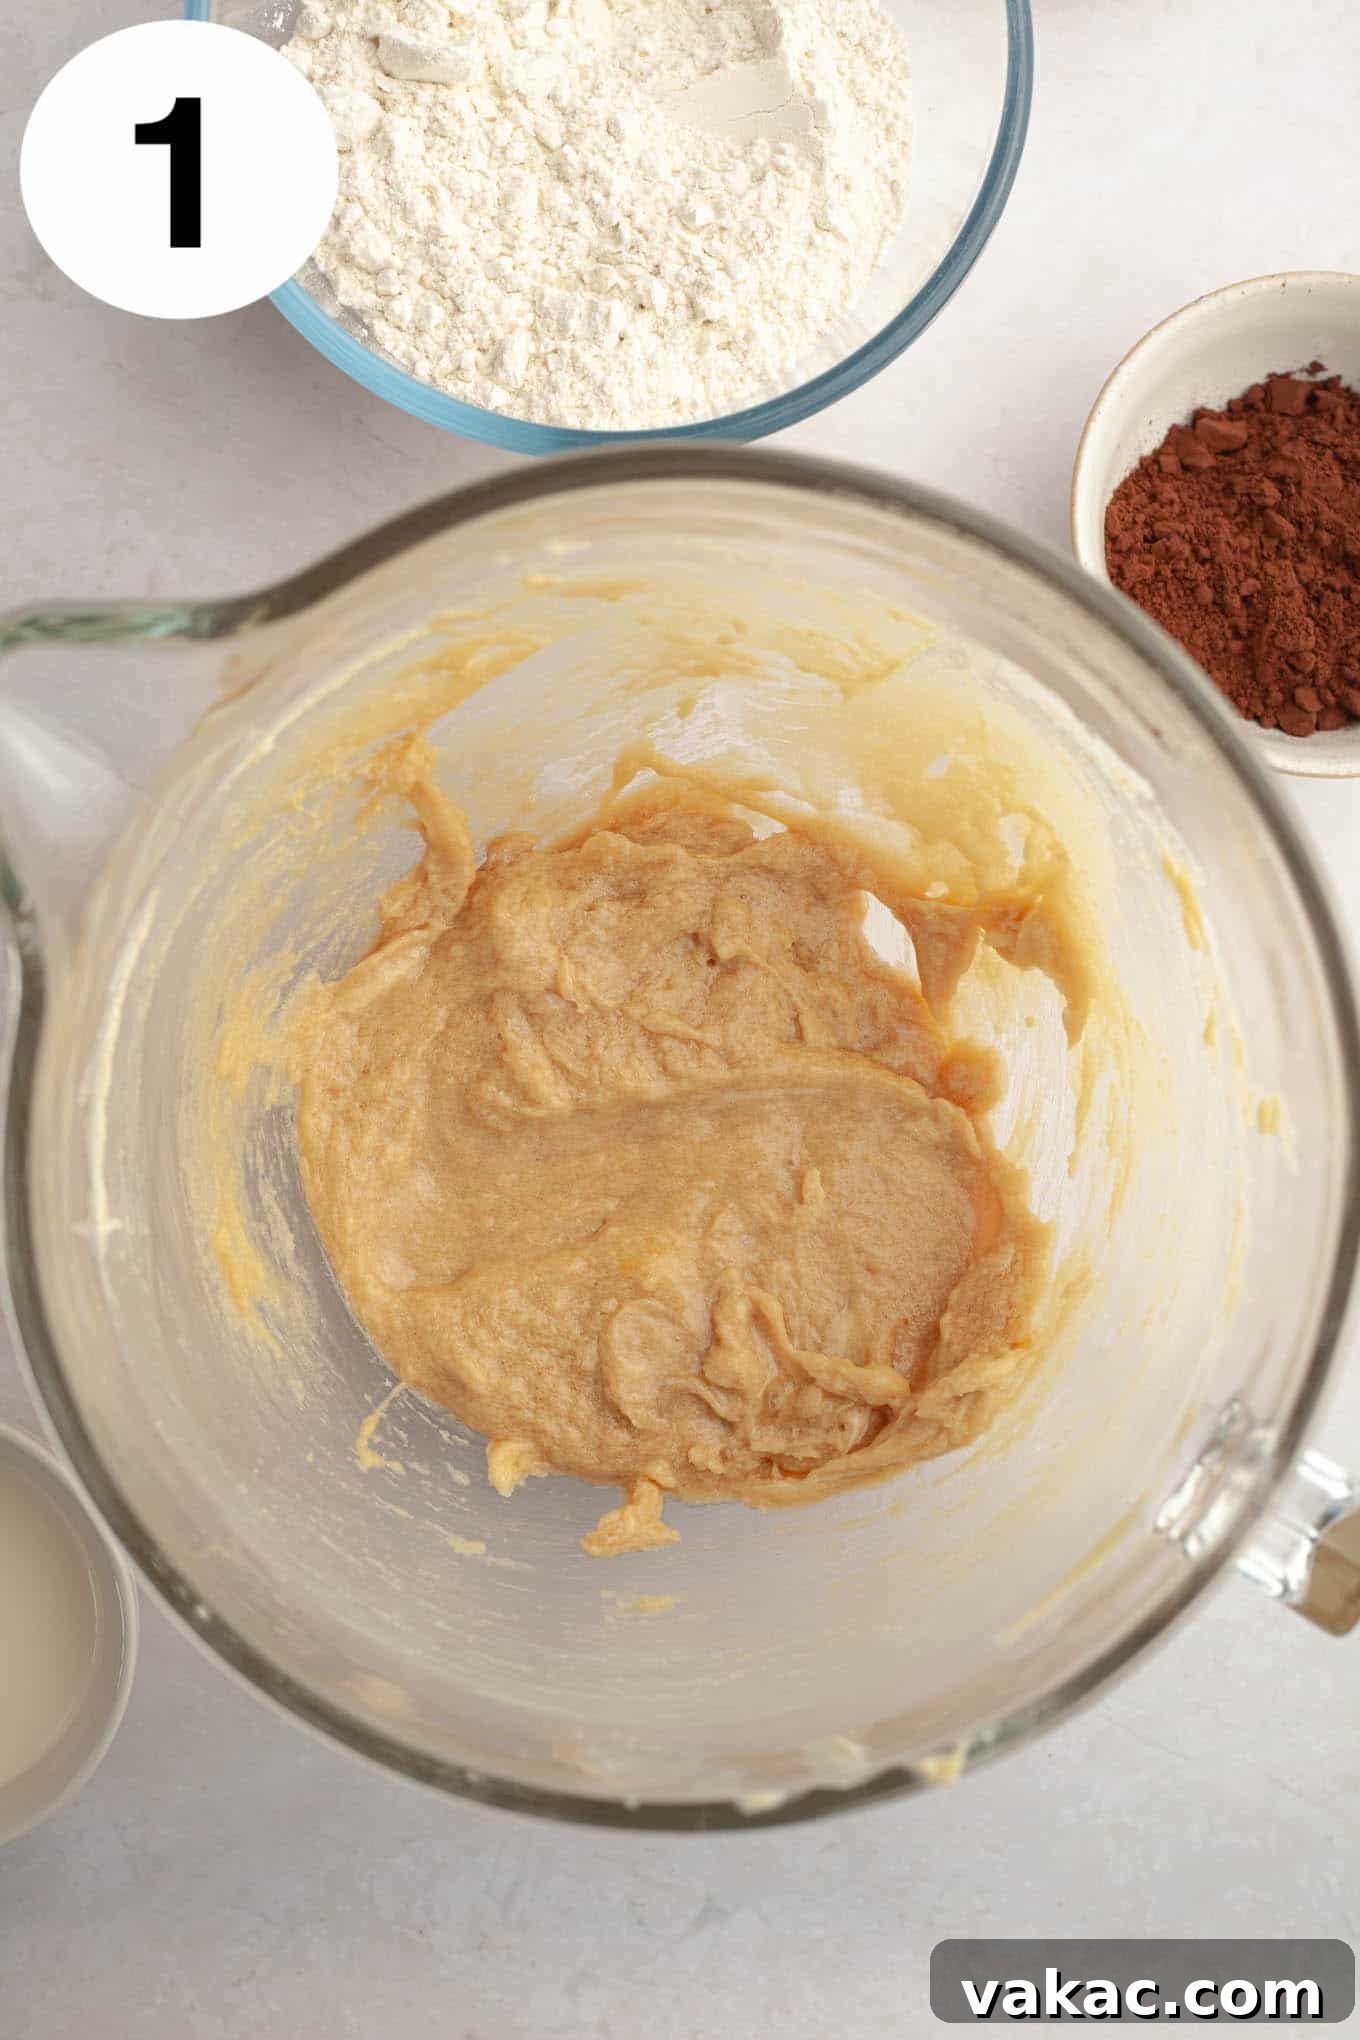
- Prepare Your Workspace and Wet Ingredients: Begin by lining two large baking sheets with parchment paper or silicone baking mats; this will prevent sticking and ensure even baking. Set them aside for later. In the bowl of a stand mixer fitted with the paddle attachment, or using a large mixing bowl with a handheld mixer, beat the softened unsalted butter until it’s smooth and creamy. Add the light brown sugar and continue mixing for 1 to 2 minutes, or until the mixture is light, fluffy, and well combined. Next, incorporate the large egg and pure vanilla extract, mixing until they are fully integrated into the butter and sugar mixture. Scrape down the sides of the bowl as needed to ensure everything is evenly combined.
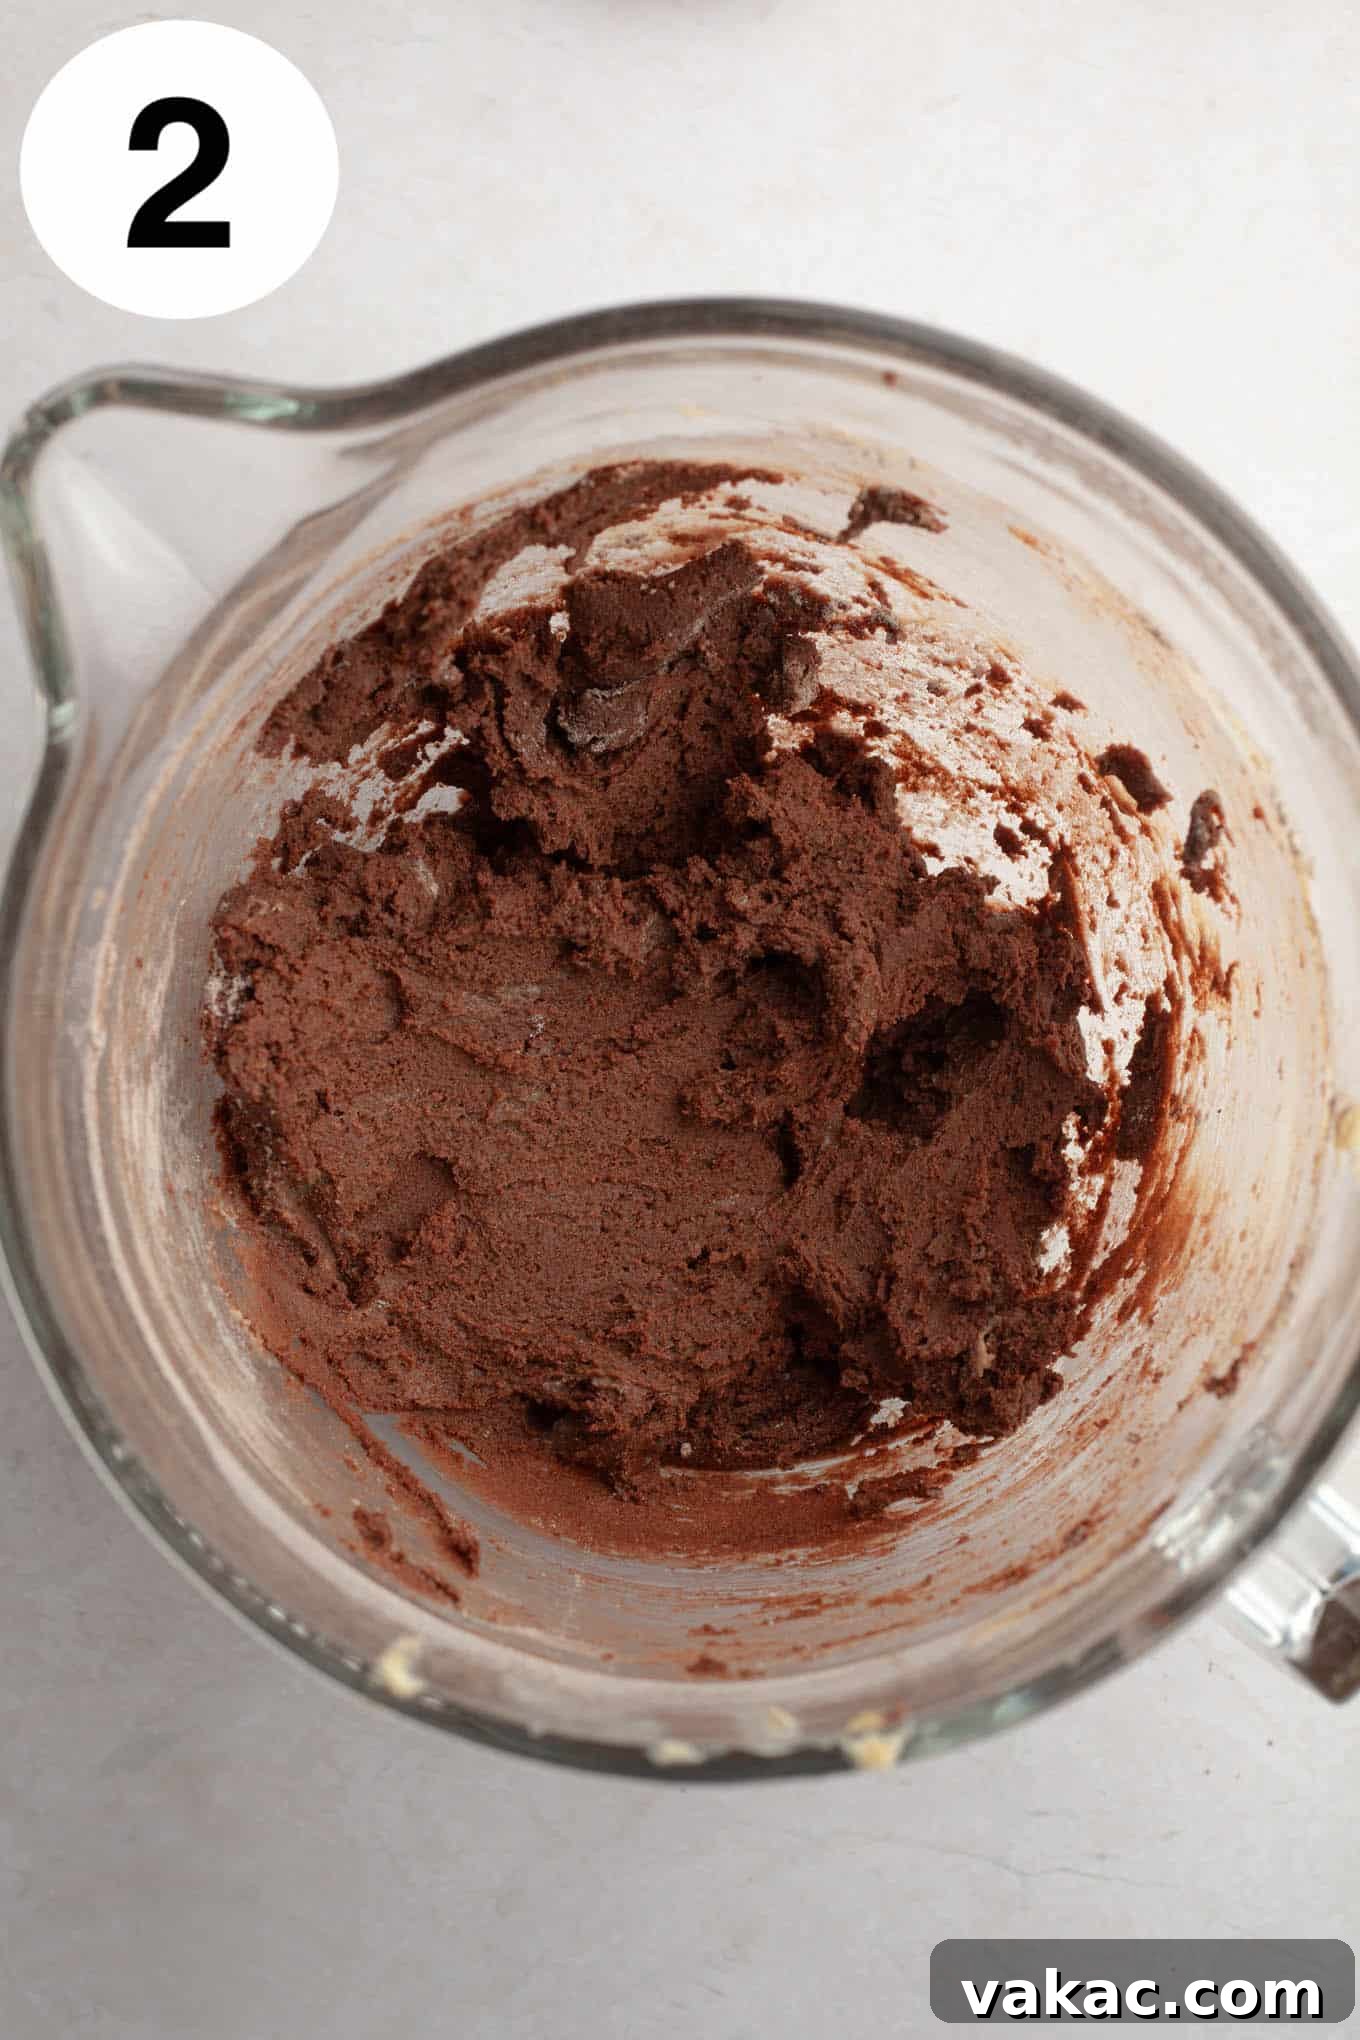
- Combine Dry Ingredients and Form the Dough: In a separate, medium-sized mixing bowl, sift together the all-purpose flour and Dutch process cocoa powder. Sifting helps to remove lumps and ensures a smoother cookie dough. Then, whisk in the baking powder and salt until thoroughly combined. Gradually add these dry ingredients to the wet mixture in the stand mixer, mixing on low speed until just combined. The dough will initially appear a little crumbly, but it will come together as you continue to mix. If necessary, use a rubber spatula or even your hands to gently press and work the cookie dough into a cohesive ball. Be careful not to overmix, which can lead to tough cookies.
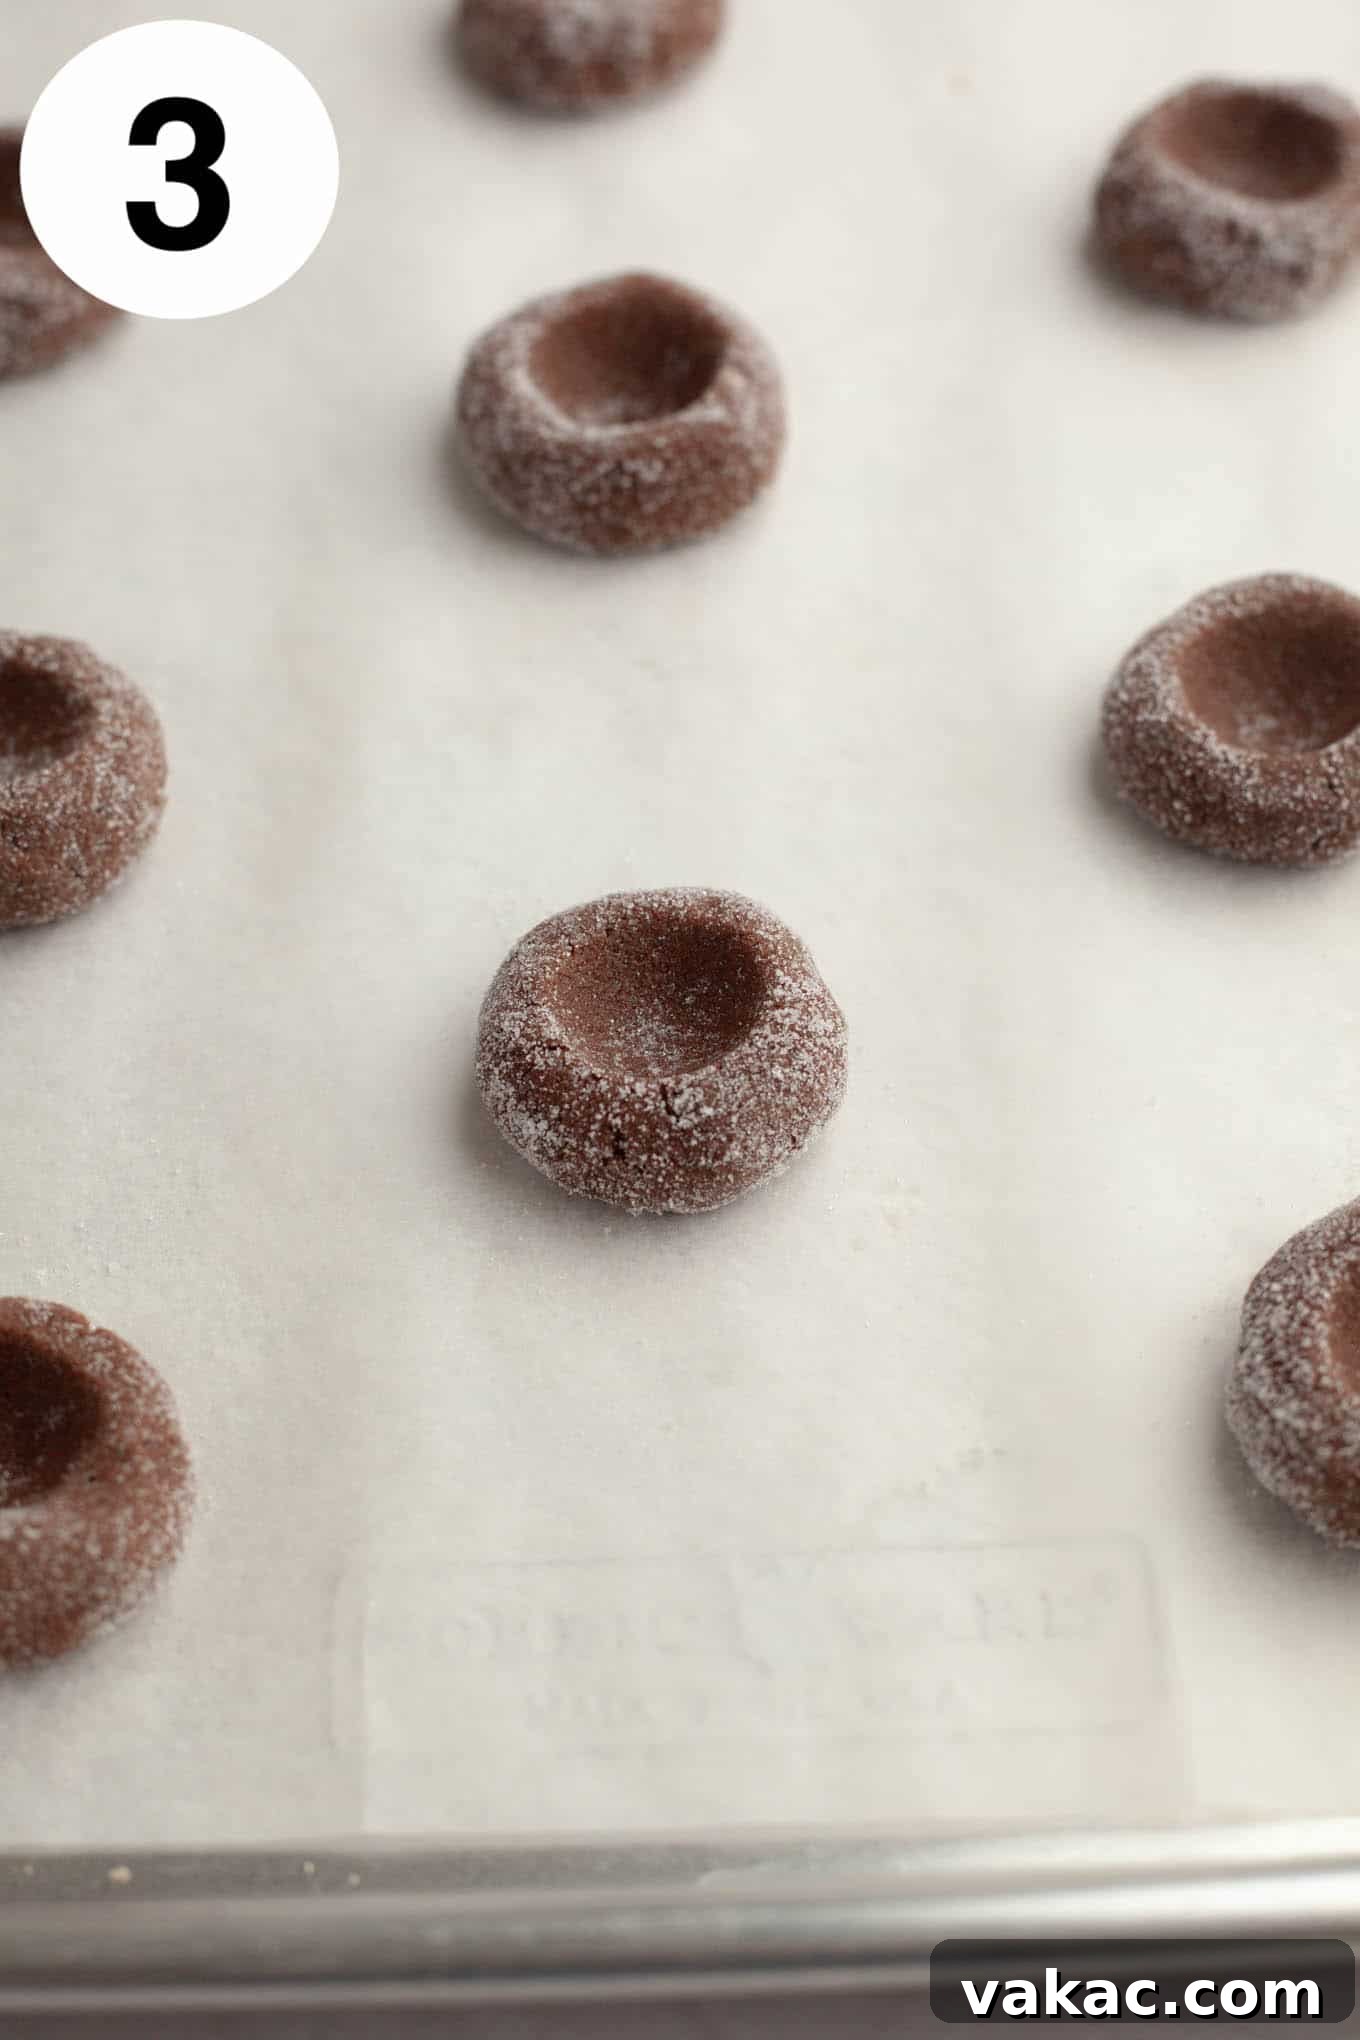
- Shape and Indent the Cookies: Using a one-tablespoon cookie scoop or a measuring tablespoon, portion out the chocolate cookie dough. Roll each portion into a smooth, uniform ball between your palms. For an extra touch of sweetness and a delicate textural contrast, roll each cookie ball in granulated sugar (this step is optional but highly recommended). Place the sugared cookie balls onto your prepared baking sheets, ensuring you leave at least 2 inches of space between each one to allow for some spreading during baking. Next, take the bottom of a ½ teaspoon measuring spoon and gently but firmly press an indentation into the center of each cookie dough ball. If the edges crack slightly, simply smooth them back with your fingertips. These indentations will hold your delicious ganache later.
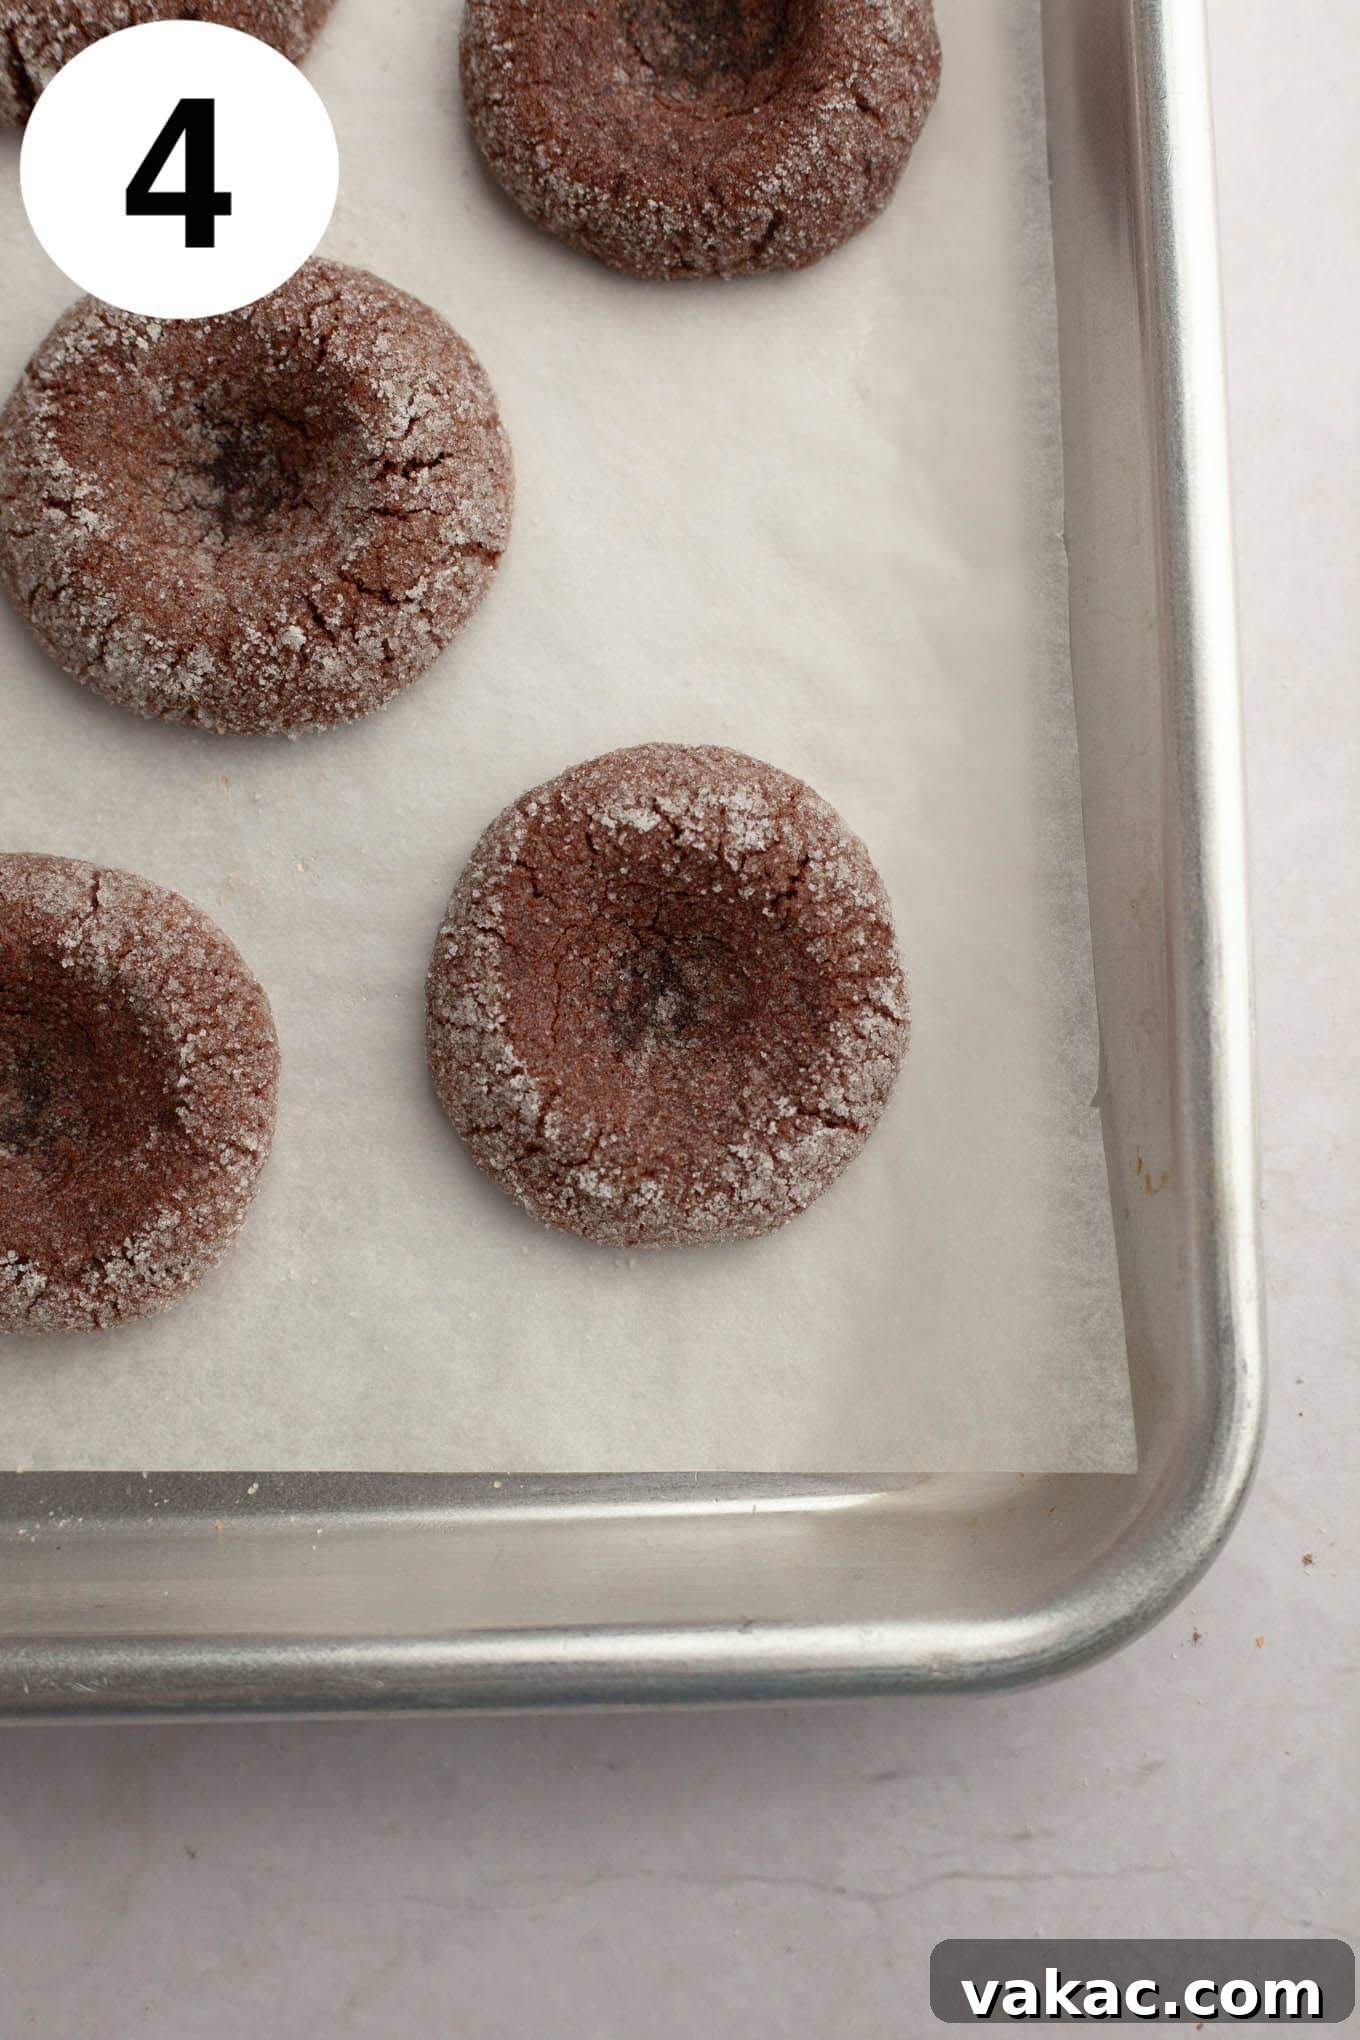
- Chill and Bake to Perfection: Once all your cookies are shaped and indented, place the baking sheets containing the cookie dough into the refrigerator to chill for a minimum of 30 minutes. Chilling the dough is a crucial step as it allows the butter to firm up, which helps prevent the cookies from spreading too much in the oven, ensuring they maintain their shape and thickness. While the dough chills, preheat your oven to 375ºF (190ºC). After chilling, remove the baking sheets from the fridge and bake for 8 to 10 minutes, or until the edges are set and the tops of the cookies look dry (I often find 9 minutes to be the sweet spot). The cookies will expand a little and the indentations may slightly diminish during baking; this is perfectly normal. Immediately upon removing them from the oven, use the bottom of a measuring teaspoon to gently press and reshape the indentations back into their crisp, defined form. Allow the baked cookies to cool on the baking sheets for 5 to 10 minutes before carefully transferring them to a wire rack to cool completely.
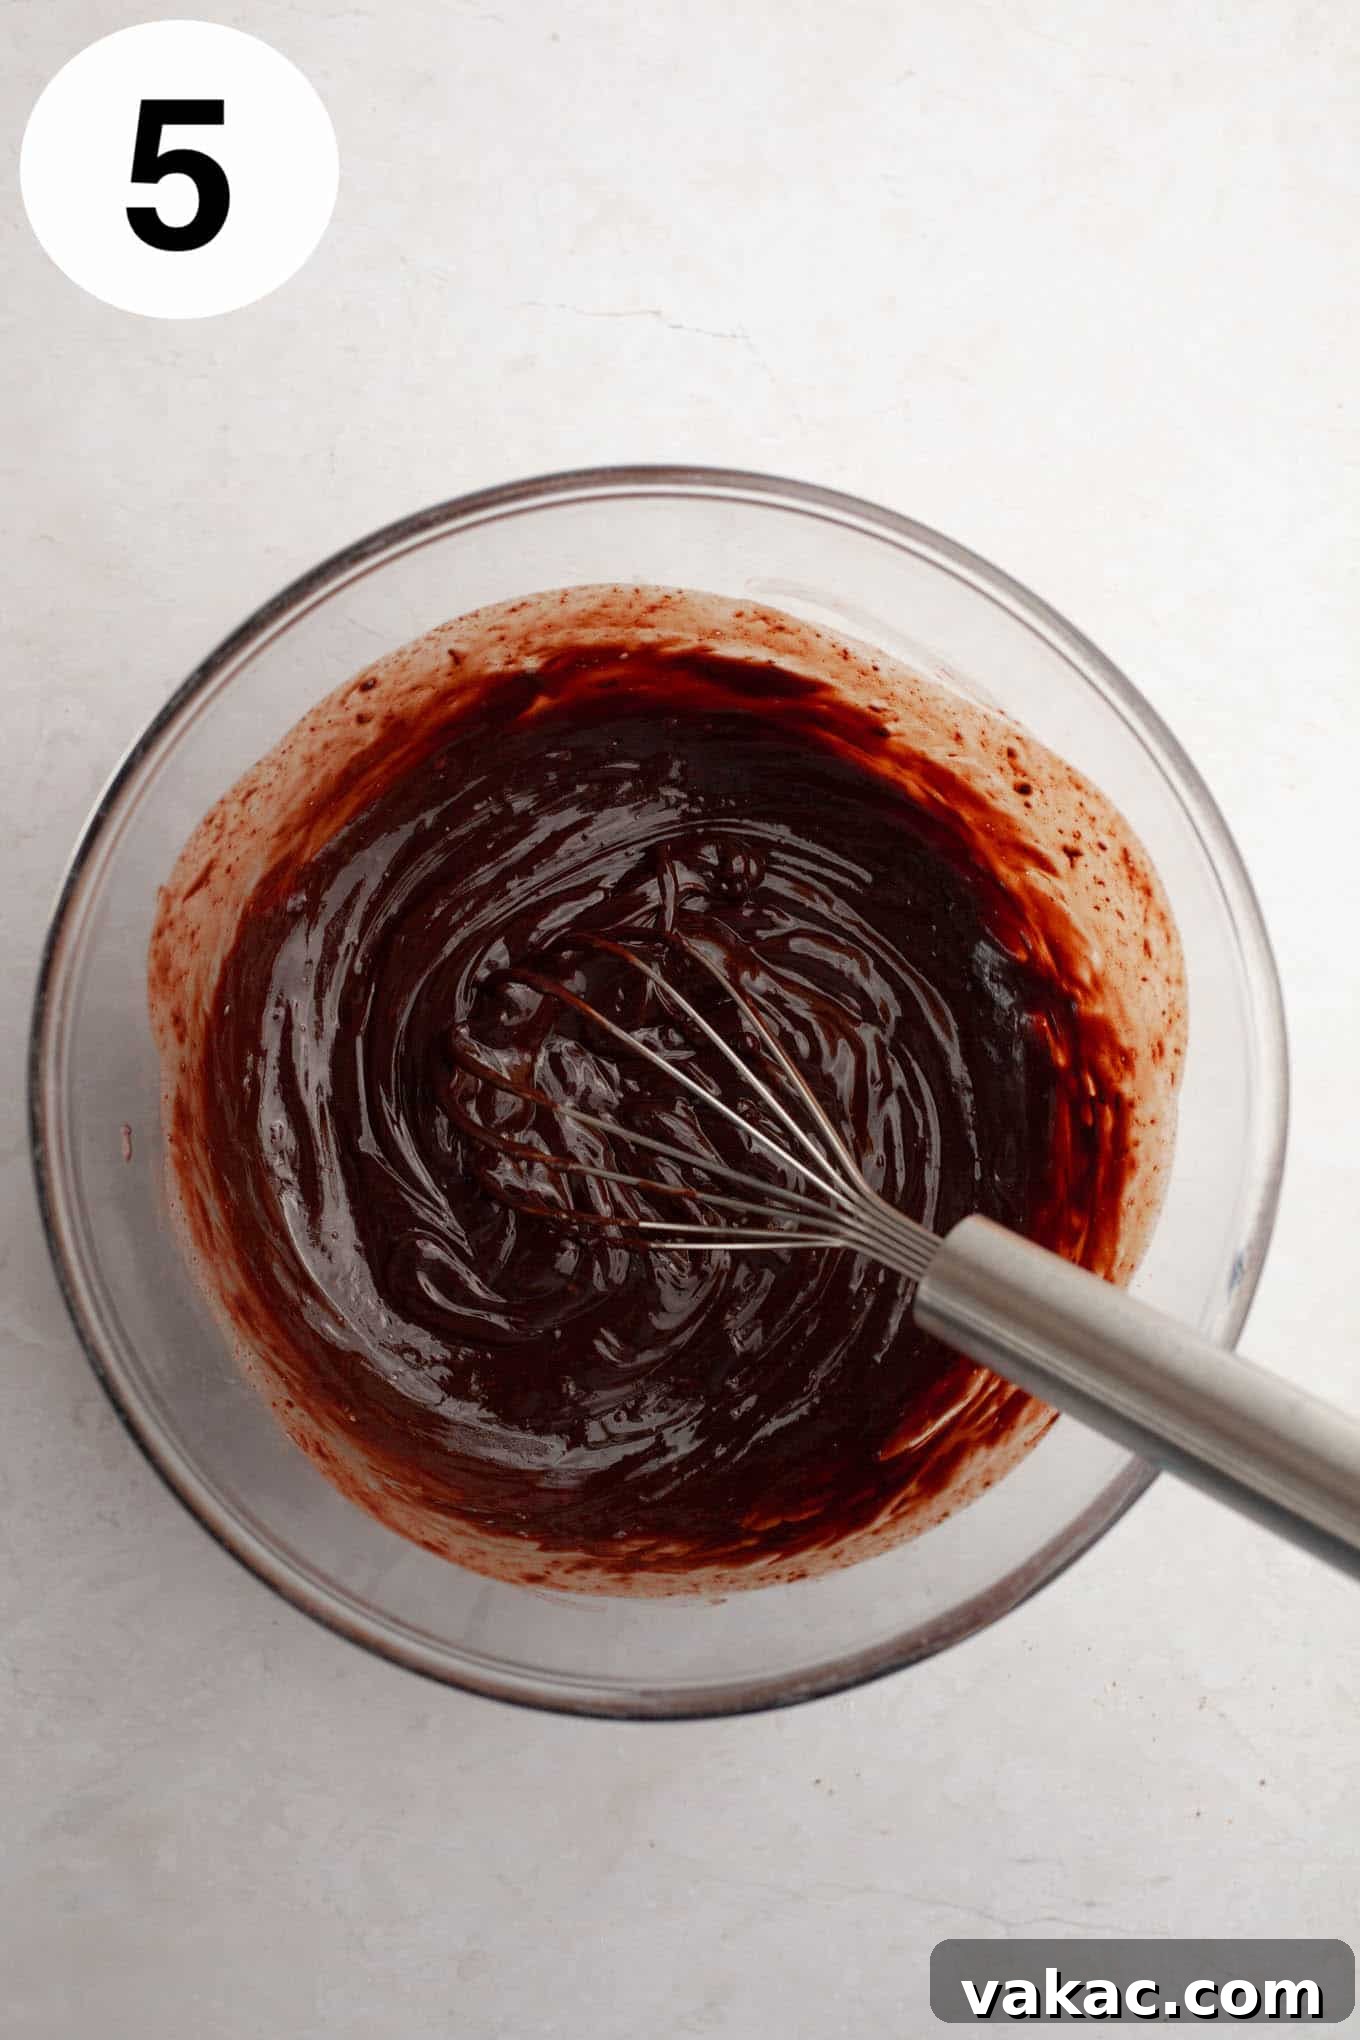
- Craft the Silky Chocolate Ganache Filling: While the cookies are cooling, prepare your decadent chocolate ganache. Place the semi-sweet chocolate chips in a large, heat-safe mixing bowl. In a separate microwave-safe bowl (or a glass measuring cup), heat the heavy cream in the microwave for 25 to 30 seconds, or until it’s warmed through and steamy, but not boiling. Watch it carefully to prevent it from bubbling over. Immediately pour the warm heavy cream over the chocolate chips. Cover the bowl tightly with foil or a plate and let it sit undisturbed for 3 minutes. This allows the hot cream to melt the chocolate chips evenly. After 3 minutes, remove the cover and begin to whisk slowly from the center of the bowl, gradually expanding your whisking motion outwards, until the mixture is completely smooth, glossy, and fully combined. If any chocolate chunks remain, you can microwave the ganache in short 10 to 15-second increments, stirring after each, until it reaches a perfectly smooth consistency.
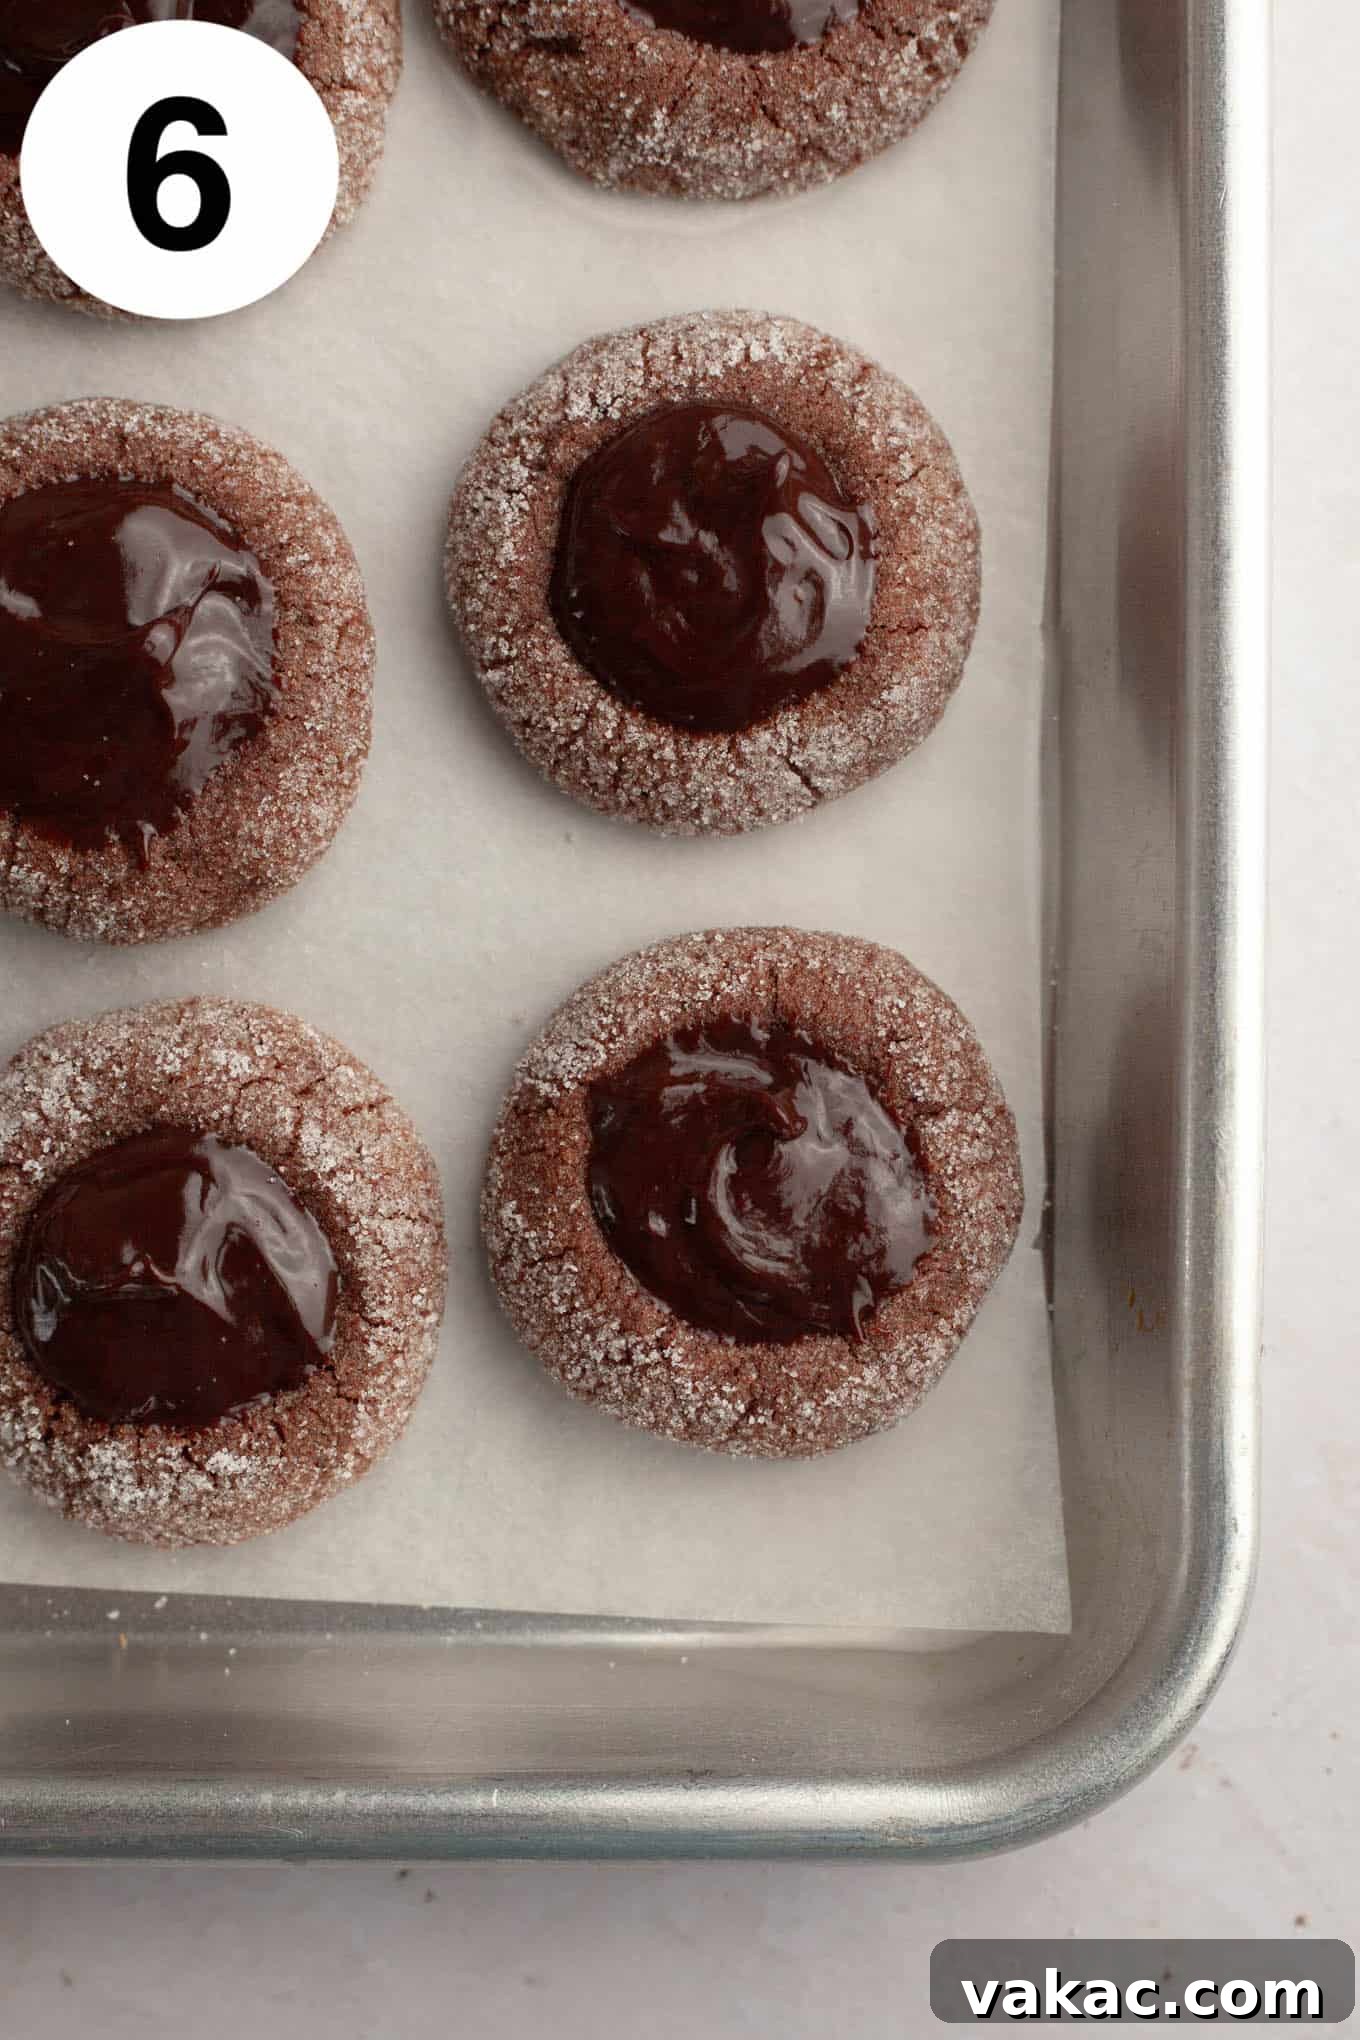
- Fill the Cookies and Allow to Set: Once the cookies are completely cool and the ganache is smooth, it’s time to fill them. Spoon approximately one teaspoon of the luscious chocolate ganache into the center indentation of each thumbprint cookie. Don’t worry if it looks a little runny; it will firm up. Set the filled cookies aside at room temperature to allow the ganache to firm up and set. If you’re short on time or eager to enjoy them sooner, you can carefully transfer the baking sheet of filled cookies to the refrigerator for about 15 minutes to speed up the setting process. Once the ganache is firm to the touch, your beautiful chocolate thumbprint cookies are ready to be savored!
Frequently Asked Questions About Chocolate Thumbprint Cookies
Absolutely! While chocolate ganache is truly divine, these versatile thumbprint cookies are fantastic with a variety of fillings. You could easily swap the ganache for creamy Nutella, a rich homemade salted caramel sauce, or a luscious dulce de leche for different flavor profiles. Get creative and experiment with your favorite spreads or sauces!
Yes, these chocolate thumbprint cookies are excellent for making ahead, which is perfect for busy holiday seasons or entertaining. The baked and filled cookies will stay fresh for up to three days at room temperature when stored in an airtight container. For longer storage, they can be refrigerated for up to five days. You can also prepare the cookie dough up to three days in advance and keep it chilled in the refrigerator before baking. Additionally, the raw cookie dough can be rolled into balls and frozen for up to three months. Just be sure to thaw them slightly before making the indentations and baking. Once baked, the unfrozen cookies can also be frozen and thawed to room temperature before filling and serving.
The ganache filling will firm up as it cools and sets, achieving a wonderfully creamy and fudge-like consistency. However, it will not harden to a solid, brittle state like tempered chocolate. It remains soft and easy to bite into, providing a perfect contrast to the tender cookie base.
There are a few common reasons cookies spread excessively. The most frequent culprit is insufficient chilling time for the dough; ensure you chill the shaped dough for at least 30 minutes, or even longer if your kitchen is warm. Using butter that is too soft or melted can also contribute to spreading. Additionally, accurately measuring your flour is crucial; too little flour will result in a looser dough that spreads more. Lastly, an oven that isn’t at the correct temperature can affect spreading, so investing in an oven thermometer can be very helpful.
Once the ganache has fully set, store your chocolate thumbprint cookies in an airtight container at room temperature for up to 2-3 days. If you need to keep them longer, they can be refrigerated for up to 5 days. For long-term storage, both the baked (unfilled) cookies and the raw cookie dough freeze exceptionally well, extending their deliciousness for months.

Top Baking Tips for Unforgettable Chocolate Thumbprint Cookies
Achieving the perfect chocolate thumbprint cookies is all about precision and a few clever tricks. These baking tips will help you navigate the process with ease, ensuring tender cookies and perfectly set ganache every time.
- Don’t Skip Chilling the Dough! This is perhaps the most important tip for thumbprint cookies. Chilling the dough gives the butter time to firm back up and prevents your cookies from spreading too much in the oven. A well-chilled dough ensures your cookies hold their shape, giving you those distinct indentations for the filling. Aim for at least 30 minutes, but longer (up to an hour) won’t hurt, especially on a warm day.
- Reshape the Indentations After Baking: It’s completely normal for the cookie indentations to puff up slightly and lose a bit of their crisp shape while baking. Don’t worry! As soon as the cookies come out of the oven, use the bottom of a ½ teaspoon measuring spoon to gently press back down into the center of each cookie, reshaping the indentation. Do this while they are still warm and pliable.
- Ensure a Smooth Ganache: If your chocolate ganache isn’t perfectly smooth after whisking, it might be that your chocolate chips didn’t melt completely. Simply microwave the ganache in very short intervals of 10 to 15 seconds, stirring thoroughly after each interval, until it becomes wonderfully smooth and glossy. Avoid overheating, as this can cause the ganache to separate.
- Add a Festive Flair: These chocolate thumbprint cookies are already beautiful, but you can easily make them even more special. Right after spooning the ganache into the centers, sprinkle them with your favorite festive toppings. Red and green nonpareils or sprinkles are perfect for the holidays. Alternatively, finely chopped pecans, walnuts, or even a sprinkle of flaky sea salt on top of the ganache would add a delightful texture and flavor contrast.
- Measure Flour Accurately: As mentioned in the ingredients section, precise flour measurement is critical. Too much flour will result in dry, crumbly cookies, while too little can make them spread excessively. Always spoon and level your flour, rather than scooping directly from the bag.
- Room Temperature Ingredients are Key: For the cookie dough, ensure your butter and egg are at room temperature. Room temperature butter creams better with sugar, creating a light and airy base, and room temperature eggs emulsify more easily, leading to a smoother batter and a more consistent cookie texture.
- Patience During Cooling: Allow your cookies to cool completely on a wire rack before filling them with ganache. Filling warm cookies will cause the ganache to melt and run, creating a messy result. A fully cooled cookie provides a stable foundation for the creamy filling.

Chocolate Thumbprint Cookies
Ingredients
Chocolate Cookie Dough
- ¾ cup unsalted butter softened (1.5 sticks; 170 grams)
- 1 cup packed light brown sugar (200 grams)
- 1 large egg at room temperature
- 1 teaspoon pure vanilla extract
- 2 cups all-purpose flour spooned & leveled (250 grams)
- ⅓ cup unsweetened Dutch process cocoa powder (33 grams)
- ½ teaspoon baking powder
- ¼ teaspoon salt
- ¼ cup granulated sugar (50 grams) for rolling
Chocolate Ganache Filling
- 1 cup semi-sweet chocolate chips (180 grams)
- ½ cup heavy cream (120 ml, at least 36% fat)
Instructions
-
To prepare the cookie dough: Line two large baking sheets with parchment paper or silicone baking mats. Set aside.
-
In the bowl of a stand mixer fitted with the paddle attachment, or a large mixing bowl using a handheld mixer, beat the softened butter until smooth. Add the brown sugar and continue mixing for 1 to 2 minutes until light and well combined.
-
Mix in the room temperature egg and vanilla extract until fully incorporated.
-
In a separate mixing bowl, sift together the flour and cocoa powder. Whisk in the baking powder and salt until evenly distributed.
-
Gradually add the dry ingredients to the wet ingredients, mixing on low speed until just combined. The mixture may be slightly crumbly at first, but it will come together into a cohesive dough as you continue to mix or gently work it with a rubber spatula/hands. Do not overmix.
-
Using a one-tablespoon cookie scoop, portion out the dough. Roll each portion into a smooth ball. Optionally, roll each ball in granulated sugar for a sparkly, crunchy coating. Place the rolled dough balls onto the prepared baking sheets, leaving a few inches between each for spreading.
-
Using the bottom of a ½ teaspoon measuring spoon, gently but firmly press an indentation into the center of each cookie dough ball. If the edges crack, carefully smooth them with your fingers.
-
Place the baking sheets with the shaped cookie dough in the refrigerator to chill for at least 30 minutes.
-
While the dough chills, preheat your oven to 375°F (190°C).
-
Remove the chilled baking sheets from the fridge and bake for 8 to 10 minutes, or until the edges are set and the tops appear dry. (Recommended baking time: 9 minutes).
-
Immediately upon removing the cookies from the oven, use the bottom of a teaspoon measuring spoon to press and reshape the indentations back into place. Allow the cookies to cool on the baking sheets for 5 to 10 minutes before transferring them to a wire rack to cool completely.
-
To make the chocolate ganache filling: Place the semi-sweet chocolate chips into a large, heat-safe bowl.
-
Pour the heavy whipping cream into a microwave-safe bowl or glass measuring cup. Heat in the microwave for 25 to 30 seconds, until warm and steamy but not boiling. Watch carefully to prevent boil-over.
-
Pour the warm heavy cream over the chocolate chips. Cover the bowl with foil or a plate and let it sit undisturbed for 3 minutes to allow the chocolate to melt.
-
Remove the cover and begin to whisk slowly from the center of the bowl, gradually expanding outwards, until the mixture is completely smooth and well combined. If any chocolate remains unmelted, microwave in 10 to 15-second increments, stirring after each, until smooth.
-
Spoon approximately 1 teaspoon of the smooth chocolate ganache into the center of each completely cooled cookie. Allow the ganache to set at room temperature or refrigerate for about 15 minutes to speed up the process. Serve and enjoy!
Notes
Freezing Instructions: Baked, unfilled cookies or raw cookie dough balls freeze beautifully for 2 to 3 months. Thaw to room temperature before filling (if baked) or baking (if raw).