
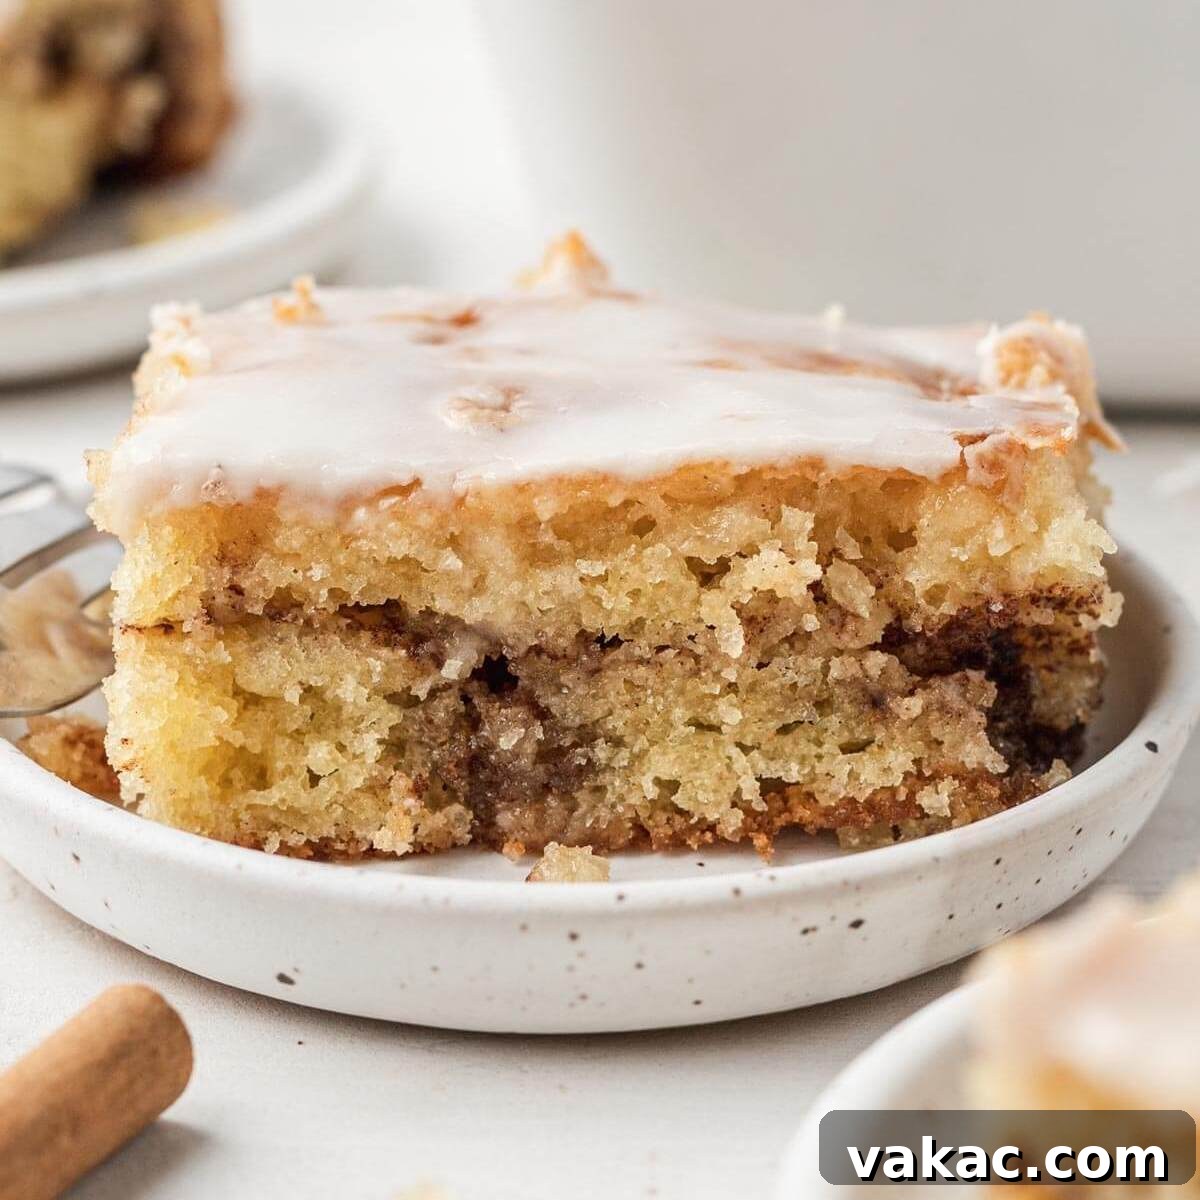
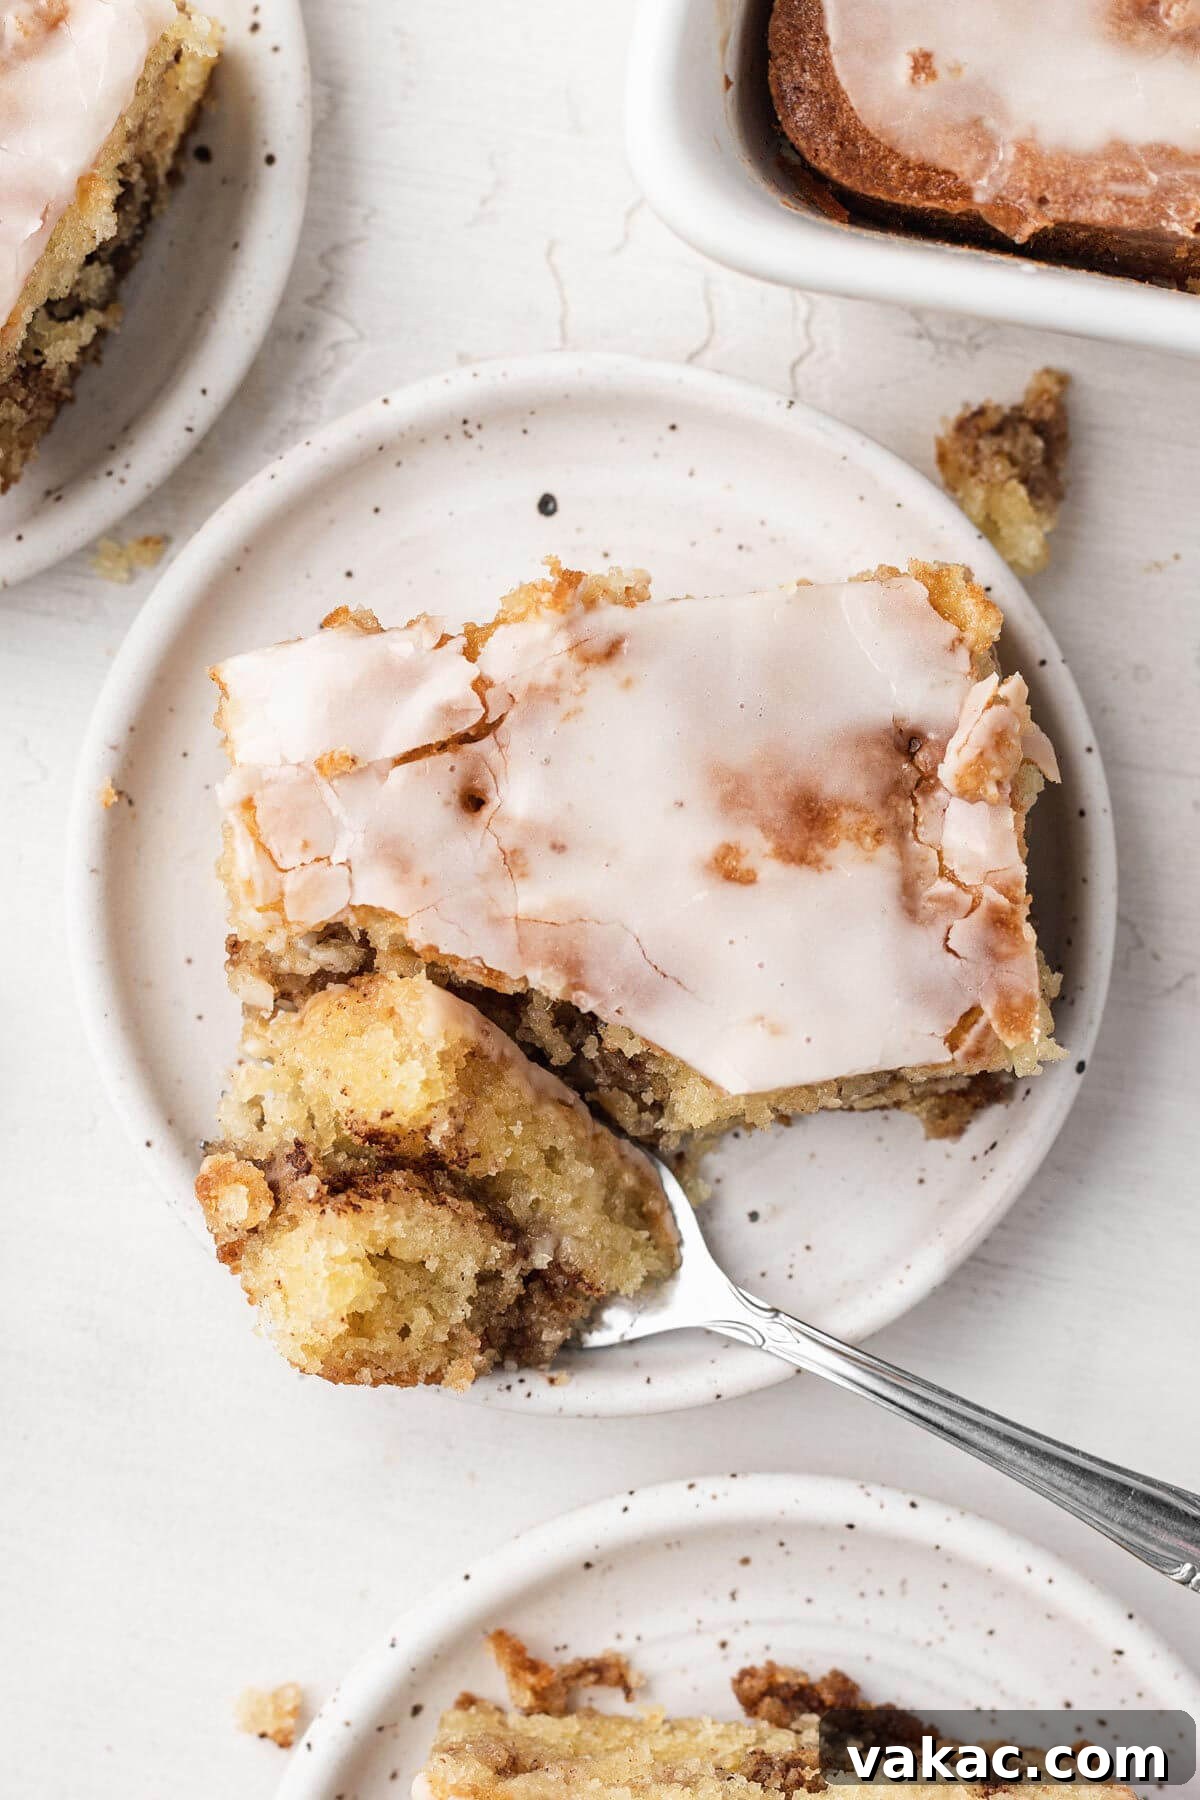
Welcome to the delightful world of homemade Honey Bun Cake, a true culinary gem that beautifully marries the comforting flavors of a classic cinnamon swirl cake with the irresistible moistness of a poke cake! Imagine a tender, rich yellow cake, generously swirled with a warm cinnamon-sugar mixture, then generously poked and drizzled with a sweet, powdered sugar icing that seeps into every crevice, creating an unparalleled moist and gooey texture. This isn’t just a cake; it’s a nostalgic journey to childhood, reimagined with gourmet flair. Forget the pre-packaged treats; this scratch-made version offers a depth of flavor and a luscious texture that simply can’t be beaten. It’s an experience that’s both familiar and wonderfully elevated, making it a perfect indulgence for any time of day.
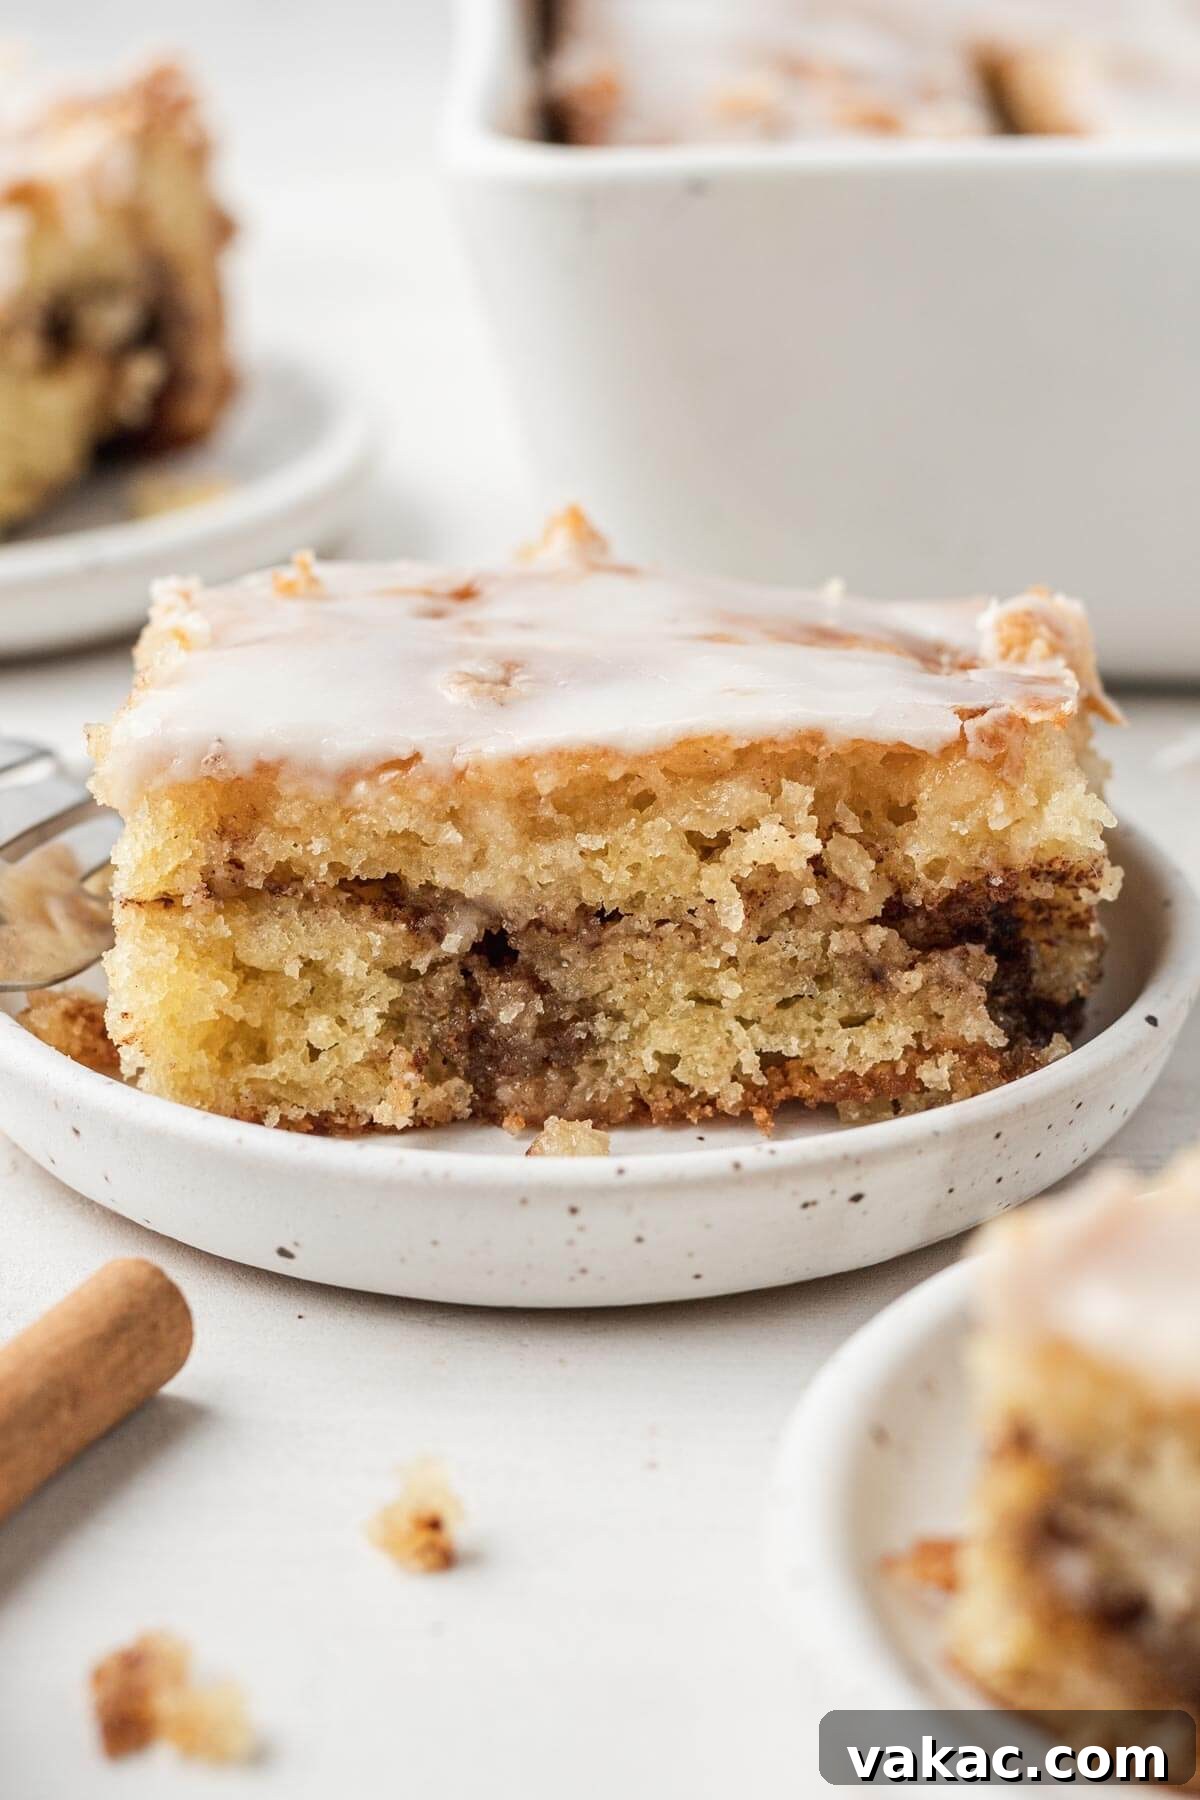
This homemade Honey Bun Cake is a testament to simple ingredients coming together to create something truly extraordinary. It boasts an incredibly moist crumb and a perfectly balanced sweetness, reminiscent of those beloved, plastic-wrapped honey buns from the grocery store, but infinitely superior in taste and quality. The cake itself is a flavorful masterpiece, starting with a homemade yellow cake batter. We infuse the batter with a generous tablespoon of pure vanilla extract, ensuring a rich and aromatic foundation. The secret to its remarkable tenderness and moisture lies in the combination of tangy buttermilk and rich sour cream, which not only tenderize the crumb but also add a subtle, delightful tang that complements the sweet cinnamon swirl beautifully.
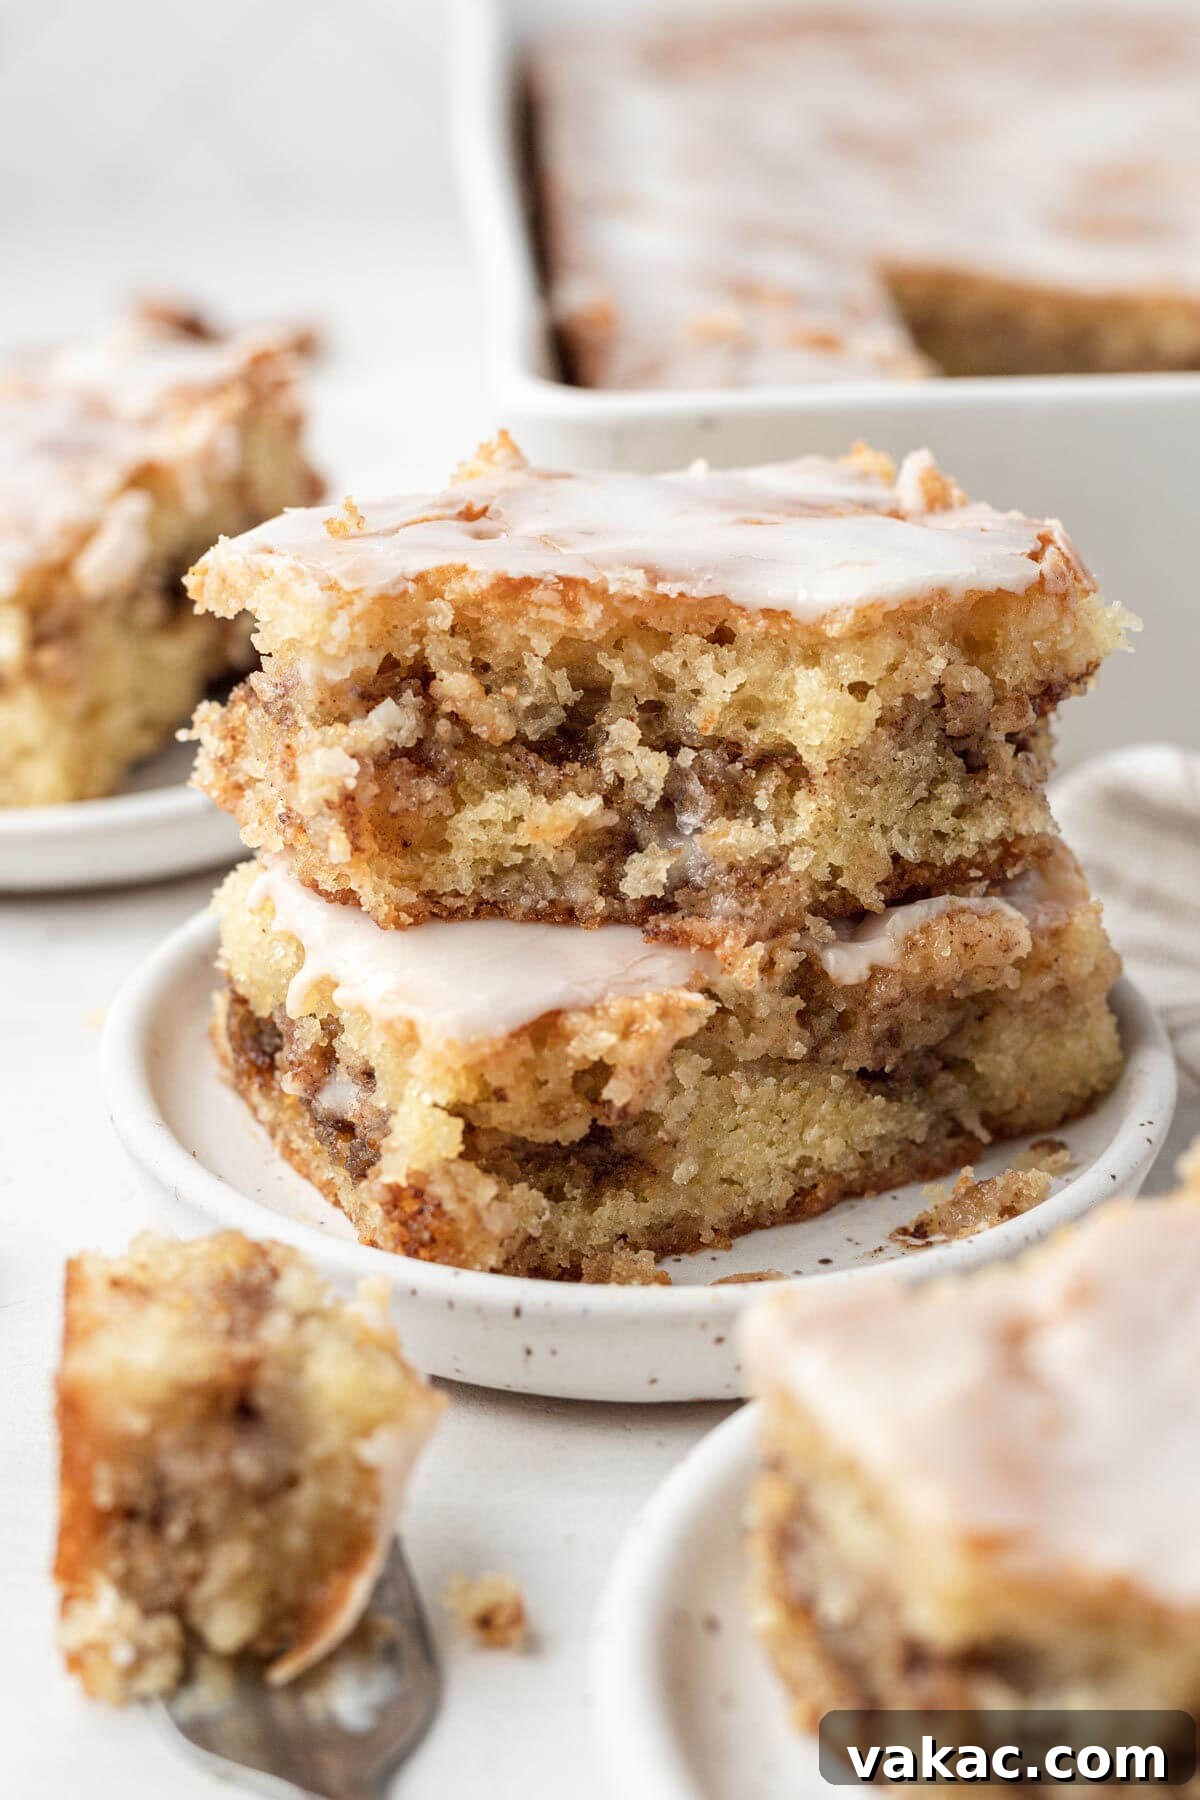
Once this magnificent cinnamon-swirled cake emerges golden brown from the oven, the magic truly begins. While still warm, the entire surface is pricked all over with a fork, creating tiny channels for the glorious powdered sugar icing. This warm embrace allows the sweet glaze to seep deep into the cake, permeating every layer, enhancing the flavor, and locking in moisture. The result is a cake that remains incredibly moist, tender, and flavorful for days, inviting you to enjoy slice after delicious slice. Whether you crave a sweet start to your morning, a decadent dessert to end a busy weeknight, or a show-stopping treat for a special occasion, this Honey Bun Cake is a versatile delight that truly delivers.
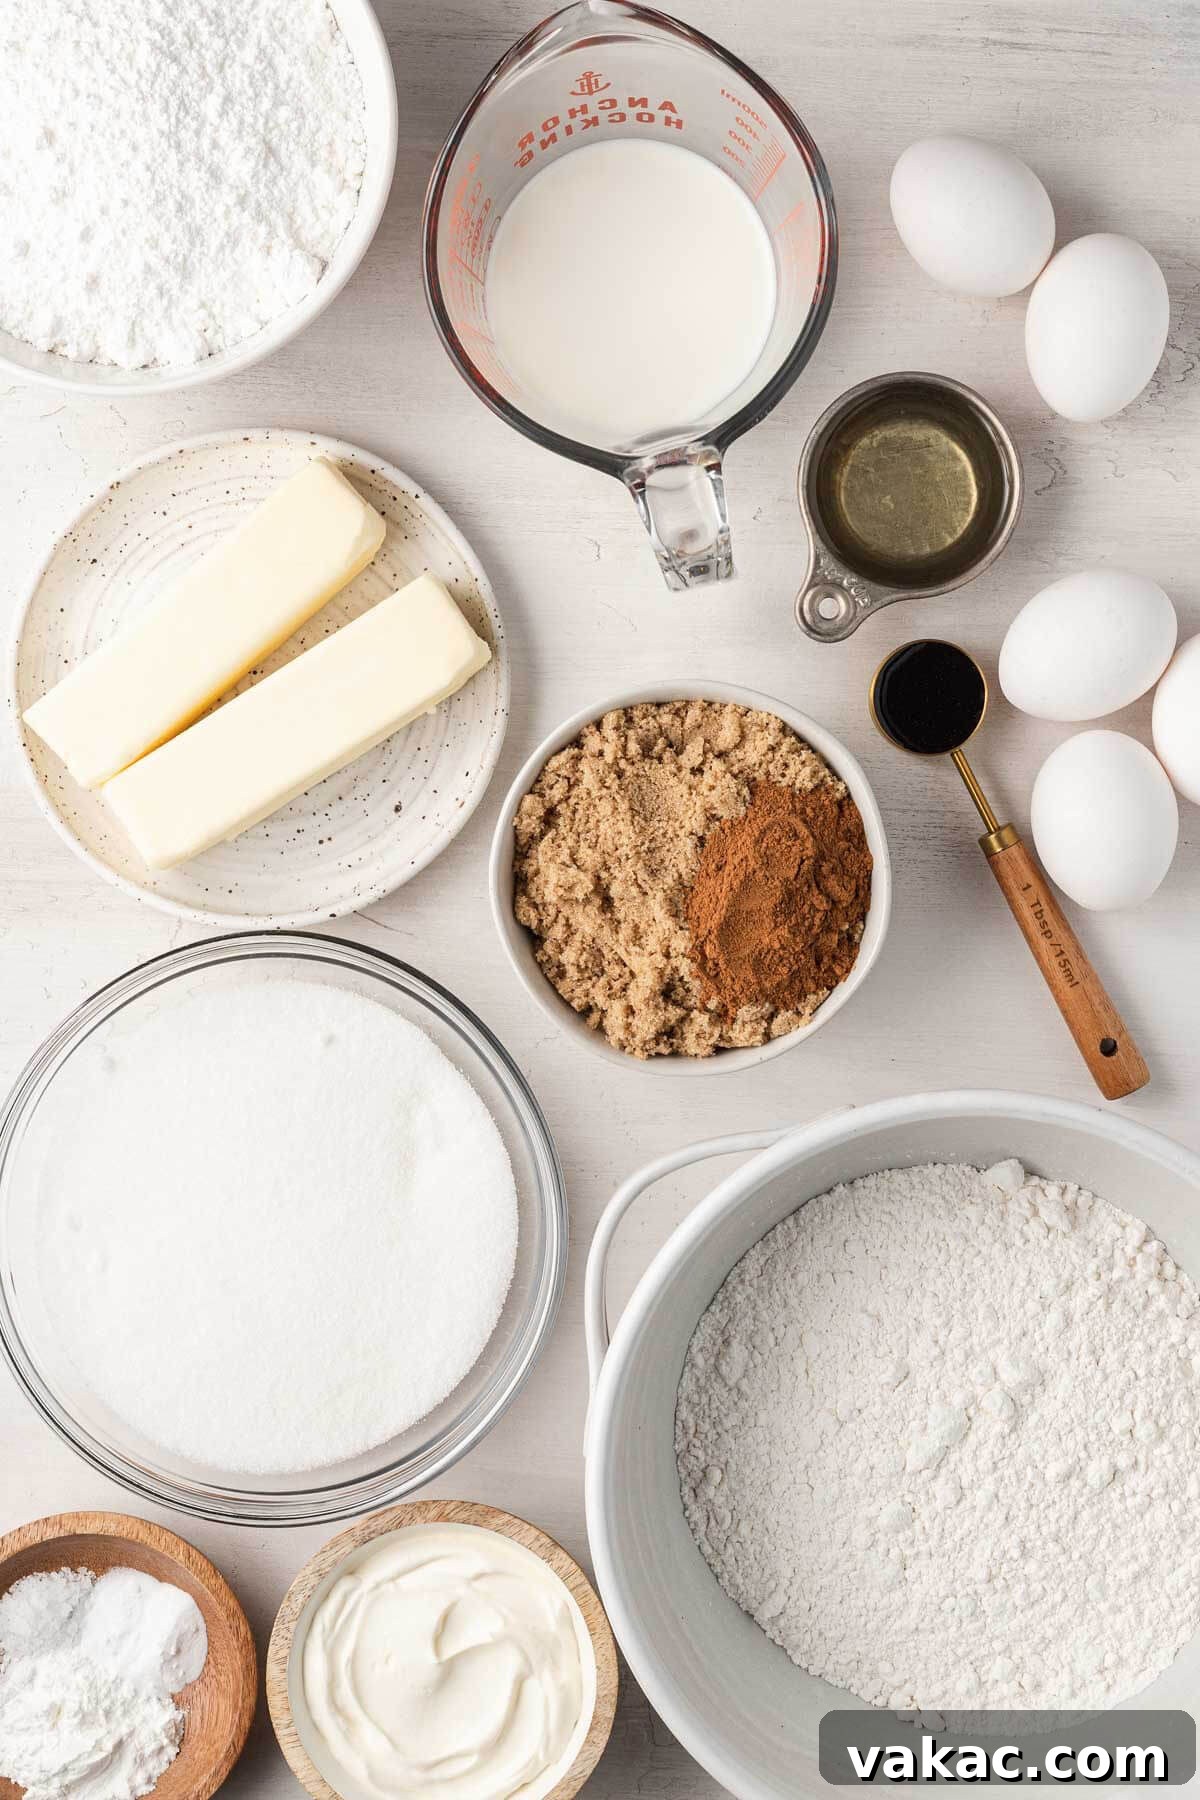
Essential Ingredients for the Perfect Honey Bun Cake
Creating this irresistible Honey Bun Cake from scratch relies on a few fundamental ingredients, many of which you likely already have in your pantry. While the full list with precise measurements is provided in the recipe section below, let’s delve into some key components and understand their vital roles in achieving the cake’s exceptional texture and flavor.
- Cake Flour: This is a cornerstone for creating an incredibly light and fluffy cake. Cake flour has a significantly lower protein content compared to all-purpose flour, which means less gluten development. Less gluten results in a softer, more delicate, and tender crumb, characteristic of a truly exceptional cake. If you don’t typically keep cake flour on hand, don’t fret! You can easily create a suitable substitute at home in about 5 minutes using all-purpose flour and cornstarch. Simply measure out 3 cups of all-purpose flour, remove 6 tablespoons, and replace it with 6 tablespoons of cornstarch, sifting them together thoroughly.
- Buttermilk: Far more acidic than regular milk, buttermilk plays a crucial role in activating the baking soda in the recipe, leading to a beautiful rise and an extra tender crumb. Its acidity also contributes significantly to the cake’s moistness and adds a subtle tang that balances the sweetness. If you find yourself without buttermilk, you can quickly make a substitute by adding 1 tablespoon of lemon juice or white vinegar to a liquid measuring cup, then filling the rest with regular milk (whole milk works best) up to the ½ cup line. Let it sit for 5-10 minutes until it slightly curdles before using. Alternatively, you can replace it with an equal amount of whole milk, though the cake might be slightly less tender.
- Sour Cream: Another powerhouse for moisture and richness, full-fat sour cream adds an unparalleled creaminess and a delightful tanginess to the cake batter. This not only enhances the flavor profile but also ensures the cake remains incredibly moist and tender. For the best results, always opt for full-fat sour cream. If sour cream isn’t available, plain full-fat Greek yogurt can be used as an equal substitute, providing a similar texture and acidity.
- Vanilla Extract: We are serious about vanilla in this recipe! You’ll notice a generous 1 full tablespoon of pure vanilla extract in the cake batter – and no, that’s not a typo! This ample amount ensures a deep, rich vanilla flavor throughout the cake. Additionally, 2 extra teaspoons are incorporated into the icing, truly amplifying that warm, comforting vanilla aroma and taste, making every bite incredibly aromatic.
- Eggs + Egg Yolks: This recipe calls for three whole large eggs and an additional two large egg yolks. While whole eggs provide structure and moisture, the extra egg yolks are key to making this cake exceptionally rich, adding a beautiful golden hue and an even more tender, melt-in-your-mouth texture. Ensure all eggs are at room temperature for optimal emulsification with the butter and sugar, leading to a smoother batter.
- Honey (Optional): While many traditional honey bun cakes don’t actually feature honey, we’ve included it as an optional addition to elevate the flavor profile. Adding 2 tablespoons of honey to the icing (and slightly reducing the milk) infuses the cake with a delicate, natural honey essence, perfectly complementing the cinnamon and vanilla. It’s a subtle yet impactful twist that enhances the “honey bun” experience.
How to Make A Honey Bun Cake from Scratch
Crafting this delicious Honey Bun Cake is a straightforward and rewarding process, typically broken down into three main components: preparing the cake batter, assembling the cinnamon-sugar filling, and whisking together the delectable vanilla icing. We’ll tackle these steps in a logical sequence to ensure a smooth baking experience and a perfect final product.
- Prepare Your Baking Pan and Oven: Begin by preheating your oven to 350°F (180°C). Lightly spray a 9×13-inch baking pan with a nonstick cooking spray, ensuring all corners and sides are well coated. Set this aside.
- Combine the Dry Ingredients: In a large mixing bowl, whisk together the cake flour, baking powder, baking soda, and salt. Whisking ensures these leavening agents and flavorings are evenly distributed throughout the flour, contributing to an even rise and consistent texture. Set this bowl aside.
- Whisk the Wet Ingredients: In a separate large bowl or a liquid measuring cup (which makes pouring easier), combine the room temperature buttermilk (or whole milk), sour cream, vegetable or canola oil, and the generous tablespoon of pure vanilla extract. Whisk these wet ingredients together until they are thoroughly combined and homogenous. This mixture will be incorporated into the butter and sugar later.
- Cream Together Butter and Sugar: In the bowl of a stand mixer fitted with the paddle attachment (or using a large mixing bowl and a handheld electric mixer), beat the softened unsalted butter on a low speed until it becomes smooth and creamy. Gradually add the granulated sugar to the butter and continue beating on medium speed for about 4 to 5 minutes. This step is crucial: you want the mixture to become light, fluffy, and noticeably pale in color. This aeration process incorporates air into the batter, which is essential for a light and tender cake.
- Incorporate Eggs and Egg Yolks: Add the large eggs and extra egg yolks to the creamed butter and sugar mixture, one at a time. After each addition, beat until just combined, and make sure to stop and scrape down the sides and bottom of the mixing bowl with a rubber spatula. This ensures that all ingredients are fully incorporated and prevents any streaks of unmixed batter.
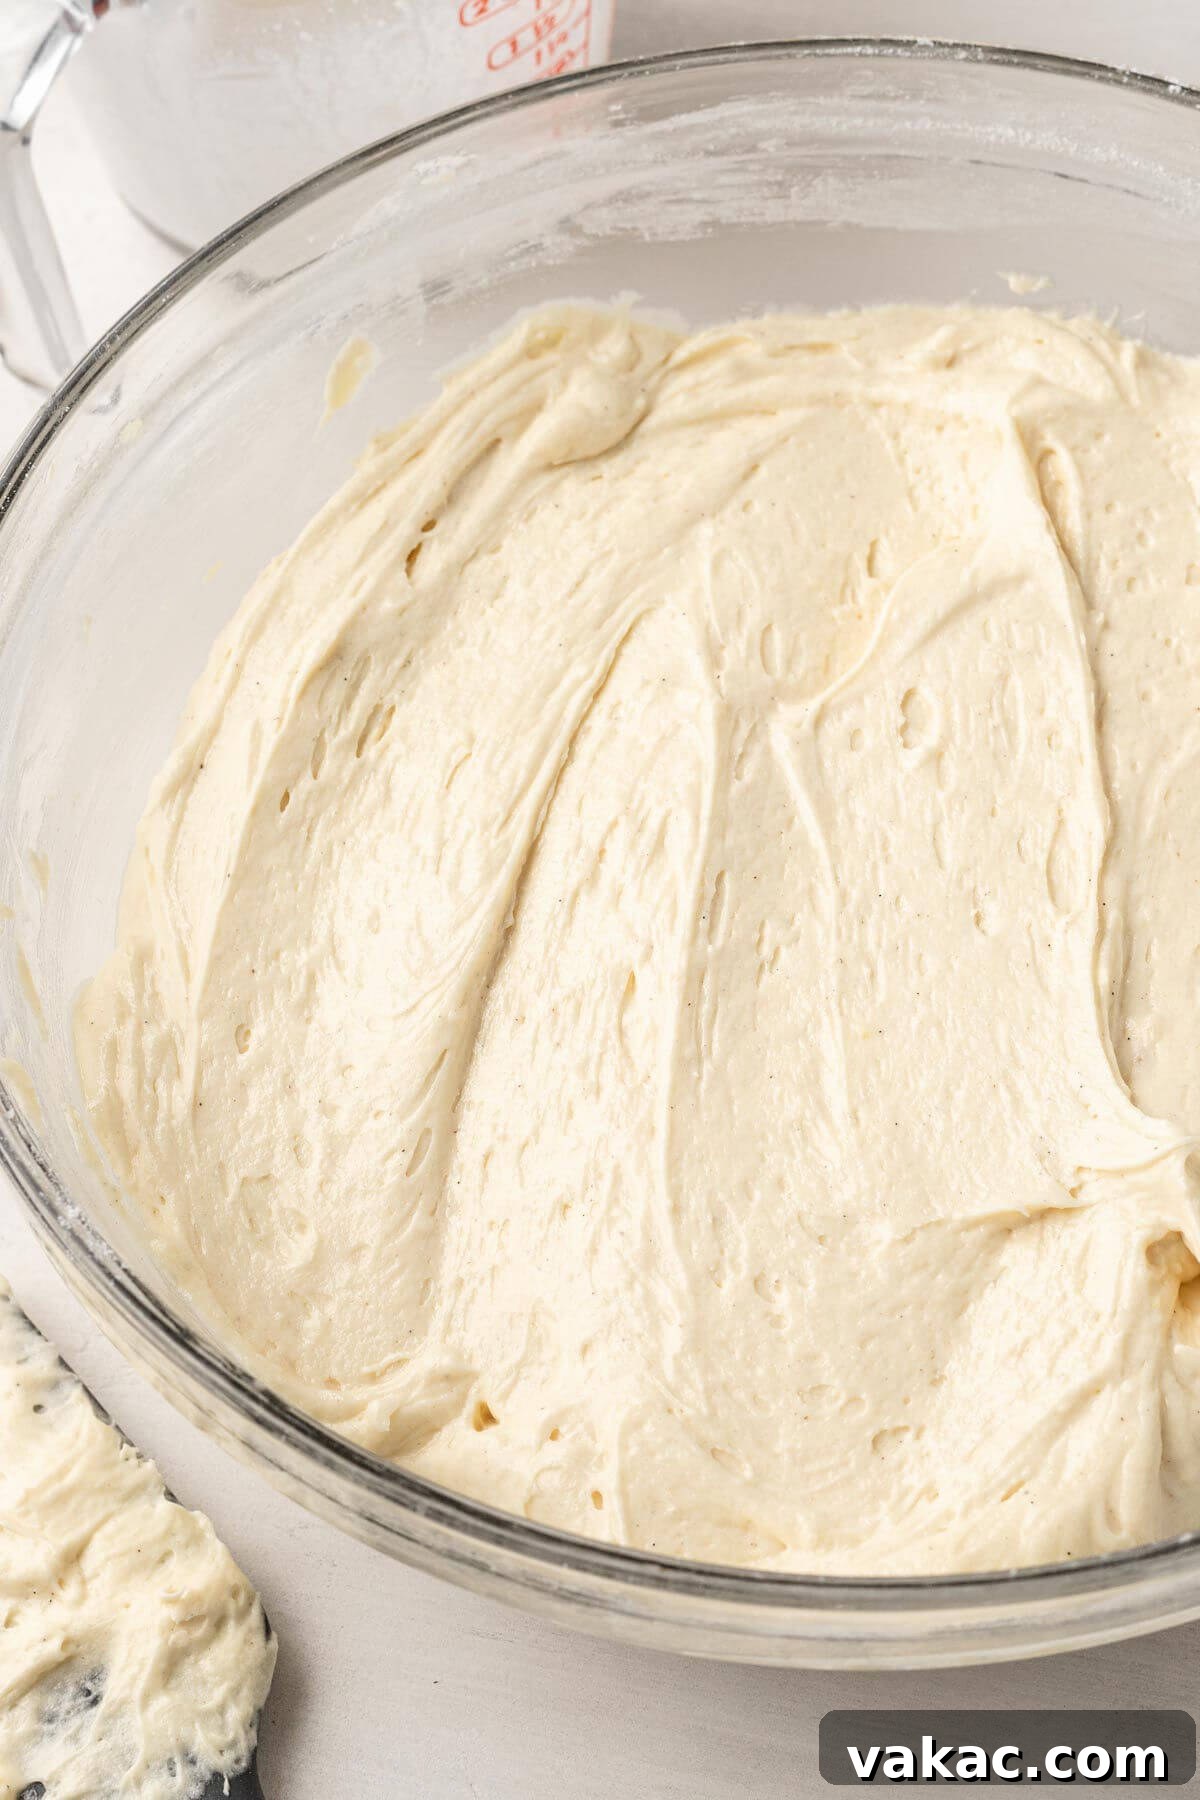
- Alternate Dry and Wet Ingredients: With the mixer on low speed, add the dry ingredient mixture in three separate additions, alternating with the wet buttermilk mixture. It’s important to begin and end with the dry ingredients. Mix each addition only until it’s just combined. Be careful not to overmix the batter at this stage, as overmixing can develop too much gluten in the cake flour, leading to a tougher cake.
- Final Batter Scrape: Once all ingredients are added, use your rubber spatula to give the bowl a final scrape, making sure everything is thoroughly combined from the bottom up. Set the prepared cake batter aside.
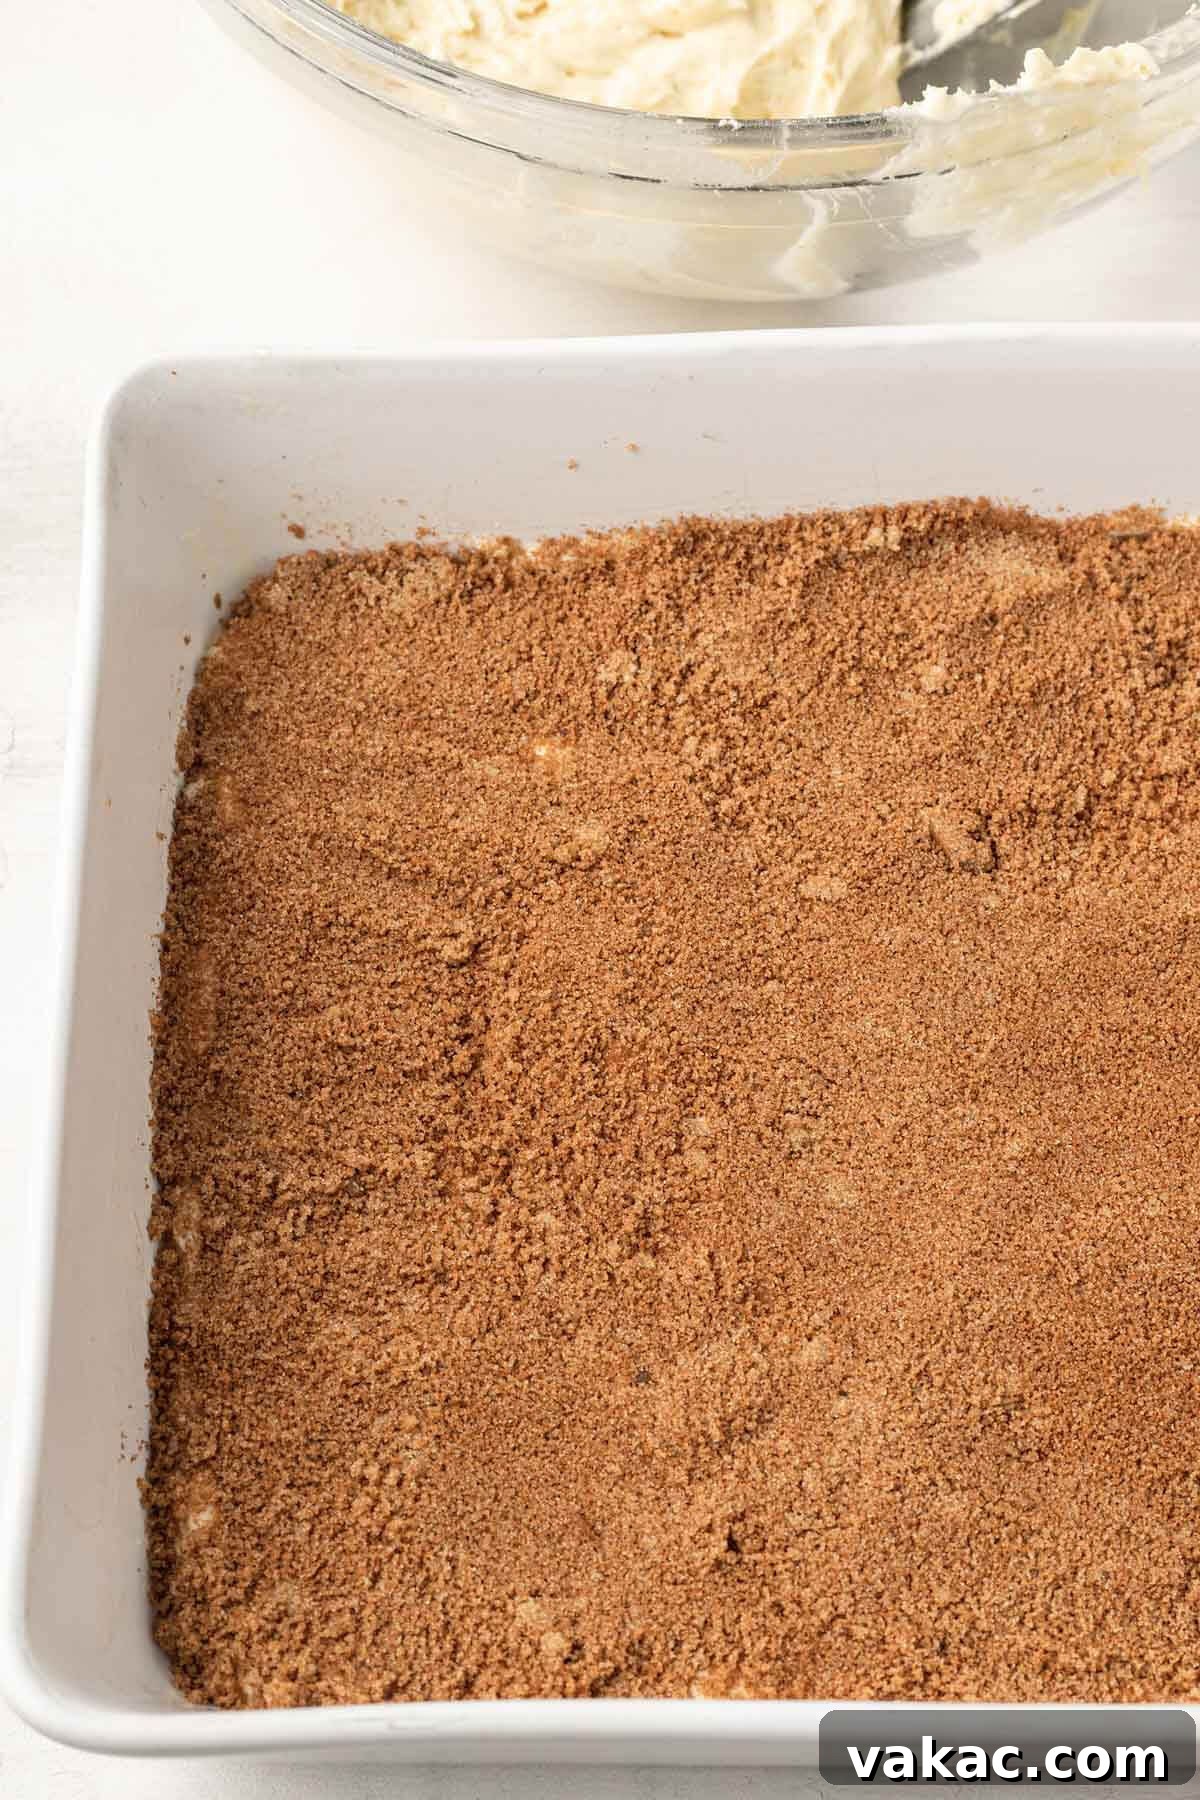
- Make the Cinnamon-Sugar Filling: In a separate medium-sized bowl, combine the packed light brown sugar and ground cinnamon. Stir them together until the cinnamon is evenly distributed throughout the brown sugar. This simple mixture is the heart of the “honey bun” flavor.
- Assemble the Cake Layers: Spoon approximately half of the prepared cake batter into your greased 9×13-inch baking pan. Use an offset spatula or the back of a spoon to gently spread it into an even layer across the bottom of the pan.
- Add the Filling: Generously sprinkle the entire brown sugar-cinnamon mixture evenly over the first layer of cake batter.
- Top with Remaining Batter: Carefully spoon the remaining cake batter over the cinnamon-sugar filling. Using an offset spatula can be very helpful here to spread the batter evenly without disturbing the filling too much. You can leave the top smooth or, if you desire a more pronounced swirl effect, gently drag a butter knife through the layers to create a light marble pattern.
- Bake the Cake: Place the baking pan in the preheated oven and bake for 38 to 45 minutes. The cake is done when a wooden toothpick or cake tester inserted into the center comes out clean or with only a few moist crumbs attached. Avoid overbaking, as this can lead to a dry cake.
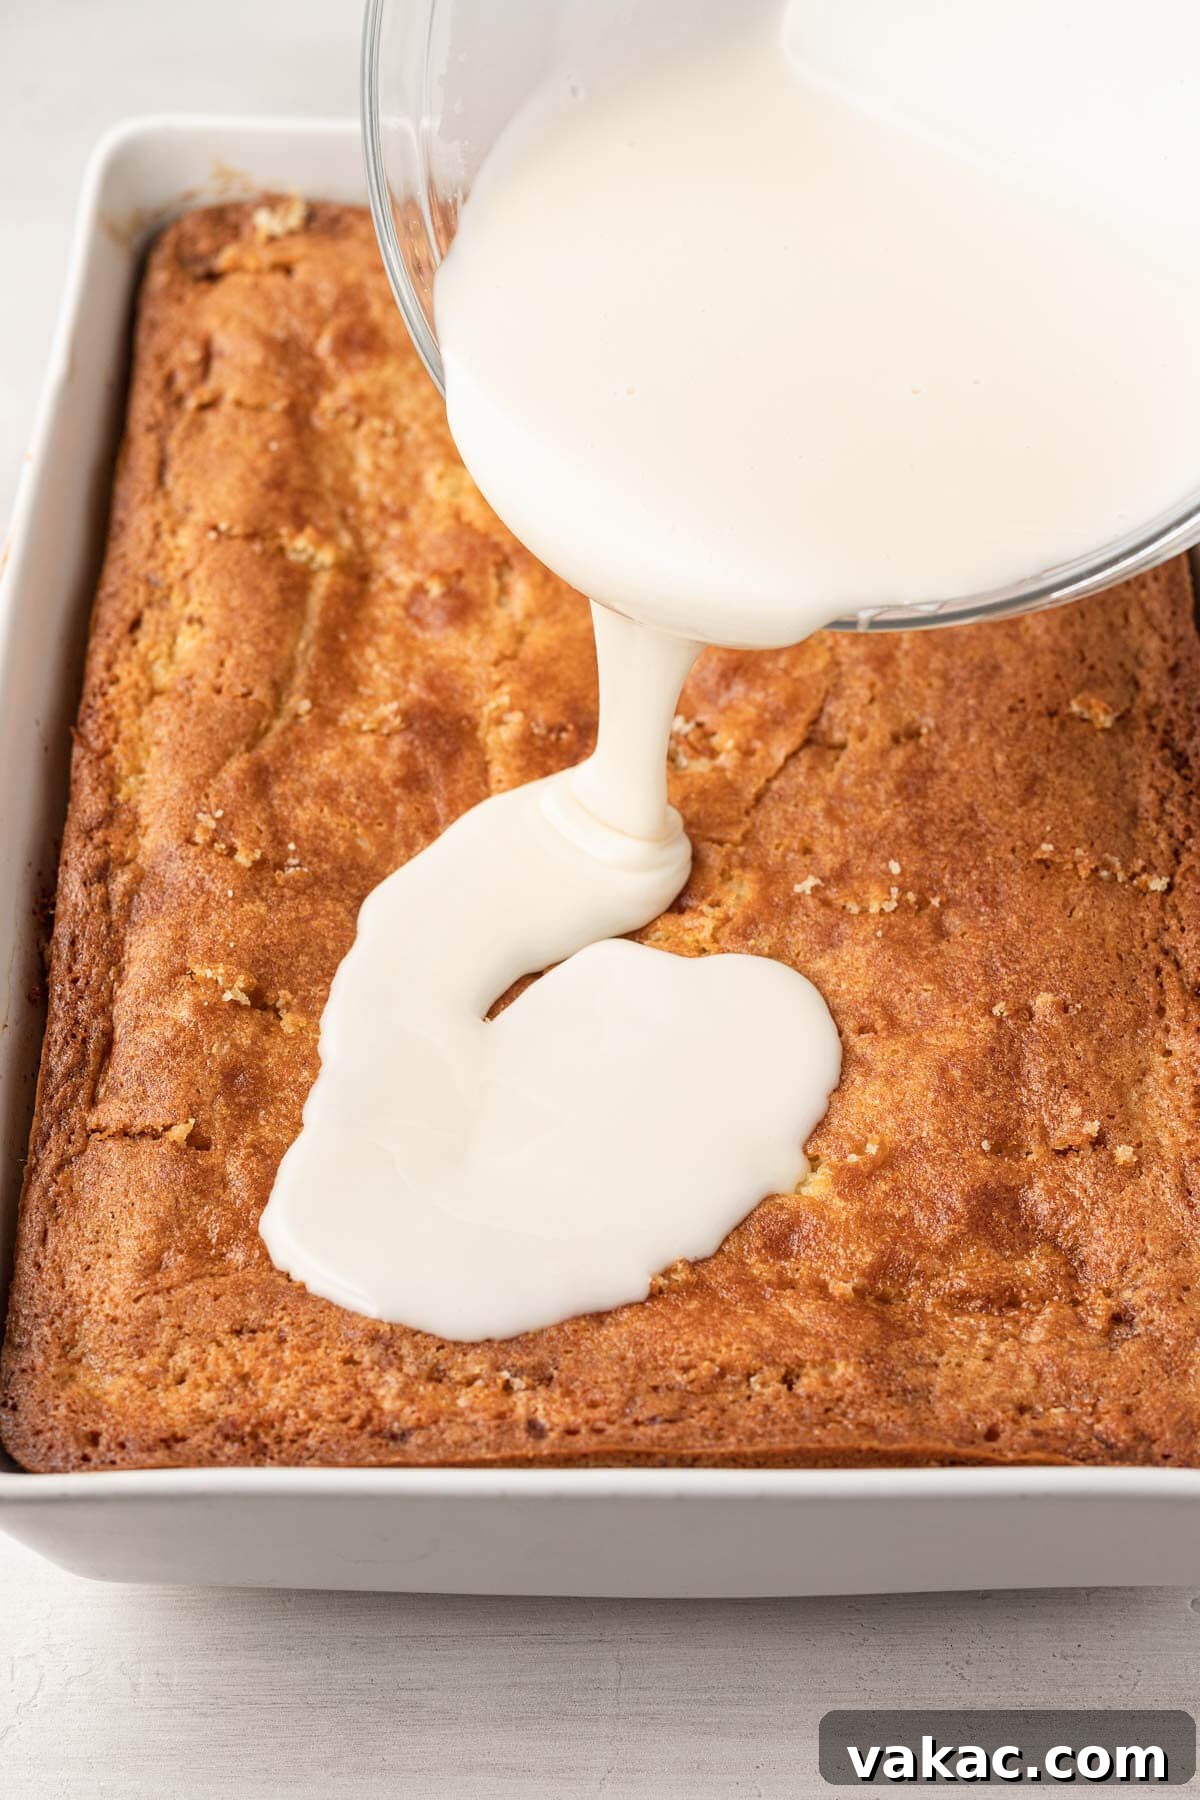
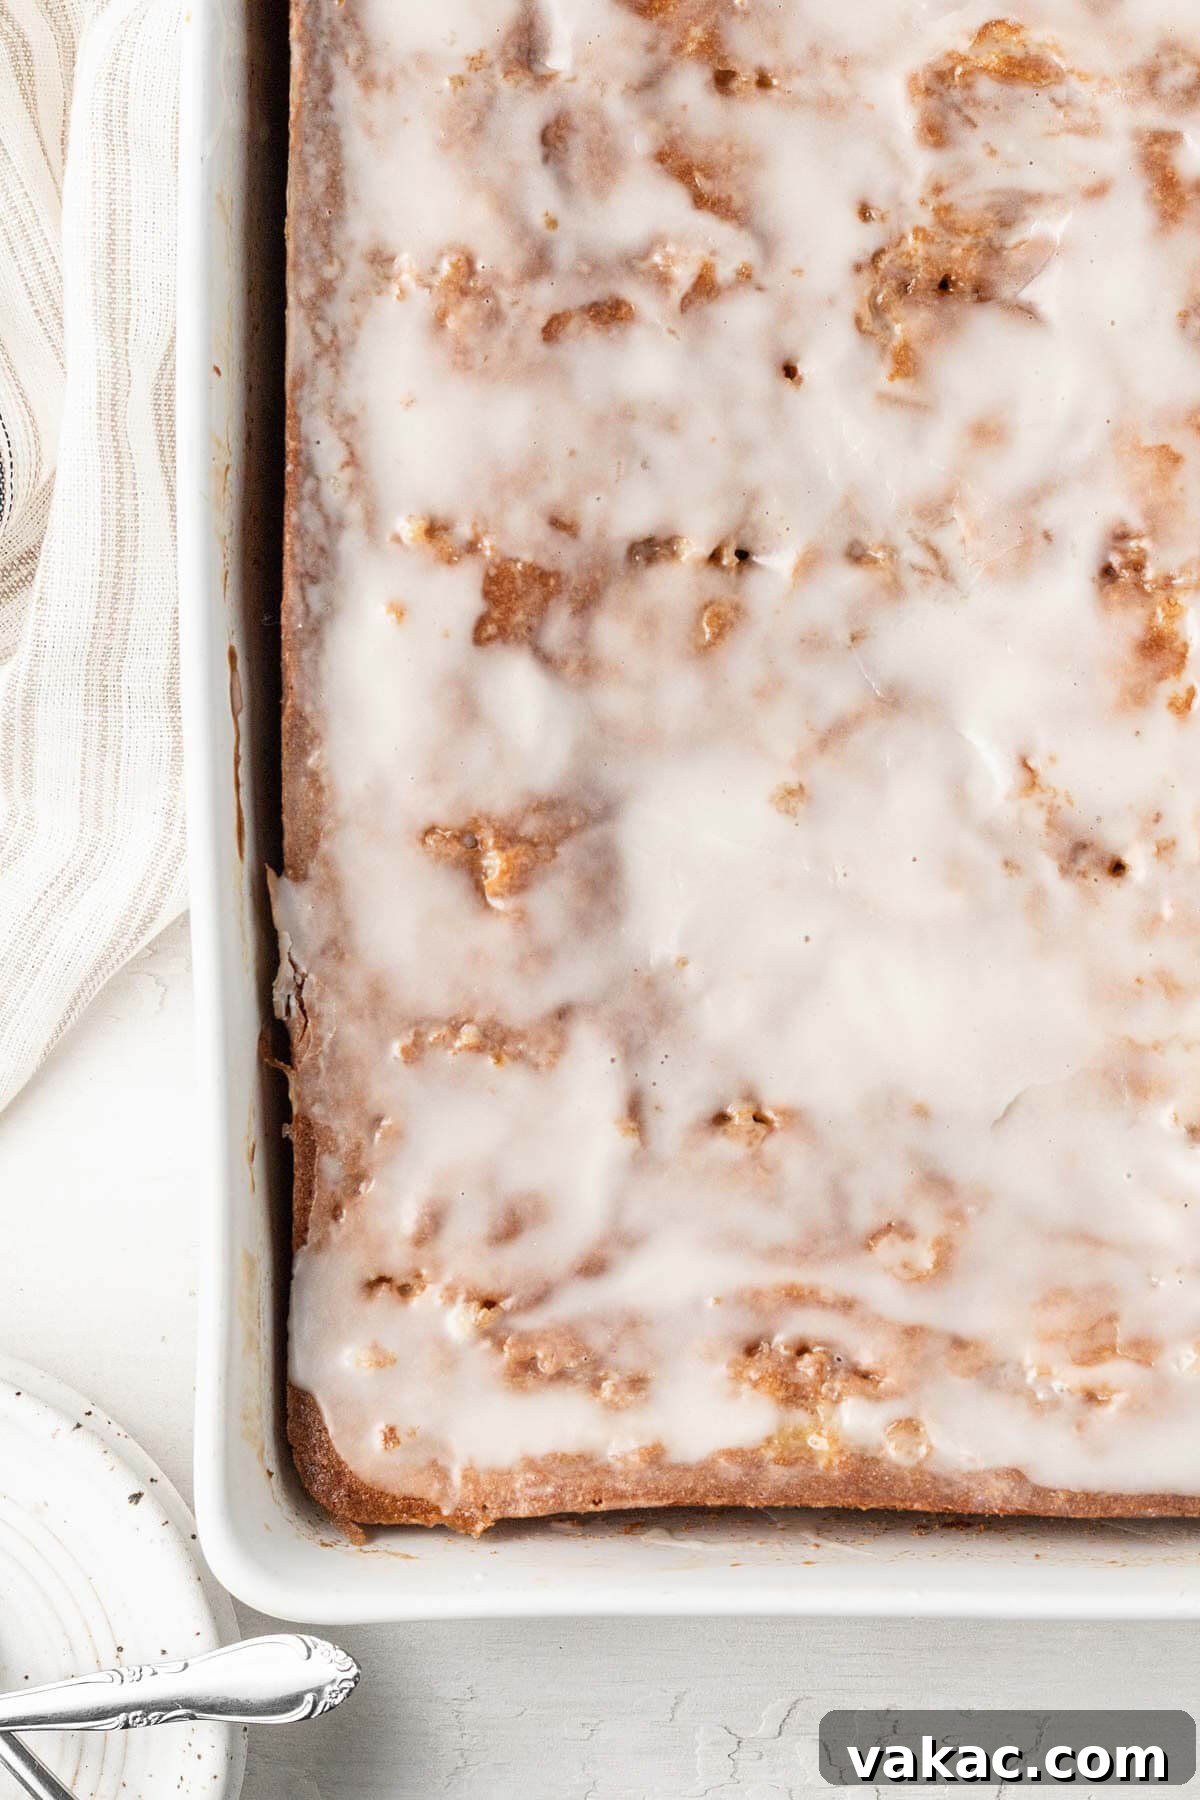
- Prepare the Icing: While the cake is baking, prepare the icing. In a large bowl, whisk together the powdered sugar, whole milk (starting with 4 tablespoons and adjusting as needed), the optional honey (if using), and the 2 teaspoons of pure vanilla extract. Whisk until the mixture is completely smooth and free of any lumps. If you’re adding honey, use 4 to 5 tablespoons of milk initially. If omitting the honey, you’ll likely need closer to 6 tablespoons of milk. The goal is a pourable, slightly thick glaze. If the icing is too thin, gradually add a little more powdered sugar. If it’s too thick, add milk, ½ teaspoon at a time, until the desired consistency is reached.
- The “Poke” and Icing Magic: This is a crucial step! As soon as the cake comes out of the oven, while it’s still warm, immediately prick the entire top surface all over with a fork or the blunt end of a wooden skewer. Make plenty of holes, going about halfway into the cake. This creates tiny reservoirs for the icing to seep into.
- Drizzle and Spread the Icing: Pour the warm icing evenly over the warm, poked cake. Use an offset spatula or the back of a spoon to gently spread the icing around, ensuring it covers the entire surface and flows into all the poked holes. This process allows the icing to absorb into the cake, creating that signature gooey, moist, and utterly delicious texture that makes a honey bun cake so irresistible.
- Cool Completely: Allow the cake to cool completely at room temperature before attempting to slice and serve it. This allows the icing to set and the flavors to fully meld, resulting in the best possible texture and taste.
FAQs & Storage for Your Honey Bun Cake
One of the many charms of this Honey Bun Cake is its adaptability, especially when it comes to preparing ahead and storage. Here are answers to some common questions to help you enjoy your cake to the fullest:
Can the Cake Be Prepared in Advance?
Absolutely! This Honey Bun Cake is an excellent make-ahead dessert option. In fact, it needs to cool completely before it can be sliced and served, allowing the flavors to deepen and the icing to set beautifully. Preparing it a day in advance often enhances its overall taste and texture, as the icing has ample time to fully absorb into the cake.
How to Store Honey Bun Cake?
To keep your Honey Bun Cake at its peak moistness and flavor, ensure it is covered tightly. You can use plastic wrap or aluminum foil to seal the baking pan, or transfer individual slices to an airtight container. Store the cake at room temperature, away from direct sunlight or heat, for up to three to four days. The generous layer of icing acts as a natural barrier, helping to prevent the cake from drying out.
Can This Recipe Be Halved?
Yes, this recipe can be successfully halved, but you’ll need to make a slight adjustment to the eggs. Since the original recipe uses an odd number of whole eggs (three whole eggs and two egg yolks), simply cutting them in half isn’t practical. Instead, for a half-batch, I recommend using 2 large eggs (and no additional egg yolks). Cut all other ingredients in half as specified. When halving the recipe, bake it in a 9-inch square baking pan instead of a 9×13-inch pan, and adjust the baking time slightly downwards, typically around 30-35 minutes, while still checking for doneness with a toothpick.
Can You Freeze Honey Bun Cake?
This cake freezes remarkably well, allowing you to enjoy slices of this delicious treat for months to come. To freeze, first allow the cake to cool completely. For best results, I recommend slicing the cake into individual portions. Wrap each slice tightly in plastic wrap, then place the wrapped slices into a large freezer-safe bag or an airtight freezer-safe container. Stored properly, the cake will maintain its quality for up to 3 months. When you’re ready to enjoy, simply thaw the desired number of slices at room temperature for a few hours before serving.
Pro Baking Tips for a Perfect Honey Bun Cake
- Room Temperature Ingredients are Key: For the smoothest batter and best emulsification, ensure all cold ingredients, including buttermilk, eggs, egg yolks, sour cream, and butter, are at room temperature before you begin mixing. This prevents a curdled-looking batter and results in a more uniform and tender cake.
- Measuring Flour Accurately: For light and fluffy cakes, it’s crucial to measure cake flour correctly. Avoid scooping directly from the bag with your measuring cup, as this compacts the flour. Instead, spoon the flour into your measuring cup until overflowing, then level it off with the back of a knife. Better yet, use a kitchen scale for precise measurement (345 grams for cake flour).
- Don’t Overmix: After adding the dry and wet ingredients alternately, mix only until the ingredients are just combined. Overmixing develops gluten, which can lead to a dense, tough cake rather than a tender one. A few lumps are perfectly fine!
- Adjust the Filling to Your Liking: The recipe calls for a full cup of cinnamon-sugar filling, which creates a pronounced swirl. If you prefer a more subtle filling, you can easily reduce the quantity to ¾ cup of packed light brown sugar (150 grams) and 2 teaspoons of ground cinnamon.
- Icing Quantity and Consistency: While it may seem like a generous amount of icing, remember that a significant portion will seep down into the poked holes of the warm cake, creating that gooey center. If you prefer less icing on top, you can scale down the amount of powdered sugar and milk slightly. Always adjust the milk gradually to achieve your desired pourable consistency.
- Timing the Icing is Crucial: The most important tip for the icing is to apply it while the cake is still warm, immediately after poking the holes. The warmth of the cake helps the icing melt and seep deeply into the cake, creating that signature moist and sticky honey bun texture. Don’t wait for the cake to cool down.
Discover More Irresistible Cakes
If you’ve fallen in love with the homemade goodness of this Honey Bun Cake, you’re in for a treat! Explore these other fantastic cake recipes to satisfy your sweet cravings:
- Classic Vanilla Cake
- Decadent Tres Leches Cake
- Rich Cream Cheese Pound Cake
- Elegant White Cake
- Flavorful Homemade Rum Cake
Recipe Video
For a visual guide to making this delicious Honey Bun Cake, watch the step-by-step video demonstration!
Honey Bun Cake
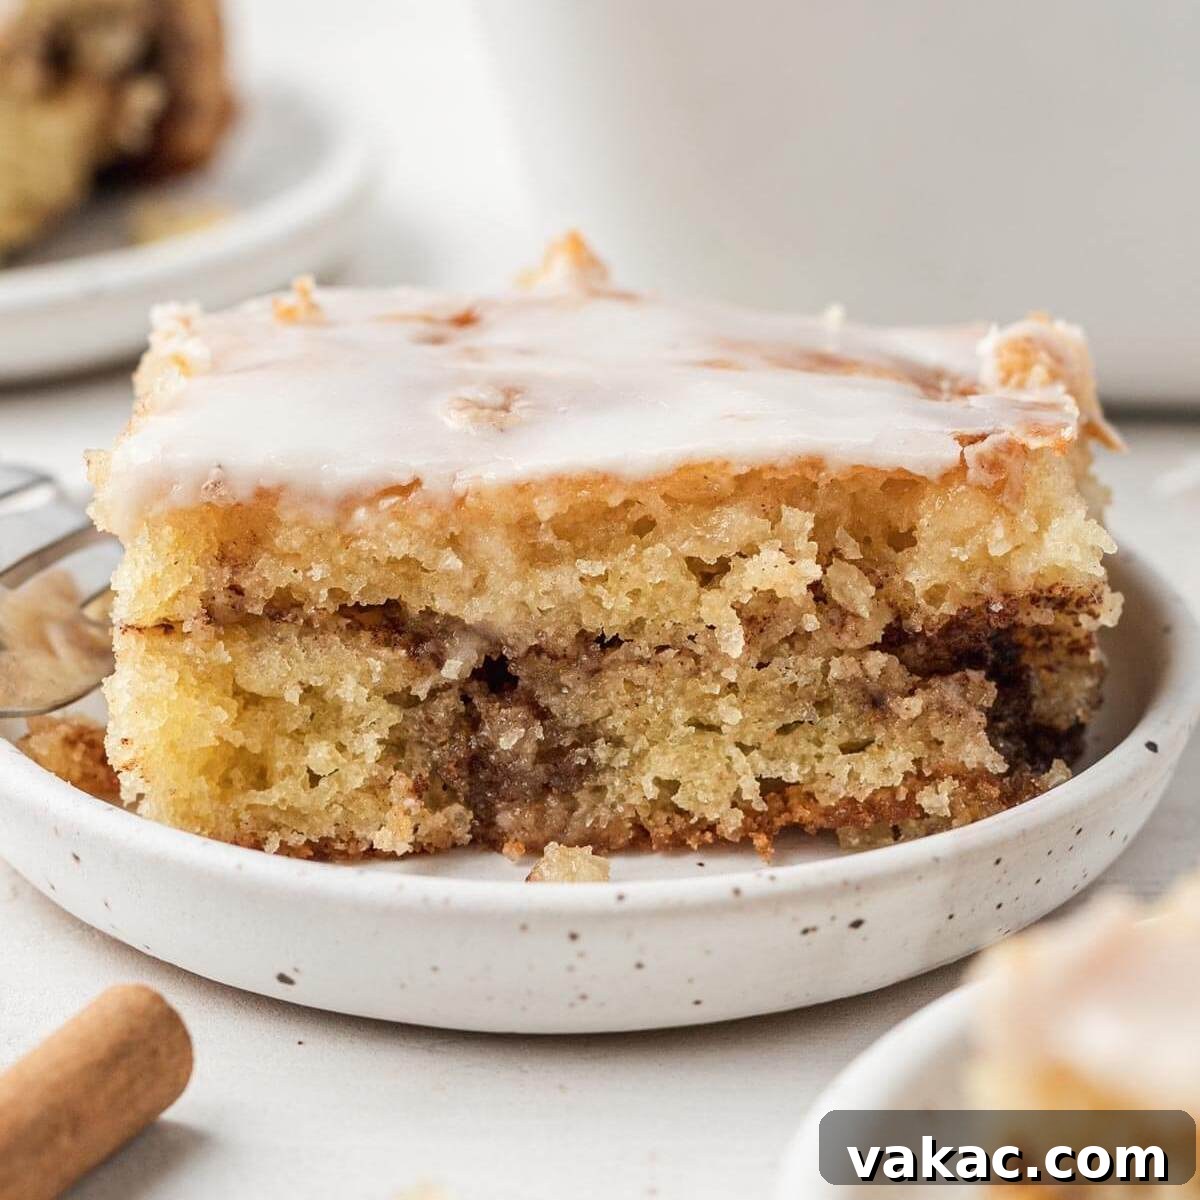
Honey bun cake tastes like a cross between a cinnamon swirl cake and a poke cake! To make it, a moist yellow cake is swirled with cinnamon-sugar, then poked all over before being drizzled with a powdered sugar icing.
Ingredients
For the cake:
- 3 cups cake flour spooned & leveled (345 grams)
- 2 teaspoons baking powder
- ½ teaspoon baking soda
- ½ teaspoon salt
- ½ cup buttermilk or whole milk room temperature (120 ml)
- ½ cup sour cream room temperature (120 grams)
- ¼ cup canola or vegetable oil (60 ml)
- 1 tablespoon pure vanilla extract (15 ml)
- 1 cup unsalted butter softened (2 sticks or 230 grams)
- 1 ¾ cups granulated sugar (350 grams)
- 3 large eggs room temperature
- 2 large egg yolks room temperature
For the filling:
- 1 cup packed light brown sugar (200 grams)
- 1 tablespoon ground cinnamon
For the icing:
- 3 cups powdered sugar (360 grams)
- 4 to 6 tablespoons whole milk (60 to 90 ml)
- 2 tablespoons honey optional (40 grams)
- 2 teaspoon pure vanilla extract
Instructions
-
To make the cake: Preheat the oven to 350°F (180°C). Spray a 9×13-inch baking pan with nonstick cooking spray and set aside.
-
In a large mixing bowl, whisk the cake flour, baking powder, baking soda, and salt together until well combined. Set aside.
-
In a large bowl or measuring cup, whisk the buttermilk (or whole milk), sour cream, oil, and vanilla extract together until well combined. Set aside.
-
In the bowl of a stand mixer fitted with the paddle attachment or in a large mixing bowl using a handheld mixer, beat the butter on low speed until smooth.
-
Add the granulated sugar and mix on medium speed for 4 to 5 minutes or until the mixture is light and fluffy.
-
Mix in the eggs and egg yolks, one at a time, making sure to stop and scrape around the bottom and sides of the bowl after each egg.
-
Add the dry ingredients in three additions alternating with the milk mixture (begin and end with the dry ingredients) on low speed. Mix in each addition until just combined, making sure not to over mix the batter.
-
Use a rubber spatula to scrape around the bottom and sides of the bowl to ensure that everything is well combined. Set the batter aside.
-
To make the filling: In a separate large mixing bowl, stir the brown sugar and cinnamon together until fully combined.
-
Scoop half of the cake batter into the prepared baking pan and spread it around into one even layer.
-
Sprinkle the brown sugar-cinnamon mixture over the batter in the pan. Then, top with the remaining cake batter and smooth the top into one even layer. If desired, you can use a knife to gently swirl the batter.
-
Bake for 38 to 45 minutes or until a toothpick inserted into the center of the cake comes out clean.
-
To make the icing: Whisk the powdered sugar, milk, honey, and vanilla extract in a large bowl until well combined and no lumps remain. If you’re adding the honey, use 4 to 5 tablespoons of milk. If you’re not using the honey, use 6 tablespoons of milk instead. If the glaze is too thin, add more powdered sugar as needed. If the glaze is too thick, add a little more milk.
-
While the cake is still warm, prick the top of it with a fork or skewer. Drizzle the icing over the cake and spread it around into one even layer.
-
Allow to cool completely before slicing and serving.
Notes
Freezing Instructions: This cake will freeze well for up to 3 months. I recommend slicing the cake, wrapping each slice tightly with plastic wrap, and storing the slices in a large freezer bag/storage container. Thaw to room temperature before serving.
Filling: If you prefer less filling, you can reduce the filling to 3/4 cup of brown sugar (150 grams) and 2 teaspoons of ground cinnamon.