
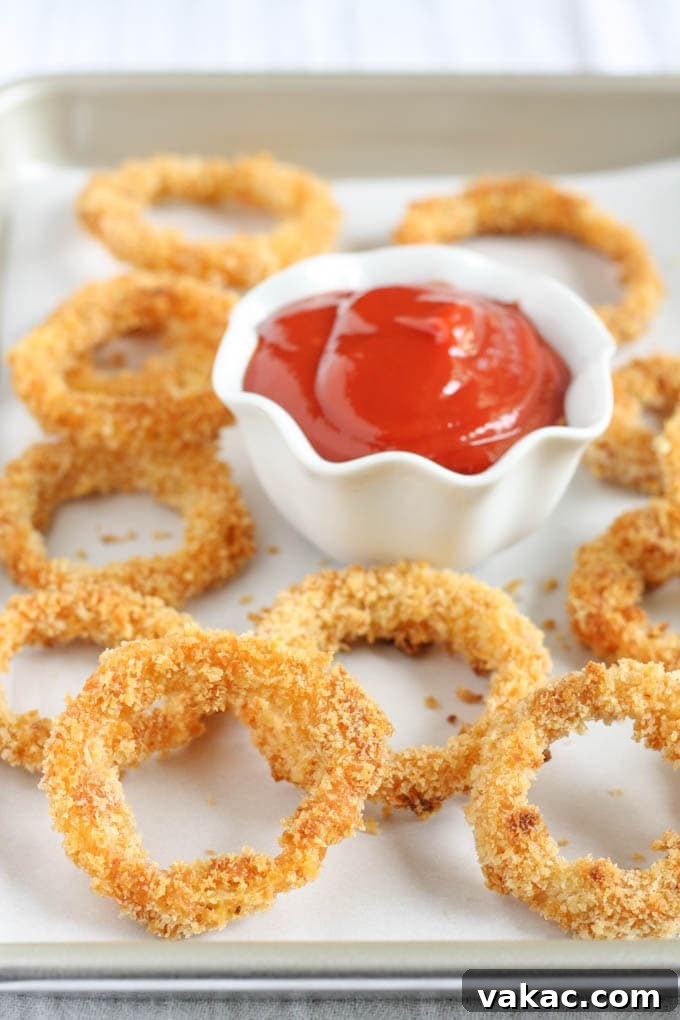
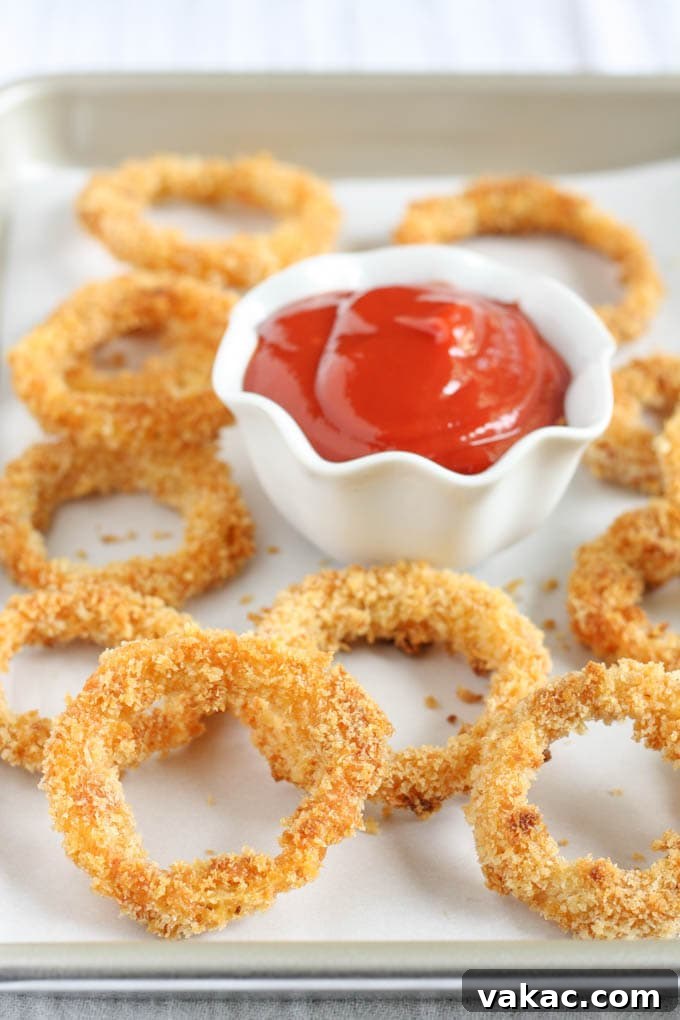
Crispy baked onion rings made with simple ingredients and much healthier than the fried version!
The Ultimate Guide to Crispy Baked Onion Rings: A Healthier Indulgence
Who can resist the irresistible crunch and savory flavor of a perfectly made onion ring? While these golden delights are a universal favorite, the traditional deep-fried preparation often comes with a side of guilt and heavy oil. But what if you could enjoy that same satisfying crispiness and rich onion flavor without all the added grease? Enter the world of **baked onion rings**, a healthier, equally delicious alternative that’s surprisingly simple to make at home. Get ready to transform your snacking and side dish game with this ultimate guide to achieving perfectly crispy, oven-baked onion rings that taste just as good, if not better, than their fried counterparts.
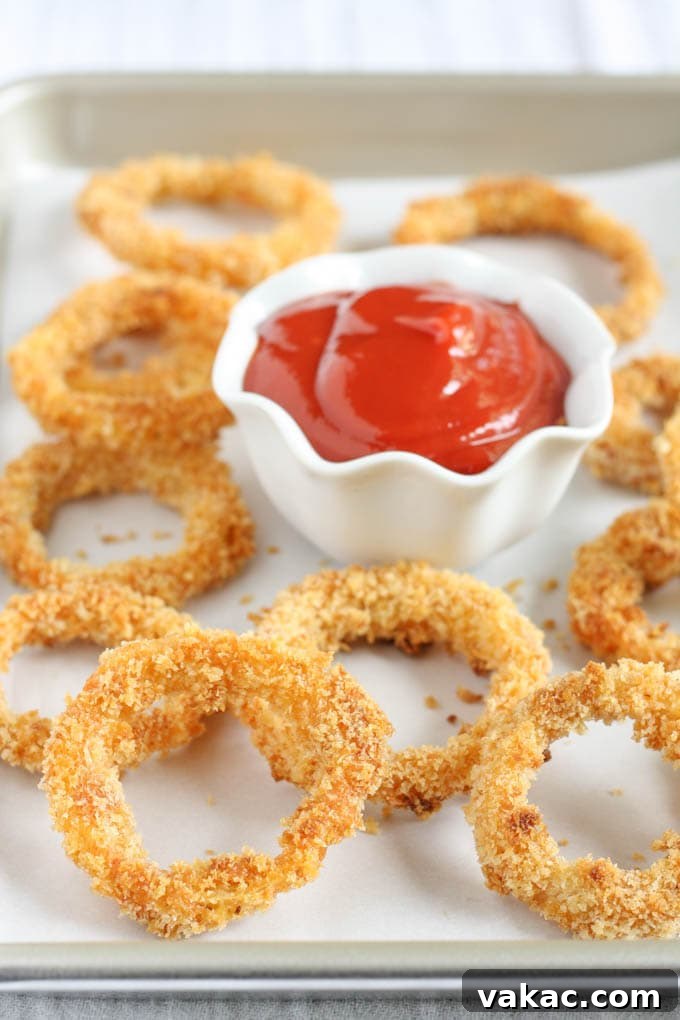
Why Choose Baked Over Fried? The Healthier, Happier Crunch You Deserve
Let’s be honest, deep-fried foods hold a special place in many hearts, offering that undeniable golden-brown crust and an immediate, satisfying crunch. However, the health drawbacks are widely recognized, ranging from excessive calorie intake to high fat content and potential digestive discomfort. Opting for oven-baked onion rings allows you to indulge in your favorite classic snack without the heavy feeling that often follows traditional fried dishes. By baking instead of deep-frying, we significantly reduce the amount of oil absorbed, leading to a much lighter, yet still incredibly flavorful and satisfyingly crispy result. This method not only makes them a smarter choice for your health but also simplifies the cooking process dramatically, eliminating the mess, potential hazards, and safety concerns associated with handling hot, deep-frying oil. No more greasy kitchen surfaces or challenging oil disposal – just a straightforward, delicious recipe that’s kind to your waistline and your entire cooking environment.
A common misconception is that “healthy” automatically implies a compromise on taste or texture, especially when it comes to beloved comfort foods like onion rings. However, we’re here to prove that with the right techniques and a few key ingredients, baked onion rings can truly rival, and often surpass, their fried predecessors in both flavor and texture. The secret lies in creating a robust, perfectly seasoned coating that crisps up beautifully in the oven, combined with onions that are tenderized to perfection from the inside out. Our meticulously crafted recipe focuses on maximizing both the flavor profile and the ultimate crunch factor, ensuring every single bite is a delightful and memorable experience. You might even find yourself preferring the cleaner, pure taste and superior crisp texture of the baked version, making it a permanent addition to your recipe rotation.
The Secret Weapon for Perfection: Buttermilk Soak for Tender Onions and Flawless Adhesion
One of the most crucial and transformative steps to achieving truly exceptional baked onion rings is the often-overlooked buttermilk soak. This isn’t just an optional preliminary step; it’s a fundamental technique that profoundly elevates both the texture and the flavor of your onion rings, setting them apart from ordinary versions. Soaking the precisely sliced onions in buttermilk for several hours accomplishes two vital and equally important goals:
- Tenderizes and Mellows the Onions: Buttermilk’s naturally mild acidity works wonders in breaking down the harsh, pungent compounds inherent in raw onions. This process effectively mellows their sharp flavor, transforming them into remarkably tender and pleasant-tasting morsels once cooked. This ensures that your baked onion rings are not only delightfully crispy on the outside but also wonderfully soft, sweet, and enjoyable to bite into, completely avoiding any lingering raw or overly strong onion aftertaste that can sometimes plague less carefully prepared versions.
- Enhances Breading Adhesion and Texture: Beyond tenderizing, the buttermilk creates a slightly tacky, ideal surface on the onion rings. This perfectly prepared surface acts as an unparalleled base, allowing the subsequent flour mixture, egg wash, and ultimately the star, panko breadcrumbs, to cling effortlessly and firmly. This steadfast adhesion ensures a thick, even, and consistent coating that remains intact throughout the baking process, preventing the breading from separating or falling off. The result is a uniformly coated onion ring that promises a consistently crispy exterior from edge to edge.
For truly outstanding results, we highly recommend soaking your onion rings for a minimum of 2 hours. However, for maximum tenderness and flavor infusion, do not hesitate to extend this duration to 4-5 hours, or even prepare them the night before and let them soak overnight in the refrigerator. The longer the soak, the more profoundly tenderized and delightfully flavorful your onions will become. To execute this step, simply slice your onions into uniform ½-inch thick rings, carefully separate them into individual rings, and immerse them completely in buttermilk within a baking dish or a large, non-reactive bowl. Ensure all onion rings are fully submerged. Cover the dish tightly and refrigerate until you’re absolutely ready to proceed with the exciting breading process. Should you find yourself without buttermilk on hand, a surprisingly effective and simple homemade substitute can be created by adding one tablespoon of white vinegar or fresh lemon juice to a cup of regular milk, then allowing it to sit undisturbed for 5-10 minutes until it visibly thickens and slightly curdles. This quick hack yields a suitable alternative for the soak.
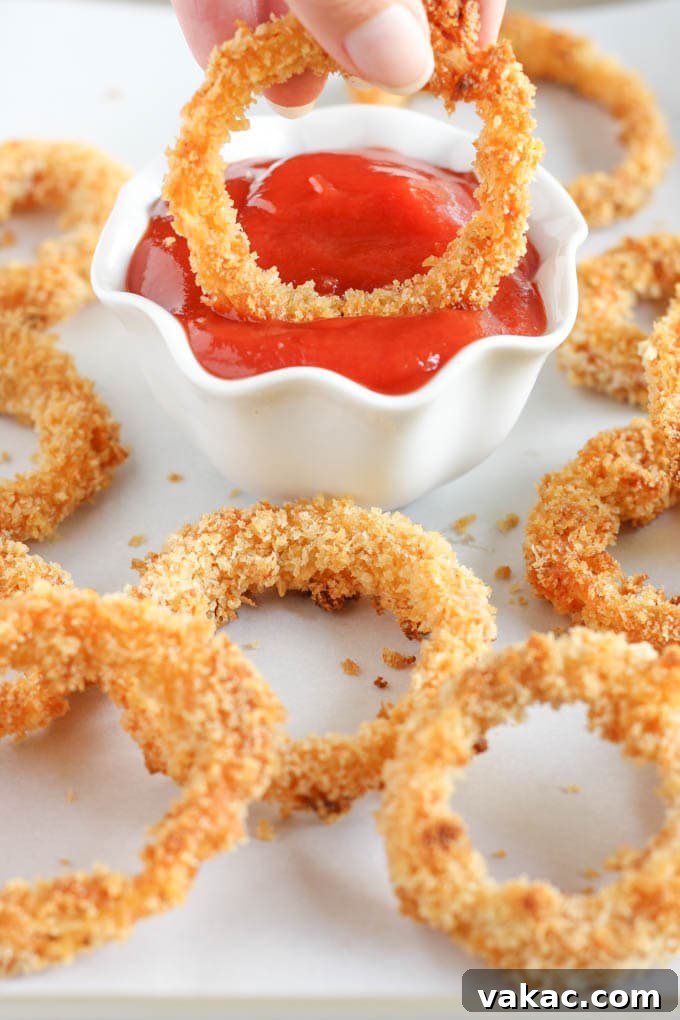
Crafting the Perfect Crispy Coating: The Essential Breading Process
Once your beautifully prepared onions have emerged from their essential buttermilk bath, drained and ready, it’s time to embark on the crucial journey of creating that utterly irresistible crispy coating. The cornerstone of a truly crunchy and structurally sound baked onion ring lies in a meticulous, three-stage breading process. Each consecutive step is thoughtfully designed to build upon the last, ensuring maximum adherence, foundational flavor, and superior texture:
- The Flavorful Flour Mixture: Begin by lightly dusting each buttermilk-soaked onion ring in a carefully seasoned flour mixture. This initial coating serves multiple critical functions: it expertly absorbs any lingering excess moisture from the buttermilk, providing a perfectly dry and receptive surface for the subsequent egg wash to cling to. Crucially, this is your first opportunity to infuse a foundational layer of flavor! Don’t be shy about seasoning your flour generously. A well-balanced blend of all-purpose flour, fragrant smoked paprika, sea salt, and freshly ground black pepper adds a delightful savory base that will permeate every single bite. For those who appreciate an extra zest, consider incorporating a pinch of finely ground garlic powder, onion powder, or a subtle whisper of cayenne pepper for a gentle warmth.
- The Crucial Egg Wash: Next, gently dip the flour-dusted rings into a bowl of well-beaten eggs. The egg wash plays the role of a vital binder, essentially acting as the adhesive “glue” that firmly secures the final, crispy breadcrumb layer to the onion. Ensure that the entire onion ring is thoroughly covered in the egg, but be sure to allow any significant excess egg to drip off. This prevents the formation of a gummy, unpleasant texture and ensures the subsequent breading adheres perfectly without becoming overly thick or pasty.
- The Panko Powerhouse: This is arguably the most pivotal stage where the true magic happens, elevating your baked onion rings to an unparalleled level of crispiness. Panko breadcrumbs, a distinct Japanese-style breadcrumb, are inherently coarser, flakier, and boast a more airy texture compared to traditional breadcrumbs. This unique structure allows them to absorb significantly less oil and achieve an incredibly light, airy, and spectacularly crisp texture when baked, far surpassing the potential of standard breadcrumbs. After dipping in egg, firmly press and roll each onion ring into the panko, ensuring it is completely and generously coated on all sides. The more panko that adheres, the more magnificently crispy your final onion ring will be! Be prepared to replenish your panko bowl as you progress through the batch, as it tends to clump slightly from the egg residue, requiring fresh crumbs for optimal coating.
Once each onion ring is perfectly coated, meticulously arrange them in a single, uncrowded layer on your prepared baking sheets. A crucial, yet often overlooked, tip for achieving that coveted golden-brown, extra-crispy finish, reminiscent of deep-frying without the oil, is to generously and evenly spray both sides of the breaded rings with a fine mist of nonstick cooking spray or a high-quality olive oil spray. This delicate application of oil effectively mimics the browning and crisping effects of frying, promoting a beautiful golden hue and an utterly satisfying crunch without the need to submerge them in a vat of hot, heavy oil.
Baking for Golden Perfection: Achieving that Signature Oven-Baked Crunch
With your exquisitely breaded onion rings meticulously prepared and waiting, it’s time for their grand finale in the oven. Mastering the proper baking technique is absolutely essential for transforming them from mere coated onions into magnificent, golden, and unequivocally crispy delights. Begin by preheating your oven to a precise 400°F (200°C). This relatively high temperature is critical to achieving a rapid, even crisping of the panko breadcrumbs, ensuring they become beautifully golden and crunchy without overcooking or burning the tender onion inside. To prevent any sticking and to facilitate effortless cleanup, thoroughly line two large baking sheets with parchment paper. Carefully arrange your breaded onion rings in a single, uncrowded layer on the prepared sheets, making certain there’s ample space between each individual ring. This crucial spacing allows hot air to circulate freely around every surface, which is paramount for crisping; overcrowding the pan will inevitably lead to steaming instead of proper crisping, resulting in regrettably soggy onion rings.
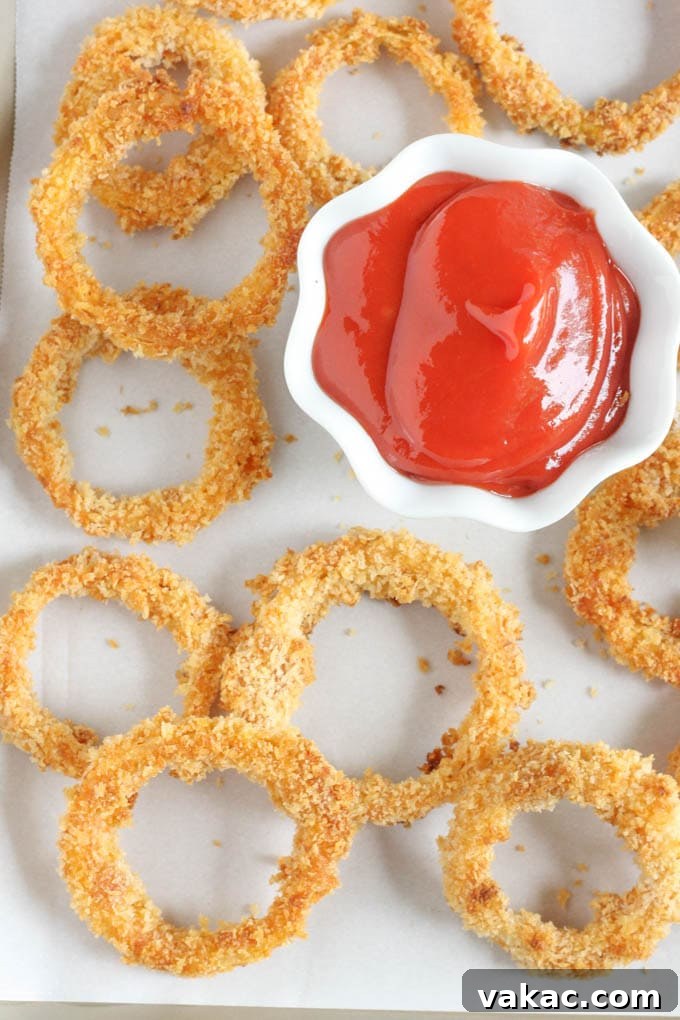
Bake the onion rings for an initial period of approximately 15 minutes. After this first baking phase, carefully remove the baking sheets from the oven. Using a pair of delicate tongs, gently flip each onion ring to expose the underside, ensuring symmetrical browning and crispness. Lightly but generously spray the newly exposed side with additional cooking spray, reinforcing that coveted crispy texture. Then, promptly return them to the oven for an additional 10-15 minutes, or until they have achieved a rich, beautiful golden-brown color and are wonderfully crispy to the touch. It’s important to keep a close eye on them during these final minutes of baking, as oven temperatures can sometimes vary, and the goal is perfectly toasted rings, not burnt ones. Once baked to an ideal perfection, immediately remove them from the oven and serve without delay. Baked onion rings are unequivocally at their absolute best when enjoyed piping hot and fresh, perhaps paired with a generous dollop of your favorite dipping sauce!
Baked Onion Rings Recipe
This recipe delivers incredibly crispy baked onion rings made with simple ingredients, offering a delicious and much healthier alternative to the traditional fried version!
Prep Time: 2 hours 20 minutes (includes essential soaking time)
Cook Time: 30 minutes
Total Time: 2 hours 50 minutes
Yields: 4 generous servings
Cuisine: American
Course: Side Dish, Appetizer, Snack
Author: Danielle Rye
Print Recipe | Pin Recipe
Ingredients
- 2 large yellow onions, peeled
- 1 quart low-fat buttermilk (or homemade substitute)
- 1/2 cup all-purpose flour
- 1 teaspoon smoked paprika
- 1/2 teaspoon salt, or adjust to taste
- 1/4 teaspoon freshly ground black pepper, or adjust to taste
- 2 large eggs, thoroughly beaten
- 1 1/2 cups panko breadcrumbs (ensure to have a little extra on hand)
- Nonstick cooking spray or a fine mist olive oil spray
Instructions
- Prepare and Soak Onions: Begin by carefully slicing off both ends of the yellow onions, then peel away the dry, outer papery layers. Slice the onions into uniform ½-inch thick rings. Gently separate each ring. Discard any excessively small, broken, or unusable pieces, or reserve them for another culinary use. Place all the separated onion rings into a 9×13-inch baking dish or a suitably large bowl. Pour the entire quart of low-fat buttermilk over the onion rings, ensuring they are completely submerged. Cover the dish tightly and refrigerate for a minimum of 2 hours. For optimal tenderness and flavor, an ideal soaking time is 4-5 hours, or even overnight if prepping ahead.
- Preheat Oven and Prepare Baking Sheets: Approximately 30 minutes before you intend to bake, preheat your oven to a precise 400°F (200°C). Prepare two large baking sheets by lining them with parchment paper; this prevents sticking and simplifies cleanup. Set them aside.
- Set Up Breading Stations: In a shallow, small bowl, combine the all-purpose flour, smoked paprika, ½ teaspoon of salt, and ¼ teaspoon of black pepper. Whisk these dry ingredients together thoroughly until well combined. In a second shallow bowl, whisk the 2 large eggs until they are smooth and uniformly beaten. In a third shallow bowl, pour the 1½ cups of panko breadcrumbs. If desired, you can add a tiny pinch of salt to the panko for an additional layer of seasoning.
- Bread the Onion Rings: Retrieve the soaked onion rings from the refrigerator. Working methodically, one onion ring at a time, lift a ring from the buttermilk (allowing any excess buttermilk to drip away). First, dredge it completely in the seasoned flour mixture, shaking off any superfluous flour. Next, fully dip it into the beaten egg, ensuring complete coating, then allow any extra egg to drip back into the bowl. Finally, firmly press the onion ring into the panko breadcrumbs, ensuring it is thoroughly and evenly coated on all sides. Gently press the panko onto the ring to help it adhere robustly. Systematically repeat this three-step breading process for all your onion rings. If your panko supply dwindles or becomes overly clumpy, simply add more to the bowl.
- Arrange for Baking: Carefully place the breaded onion rings in a single, well-spaced layer on the prepared baking sheets. It is crucial to leave a small amount of space between each ring to allow for proper air circulation, which is vital for achieving an even cook and optimal crispness. Once all rings are arranged, generously spray the tops of all the onion rings with nonstick cooking spray or a fine mist of olive oil spray; this aids in achieving that desirable golden-brown and crispy finish.
- First Bake Cycle: Place the baking sheets in the preheated oven and bake for exactly 15 minutes.
- Flip and Second Bake Cycle: After 15 minutes, carefully remove the baking sheets from the oven. Using kitchen tongs, gently flip each onion ring over to ensure even browning and crisping on both sides. Generously spray the newly exposed side of the onion rings with more cooking spray. Return the baking sheets to the oven and continue to bake for an additional 10-15 minutes, or until the onion rings achieve a rich golden-brown hue and are wonderfully crispy to the touch. Monitor them closely during the final minutes to prevent over-browning.
- Serve Immediately: Remove the perfectly baked onion rings from the oven and serve them piping hot. These crispy delights are best enjoyed fresh, ideally accompanied by your favorite dipping sauce, such as classic ketchup, creamy ranch, a tangy homemade aioli, or a smoky BBQ sauce. Enjoy every guilt-free bite!
Expert Tips for Success
- Uniform Onion Slices: The consistency of your onion slices is key. Aim for all rings to be approximately ½-inch thick. This uniformity ensures that all onion rings cook evenly at the same rate, preventing some from being undercooked while others become over-crisped or even burnt.
- Avoid Overcrowding: This cannot be stressed enough – give your onion rings ample space on the baking sheet. Overcrowding inhibits proper hot air circulation, causing the rings to steam rather than crisp, which inevitably leads to a disappointing, soggy texture. Utilize two baking sheets if necessary to ensure sufficient spacing.
- Generous Oil Spraying: Do not be shy with the nonstick cooking spray or olive oil spray! A thorough, even coat on both sides of the breaded rings is absolutely crucial for achieving that coveted golden-brown color and the deeply satisfying crispy texture without resorting to deep-frying.
- Serve Without Delay: Baked onion rings are unequivocally at their peak when served fresh from the oven, still warm and wonderfully crispy. While they can be stored and reheated, some of their initial crispness will naturally diminish over time.
- Seasoning Throughout: Remember that a significant portion of the overall flavor comes from seasoning the flour mixture. Don’t neglect this step; it forms the foundational taste profile of your onion rings. Consider tasting the seasoned flour (raw, in small amounts) to adjust for your preference.
Storage and Reheating Recommendations
If you find yourself with any delicious leftover baked onion rings, allow them to cool completely to room temperature before transferring them to an airtight container. They can be stored in the refrigerator for a period of up to 2-3 days. To revive their crispness and enjoy them again, arrange the cooled onion rings in a single layer on a clean baking sheet. Reheat them in a preheated oven at 350°F (175°C) for approximately 5-8 minutes, or until they are thoroughly heated through and have regained a pleasing crisp texture. Alternatively, an air fryer offers an excellent and even quicker method for reheating: place them in a preheated air fryer at 350°F for about 3-5 minutes, shaking the basket halfway through.
Customization and Delicious Variations
This foundational recipe for baked onion rings is incredibly versatile and serves as a perfect canvas for your culinary creativity. Feel free to experiment with these exciting ideas to customize your next batch:
- Spice Lover’s Edition: For those who appreciate a fiery kick, incorporate a generous pinch of cayenne pepper, a dash of chili powder, or even a few drops of your favorite hot sauce into the buttermilk soak or the flour mixture.
- Parmesan Perfection: Elevate the savory profile by mixing some finely grated Parmesan cheese directly into your panko breadcrumbs. This adds a delightful umami depth and an extra layer of crunch.
- Aromatic Herb Infusion: Introduce a fragrant twist by stirring dried herbs such as oregano, thyme, Italian seasoning, or even finely chopped fresh parsley (mixed with the panko) into the flour mixture for an aromatic boost.
- Garlic Lover’s Dream: Enhance the savory essence with a teaspoon of garlic powder added to the flour mixture. For an even bolder flavor, a pinch of onion powder can also be added.
- Gluten-Free Alternative: This recipe is remarkably easy to adapt for gluten-free diets. Simply swap out the all-purpose flour for your preferred gluten-free all-purpose flour blend and ensure you use certified gluten-free panko breadcrumbs. The preparation process remains entirely the same!
- Air Fryer Method for Ultimate Crispness: For an even quicker preparation and potentially a crispier result, consider using an air fryer. Preheat your air fryer to 375°F (190°C). Generously spray both the air fryer basket and the coated onion rings with oil. Cook the onion rings in small batches, avoiding overcrowding, for 10-15 minutes, making sure to flip them halfway through, until they are beautifully golden and wonderfully crisp.
Enjoy Your Guilt-Free Indulgence!
There you have it – a comprehensive, step-by-step guide to crafting the most delicious, incredibly crispy baked onion rings that are not only a healthier choice but also exceptionally satisfying. Say goodbye to the deep fryer and enthusiastically embrace a lighter, easier, and equally flavorful way to enjoy this universally beloved classic. Whether you’re planning to serve them as a dynamic side dish, an irresistible appetizer, or simply a delightful snack, these oven-baked beauties are absolutely guaranteed to be a resounding hit with everyone at your table. Don’t delay, gather your ingredients, grab your onions, and get baking today! We encourage you to share your culinary creations with us and let us know what your absolute favorite dipping sauce is in the comments section below.
Did you make this recipe? We’d love to see it!
Mention @livewellbakeoften on Instagram or tag your photos with #livewellbakeoften so we can admire your delicious creations!