
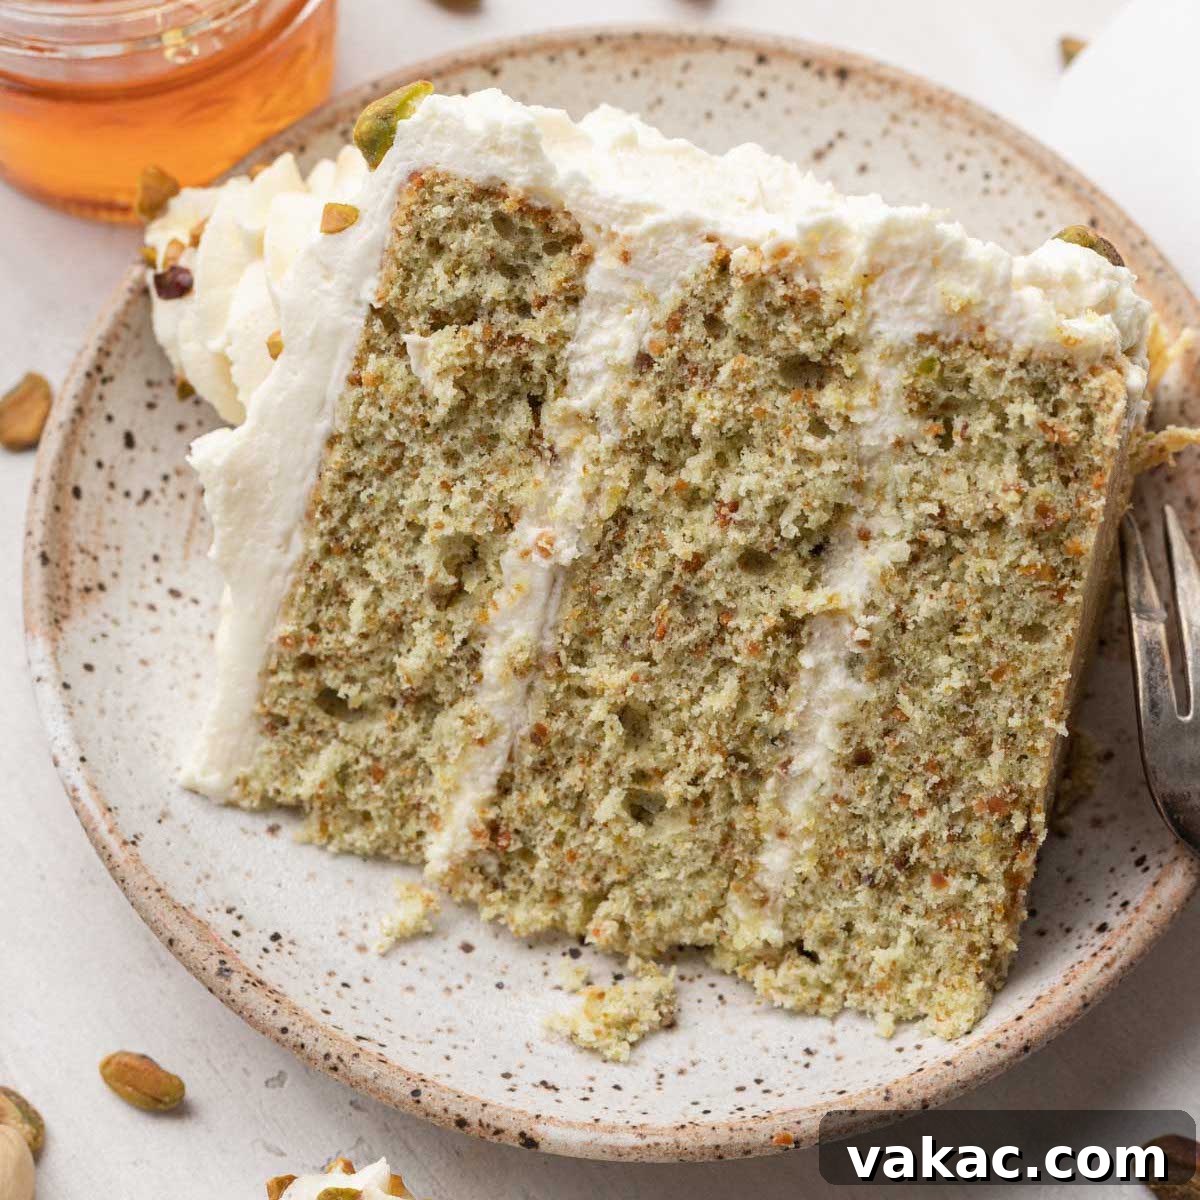
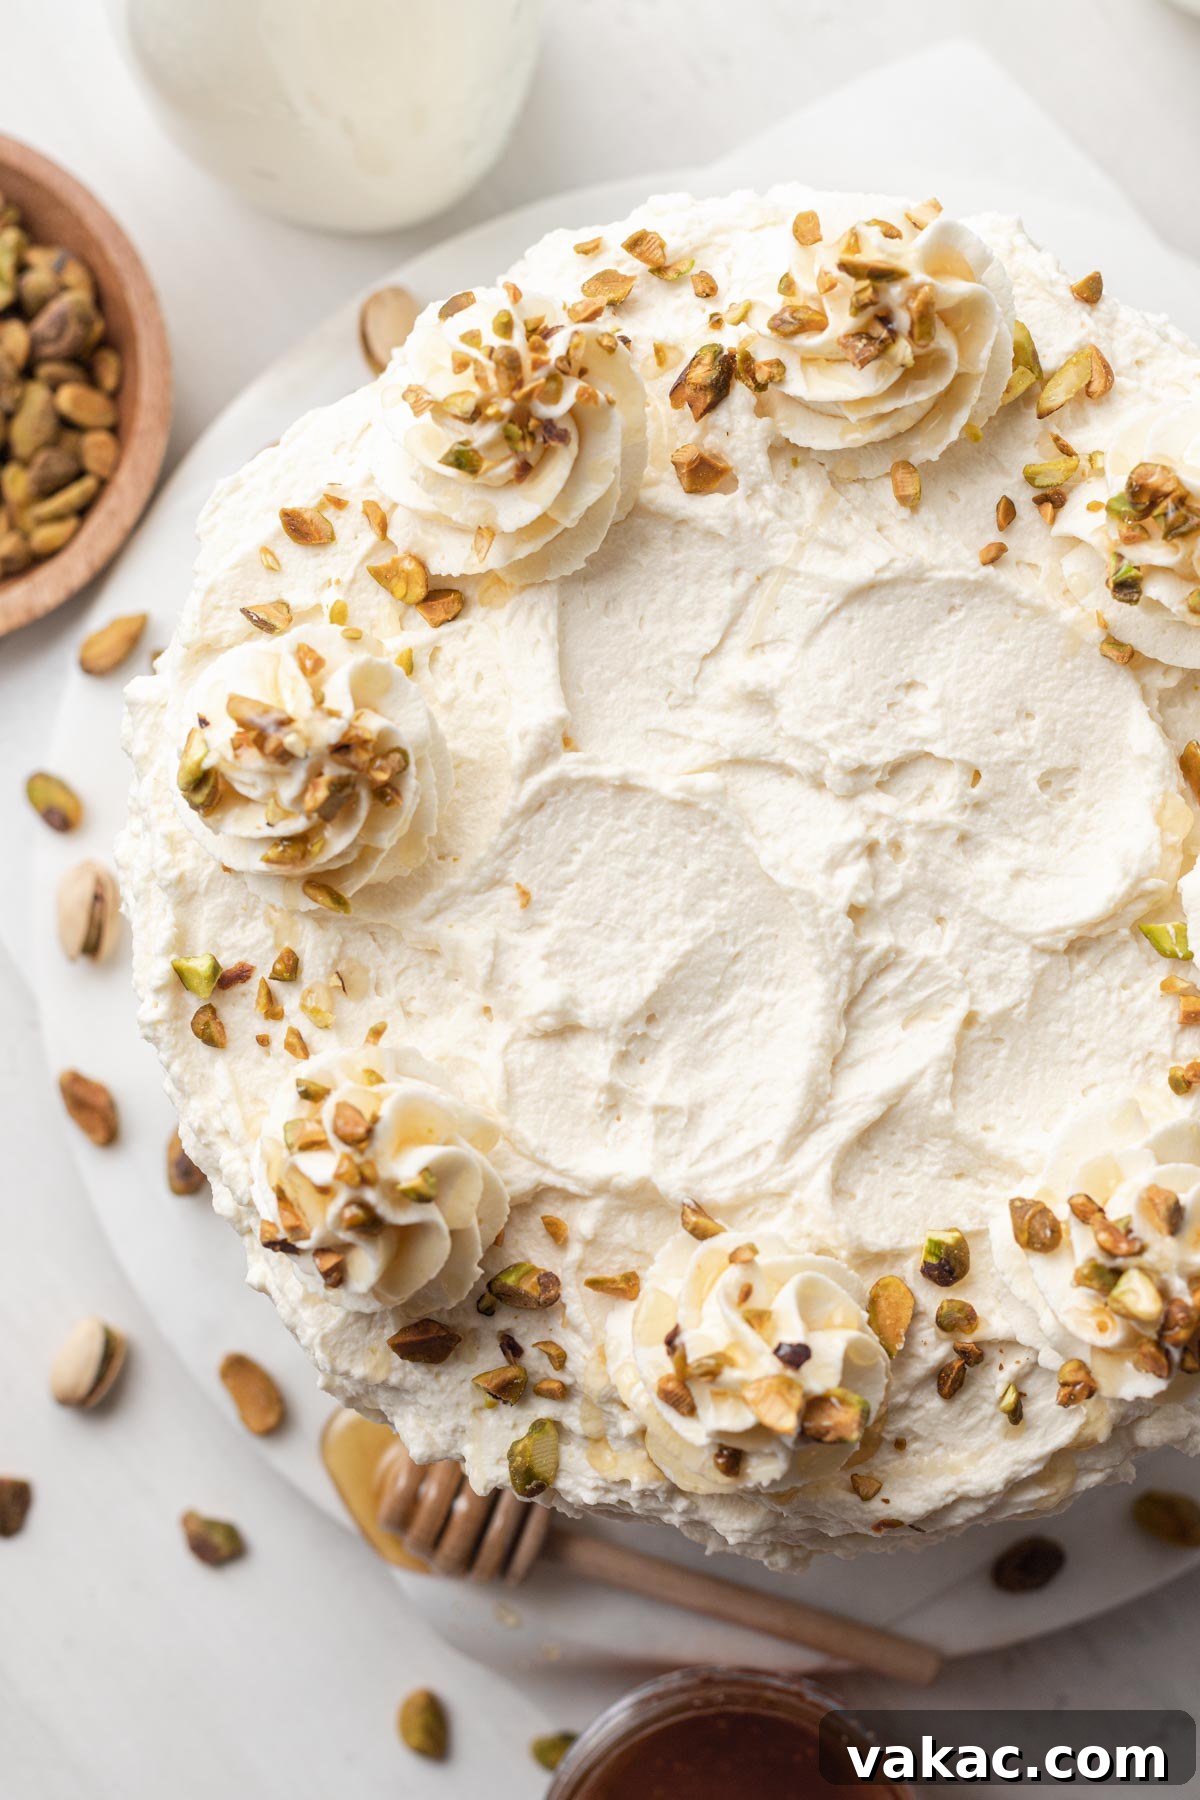
Welcome to the enchanting world of homemade baking, where every bite tells a story of exquisite flavor and dedication. This ultimate pistachio cake recipe promises an unforgettable culinary experience, infusing every crumb with the rich, earthy, and subtly sweet essence of finely blended pistachios. Crowned with a luxurious whipped honey mascarpone frosting, this cake is not just a dessert; it’s a celebration of flavor and texture, perfect for any special occasion or simply to indulge your sweet cravings. Prepare to impress your guests and delight your family with a cake that truly stands out.
What makes this pistachio cake so special? It’s the commitment to pure, unadulterated pistachio goodness. We start with premium roasted and salted pistachios, meticulously ground into fine crumbs. These vibrant green specks are then carefully incorporated into the cake batter, ensuring a deep, authentic pistachio flavor that resonates through every moist layer. For a touch of visual appeal without overwhelming the natural hue, a few drops of optional green food coloring are added, giving the cake layers a subtle, inviting tint without turning them artificially bright.
Beyond the star ingredient, the cake batter is thoughtfully enhanced with vanilla and almond extracts. These extracts don’t overshadow the pistachios; instead, they harmonize, adding layers of aromatic depth and a gentle nuttiness that elevates the overall flavor profile. The grand finale is a cloud-like whipped mascarpone frosting, sweetened with golden honey and delicate powdered sugar, providing a creamy, rich contrast to the cake’s texture and flavor.
This isn’t just another cake recipe; it’s a testament to the beauty of baking from scratch. You won’t find any instant pudding mixes or shortcuts here. Every component is prepared with care, making this an easy-to-master yet elegantly sophisticated layer cake that’s surprisingly achievable for bakers of all skill levels. It’s the perfect centerpiece for birthdays, anniversaries, holidays, or any moment deserving of something truly spectacular.
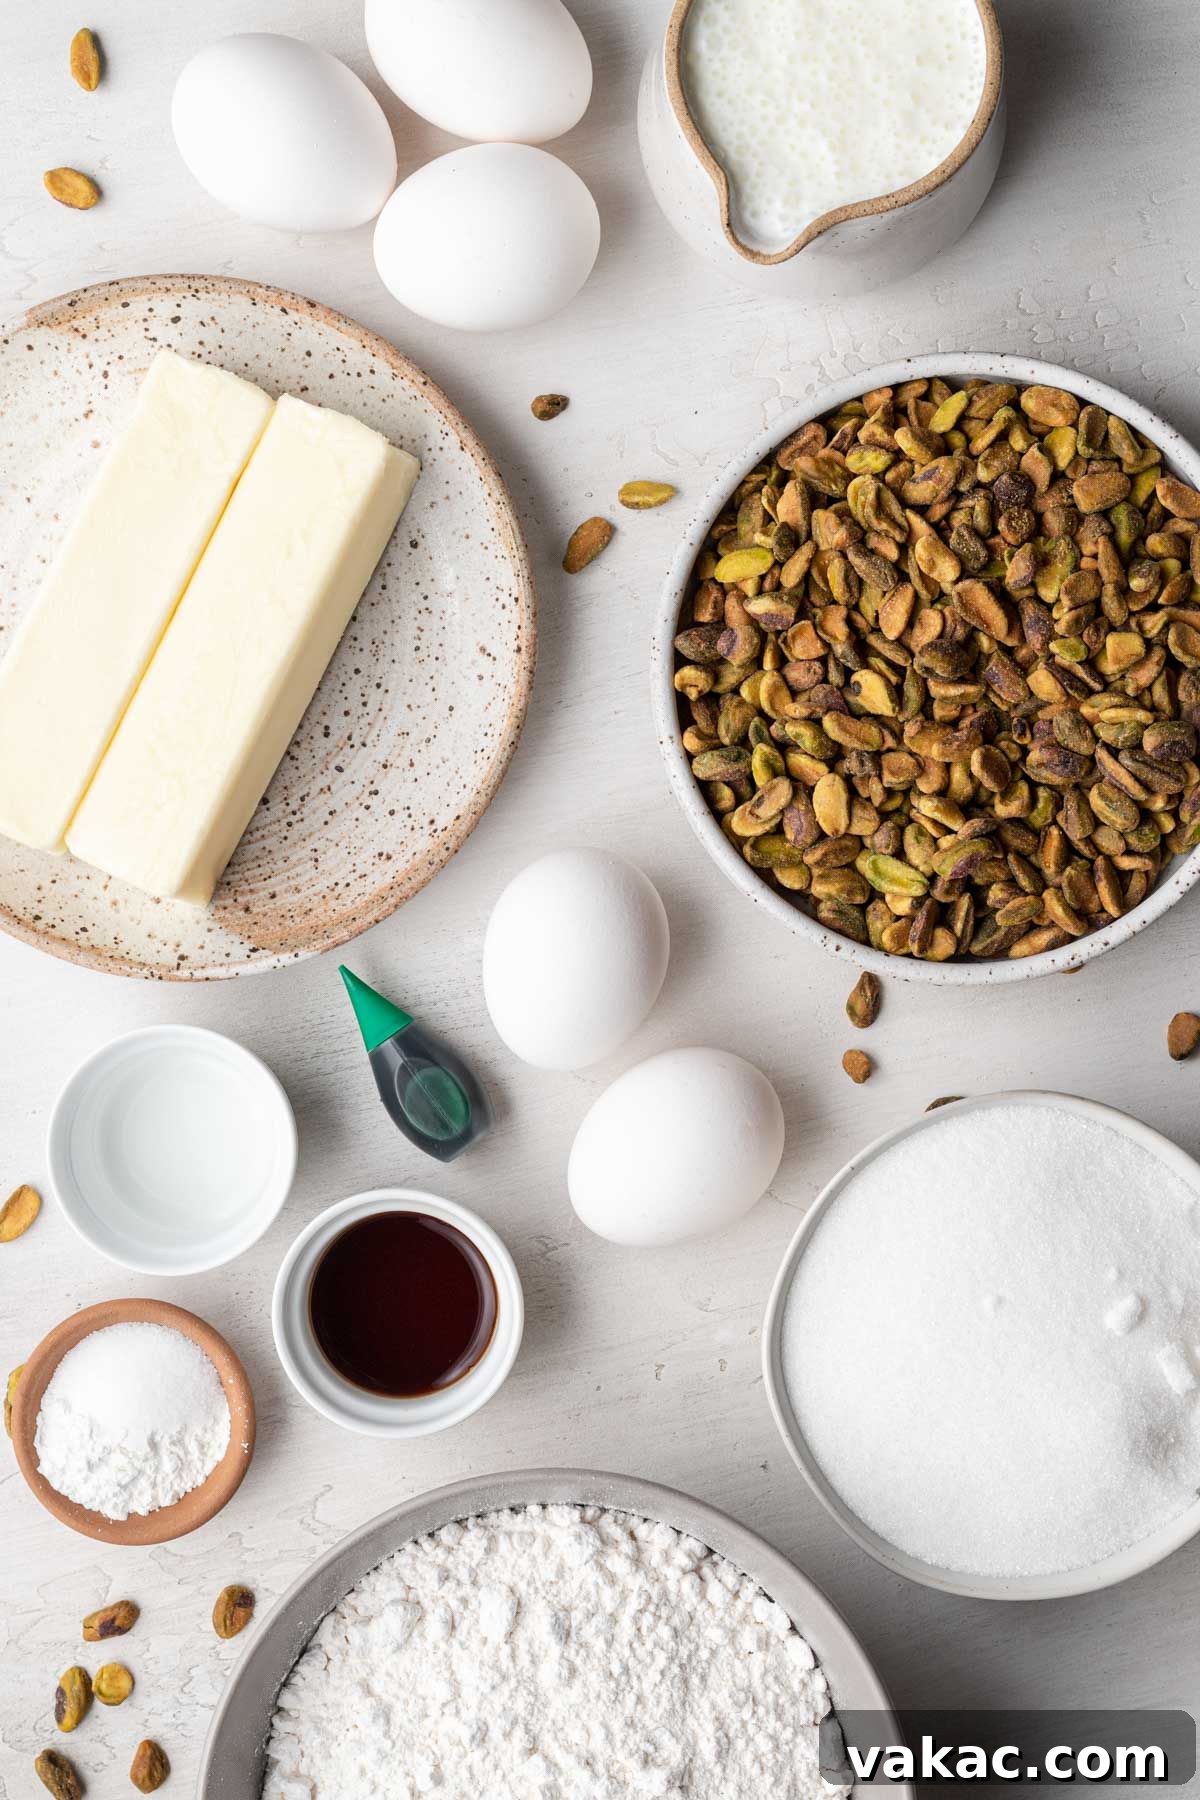
Unveiling the Essential Ingredients for Your Pistachio Masterpiece
Crafting a truly exceptional pistachio cake requires a selection of fresh, high-quality ingredients. While many are pantry staples, a few special items are key to achieving the cake’s signature flavor and moist texture. Here’s a detailed look at what you’ll need to gather:
- Pistachios: The heart of this cake! Opt for shelled, roasted, and salted pistachios for the best flavor. Roasting enhances their nutty depth, and a touch of salt perfectly balances the sweetness of the cake. Brands like Wonderful Pistachios are excellent choices. If using unsalted pistachios, remember to increase the salt content in your dry ingredients as specified in the recipe.
- Cake Flour: For an incredibly soft, tender, and light crumb, cake flour is highly recommended. Its lower protein content results in a more delicate texture compared to all-purpose flour. If you don’t have cake flour on hand, you can easily create a substitute by combining regular all-purpose flour with a small amount of cornstarch.
- Almond Extract: This subtle addition provides a delicate, complementary nuttiness that enhances the pistachio flavor without overpowering it. The cake won’t taste distinctly “almondy”; instead, it will simply boast a richer, more complex nutty profile.
- Buttermilk: Essential for a tender crumb and exceptional moistness. The acidity in buttermilk reacts with the baking powder, contributing to the cake’s rise and creating a fine, delicate texture. If you don’t have buttermilk, a quick homemade substitute can be made in minutes using milk and a touch of lemon juice or vinegar.
- Green Food Coloring: This is entirely optional but can provide a beautiful, subtle green hue to your cake layers, making them visually striking. Just a few drops are enough to achieve a natural, inviting color without appearing artificial.
- Mascarpone Cheese: The secret to the frosting’s unparalleled richness and creamy texture. Mascarpone is an Italian cream cheese, much richer and less tangy than traditional cream cheese due to its higher fat content. Ensure your mascarpone is cool but not ice-cold from the fridge; removing it about 20 minutes before use allows it to soften slightly for easier blending without becoming watery.
- Honey: Not just a sweetener, honey imparts a unique, aromatic flavor to the mascarpone frosting that beautifully complements the pistachios. Its distinct floral notes elevate the frosting beyond simple sweetness. Due to its specific flavor and consistency, substituting honey with other liquid sweeteners is not recommended for this recipe.
- Unsalted Butter: Softened to room temperature, butter is crucial for creaming with sugar, creating air pockets that contribute to the cake’s light texture.
- Granulated Sugar: Provides sweetness and helps create a tender crumb.
- Baking Powder: A leavening agent that helps the cake rise, ensuring a light and airy structure.
- Salt: Balances the sweetness and enhances all the flavors in the cake.
- Pure Vanilla Extract: A classic flavor enhancer that adds warmth and depth to both the cake and the frosting.
- Large Egg Whites: Whipped to stiff peaks, egg whites are gently folded into the batter to create an incredibly light and airy cake texture. Ensure they are at room temperature for optimal whipping volume.
- Heavy Whipping Cream: The base for the whipped component of the mascarpone frosting, providing body and lightness. It must be very cold to whip properly.
- Powdered Sugar: Fine powdered sugar dissolves smoothly into the frosting, ensuring a silky, lump-free consistency.
Step-by-Step Guide to Crafting Your Delicious Pistachio Layer Cake
While this pistachio layer cake exudes elegance, its preparation is surprisingly straightforward. Follow these detailed steps to create a show-stopping dessert that will delight everyone who tries it.
Preparing the Cake Layers
- Prepare Your Cake Pans: Begin by preheating your oven to 350ºF (175°C). This ensures a consistent baking temperature from the moment your batter enters the oven. Prepare three 8-inch round cake pans by spraying them generously with non-stick cooking spray. For easy removal and to prevent sticking, line the bottom of each pan with a round of parchment paper. This simple step makes a big difference in presentation and prevents frustration.
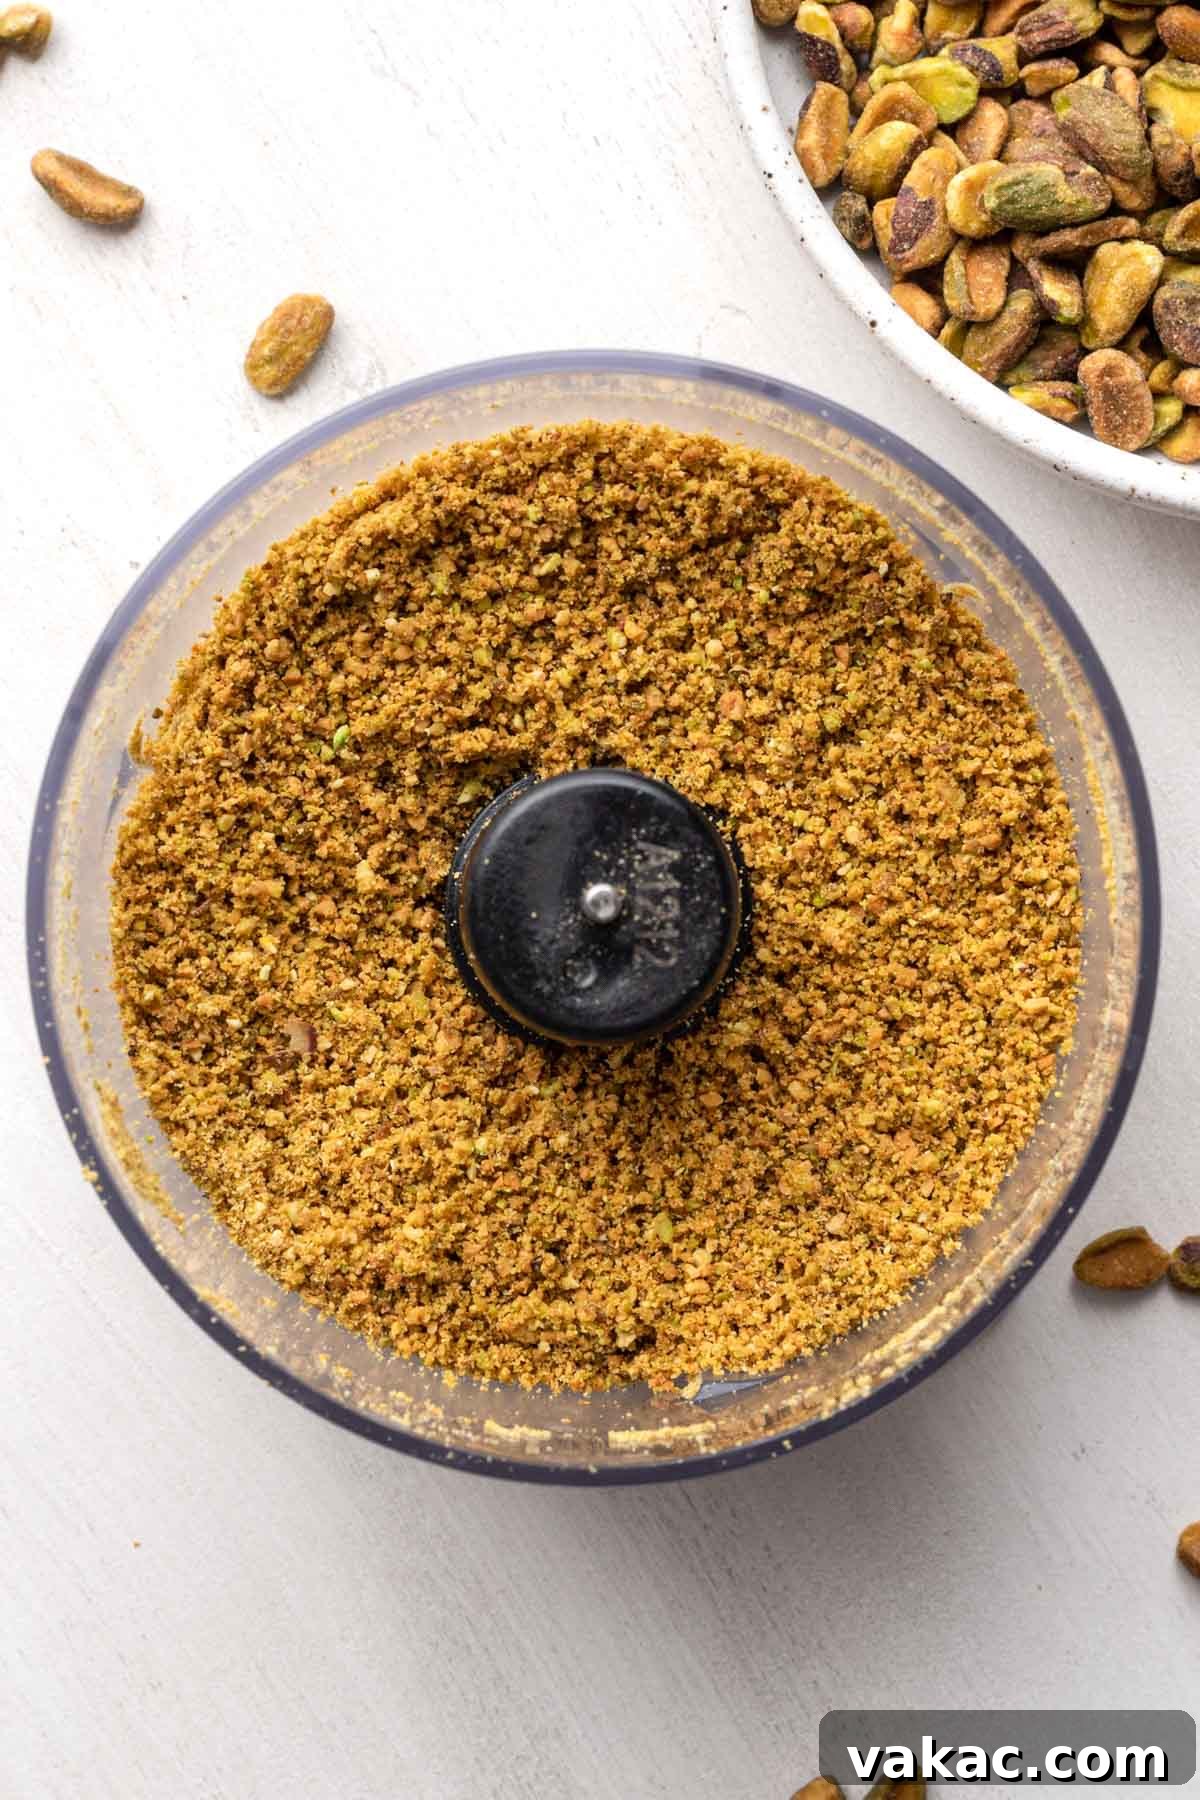
- Grind the Pistachios to Perfection: Place your shelled pistachios into a blender or food processor. Pulse them until they achieve the texture of fine crumbs, similar to coarse sand. The key here is not to over-process them! Keep a close eye on the pistachios, especially if using a high-speed blender, as they can quickly transform from lovely crumbs into a thick, oily pistachio butter. Fine crumbs ensure an even distribution of flavor and texture throughout the cake.
- Combine the Dry Ingredients: In a large mixing bowl, thoroughly whisk together the cake flour, finely ground pistachio crumbs, baking powder, and salt. Whisking ensures that the leavening agents and salt are evenly distributed throughout the flour, preventing pockets of unmixed ingredients and promoting an even rise. Set this mixture aside.
- Whisk the Wet Ingredients: In a separate medium bowl, combine the buttermilk (ensure it’s at room temperature), pure vanilla extract, almond extract, and the optional green food coloring. Stir until all the ingredients are well blended. Having your wet ingredients pre-mixed ensures quick and even incorporation into the batter.
- Cream the Butter and Sugar: In the bowl of a stand mixer fitted with a paddle attachment (or using a large mixing bowl with an electric handheld mixer), beat the softened unsalted butter on low speed until smooth. Gradually add the granulated sugar, then increase the speed to medium and beat for about 4 to 5 minutes. This creaming process is vital; it incorporates air into the butter and sugar mixture, creating a light, fluffy base that contributes to the cake’s airy texture. The mixture should become noticeably lighter in color and texture.
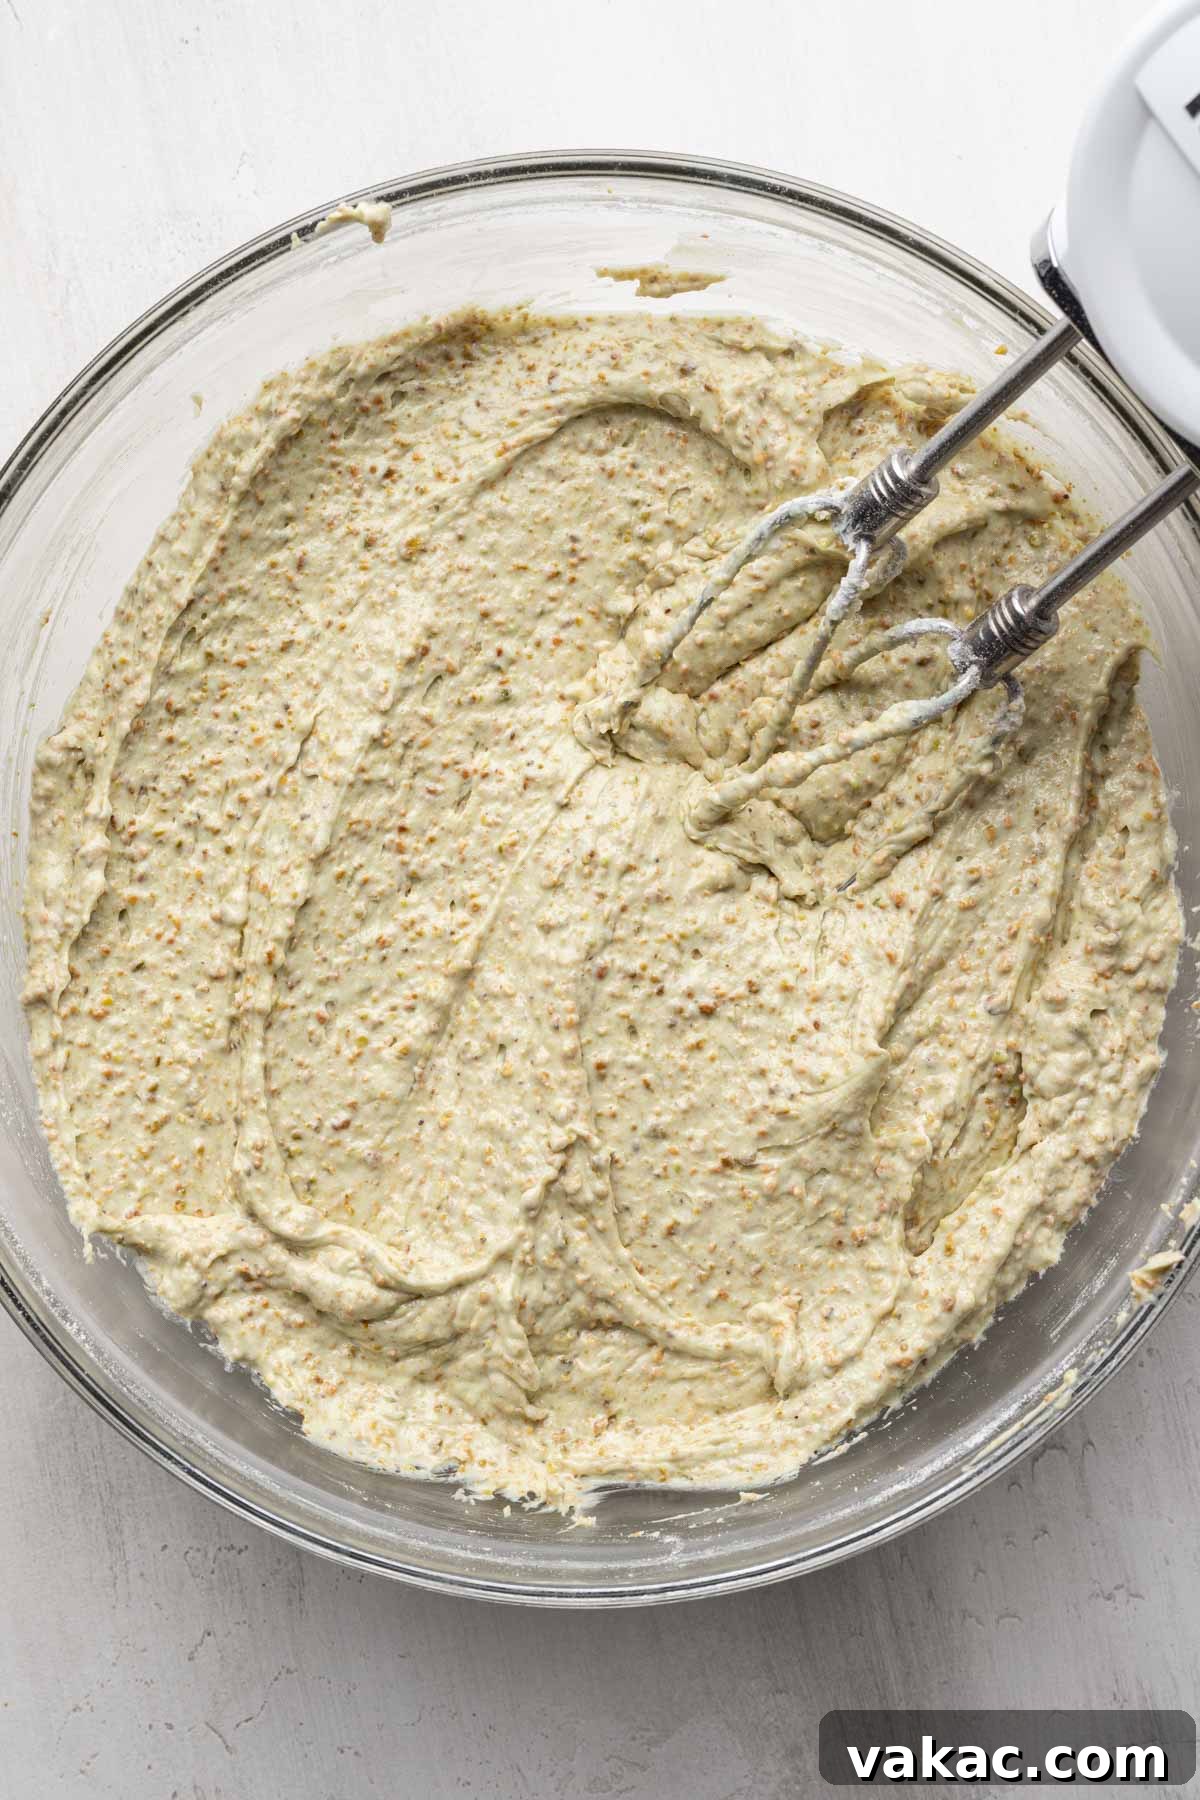
- Alternate Dry and Wet Additions: With the mixer on low speed, begin adding the dry ingredient mixture to the creamed butter and sugar in three additions, alternating with the buttermilk mixture in two additions. Always start and end with the dry ingredients. Mix each addition only until just combined. Overmixing at this stage can develop the gluten in the flour too much, resulting in a tough cake. The goal is a smooth, homogenous batter without excess beating.
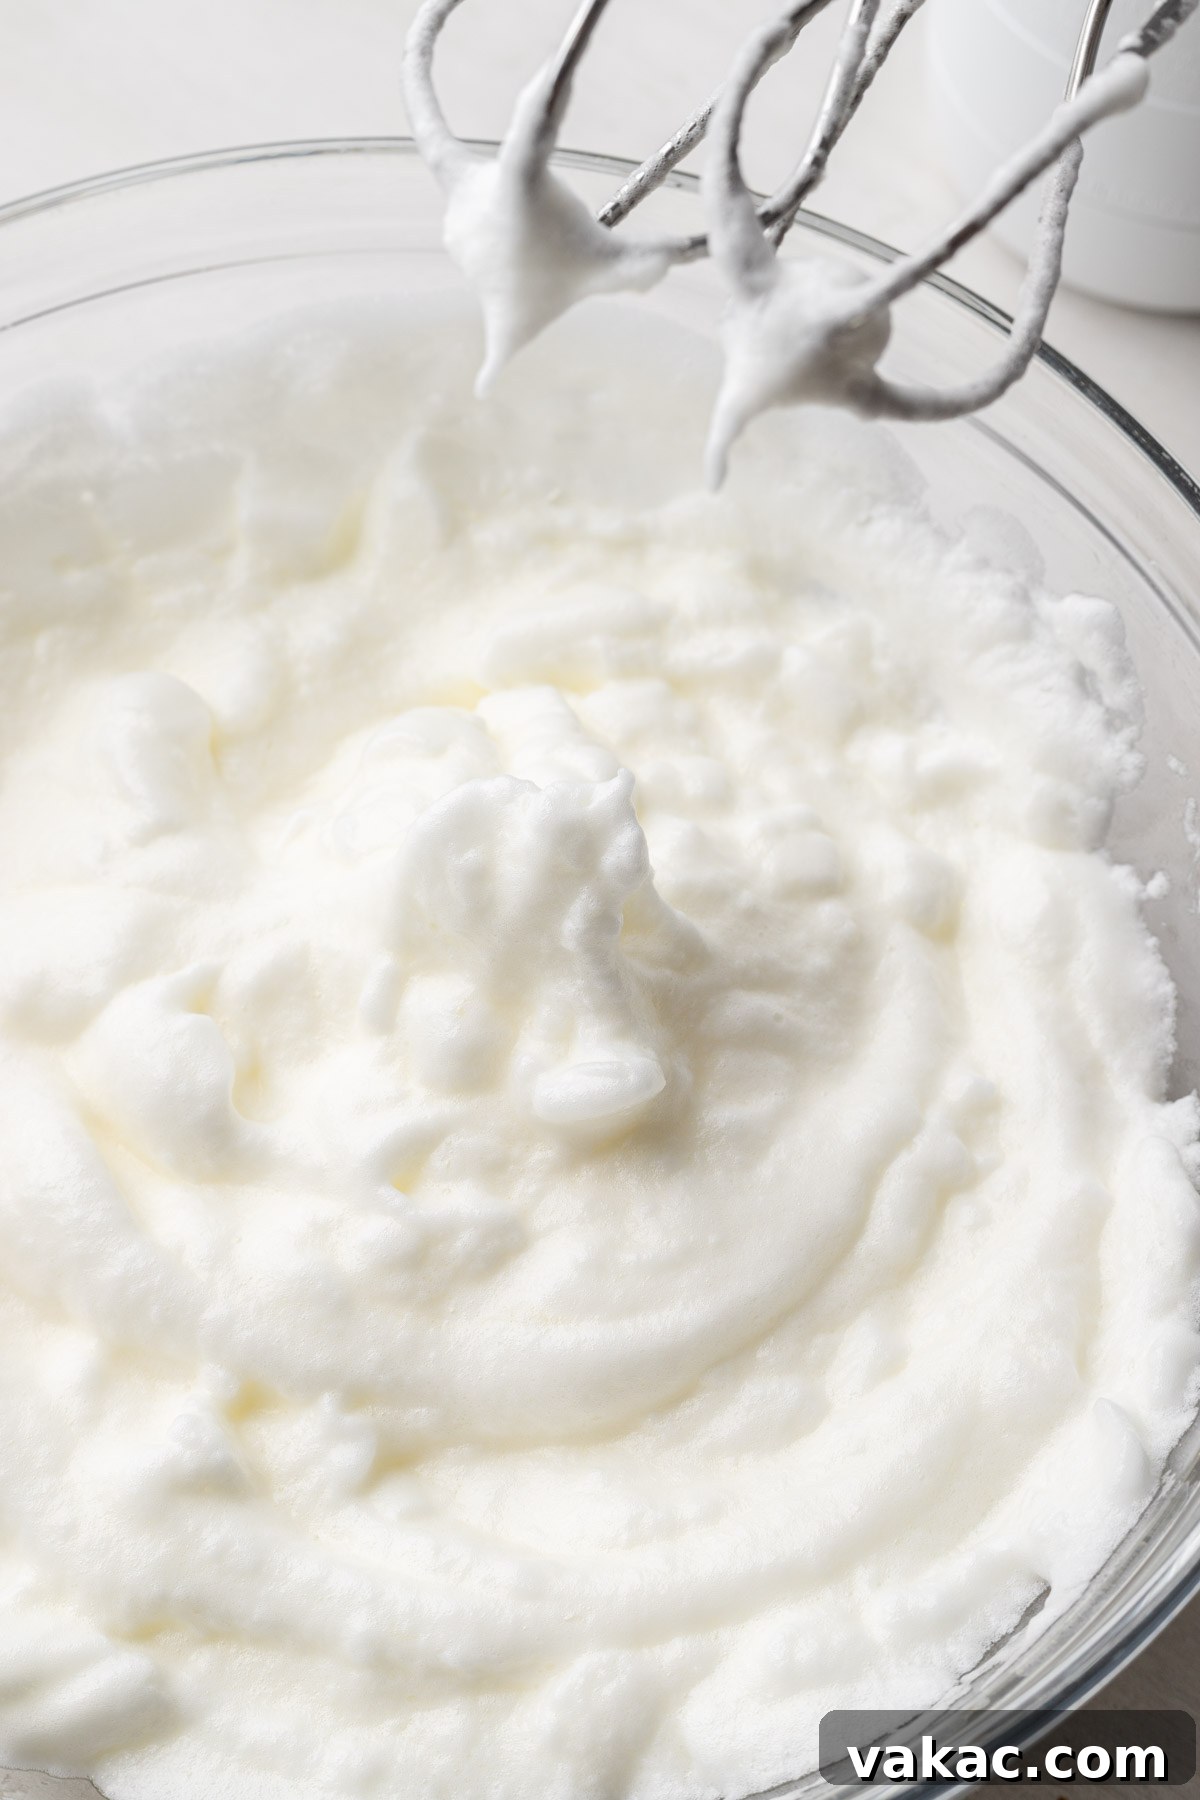
- Whip Egg Whites to Stiff Peaks: In a separate, impeccably clean mixing bowl, beat the room-temperature egg whites on medium speed until they form stiff peaks. This means that when you lift the beaters out of the bowl, the peaks of egg white should stand straight up without drooping. This step is critical for adding lightness and structure to the cake.
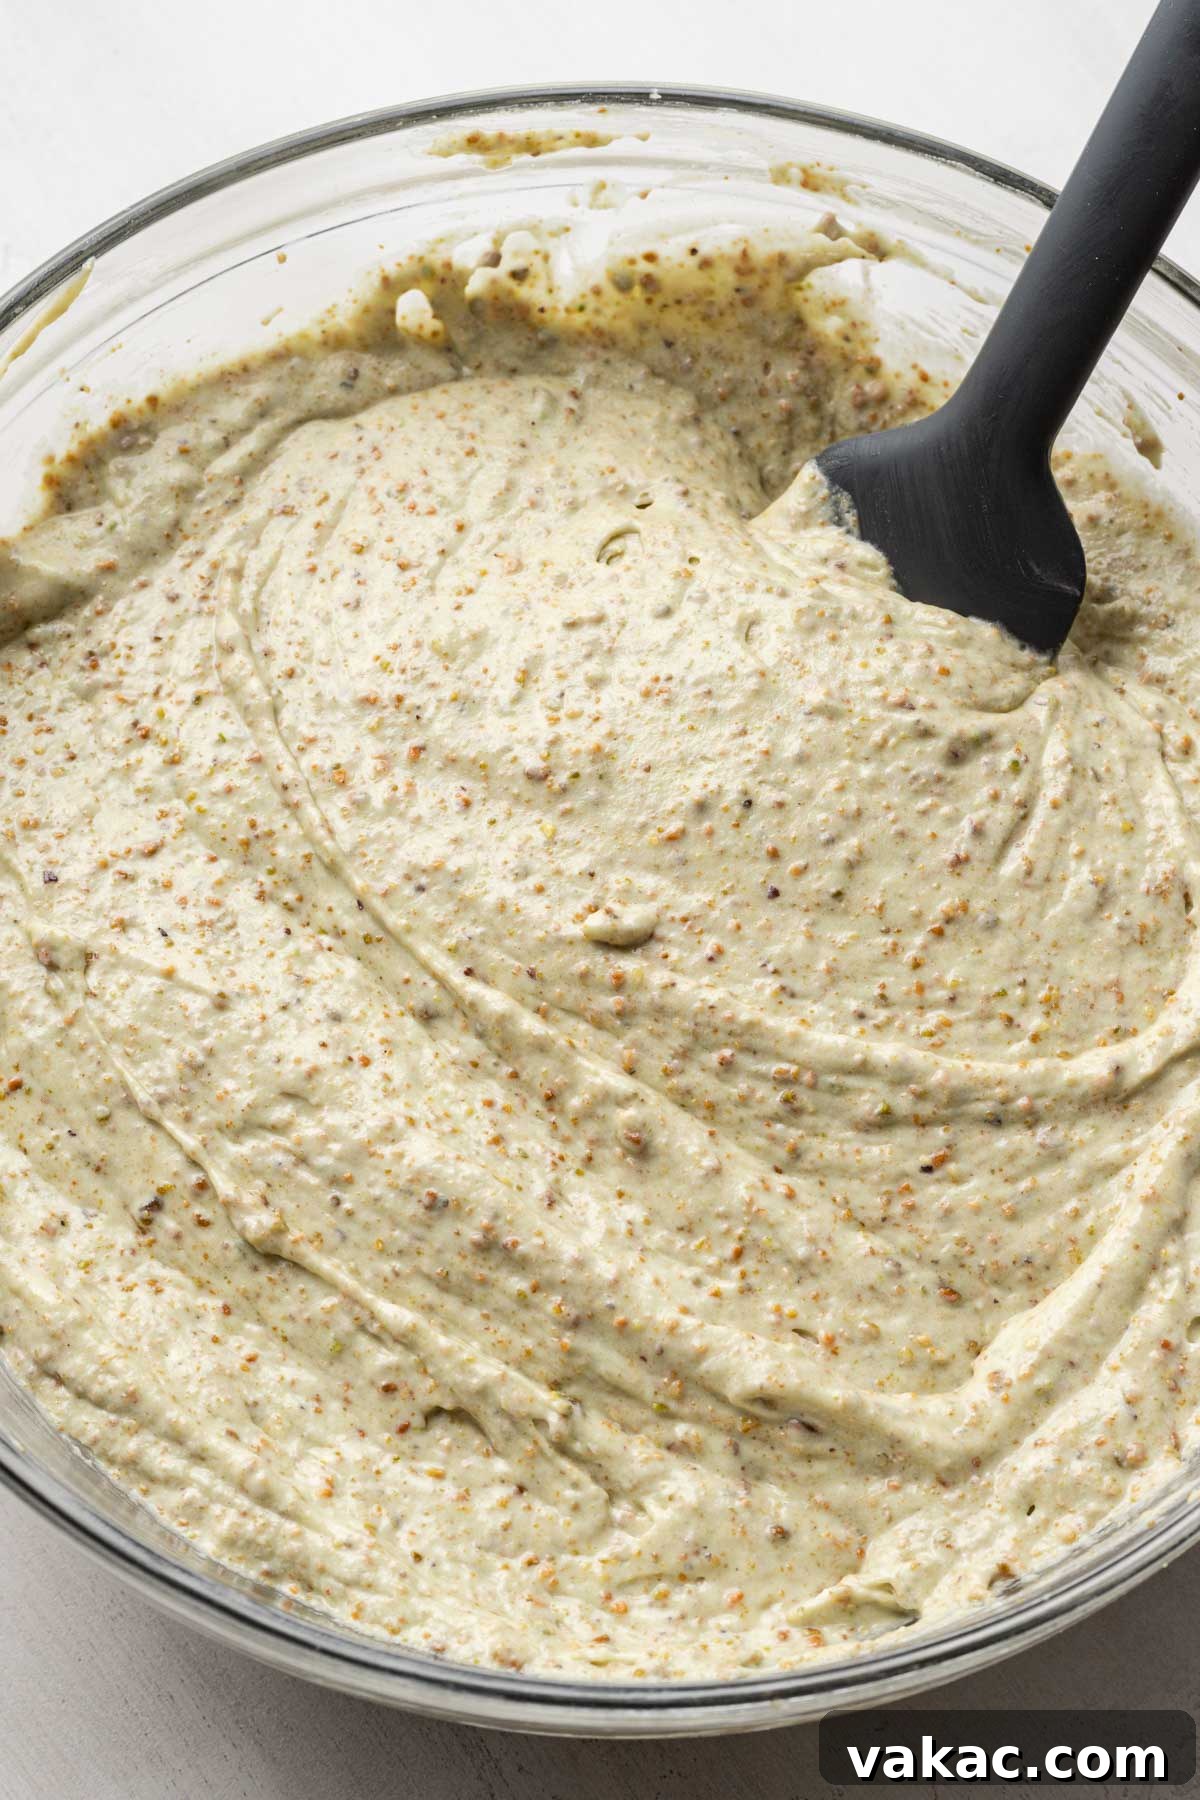
- Gently Fold in Whipped Egg Whites: To lighten the cake batter, gently fold in about half of the whipped egg whites using a rubber spatula. Use a cutting and folding motion, trying to incorporate air rather than deflate the whites. Once partially combined, fold in the remaining egg whites until just combined. Be very gentle to preserve the air you’ve worked hard to incorporate; this air will help the cake rise beautifully and maintain its tender texture.
- Bake the Cake Layers: Divide the prepared batter evenly among the three lined cake pans. Use a spoon or an offset spatula to gently spread the batter into an even layer in each pan. Bake for 23 to 28 minutes, or until a toothpick inserted into the center of the cakes comes out clean. This indicates that the cakes are fully baked.
- Cool the Cake Layers: Once baked, remove the pans from the oven and allow the cakes to cool in their pans on a wire rack for 20 to 30 minutes. This allows the cakes to set and become firm enough to handle without breaking. After this initial cooling, carefully invert the cakes onto the wire rack to cool completely. Ensuring the cake layers are entirely cool before frosting is crucial to prevent the frosting from melting.
Crafting the Whipped Honey Mascarpone Frosting
Once your cake layers are completely cooled, it’s time to prepare the star of the show – the luscious honey mascarpone frosting. Its light, airy, and rich texture is the perfect complement to the moist pistachio cake.
- Whip the Heavy Cream: In the bowl of a stand mixer fitted with the whisk attachment (or using an electric handheld mixer), add the very cold heavy whipping cream. Start mixing on low speed, then gradually increase to medium-high as the cream begins to thicken. Continue whipping until medium peaks form. At this stage, the cream will hold its shape but the tips will softly curl over when the whisk is lifted. Immediately transfer the whipped cream to the refrigerator to keep it cold and firm while you prepare the rest of the frosting.
- Combine Remaining Ingredients: In a separate clean bowl of a stand mixer fitted with a paddle or whisk attachment, add the cool mascarpone cheese, powdered sugar, honey, and pure vanilla extract. Mix on low speed until all ingredients are just combined and smooth. It’s crucial not to overmix the mascarpone at this stage, as its delicate texture can separate or become watery if beaten too vigorously or for too long.
- Gently Fold in Whipped Cream: Retrieve the whipped cream from the fridge. Using a rubber spatula, gently fold about a third of the whipped cream into the mascarpone mixture until just combined. Then, carefully fold in the remaining whipped cream. At this point, the mixture might appear a little soft, which is perfectly normal.
- Mix Until Thick and Creamy: Return the bowl to the stand mixer, fitted with the whisk attachment, and mix on low-medium speed for a short period, just until the frosting thickens and becomes wonderfully creamy and smooth. Again, be very careful not to overmix. Overmixing mascarpone frosting can cause it to curdle or become grainy, losing its desirable smooth consistency.
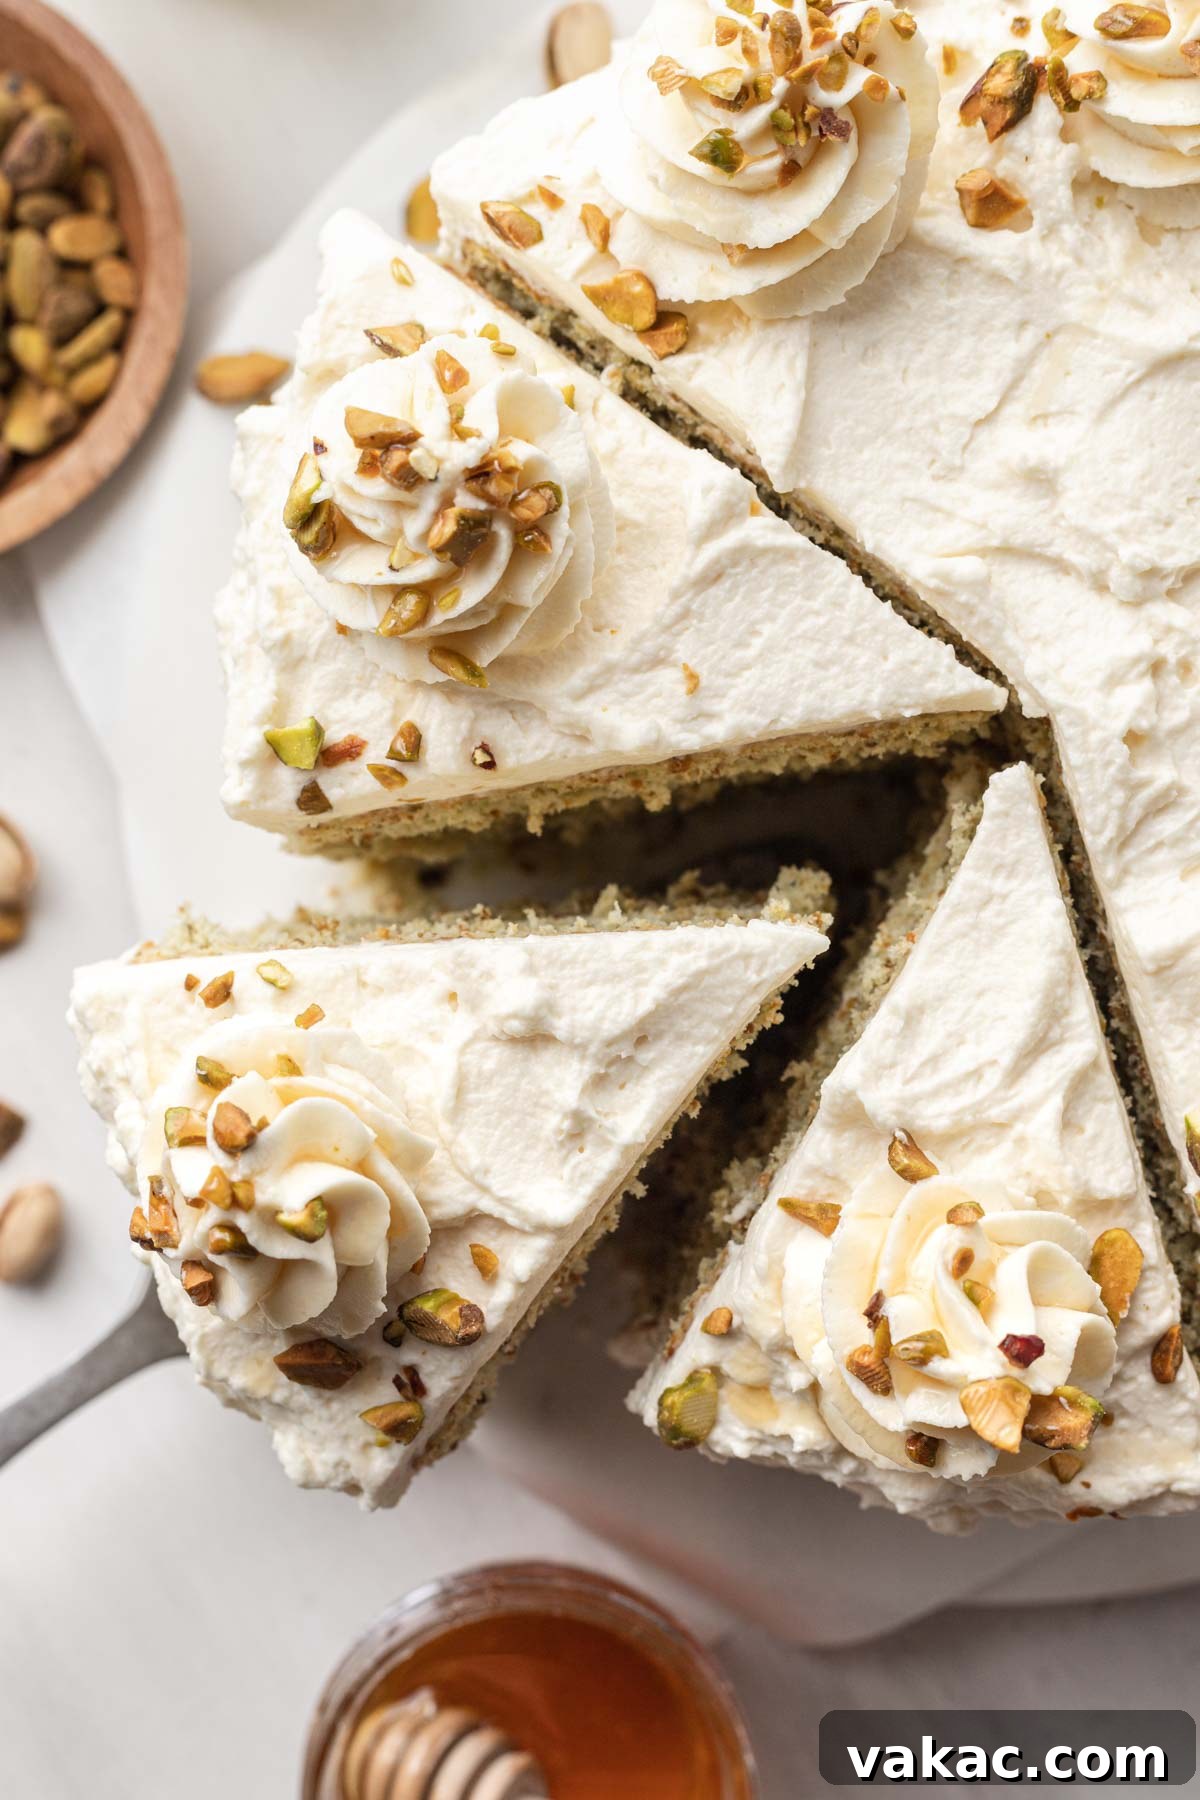
- Frost and Decorate the Cake: With your frosting ready, you can now assemble your masterpiece. Level the tops of each cooled cake layer with a serrated knife or a cake leveler to ensure a neat, even cake. Place a small dollop of frosting on your cake stand or serving plate to secure the first cake layer. Spread an even layer of frosting over the first cake, then carefully place the second layer on top, followed by more frosting, and finally the third cake layer. For a professional finish, apply a thin “crumb coat” of frosting all over the cake, which traps any loose crumbs. Chill the cake for 15-20 minutes, then apply the remaining frosting for a smooth, beautiful finish. If you plan to pipe decorations, reserve a cup or so of frosting before the final spread.
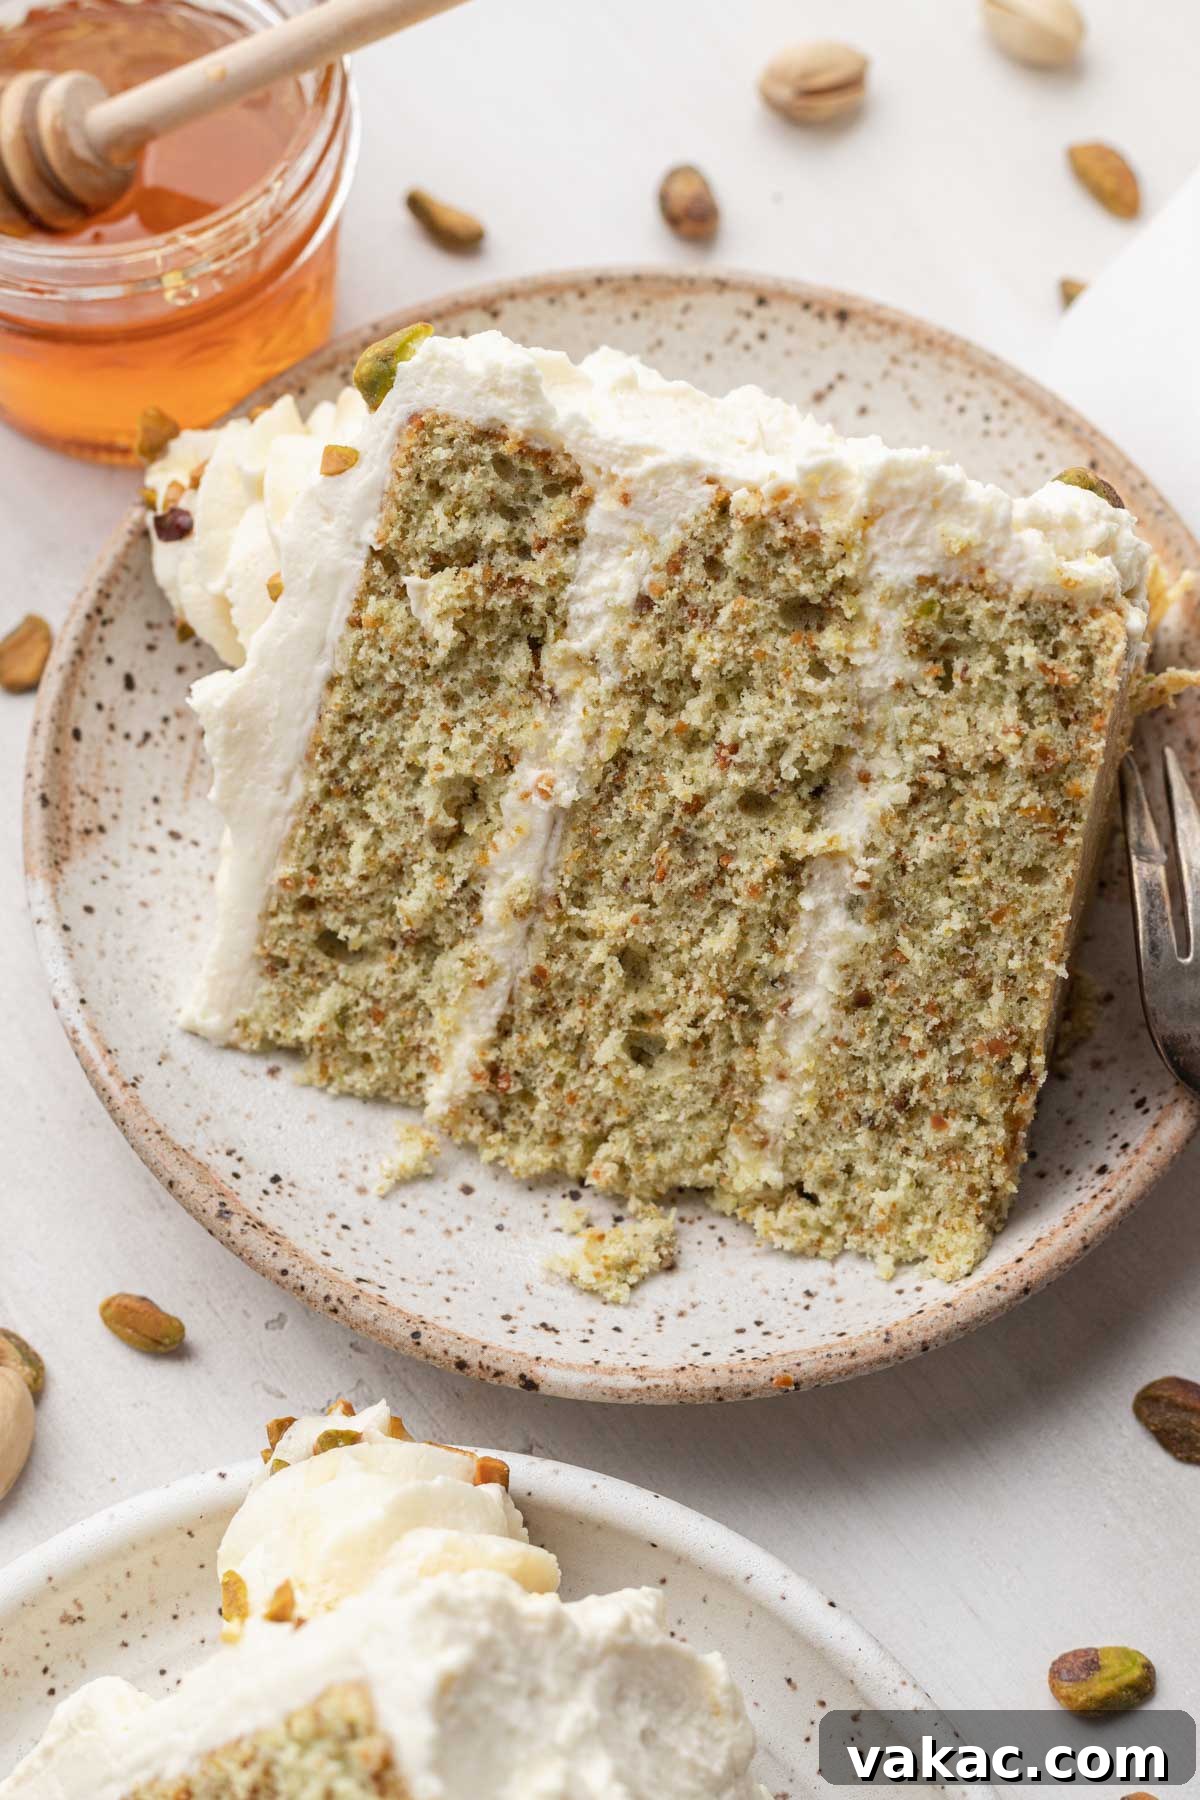
Understanding Mascarpone: Why It’s the Star of This Frosting
The choice of mascarpone cheese for this frosting is intentional and crucial to its decadent character. While cream cheese might seem like a close substitute, mascarpone truly sets this frosting apart. Mascarpone is an Italian dairy product, often described as a triple-cream cheese, boasting an exceptionally high fat content (typically 60-75%). This high fat content translates directly into a luxuriously rich, velvety-smooth, and intensely creamy texture that is unparalleled.
In contrast, standard cream cheese has a lower fat content and a tangier flavor profile, which, while delicious in its own right, would alter the delicate balance of this pistachio cake. The subtle sweetness and mild creaminess of mascarpone allow the honey and pistachio notes to shine through beautifully, creating a harmonious flavor combination. If you were to use cream cheese, you might find the frosting to be slightly firmer and to have a distinct tang that could compete with the cake’s flavor. While it’s possible to adapt a cream cheese frosting recipe (and you would likely need to double a standard recipe to have enough), for the authentic taste and texture of this particular cake, mascarpone is undeniably the preferred choice.
Planning Ahead: Can You Make This Pistachio Cake in Advance?
Yes, this pistachio cake is quite accommodating to advance preparation, making it a fantastic option for busy schedules or special events. Planning ahead can reduce stress on the day of serving while ensuring maximum freshness and flavor.
- Cake Layers: You can bake the cake layers 1 to 2 days before you plan to frost and assemble the cake. Once the layers are completely cooled, wrap each tightly in plastic wrap to prevent them from drying out. Store them at room temperature or in the refrigerator. If storing for longer than 2 days, the cake layers can be frozen (see “Freezing Instructions” in the recipe notes).
- Frosting: While you can prepare components of the frosting, it’s generally best to make the full whipped honey mascarpone frosting closer to the assembly time. The texture is at its peak when freshly made. However, you can whip the heavy cream and store it in the refrigerator for a few hours. The mascarpone mixture can also be prepared and refrigerated separately. Combine them and whip to final consistency just before frosting.
- Assembled Cake: An assembled and frosted pistachio cake can be stored in an airtight container in the refrigerator for up to 4 days. The flavors will meld beautifully, and the cake will remain wonderfully moist. For the best presentation, if you plan to add garnishes like chopped pistachios or a honey drizzle, it’s recommended to do this just before serving.
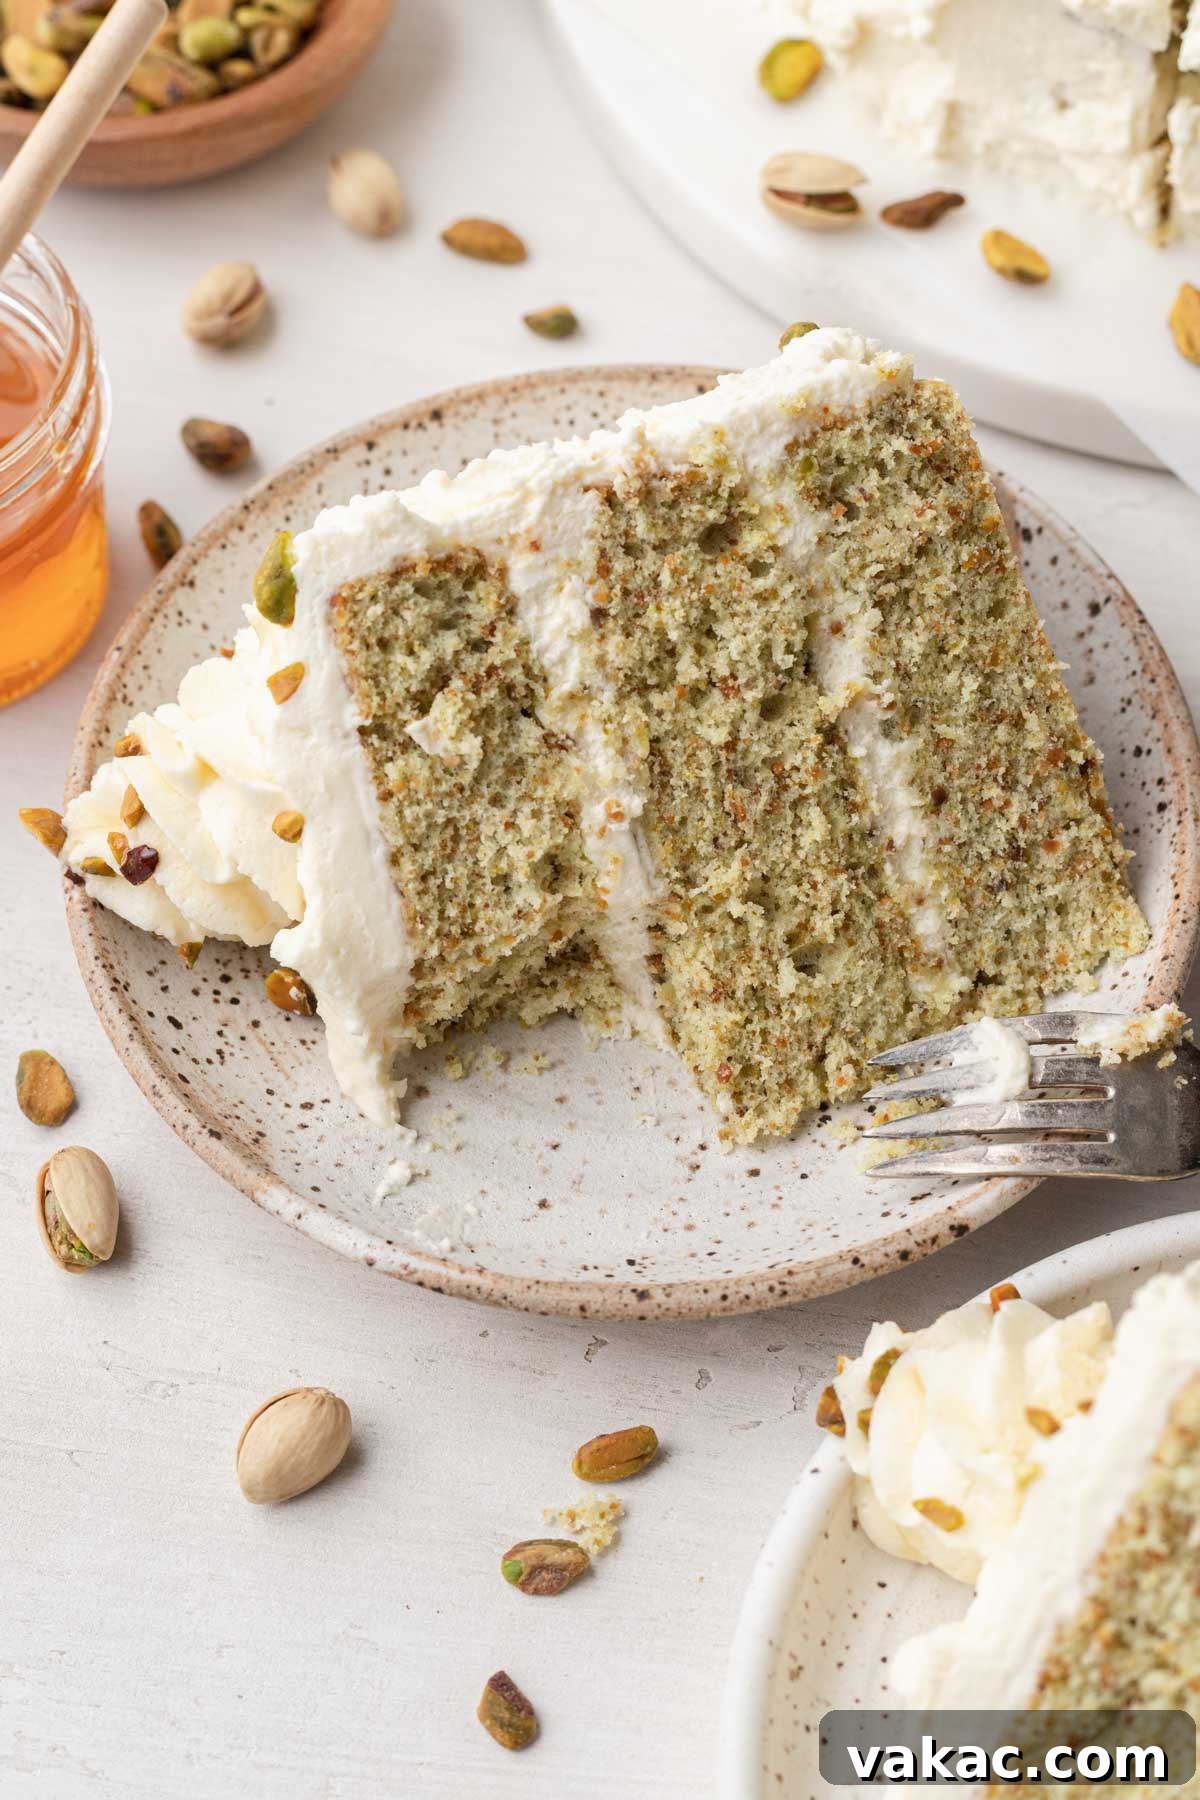
Expert Baking Tips for a Flawless Pistachio Cake
- Adjust Salt for Unsalted Pistachios: This recipe calls for roasted and salted pistachios, which provide a balanced flavor. If you choose to use unsalted pistachios, remember to increase the amount of salt in the cake batter from ½ teaspoon to ¾ teaspoon to maintain that crucial flavor balance.
- Perfect Pistachio Crumb, Not Butter: When grinding the pistachios, be diligent about processing them only until they reach a fine crumb consistency. High-speed blenders can be particularly efficient, so watch them closely. Over-processing will release their natural oils, quickly turning them into a paste or butter, which can negatively impact the cake’s texture and make it denser.
- Mascarpone Temperature Matters: Mascarpone cheese is sensitive to temperature. Using it too cold from the refrigerator can make it difficult to incorporate smoothly, while using it at room temperature (too warm) greatly increases the risk of it separating or becoming watery when mixed. The ideal approach is to remove it from the fridge approximately 20 minutes before you plan to use it, ensuring it’s still cool to the touch but has lost its refrigerator chill.
- Avoid Overmixing the Frosting: This is a golden rule for mascarpone frosting. Mascarpone has a tendency to curdle if overmixed, especially once the whipped cream has been folded in and you’re aiming for a thick, creamy consistency. Mix only until the desired texture is achieved and stop immediately. A slightly softer frosting is always preferable to a curdled one.
- Garnish Just Before Serving: If you plan to decorate your cake with chopped pistachios and a drizzle of honey, apply these garnishes right before serving. Pistachios, when left on frosting for extended periods, can absorb moisture and soften, losing their appealing crunch. Similarly, honey can dissolve into the frosting, potentially affecting its texture and appearance. Freshly applied garnishes ensure maximum visual appeal and textural contrast.
- Room Temperature Ingredients for Cake: Beyond just butter and buttermilk, having all your cold ingredients (like egg whites) at room temperature helps them emulsify better and creates a smoother, more uniform batter, resulting in a finer cake crumb.
- Don’t Rush Cooling: Patience is key. Ensure your cake layers are completely cooled before attempting to frost them. Warm cake layers will melt your beautiful frosting, leading to a messy and unsatisfying result. A wire rack allows air circulation, speeding up the cooling process.
Discover More Delicious Layer Cake Recipes
- Classic Yellow Cake
- Coconut Cake
- Italian Cream Cake
- Funfetti Cake
- Lemon Cake
The Ultimate Pistachio Cake Recipe Card
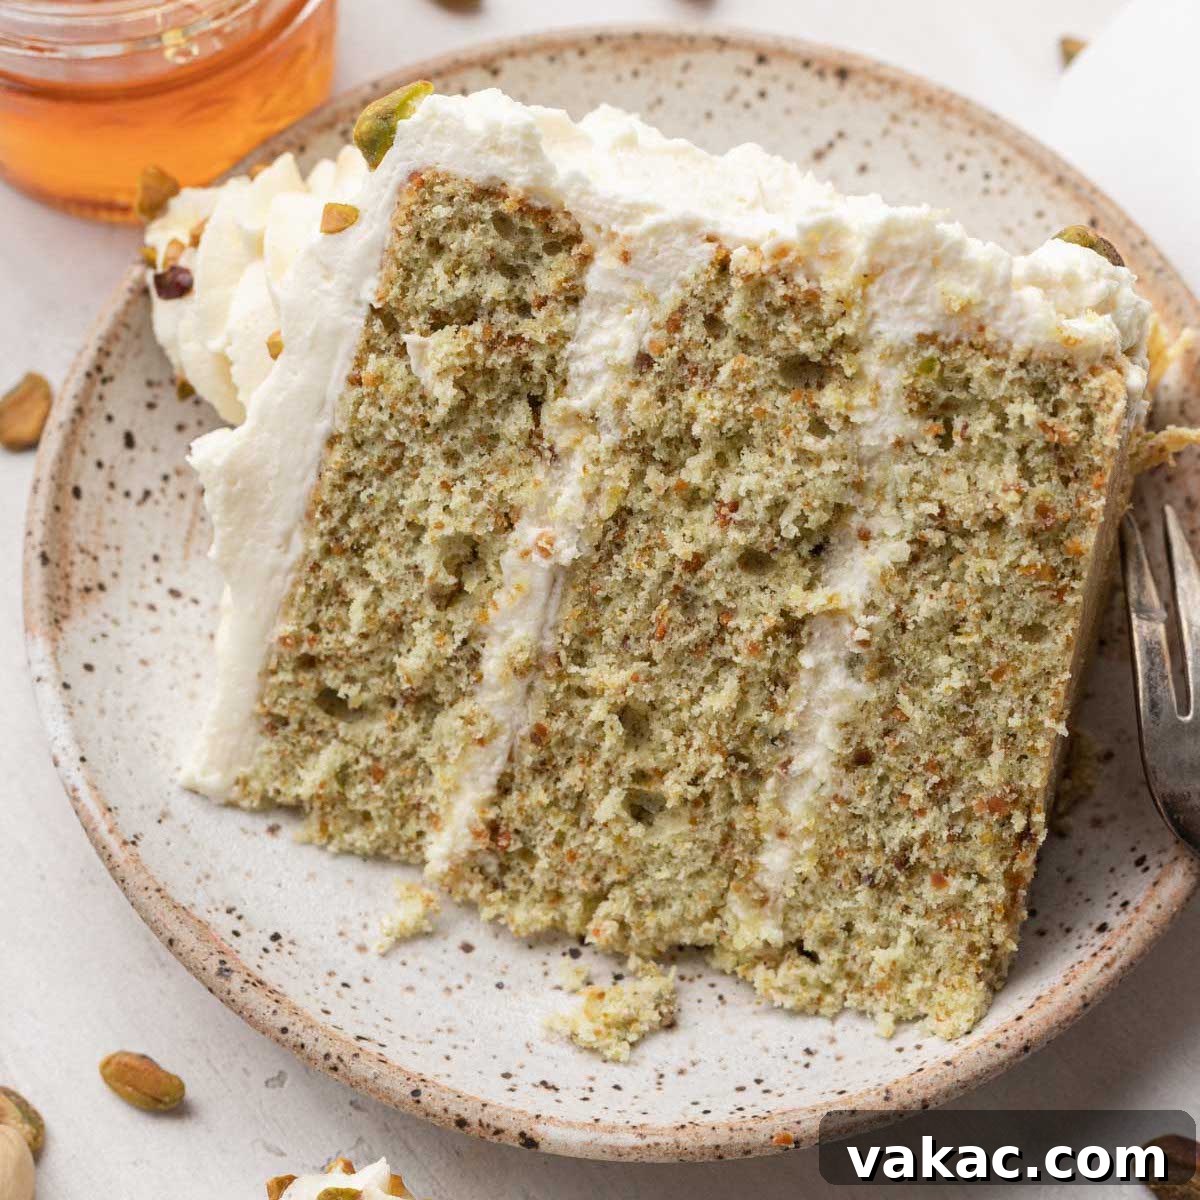
Pistachio Cake
Rating: 5 out of 5 stars (4 ratings)
Prep Time: 1 hr 15 mins
Cook Time: 30 mins
Total Time: 1 hr 45 mins
Roasted pistachios that have been blended to fine crumbs infuse every bite of this cake with pure pistachio flavor! Honey mascarpone frosting finishes off the pistachio cake beautifully.
Pin Recipe
Ingredients
Servings: 10 slices
Pistachio Cake
- 2 cups roasted and salted shelled pistachios (I used Wonderful Pistachios, 275 grams)
- 2 ¾ cups cake flour, spooned & leveled (315 grams)
- 1 tablespoon baking powder
- ½ teaspoon salt
- 1 ⅓ cups buttermilk, at room temperature (320 ml)
- 2 ½ teaspoons pure vanilla extract
- ½ teaspoon almond extract
- 3 to 4 drops green liquid food coloring (optional, but recommended)
- 1 cup unsalted butter, softened (2 sticks; 230 grams)
- 1 ¾ cups granulated sugar (350 grams)
- 5 large egg whites, at room temperature
Whipped Honey Mascarpone Frosting
- 2 cups heavy whipping cream, cold from the fridge (480 ml)
- 16 ounces mascarpone cheese, cool (remove from the fridge about 20 minutes before, 452 grams)
- 1 cup powdered sugar (120 grams)
- ¼ cup honey (80 grams)
- 1 teaspoon pure vanilla extract
Optional Garnish
- Chopped pistachios
- Honey for drizzling
Instructions
- To make the pistachio cake: Preheat the oven to 350°F (180°C). Spray three 8-inch round cake pans with nonstick cooking spray, line the bottom of each pan with parchment paper, and set aside.
- Place the shelled pistachios into a food processor or blender and process until it resembles fine crumbs. Make sure not to process the pistachios for too long! If you have a high-speed blender, keep a close eye on the pistachios as you’re crushing them. They can quickly go from crumbs to pistachio butter.
- In a large mixing bowl, whisk together the pistachio crumbs, cake flour, baking powder, and salt. Set aside.
- Combine the buttermilk, vanilla extract, almond extract, and green food coloring in a separate mixing bowl and stir together. Set aside.
- In the bowl of a stand mixer fitted with the paddle attachment or in a large mixing bowl using a handheld mixer, beat the butter on low speed until smooth, then slowly mix in the granulated sugar. Once all of the sugar is added, increase to medium speed and continue mixing for another 4 to 5 minutes or until the mixture is light and fluffy.
- Add the dry ingredients to the creamed butter and sugar in three additions alternating with the buttermilk mixture (begin and end with the dry ingredients) on low speed. Make sure to only mix in each addition until just combined to avoid overmixing the batter.
- In a separate clean mixing bowl, beat the egg whites on medium speed until stiff peaks form (when you lift up the beaters, the peaks should stand straight up). Gently fold half of the egg whites into the batter, then fold in the remaining egg whites until just combined.
- Divide the cake batter evenly between the prepared cake pans, then use a spoon or spatula to spread it around into one even layer.
- Bake for 23 to 28 minutes or until a toothpick inserted into the center of the cakes comes out clean. Remove from the oven and allow to cool in the pans for 20 to 30 minutes (or until cool enough to handle). Remove the cakes from the pans and transfer them to a wire rack to cool completely.
- To make the whipped honey mascarpone frosting: In the bowl of a stand mixer fitted with the whisk attachment, or in a large mixing bowl using a handheld mixer, add the heavy whipping cream. Start mixing on low speed. Once the mixture starts to increase in volume, increase the speed to medium-high and mix until medium peaks form (almost stiff peaks, but the tips fold over when you lift your beaters up out of the bowl).
- Transfer the whipped cream to the refrigerator while you prepare the rest of the frosting.
- In the bowl of a stand mixer fitted with the whisk or paddle attachment or in a large mixing bowl using a handheld mixer, add the mascarpone, powdered sugar, honey, and vanilla extract. Mix on low speed until fully combined, stopping to scrape down the sides of the bowl as needed. Do not mix past low speed to avoid overmixing the mascarpone because it can break or become watery.
- Remove the whipped cream from the fridge. Use a rubber spatula to gently fold ⅓ of the whipped cream into the mascarpone mixture until just combined. Then, fold in the remaining whipped cream. The mixture will be a little soft at this point, this is normal!
- Return the bowl to a stand mixer fitted with a whisk attachment (or use a handheld mixer) and mix on low-medium speed until the mixture is thick and creamy. Do not overmix or the mixture may separate.
- To assemble the cake: Level the tops of each cake layer with a knife or cake leveler.
- Add a tablespoon of frosting to the center of a cardboard cake round, a cake stand, or a large serving plate to help the cake stick to the surface.
- Place the first layer of cake onto your work surface. Scoop ¾ cup of frosting onto the first layer of cake and spread it around evenly with an offset spatula or the back of a spoon.
- Place the second cake layer upside down on top of the frosted cake layer. Spread ¾ cup of frosting onto the second layer of cake and spread it around evenly.
- Place the third cake layer upside down on top. Spread a thin layer of frosting over the outside of the cake to catch any crumbs. If needed, refrigerate or freeze for 15 to 20 minutes. Then, use the remaining frosting to frost the top and sides of the cake. If you want to pipe some decorations on top, I recommend reserving 1 to 1 ½ cups of frosting.
- If desired, add chopped pistachios and a drizzle of honey right before serving.
Notes
- Storage Instructions: Cake may be stored in an airtight container in the fridge for up to 4 days.
- Freezing Instructions: Cake layers will freeze well for up to 3 months. Wrap tightly with plastic wrap and freeze in a large freezer bag/container. Thaw the cake layers overnight in the refrigerator, make the frosting, then assemble the cake.
- Pistachios: If using unsalted pistachios, you’ll need to increase the amount of salt in the batter to ¾ of a teaspoon.
Cuisine: American
Course: Dessert
Author: Danielle Rye
Did you make this recipe?
Mention @livewellbakeoften on Instagram or tag #livewellbakeoften.