
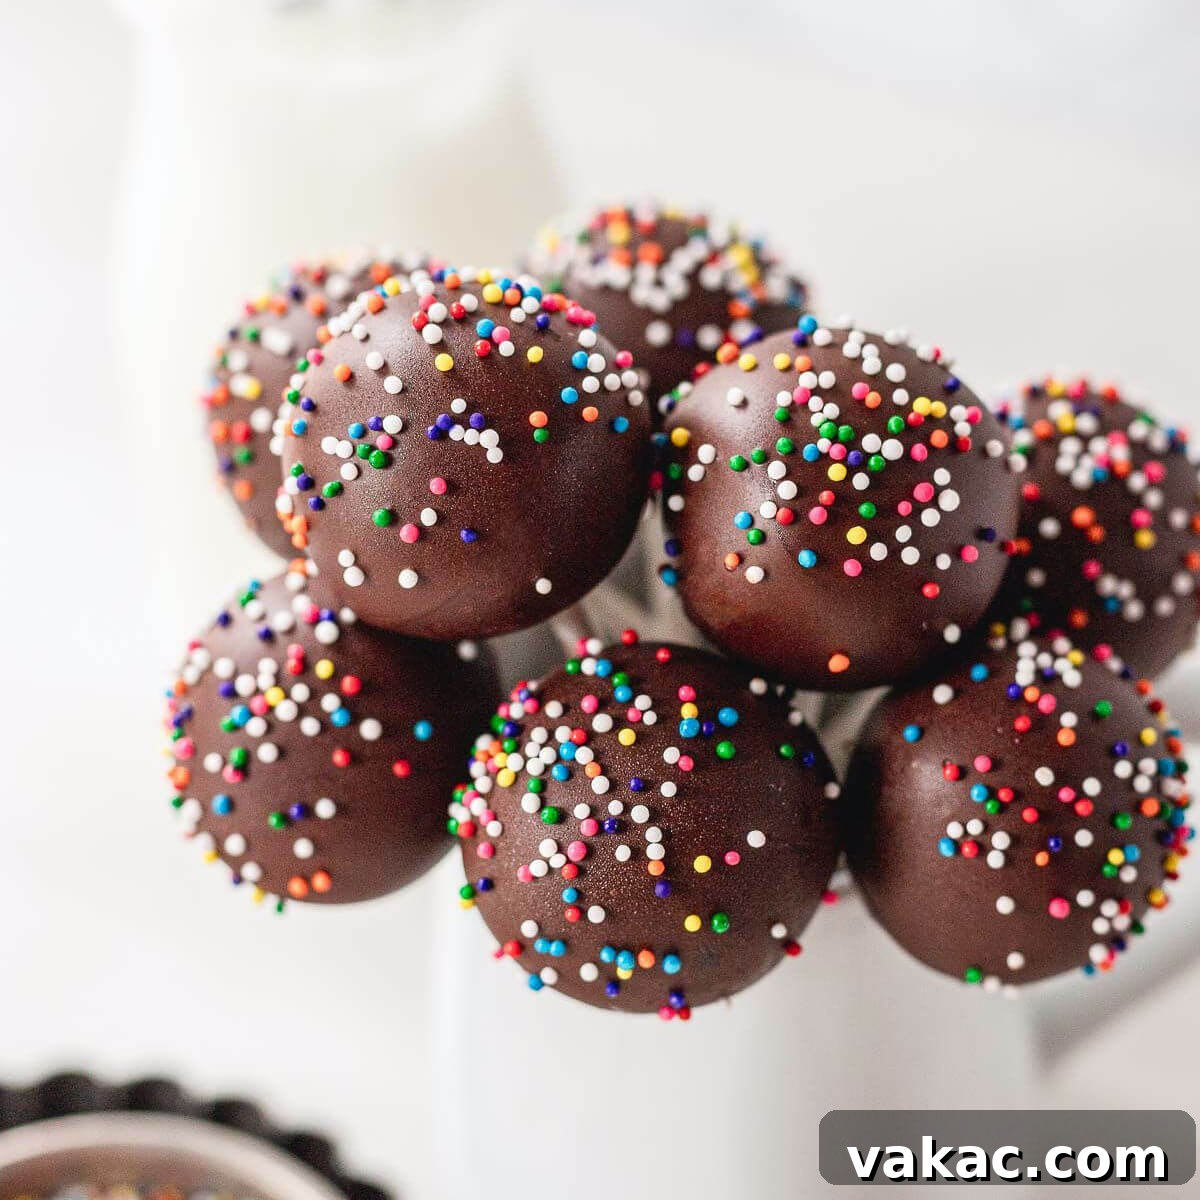
The Ultimate Guide to Delicious Homemade Chocolate Cake Pops
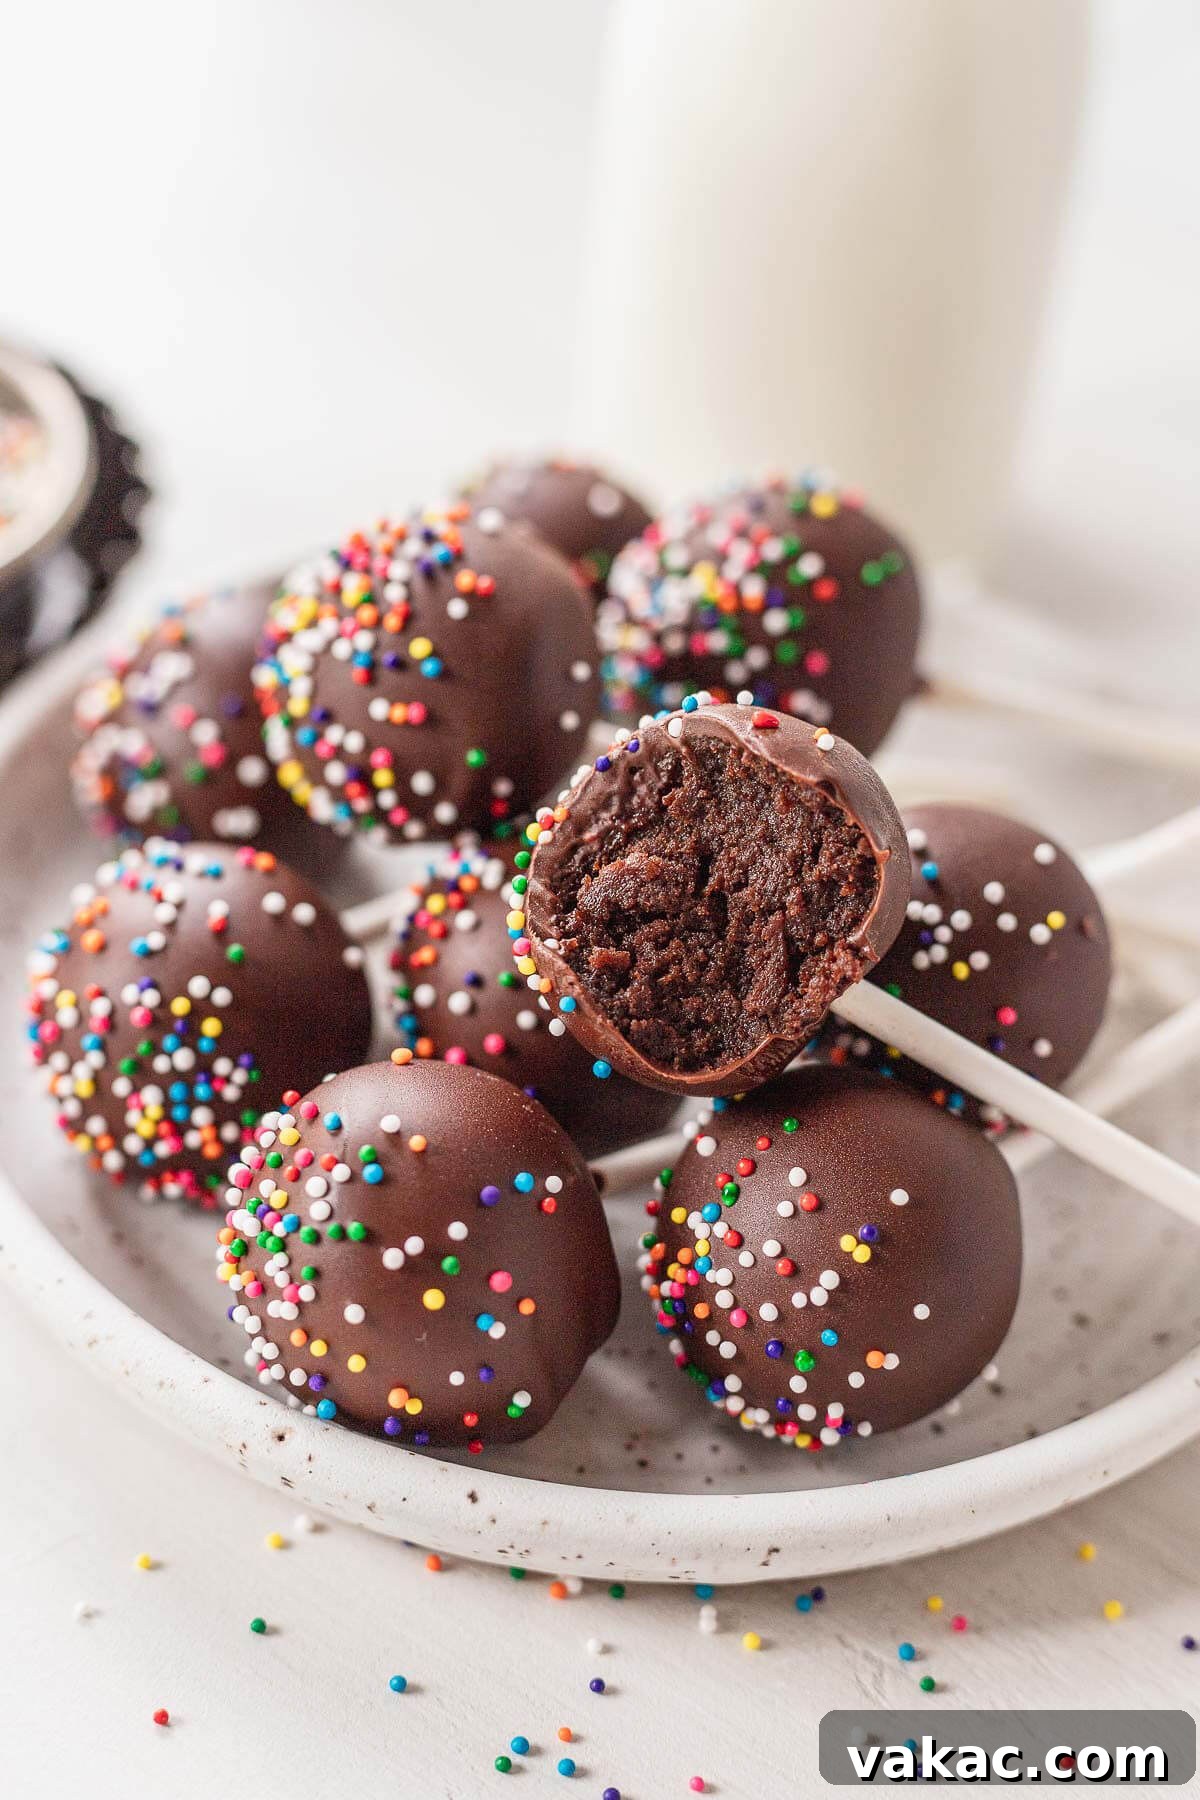
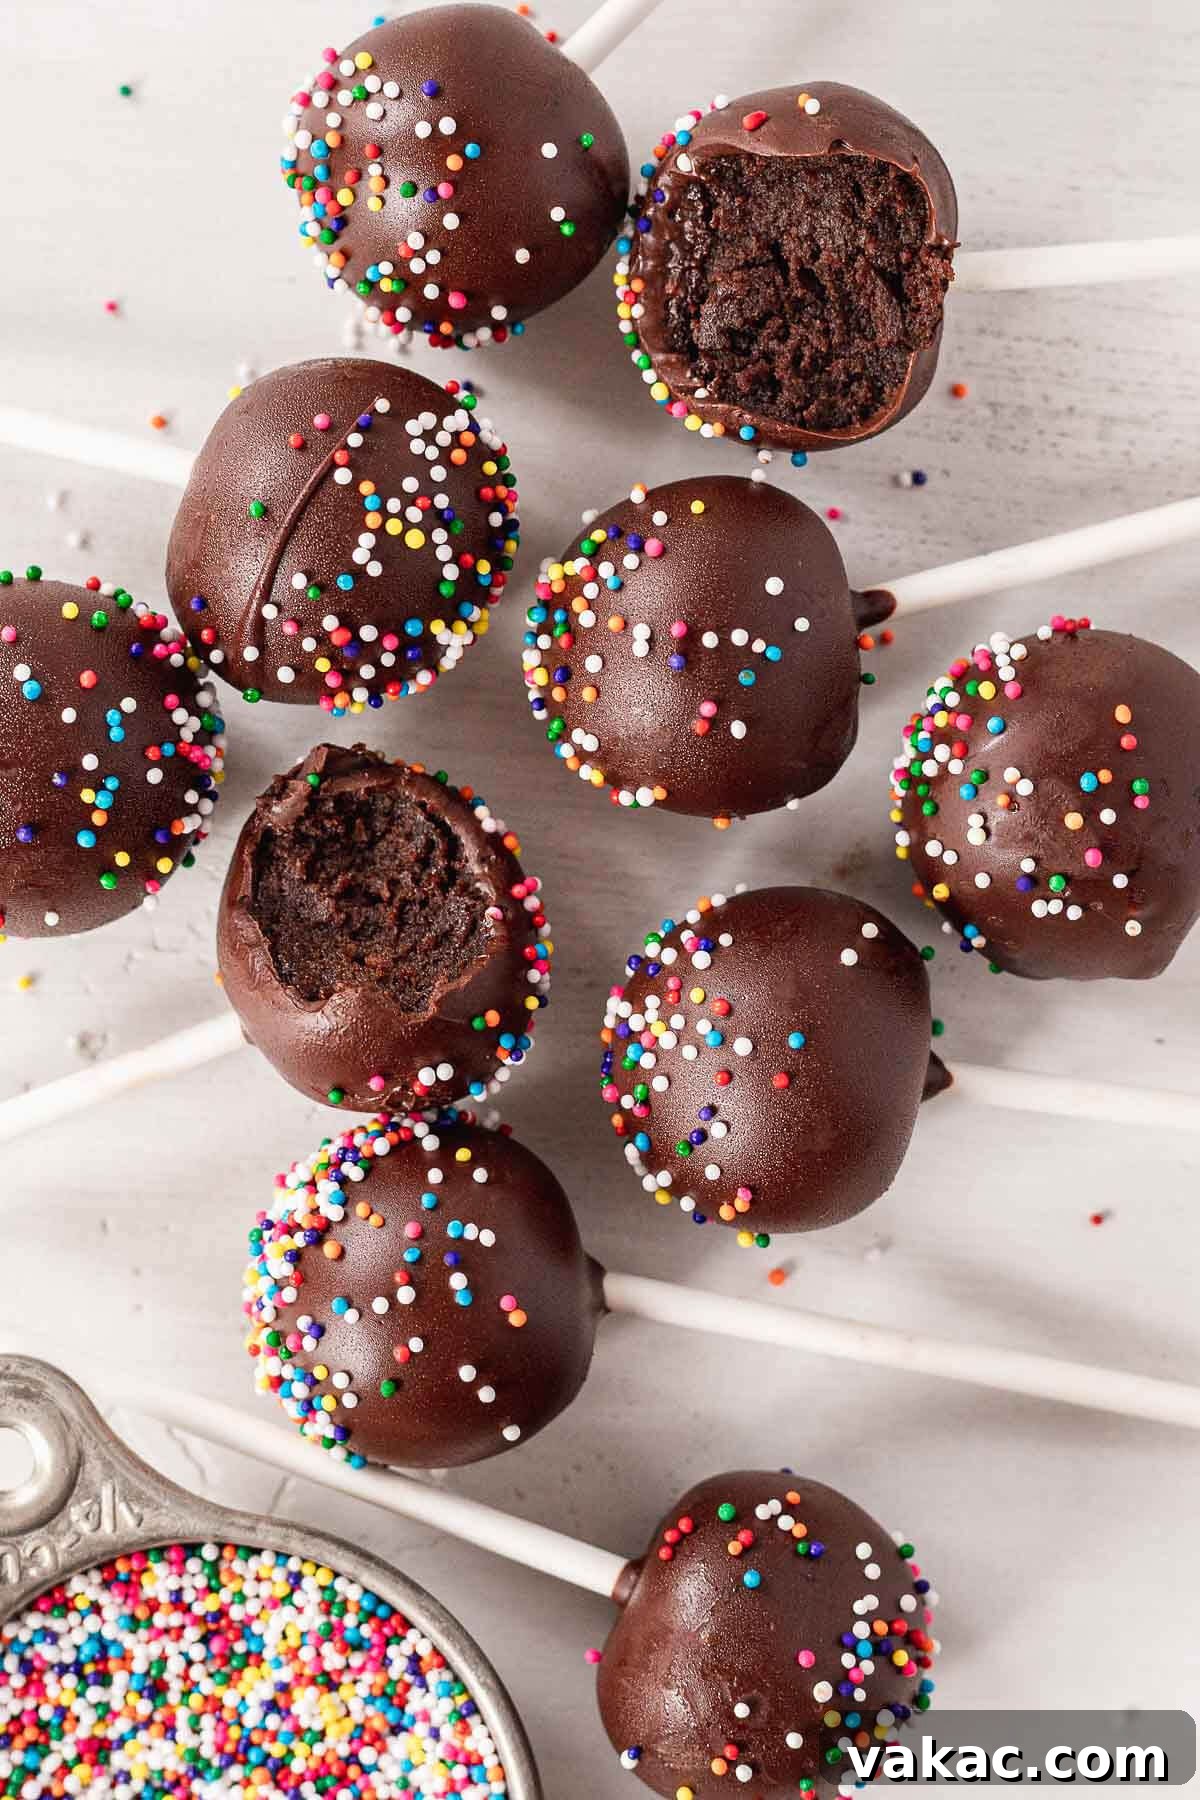
Delight your senses and impress your guests with these irresistible homemade chocolate cake pops! Imagine moist, rich chocolate cake crumbled to perfection, then lovingly blended with a luscious chocolate buttercream frosting. These decadent cake-and-frosting mixtures are then rolled into bite-sized spheres, chilled until firm, and finally enrobed in a crisp, shiny layer of melted chocolate, often adorned with colorful sprinkles or chopped nuts. While the process requires a bit of assembly, the effort is truly minimal compared to the incredible reward: a sophisticated, fun, and utterly delicious treat that far surpasses any store-bought alternative. Perfect for parties, holidays, or simply as a delightful indulgence, these chocolate cake pops are a guaranteed crowd-pleaser and a joy to create.
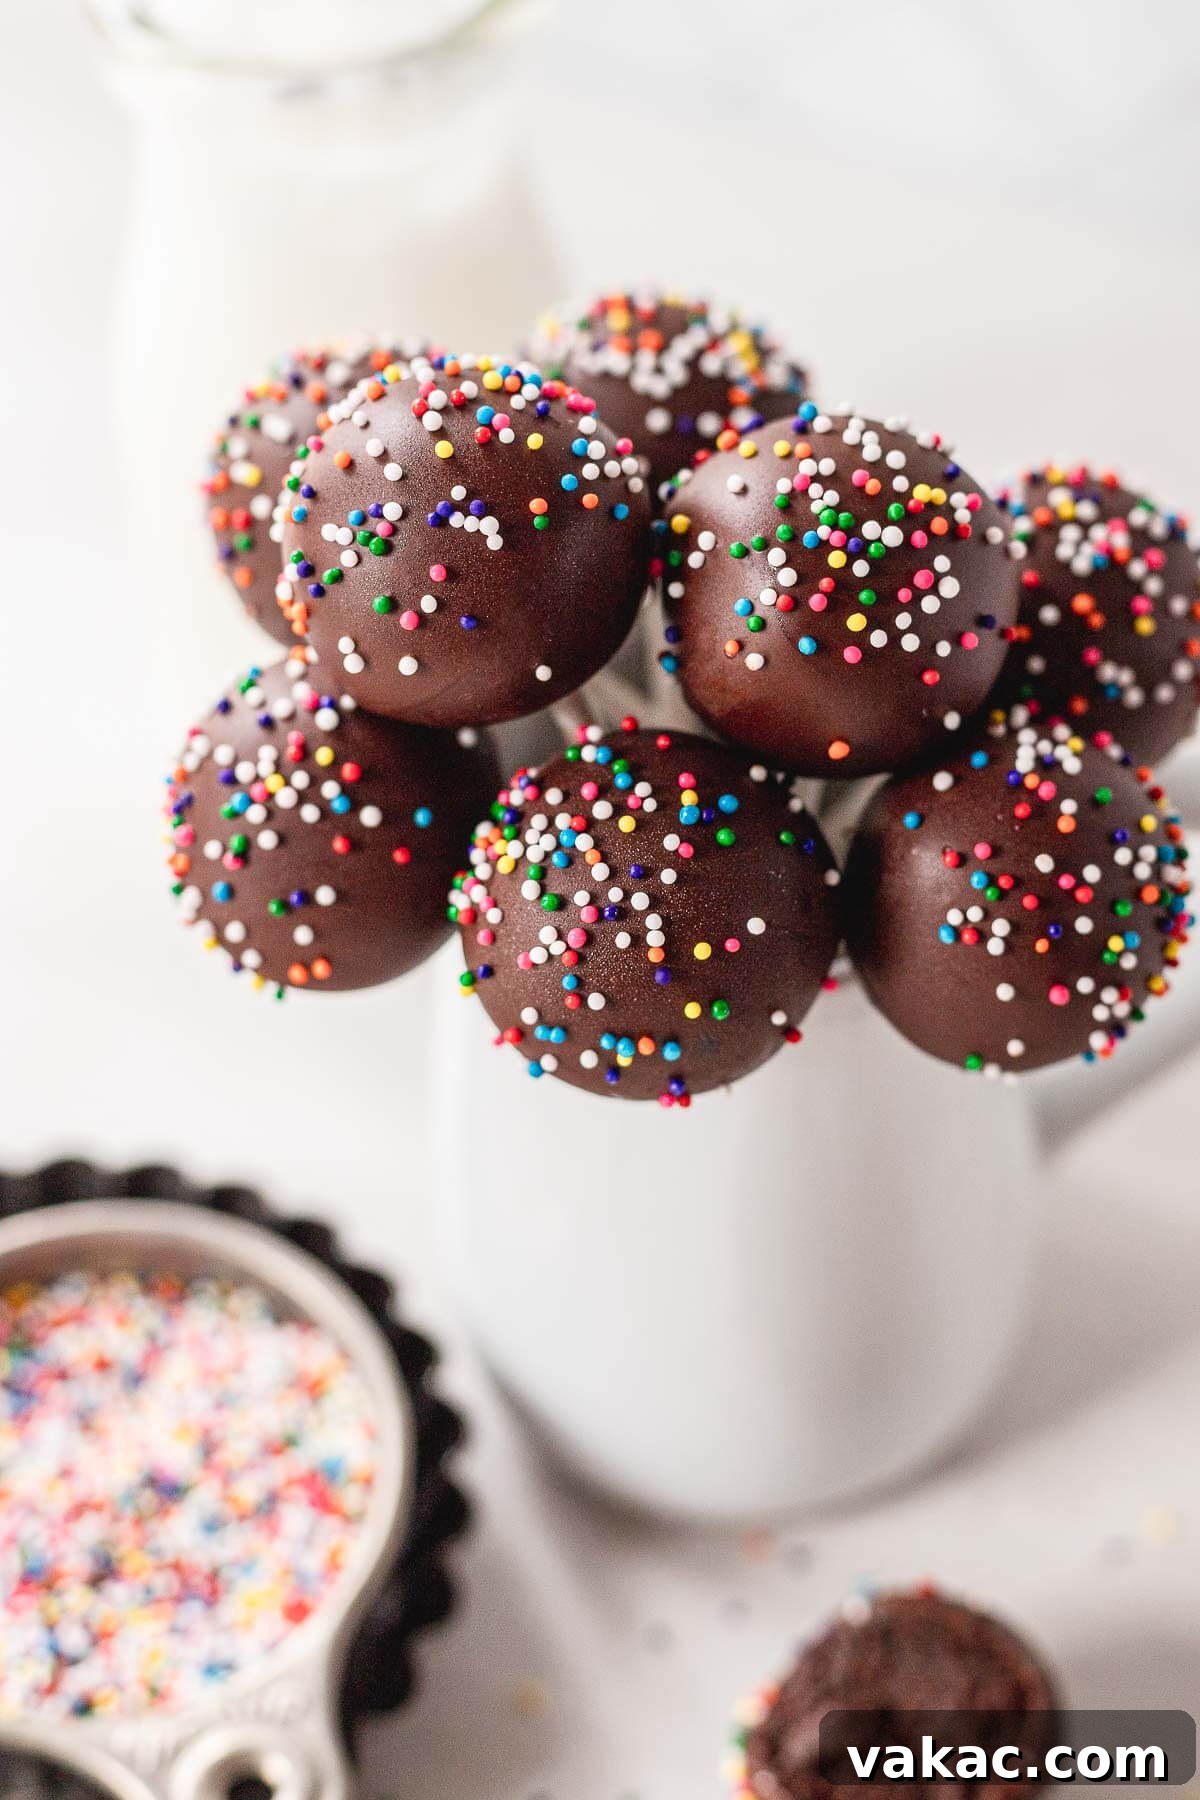
Why Homemade Chocolate Cake Pops are a Must-Try
Making chocolate cake pops at home offers an experience far superior to grabbing them from a local coffee shop. The freshness of homemade ingredients translates into a profound difference in taste and texture. You control every element, from the rich flavor of the chocolate cake itself to the creamy consistency of the buttercream and the quality of the chocolate coating. This recipe ensures a moist, flavorful cake base that melts in your mouth, perfectly complemented by the silky frosting. Plus, the satisfaction of creating these charming treats from scratch is immense, making them not just a dessert, but a labor of love that friends and family will undoubtedly appreciate. They are incredibly versatile, allowing for endless customization with different chocolate coatings, sprinkles, or even flavor extracts to suit any occasion or personal preference.
This comprehensive guide will walk you through every step, ensuring your chocolate cake pops turn out beautifully and taste divine. We’ll cover everything from baking the perfect chocolate cake and whipping up a delectable buttercream, to the art of rolling, chilling, and dipping your cake pops for that flawless finish. Get ready to embark on a delightful baking adventure that promises scrumptious results!
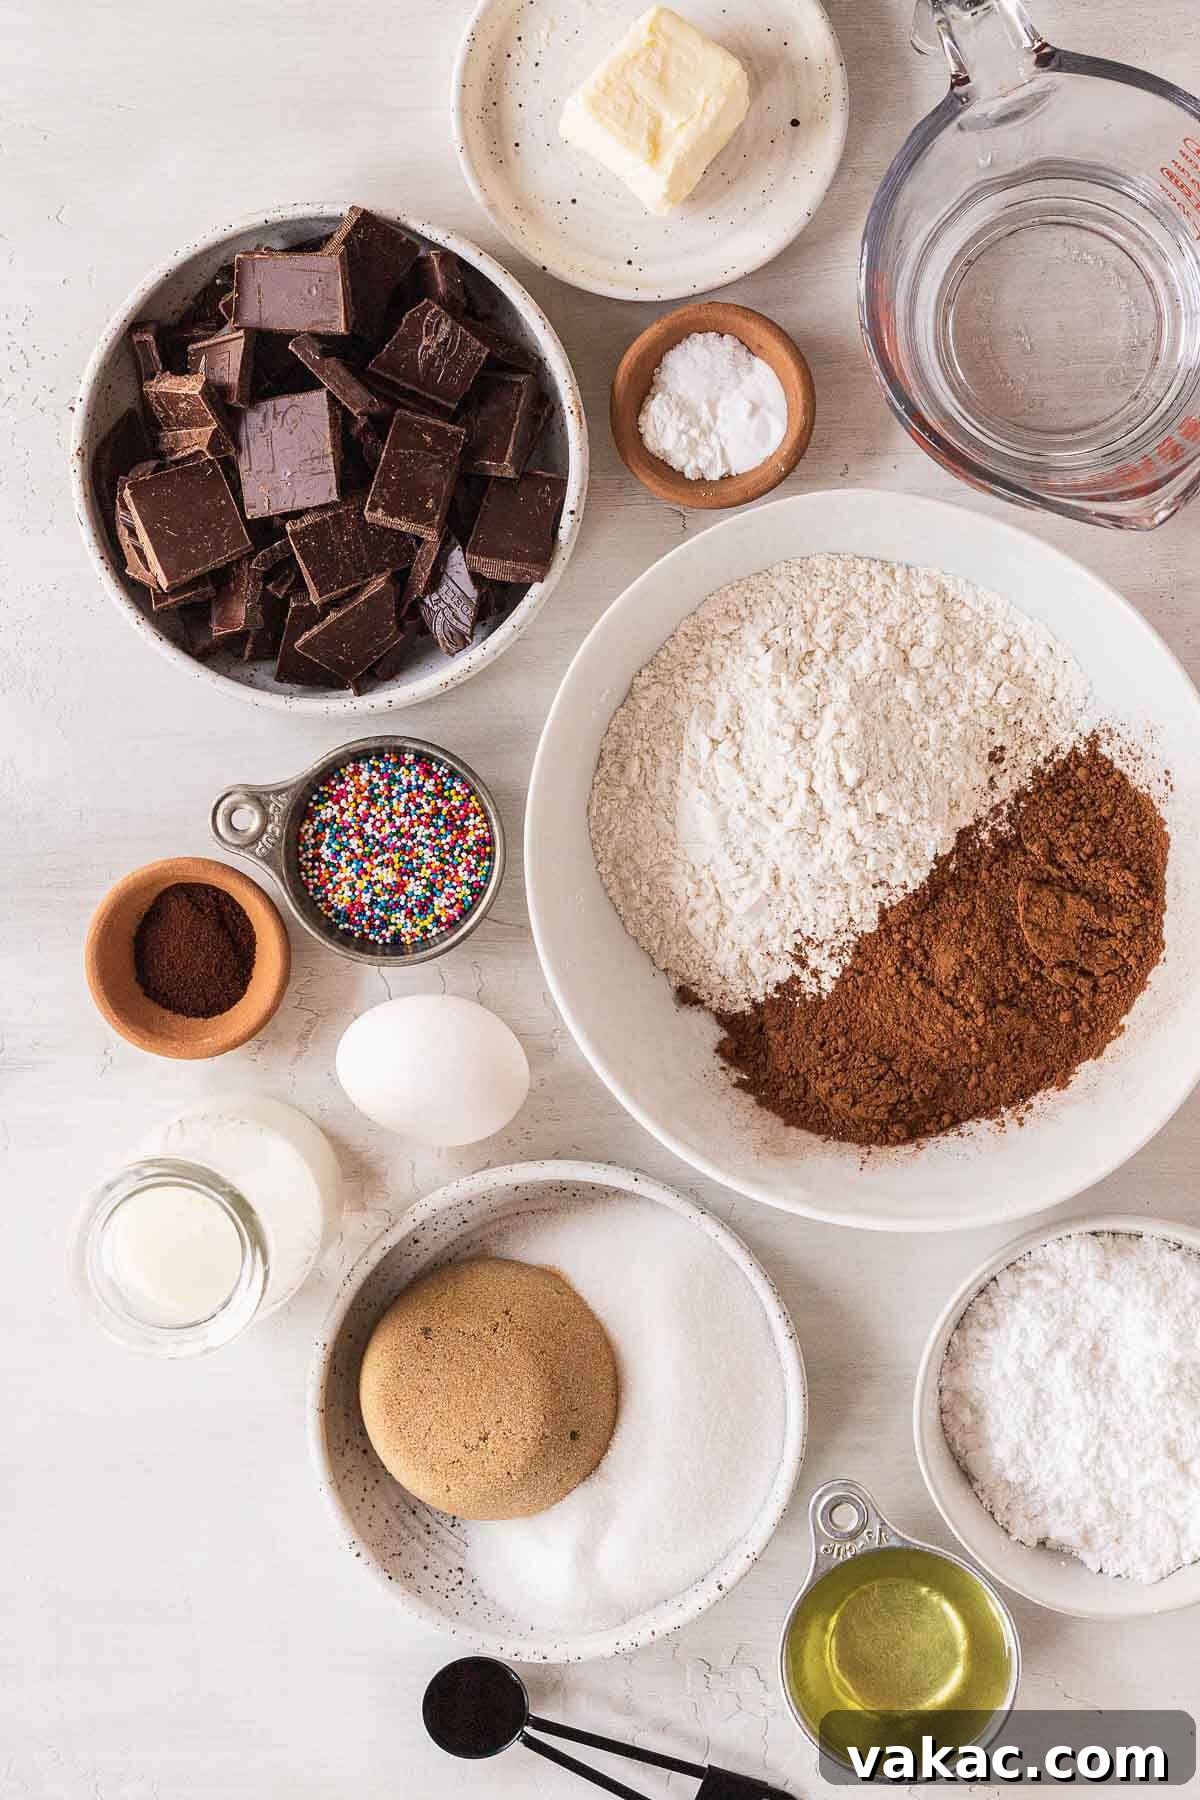
Essential Ingredients for Perfect Chocolate Cake Pops
Crafting the perfect chocolate cake pop involves three crucial components: the rich chocolate cake, the binding chocolate buttercream, and the smooth, glossy chocolate coating. Each ingredient plays a vital role in achieving the desired flavor and texture. Here’s a detailed look at the key elements you’ll need to gather:
For the Decadent Chocolate Cake Base:
- All-purpose flour: The structural backbone of your cake. Ensure it’s spooned and leveled for accurate measurement, resulting in a tender crumb.
- Unsweetened natural cocoa powder: This is where the deep chocolate flavor truly comes from. Natural cocoa powder is essential for proper leavening when combined with baking soda, ensuring your cake rises beautifully and has that intense chocolatey hue.
- Baking powder and baking soda: These leavening agents work in harmony to create a light and airy cake texture. Baking soda reacts with the acidic buttermilk and cocoa powder, while baking powder provides additional lift.
- Salt: A touch of salt enhances all the other flavors, particularly the sweetness and richness of the chocolate.
- Granulated sugar and packed light brown sugar: A combination of sugars provides both sweetness and moisture. Granulated sugar contributes to the crisp exterior, while brown sugar adds a deeper, molasses-like flavor and keeps the cake incredibly moist.
- Canola or vegetable oil: Using oil instead of butter in the cake batter ensures a very moist cake with a fine crumb that stays soft even when chilled.
- Buttermilk: The acidity in buttermilk reacts with the baking soda, contributing to the cake’s tenderness and lift. If you don’t have buttermilk on hand, you can easily make a substitute by adding a tablespoon of lemon juice or white vinegar to regular milk and letting it sit for five minutes until it slightly curdles.
- Large egg: The egg acts as a binder, adds richness, and helps with the cake’s structure.
- Pure vanilla extract: A classic flavor enhancer that complements and deepens the chocolate notes.
- Boiling water: This unique addition blooms the cocoa powder, intensifying its flavor and creating a thin, pourable batter that bakes into an exceptionally moist cake.
- Instant espresso powder (optional but highly recommended): Don’t worry, your cake won’t taste like coffee! Espresso powder works wonders by enhancing the chocolate flavor, making it richer and more profound without adding any discernible coffee taste. If you choose to omit it, still use the boiling water for moisture.
For the Rich Chocolate Buttercream Frosting:
- Unsalted butter: Softened butter is key for a smooth, creamy frosting. Using unsalted butter allows you to control the overall saltiness of your frosting.
- Powdered sugar: Also known as confectioners’ sugar, this fine sugar dissolves easily, creating a silky-smooth frosting texture.
- Unsweetened cocoa powder: For that rich chocolate flavor in your buttercream. Sifting it helps prevent lumps.
- Milk: Adds creaminess and helps achieve the desired frosting consistency. Any milk (dairy or non-dairy) will work.
- Pure vanilla extract: Essential for rounding out the flavors in the buttercream.
For the Irresistible Chocolate Coating and Decoration:
- Semi-sweet chocolate (bars recommended): High-quality chocolate is paramount for a smooth, crack-free coating that melts beautifully. Brands like Baker’s or Ghirardelli are excellent choices. While semi-sweet is traditional, feel free to experiment with dark chocolate for a more intense flavor, or white chocolate for a contrasting look and taste.
- Refined coconut oil: Just a tablespoon of coconut oil is a game-changer! It thins the melted chocolate slightly, making it easier to dip the cake pops and preventing the coating from becoming too hard or brittle once set. This results in a softer bite that’s much more enjoyable. If you don’t have it, you can omit it, but the coating might be firmer.
- Sprinkles or chopped nuts (optional): These are purely for aesthetic appeal and added texture. Sprinkles add a festive touch, while chopped nuts (like pecans or almonds) can provide a delightful crunch and extra flavor.
Step-by-Step Guide: How to Make Chocolate Cake Pops from Scratch
Creating these delightful chocolate cake pops is a rewarding process broken down into several manageable steps. Follow this detailed guide for flawless results!
Part 1: Baking the Moist Chocolate Cake
A perfect cake pop starts with a perfect cake. This recipe utilizes a single layer of rich chocolate cake as its foundation. If you prefer to use a boxed cake mix, ensure it’s a 9-inch round layer.
- Prepare your oven and pan: Preheat your oven to 350°F (180°C). Lightly grease a 9-inch round cake pan with nonstick cooking spray. For easy removal, line the bottom of the pan with a circle of parchment paper. Set it aside.
- Combine dry ingredients: In a large mixing bowl, meticulously sift together the all-purpose flour, unsweetened cocoa powder, baking powder, baking soda, and salt. Sifting helps prevent lumps and ensures an even distribution of leavening agents. Next, whisk in both the granulated sugar and the packed light brown sugar until everything is thoroughly combined.
- Incorporate wet ingredients: To your dry mixture, add the canola or vegetable oil, buttermilk, large egg, and pure vanilla extract. Mix until these ingredients are just combined. At this stage, your batter will appear quite thick and fudgy, similar to a rich brownie batter.
- Add the hot liquid: In a separate small bowl or measuring cup, dissolve the instant espresso powder (if using) into the boiling water. Stir until fully integrated. Carefully pour this hot liquid into your cake batter and mix gently until just combined. The batter will become noticeably thinner, which is perfectly normal and contributes to the cake’s incredible moisture.
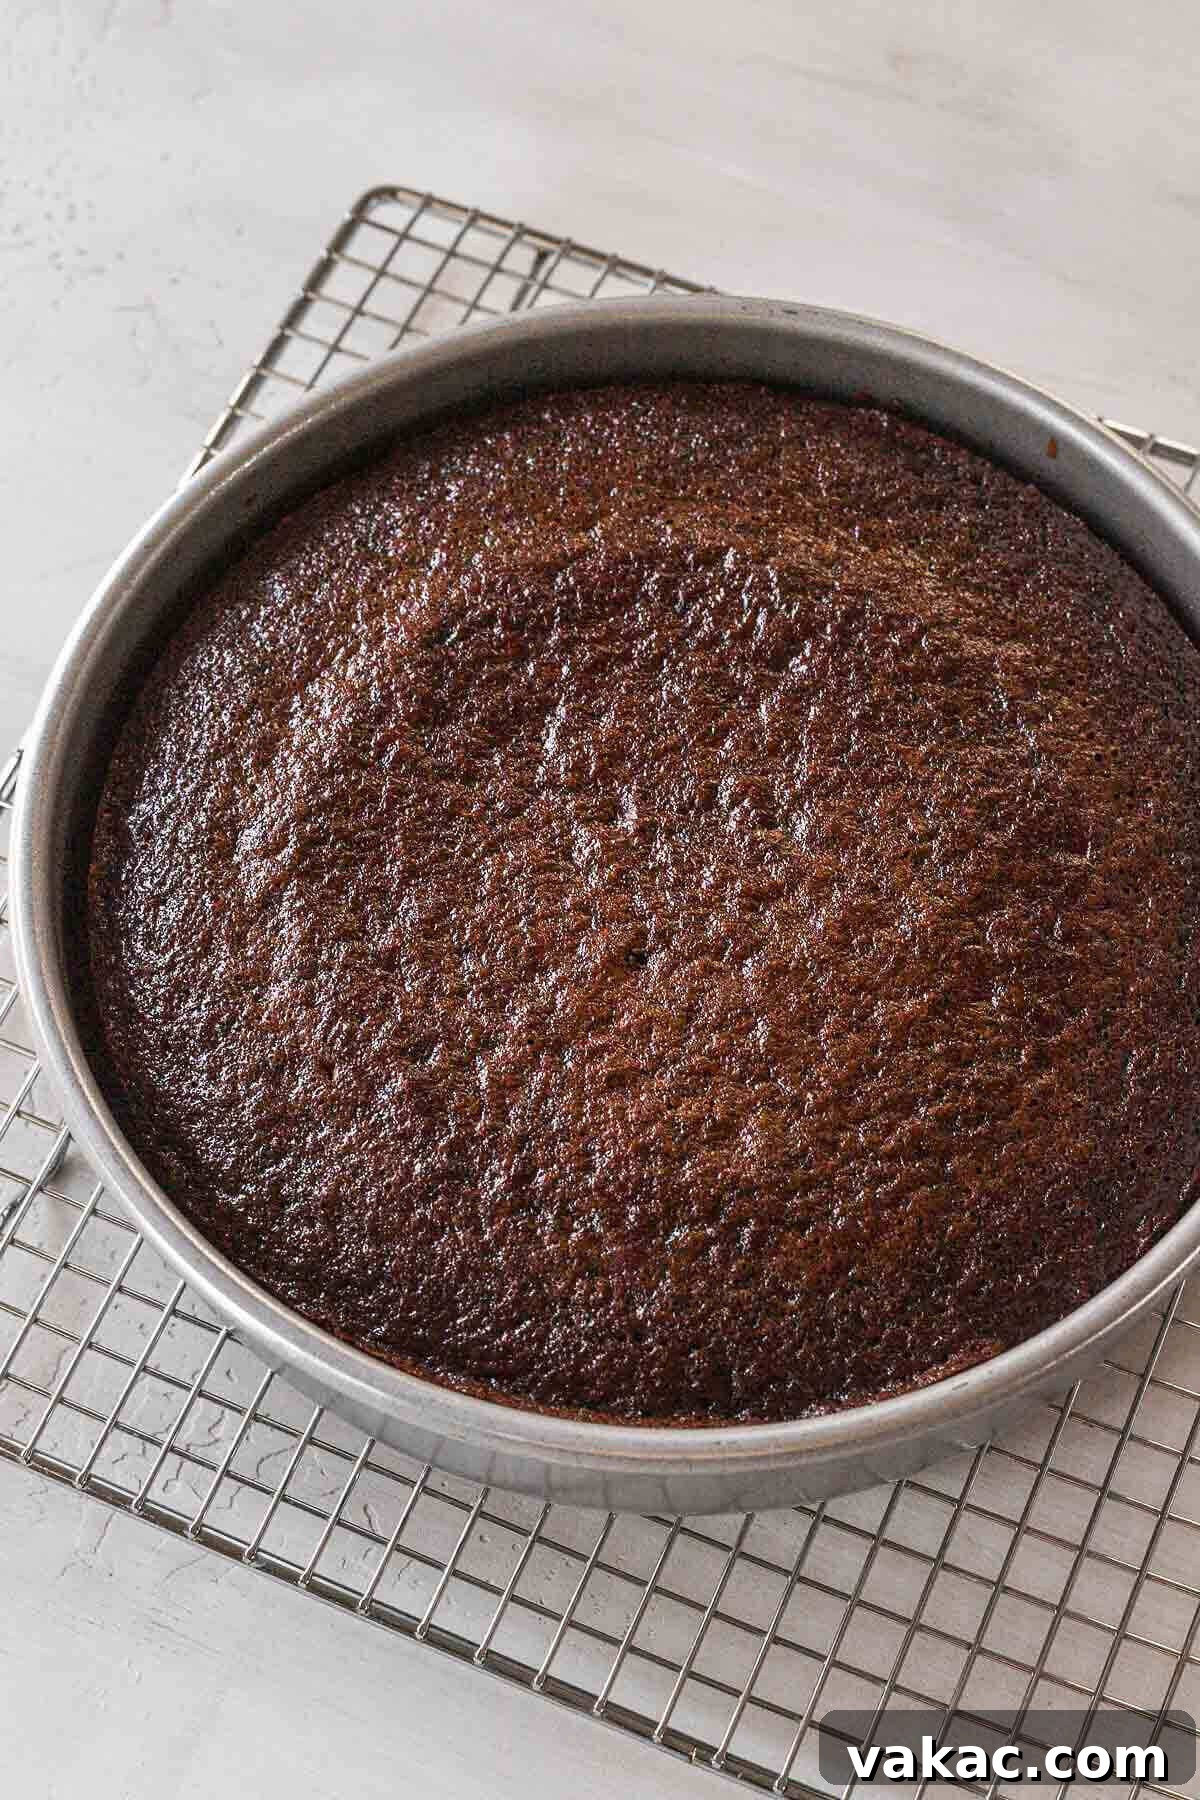
- Bake to perfection: Pour the now-thinned batter evenly into your prepared 9-inch round cake pan. Place it in the preheated oven and bake for approximately 28 to 30 minutes. You’ll know it’s done when a toothpick inserted into the center of the cake comes out clean, and the top springs back when lightly touched.
- Cool completely: Remove the cake from the oven and let it cool in the pan on a wire rack for about 30 minutes. This allows the cake to firm up before handling. After 30 minutes, carefully run a knife around the edges of the pan, then invert the cake onto the wire rack to cool completely. This cooling process is crucial – attempting to crumble a warm cake will result in a sticky mess.
Part 2: Crafting the Velvety Chocolate Buttercream Frosting
While your cake is cooling, you can prepare the decadent chocolate buttercream that will bind your cake pop mixture together. This frosting is not only delicious but also provides the perfect consistency for rolling.
- Beat the butter: In the bowl of a stand mixer fitted with the paddle attachment (or using a large mixing bowl and a handheld mixer), beat the softened unsalted butter on medium speed until it is light, fluffy, and smooth. This usually takes 1-2 minutes.
- Add powdered sugar: Gradually add the powdered sugar, starting on low speed to avoid a cloud of sugar dust, then increasing to medium speed. Beat for another 1-2 minutes until the sugar is fully incorporated and the mixture is well combined and creamy.
- Incorporate chocolate and liquids: Add the sifted unsweetened cocoa powder and mix until just combined. Be sure to stop the mixer and scrape down the sides of the bowl to ensure all ingredients are fully incorporated. Finally, pour in the milk and pure vanilla extract, mixing on medium speed until the frosting is smooth, light, and perfectly blended. This buttercream will be slightly thicker than typical frosting, which is ideal for holding the cake pops together.
Part 3: Assembling and Freezing the Cake Pop Balls
Once your cake is completely cool and your frosting is ready, it’s time for the fun part: combining them and shaping your cake pops!
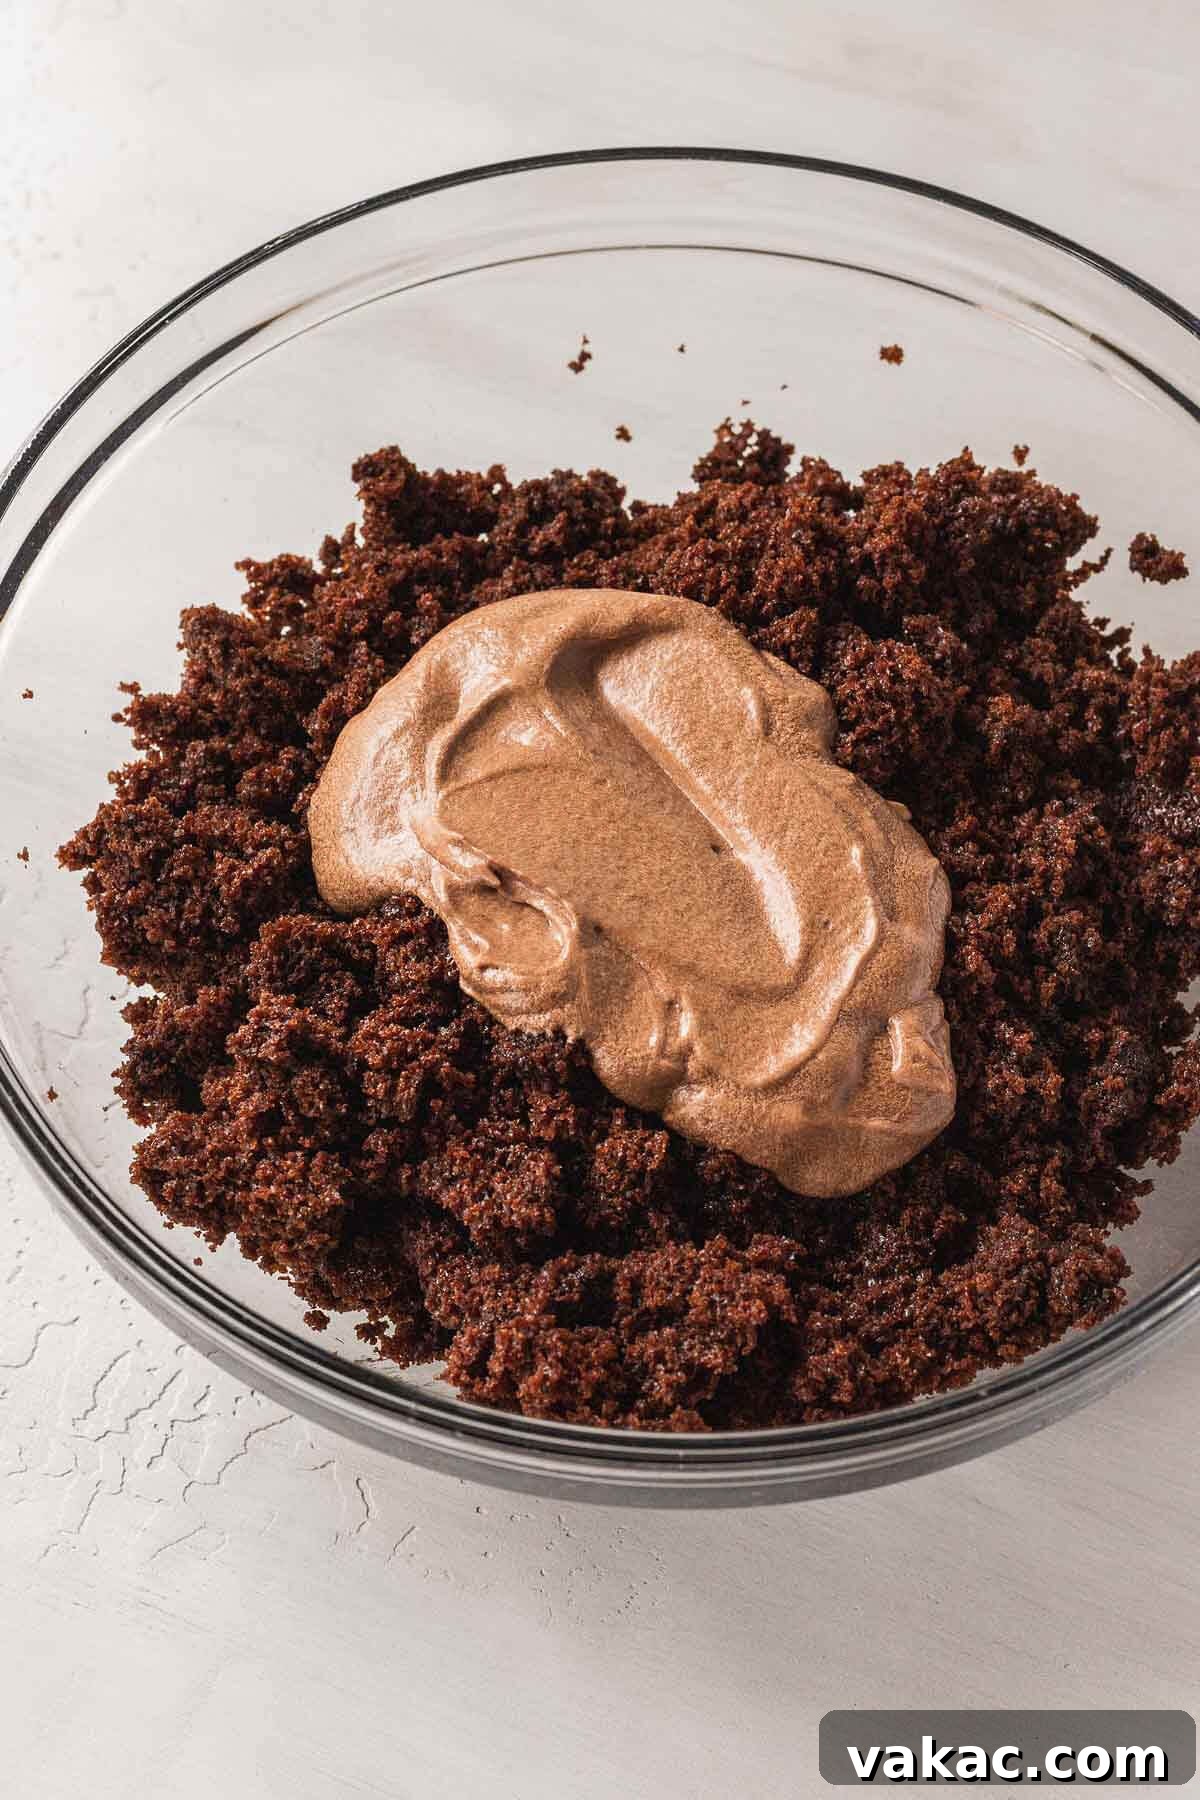
- Crumble the chocolate cake: Transfer the cooled chocolate cake into a large mixing bowl. Using your hands, crumble the cake into very fine, even pieces. Aim for a texture similar to coarse sand, ensuring there are no large lumps. Alternatively, you can use the paddle attachment of a stand mixer to break down the cake.
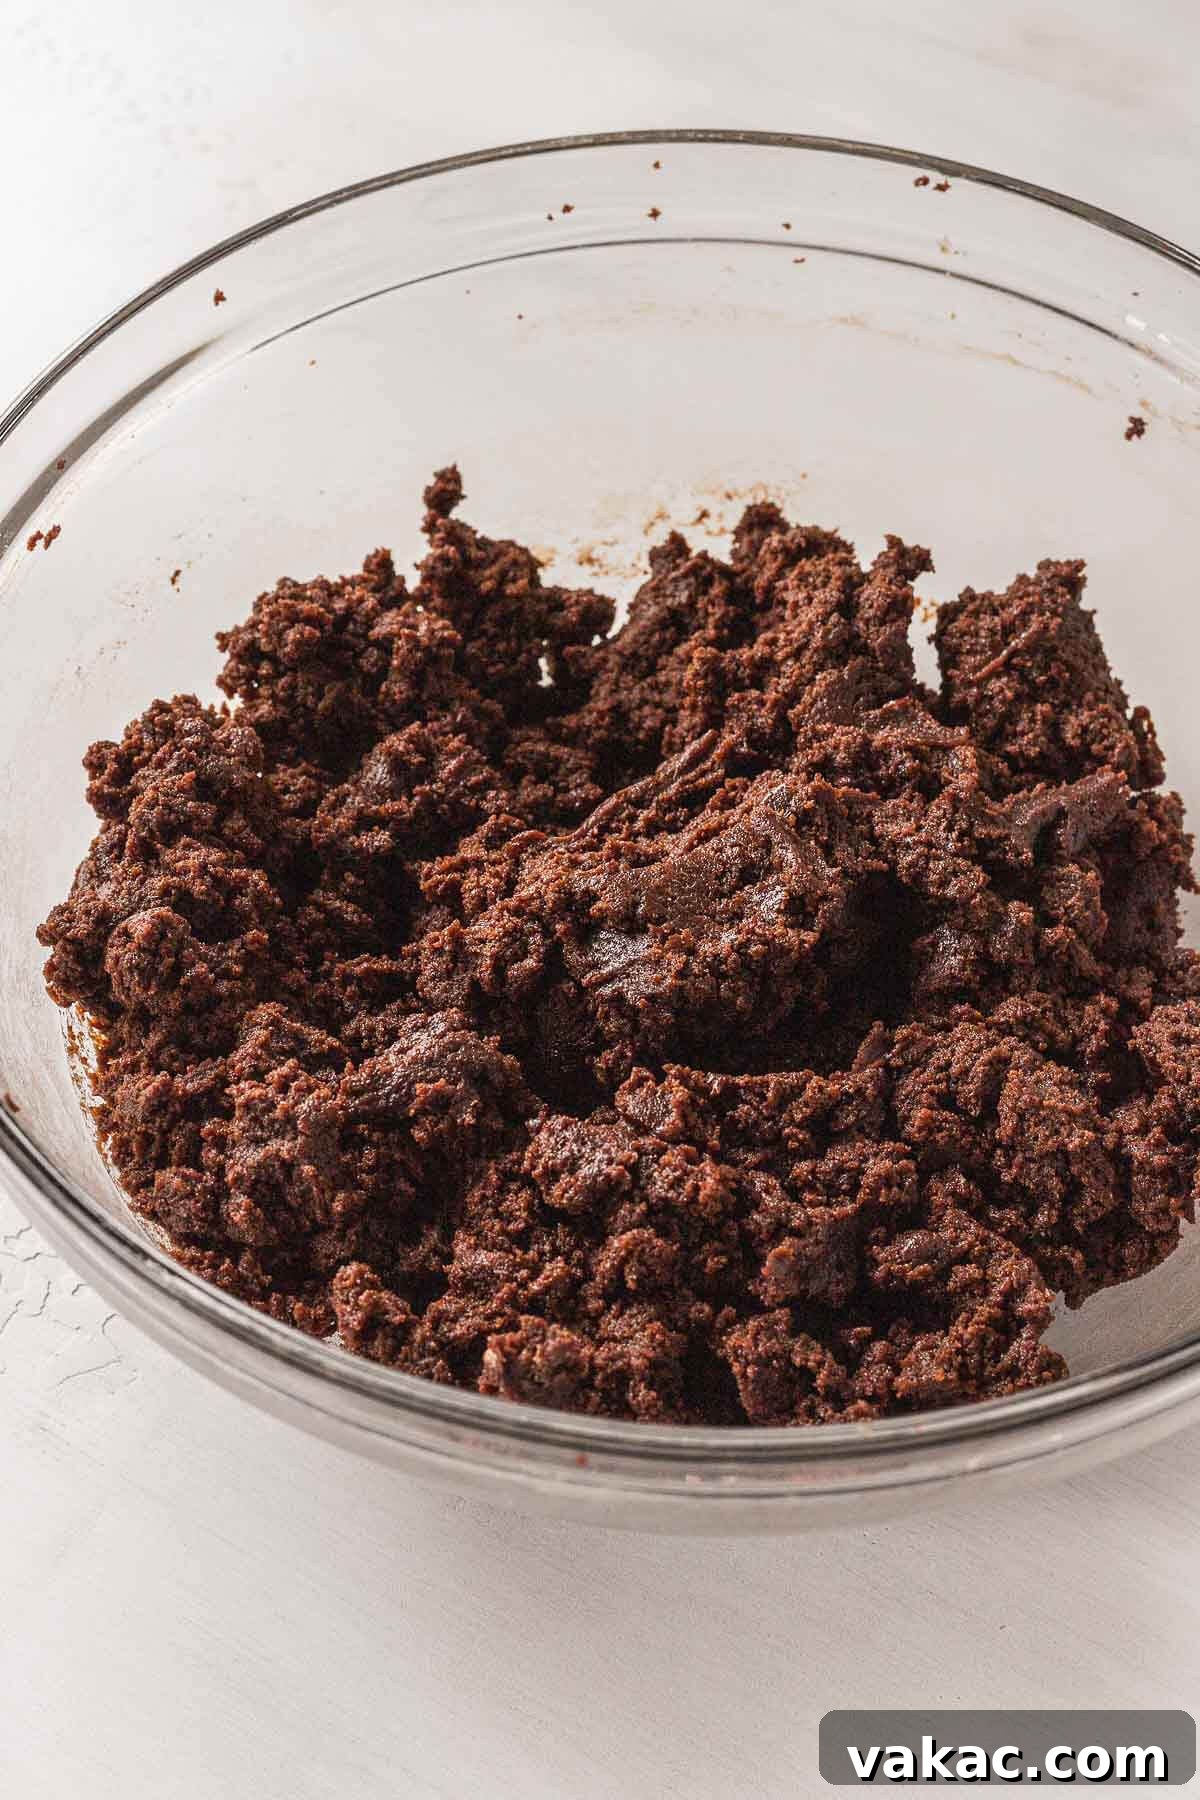
- Mix cake and frosting: Add precisely ½ cup of the prepared chocolate buttercream frosting to the crumbled cake. Mix thoroughly, using your hands or the stand mixer, until the mixture is fully combined. The goal is a dough-like consistency that holds together when squeezed but isn’t overly sticky or wet. It should resemble cookie dough. (Tip: You will likely have leftover frosting. Don’t discard it! You can freeze the excess buttercream for future use.)
- Roll the cake pop balls: Using a tablespoon measuring spoon or a tablespoon cookie scoop, portion out the cake mixture. Roll each portion firmly between your palms to form smooth, uniform balls. Place these cake balls onto a baking sheet lined with parchment paper.
- Freeze to firm: Once all your cake balls are formed, transfer the baking sheet to the freezer. Freeze for at least 1 hour. This crucial step ensures the cake balls are firm enough to withstand dipping without falling apart and helps the chocolate coating set quickly and smoothly.

Part 4: Dipping and Decorating Your Cake Pops
The final step brings your chocolate cake pops to life with a beautiful, glossy coating and festive decorations.
- Prepare the chocolate coating: In a large, microwave-safe bowl, combine the chopped semi-sweet chocolate and refined coconut oil. Microwave in 30-second intervals, stirring thoroughly after each interval, until the chocolate is completely melted and smooth. Stirring frequently prevents the chocolate from burning. Allow the melted chocolate to cool slightly for about 10 minutes before dipping; this helps prevent the coating from cracking and ensures it adheres well.
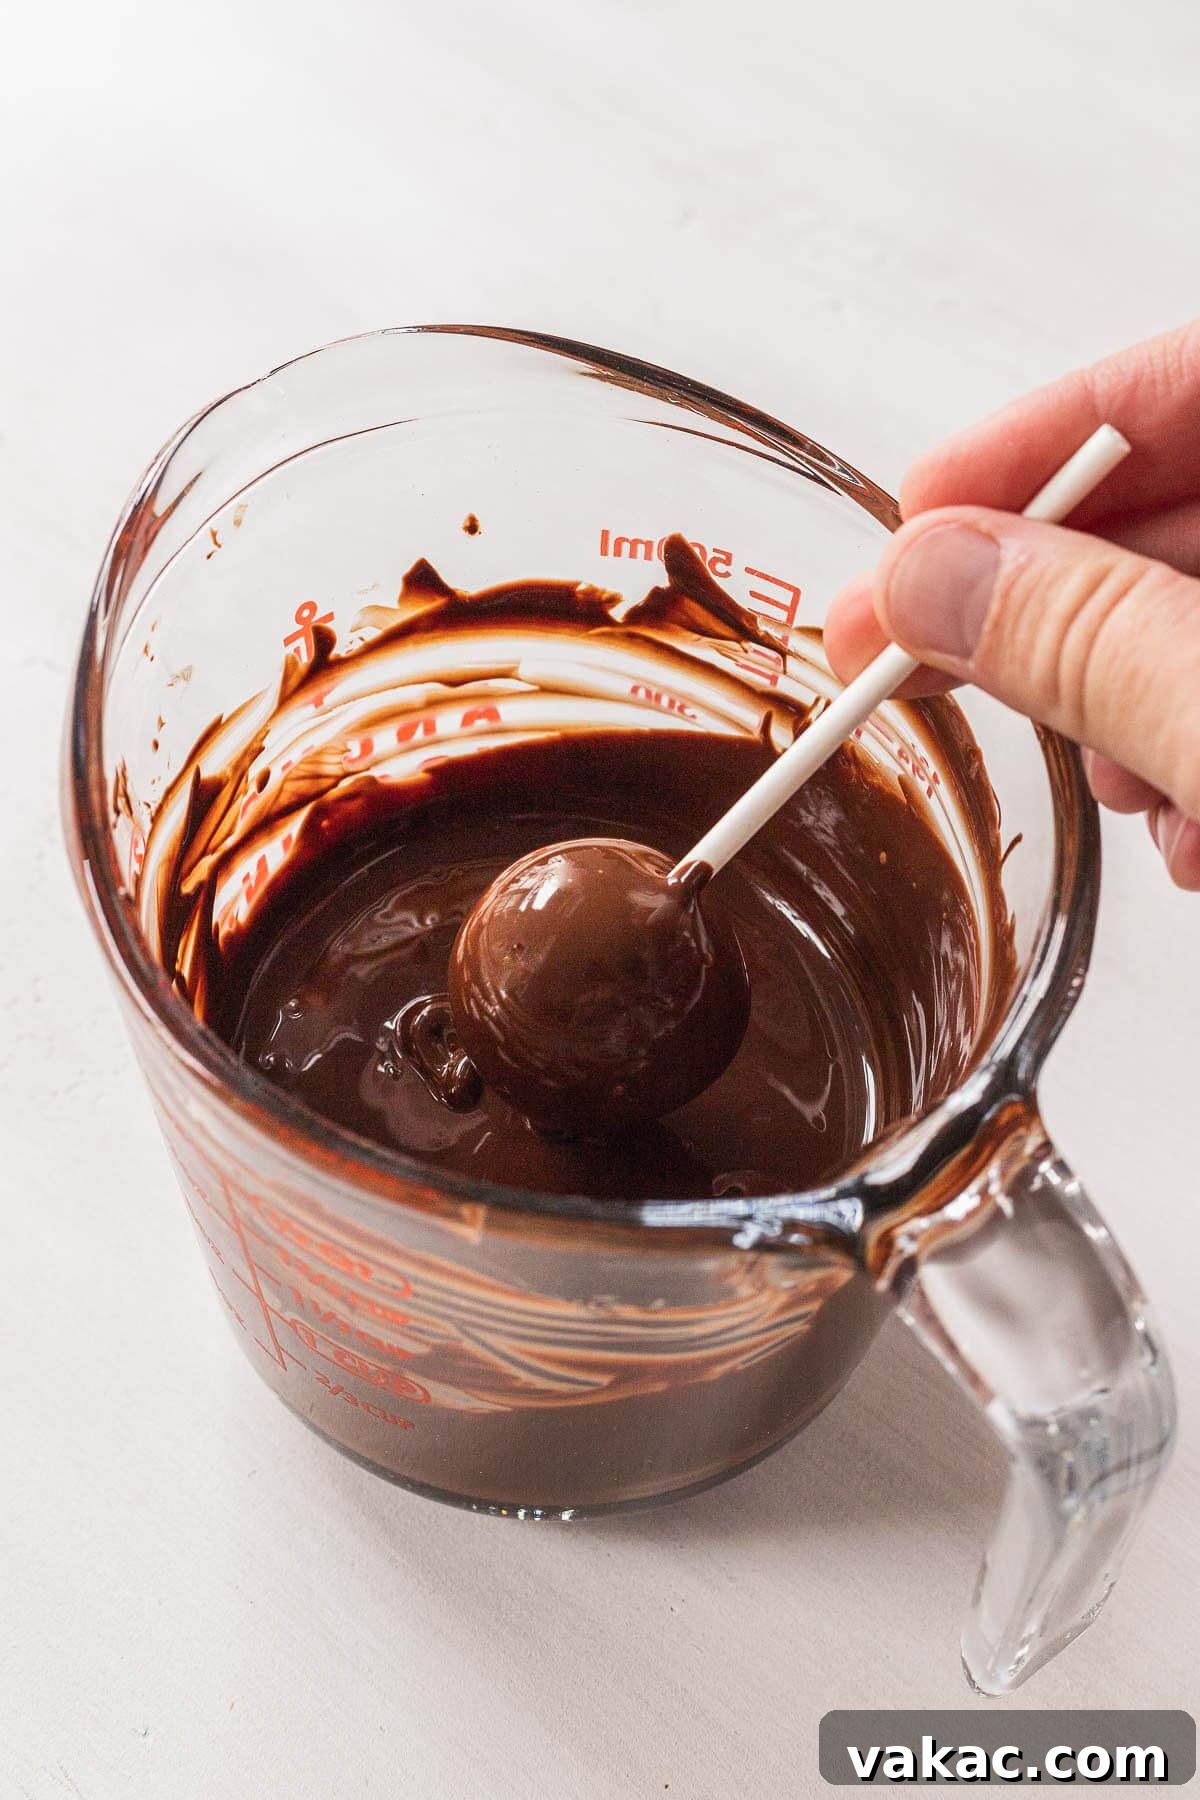
- Set up your dipping station: Pour some of the melted chocolate into a tall, narrow cup. The cup should be wide enough to easily dunk a cake pop. You will refill this cup as needed during the dipping process.
- Dip and decorate: Retrieve 4 to 5 chilled cake balls from the freezer at a time. This prevents them from defrosting too quickly. Dip the tip of a lollipop stick (I recommend 4-inch sticks) about ½-inch into the melted chocolate, then insert the chocolate-coated end of the stick about ¾ of the way into the center of a cake ball. This chocolate acts as “glue” to secure the stick. Immediately dip the entire cake pop (excluding the stick) into the melted chocolate, ensuring it’s fully covered. Gently tap the stick against the edge of the cup a few times, rotating it slowly, to allow any excess chocolate to drip off.
- Add sprinkles or nuts: If you’re adding sprinkles or chopped nuts, do so immediately after dipping and tapping off excess chocolate, while the chocolate coating is still wet. This ensures they adhere properly.
- Allow to set: Stick the decorated cake pop into a styrofoam block or a box with holes punched in it. This holds them upright while the chocolate sets.
- Repeat and finish: Continue this process, taking out small batches of cake balls from the freezer as needed, until all your chocolate cake pops are coated and decorated. Allow the chocolate-covered cake pops to set completely at room temperature for at least 30 minutes, or until the chocolate is firm to the touch.
Frequently Asked Questions About Chocolate Cake Pops
What Equipment Do I Need to Make Cake Pops?
Beyond your standard baking tools and the ingredients listed in the recipe, you’ll need a few specialized items to master the art of cake pops:
- Short paper sticks: Often labeled as “cake pop sticks” or “lollipop sticks” on Amazon or in craft stores. Four-inch sticks are a good versatile size.
- A tablespoon measuring spoon or a tablespoon cookie scoop: For consistently sized cake balls, which ensures even dipping and a professional look.
- Tall, narrow cup: Essential for holding the melted chocolate for dipping. Its height allows you to fully submerge the cake ball without using excessive chocolate.
- Styrofoam block or a box with punched holes: Crucial for standing the cake pops upright while their chocolate coating sets. This prevents flattening or smudging.
How to Store Chocolate Cake Pops?
Once the chocolate coating has fully set, store your delicious chocolate cake pops in an airtight container or a Ziploc bag. Place them in the refrigerator to maintain their freshness and firm texture. When you’re ready to enjoy them, simply take them out of the fridge and let them sit on the counter for a few minutes to warm up slightly to room temperature; this will enhance their flavor and make them perfectly soft to bite into.
Can You Freeze Cake Pops?
Absolutely! Cake pops are fantastic for making ahead. You can freeze them for up to three months. For best results, freeze them after they’ve been dipped and the chocolate coating has set. Place them in a single layer on a baking sheet to freeze solid, then transfer them to a large freezer-safe bag or airtight container, ensuring they are well protected from freezer burn. To thaw, simply transfer them to the refrigerator overnight. They will be just as delicious as when they were freshly made.
How Long Do Cake Pops Last?
Properly stored, your homemade chocolate cake pops have a good shelf life:
- In the refrigerator: They will last for up to one week in an airtight container.
- In the freezer: They can be kept for up to three months. This applies whether they are coated in chocolate or just as plain cake balls.
Troubleshooting Common Cake Pop Issues
Even experienced bakers can encounter small hurdles. Here are solutions to common cake pop problems:
- My chocolate coating is too thick: If your melted chocolate seems too thick for smooth dipping, add a tiny bit more coconut oil (½ teaspoon at a time) and stir until it reaches the desired consistency. Be careful not to add too much, or it will be too thin and won’t coat properly.
- My cake pops are falling off the sticks: This usually happens for a few reasons: the cake balls weren’t frozen long enough, the melted chocolate used to “glue” the stick was too hot, or the stick wasn’t inserted far enough into the cake ball. Ensure your cake balls are very firm from freezing, and let your melted chocolate cool slightly before inserting the sticks.
- My chocolate coating is cracking: This can occur if the cake balls are too cold when dipped into chocolate that is too warm. The sudden temperature difference causes the chocolate to contract and crack. Allow your melted chocolate to cool for about 10 minutes before dipping, and only remove a few cake balls from the freezer at a time.
Expert Tips for Chocolate Cake Pop Perfection
To ensure your chocolate cake pops are absolutely perfect, keep these expert tips in mind:
- Cake base flexibility: While this recipe includes instructions for a homemade chocolate cake layer, feel free to use a good quality boxed cake mix if you’re short on time. Just remember, you’ll only need one 9-inch cake layer from the mix for this recipe. Baking from scratch allows for superior flavor and texture, but a box mix can be a convenient shortcut.
- No need to trim edges: Unlike some vanilla cake pop recipes where removing the slightly drier outer crust of the cake is recommended, with this chocolate cake, there’s no need to peel off the edges or outside prior to crumbling. I’ve thoroughly tested this, and you won’t notice a difference in the final product. The chocolate cake is inherently moist and blends seamlessly with the frosting.
- Frosting quantity: This chocolate frosting recipe makes slightly more than you’ll need for the cake pops (you’ll use about ½ cup). This is intentional, allowing for a perfectly balanced consistency. Don’t waste the extra! You can freeze the remaining buttercream in an airtight container for up to a month and use it for cupcakes, cookies, or another batch of cake pops.
- Secure setting: For the chocolate coating to harden beautifully without your cake pops toppling over, it’s highly recommended to use a piece of styrofoam. Simply poke the sticks into the styrofoam, allowing the cake pops to stand upright. If styrofoam isn’t available, a sturdy cardboard box with small holes pierced into it will serve as a great alternative. Ensure the holes are just large enough to hold the sticks securely.
- Temperature is key for dipping: The temperature of both your cake balls and your melted chocolate significantly impacts the dipping process. Cake balls should be thoroughly frozen and kept cold. The melted chocolate, however, should not be too hot, as this can cause the cake balls to melt and crumble, or the coating to crack when it sets. Let the chocolate cool slightly after melting, aiming for a warm, fluid consistency, not scorching hot.
- Consistency of cake/frosting mixture: When mixing the crumbled cake and frosting, the mixture should resemble play-dough or cookie dough. It should be pliable enough to roll into balls without crumbling, but not so sticky that it’s difficult to handle. If it’s too dry, add a tiny bit more frosting (½ teaspoon at a time). If it’s too wet, you can mix in a tablespoon of extra cake crumbs or powdered sugar.
Explore More Decadent Chocolate Desserts to Try!
If you’ve fallen in love with these chocolate cake pops, you’ll surely enjoy these other delightful chocolate treats from our collection:
- Decadent Chocolate Truffles
- Rich Chocolate Peanut Butter Balls
- Irresistible Oreo Balls
- Refreshing Mint Chocolate Truffles
- Gourmet Salted Caramel Almond Turtles
Homemade Chocolate Cake Pops
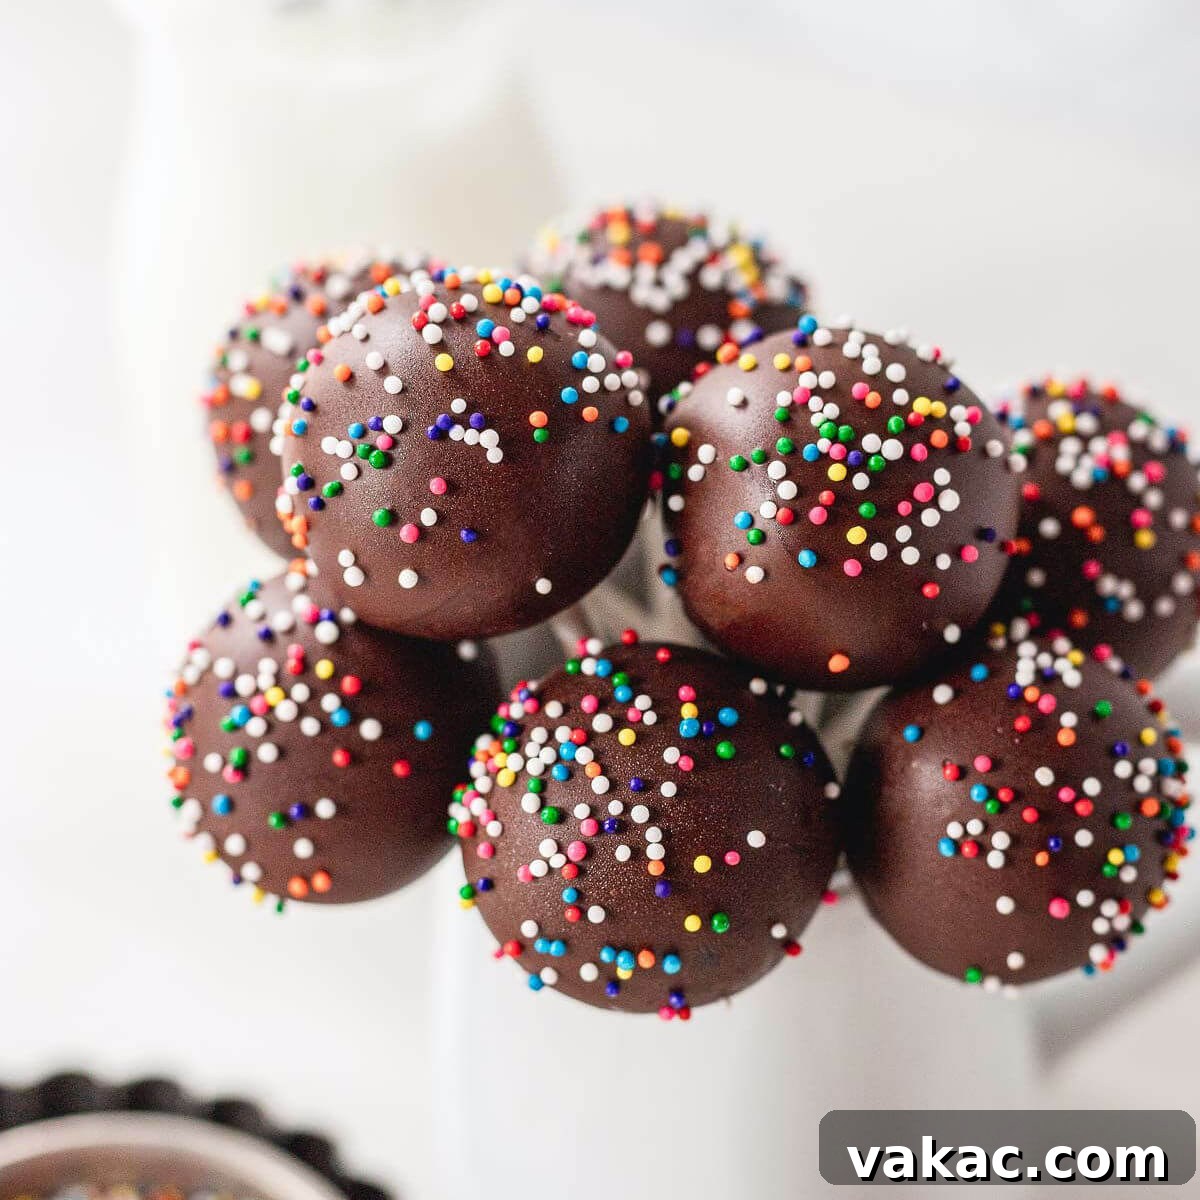
Chocolate cake is crumbled up and mixed with frosting before being rolled into balls and dunked into melted chocolate. Chocolate cake pops require some assembly, but they’re more than worth the extra effort!
Pin Recipe
Leave a Review
Ingredients
For the chocolate cake:
- 1 cup all-purpose flour (spooned & leveled, 125 grams)
- ¼ cup plus 2 tablespoons unsweetened natural cocoa powder (30 grams)
- ¾ teaspoon baking powder
- ½ teaspoon baking soda
- ½ teaspoon salt
- ½ cup packed light brown sugar (100 grams)
- ½ cup granulated sugar (100 grams)
- ⅓ cup canola or vegetable oil (80 ml)
- ½ cup buttermilk (120 ml)
- 1 large egg
- 1 teaspoon pure vanilla extract
- ½ cup boiling water (120 ml)
- 1 teaspoon instant espresso powder (optional but recommended)
For the chocolate frosting:
- ¼ cup unsalted butter (softened, ½ stick; 60 grams)
- ¾ cup powdered sugar (90 grams)
- 2 tablespoons unsweetened cocoa powder (sifted, 10 grams)
- 1 tablespoon milk (15 ml)
- ¼ teaspoon pure vanilla extract
For the chocolate coating:
- 16 ounces semi sweet chocolate (I used 4, 4oz Ghirardelli Semi Sweet Chocolate Bars)
- 1 tablespoon refined coconut oil (14 grams)
- Optional: sprinkles or chopped nuts (as decoration)
Instructions
- To make the chocolate cake: Preheat the oven to 350°F (180°C). Grease a 9-inch round cake pan with nonstick cooking spray, line the bottom of the pan with parchment paper, and set aside.
- In a large mixing bowl, sift together the flour, cocoa powder, baking powder, baking soda, and salt. Whisk in the brown sugar and granulated sugar until well combined. Then, add the oil, buttermilk, eggs, and vanilla extract and mix until just combined.
- Add the instant espresso powder to the ½ cup of boiling water and mix until fully dissolved. Add to the mixing bowl and mix until everything is just combined. The batter will be thin.
- Pour the batter into the prepared cake pan.
- Bake for 28 to 30 minutes or until a toothpick inserted into the center of the cake comes out clean and the top springs back when lightly touched.
- Remove from the oven and transfer to a wire rack to cool in the pan for 30 minutes. Run a knife around the outside of the cake, then carefully remove the cake from the pan, and place on a wire rack to cool completely.
- To make the chocolate frosting: In the bowl of a stand mixer fitted with the paddle attachment or in a large mixing bowl using a handheld mixer, beat the butter until smooth.
- Add the powdered sugar and mix on low speed at first, then increase to medium speed and continue mixing for 1 to 2 minutes or until fully combined.
- Add the cocoa powder and mix until well combined. Stop and scrape down the sides of the bowl, then mix in the milk and vanilla extract on medium speed until everything is fully combined.
- To make and assemble the cake pops: Crumble the cake into small pieces into a large mixing bowl or the bowl of a stand mixer fitted with the paddle attachment. Add ½ cup of the chocolate frosting to the bowl (freeze the rest for another use!), and mix until fully combined, the mixture should resemble cookie dough.
- Roll the cake-pop mixture into 1-tablespoon sized balls and place on a parchment-lined baking sheet. Freeze for 1 hour.
- Add the chopped semi-sweet chocolate and coconut oil to a large microwave safe bowl. Microwave in 30 second intervals, stirring well between each one, until completely melted and smooth.
- Transfer some of the melted chocolate into a tall cup that is wide enough to dunk a cake pop into. You will refill this cup with chocolate as you work. Allow the melted chocolate to cool slightly, about 10 minutes, before proceeding.
- Remove 4 to 5 cake balls from the freezer at a time, to prevent them from defrosting before dipping in the chocolate.
- Dip the end of a lollipop stick about ½-inch into the melted chocolate (I used 4-inch sticks), then into the center of a cake ball so it’s ¾ of the way in. Then, dip the cake pop into the melted chocolate, so the entire cake pop is covered in chocolate (not the stick). Gently tap the stick a few times and rotate it to remove excess chocolate. If adding sprinkles, add right after the cake pop is dunked in the chocolate and the excess chocolate is tapped off. Stick into a styrofoam block and allow to set.
- Repeat with the remaining 3 to 4 cake balls that are out of the freezer. Then slowly take out more cake balls as needed until all of the cake pop balls are coated in chocolate.
- Allow chocolate-covered cake pops to set at room temperature for at least 30 minutes.
Notes
Storage Instructions: Store the coated cake pops in a ziplock bag or airtight container in the refrigerator for up to 1 week.
Freezing Instructions: Cake pops may be frozen in a large freezer bag for up to 3 months. Thaw overnight in the refrigerator.
Did you make this recipe?
Mention @livewellbakeoften on Instagram or tag #livewellbakeoften.