
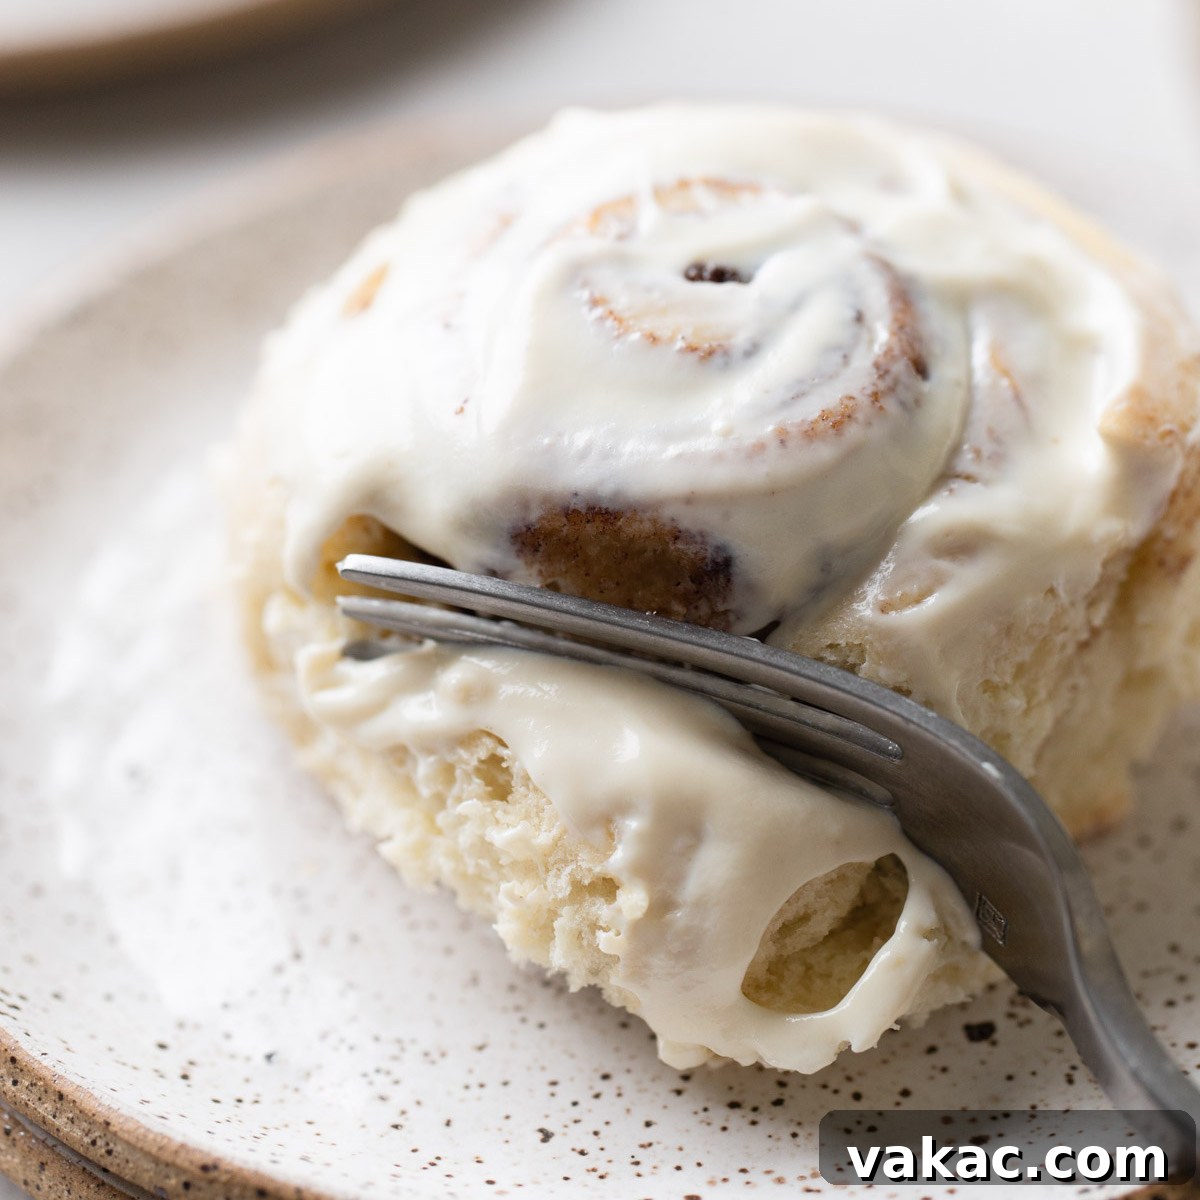
The Best Homemade Cinnamon Rolls: A Step-by-Step Guide to Fluffy Perfection
Welcome to the ultimate guide for making my family’s favorite homemade cinnamon rolls! This easy-to-follow recipe and comprehensive tutorial will walk you through every step, ensuring you achieve soft, gooey, and utterly delicious results every time. Whether you prefer a classic cream cheese frosting or a simple vanilla icing, these rolls are perfect for any occasion and can even be prepped ahead of time to make your mornings sweeter.
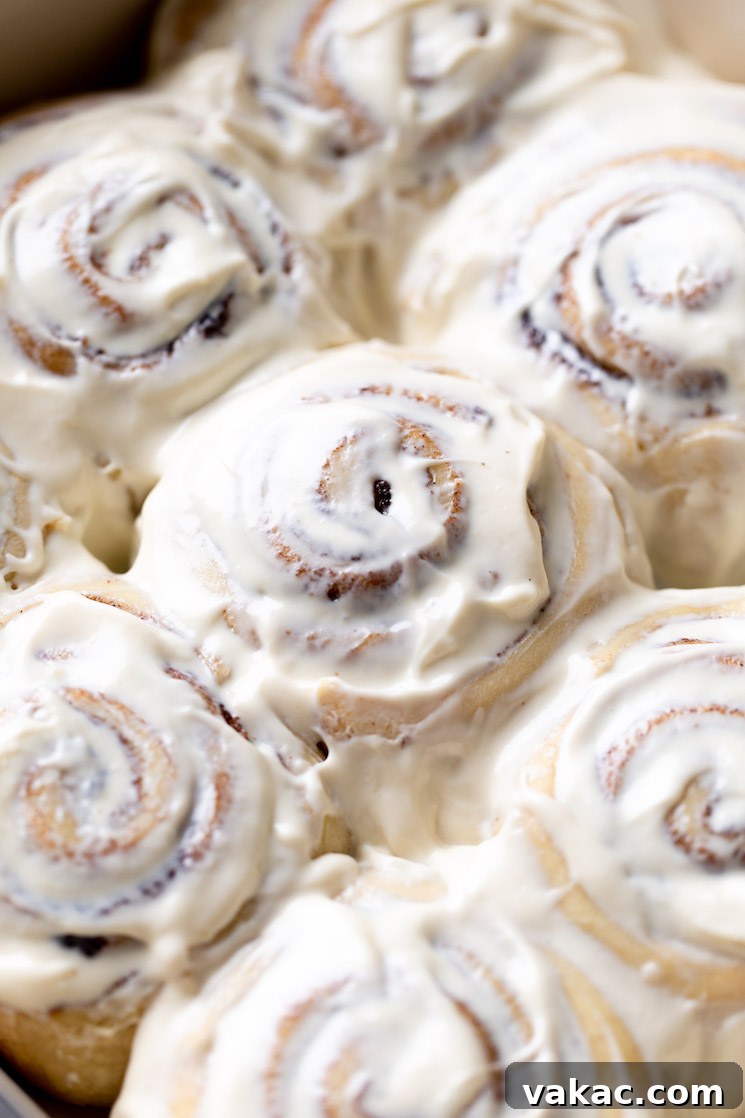
There’s nothing quite like the aroma of freshly baked cinnamon rolls filling your home, especially during the holidays or for a special breakfast treat. This isn’t just any cinnamon roll recipe; it’s a cherished family heirloom, perfected over many years by my grandmother. Her dedication to achieving the ideal balance of warmth, sweetness, and tender texture has resulted in a recipe that consistently delivers pure delight.
Originally shared in 2018, I’ve taken the time to thoroughly update and enhance this post, transforming it into an even more detailed resource. I’ve meticulously broken down every critical step, from the delicate art of proofing yeast and scalding milk to the simplest way to slice the rolls and how to gauge perfect dough consistency. Plus, you’ll find invaluable tips for preparing them in advance, making these irresistible pastries more accessible than ever.
If the thought of baking homemade cinnamon rolls has ever seemed daunting, I’m confident this recipe will completely change your perspective. Once you experience the first bite of these incredibly soft, buttery, and melt-in-your-mouth cinnamon rolls, generously coated in a decadent frosting, you’ll be eager to bake them again and again. They are truly an experience—a warm hug in food form—and a testament to the joy of homemade baking.
Crafting the Perfect Cinnamon Roll Dough: A Detailed Guide
While this cinnamon roll recipe involves several steps, each one is straightforward and contributes to the incredible final product. Don’t let the length deter you; think of it as a guided journey to baking perfection. Here’s a simple breakdown of how to achieve cinnamon roll bliss:
-
Proof the Yeast for Optimal Rise
The foundation of soft, airy cinnamon rolls lies in active yeast. To activate your yeast effectively, combine ¼ cup of warm water with 1 teaspoon of granulated sugar in a small bowl. The sugar acts as food for the yeast, helping it to wake up. Stir in 1 package (2¼ teaspoons) of active dry yeast. It’s crucial that your water is at the right temperature—ideally between 105°F and 115°F (40°C-46°C). Water that’s too hot will kill the yeast, rendering it inactive, while water that’s too cold won’t activate it at all. The water should feel warm to the touch, similar to a warm bath, but not hot. Let this mixture sit undisturbed for 5 to 10 minutes. When ready, it should be foamy and bubbly, indicating that the yeast is alive and ready to work its magic. If it doesn’t foam, your yeast might be old or the water temperature was off, and you’ll need to start this step over with fresh yeast.
-
Scald Your Milk for a Lighter Texture
Scalding milk is a traditional baking technique that plays a vital role in achieving incredibly light and soft cinnamon rolls. The process of heating the milk denatures proteins that can inhibit yeast activity and gluten development, which, in turn, allows for a better rise and a more tender crumb. To scald the milk, pour 1 cup of whole milk into a saucepan and place it over medium heat. Stir frequently to prevent scorching on the bottom. Watch closely; once you see small bubbles forming around the edges of the pan, just before it comes to a rolling boil, remove it immediately from the heat. Avoid boiling the milk aggressively, as this can affect its flavor and consistency. Set it aside to cool slightly.
-
Combine the Warm Milk with Sugar, Shortening, and Salt
In a large heat-proof mixing bowl (or the bowl of your stand mixer), add the 5 tablespoons of granulated sugar, 3 tablespoons of shortening, and 1¼ teaspoons of salt. Pour the freshly scalded milk over these ingredients. The warmth of the milk will help to dissolve the sugar and salt efficiently, and also aid in melting the shortening. Don’t worry if a few small pieces of shortening remain; they will eventually incorporate into the dough. Now, here’s another critical temperature check: allow this mixture to cool down to about 110°F (43°C). This is essential to prevent killing your activated yeast in the next step. You can use a kitchen thermometer to be precise, or test it by touching – it should feel comfortably warm, not hot.
-
Integrate Flour, Egg, and Yeast Mixture
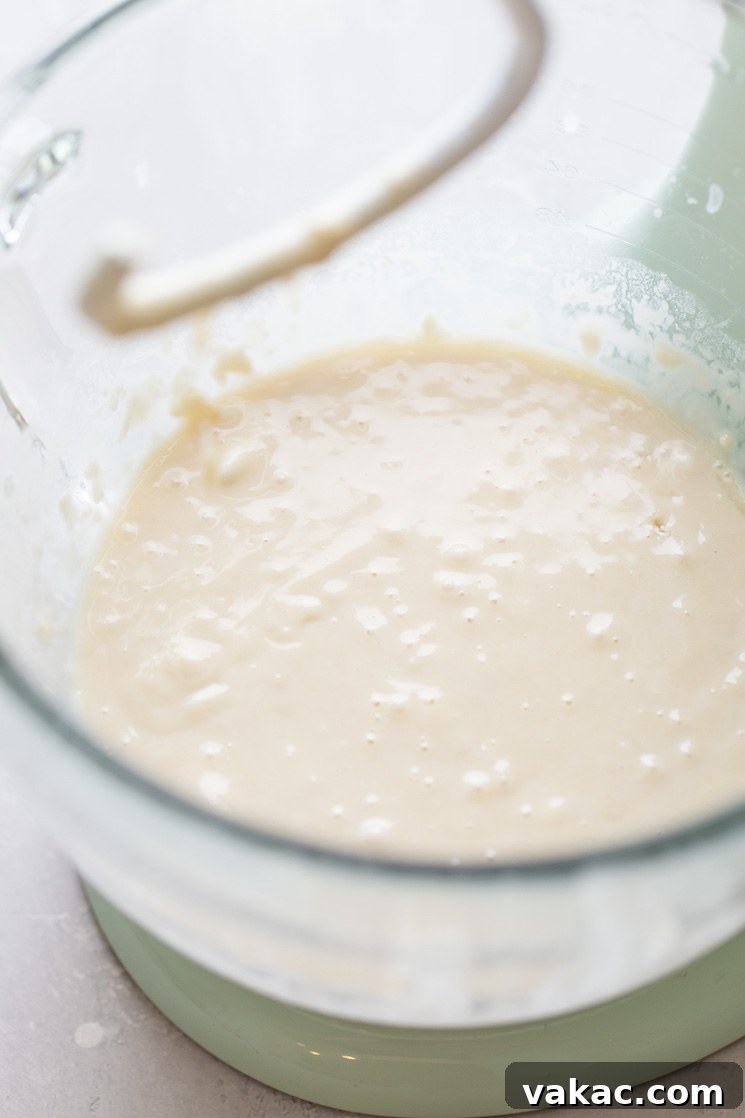
Once your milk mixture has cooled to the appropriate temperature (around 110°F), it’s time to bring everything together. Add 2 cups (250 grams) of all-purpose flour, one large room temperature egg, and your foamy, proofed yeast mixture to the bowl. Mix these ingredients together until they are just combined. At this stage, your mixture will be quite wet and loose, resembling a thick batter. It should look similar to the image above on the left, demonstrating the initial integration of wet and dry components.
-
Gradually Add Remaining Flour for Perfect Consistency
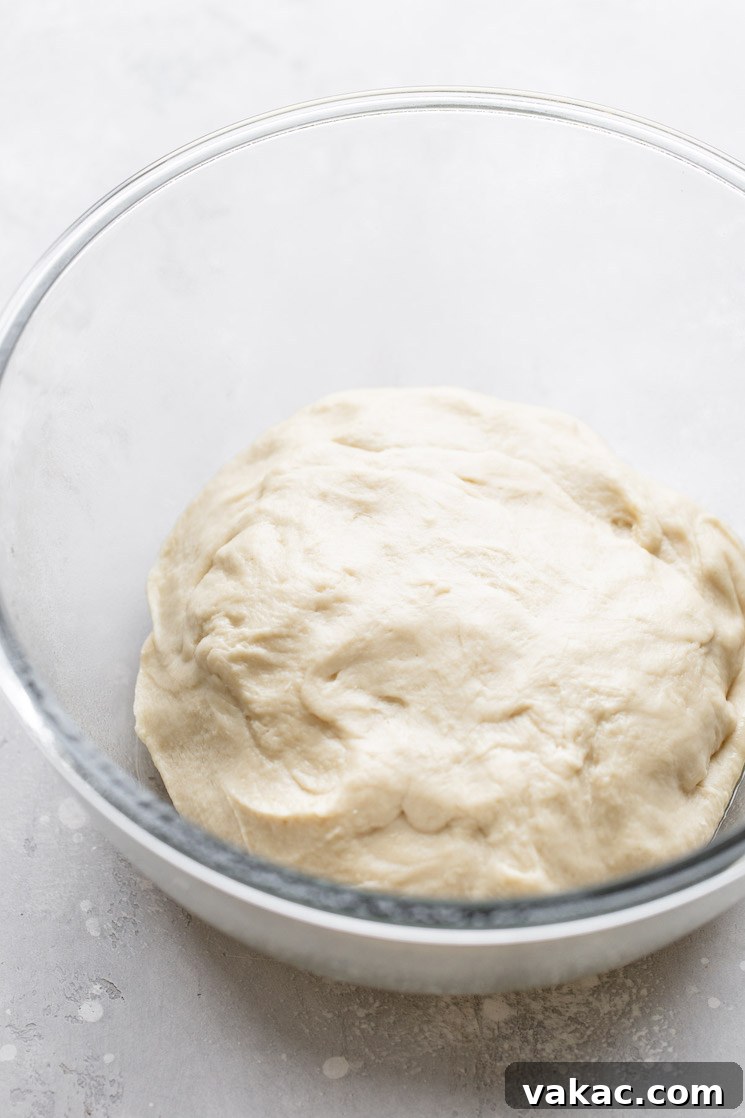
The total amount of flour needed can vary slightly based on humidity and how you measure. I typically use between 4¼ to 4½ cups (500-560 grams) of all-purpose flour in total for this recipe. After adding the initial 2 cups, I recommend mixing in another 2 cups (250 grams) of flour. Once that’s incorporated, begin adding the remaining flour one to two tablespoons at a time, kneading after each addition. The goal is to achieve a dough that is soft, pliable, and easy to handle, yet no longer excessively sticky. It should pull away from the sides of the bowl or your hands cleanly. Resist the urge to add too much flour, as this can result in dense, tough cinnamon rolls instead of the light, fluffy texture we’re aiming for.
-
Knead the Dough to Develop Gluten
Kneading is a fundamental step that develops the gluten in the dough, which is essential for giving the cinnamon rolls their characteristic soft and elastic texture. Without adequate kneading, your rolls can turn out tough and crumbly. Knead the dough for approximately 5 to 10 minutes. If you’re using a stand mixer, attach the dough hook and knead on low speed. This is the easiest method. Alternatively, you can knead by hand on a lightly floured surface, folding and pressing the dough repeatedly. You’ll know your dough is properly kneaded when it feels smooth, is no longer sticky, and passes the “windowpane test.” This test involves stretching a small piece of dough; if you can stretch it thin enough to see light through it without tearing, the gluten is well-developed.
-
First Rise: Allowing the Dough to Double in Size
After kneading, form the dough into a smooth ball and place it in a lightly greased bowl. Ensure the bowl is large enough to accommodate the dough doubling in size. Cover the bowl tightly with plastic wrap or a clean kitchen towel to prevent it from drying out. Place the covered bowl in a warm, draft-free environment to rise. A warm spot in your kitchen, or even a slightly warmed oven (turned off, with just the light on) can work wonders. I’ve even had success placing the bowl on a heating pad set on low – it might sound unconventional, but it creates a perfect warm microclimate for yeast activity! Allow the dough to rise for about 1 to 1.5 hours, or until it has visibly doubled in size. This first rise, also known as the bulk fermentation, is crucial for flavor development and texture.
-
Punch Down and Roll Out the Dough
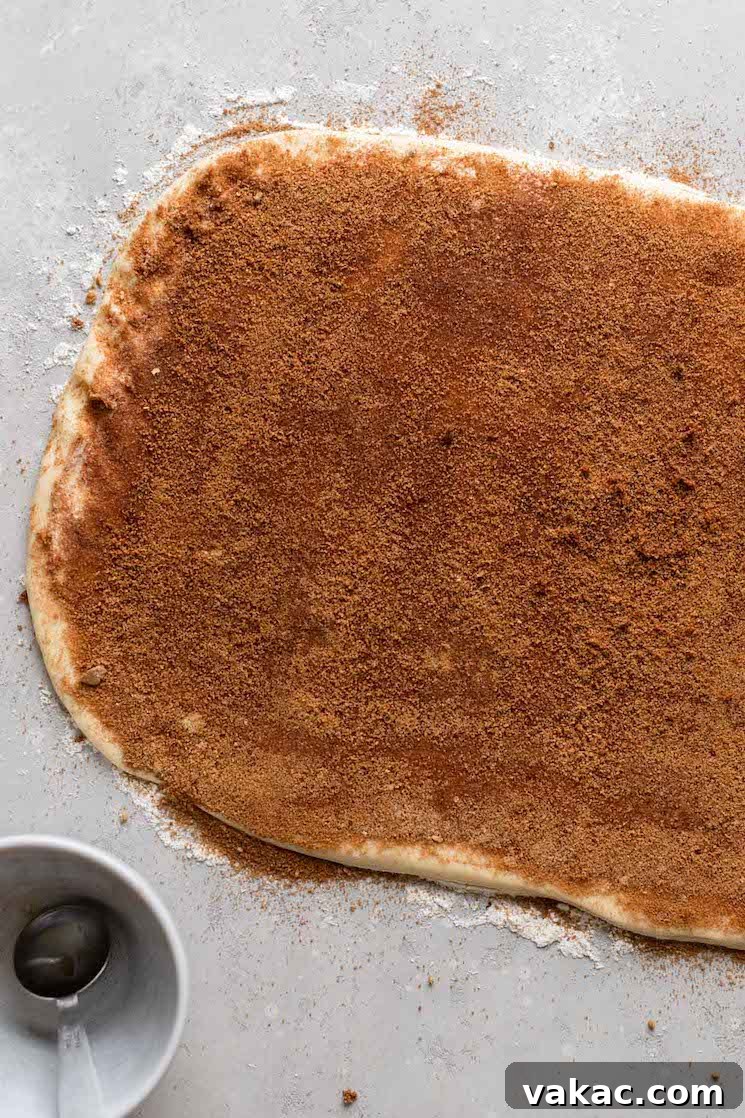
Once the dough has completed its first rise and doubled in size, gently punch it down. This step releases the accumulated gases and helps redistribute the yeast for a more even texture. Turn the dough out onto a lightly floured surface and roll it into a large rectangle, approximately 12×18 inches and about ¼-inch thick. Aim for an even thickness across the entire rectangle to ensure consistent baking and uniform rolls. Take your time to get the shape right, as this will impact the final appearance of your cinnamon rolls.
-
Layer on the Irresistible Filling
Now for the heart of the cinnamon roll: the delicious filling! Evenly spread 4 tablespoons (60 grams) of softened butter across the entire surface of the rolled-out dough, leaving a small border (about ½ inch) along one of the longer edges to help seal the roll. In a separate small bowl, combine ¾ cup (150 grams) of packed brown sugar with 1½ tablespoons of ground cinnamon. Sprinkle this aromatic mixture generously over the buttered dough, then gently press it down with your hands or a spatula to ensure it adheres well. For an extra touch of flavor, you can even add a pinch of nutmeg or cardamom to your cinnamon mixture.
-
Roll and Cut the Dough into Perfect Swirls
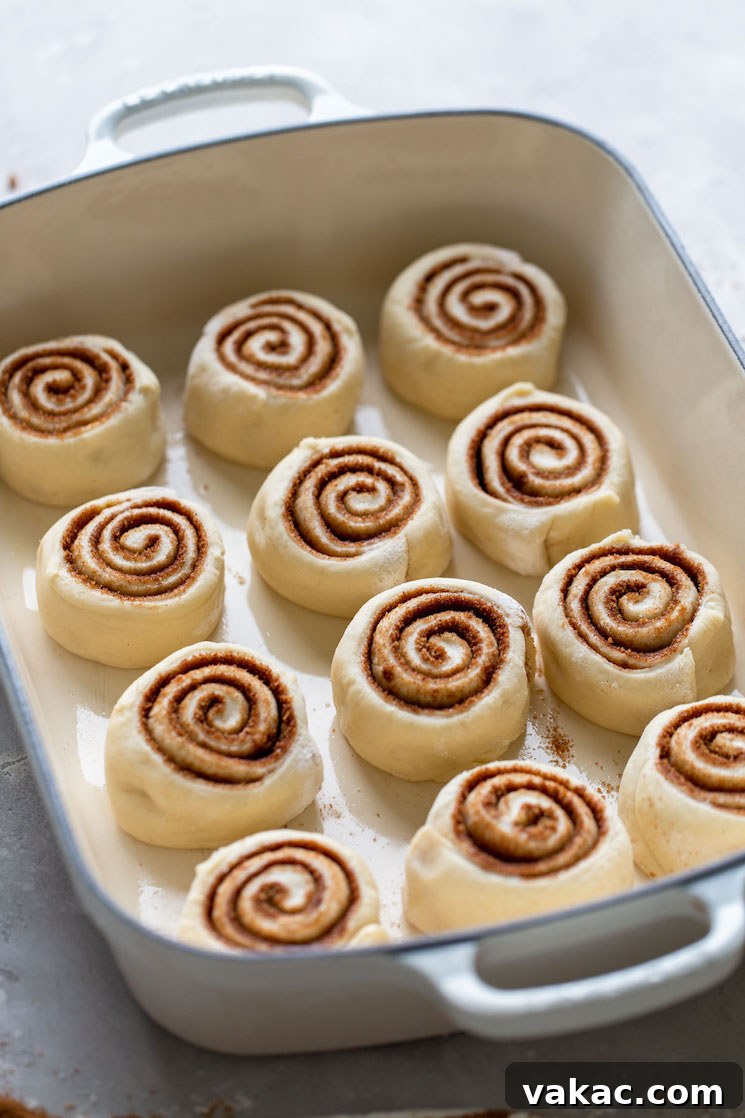
Starting from the 18-inch side (the longer edge) opposite the small butter-free border, carefully roll the dough up tightly into a log. A tight roll is key to achieving those beautiful, well-defined swirls. Once rolled, use a sharp, unflavored dental floss string or a very sharp knife to cut the log into 12 equal pieces. Dental floss is often preferred because it creates clean, even slices without squishing the dough, preserving the distinct layers. Simply slide the floss under the log, cross the ends over the top, and pull tightly. Grease a 9×13-inch baking pan and arrange the cut cinnamon rolls snugly inside, leaving a little space between them as they will expand during the second rise.
-
Second Rise: The Final Proof
Once the rolls are in the pan, cover them again with plastic wrap or a clean towel and allow them to rise in a warm spot for another 45 minutes to 1 hour. This second rise, or “proof,” is crucial for developing their ultimate lightness and airy texture. Alternatively, for convenient morning baking, you can prepare the rolls up to this point, cover them tightly, and refrigerate them overnight. In the morning, remove them from the refrigerator and let them rise in a warm spot for 1 to 1.5 hours before baking as directed. Both methods yield fantastic results!
-
Bake to Golden Perfection and Cool
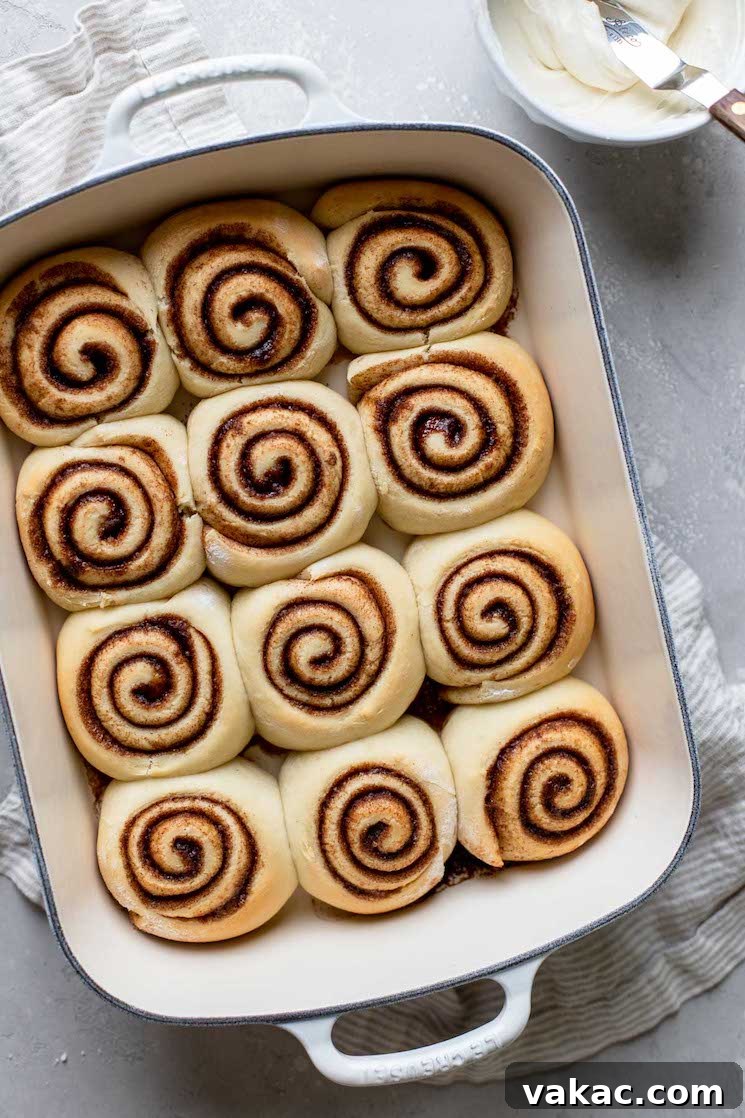
Preheat your oven to 375°F (190°C) during the last 30 minutes of the second rise. Bake the cinnamon rolls for approximately 25 minutes. Keep a close eye on them; if they start to brown too quickly on top, loosely tent the pan with a piece of aluminum foil after about 10-15 minutes of baking. This prevents over-browning while allowing the centers to cook through. The rolls are done when they are golden brown on top and cooked through in the middle (you can gently lift one to check the bottom). Remove them from the oven and let them cool in the pan for about 15-20 minutes before applying frosting. This allows them to set slightly and prevents the frosting from melting too quickly.
Choosing Your Perfect Frosting: Cream Cheese or Vanilla Glaze?
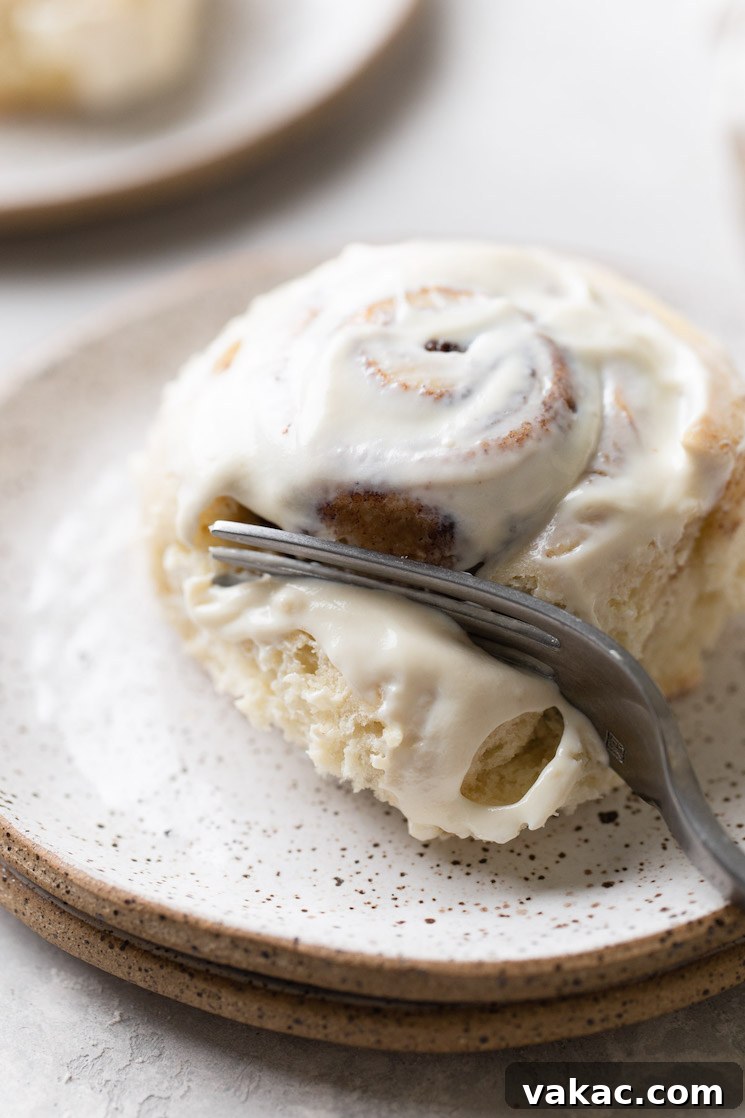
The final touch to these incredible cinnamon rolls is the frosting, and you have delightful options. My recipe includes a luxurious cream cheese frosting, which provides a tangy counterpoint to the sweet cinnamon filling, adding a richness that is simply irresistible. Alternatively, for those who prefer a lighter, simpler finish, I’ve also provided a straightforward recipe for an easy vanilla glaze in the recipe notes. No matter which you choose, these homemade cinnamon rolls promise to be among the best you’ve ever tried, elevating any breakfast or dessert experience.
Frequently Asked Questions About Homemade Cinnamon Rolls
Baking with yeast can sometimes bring up questions, especially for newcomers. Here are some common queries and detailed answers to help you master these homemade cinnamon rolls:
How can you tell if your dough is properly kneaded?
Determining if yeast dough is perfectly kneaded is key to its texture. Your dough is ready when it transforms from a sticky, shaggy mass into a smooth, elastic, and non-sticky ball that holds its shape. A classic test is the “windowpane test”: pinch off a small piece of dough and gently stretch it with your fingers. If you can stretch it thin enough to see light through it without tearing, much like a translucent windowpane, then the gluten has developed sufficiently. Another good indicator is if you lightly press your finger into the dough, it should slowly bounce back.
How long do I bake them?
I typically bake these cinnamon rolls for about 25 minutes in a 375°F (190°C) oven. However, baking times can vary slightly depending on your specific oven and the pan you’re using. Look for visual cues: the rolls should be golden brown on top and feel firm but springy to the touch. The centers should be cooked through, which you can sometimes check by gently lifting a roll from the edge of the pan. If the edges are deeply golden and the center appears cooked, they are likely done. If they’re browning too fast, remember to tent with foil.
How do you store them?
Proper storage ensures your homemade cinnamon rolls stay fresh and delicious. If you’ve topped them with the cream cheese frosting, it’s best to store them in an airtight container in the refrigerator due to the dairy content of the frosting. They will stay fresh for 3 to 4 days. If you opt for the simple vanilla glaze, which is more stable at room temperature, you can store the rolls in an airtight container at room temperature for the same duration. To reheat, a quick zap in the microwave will bring back their warmth and gooey texture.
Why didn’t my cinnamon rolls rise?
Several factors can prevent your cinnamon rolls from rising. The most common culprit is inactive yeast. Ensure your yeast is fresh (check the expiry date) and proof it properly with warm (not hot or cold) water and a little sugar. A cold environment can also hinder rising; always place your dough in a warm, draft-free spot. Over-kneading or adding too much flour can result in a dense dough that struggles to rise. Lastly, ensure your milk and egg are at the correct temperatures when added to avoid shocking the yeast.
Can I use different types of milk?
While whole milk is recommended for its richness and fat content, which contributes to a tender dough, you can experiment with other types of milk. Skim or low-fat milk can be used, but your rolls might be slightly less rich and tender. Plant-based milks like almond or soy milk can also work, but be aware that they might alter the flavor and texture subtly. Always scald the milk, regardless of type, to get the full benefit of softer rolls.
Can I freeze homemade cinnamon rolls?
Yes, homemade cinnamon rolls freeze beautifully! You have two main options:
- Freezing unbaked rolls: After cutting and placing the rolls in a greased baking pan, cover them tightly with plastic wrap and then aluminum foil. Freeze for up to 1 month. When ready to bake, transfer them to the refrigerator overnight to thaw, then let them rise in a warm spot for 1-1.5 hours before baking as directed.
- Freezing baked rolls: Bake the cinnamon rolls completely, but cool them entirely before frosting. Wrap individual rolls or the entire pan tightly in plastic wrap and then foil. Freeze for up to 2-3 months. Thaw in the refrigerator or at room temperature, then warm in the microwave or oven. Frost just before serving.
Pro Baking Tips for Success
- Always ensure the scalded milk mixture cools to approximately 110°F (43°C) before combining it with the flour, yeast, and egg to protect your yeast’s activity.
- For effortlessly clean and uniform slices, use unwaxed, unflavored dental floss. Simply slide the floss under the rolled dough, cross it over the top, and pull tightly.
- During baking, monitor your cinnamon rolls closely. If they begin to brown too much on top before cooking through, loosely cover the pan with a piece of aluminum foil.
- To prepare ahead of time: Once you’ve cut and placed the cinnamon rolls in the pan, cover them tightly with plastic wrap and refrigerate overnight. In the morning, remove them from the refrigerator and let them rise in a warm place for 45 minutes to 1 hour (or until visibly puffy) before baking according to the recipe instructions.
- A small amount of apple cider vinegar (about 1 teaspoon) added to the dough can enhance its tenderness and shelf life, reacting with the milk to create a buttermilk-like effect.
More Easy Breakfast Recipes To Try!
- Fluffy Buttermilk Pancakes
- Delicious Banana Muffins
- Classic Homemade French Toast
- Hearty Blueberry Banana Baked Oatmeal
- Flaky Buttermilk Biscuits
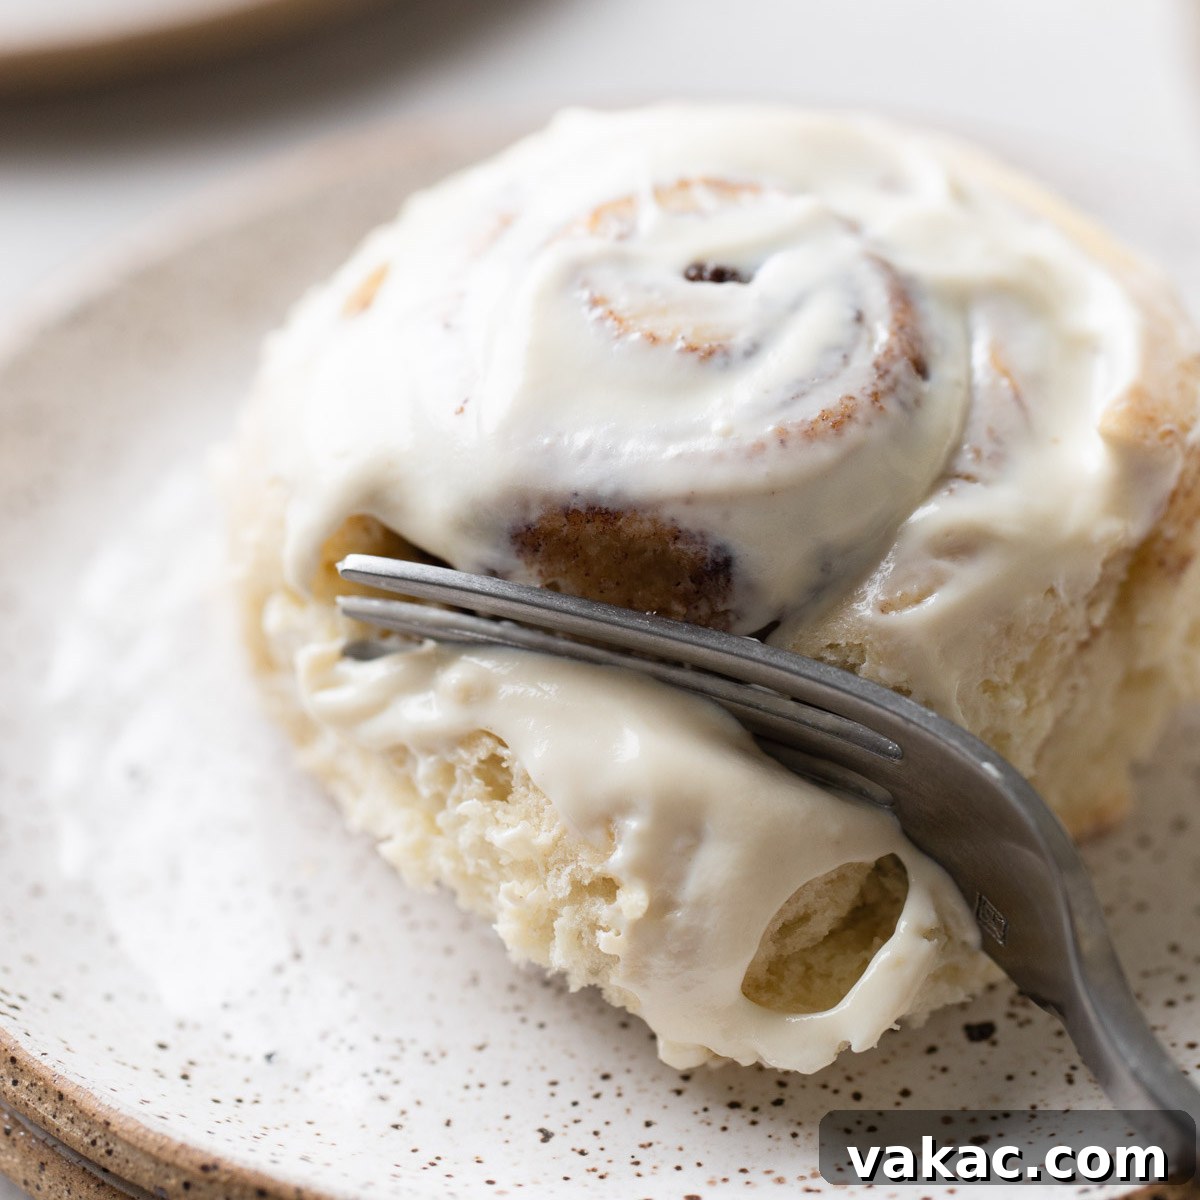
Grandma’s Classic Cinnamon Rolls
2 hrs 30 mins
25 mins
2 hrs 55 mins
An easy recipe and tutorial on how to make my family’s favorite cinnamon rolls. You can serve these with a cream cheese frosting or simple vanilla icing and even prep them ahead of time!
Pin Recipe
Leave a Review
Ingredients
12 cinnamon rolls
For the dough:
- 1/4 cup warm water (110°F-115°F) plus 1 teaspoon granulated sugar
- 1 package (2 and 1/4 teaspoons) active dry yeast
- 5 tablespoons (62 grams) granulated sugar
- 3 tablespoons (32 grams) shortening
- 1 and 1/4 teaspoons salt
- 1 cup (240 ml) whole milk, scalded*
- 1 large egg, room temperature
- 4-5 cups (500-625 grams) all-purpose flour, spooned & leveled
For the filling:
- 4 tablespoons (60 grams) butter, softened to room temperature
- 3/4 cup (150 grams) brown sugar, packed
- 1 and 1/2 tablespoons ground cinnamon
For the cream cheese frosting:
- 3 ounces (85 grams) brick-style cream cheese, softened to room temperature
- 2 tablespoons (30 grams) butter, softened to room temperature
- 1/2 cup (60 grams) powdered sugar
- 1/2 teaspoon vanilla extract
- 1-2 tablespoons (15-30 ml) milk, use more as needed
Instructions
To make the cinnamon rolls:
- Whisk the warm water with the teaspoon of sugar until the sugar is dissolved. Sprinkle the yeast on top and gently stir it into the water. Set aside for 5 to 10 minutes until the yeast is foamy.
- Add the 5 tablespoons of sugar, shortening, and salt to a heat-proof mixing bowl or the bowl of a stand mixer. Pour the scalded milk on top and whisk until well combined. Set aside and allow to cool until it’s warm and no longer hot (about 110°F or 43°C).
- Once the scalded milk mixture has cooled, mix in 2 cups (250 grams) of flour by hand or using the dough hook attachment on a stand mixer. Add the yeast mixture and mix until well combined, then mix in the egg.
- Mix in 2 more cups (250 grams) of flour until fully combined, then mix in 1 to 2 tablespoons of flour at a time until the dough is easy to handle. Knead the dough by hand on a lightly floured surface or using the dough hook on a stand mixer on low speed for 5 to 10 minutes until the dough is smooth and elastic, adding a little extra flour if needed.
- Once the dough is kneaded, form it into a ball and place it into a lightly greased bowl. Cover and allow to rise in a warm place for about 1 hour or until double in size.
- Once double in size, punch down the dough and roll it out on a lightly floured surface into a 12×18 inch rectangle (about 1/4-inch thick).
- Spread the softened butter all over the dough. Mix the brown sugar and ground cinnamon in a mixing bowl until well combined, then sprinkle on top of the butter and gently press it down.
- Starting at the 18-inch side, roll the dough up tightly. Cut the roll of dough into 12 equal pieces and place each piece in a greased 9×13 baking pan. Cover and allow to rise in a warm place for about 45 minutes.
- After about 30 minutes of rising, preheat the oven to 375°F (190°C). Once the oven is preheated, place the cinnamon rolls in the oven and bake for about 25 minutes or until the cinnamon rolls are cooked through in the center. Cover loosely with foil after about 10 to 15 minutes of baking to prevent excess browning. Once the cinnamon rolls are done, remove them from the oven and set aside to cool.
To make the cream cheese frosting:
- In a medium-sized mixing bowl, beat the cream cheese and butter together until smooth. Mix in the powdered sugar and vanilla extract until fully combined. Then mix in the milk, adding more as needed until it has reached your desired consistency.
- Once the cinnamon rolls have cooled slightly, frost them, serve and enjoy!
Notes
How to scald milk: Pour the milk into a saucepan and place it over medium heat, stirring often. The milk will start to steam and bubble around the edges. Once the milk starts to bubble, right before it comes to a boil, remove it from the heat.
To make ahead of time (baked): Cinnamon rolls may be baked, cooled, and covered tightly at room temperature for up to 2 days. Add the cream cheese frosting or icing right before serving.
To prepare ahead of time (unbaked): Once you’ve cut the cinnamon rolls, cover them tightly, and refrigerate overnight. In the morning, remove from the refrigerator and allow to rise for 45 minutes to 1 hour in a warm place, then bake as instructed.
For a vanilla glaze: Whisk together 1 cup (120 grams) of powdered sugar, 1/2 teaspoon vanilla extract, and 2 tablespoons of milk. If the glaze is too thin, add more powdered sugar and if it’s too thick, add more milk.
For the filling: You may reduce the filling down to 1/2 cup (100 grams) brown sugar and 1 tablespoon ground cinnamon. I suggest still using 1/4 cup (60 grams) of butter to spread on top of the dough.
Store frosted cinnamon rolls in the refrigerator covered tightly for 3 to 4 days. Reheat in the microwave if desired.
Did you make this recipe?
Mention @livewellbakeoften on Instagram or tag #livewellbakeoften.