
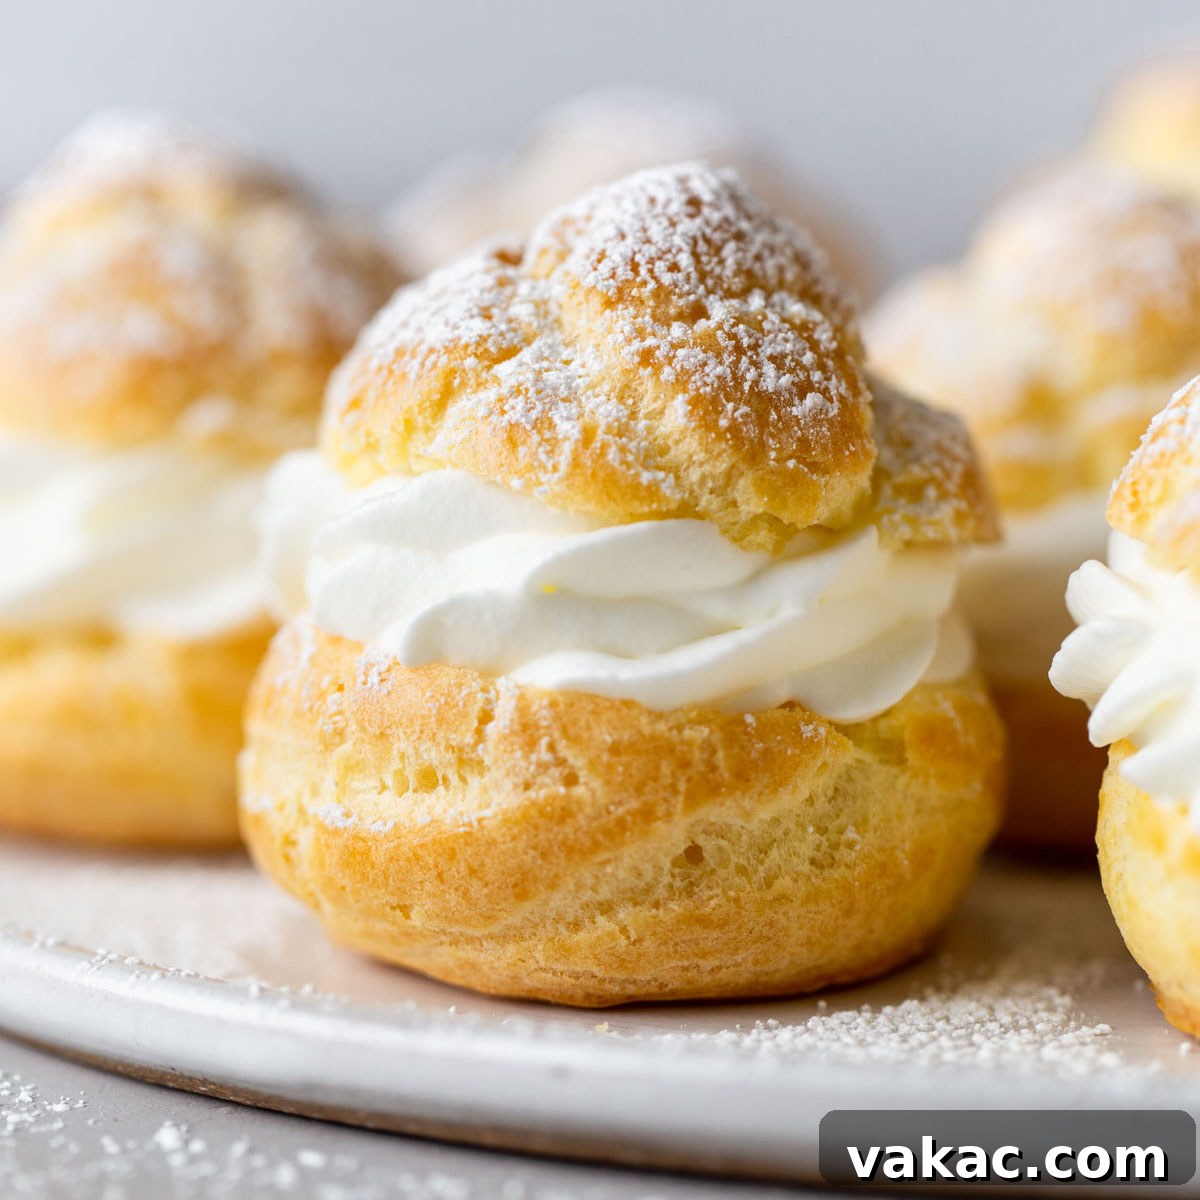
Made with just six simple ingredients, this homemade cream puff recipe looks impressive but is easy to make! Perfect for family gatherings, bridal showers, birthdays, and more.
The Ultimate Guide to Easy Homemade Cream Puffs: A Delightful French Pastry Recipe
Cream puffs, or choux à la crème as they are elegantly known in France, are an iconic dessert that exudes sophistication and charm. Often perceived as a challenge for home bakers, these delicate pastry shells, filled with luscious whipped cream or rich pastry cream, are surprisingly straightforward to master. This comprehensive guide will demystify the art of creating perfect homemade cream puffs from scratch, transforming any baking apprehension into confidence.
Whether you’re hosting a family gathering, celebrating a birthday, or looking for an impressive yet accessible dessert for a bridal shower, these airy, golden delights are guaranteed to be a showstopper. We’ll delve into the foundational dough, pâte à choux, examine each essential ingredient, provide clear step-by-step instructions with invaluable tips, and equip you with troubleshooting solutions to ensure your baking success. Prepare to create professional-looking pastries that taste as incredible as they look!
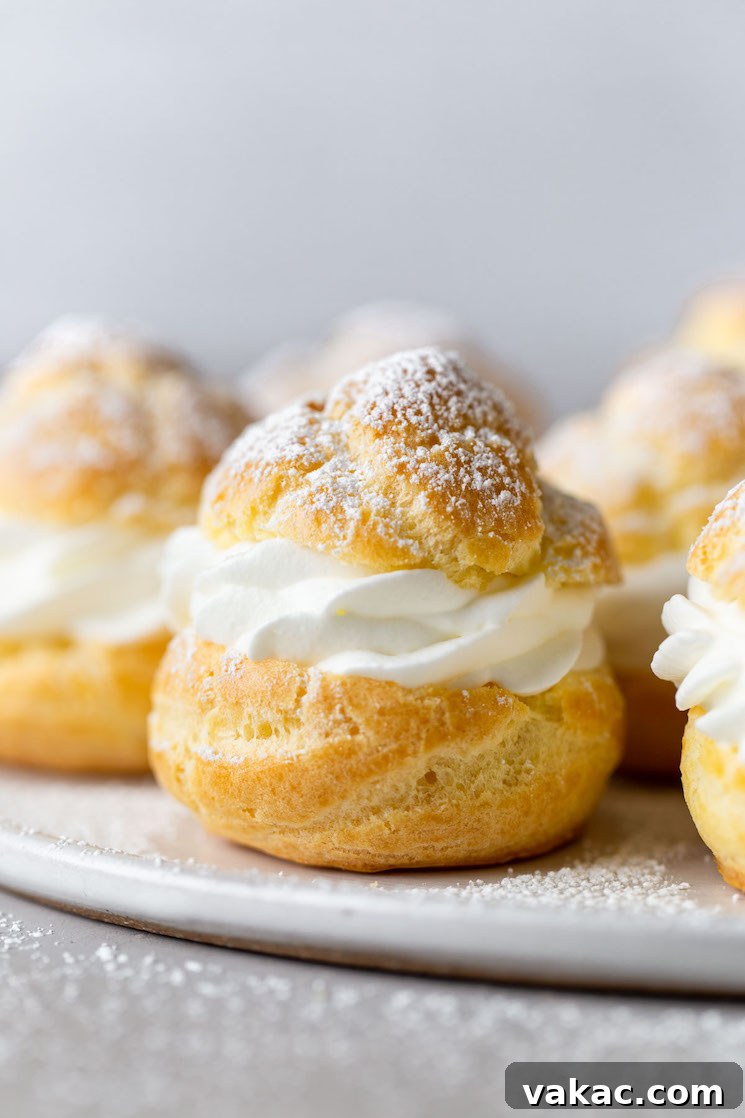
Understanding Cream Puffs and Pâte à Choux
At the heart of every exquisite cream puff lies pâte à choux, or choux pastry. This incredibly versatile and unique dough is a fundamental element in French patisserie. Its distinct characteristic is its ability to puff up dramatically during baking, creating a hollow interior that’s ideal for a variety of sweet or savory fillings. Unlike typical doughs that rely on yeast or chemical leaveners, pâte à choux achieves its remarkable airy texture through steam leavening. When exposed to high heat, the water content within the dough rapidly converts into steam, which then expands and inflates the pastry, leaving behind a wonderfully light, crisp, and hollow shell.
This same adaptable dough is also the base for other beloved classics such as éclairs, profiteroles (which are essentially smaller cream puffs), and savory gougères. The beauty of choux pastry is its simplicity in ingredients combined with a technique that, once understood, unlocks a world of elegant baking. While the end result is undeniably impressive, the process itself is not overly complex, making it an achievable goal for bakers of all skill levels. Our aim here is to break down each stage, making it easy for you to achieve perfect results every time.
Essential Ingredients for Your Homemade Cream Puffs
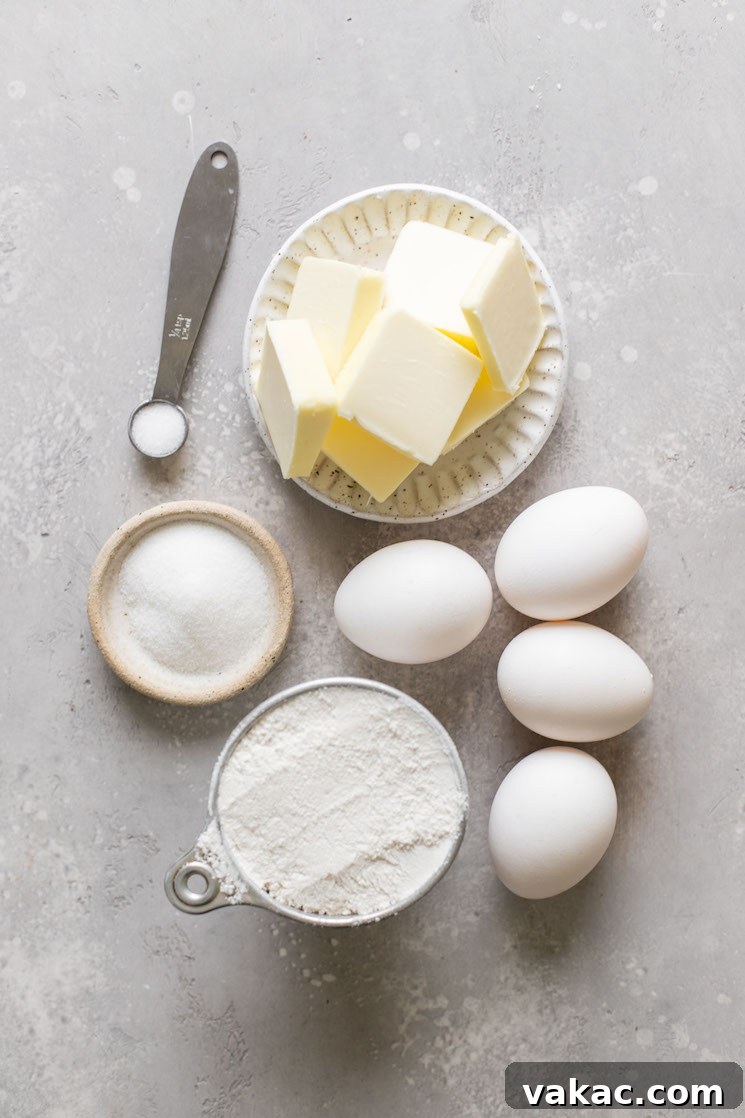
One of the most appealing aspects of cream puffs is that they require surprisingly few ingredients. However, because the ingredient list is so concise, the quality and proper preparation of each component become incredibly important for achieving the desired light and airy texture. Here’s a detailed look at what you’ll need and the role each ingredient plays:
- Water: This is the primary liquid in our dough, crucial for creating the steam that makes the choux pastry puff up. Regular tap water is perfectly suitable for this recipe.
- Unsalted Butter: Butter provides essential richness, a beautiful golden color, and contributes to the crispness of the cream puff shells. We specify unsalted butter because the salt content in salted butter can vary significantly between brands, making it harder to control the flavor profile. By using unsalted butter, you can precisely adjust the amount of salt in your recipe. Make sure to slice your butter into tablespoon-sized pieces to ensure it melts evenly and quickly.
- Granulated Sugar: This ingredient is optional, but highly recommended. A small amount of granulated sugar adds a subtle, delicate sweetness to the pastry shells themselves, which beautifully balances the richness of the butter and complements the sweet filling. It also aids in achieving a desirable golden-brown color during baking.
- Salt: Even in sweet desserts, salt is a critical flavor enhancer. It helps to round out and amplify the other flavors in the dough, preventing the pastry from tasting bland and bringing out the nuances of the sugar and butter.
- All-Purpose Flour: Flour provides the necessary structure for the pâte à choux. Accurate measurement of flour is absolutely vital for the correct consistency of your dough. The best method is to “spoon and level” the flour: lightly spoon the flour into your measuring cup until it overflows, then use a straight edge (like the back of a knife) to level off the excess. Scooping flour directly from the bag can compact it, leading to an over-measurement of flour, which will result in a dense, heavy dough that won’t puff properly.
- Large Eggs: Eggs are perhaps the most dynamic ingredient in pâte à choux. They emulsify the dough, adding richness and contributing significantly to its structure and lift. They also play a role in the glossy finish and golden-brown color of the baked shells. It is extremely important that your eggs are at room temperature. Cold eggs can cause the warm dough to seize and become lumpy, preventing them from incorporating smoothly and creating a homogeneous mixture. If you forget to set them out in advance, simply place the eggs in a bowl of warm (not hot) water for 5 to 10 minutes to bring them to temperature.
- Egg Wash: A simple mixture of one large egg whisked with a tablespoon of water. This is brushed over the piped dough just before baking. The egg wash helps to achieve a beautiful, glossy, and evenly golden-brown exterior on your cream puff shells, making them look even more professional and appetizing.
How to Master Homemade Cream Puffs: Step-by-Step Instructions
Crafting perfect cream puffs involves a series of precise steps, each crucial to the final airy texture. Follow these instructions meticulously, and you’ll be rewarded with light, crisp shells, ready for your favorite fillings.
1. Prepare Your Workspace and Oven
- Preheat your oven to 375°F (190°C). This initial high temperature is critical for generating the steam required to make the choux pastry puff dramatically.
- Line two large baking sheets with parchment paper. This simple step prevents sticking and makes transferring the delicate pastries much easier, minimizing cleanup.
- Create a piping template: Take a separate piece of parchment paper, cut to the same size as your baking sheets. Using a 2-inch round cookie cutter, trace ten 2-inch circles onto it. Ensure you leave ample space—at least 2 inches—between each circle, as the dough will expand significantly during baking. This template serves as your guide for uniform size and even spacing, promoting consistent baking.
2. Prepare the Pâte à Choux Base (Panada)
- In a large, heavy-bottomed saucepan, combine the water, pre-sliced unsalted butter, granulated sugar (if you are using it for subtle sweetness), and salt.
- Place the saucepan over medium heat and bring the mixture to a rapid boil. Stir occasionally to ensure the butter melts completely and the sugar and salt are fully dissolved.
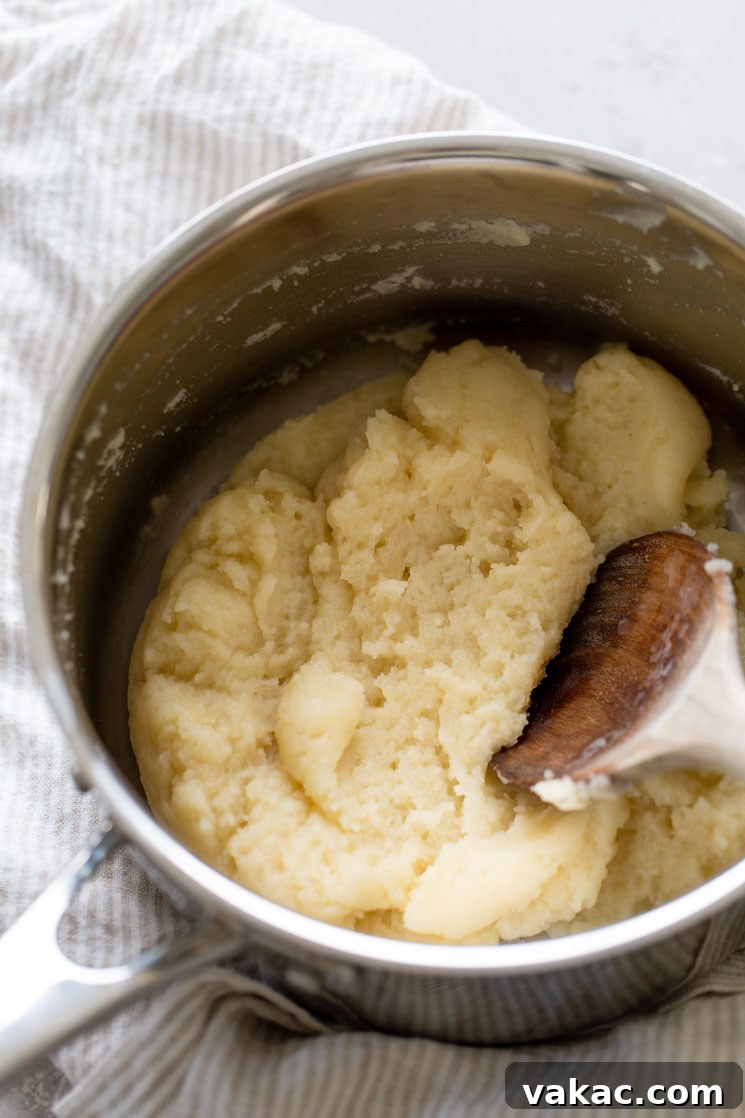
- Once a rolling boil is reached, immediately remove the saucepan from the heat. Add the measured all-purpose flour all at once. Stir vigorously and continuously with a sturdy wooden spoon until the flour is fully incorporated and a smooth, cohesive dough forms. It will look quite thick at this stage.
- Return the saucepan to medium heat. Continue cooking and stirring the dough for another 2 to 3 minutes. This crucial step, known as creating a “panada,” serves to dry out the dough, cook out the raw flour taste, and develop the starches, allowing it to absorb more eggs later. You’ll know it’s ready when the dough pulls away cleanly from the sides of the pan, forms a smooth ball, and leaves a thin film or crust on the bottom of the pan.
3. Incorporate the Eggs into the Dough
- Immediately transfer the hot dough from the saucepan into a large, heat-proof mixing bowl. Allow the dough to cool slightly for approximately 3 minutes. This brief cooling period is essential to prevent the eggs from scrambling when they are added.
- Add the room-temperature large eggs one at a time. This is a critical technique; do not add all the eggs at once. After each egg addition, mix thoroughly until it is completely absorbed into the dough and the mixture is smooth before adding the next. You can do this by hand with a sturdy wooden spoon (it requires some muscle!) or, more easily, with an electric mixer on medium speed.
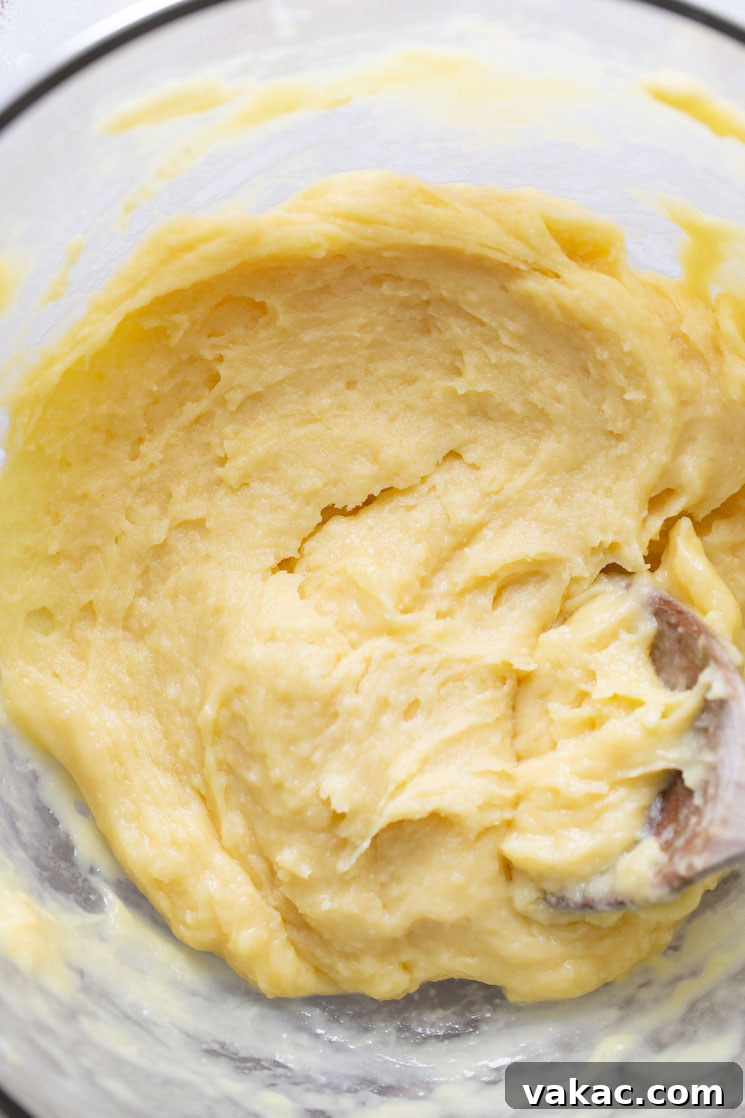
- After the fourth egg is fully incorporated, the dough should have a glossy sheen and a thick, smooth consistency. To check for the perfect consistency, lift your spoon or beaters from the dough; it should slowly fall back into the bowl, forming a distinct “V-shape” or a “bird’s beak.” This indicates the dough is ready for piping. If your dough still appears too stiff, you may need to whisk a small amount of a fifth egg and add it a teaspoon at a time until the desired V-shape is achieved.
4. Pipe the Choux Pastry Shells
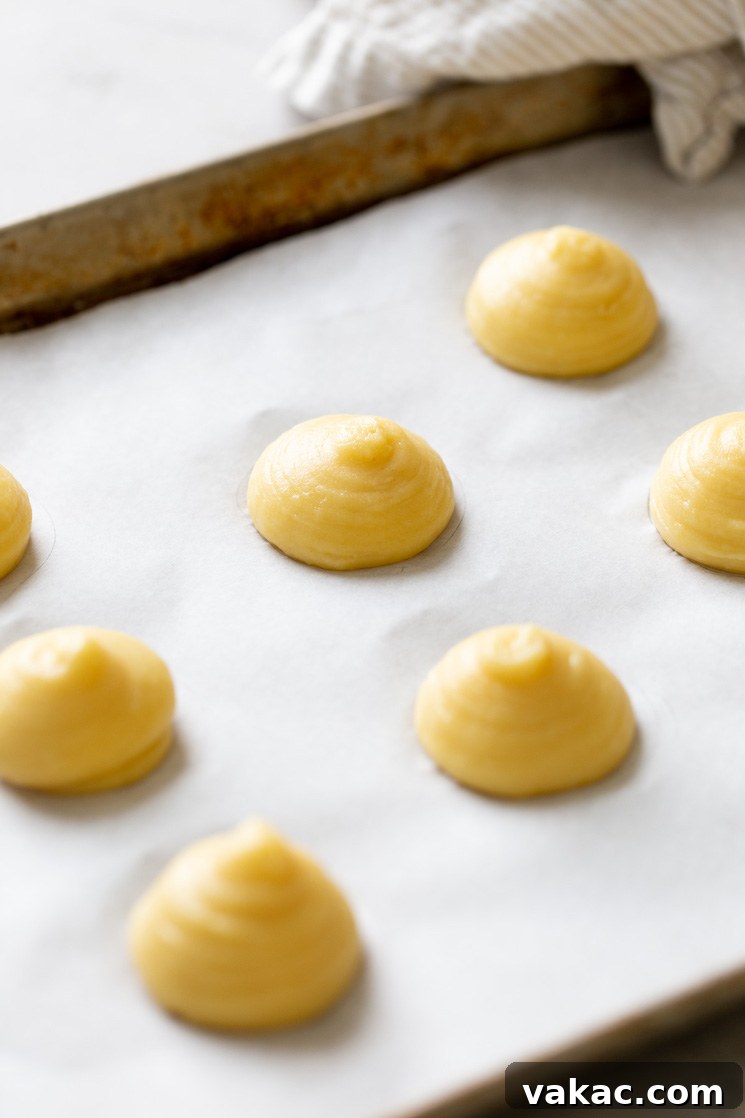
- Transfer the prepared pâte à choux dough into a large piping bag fitted with a ½-inch round piping tip (a Wilton 1A tip is an excellent choice for this).
- Place your prepared parchment paper template underneath the parchment-lined baking sheet. Hold the piping bag perpendicular (straight up) to the parchment paper, about ½-inch above it. This vertical piping method is crucial for ensuring the cream puffs rise straight up and maintain their perfectly round shape. Avoid piping at an angle, as this can result in lopsided or uneven pastries.
- Apply even, steady pressure to pipe 2-inch circles, allowing the dough to expand slightly in both height and width. When you finish piping each circle, gently swirl the tip as you release pressure rather than pulling straight up. This technique prevents the formation of pointed peaks that can burn prematurely in the oven.
- Once you’ve piped all the circles on the first baking sheet, carefully slide out the template and repeat the process for the second baking sheet. You should yield approximately 18 to 20 consistent cream puff shells in total.
- If any small, pointed peaks do form despite your best efforts, simply dip your finger in a little water and gently smooth them out.
5. Apply Egg Wash and Bake to Perfection
- Prepare the egg wash by whisking one large egg with one tablespoon of water in a small bowl until the mixture is completely uniform.
- Gently brush the tops of each piped choux pastry with the egg wash. This step is key for promoting a beautiful, glossy, and evenly golden-brown crust on your finished cream puffs, giving them that irresistible professional appearance.
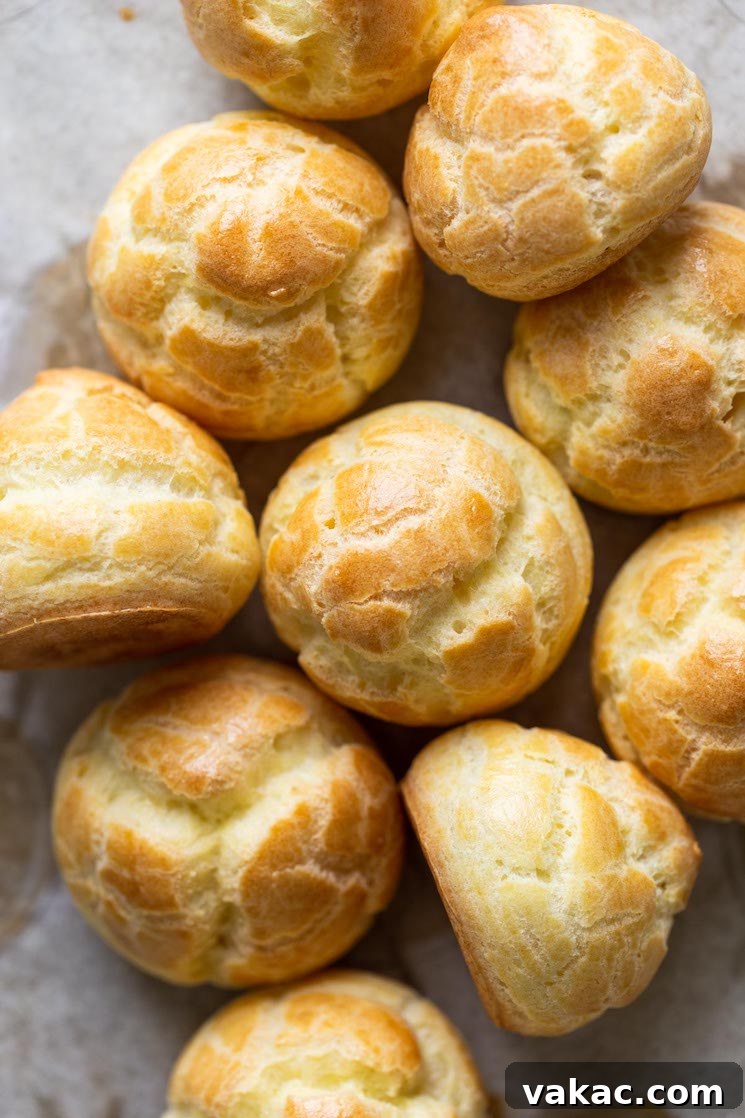
- Carefully place the baking sheets into your preheated 375°F (190°C) oven. Bake for 30 to 35 minutes, or until the cream puffs are deeply golden brown, look firm, and feel light when gently lifted.
- A critical warning: DO NOT open the oven door during the baking process! This cannot be stressed enough. A sudden rush of cold air will cause the delicate steam inside the pastries to condense and release, leading to an immediate and irreversible deflation of your cream puffs, resulting in flat, dense pastries. Resist the urge to peek until the very end of the baking time!
6. Cool and Dry the Shells for Crispness
- Once the cream puffs are thoroughly baked and golden brown, turn off the oven, but do not remove them immediately.
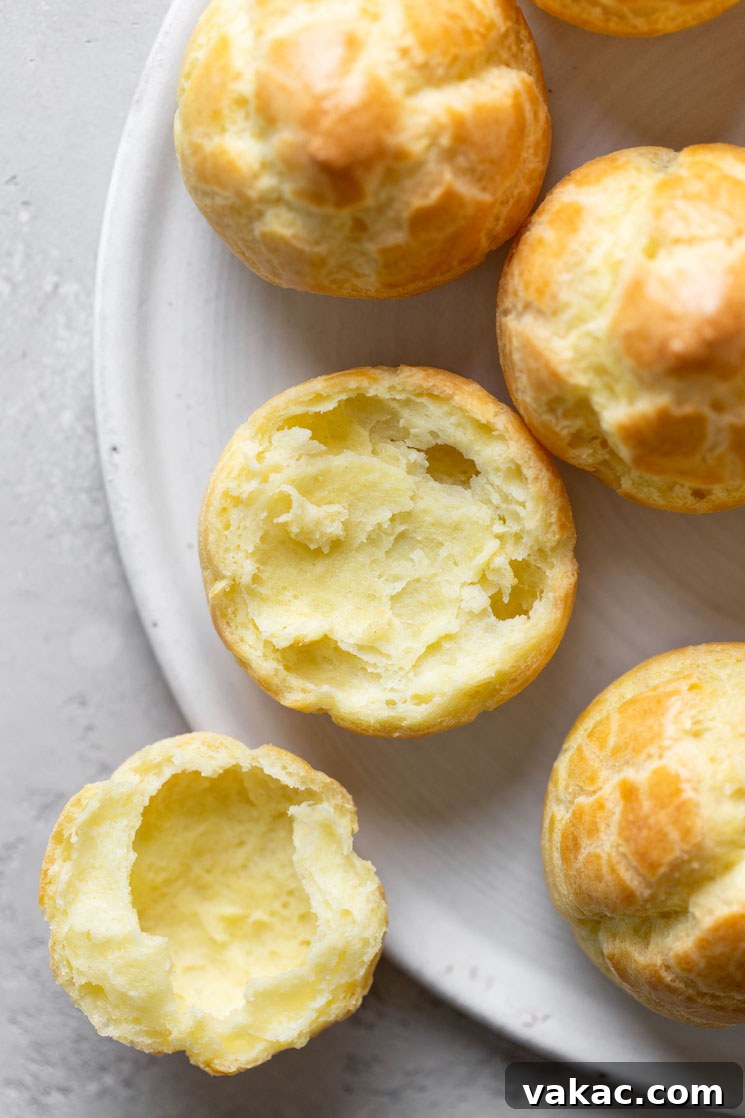
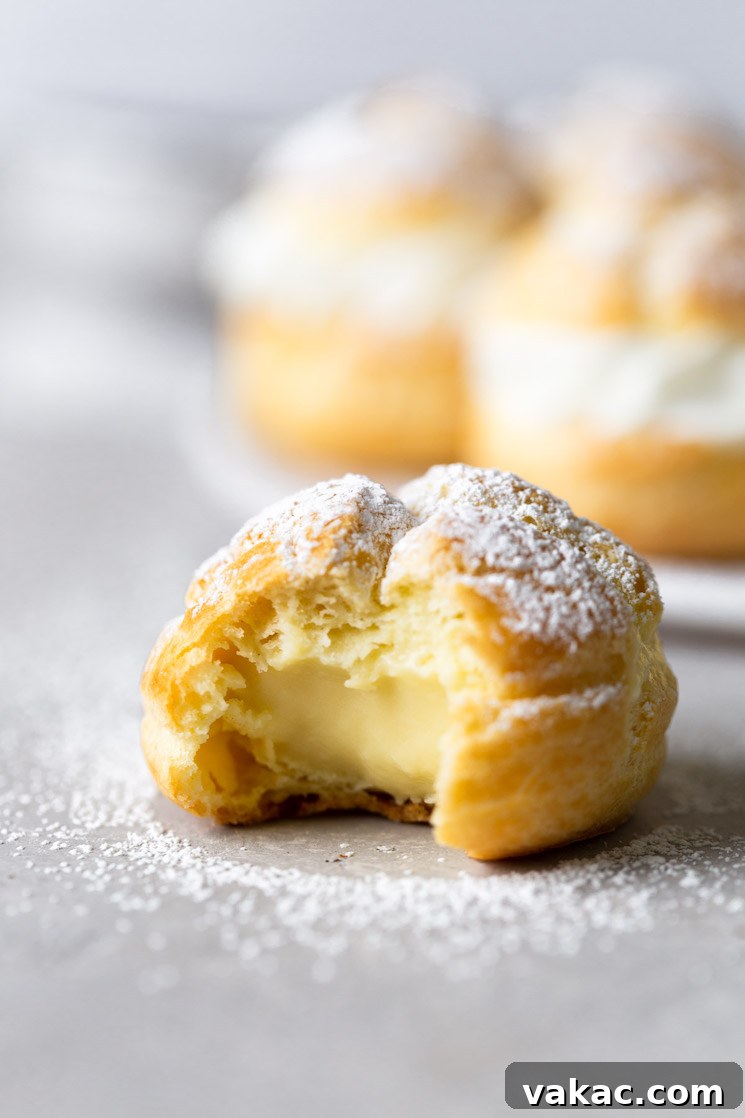
- Carefully take the hot cream puffs from the oven and, using a small sharp knife or a skewer, pierce a small hole in the side of each one. This crucial step allows any trapped steam to escape from the hollow interior, which is vital for preventing the insides from becoming soggy and ensuring the shells remain crisp.
- Return the pierced cream puffs to the now-turned-off oven, leaving the oven door slightly ajar (cracked open) for an additional 10 minutes. This drying-out period helps to further crisp up the shells and prevents them from collapsing as they gradually cool.
- Finally, remove the cream puff shells from the oven and carefully transfer them to a wire rack to cool completely to room temperature before adding any filling. This is another vital step; attempting to fill warm shells will cause your filling to melt and create a messy, undesirable result.
Filling Your Homemade Cream Puffs
The beauty of cream puffs lies not only in their delicate shells but also in their incredible versatility when it comes to fillings. While classic options are always a hit, don’t hesitate to let your creativity shine!
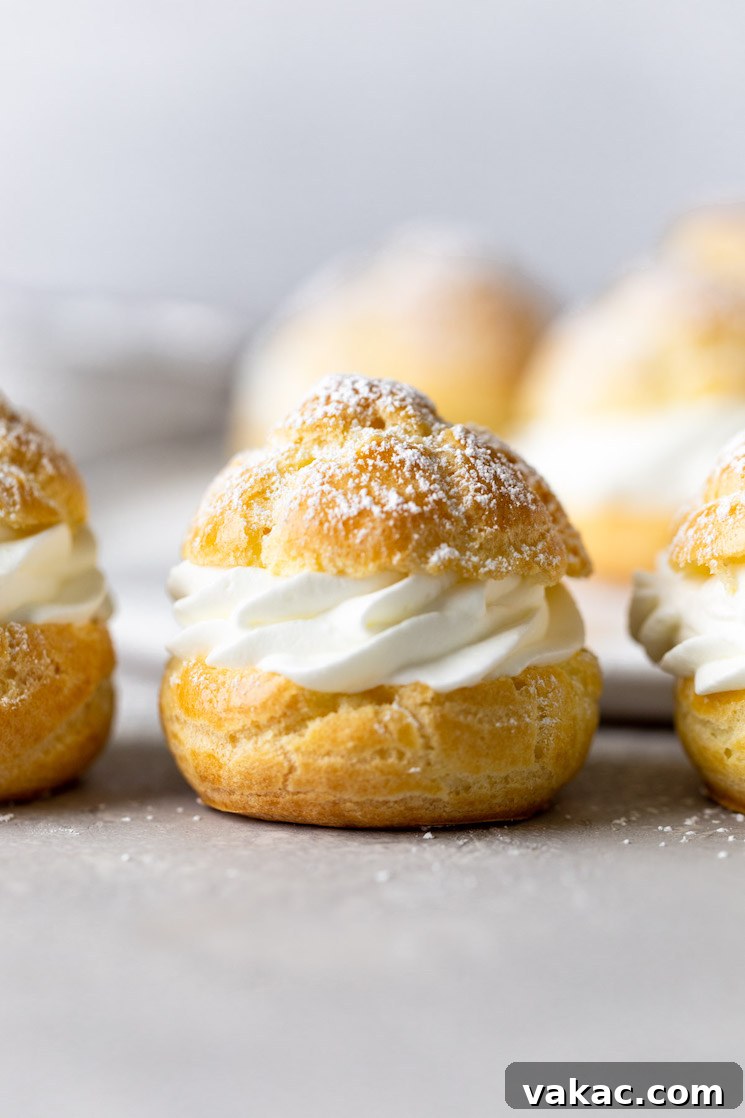
- Sweetened Whipped Cream: This is a simple, elegant, and timeless choice. You can easily prepare your own by whipping cold heavy cream with powdered sugar and a touch of vanilla extract until stiff peaks form. For this recipe, it’s often a good idea to double a standard whipped cream recipe to ensure you have plenty for all your shells.
- Pastry Cream (Crème Pâtissière): For a richer, more decadent experience, pastry cream is an excellent choice. This thick, custard-like cream is traditionally made with milk, sugar, egg yolks, and a thickening agent like flour or cornstarch, often flavored with vanilla bean or extract.
- Other Delicious Filling Ideas: Feel free to experiment with other delightful options! Consider a luscious chocolate ganache, tangy lemon curd, fresh fruit compotes (like berry or cherry), or even a scoop of your favorite ice cream for a truly indulgent treat. You can also infuse your whipped or pastry cream with different flavors such as coffee, various extracts (almond, peppermint), or citrus zests for unique twists.
To fill your cooled cream puff shells, you have a couple of primary methods: You can either slice the shells horizontally (like a sandwich) and spoon or pipe in the filling, then replace the top. Alternatively, for a neater and more traditional presentation, you can pierce a small hole in the bottom or side of each shell with a skewer, a sharp knife, or a piping tip, and then pipe the filling directly into the center. This method keeps the shell intact and creates a delightful surprise when your guests take their first bite.
Common Troubleshooting for Cream Puffs: Don’t Panic!
Even seasoned bakers can occasionally encounter challenges when making choux pastry. Understanding common issues and their solutions will help you achieve consistent success. Here’s how to identify and resolve typical problems:
- Why did my cream puffs deflate?
- Opening the oven door too early: This is by far the most frequent reason for deflation. The sudden influx of cooler air causes the steam inside the delicate pastry to condense and escape prematurely, leading to an immediate collapse. Always resist the urge to open the oven door until the final stages of baking.
- Underbaking: If the shells are not baked for a sufficient duration, their internal structure hasn’t had enough time to dry out and set properly. They might look perfectly puffed in the oven but will inevitable collapse shortly after being removed. Ensure they are deeply golden brown and feel firm and light. The post-baking drying period in the turned-off oven is crucial for preventing this.
- Excessive moisture in the dough: If the dough (panada) wasn’t cooked long enough on the stovetop to dry it out sufficiently, or if too many eggs were incorporated, the dough might be too wet. This excess moisture can hinder the dough’s ability to hold its puffed structure, leading to collapse.
- Why are my cream puffs lopsided or irregular in shape?
- This issue typically arises during the piping stage. If the piping bag is held at an angle rather than perpendicularly (straight up) to the baking sheet, or if the pressure applied isn’t consistent, the dough will spread unevenly, resulting in lopsided pastries. Don’t fret if this happens; they will still taste delicious, just aim for more consistent technique on your next batch!
- Why didn’t my cream puffs puff up enough?
- Oven temperature too low: The initial high oven temperature is absolutely critical for generating the powerful burst of steam needed to inflate the choux pastry. If your oven isn’t hot enough, the dough won’t puff. Consider investing in an oven thermometer to verify your oven’s accuracy.
- Dough consistency issues: If the dough was too cold when eggs were added, or if it wasn’t cooked long enough on the stovetop to reach the proper consistency, it might not have the right texture to puff adequately.
- Why are my cream puffs soggy inside?
- Sogginess inside the shells indicates that steam was trapped and condensed. Piercing the baked shells immediately after removing them from the oven, and then returning them to the turned-off oven with the door ajar for a final drying period, is essential to allow residual steam to escape and ensure a crisp, dry interior.
Storage and Freezing Instructions for Maximum Freshness
Proper storage is key to maintaining the delicate texture and delicious flavor of your cream puffs:
- Unfilled Cream Puff Shells: Once completely cooled, store unfilled shells in an airtight container at room temperature for up to 2 days. For slightly longer storage, you can keep them in the refrigerator for 3-4 days. If the shells have softened due to humidity, you can easily re-crisp them by placing them in a 300°F (150°C) oven for about 5 minutes. Always ensure they are completely cooled again before filling.
- Filled Cream Puffs: Once you’ve filled your cream puffs, they should be stored in an airtight container in the refrigerator and are best consumed within 1-2 days. The moisture from the filling will gradually soften the delicate pastry shells over time, so for the best texture, enjoy them as fresh as possible.
- Freezing Instructions: Unfilled cream puff shells freeze exceptionally well, making this recipe an ideal make-ahead dessert for parties and busy schedules!
- To Freeze Unfilled Shells: After the shells have cooled completely, arrange them in a single layer on a baking sheet and place them in the freezer until they are solid (this prevents them from sticking together). Once frozen, transfer the solid shells to a freezer-safe airtight container or a heavy-duty freezer bag. They can be stored in the freezer for up to 2 months.
- To Thaw and Reheat Frozen Shells: When ready to use, thaw the frozen shells at room temperature for about an hour. To restore their crispness, reheat them in a preheated 300°F (150°C) oven for 5-7 minutes. Once reheated, allow them to cool completely to room temperature before adding your desired filling.
Expert Baking Tips for Cream Puff Perfection
Elevate your cream puff game with these additional insights and creative suggestions:
- The Golden Rule: Cool Completely Before Filling: This tip is paramount and cannot be overstated. If you attempt to fill cream puff shells while they are still warm, the residual heat will inevitably melt your delicate filling, causing it to seep out and result in a soggy, unappealing pastry. Patience truly is a virtue in this final step!
- Unleash Your Creativity with Fillings: While classic sweetened whipped cream and rich pastry cream are undeniably delicious, don’t shy away from exploring other filling variations. Consider piping in a creamy chocolate mousse, a vibrant fruit curd (like raspberry or passion fruit), or even a scoop of gelato for an exciting textural contrast. You can also experiment with flavoring your basic whipped cream or pastry cream by adding different extracts (like mint or coconut), a swirl of espresso powder, or finely grated citrus zest.
- Achieve Uniformity with a Piping Bag: Using a piping bag fitted with a round tip is highly recommended for creating consistently sized and shaped cream puffs. This not only makes the process easier but also ensures that all your pastries bake evenly. While you can use two spoons to drop dollops of dough, the results will be less uniform in appearance.
- Know Your Oven: An Essential Baking Tool: Ovens can vary significantly in their actual temperature compared to their display settings. Investing in an inexpensive oven thermometer is a smart move for any serious baker. An accurate oven temperature is absolutely crucial for the success of choux pastry, as the initial high heat is what drives the steam expansion.
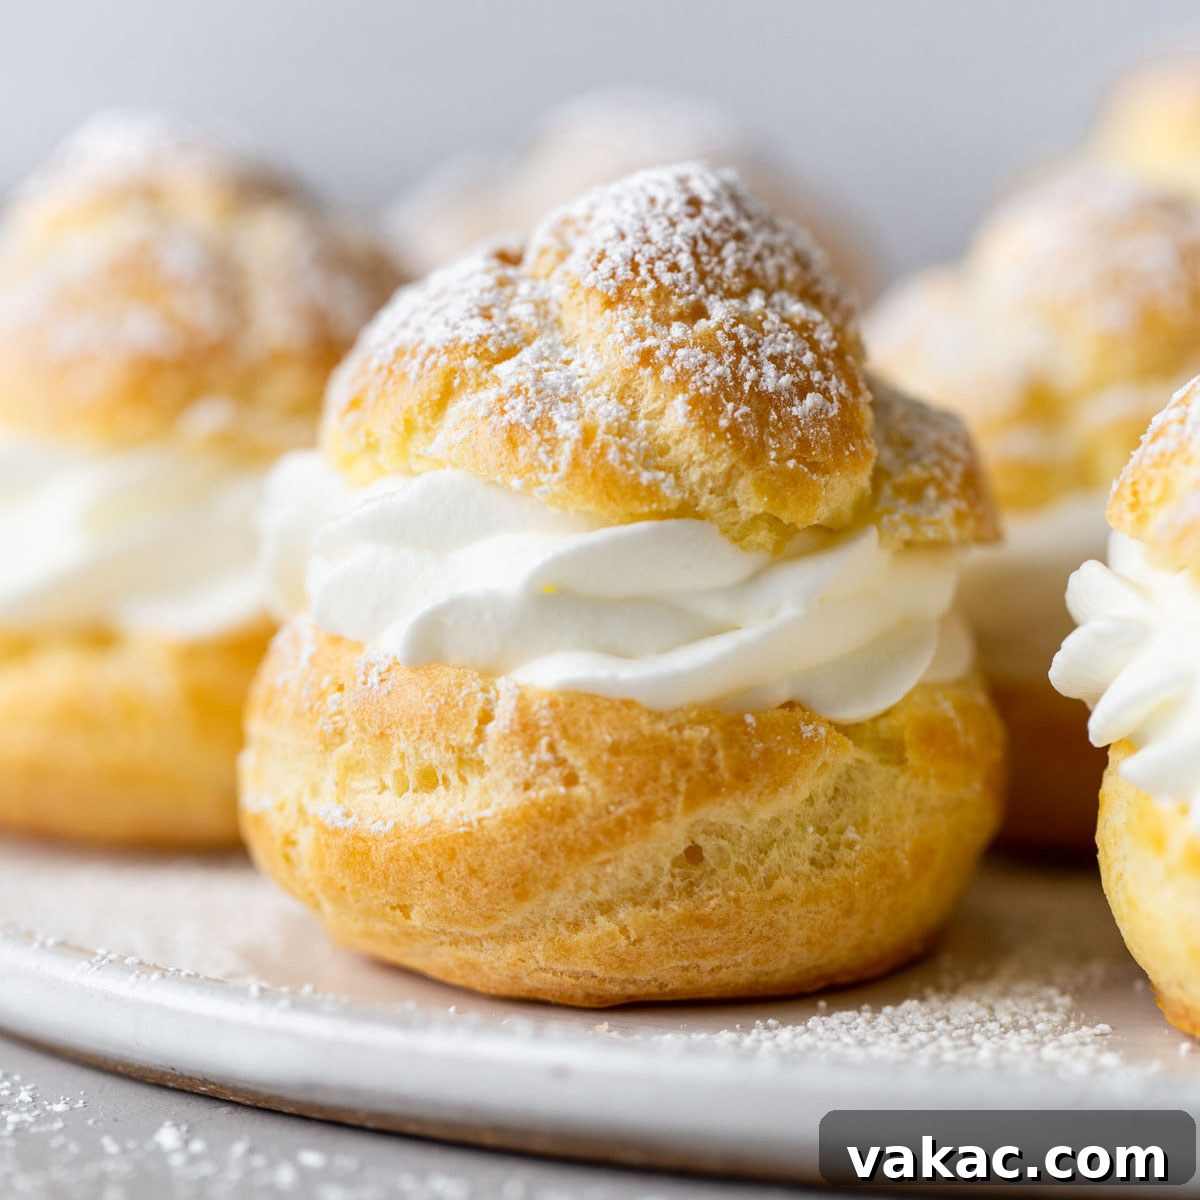
- Garnish for Impact: Once filled, elevate your cream puffs with simple garnishes. A light dusting of powdered sugar, a drizzle of melted chocolate, fresh berries, or a few mint leaves can add a professional finish and extra visual appeal.
More Classic Dessert Recipes to Explore
If you’ve enjoyed the rewarding process of mastering homemade cream puffs, you might find joy in creating these other timeless dessert classics:
- Crème Brûlée
- Angel Food Cake
- Classic White Cake
- Cream Cheese Pound Cake
- Coconut Cream Pie
Cream Puffs Recipe
Made with just six simple ingredients, this homemade cream puff recipe looks impressive but is easy to make! Perfect for family gatherings, bridal showers, birthdays, and more.
Yields: 20 cream puffs
- Prep Time:
- 1 hour
- Cook Time:
- 45 minutes
- Total Time:
- 1 hour 45 minutes
Cuisine: French | Course: Dessert | Author: Danielle Rye
Ingredients
- 1 cup (240 ml) water
- ½ cup (115 grams) unsalted butter, sliced into tablespoon sized pieces
- 2 teaspoons granulated sugar (optional, for subtle sweetness)
- ¼ teaspoon salt
- 1 cup (125 grams) all-purpose flour, spooned & leveled
- 4 large eggs, room temperature
- For Egg Wash: 1 large egg plus 1 tablespoon water
Instructions
- Preheat the oven to 375°F (190°C). Tear off a large piece of parchment paper the same size as your baking sheets and use a 2-inch cookie cutter to draw 10 2-inch circles on it, making sure to leave some space between each one (this will be your template for piping the dough). Line two large baking sheets with parchment paper and set aside.
- Combine water, sliced butter, sugar, and salt in a large saucepan. Place the saucepan over medium heat and bring to a boil, stirring occasionally.
- Stir in the cup of flour with a wooden spoon until fully combined. Keep the mixture over medium heat and continue stirring until the mixture pulls away from the sides of the pan, forms a smooth dough, and leaves a film on the bottom of the pan (about 2 to 3 minutes).
- Remove the mixture from the heat and transfer it to a large heat-proof bowl to cool slightly for 3 minutes.
- Mix in the eggs, one at a time, with a wooden spoon or an electric mixer, making sure to mix in each one until fully combined before adding the next. Once the 4th egg is fully mixed in, the dough should hold a V-shape on the end of the spoon or beaters.
- Transfer the dough to a large piping bag fitted with a ½-inch round piping tip (a Wilton 1A tip is recommended).
- Place the template underneath the parchment paper on one of your prepared baking sheets. Place the piping bag perpendicular to the parchment paper about ½-inch above it, this will ensure that the cream puffs rise straight up. Applying even pressure, pipe 2-inch circles, letting them expand in both height and width, and making sure to swirl the tip when you are done (do not pull straight up). Remove the template beneath the parchment paper and repeat with the process for the other baking sheet, you should end up with 18 to 20 circles total.
- Dip your finger in a little water and gently smooth out any pointed peaks.
- To make the egg wash: In a small mixing bowl, whisk the egg and water together until fully combined. Gently brush the top of each one with the egg wash.
- Bake for 30 to 35 minutes or until the cream puffs are golden brown, making sure not to open the oven door as they are baking. Once they’re done, turn the oven off, remove them from the oven, use a knife or skewer to pierce a hole in the side of each one, then return to the oven with the door cracked open for 10 minutes.
- Remove from the oven and carefully transfer to a wire rack to cool completely. Once cooled, fill with whipped cream, pastry cream, or your favorite filling.
Notes
- Storage Instructions: Unfilled cream puffs may be stored in an airtight container at room temperature or in the refrigerator for 1 to 2 days. If they have softened, place them in a 300°F (150°C) oven for about 5 minutes to re-crisp. Allow to cool completely before filling them. Filled cream puffs may be stored in an airtight container in the refrigerator for 2 to 3 days, but are best enjoyed fresh.
- Freezing Instructions: Cream puff shells will freeze well for up to 2 months. Thaw to room temperature and reheat in the oven at 300°F (150°C) for 5 to 7 minutes to re-crisp. Make sure to let them cool completely before filling.
- Granulated Sugar: This ingredient is optional, but it adds a subtle sweetness to the shells, enhancing the overall flavor profile.
- Eggs: It’s crucial for your eggs to be at room temperature so that they mix together properly with the dough. Cold eggs can cause the dough to seize. If you forget to sit them out ahead of time, place them in a bowl of warm water for 5 to 10 minutes.
Did you make this recipe? Mention @livewellbakeoften on Instagram or tag #livewellbakeoften.