

Welcome to the ultimate guide for creating flawless royal icing that will transform your homemade cookies into edible masterpieces! Whether you’re a seasoned baker looking for a reliable recipe or a beginner eager to dive into the world of cookie decorating, this comprehensive guide is designed for you. Forget about complicated techniques or hard-to-find ingredients; this recipe uses just a handful of simple items and is practically foolproof, promising perfect results every single time.
Many years ago, I shared my easy sugar cookie icing, which quickly became a reader favorite, especially during festive seasons. Since then, I’ve received numerous requests for a royal icing recipe that’s equally approachable without sacrificing quality or decorative potential. Today, I’m thrilled to unveil my go-to royal icing recipe – a game-changer that eliminates the need for raw egg whites, making it safer and more convenient.
This recipe focuses on five core ingredients and, while it requires a little mixing time, the process is incredibly straightforward. Beyond just the recipe, this post is packed with everything you need to know: from mastering the various royal icing consistencies to recommendations for essential cookie decorating tools, and even step-by-step instructions on how to decorate your cookies like a pro. Prepare to elevate your baking skills and impress everyone with beautifully adorned treats!
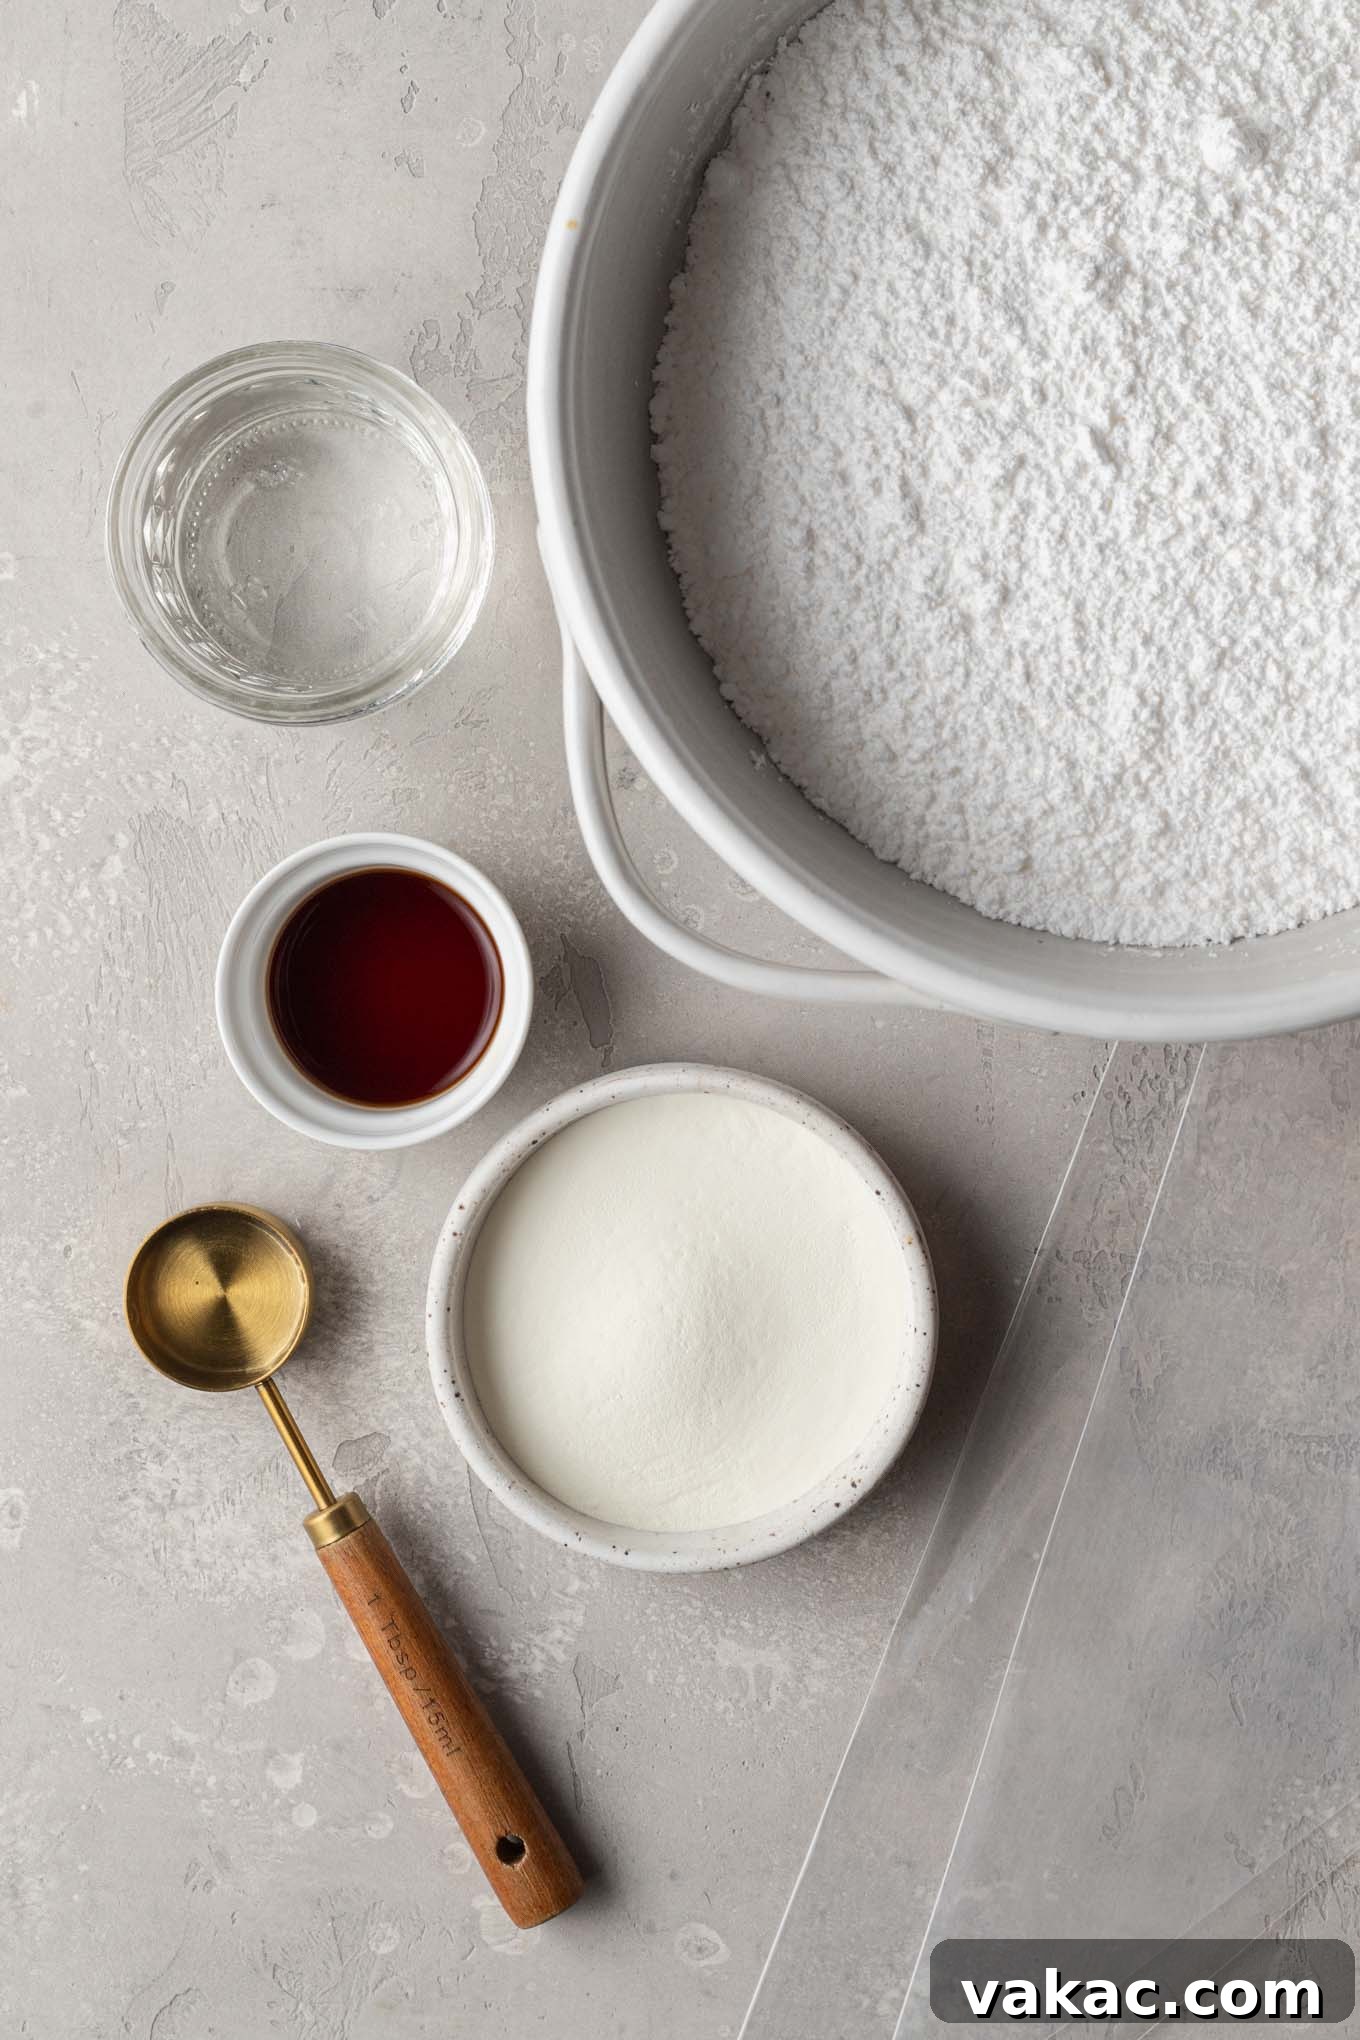
Essential Ingredients for Perfect Royal Icing
Crafting perfect royal icing starts with understanding the role of each ingredient. My recipe utilizes readily available components to achieve that signature smooth, hard-setting finish. Here’s a breakdown of what you’ll need and why:
- Powdered Sugar: Also known as confectioners’ sugar or icing sugar, this is the foundation of your royal icing. You’ll need 4 cups for this recipe. It not only provides sweetness but also gives the icing its characteristic body and structure. For the smoothest, lump-free icing, it’s highly recommended to sift your powdered sugar, especially if it’s been sitting in the pantry for a while. This step is crucial for preventing clogged piping tips and ensuring a flawless finish on your cookies.
- Meringue Powder: This dry powder is the secret ingredient that makes this recipe incredibly easy and safe, as it primarily consists of pasteurized egg whites. Meringue powder eliminates the concerns associated with using raw egg whites, offering excellent stability, a longer shelf life, and consistent results. It’s a fantastic alternative that works just as effectively, providing the necessary protein to create strong, durable icing. My personal favorite brand, known for its reliability and performance, is Wilton.
- Warm Water: Water is essential for bringing all the ingredients together and adjusting the icing’s consistency. Using warm water helps the powdered sugar and meringue powder dissolve more easily, leading to a smoother mixture without gritty textures. You’ll start with a specific amount and then add more as needed to achieve your desired consistency for decorating.
- Light Corn Syrup: While optional, adding just one tablespoon of light corn syrup is highly recommended. It works wonders by creating a slightly softer bite in the dried icing, preventing it from being overly crunchy or brittle. This subtle addition contributes to a more pleasant eating experience, making your decorated cookies even more delightful.
- Vanilla Extract: Flavor is just as important as aesthetics! Pure vanilla extract adds a wonderful depth of flavor to your royal icing. If you’re aiming for a pristine white icing, opt for clear vanilla extract to avoid any discoloration. It’s crucial to steer clear of oil-based flavorings, as oil can break down the structure of royal icing, preventing it from setting properly. Feel free to experiment with other oil-free extracts like almond, lemon, or peppermint for different flavor profiles.
- Gel Food Coloring: For vibrant and rich colors, gel food coloring is a must-have. A little goes a long way, and its concentrated nature means it won’t thin out your icing like liquid food coloring can. Brands like AmeriColor and Wilton are highly regarded for their intense pigments and ease of use. While liquid food coloring can be used, be mindful of the quantity to avoid compromising your icing’s consistency.

Essential Tools for Mastering Cookie Decorating
You don’t need a professional setup to create beautifully decorated cookies. A few key tools will make your decorating journey much smoother and more enjoyable. Here are my top recommendations:
- Piping Bags: These are indispensable for precise application of royal icing. I typically use the 12-inch Wilton piping bags, which are a great all-around size for various decorating tasks. Disposable piping bags are convenient for easy cleanup, while reusable silicone bags are an eco-friendly option. Always ensure your bags are securely twisted at the top to prevent icing from spilling out.
- Couplers: While not strictly mandatory, couplers are a lifesaver if you plan on using the same piping tip with different colors of icing or want to switch between various tips for a single color. These small plastic devices allow you to easily attach and detach piping tips from your bags without changing the entire bag of icing. I highly recommend these plastic couplers for their efficiency and ease of use.
- Piping Tips: The right piping tip can make all the difference in achieving clean lines and intricate details. While you can technically snip the end of a piping bag for a makeshift tip, small round piping tips offer superior control and precision.
- The Wilton #3 round piping tip is my personal favorite, as it’s versatile enough for both outlining and flooding cookies with a medium-consistency icing.
- Wilton #4 is another excellent option, offering a slightly thicker line.
- For more intricate details, fine lines, or delicate lettering, I recommend Wilton’s #1 (the smallest) and #2 tips.
- Toothpicks or Scribe Tools: These simple tools are surprisingly versatile. They are perfect for guiding flood icing into corners, popping air bubbles, creating delicate designs, or swirling colors for marbling effects. A clean toothpick works perfectly, or you can invest in a dedicated scribe tool for a more professional touch.
- Stand Mixer or Handheld Mixer: You’ll need one of these to achieve the proper consistency for your royal icing. A stand mixer with a whisk attachment is ideal for hands-free mixing, especially when beating the icing to stiff peaks, which can take several minutes. A handheld mixer works just as well, though it requires more direct effort.
- Airtight Containers: Essential for storing any leftover icing and for keeping your colored icing fresh while you work.
- Damp Paper Towels or Cling Film: Always keep your icing covered when not in use to prevent it from drying out and hardening. A damp paper towel placed directly over the surface of the icing in a bowl or wrapped around piping tips works wonderfully.
- Cookies: Of course, you’ll need cookies to decorate! My regular cut-out sugar cookies are my preferred base, but this royal icing also pairs beautifully with my cut-out pumpkin cookies, classic gingerbread cookies, or rich chocolate sugar cookies. Choose a cookie recipe that holds its shape well during baking and provides a smooth, flat surface for decorating.
Crafting Your Royal Icing: A Step-by-Step Guide
Creating beautiful royal icing is simpler than you might think. Follow these steps carefully to ensure a smooth, stable, and perfectly textured icing.
First and foremost, you will need either a high-quality handheld mixer or a stand mixer fitted with the whisk attachment. Before you begin, ensure your mixing bowl and whisk are impeccably clean and completely grease-free. Any trace of grease or oil can prevent royal icing from setting up properly, leading to frustrating decorating mishaps.
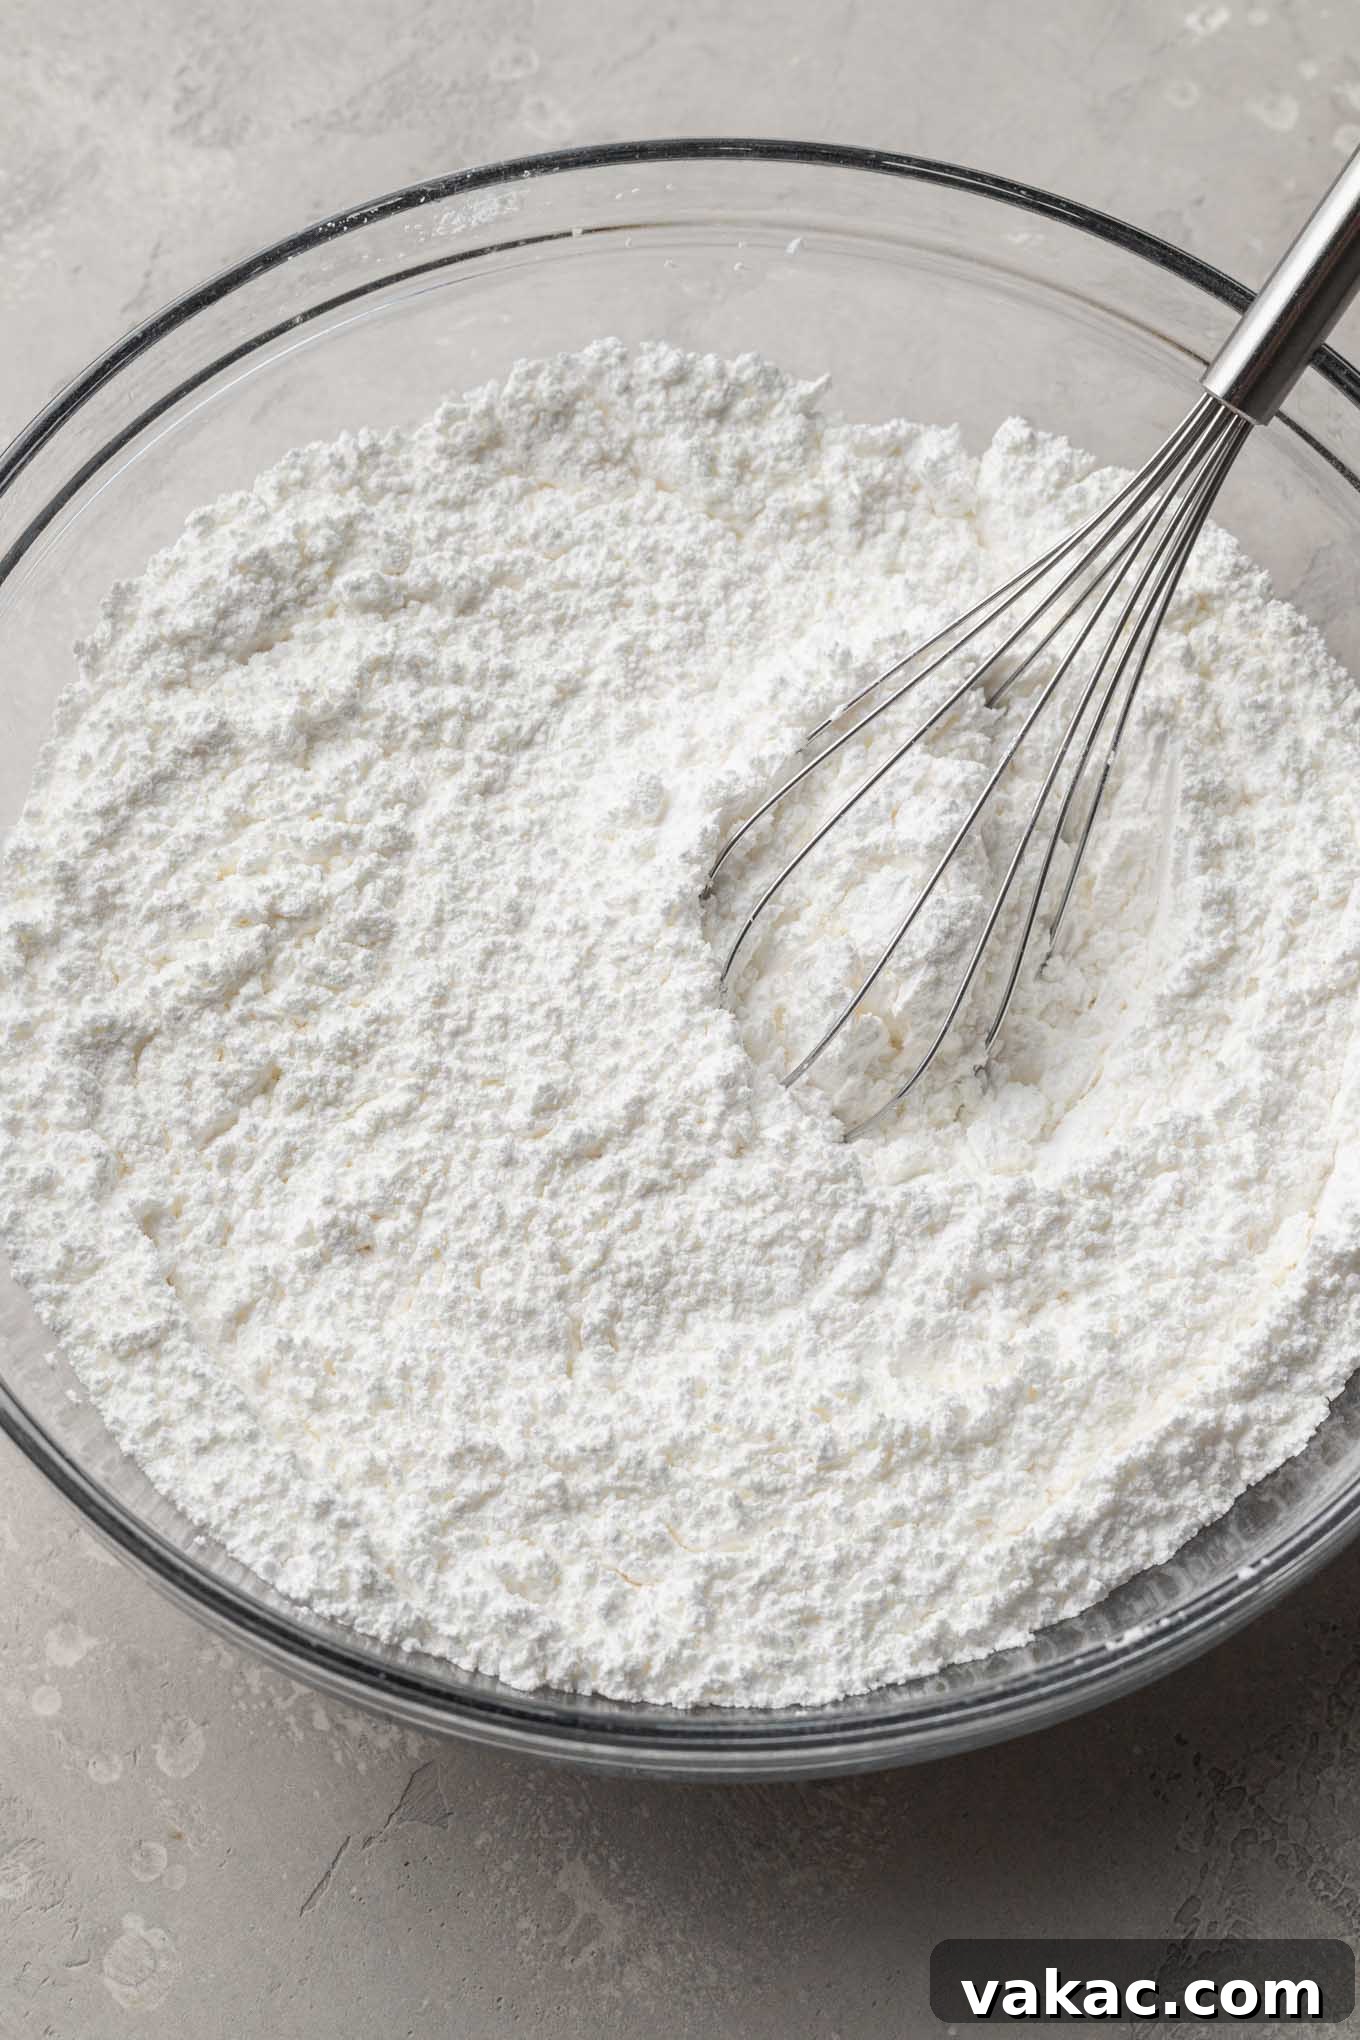
- Combine Dry Ingredients: In your meticulously cleaned mixing bowl (or the bowl of your stand mixer), add the sifted powdered sugar and meringue powder. Whisk them together thoroughly until they are well combined. This initial step helps to evenly distribute the meringue powder and prevents lumps.
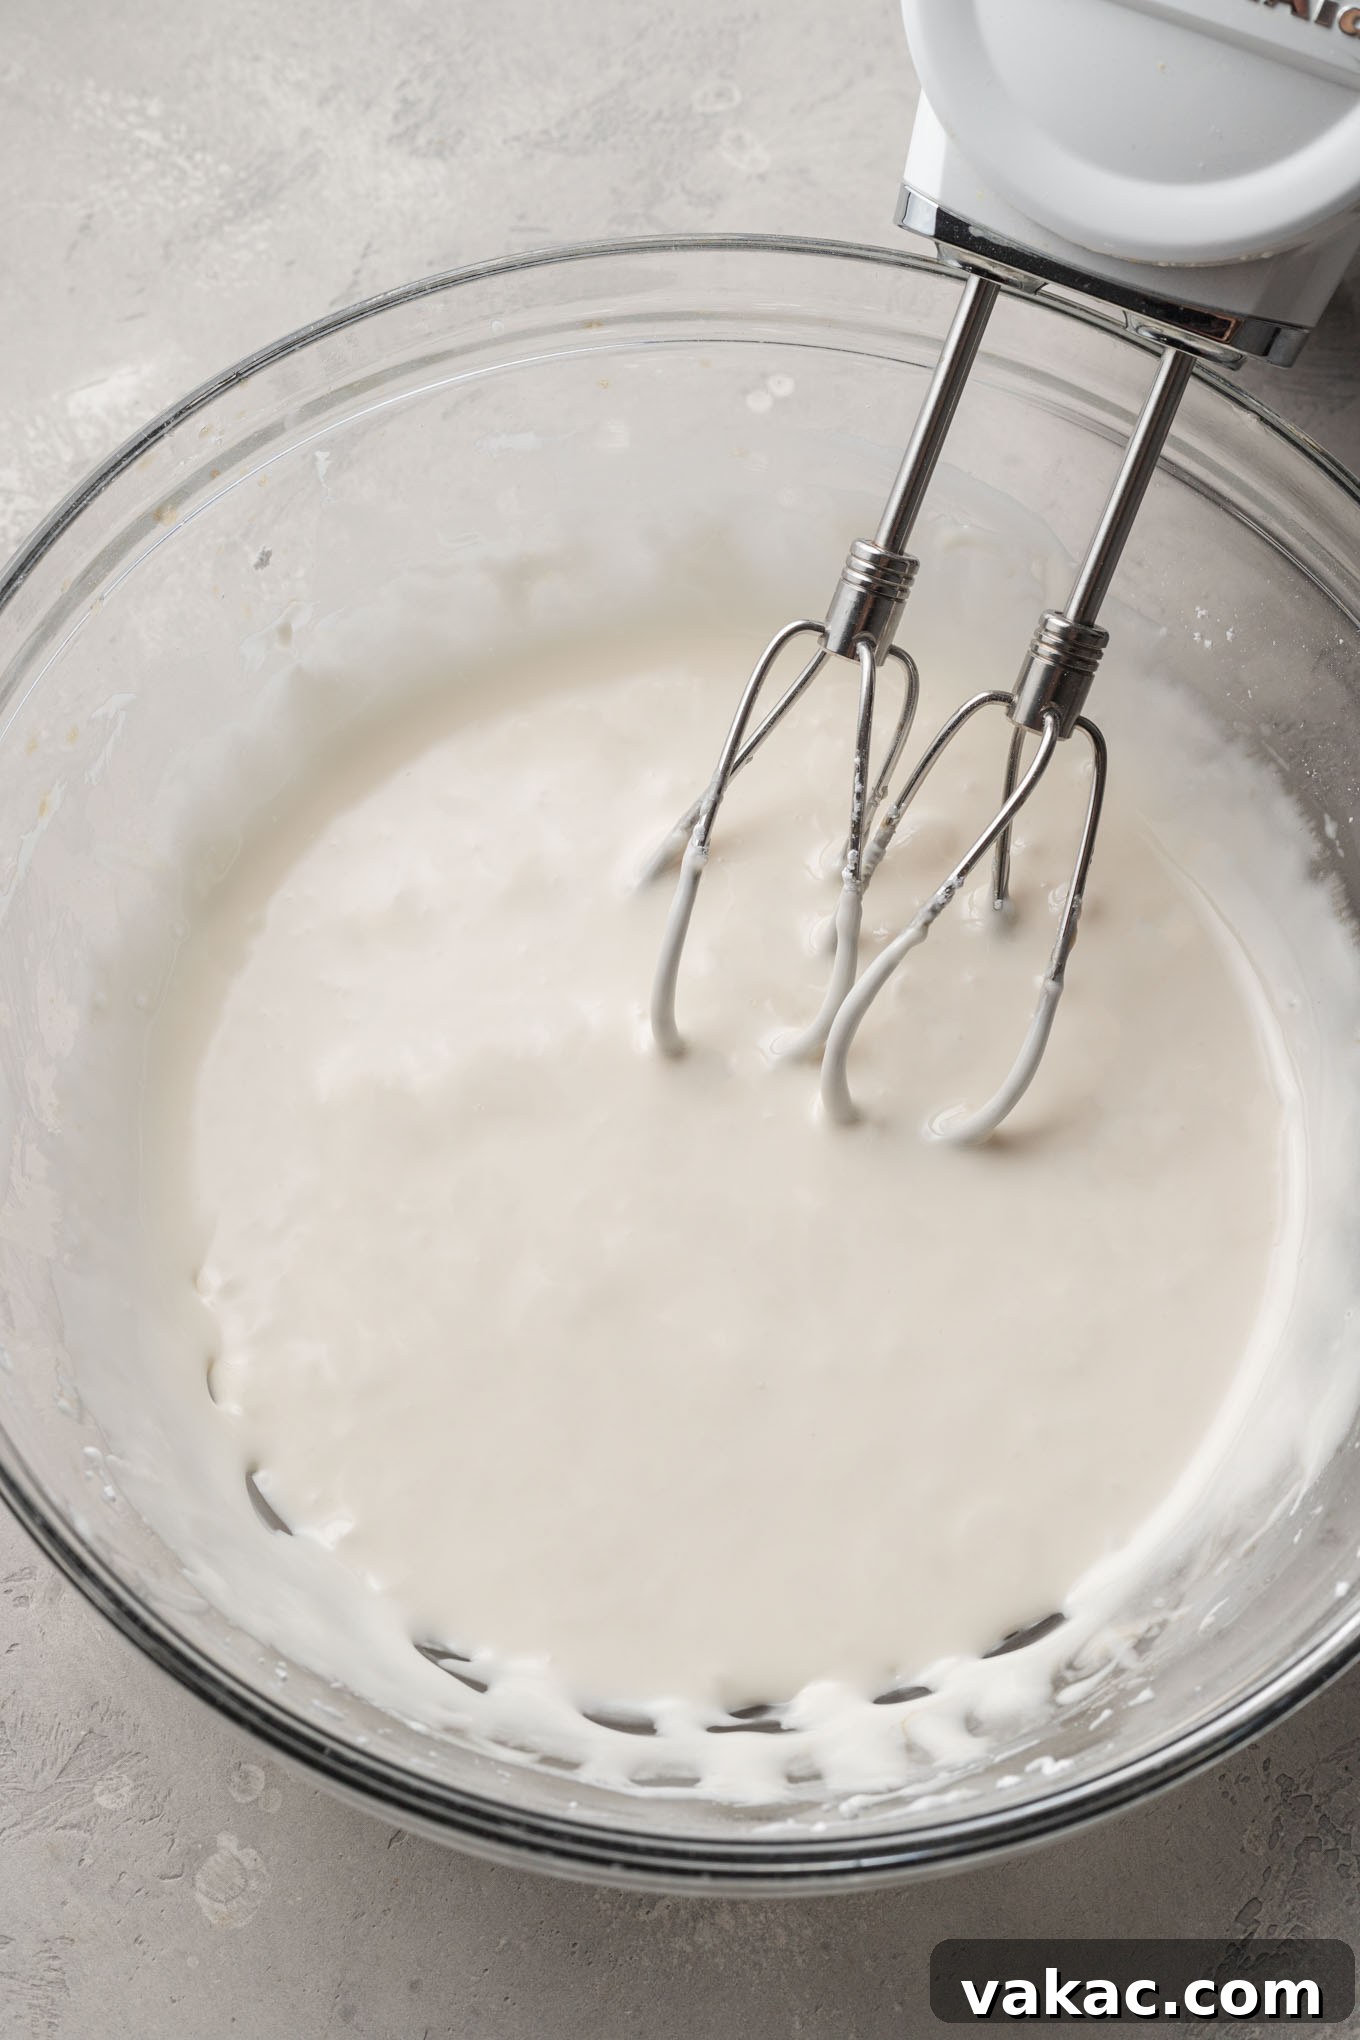
- Introduce Liquid Ingredients (Initial): Pour in the warm water. Start mixing on low speed, allowing the powdered sugar and meringue powder to gradually incorporate with the water. Continue mixing until the mixture appears well combined and smooth, with no dry spots remaining.
- Scrape and Add Wet Ingredients (Final): Stop the mixer and use a rubber spatula to scrape down the sides of your bowl. This ensures all ingredients are fully incorporated. Next, add the light corn syrup (if using) and vanilla extract. Continue mixing on low speed until everything is fully combined and the mixture is uniform.
- Beat to Desired Consistency: Once all ingredients are incorporated, increase the mixer speed to medium. Continue beating until the icing reaches stiff peaks or your desired consistency for decorating. This step requires patience. With a handheld mixer, it can take anywhere from 10 to 12 minutes to achieve stiff peaks. The icing will transform from a dull, off-white mixture into a bright, voluminous, and glossy white. If you’re unsure about the different consistencies and their uses, don’t worry – the next section provides a detailed explanation.
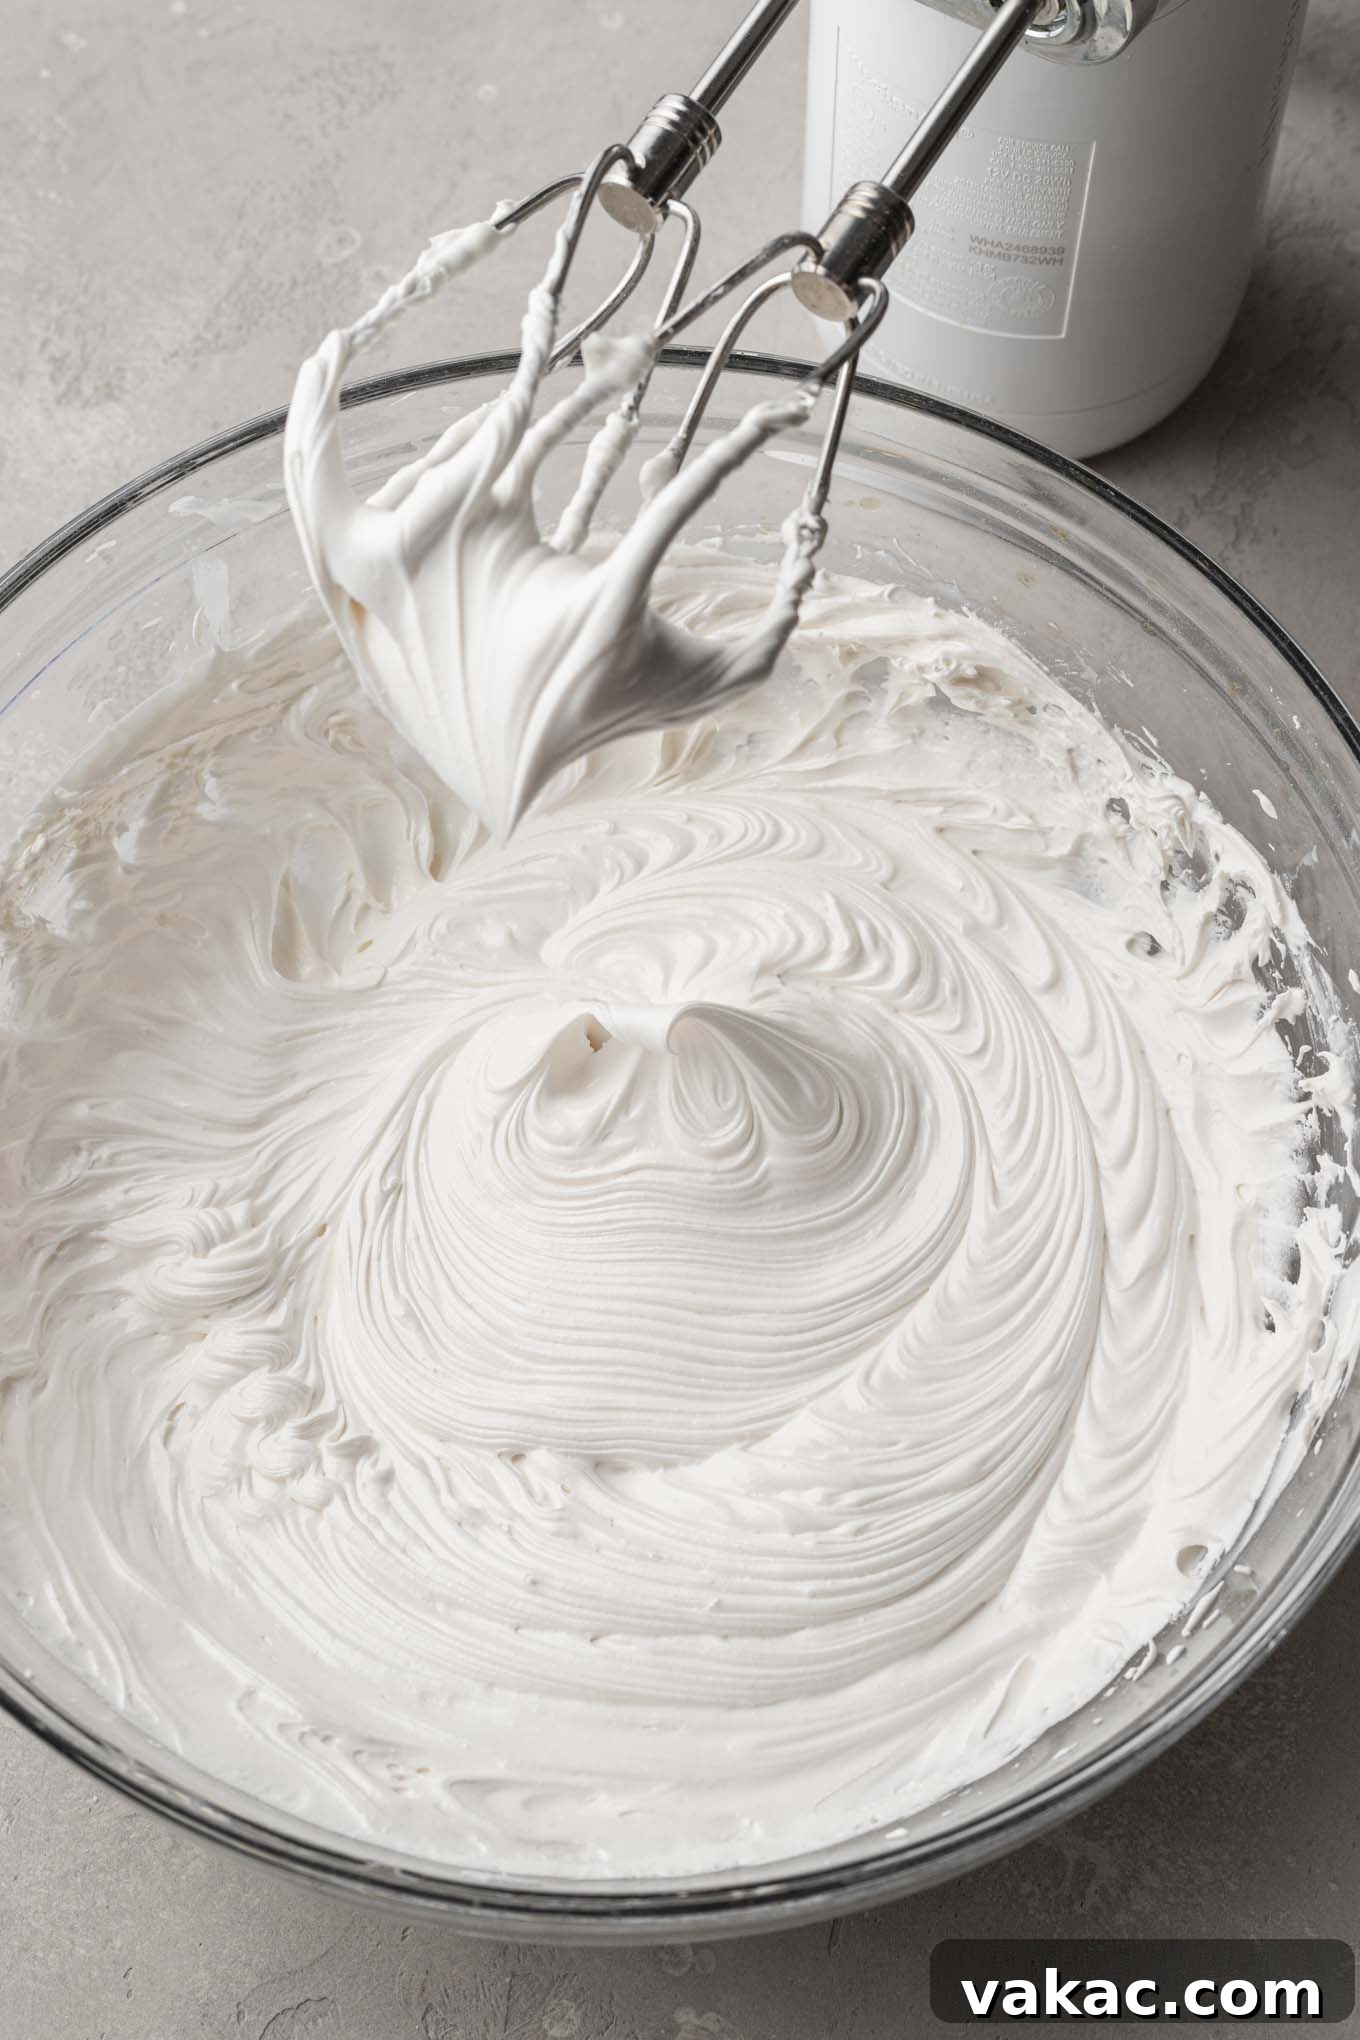
Remember, the goal is to beat enough air into the mixture to create a stable structure. Don’t be tempted to rush this process; the quality of your icing depends on it.
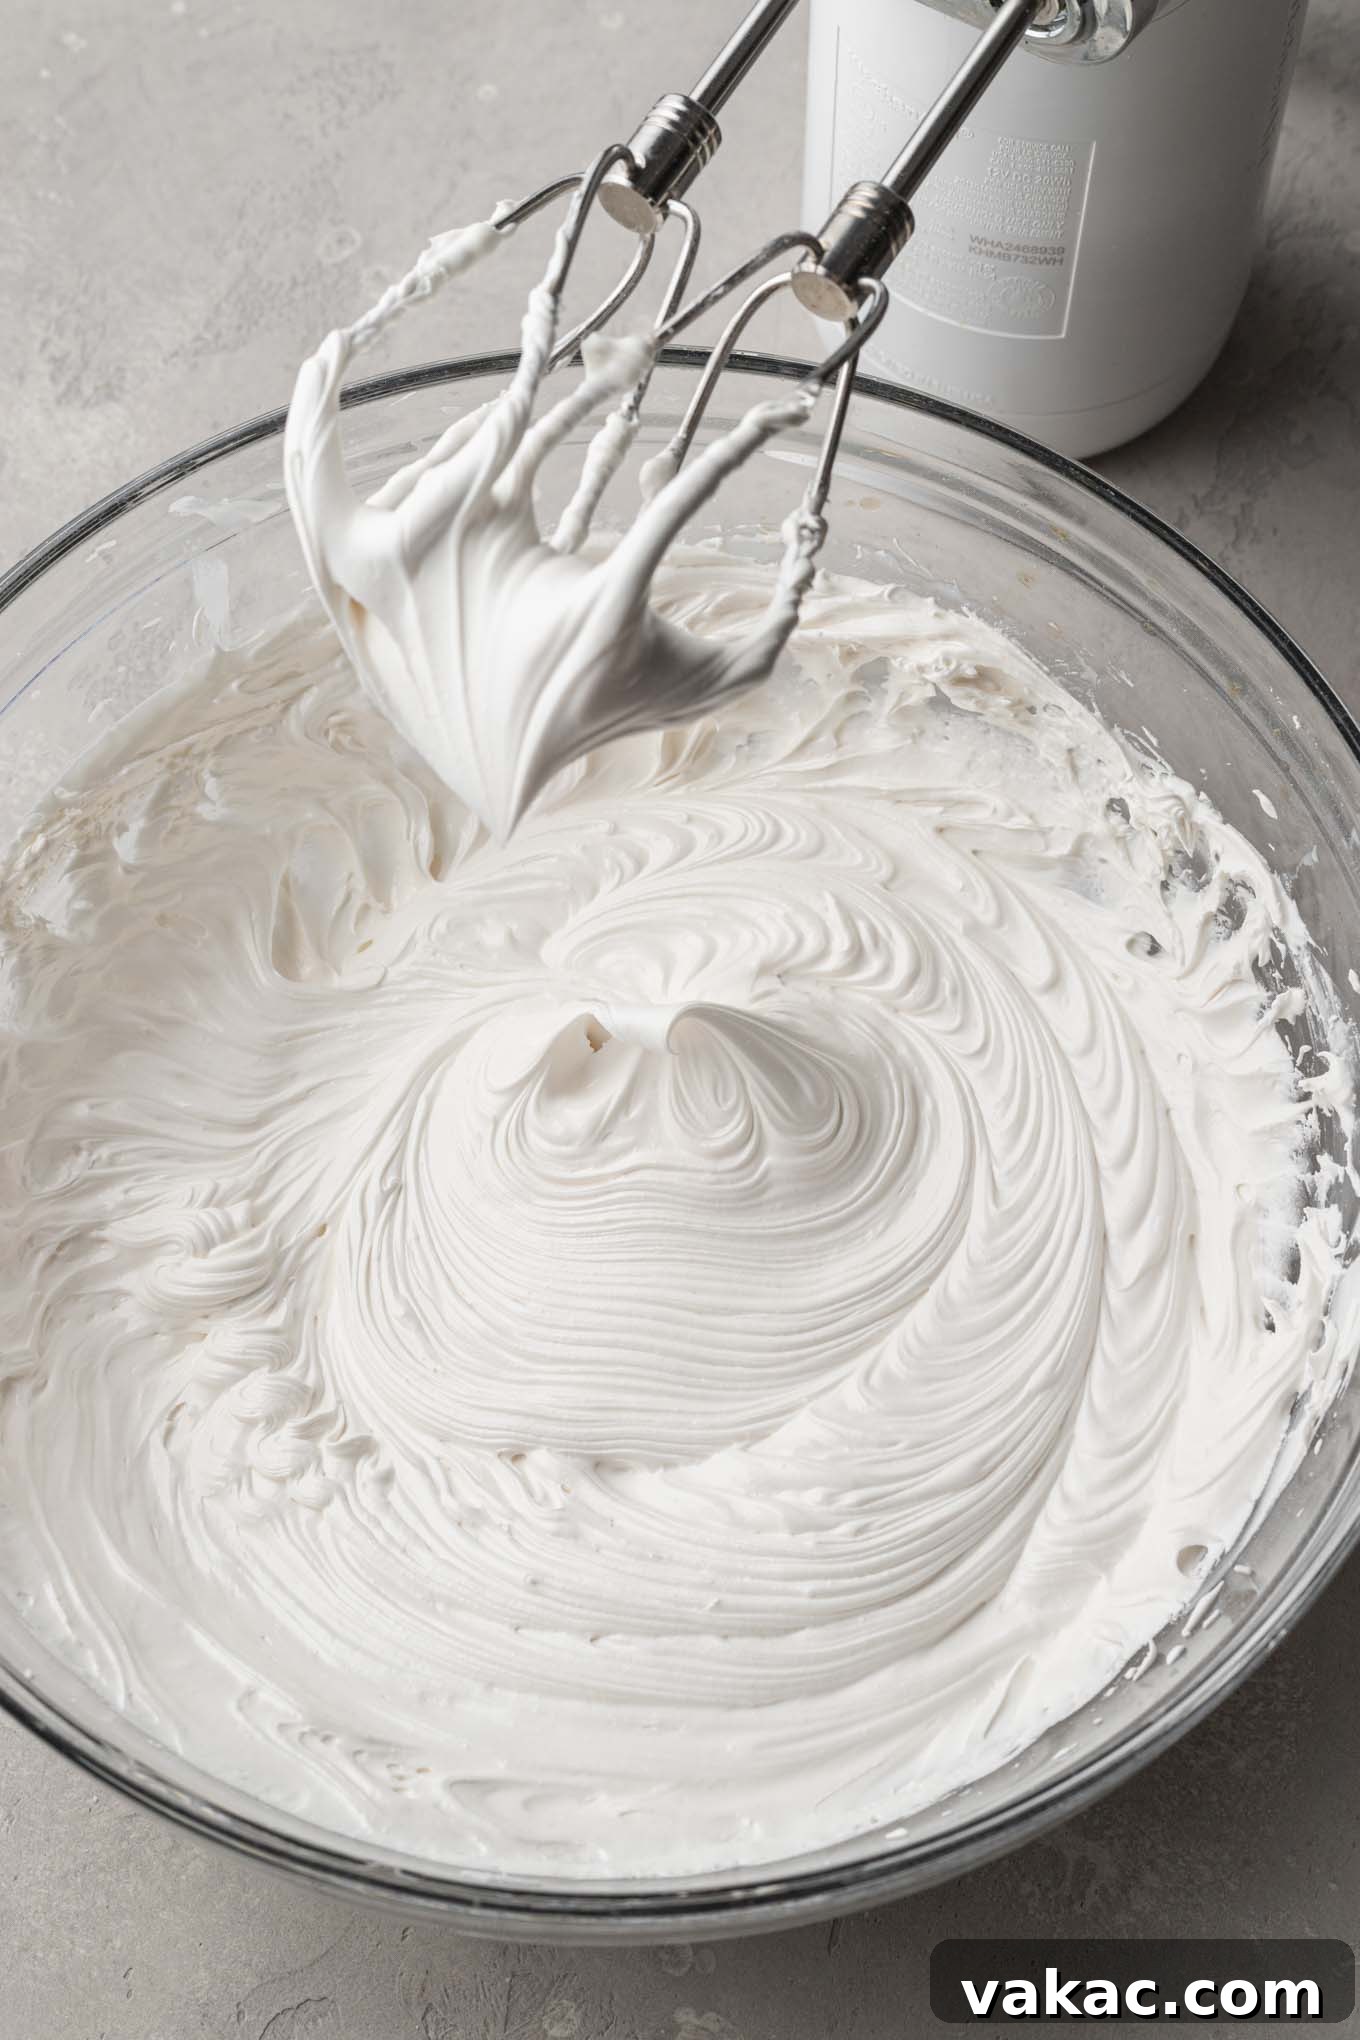
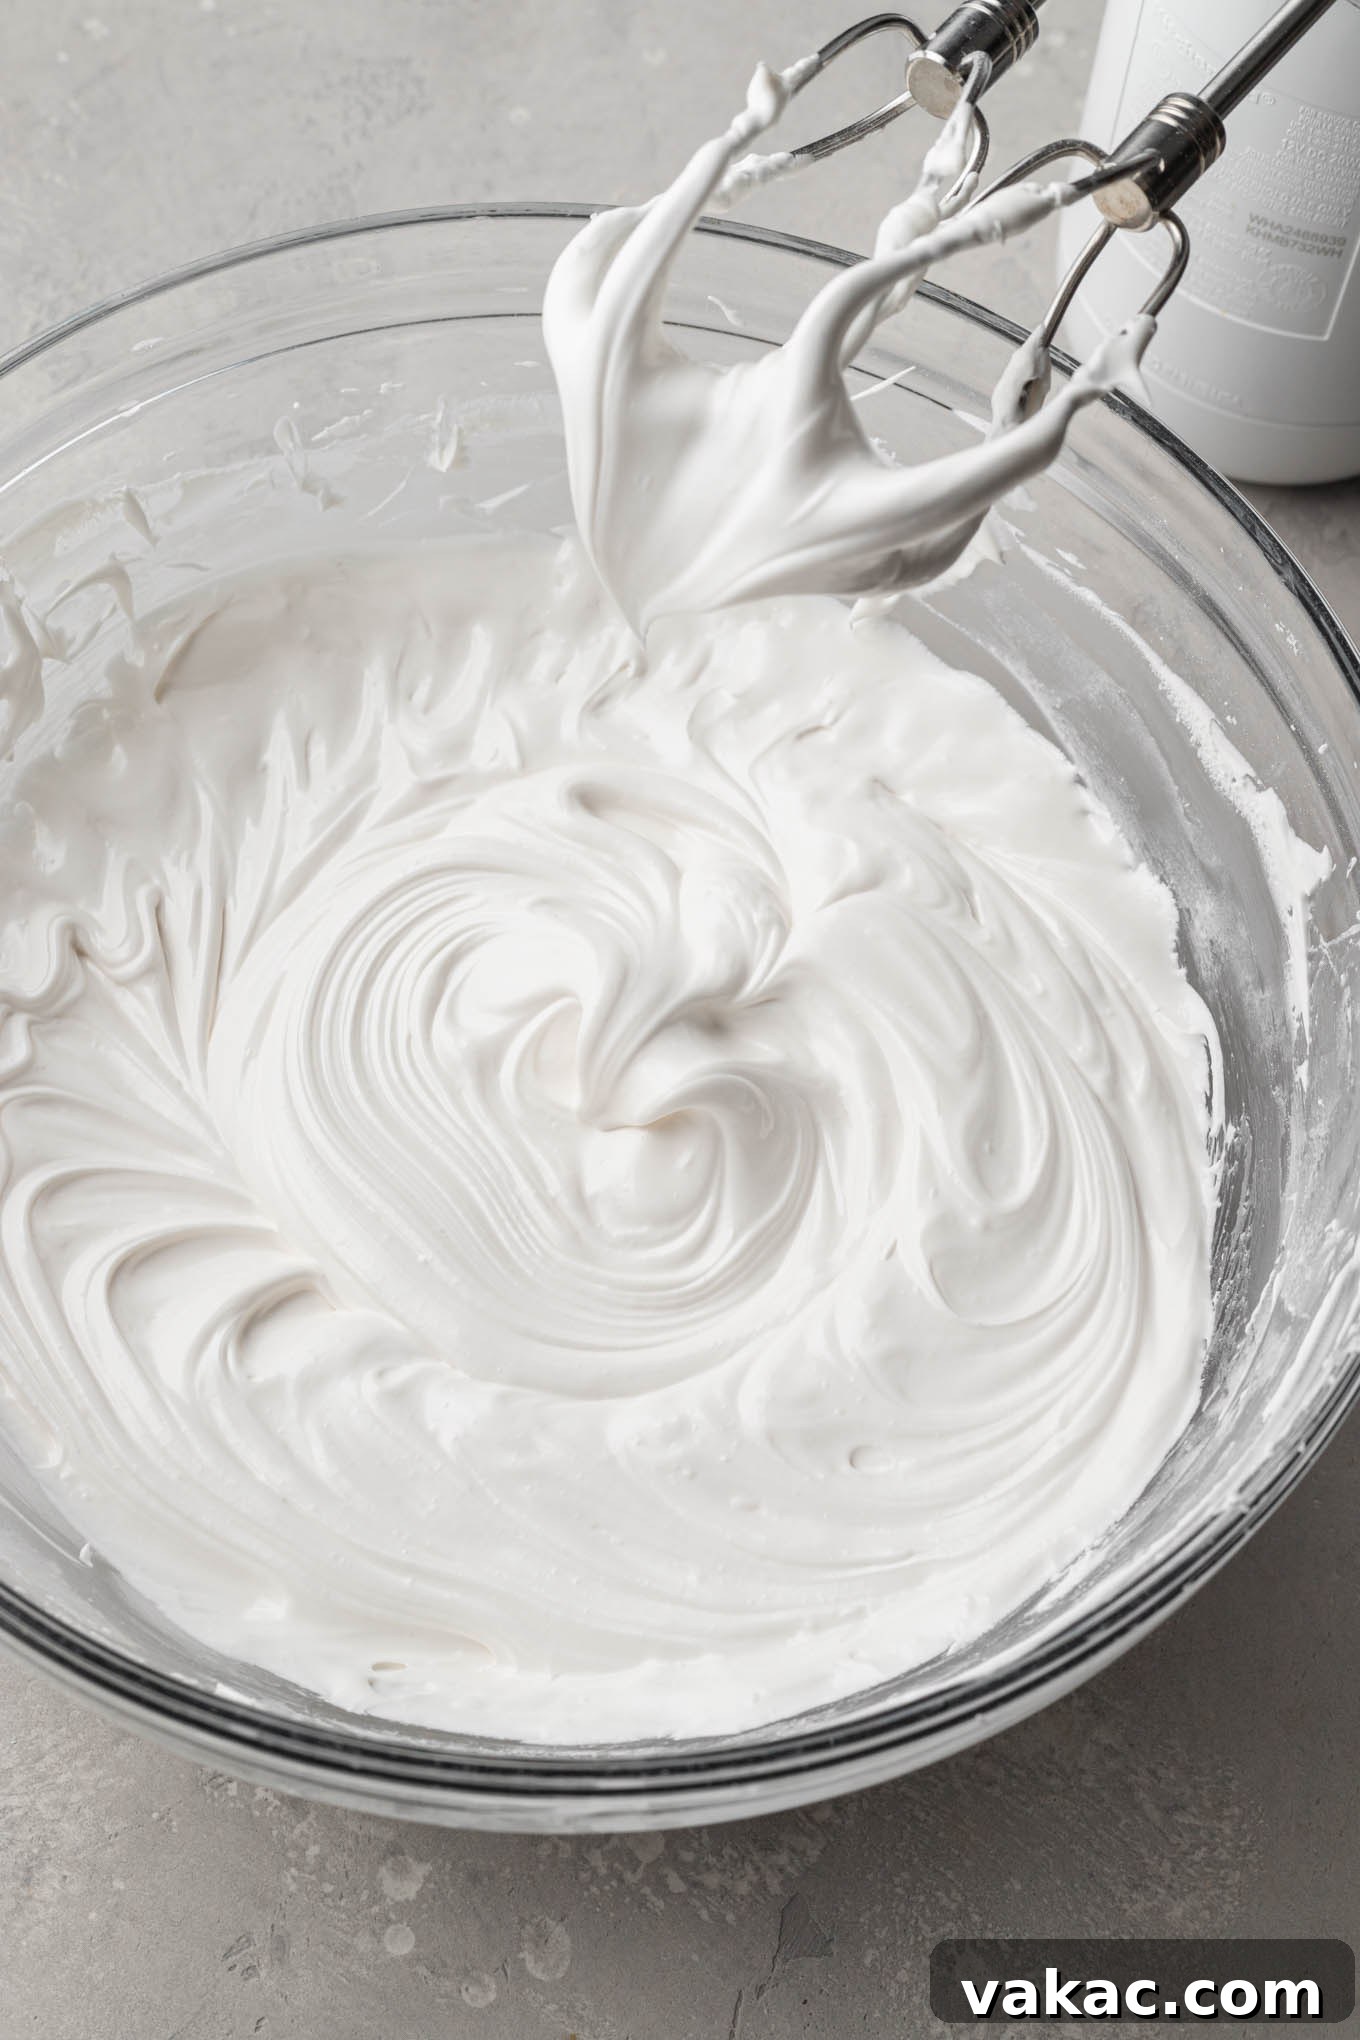
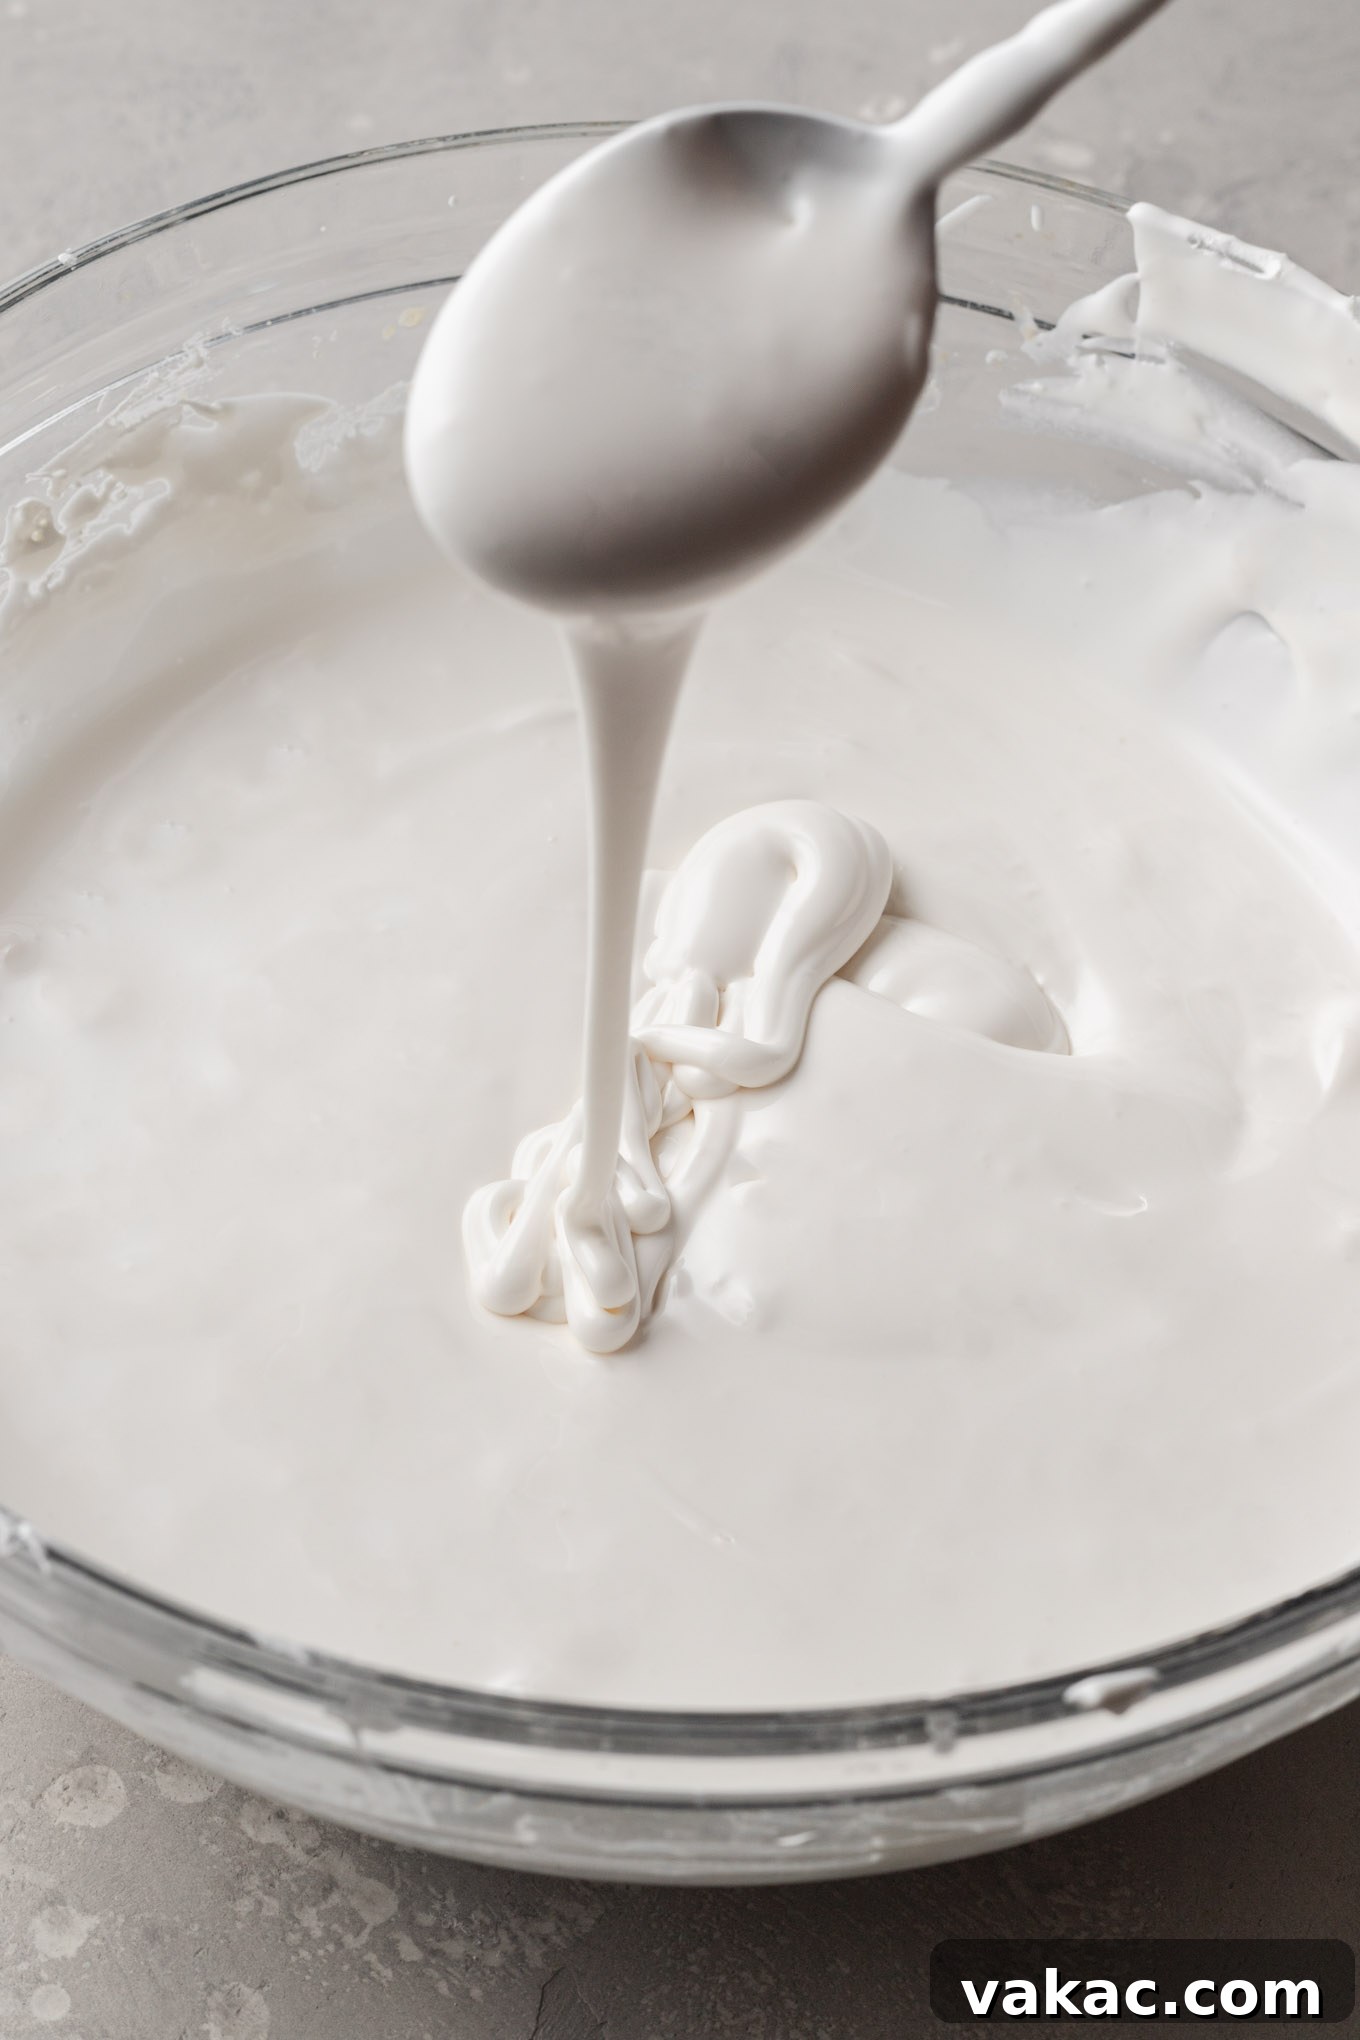
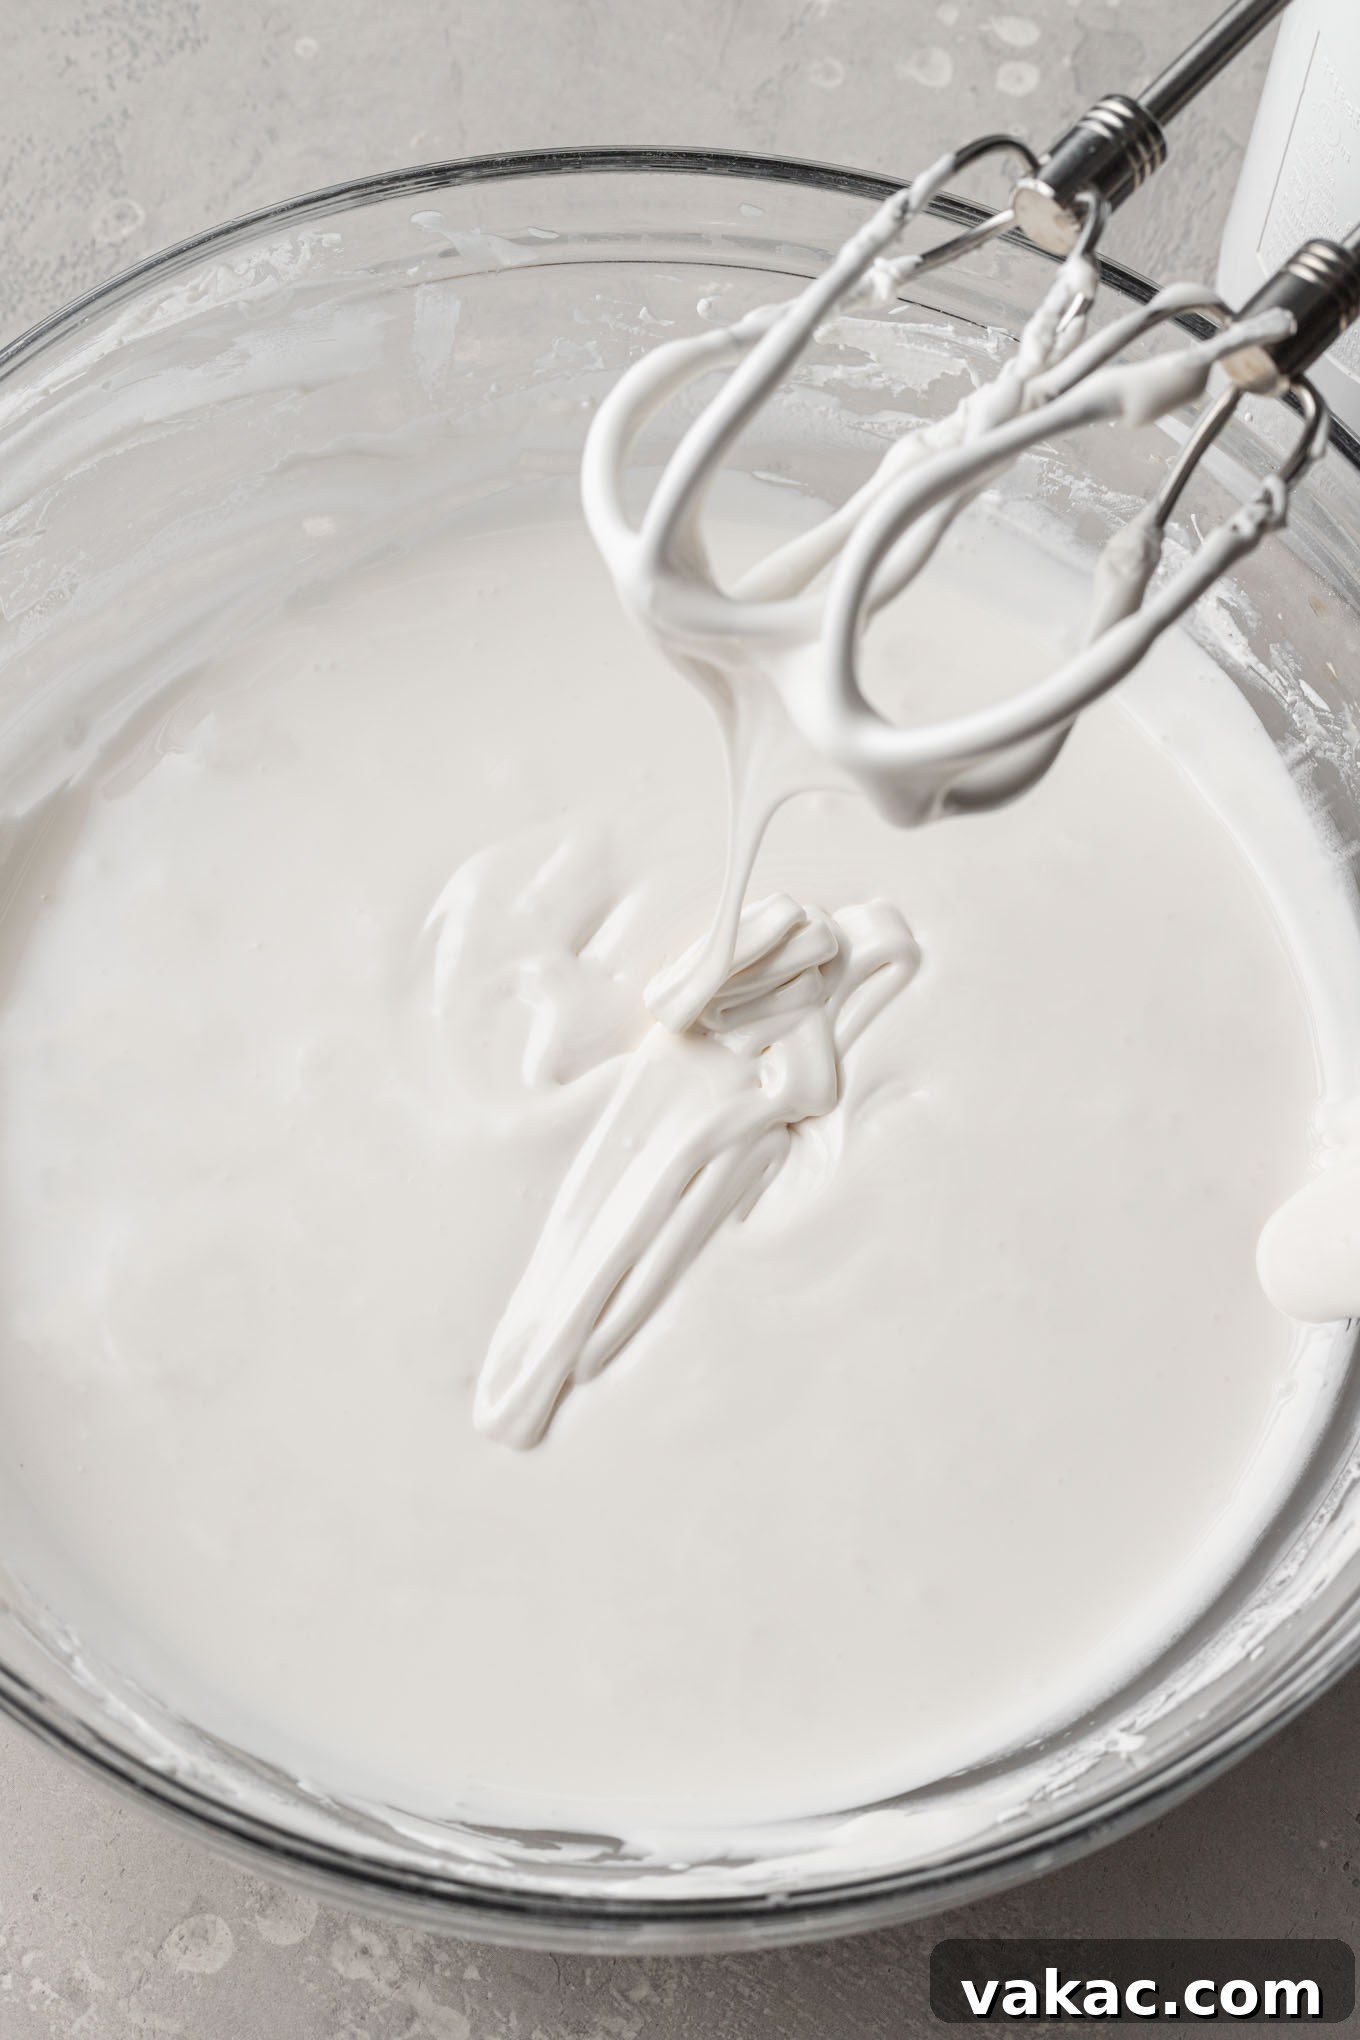
Mastering Royal Icing Consistencies for Flawless Decorating
Understanding and achieving the right royal icing consistency is paramount for successful cookie decorating. Each consistency serves a specific purpose, allowing for different techniques and levels of detail. Here are the key consistencies you’ll encounter:
- Stiff Consistency: This is the thickest consistency, akin to a firm buttercream frosting. It holds strong, distinct peaks when lifted with a spoon. Stiff icing is ideal for intricate piping work that requires structural integrity, such as creating delicate leaves, dimensional roses, beautiful flowers, or constructing gingerbread houses. It’s also perfect for piping borders that need to stand up or attaching edible decorations. Achieving this consistency can take the longest, often requiring 10 to 12 minutes of beating with a handheld mixer, so patience is key.
- Outline Consistency: Slightly softer than stiff icing, the outline consistency forms soft peaks that curl over. This texture is perfect for piping crisp, defined borders around your cookies, which act as a dam to contain thinner flood icing. It’s also excellent for delicate lettering, intricate lace designs, or small decorative details that require precision without being too rigid.
- Medium (15-Second) Consistency: This is arguably the most versatile consistency and a personal favorite for many decorators, especially beginners. It’s thick enough to create clean outlines but thin enough to flow smoothly and fill (or flood) cookies in a single step. To test for a 15-second consistency, lift your spoon or spatula and let some icing drizzle back into the bowl. If it takes approximately 15 seconds for the drizzled line to completely disappear and become smooth with the rest of the icing, you’ve hit the sweet spot. This consistency is ideal if you want to streamline your decorating process and avoid managing multiple bags of icing.
- Flood (8-Second) Consistency: This is the thinnest consistency used for covering large areas of your cookie with a smooth, even layer of icing. When tested with a spoon, the icing should drizzle off and fully dissolve back into the bowl within about 8 seconds. Flood consistency flows easily, creating a seamless, uniform surface. It is typically used after an outline has been piped and allowed to set slightly, preventing the flood icing from spilling over the edges of the cookie.
How to Adjust Consistencies:
You’ll typically beat your royal icing to its thickest desired consistency first (usually stiff or medium), and then adjust it by thinning it out.
- To thin icing: Add small amounts of warm water (¼ to ½ teaspoon at a time) or use a spray bottle to spritz the icing with water, mixing well after each addition until the desired consistency is reached. It’s always easier to add more water than to thicken it.
- To thicken icing: If your icing becomes too thin, gradually mix in a tablespoon of powdered sugar at a time until it reaches the correct consistency.
Working with Multiple Consistencies: If your design requires more than one consistency, I recommend beating the entire batch of icing to the thickest consistency you need (e.g., stiff or outline consistency). Then, divide the icing into separate bowls for different colors and uses. Thin each portion with a little warm water to achieve the precise consistency required for outlining, flooding, or intricate details.
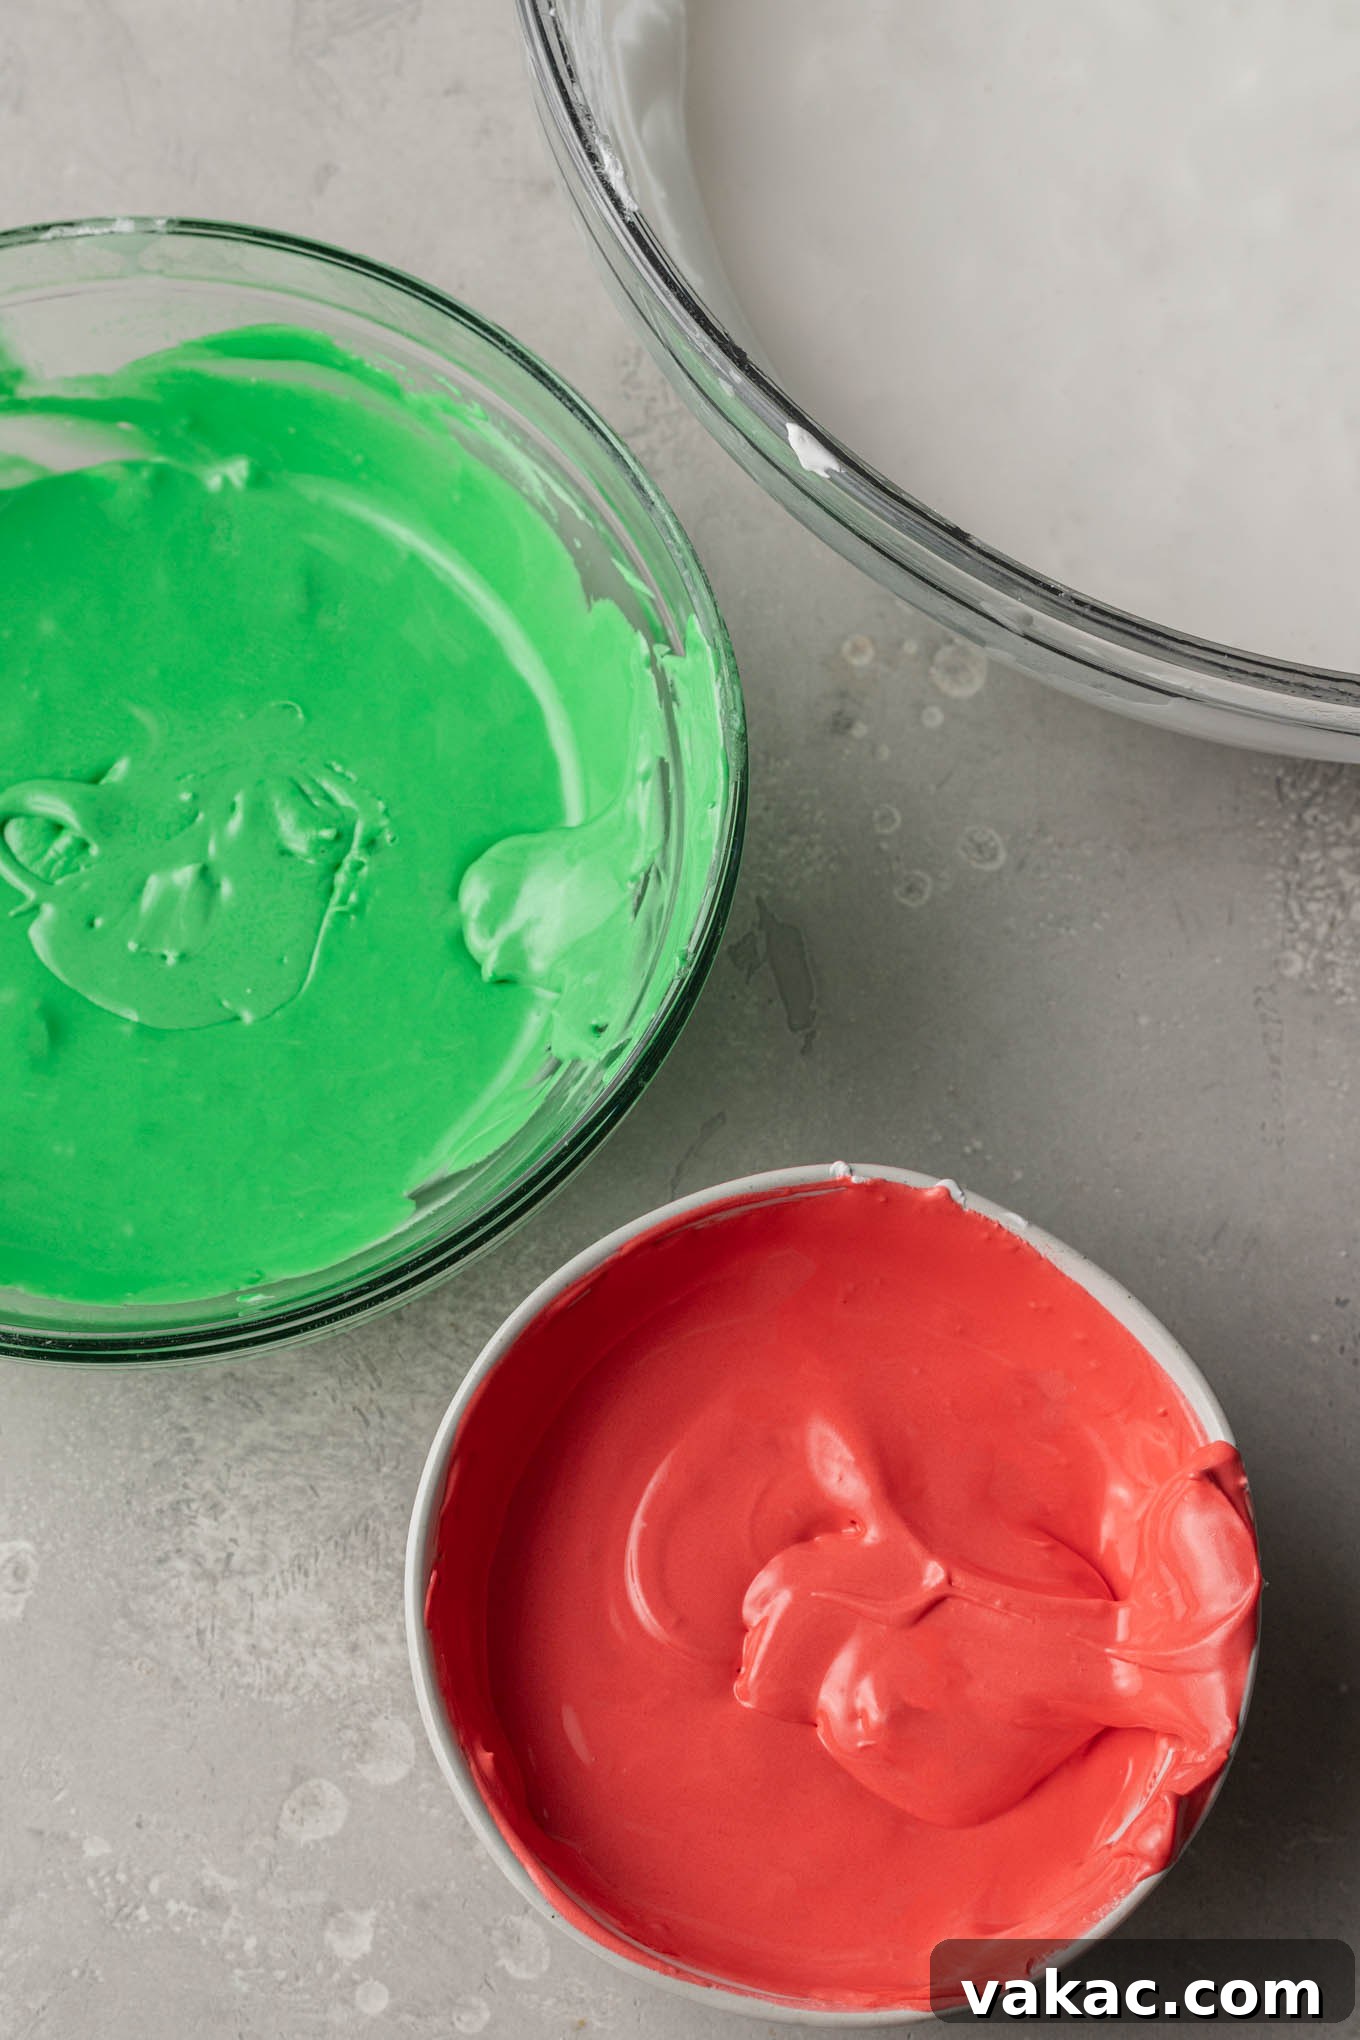
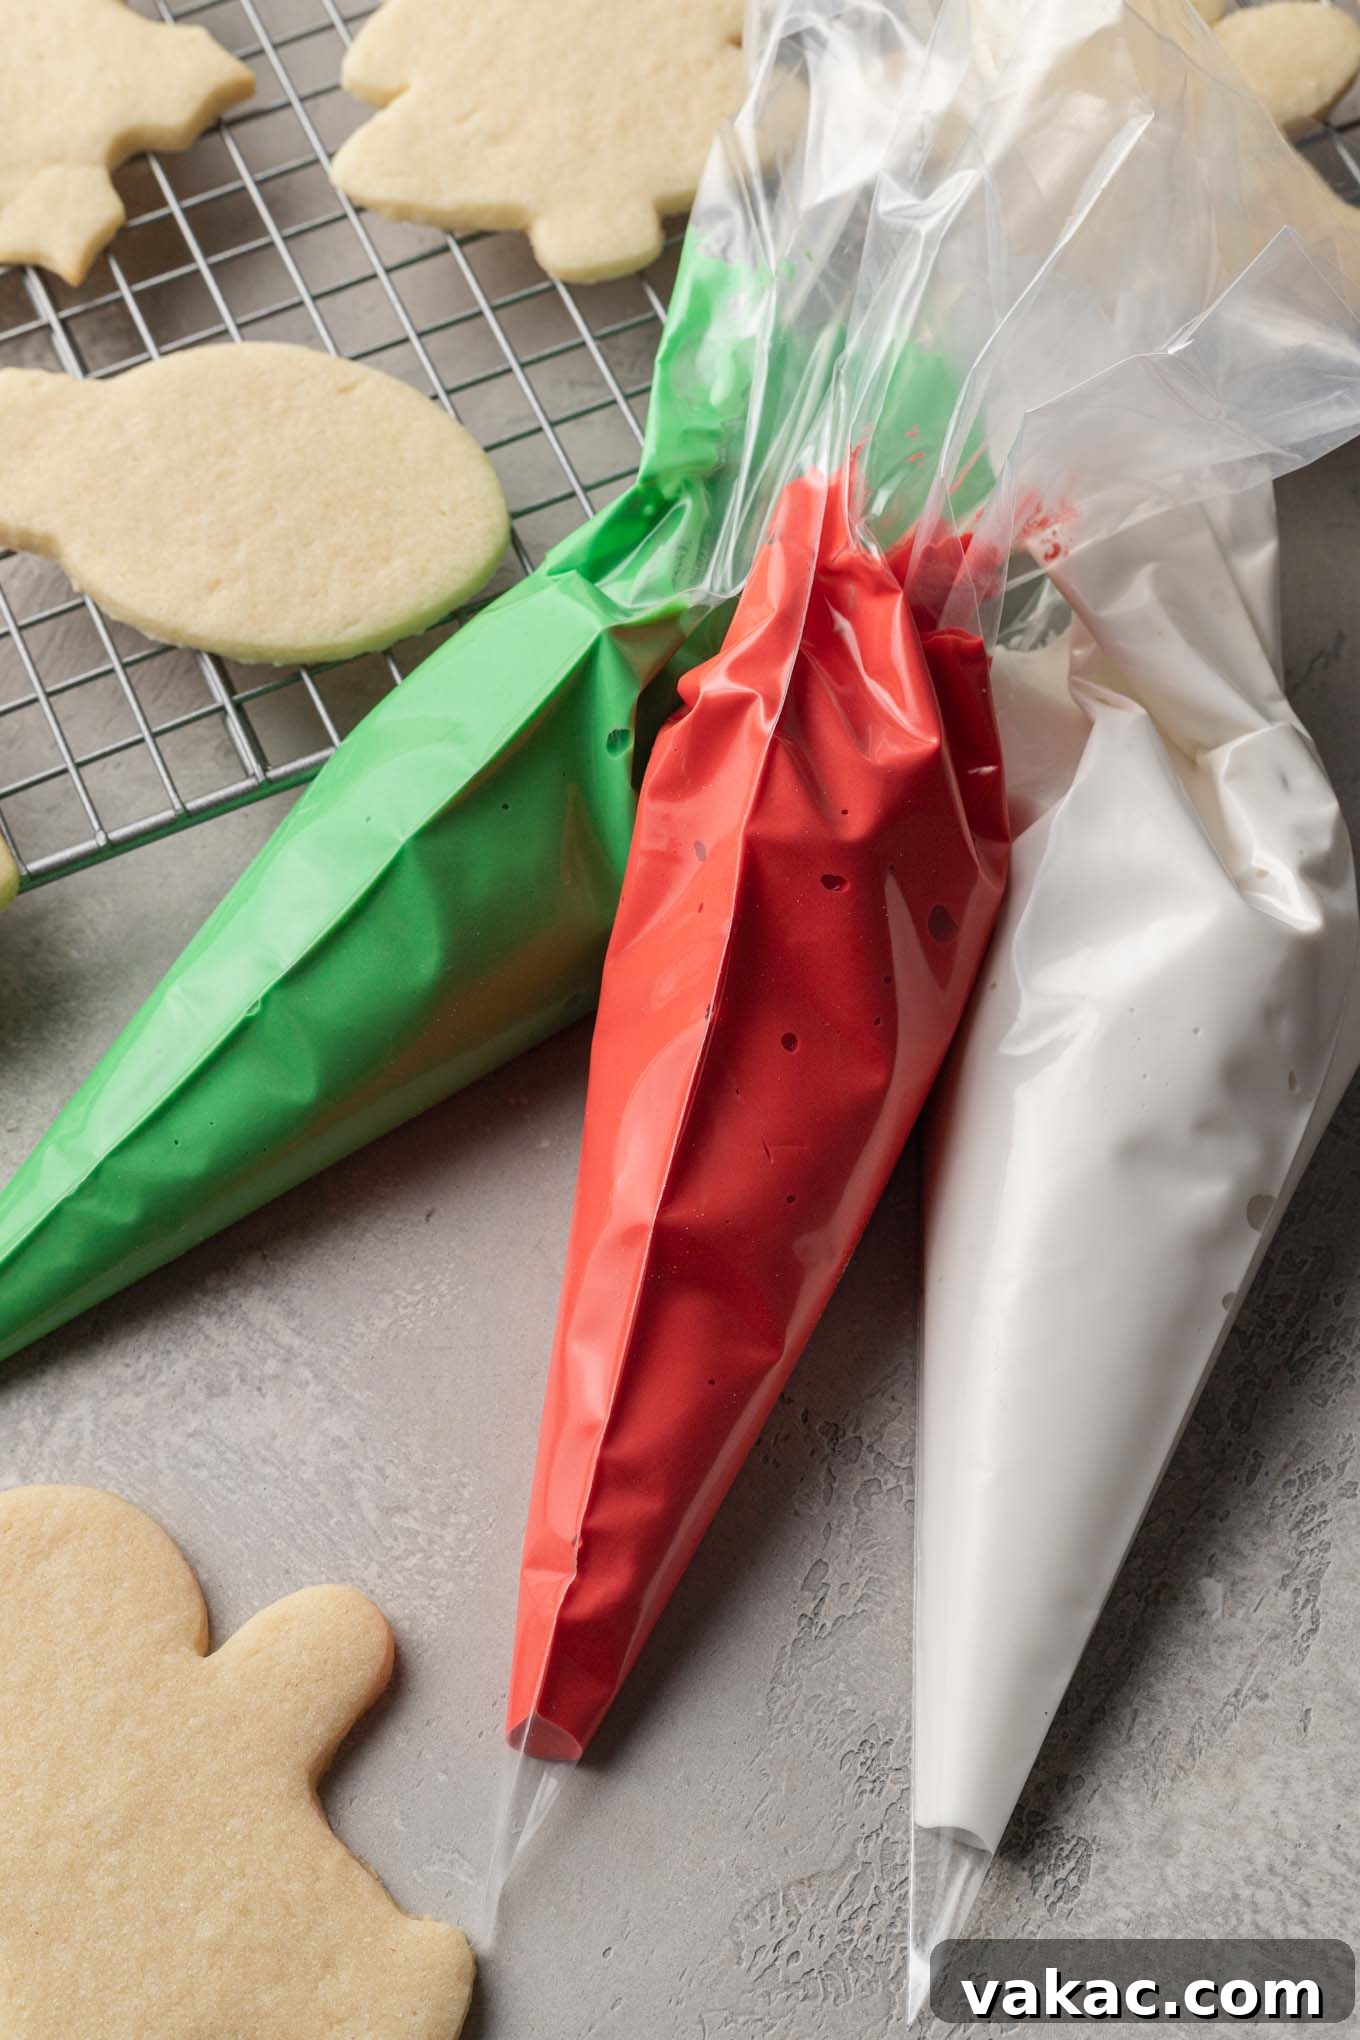
Coloring and Preparing Your Icing for Decorating
Once you’ve achieved your desired base consistency, it’s time to add color and prepare your icing for piping. This step allows for immense creativity and personalization.
- Coloring the Icing:
- For a single color: If your design only requires one color, you can add the gel food coloring directly into your stand mixer or handheld mixer bowl with the full batch of icing. Mix on low speed until the color is evenly distributed and vibrant.
- For multiple colors: Divide the prepared white icing into several separate bowls, one for each color you plan to use. Add a small amount of gel food coloring to each bowl. Start with a tiny drop, as gel colors are highly concentrated, and gradually add more until you achieve your desired shade. Mix thoroughly with a spoon or spatula. Remember that colors often deepen slightly as they sit, so don’t overdo it initially.
- Preparing for Different Consistencies (if applicable):
- Using a medium (15-second) consistency: If you’ve beaten your icing to a medium consistency, you typically don’t need to divide the colored icing between separate bowls for outlining and flooding. This versatile consistency allows you to use the same icing in one piping bag for both tasks, simplifying your decorating process.
- Using stiffer consistencies for outline and flood: If you prefer to use a stiffer consistency for outlining and a thinner one for flooding, divide each colored portion of icing into two bowls. You’ll generally need less icing for outlining than for flooding, so allocate more icing to the bowl designated for flooding.
- Thinning the Icing:
- For the flood icing (or if your outline icing is too thick), gradually add small amounts of warm water. Start with about ¼ to ½ teaspoon of water at a time, mixing well after each addition. Alternatively, a spray bottle filled with water provides excellent control for spritzing the icing to thin it out incrementally. Mix until you reach the correct flood consistency (e.g., 8-second count).
- If you accidentally make your icing too thin, you can thicken it by mixing in a small amount of additional powdered sugar, about a tablespoon at a time, until the desired consistency is restored.
- Preventing Dryness: Royal icing dries quickly when exposed to air. Always cover any icing you are not actively using with a damp paper towel or plastic wrap. Place the damp paper towel directly on the surface of the icing in the bowl, ensuring no air gets to it. This creates a humid environment and prevents the icing from hardening prematurely. Similarly, cover the tips of your piping bags with a damp cloth or plastic wrap when taking a break.

Your Guide to Decorating Cookies with Royal Icing
Now for the fun part: bringing your cookies to life with vibrant royal icing! With your icing prepared and colored, it’s time to pipe and create stunning designs. Here’s how to decorate your cookies like a pro:
- Prepare Piping Bags: Once all of your icing colors and consistencies are ready, fill your piping bags. Snip a small opening at the pointed end of each bag, then insert your preferred piping tip. If you’re using couplers, attach them first, then screw on the tip. Remember, couplers make swapping tips or colors much easier, saving you time and effort! Twist the top of each filled piping bag securely to prevent icing from leaking out.
- Cover Unused Icing: As emphasized before, always cover any icing in bowls or piping bags that you aren’t actively using with a damp paper towel or plastic wrap. Royal icing hardens quickly when exposed to air, which can clog your tips or dry out your batch.
- Outline Your Cookies: Begin by outlining each cookie with your outline-consistency icing. Hold the piping bag at a 45-degree angle, allowing the icing to flow smoothly from the tip. Apply steady, even pressure, and try to keep your hand slightly above the cookie surface, letting the icing fall rather than dragging the tip along the cookie. This creates a cleaner, more consistent line.
- Flood the Cookie: After outlining, use your flood-consistency icing to fill in the middle of the cookie. If you’re working with a versatile medium-consistency icing, you can use the same bag and tip to both outline and immediately fill in the cookie. For flooding, pipe the icing in a zigzag pattern or concentric circles until the entire outlined area is covered.
- Even Out and Remove Bubbles: Immediately after flooding, use a toothpick or scribe tool to gently spread the flood icing to the edges and fill in any empty spots. This also helps to evenly distribute the icing. If you notice any small air bubbles, gently prick them with your toothpick to release the air and achieve a perfectly smooth surface. If the icing doesn’t look perfectly level, gently shake or tap your cookies on your work surface a few times to help the icing settle and flatten out.
- Add Sprinkles and Wet-on-Wet Designs: If you’re adding sprinkles or other non-edible decorations, do so while the flood icing is still wet. This ensures they adhere properly. For “wet-on-wet” designs (where colors blend seamlessly, like the turkey feathers often seen on autumn cookies), immediately pipe your additional designs onto the still-wet flood icing. The wet-on-wet technique allows colors to bleed slightly and meld together, creating unique patterns.
- Layered Designs: If your design involves adding details on top of a dried base layer, it’s crucial to let the bottom layer of royal icing harden completely first. This usually takes a few hours, but allowing it to dry overnight is best. Applying wet icing on top of wet or partially dry icing can cause craters, bleeding, or cracking.
- Drying the Cookies: Once decorated, allow your cookies to dry at room temperature for several hours or until the icing is completely hard to the touch. The drying time can vary depending on factors such as the size of the cookies, the thickness of the icing, and the humidity in your environment. To expedite the process, you can place a fan nearby or even use a food dehydrator on a low setting. I personally prefer to ice my cookies the night before and let them sit out overnight on a cooling rack. This ensures the icing is fully set and durable enough for stacking and packaging without smudging. Don’t worry, your iced cookies will not dry out!


Frequently Asked Questions About Royal Icing
Yes, absolutely! Since this recipe is made with shelf-stable ingredients (meringue powder instead of raw egg whites), it’s perfectly safe to store your royal icing at room temperature. Simply place it in an airtight container, and it will remain fresh for up to 2 weeks. If the icing appears too soft or separated after storage, a quick re-mix with an electric mixer will bring it back to its original consistency and smoothness.
Indeed it can! Any leftover royal icing can be frozen for longer storage. Transfer the icing into freezer-safe bags, pressing out as much air as possible before sealing. It can be stored in the freezer for up to 3 months. When you’re ready to use it, thaw the icing overnight in the refrigerator. After thawing, let it sit on your kitchen counter for a few hours to reach room temperature, then give it a good stir or light beat to restore its consistency.
The drying time for royal icing can vary depending on several factors: the size and thickness of the icing layer on your cookies, the humidity in your environment, and how much airflow the cookies are receiving. Generally, thin layers can harden in a few hours, but thicker applications or humid conditions might require longer. To speed up the drying process, you can place a small fan near your cookies to circulate air or, for advanced users, a heat gun (used carefully and briefly) can accelerate drying. As a best practice, I personally prefer to ice my cookies the night before and allow them to air dry overnight. This ensures the icing is fully hardened and resilient, making them safe for stacking and packaging. Rest assured, properly iced cookies will not dry out when left uncovered overnight.
Air bubbles are a common occurrence in royal icing and are usually a result of beating too much air into the mixture, often from over-mixing or mixing at too high a speed. But don’t fret if you find them! A simple trick to manage air bubbles is to let your prepared icing sit undisturbed for 15 to 20 minutes (with a damp paper towel covering it). This allows the air bubbles to rise to the surface, where you can then gently stir or tap the bowl to smooth them out before transferring the icing to piping bags. Once piped on the cookie, use a toothpick or scribe tool to gently pop any remaining bubbles for a perfectly smooth finish.
There are a few common reasons royal icing might not dry properly. The most frequent issue is insufficient meringue powder or too much liquid. Ensure you’ve measured accurately and haven’t added excessive water or liquid food coloring. High humidity can also significantly prolong drying times. Make sure your environment is relatively dry, or use a fan/dehydrator to assist. Lastly, grease contamination in your bowl or tools can prevent the icing from setting.
While lemon juice is sometimes used in traditional royal icing for flavor and to help with hardening, it doesn’t offer the same plasticizing effect as corn syrup for a softer bite. Corn syrup contains glucose, which helps prevent the sugar crystals from forming a completely rigid structure. Lemon juice would instead contribute to a firmer, snappier icing. For a softer bite, stick with light corn syrup.

Top Tips for Royal Icing Success
Achieve consistently beautiful results with these expert tips:
- Sift Your Powdered Sugar: This is a non-negotiable step for truly smooth icing. Powdered sugar often clumps, and sifting prevents these lumps from clogging your piping tips or creating a grainy texture.
- Combat Drying: Royal icing dries incredibly fast when exposed to air. Always cover your mixing bowls or the openings of your piping bags with a damp cloth or plastic wrap when not actively decorating. This creates a humid environment and keeps your icing workable.
- Mind Your Liquids: Be cautious when adding liquid food coloring or flavorings. Too much liquid can thin out your icing beyond repair. Opt for gel food colors, which are highly concentrated and won’t significantly alter your icing’s consistency.
- Achieving Pure White Icing: As you beat the icing, it will naturally lighten in color to a bright white. For an ultra-pure white, especially desirable for wedding cookies or delicate designs, use clear vanilla extract instead of brown pure vanilla. You can also add a tiny touch of white gel food coloring (often labeled “bright white”) to counteract any yellow undertones from other ingredients.
- Icing Yield: This recipe yields approximately 3 cups of royal icing. This quantity is generally sufficient to decorate about two dozen 3-inch cookies or three dozen 2.5-inch cookies, depending on the complexity of your designs and how generously you apply the icing. Plan accordingly based on the number and size of cookies you intend to decorate.
- Cleanliness is Key: Ensure all your mixing bowls, spatulas, and whisk attachments are completely free of grease or oil. Royal icing is very sensitive to fats, which can prevent it from stiffening and drying properly.
- Practice Makes Perfect: If you’re new to cookie decorating, don’t be discouraged if your first attempts aren’t flawless. Practice on parchment paper or a spare cookie to get a feel for the pressure, flow, and consistency before moving on to your main batch.
Royal Icing Video Tutorial
For a visual guide to making and using royal icing, watch our comprehensive video tutorial. It covers all the steps, from mixing ingredients to achieving perfect consistencies and basic decorating techniques. (Video content would be embedded here)

Royal Icing Recipe
Total Time: 25 mins
This is the only royal icing recipe you will ever need! It’s made with just a few simple ingredients, comes together quickly, and always turns out perfect.
Pin Recipe
Leave a Review
Ingredients
Yields: 3 cups
- 4 cups powdered sugar (480 grams)
- 3 tablespoons meringue powder (27 grams; I use Wilton)
- 6 tablespoons warm water plus more as needed to thin the icing
- 1 tablespoon light corn syrup (optional but recommended for a softer bite)
- 1 teaspoon pure vanilla extract (or clear vanilla for pure white icing)
Instructions
- To prepare the icing: In the bowl of a stand mixer fitted with the whisk attachment, or in a large mixing bowl using a handheld mixer, add the powdered sugar and meringue powder. Stir until well combined.
- Add the water and continue mixing on low speed until fully combined and smooth. Stop and scrape down the sides of the bowl, then mix in the corn syrup and vanilla extract.
- Increase the speed to medium and continue mixing until the icing reaches stiff peaks or your desired consistency (refer to the blog post for detailed royal icing consistencies). If using a handheld mixer, it can take up to 12 minutes to reach stiff peaks, so be patient!
- To color the icing: If using just one color, add it directly to the bowl of icing and mix with your mixer. If making several different colors, divide the icing between separate bowls and add gel food coloring to each.
- To thin the icing: If you beat the icing to a medium consistency, you can use the same icing to outline and flood the cookies. If you beat to a stiffer consistency and need to thin some for flooding, divide the colored icing. Put more icing in the bowl for flooding. Add small amounts of water (¼ to ½ teaspoon at a time or spritz with a spray bottle) to the flood icing until it reaches desired consistency. If too thick, add more water. If too thin, add powdered sugar. Cover any unused icing with a damp paper towel to prevent hardening.
- To prepare your bag: Once all icing is colored and prepared, fill piping bags with your desired piping tips. If swapping tips or colors, use couplers for ease.
- To decorate the cookies: Outline each cookie with outline icing, then fill the middle with flood icing (or use medium consistency for both). Use a toothpick or scribe to spread the icing and fill empty spots. Gently tap or shake the cookie to smooth the icing. Add sprinkles immediately if desired.
- Allow the cookies to dry at room temperature for several hours or overnight until the icing has fully hardened. Drying time varies by cookie size, icing thickness, and airflow. Letting them dry overnight ensures they are ready for stacking.
Notes
Storage Instructions: Prepared royal icing can be stored in an airtight container at room temperature for up to two weeks. Stir well before reuse.
Freezing Instructions: Leftover icing can be frozen in a freezer-safe bag for up to 3 months. Thaw overnight in the fridge, then bring to room temperature on the counter before using. Re-beat lightly if needed.
Course: Dessert
Author: Danielle Rye
Did you make this recipe?
Mention @livewellbakeoften on Instagram or tag #livewellbakeoften.