
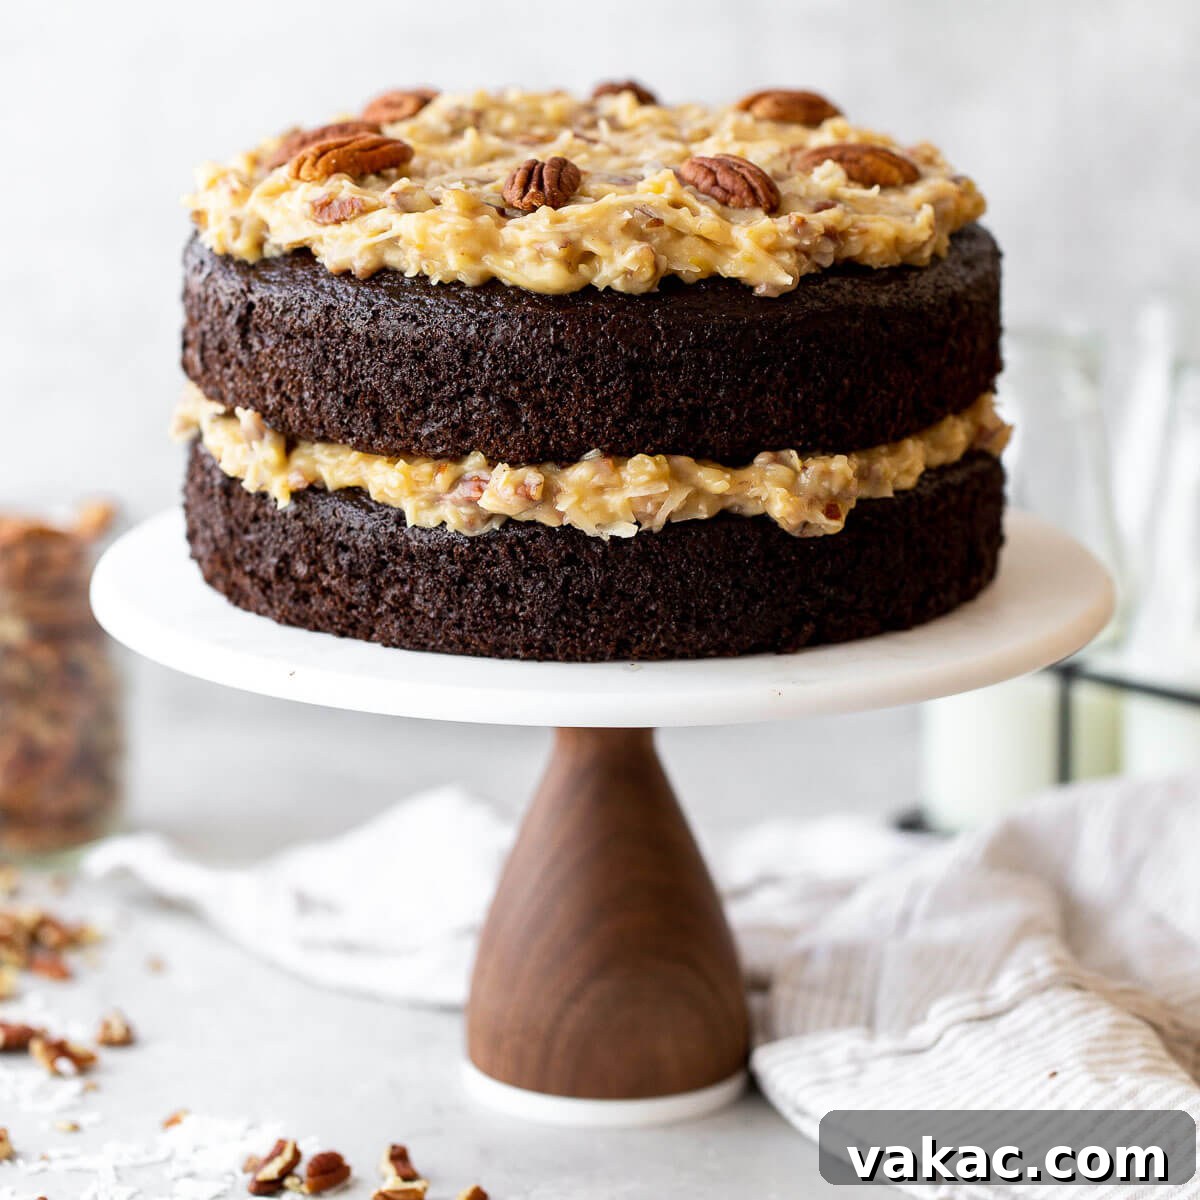
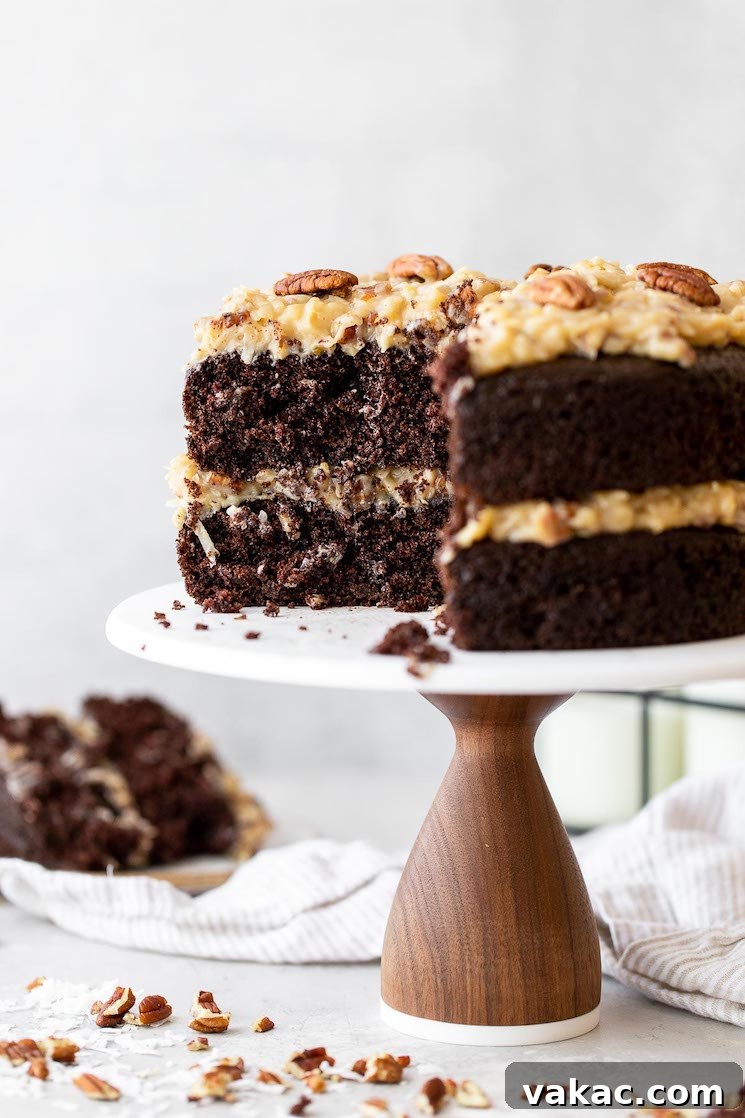
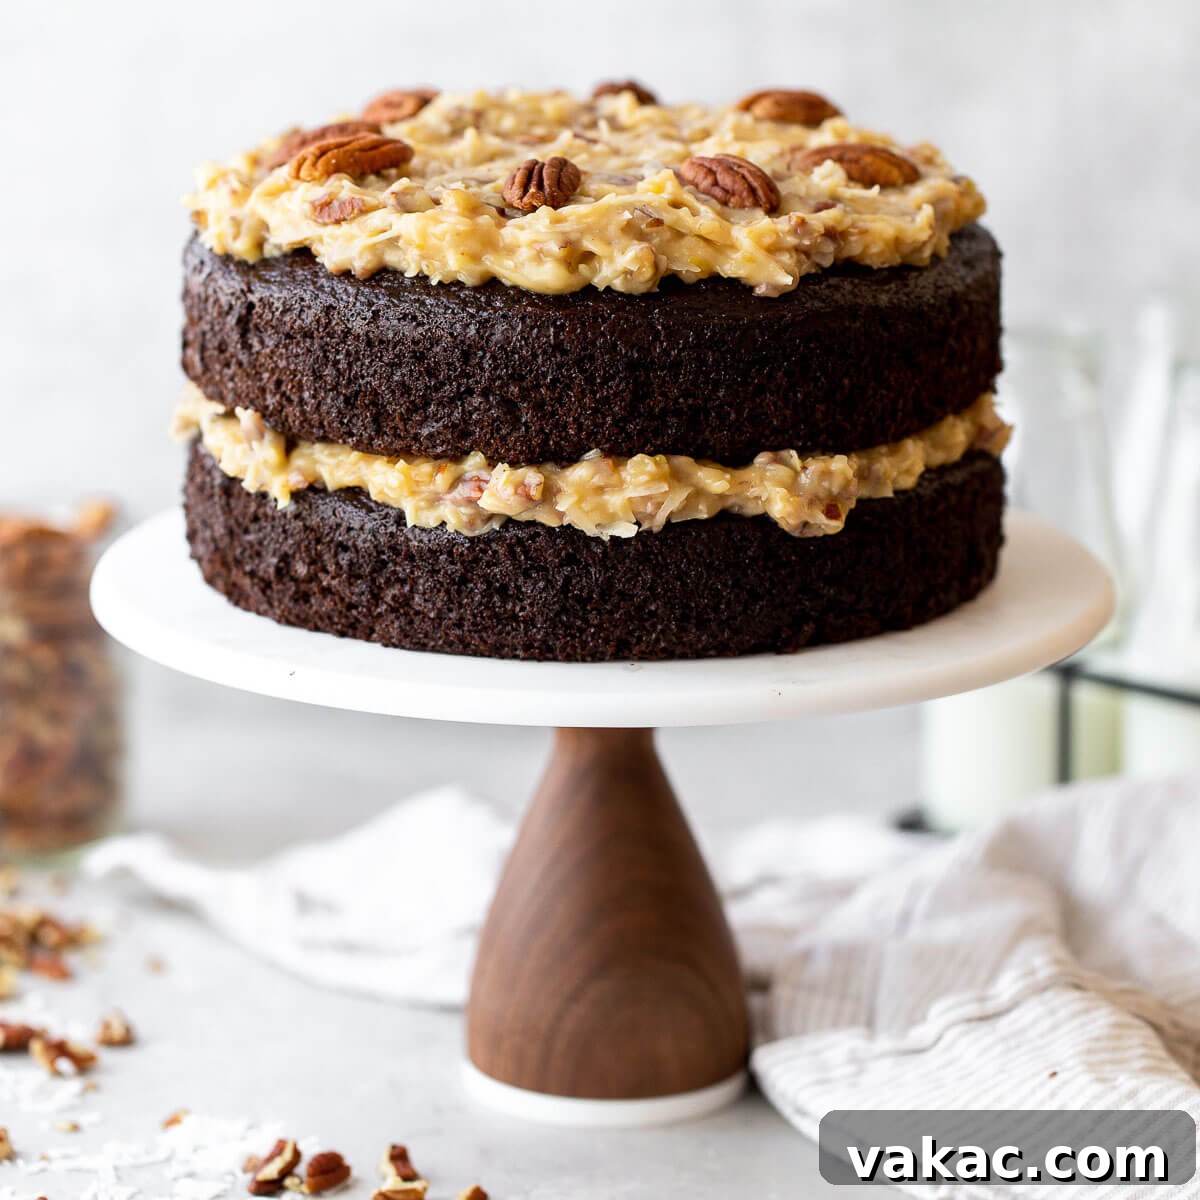
This is the ultimate German Chocolate Cake recipe you’ll ever need! This homemade cake features layers of incredibly moist chocolate cake and a luscious, homemade coconut pecan frosting. Prepare for a dessert experience that’s both easy to make and absolutely unforgettable.
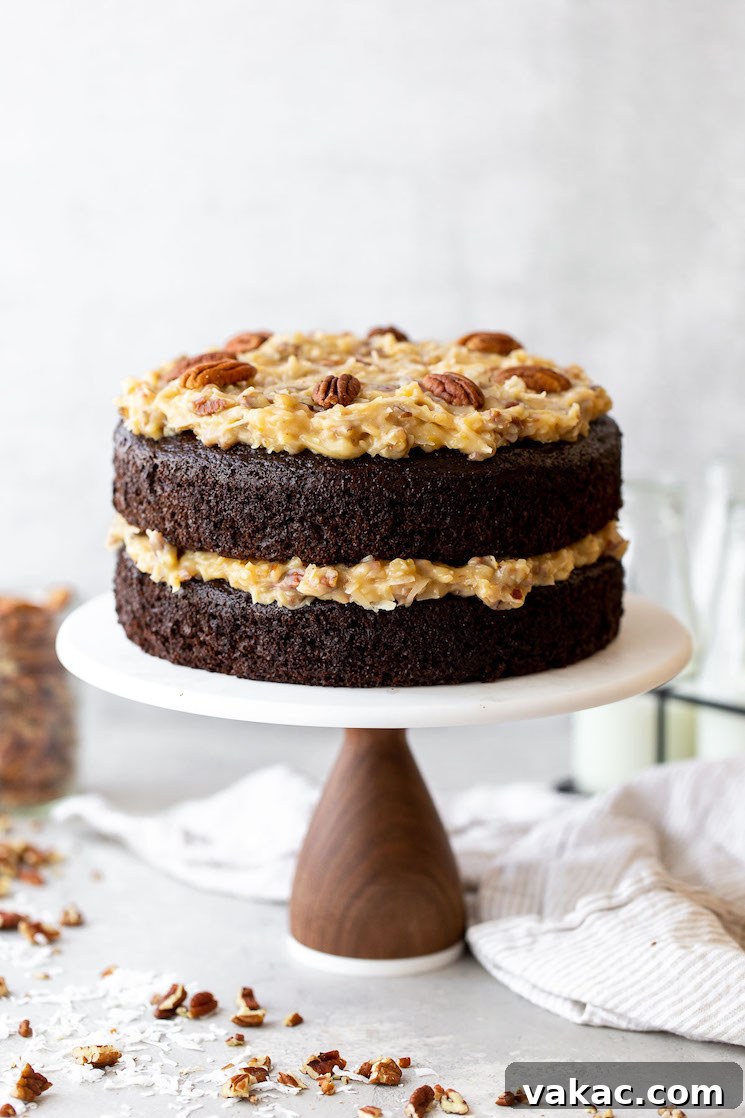
Do you have a truly unforgettable cake that holds a special place in your heart? For many, the answer is a resounding “yes,” and often, it involves chocolate. While classics like a rich chocolate fudge cake or a comforting carrot cake have always been beloved staples, there’s one particular dessert that consistently captivates with its unique blend of flavors and textures: the German Chocolate Cake. This isn’t just any chocolate cake; it’s a culinary masterpiece with a distinct heritage and an irresistible appeal, known for its deep chocolate layers and signature sweet, nutty, and coconut-infused topping. Its origins, dating back to the mid-19th century through an American baker named Samuel German, firmly establish it as a cherished American classic, despite its misleading name.
Today, we’re diving deep into what I believe is the ultimate German Chocolate Cake recipe – a simplified, richer, and utterly delicious version that will quickly become your new go-to. My goal with this recipe was to create an updated classic that maintains all the indulgence of traditional German Chocolate Cake while making it more accessible for home bakers of all skill levels. Forget complicated techniques or hard-to-find ingredients; this recipe focuses on creating a remarkably moist and tender chocolate cake, made effortlessly in a single bowl.
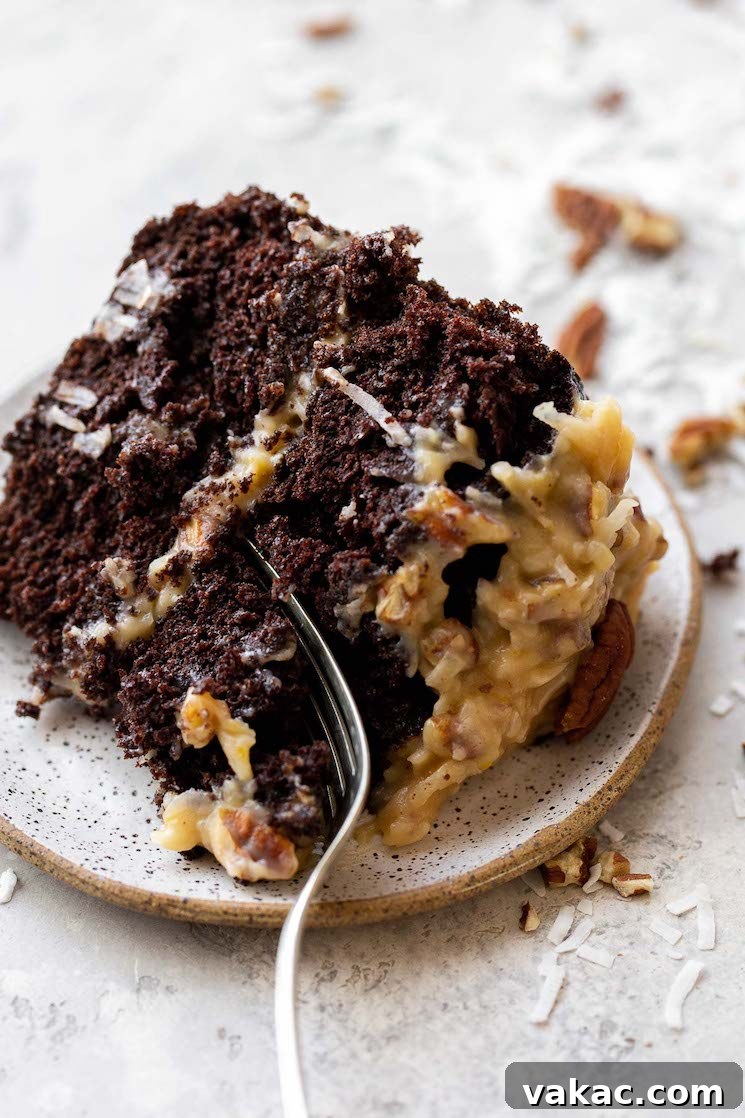
The real star, of course, is the legendary homemade coconut pecan frosting – a sweet, creamy, and nutty concoction that, I promise you, far surpasses any store-bought alternative. It’s surprisingly simple to prepare and delivers a depth of flavor and a delightful texture that is truly unparalleled. This unique frosting, which becomes almost a filling between the cake layers, is what sets German Chocolate Cake apart from all other chocolate cakes, offering a delightful contrast of textures and tastes in every bite.
To keep the process streamlined and enjoyable, I’ve designed this cake without an outer layer of traditional chocolate frosting. The focus here is squarely on the exquisite combination of the decadent chocolate cake and its iconic coconut-pecan topping, allowing their individual flavors to shine through beautifully. However, if you desire that extra touch of chocolate elegance around the perimeter of your cake, perhaps for a special presentation, I’ve included an option to add a complementary chocolate buttercream frosting. This flexibility ensures you can tailor this incredible dessert to your exact preference, making it perfect for any occasion, from a casual family gathering to a festive celebration where it will undoubtedly be the star.
Unlock the Secret: Essential Ingredients for the Perfect German Chocolate Cake
Crafting the best German Chocolate Cake begins with selecting the right ingredients. Fortunately, this recipe relies mostly on common pantry staples, transformed into something truly extraordinary. Below is a detailed look at what you’ll need for both the incredibly moist chocolate cake layers and the irresistible coconut pecan frosting, along with essential tips for each component to ensure your baking success.
- All-Purpose Flour: The foundational structure of our cake. Accuracy in measuring flour is paramount for achieving a light, airy, and tender crumb. Always spoon your flour into the measuring cup (rather than scooping directly from the bag, which compacts it) and level it off with the back of a knife to avoid adding too much flour, which can lead to a dense, heavy cake.
- Natural Unsweetened Cocoa Powder: This provides the deep, rich chocolate flavor for our cake layers. Using natural unsweetened cocoa powder is crucial as its acidity reacts with the baking soda, aiding in the cake’s rise and contributing to its vibrant, deep chocolate hue. Dutch-processed cocoa powder, while delicious, would react differently.
- Baking Soda & Baking Powder: These leavening agents work in harmony to give the cake its beautiful lift and tender texture, ensuring a fluffy result that isn’t too heavy. Ensure they are fresh for optimal performance; check their expiry dates!
- Salt: A pinch of salt is a baking secret weapon. It perfectly balances the sweetness of the batter, preventing it from tasting overly sugary, and significantly enhances the natural, complex flavors of the chocolate, making every bite more profound and well-rounded.
- Granulated Sugar & Brown Sugar: Our cake uses a thoughtful combination of both. Granulated sugar provides foundational sweetness and helps with browning and tenderization, while brown sugar adds an extra layer of moisture and a subtle caramel note. This blend contributes to the cake’s incredible tenderness and depth of flavor.
- Oil (Vegetable or Canola): Unlike butter, which contains water and milk solids that can make cakes denser, oil contributes to an exceptionally moist cake that stays tender for longer. Both vegetable and canola oil are neutral in flavor, allowing the rich chocolate notes to truly shine without any interference.
- Buttermilk: The acidity in buttermilk reacts beautifully with the baking soda, resulting in a super moist, tender, and finely crumbed cake. It also adds a slight tang that complements the sweetness. Don’t have any on hand? No problem! You can easily make a homemade buttermilk substitute here by adding a tablespoon of lemon juice or white vinegar to regular milk and letting it sit for 5-10 minutes.
- Eggs: Essential for both the cake batter and the frosting. In the cake, eggs provide structure, richness, and emulsification. For the cooked frosting, the egg yolks contribute to its classic thick, smooth, and custardy texture. Ensure your eggs are at room temperature for optimal mixing and emulsification, leading to a smoother batter and frosting.
- Pure Vanilla Extract: A splash of high-quality pure vanilla extract elevates all the other flavors, adding warmth, complexity, and depth to both the chocolate cake layers and the sweet, nutty coconut pecan frosting. Don’t skimp on good vanilla!
- Boiling Water: This might seem unusual for a cake batter, but adding very hot or boiling water to the chocolate mixture “blooms” the cocoa powder. This process intensifies its chocolate flavor, making it richer and darker, and also contributes to an incredibly moist, tender crumb that melts in your mouth.
- Instant Espresso Powder (Optional, but Highly Recommended): While optional, a teaspoon of instant espresso powder doesn’t make the cake taste like coffee. Instead, it subtly deepens and enhances the chocolate flavor, making it taste even more robust and complex without overpowering it. It truly rounds out the cake’s profile, making the chocolate taste “more chocolatey.”
- Evaporated Milk: A key ingredient for the classic coconut pecan frosting. It provides a creamy, rich base without being overly sweet, and its reduced water content helps create a thicker, more stable frosting. Crucially, do not confuse it with sweetened condensed milk, which is much thicker and significantly sweeter, and would not yield the correct frosting consistency.
- Unsalted Butter: Used in the delectable, rich frosting. I recommend using unsalted butter so you have complete control over the salt content, as the amount can vary widely between different salted butter brands. This precision ensures your frosting is perfectly balanced in flavor.
- Sweetened Shredded Coconut: The signature texture and tropical sweetness for the frosting. This ingredient is readily available in the baking aisle of most grocery stores and provides that iconic chewiness and flavor that defines German Chocolate Cake.
- Chopped Pecans: Providing a delightful crunch, earthy flavor, and buttery notes to the frosting, raw chopped pecans are ideal. You can toast them lightly in a dry pan for a few minutes before adding them for an even more pronounced nutty taste, though it’s not strictly necessary for a delicious result.
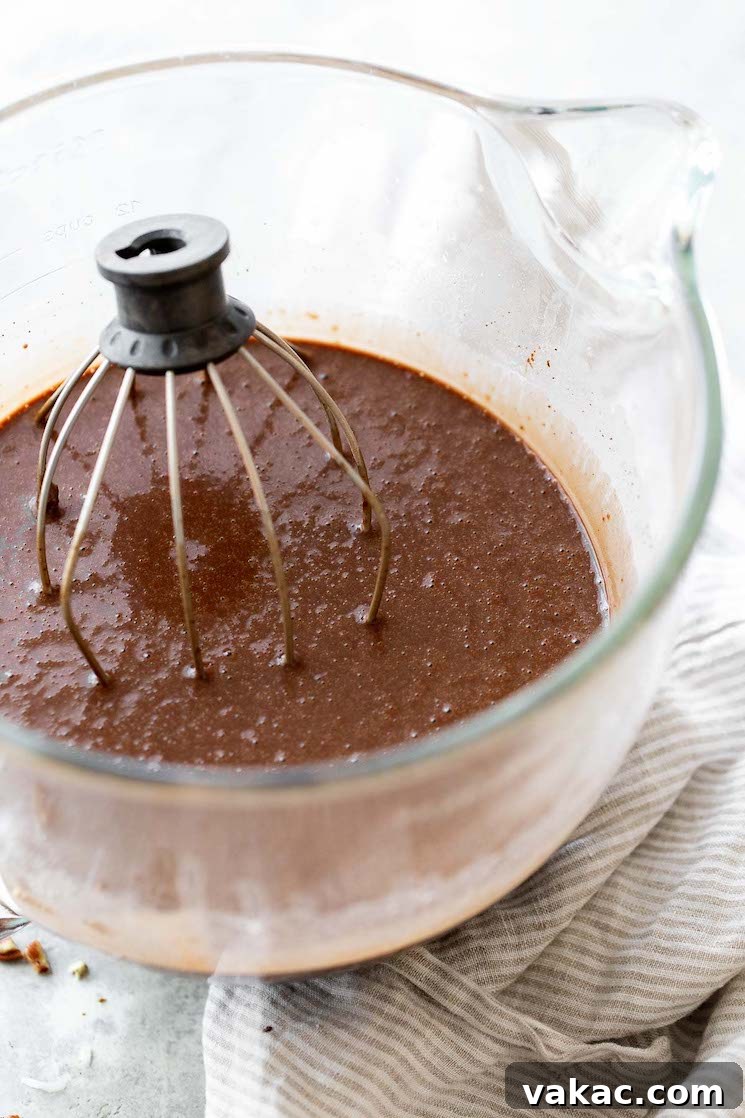
Baking Perfection: Crafting the Moist German Chocolate Cake Layers
While traditional German Chocolate Cake often incorporates melted German chocolate into a lighter-colored batter, our recipe takes a deliciously different approach. We’re utilizing my tried-and-true homemade chocolate cake recipe as the base – and for good reason. It’s not only incredibly delicious, yielding a deeply flavored and wonderfully moist cake, but it’s also remarkably simple to make. The beauty of this method lies in its efficiency: you can prepare all the cake layers in a single bowl, using straightforward ingredients you likely already have on hand. This streamlined process ensures that even novice bakers can achieve spectacular results, transforming basic ingredients into a rich, tender, and perfectly crumbed chocolate cake.
For a complete visual guide and more in-depth tips on perfecting your chocolate cake, you can refer to my full tutorial on chocolate layer cake. However, here’s a concise step-by-step rundown for creating these perfect chocolate cake layers, focusing on precision and technique for optimal results:
- Prepare Your Pans & Preheat Oven: Begin by preheating your oven to 350°F (177°C). Properly prepare your two 9-inch round cake pans by thoroughly greasing and flouring them, or by spraying generously with a nonstick baking spray that contains flour. For an extra layer of non-stick insurance and easy release, line the bottoms of each pan with a circle of parchment paper. This crucial first step prevents sticking and ensures beautifully intact cake layers, which are essential for a stunning presentation.
- Whisk Together the Dry Ingredients: In a large mixing bowl, combine the all-purpose flour, natural unsweetened cocoa powder, baking powder, baking soda, and salt. Then, thoroughly whisk in both the granulated sugar and brown sugar until everything is perfectly combined and there are no visible lumps. Sifting the dry ingredients before whisking can help ensure an even distribution of leavening agents and a smoother, lump-free batter, contributing to a uniform cake texture.
- Incorporate the Wet Ingredients: Once your dry mixture is perfectly blended, add the oil, room-temperature buttermilk, room-temperature eggs, and pure vanilla extract to the bowl. Using room-temperature ingredients allows for better emulsification, leading to a smoother batter and a more consistent, tender crumb. Mix these ingredients with a whisk or electric mixer until they are *just* combined. Be careful not to overmix at this stage, as over-developing the gluten in the flour can lead to a tough, dry cake. At this point, the batter will be quite thick, resembling a rich, fudgy brownie batter.
- Add the Boiling Water with Espresso Powder: This is a key step for intensifying the chocolate flavor and ensuring a moist cake. While you start preparing the other ingredients, heat a cup of water to a rolling boil. If using, whisk a teaspoon of instant espresso powder into the boiling water until it’s fully dissolved. Carefully add this hot liquid to your thick cake batter and mix gently until it is just incorporated and the batter is smooth. The batter will become noticeably thinner and very liquidy after this addition, which is exactly the desired consistency.
- Pour and Bake: Divide the now thin and smooth batter evenly between your two prepared 9-inch cake pans. Place the pans in the preheated oven and bake for approximately 28-32 minutes. The cake layers are done when a wooden skewer or toothpick inserted into the center of the cakes comes out clean, and the tops of the cakes spring back lightly when gently touched. Avoid opening the oven door too frequently during baking, as this can cause the cakes to sink.
- Cooling Process: Once baked, remove the cake pans from the oven and allow them to cool on a wire rack for about 10-15 minutes. This crucial period allows the cakes to firm up and set properly, making them less fragile. Then, carefully invert the cakes onto the wire rack, gently peel off the parchment paper from the bottoms, and let them cool completely to room temperature before frosting. Attempting to frost warm cakes will result in a messy, melted frosting disaster, as the heat will cause the frosting to slide right off. Patience here ensures a beautiful, stable cake.
See? It’s incredibly straightforward, which is precisely why this versatile chocolate cake recipe serves as the ideal foundation for our spectacular German Chocolate Cake. The result is consistently moist, rich, and ready for its star topping, providing a perfect canvas for the unique coconut pecan frosting.
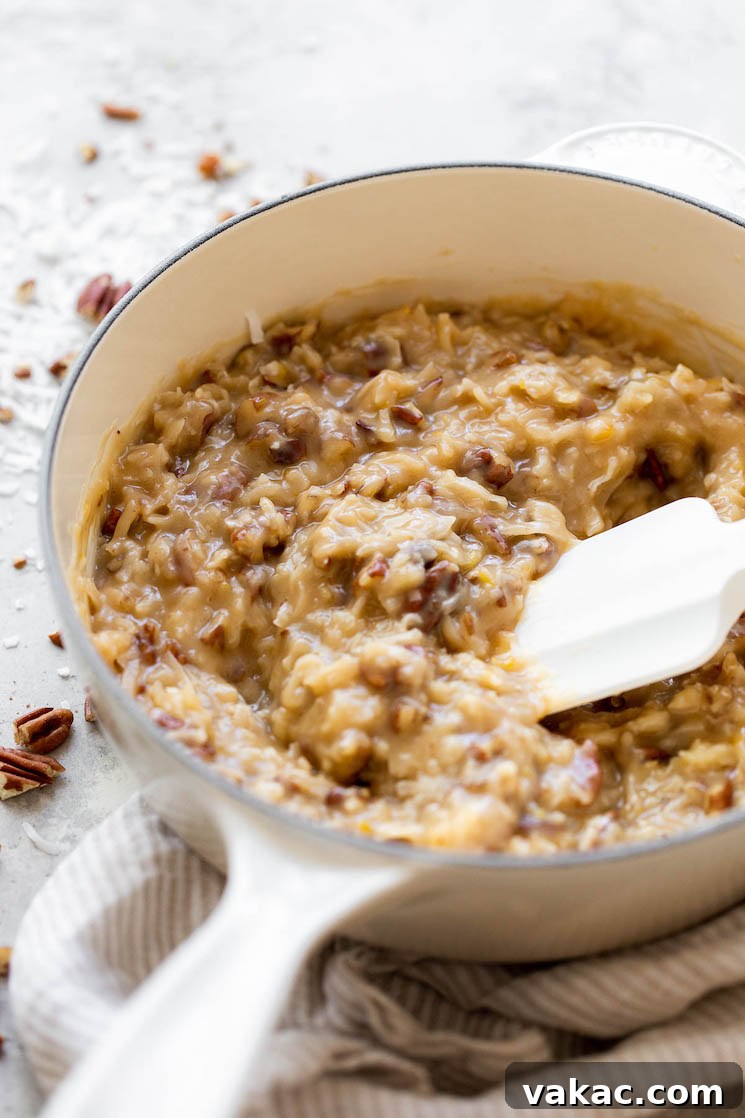
The Star of the Show: Crafting Irresistible German Chocolate Cake Frosting
While your decadent chocolate cake layers are cooling to perfection, it’s the ideal time to prepare the pièce de résistance: the homemade coconut pecan frosting. This signature frosting is what truly defines a German Chocolate Cake. While a canned version might be tempting for convenience, I wholeheartedly urge you to make this frosting from scratch. It is remarkably easy to assemble and, without exaggeration, infinitely superior in flavor and texture to any store-bought variety. The richness, the depth of caramel-like sweetness, and the fresh nuttiness are simply unparalleled, making every bite a true indulgence.
To embark on this delightful frosting journey, gather your ingredients in a medium-sized, heavy-bottomed saucepan. You’ll begin by whisking together the granulated sugar, evaporated milk, and lightly beaten egg yolks until they are fully combined and smooth. The egg yolks are essential here, acting as a natural thickener and contributing significantly to the frosting’s luxurious, custardy consistency and rich flavor. Next, slice your unsalted butter into small, uniform pieces and add them to this mixture in the saucepan. The sugar will provide the classic sweetness, while the combination of evaporated milk, egg yolks, and butter creates an incredibly rich, smooth, and deeply flavorful base that will caramelize beautifully as it cooks.
Once all the ingredients are in the saucepan, place it over medium heat. This step requires your full attention: you’ll need to stir the mixture constantly with a whisk or a wooden spoon to prevent scorching, especially at the bottom of the pan, and to ensure even cooking and melting. Continue stirring until the butter completely melts, which typically takes about 4-5 minutes. After the butter has fully incorporated, continue cooking and stirring diligently for another 8-12 minutes. During this crucial time, the mixture will gradually thicken and eventually come to a gentle boil, bubbling softly. Keep a close eye on the consistency; it should be thick enough to generously coat the back of a spoon. Don’t be tempted to rush this process by increasing the heat, as proper thickening on medium heat is key to the frosting’s success and prevents the eggs from scrambling.
As soon as the mixture has reached the desired thickened consistency and has boiled gently, remove the saucepan from the heat immediately. Now comes the moment to incorporate the iconic textures and flavors that make this frosting so special: stir in the sweetened shredded coconut and the chopped pecans. The residual warmth of the mixture will soften the coconut slightly and allow the pecans to release their aromatic oils, infusing the frosting with their delicious essence. Finally, stir in the pure vanilla extract for that lovely, aromatic finish, rounding out all the flavors. At this stage, the frosting might still appear slightly thin, but do not fret! It will continue to thicken significantly as it cools. For best results, transfer the frosting to a heat-safe bowl and allow it to cool completely to room temperature before assembling your cake. This cooling period, typically 1 to 1.5 hours, is crucial for the frosting to achieve its perfect spreadable and scoopable consistency.
Once both your cake layers and the coconut pecan frosting are completely cooled – patience is truly a virtue here – you’re ready for the exciting assembly phase. If you wish to adorn the outer sides of your cake with an additional layer of chocolate goodness, creating a more traditional look, my homemade chocolate buttercream frosting recipe is an excellent choice. It provides a velvety contrast to the coconut-pecan filling and an extra touch of decadent chocolate to this already magnificent dessert, allowing you to customize your German Chocolate Cake to your heart’s desire.
Frequently Asked Questions About German Chocolate Cake
Even seasoned bakers have questions, and tackling a classic like German Chocolate Cake can sometimes bring up a few queries. Here are some of the most common questions and comprehensive answers to help you achieve baking success and confidence:
Do I Have to Use Espresso Powder in the Cake?
While instant espresso powder is technically optional, I cannot recommend it enough for any chocolate cake, especially this German Chocolate Cake. Adding just a teaspoon to the boiling water truly enhances the chocolate flavor in the cake, making it deeper, richer, and more profound without imparting any noticeable coffee taste. Think of it as a secret ingredient that amplifies the chocolate’s natural complexity. If you don’t have espresso powder on hand, you have a couple of excellent alternatives: you can substitute the 1 cup of boiling water with 1 cup of freshly brewed hot coffee (ensure it’s strong coffee for the best effect), or simply omit the espresso powder and use plain boiling water. The cake will still be delicious and moist, but the espresso powder adds that extra “wow” factor that truly elevates the chocolate experience.
How Should I Store This German Chocolate Cake?
Proper storage is absolutely key to maintaining the cake’s freshness, incredible moisture, and exquisite texture. Due to the custardy, dairy-based coconut pecan frosting, it’s essential to store this cake in an airtight container in the refrigerator. This prevents it from drying out and keeps the frosting food-safe. When stored correctly, it will remain wonderfully moist and delicious for up to 4 days. Before serving, for the best flavor and texture, I highly recommend letting the cake sit at room temperature for about 15-30 minutes. This allows the cake layers to soften slightly, the frosting to become creamier, and the flavors to mellow and fully develop, enhancing the overall sensory experience.
Can I Freeze This German Chocolate Cake?
Absolutely! This cake is surprisingly freezer-friendly, allowing you to prepare components ahead of time or save leftovers for a future treat. This is especially convenient for larger recipes or if you’re planning a dessert for a special event.
- Cake Layers: The baked chocolate cake layers freeze exceptionally well for up to 3 months. Once completely cooled, wrap each individual layer tightly in plastic wrap, then add an additional layer of aluminum foil to prevent freezer burn. To thaw, simply transfer them to the refrigerator overnight, or for a quicker thaw, leave them on the counter for a few hours.
- Coconut Pecan Frosting: The homemade German Chocolate Cake frosting can also be frozen for up to 3 months. Store it in an airtight freezer-safe container. When ready to use, thaw it overnight in the refrigerator. Before frosting the cake, give it a good stir or whisk vigorously to bring it back to a smooth, spreadable consistency, as some separation might occur during the freezing and thawing process.
Freezing individual slices is also an option! Just wrap them securely in plastic wrap and foil, and thaw as needed for a delightful personal dessert anytime the craving strikes.
Can I Make This Cake Ahead of Time?
Yes, you certainly can, and it’s often recommended for layered cakes like this one to help manage your baking schedule! The beauty of this recipe is that many components can be prepared in advance. The cake layers can be baked a day or two before assembly and stored at room temperature (tightly wrapped in plastic wrap) or frozen for longer. The frosting can also be made a day in advance and stored in an airtight container in the refrigerator; just bring it to room temperature and give it a good stir before assembly. Assembling the cake a few hours before serving is ideal, allowing the flavors to meld beautifully. You can even assemble it the day before, store it in the refrigerator, and bring it to room temperature for optimal enjoyment before serving.
Why are My Cake Layers Dense and Not Fluffy?
Achieving a light and fluffy cake is the goal, and several factors can lead to dense cake layers:
- Overmixing the Batter: This is the most common culprit. Once you add the wet ingredients to the dry, mix *just* until combined and no streaks of dry flour remain. Overmixing develops the gluten in the flour, resulting in a tough, dense texture.
- Improper Flour Measurement: Scooping flour directly from the bag compacts it, leading to too much flour by weight. Always spoon flour lightly into the measuring cup and level it off with the back of a knife.
- Expired Leavening Agents: Baking soda and baking powder lose their potency over time. Ensure yours are fresh for optimal lift and aeration in your cake.
- Oven Temperature Issues: An oven that isn’t properly calibrated can significantly affect baking results. If your oven runs too cool or too hot, it can impact the cake’s rise and texture. Consider using an oven thermometer to ensure accuracy.
- Ignoring Room Temperature Ingredients: Cold ingredients don’t emulsify as well as room temperature ones, which can lead to a less uniform batter and a denser cake.
My Coconut Pecan Frosting Didn’t Thicken Enough. What Went Wrong?
The delicious, custardy texture of the coconut pecan frosting relies on proper cooking. The most common reasons for a thin frosting are:
- Insufficient Cooking Time: The frosting needs to cook over medium heat, stirring constantly, until it visibly thickens and comes to a gentle boil. If it doesn’t reach a boil or isn’t cooked long enough, the egg yolks and evaporated milk won’t thicken sufficiently to set properly. Be patient with this step!
- Not Using Egg Yolks or Under-beating Them: Egg yolks are crucial for thickening the custard base. Ensure they are lightly beaten before adding and fully incorporated into the mixture.
- Mistaking Evaporated Milk for Sweetened Condensed Milk: While both are canned milks, they are very different products. Sweetened condensed milk is much thicker and significantly sweeter due to added sugar, and using it will result in a frosting that is either too thick and cloyingly sweet, or simply won’t have the right texture. Evaporated milk provides the correct liquid base for the proper thickening process.
- Not Cooling Completely: The frosting thickens considerably as it cools. If it seems thin straight off the stove, transfer it to a bowl and let it cool completely to room temperature before judging its final consistency. Rushing this step will result in a runny frosting that won’t hold between cake layers.
Pro Baking Tips for German Chocolate Cake Success
Achieving a show-stopping German Chocolate Cake is well within your reach with these expert tips, designed to ensure perfect results every time:
- Pre-boil Water for Efficiency: Before you even start mixing your cake batter, put a pot of water on the stove to boil. This proactive step ensures your boiling water with espresso powder will be ready exactly when you need it for the cake batter, keeping your baking process smooth, efficient, and stress-free.
- Master Flour Measurement: The single most common mistake in baking is incorrect flour measurement. Never scoop flour directly from the container or bag, as this compacts it and leads to too much flour by volume. Instead, gently stir or fluff your flour in its container, then spoon it lightly into your dry measuring cup until it overflows. Finally, level it off with the straight edge of a knife or a flat ruler. This ensures you’re using the correct amount for a tender, moist cake.
- Room Temperature Ingredients are Key: For both the cake and the frosting, ensure your eggs and buttermilk (for the cake) and egg yolks and butter (for the frosting) are at room temperature. Room temperature ingredients emulsify better, creating a smoother, more uniform batter and a more consistent, creamy frosting. This leads to a superior final product.
- Slice Butter for Even Melting: When preparing the coconut pecan frosting, make sure to slice your unsalted butter into small, uniform pieces. This allows the butter to melt more quickly and evenly into the granulated sugar and evaporated milk mixture, preventing scorching at the bottom of the pan and ensuring a smooth, lump-free base for your frosting.
- Don’t Overmix Cake Batter: Overmixing is a cardinal sin in cake baking as it develops gluten, which can lead to a tough, dry cake with an unpleasant chew. Mix your cake batter just until the ingredients are combined and no streaks of dry flour remain. A few small lumps are perfectly fine and will bake out.
- Cool Cakes Completely: Patience is a virtue in baking, especially when it comes to cooling. Ensure your cake layers are *completely* cool to the touch before attempting to level, frost, or stack them. Warm cakes will cause your frosting to melt, slide, and weep, ruining your carefully crafted dessert. Plan ahead and allow ample cooling time.
- Cook Frosting Thoroughly: For the coconut pecan frosting, consistent stirring and adequate cooking time over medium heat are absolutely crucial. The mixture needs to thicken properly and reach a gentle boil to ensure it sets correctly and achieves that perfect custardy texture. Do not pull it off the heat too early, or your frosting will be runny.
- Parchment Paper is Your Friend: Always line the bottom of your cake pans with parchment paper after greasing. This extra step guarantees that your cake layers will release cleanly and effortlessly from the pans, preventing sticking and crumbling, and saving you from frustration.
- Level Your Cake Layers: For a professional-looking, stable layered cake, use a long serrated knife or a dedicated cake leveler to carefully trim the domed tops off your cooled cake layers. This creates flat, even surfaces that stack beautifully, preventing your cake from leaning or becoming uneven.
More Decadent Homemade Cake Recipes To Try!
If you’ve fallen in love with the joy of baking from scratch, or simply crave another slice of homemade goodness, explore these other delightful cake recipes from my collection. Each one is designed for success and packed with flavor:
- Carrot Cake
- White Cake
- Red Velvet Cake
- Apple Cake
- Banana Cake
Watch the Recipe Video:
See how easily this incredible German Chocolate Cake comes together by watching our step-by-step video tutorial. It’s the perfect visual companion to the written recipe, guiding you through each stage with clarity and ease.
Video content would be displayed here.
German Chocolate Cake
5 from 27 ratings
This is the ultimate German Chocolate Cake recipe you’ll ever need! This homemade cake features layers of incredibly moist chocolate cake and a luscious, homemade coconut pecan frosting, promising a dessert that’s both easy to make and unforgettable.
Pin Recipe
Leave a Review
Ingredients
For the cake:
- 2 cups (250 grams) all-purpose flour (spooned & leveled)
- 3/4 cup (65 grams) natural unsweetened cocoa powder
- 1 1/2 teaspoons baking soda
- 1 1/2 teaspoons baking powder
- 1 teaspoon salt
- 1 cup (200 grams) granulated sugar
- 1 cup (200 grams) brown sugar
- 1/2 cup (120 ml) canola or vegetable oil
- 1 cup (240 ml) buttermilk
- 2 large eggs
- 2 teaspoons pure vanilla extract
- 1 cup (240 ml) boiling water
- 1 teaspoon instant espresso powder (optional, but recommended)
For the frosting:
- 1 cup (200 grams) granulated sugar
- 1 cup (240 ml) evaporated milk
- 3 large egg yolks, room temperature and lightly beaten
- ½ cup (115 grams) unsalted butter
- 1 teaspoon pure vanilla extract
- 1 1/2 cups (120 grams) sweetened shredded coconut
- 1 cup (115 grams) chopped pecans
Instructions
To make the cake:
- Preheat oven to 350°F (177°C). Spray two 9-inch cake pans with nonstick cooking spray, line the bottom of each pan with parchment paper, and set aside.
- In a large mixing bowl, sift together the flour, cocoa powder, baking powder, baking soda, and salt. Whisk in the granulated sugar and brown sugar, then add the oil, buttermilk, eggs, and vanilla extract and mix until just combined.
- Add the instant espresso powder to the cup of boiling water and mix until fully dissolved. Add to the mixing bowl and mix until just combined (the batter will be very thin).
- Evenly distribute the batter between both cake pans. Bake at 350°F (177°C) for 28-30 minutes or until a toothpick inserted into the center of the cakes comes out clean and the tops spring back when lightly touched.
- Remove from the oven and transfer to a wire rack to cool in the pans for 30 minutes. Run a knife around the outside of each cake layer in the pan then carefully remove the cakes from the pans and place on the wire rack to cool completely.
To make the frosting:
- Add the granulated sugar, evaporated milk, and egg yolks to a large saucepan and whisk until fully combined. Slice the butter into small pieces and add to the saucepan.
- Place over medium heat, stirring constantly until the butter completely melts (about 4-5 minutes). Continue cooking and stirring constantly for another 8-12 minutes or until the mixture starts to boil and thicken.
- Remove from the heat and stir in the sweetened shredded coconut and chopped pecans, then stir in the vanilla extract.
- Transfer to a heat-safe container and allow to cool completely (about 1 – 1.5 hours).
To assemble the cake:
- Once the cakes have cooled, level the tops of each cake. Place one cake layer on a cake stand or large serving plate and top with half of the frosting. Spread the frosting into one even layer on top of the cake layer.
- Place the second cake layer on top of the frosting, add the remaining frosting on top, and spread around into one even layer.
- Slice and enjoy or refrigerate until you’re ready to serve the cake.
Notes
- Store cake in an airtight container in the refrigerator for up to 4 days.
- Freezing Instructions: Cake layers will freeze well for up to 3 months. Thaw overnight in the refrigerator. The frosting will also freeze well for up to 3 months; thaw overnight in the refrigerator and mix well before frosting the cake.
- Buttermilk Substitute: If you don’t have buttermilk on hand, you can make a simple homemade substitute.
- Instant Espresso Powder: This ingredient is optional but highly recommended to enhance the chocolate flavor. If omitted, you can substitute the boiling water and espresso powder with 1 cup of coffee, or simply use 1 cup of boiling water alone.
- Optional Chocolate Frosting: For a chocolate frosted exterior, consider using a batch of my homemade chocolate buttercream frosting.
Did you make this recipe?
Mention @livewellbakeoften on Instagram or tag #livewellbakeoften.