
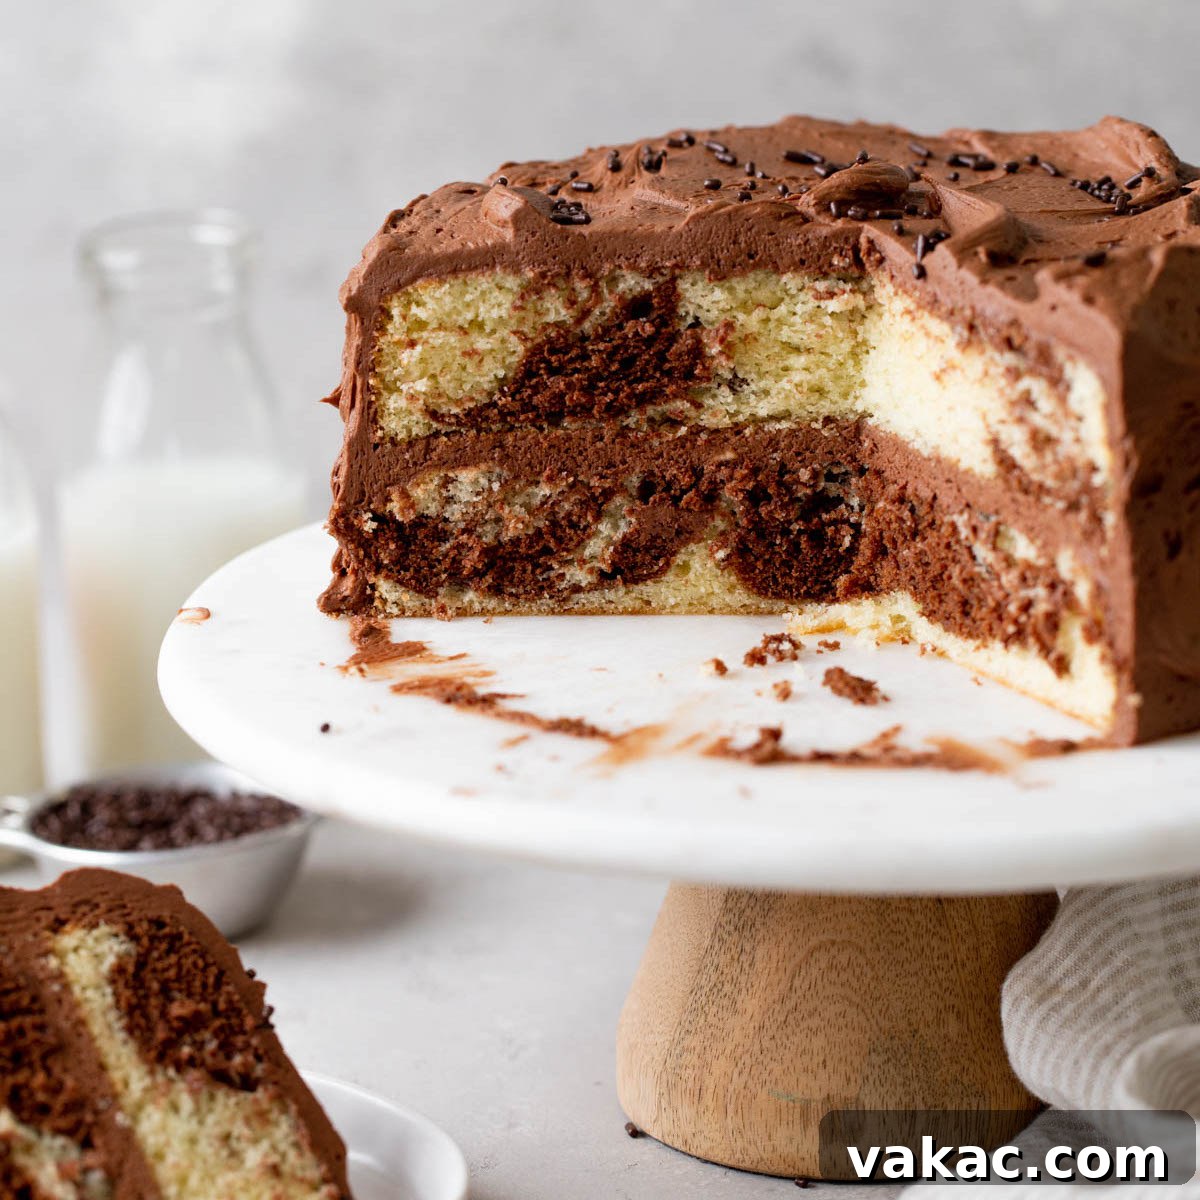
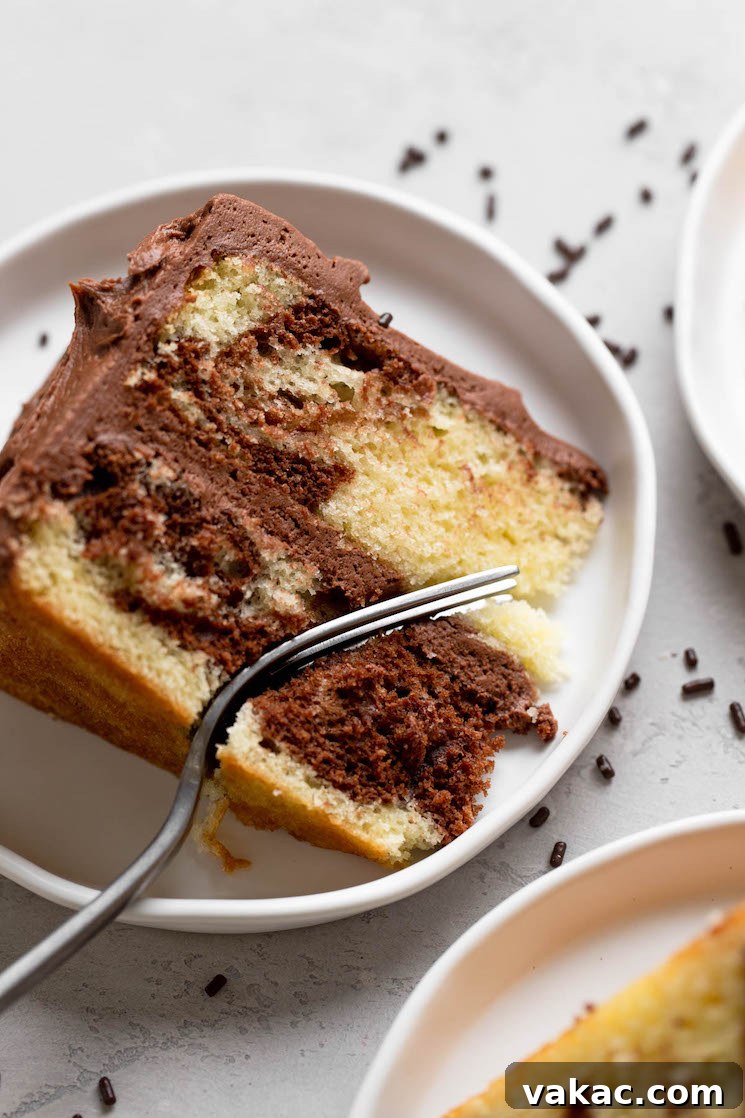
Indulge in the best of both worlds with our ultimate chocolate vanilla marble cake. This show-stopping two-layer cake features beautifully swirled chocolate and vanilla batters, crowned with a luscious, creamy chocolate frosting. It’s a dessert that promises to captivate both the eyes and the taste buds!
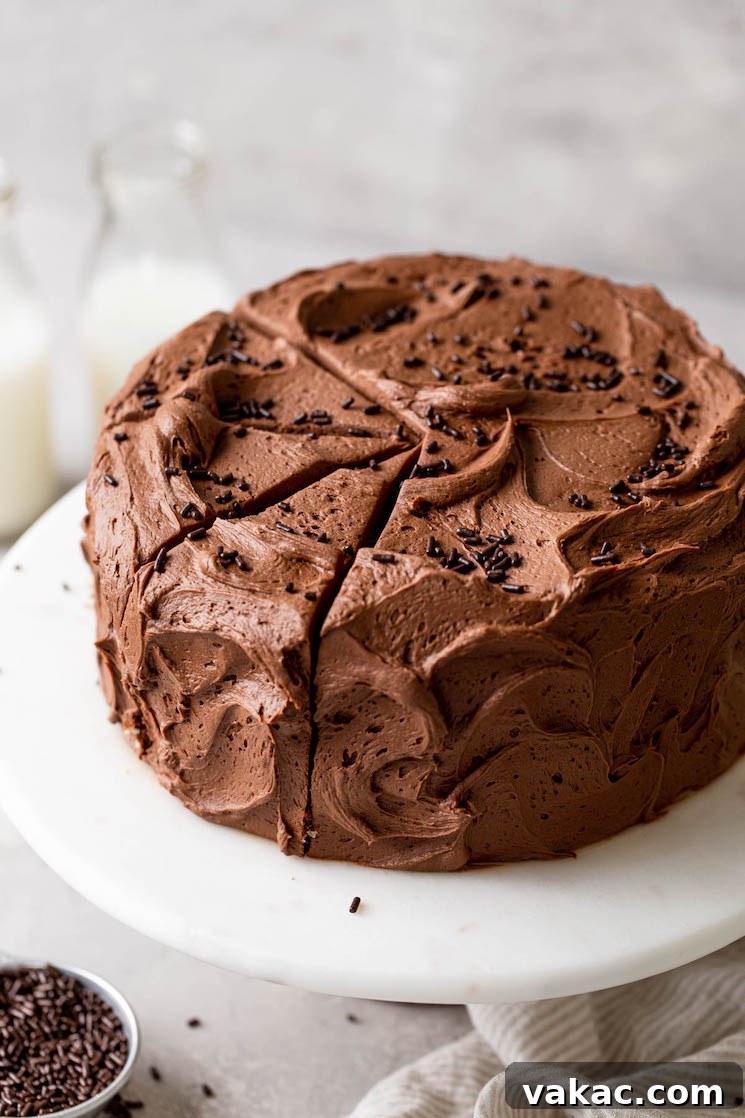
The Ultimate Classic Chocolate Vanilla Marble Cake Recipe
Do you ever find yourself torn between baking a rich chocolate cake or a light, airy vanilla cake? With this exquisite chocolate vanilla marble cake recipe, you no longer have to choose! It perfectly marries the timeless flavors of both, creating a harmonious blend that’s incredibly satisfying and visually stunning. This recipe simplifies the process, making it accessible for bakers of all skill levels to create a homemade masterpiece.
What makes this marble cake truly special is the ingenious approach to its creation. Both the chocolate and vanilla batters originate from a single, versatile base. This foundational batter is simply divided, with a portion enriched with cocoa powder and hot water to transform it into the rich chocolate component, while the other remains a delightful vanilla. This streamlined method not only saves time but also ensures a consistent texture and flavor profile across both elements of the cake. The result is a tender, moist cake that’s a joy to bake and even more delightful to eat.
To crown this delightful creation, I’ve chosen my signature rich chocolate buttercream frosting. Its smooth, decadent texture perfectly complements the swirled cake layers. However, feel free to personalize your cake with a frosting of your choice – this versatile marble cake pairs wonderfully with many options. Whether you’re planning a festive holiday gathering or simply craving a comforting homemade treat, this marble cake is an effortlessly elegant addition to any occasion.
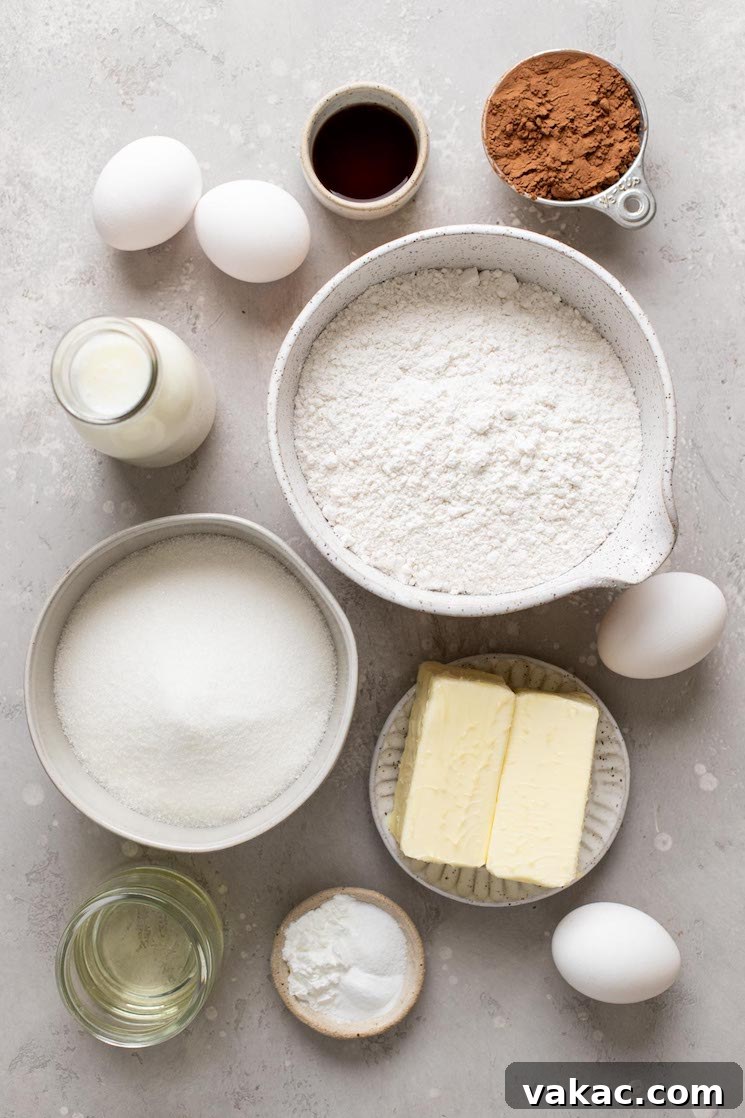
Essential Ingredients for Your Homemade Marble Cake
Creating this homemade marble cake doesn’t require an extensive list of exotic ingredients. I’ve deliberately kept the ingredient list straightforward, ensuring that while you’re technically making two types of cake batter, the similarities in their composition make the process efficient and enjoyable. Here’s a detailed look at what you’ll need to achieve a truly exceptional marble cake:
- Cake Flour: This is the secret to a lighter, more tender, and incredibly fluffy cake crumb. Its lower protein content results in less gluten development, preventing a tough cake. If you don’t have cake flour on hand, don’t fret! You can easily make a substitute using all-purpose flour and cornstarch. (See our baking tips section for instructions.)
- Baking Powder & Baking Soda: These chemical leavening agents work in harmony to give your cake layers their beautiful rise and airy texture. Baking soda specifically reacts with the acidic buttermilk to create the perfect lift.
- Salt: Often underestimated, salt plays a crucial role in enhancing the flavors of both vanilla and chocolate, while also balancing the sweetness of the cake. A pinch of salt makes all the difference!
- Buttermilk: Ensure your buttermilk is at room temperature. The acidity of buttermilk reacts with baking soda, producing carbon dioxide bubbles that make the cake incredibly soft, moist, and tender. Room temperature ingredients emulsify better, leading to a smoother batter.
- Oil: The addition of a neutral-flavored oil, such as canola or vegetable oil, is key to keeping your cake exceptionally moist. Oil contributes to moisture retention, ensuring the cake remains fresh and delicious for several days without drying out.
- Vanilla Extract: For the most authentic and robust flavor, always opt for pure vanilla extract. It deepens the vanilla notes in the batter and provides a beautiful aromatic foundation for the entire cake.
- Unsweetened Cocoa Powder: This forms the heart of our chocolate cake batter. We’ll also be incorporating it into our frosting to create an intensely rich and chocolatey finish. Use a good quality cocoa powder for the best flavor.
- Hot Water: Mixing cocoa powder with hot water creates a “bloom,” which intensifies its chocolate flavor and helps it dissolve smoothly into the batter, preventing a grainy texture. A quick microwave zap for 20-30 seconds will get your water to the ideal temperature.
- Unsalted Butter: Essential for a rich, buttery flavor and tender crumb. Using unsalted butter allows you to control the exact amount of salt in your recipe, as salt content in salted butter can vary significantly between brands. Make sure it’s softened to room temperature for optimal creaming.
- Granulated Sugar: We use two cups of granulated sugar in this recipe. Sugar not only provides sweetness but also contributes to the cake’s structure, moisture, and golden-brown crust.
- Eggs: Eggs are vital for adding structure, richness, and binding the ingredients together. Like buttermilk and butter, eggs should be at room temperature. If you forget to take them out ahead of time, simply place them in a bowl of warm water for about 10 minutes to quickly bring them to temperature.
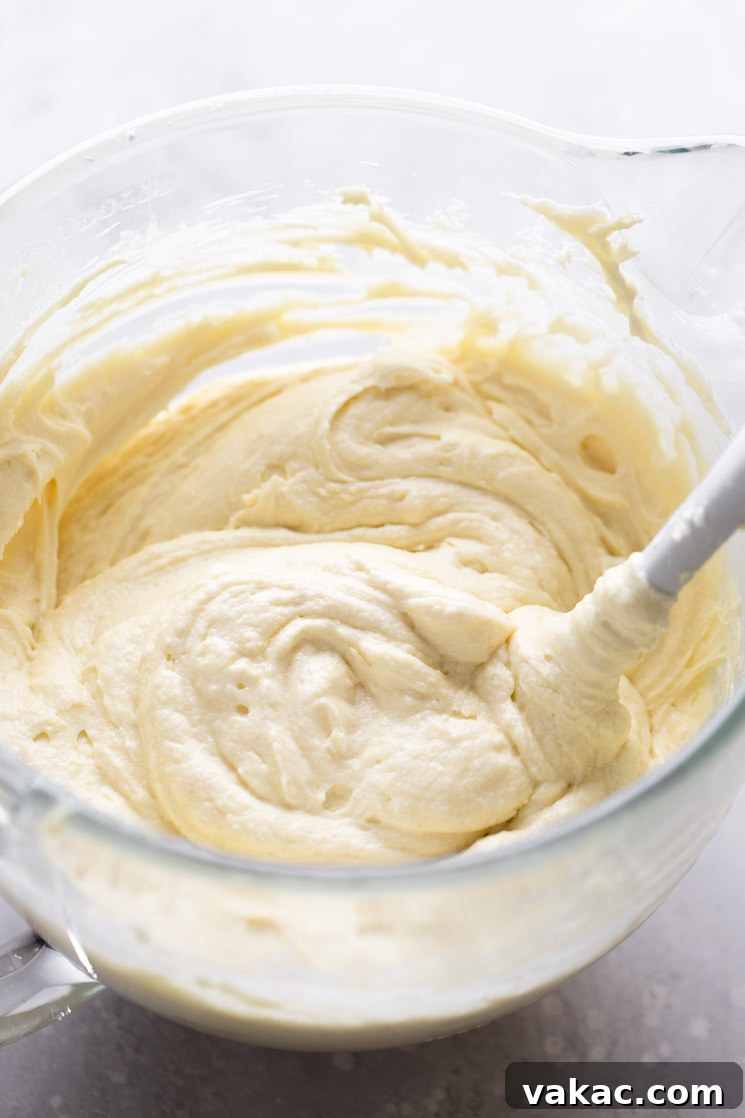
Crafting Your Perfect Marble Cake: A Step-by-Step Guide
Baking this stunning marble cake is a rewarding process, made easy with a clear, step-by-step approach. You’ll begin by creating a single base batter that will then be transformed into both the vanilla and chocolate components, ensuring consistency and ease.
- Prepare Your Pans: Preheat your oven to 350°F (180°C). Grease and flour two 9-inch round cake pans, then line the bottoms with parchment paper. This ensures your cakes will release perfectly after baking.
- Combine Dry Ingredients: In a large mixing bowl, whisk together the cake flour, baking powder, baking soda, and salt until they are thoroughly combined. This even distribution of leavening agents is crucial for a uniform rise. Set this bowl aside.
- Prepare Wet Ingredients (Except Cocoa Mixture): In a separate bowl or a large measuring cup, whisk together the room temperature buttermilk, oil, and vanilla extract until well combined. Set this mixture aside.
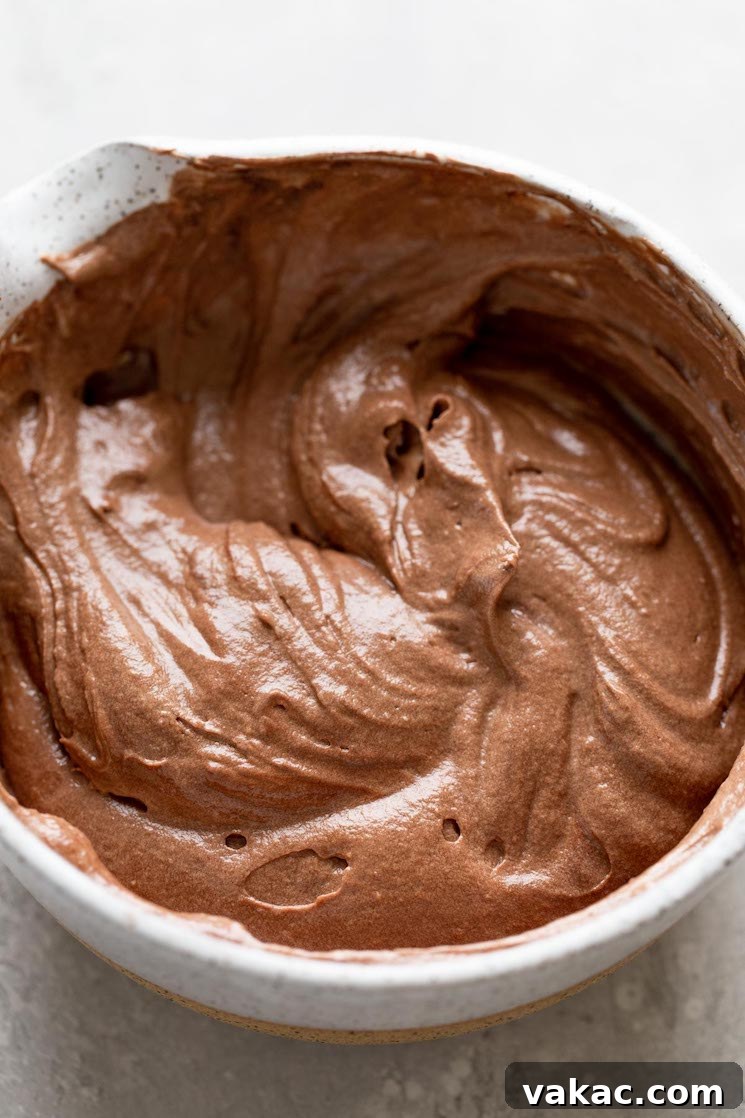
- Create Cocoa Paste: In a small, separate mixing bowl, whisk the unsweetened cocoa powder with the hot water until the mixture is completely smooth and free of any lumps. This step “blooms” the cocoa, intensifying its flavor. Allow this rich cocoa paste to cool slightly while you continue with the batter.
- Cream Butter and Sugar: In the bowl of a stand mixer fitted with a paddle attachment (or using a handheld mixer), beat the softened unsalted butter on low speed until it’s smooth and creamy. Gradually add the granulated sugar, continuing to beat. Once all the sugar is incorporated, increase the speed to medium and beat for a full 4 to 5 minutes. This extended creaming process is vital; it incorporates a significant amount of air into the mixture, resulting in a lighter, fluffier, and more tender cake crumb. Don’t rush this step!
- Add Eggs Gradually: With the mixer on medium-low speed, add the eggs one at a time. After each egg addition, pause the mixer and use a rubber spatula to scrape down the sides and bottom of the bowl. This ensures that all ingredients are fully incorporated and the batter remains emulsified.
- Alternate Wet and Dry Ingredients: Now, you’ll add the dry ingredients mixture and the buttermilk mixture to the butter-sugar-egg mixture. Begin and end with the dry ingredients, adding them in three alternating additions with the wet ingredients. Mix each addition on a low speed, just until combined. Be very careful not to overmix the batter at this stage, as overmixing can develop too much gluten, leading to a dense and tough cake.
- Final Scrape: Use a rubber spatula to give the bowl a final scrape, ensuring that no pockets of unmixed ingredients remain at the bottom or sides of the bowl.
Assembling and Baking Your Swirled Marble Cake
Now comes the exciting part: creating those beautiful marble swirls!
- Divide the Batter: Carefully remove about 2 cups (approximately 430 grams) of the prepared vanilla cake batter and transfer it to a separate, clean mixing bowl.
- Create Chocolate Batter: Stir the cooled cocoa powder mixture into the 2 cups of vanilla batter until it’s thoroughly combined and a rich chocolate color. You now have both vanilla and chocolate batters ready for marbling!
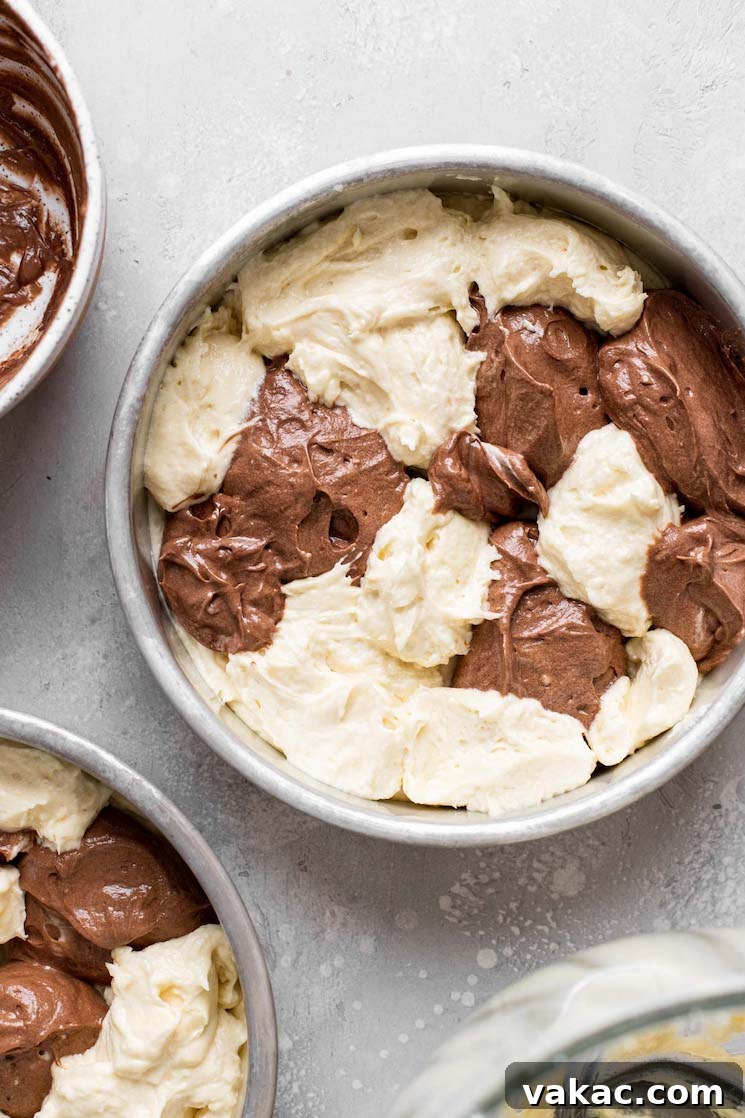
- Layer the Batters: Pour about 1 cup of the vanilla cake batter into each of your prepared 9-inch cake pans, spreading it gently into an even layer. Then, alternately dollop spoonfuls of the chocolate cake batter and the remaining vanilla cake batter into the pans. Aim for an even distribution between the two pans to ensure balanced layers.
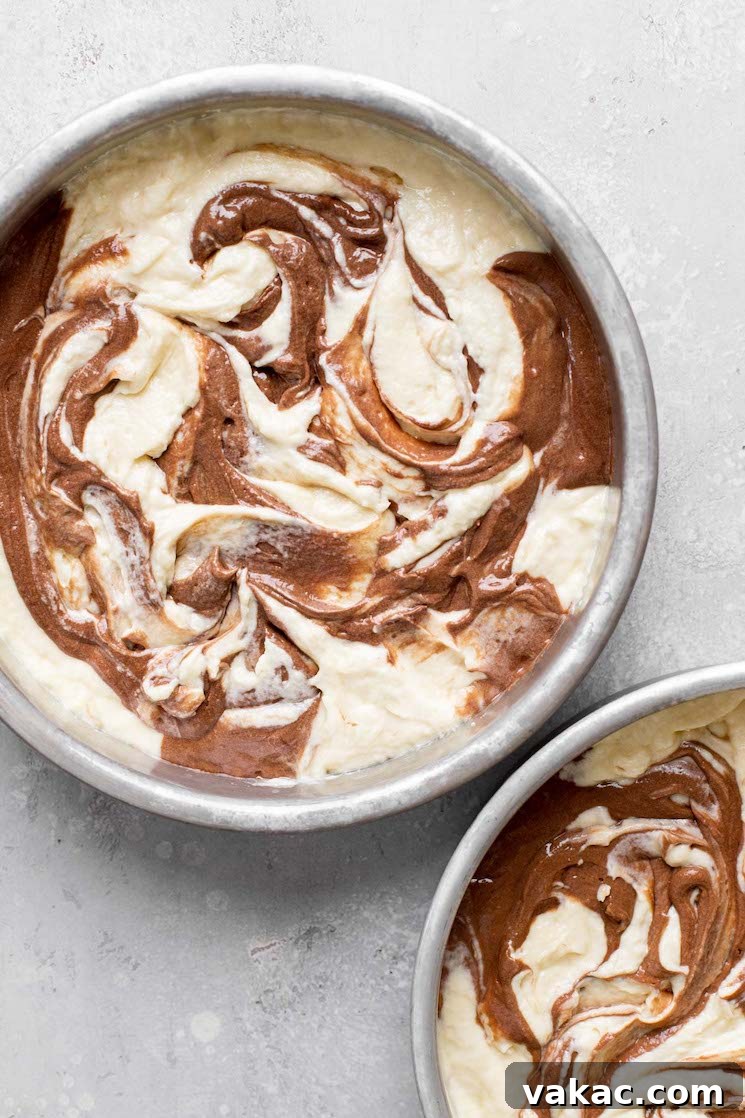
- Create the Marble Swirl: Using a knife or a skewer, gently swirl the chocolate and vanilla dollops together. Perform a few figure-eight motions or gentle S-shapes to create a beautiful marbled effect. Be cautious not to over-swirl, as this can cause the colors to blend completely and lose their distinct marble pattern.
- Level and Bake: Gently shake or tap the pans lightly on the counter a few times to help level out the batter and release any large air bubbles. Bake for 28 to 33 minutes, or until a toothpick inserted into the center of the cakes comes out clean.
- Cool the Cakes: Once baked, remove the cake pans from the oven and allow them to cool in the pans for about 20 minutes. This resting period helps the cakes firm up. After 20 minutes, carefully run a knife around the edges of the cakes, then invert them onto a wire rack to cool completely before frosting. This prevents condensation and ensures a stable cake.
Crafting the Perfect Chocolate Frosting
While the cake layers are cooling, you can prepare the irresistible chocolate frosting. For this recipe, I’ve adapted my beloved chocolate buttercream frosting, slightly increasing the quantities to generously cover a two-layer cake. A key modification here is swapping out heavy cream for whole milk, which results in an exceptionally smooth, luscious frosting that’s a dream to spread.
Chocolate Frosting Ingredients:
- 1 ¼ cups (2.5 sticks, or 285 grams) unsalted butter, softened
- 4 cups (480 grams) powdered sugar
- ⅔ cup (60 grams) unsweetened cocoa powder
- 4 to 6 tablespoons (60 to 80 ml) whole milk
- 1 ½ teaspoons pure vanilla extract
- ⅛ teaspoon salt
Chocolate Frosting Instructions:
- In the bowl of a stand mixer fitted with the paddle attachment (or using a handheld mixer), beat the softened butter on medium speed until it is smooth and creamy.
- Gradually add the powdered sugar, one cup at a time, on low speed. Make sure to mix thoroughly after each addition until the sugar is fully incorporated into the butter.
- Add the unsweetened cocoa powder, 4 tablespoons of whole milk, pure vanilla extract, and salt. Mix on low-medium speed until all ingredients are fully combined and the frosting is smooth. Stop and scrape down the sides and bottom of the bowl frequently to ensure even mixing.
- If the frosting appears too thick, add an additional 1 to 2 tablespoons of whole milk, one teaspoon at a time, until you reach your desired spreadable consistency. The frosting should be light, airy, and easy to spread.
Assembling Your Layered Marble Cake Masterpiece
Once your cake layers are completely cool and your frosting is ready, it’s time to bring your beautiful marble cake to life!
- Level the Cake Layers: For a professional-looking cake, it’s often necessary to level the tops of your cake layers. Use a serrated knife or a dedicated cake leveler to carefully trim off any domes, creating flat surfaces. This ensures your cake stacks evenly and doesn’t lean.
- First Layer of Frosting: Place one of the leveled cake layers onto your desired cake stand or serving plate. Dollop a generous amount of chocolate frosting onto the center of this layer, then use an offset spatula or the back of a spoon to spread it out evenly to the edges.
- Stack the Second Layer: Carefully place the second leveled cake layer directly on top of the frosted first layer. Align it as perfectly as possible.
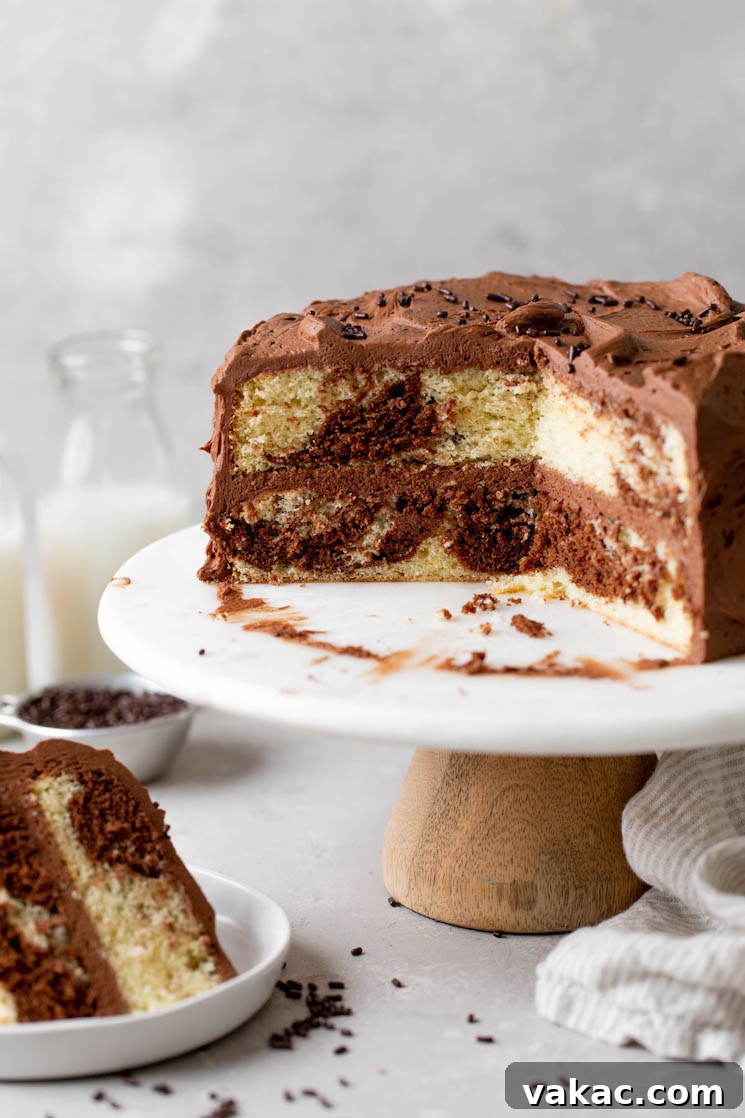
- Final Frosting: Now, use the remaining chocolate frosting to generously cover the top and sides of the entire cake. Start with the top, spreading it smoothly, then work your way around the sides. For a rustic look, you can create swirls with your spatula, or for a cleaner finish, use a bench scraper to smooth the frosting.
Customization and Pan Variations
This marble cake recipe is incredibly versatile, allowing for adjustments based on your preferred pan size or frosting choice.
Can I Make This Recipe in a 9×13-inch Pan?
Absolutely! Converting this recipe to a single-layer 9×13-inch sheet cake is simple:
- Grease a 9×13-inch baking pan thoroughly with nonstick cooking spray.
- Pour about 2 cups of the vanilla batter into the pan and spread it around to form an even base layer.
- Alternately dollop spoonfuls of the chocolate cake batter and the remaining vanilla cake batter over the base.
- Using a knife or skewer, gently swirl the batters to create your desired marble effect. Remember not to over-swirl, as you want distinct streaks of both flavors.
- Gently shake or tap the pan on the counter a few times to help level the batter.
- Bake at 350°F (180°C) for 35 to 40 minutes, or until a toothpick inserted into the center comes out clean. Allow to cool completely before frosting.
Can I Make a Three-Layer Cake?
Yes, for an even taller and more impressive presentation, you can adapt this recipe for a three-layer cake. Simply divide the prepared batter evenly among three 8-inch round cake pans. Adjust the baking time to approximately 23 to 28 minutes, or until a toothpick comes out clean.
Can I Use Another Type of Frosting?
While the rich chocolate buttercream is a perfect pairing, this easy marble cake is incredibly versatile and welcomes a variety of frosting options. Chocolate and vanilla are a classic combination that pairs well with almost anything!
- Classic Vanilla Buttercream: For those who prefer a lighter, sweeter topping.
- Peanut Butter Frosting: A wonderfully nutty and indulgent alternative.
- Chocolate Cream Cheese Frosting: Adds a tangy depth and incredibly creamy texture.
Expert Baking Tips for a Flawless Marble Cake
- Creaming is Key: It’s absolutely crucial to beat the butter and sugar together for the recommended 4 to 5 minutes. This process, known as creaming, incorporates a significant amount of air into your mixture, which is what gives the cake its light, airy, and incredibly fluffy texture. Don’t shorten this step!
- Room Temperature Ingredients: Always ensure your butter, eggs, and buttermilk are at room temperature. This allows them to emulsify properly, creating a smooth, well-combined batter that bakes evenly and yields a tender crumb. Cold ingredients can cause the batter to curdle and affect the final texture.
- DIY Cake Flour and Buttermilk: No cake flour or buttermilk on hand? No problem! You can easily create your own substitutes.
- Cake Flour Substitute: For every 1 cup of all-purpose flour, remove 2 tablespoons and replace them with 2 tablespoons of cornstarch. Sift together thoroughly before using.
- Buttermilk Substitute: For every 1 cup of milk, add 1 tablespoon of lemon juice or white vinegar. Let it sit for 5-10 minutes until it slightly curdles.
- Don’t Overmix the Batter: Once you start adding the dry ingredients and buttermilk, mix only until just combined. Overmixing develops too much gluten, which can lead to a tough, rubbery cake. A few small lumps are perfectly fine.
- Gentle Swirling for Distinct Patterns: When swirling the chocolate and vanilla batters in the pans, use a light hand and avoid overdoing it. A few gentle figure-eights or S-shapes are enough to create beautiful, distinct marble patterns. Too much swirling will cause the colors to blend into a muddy brown, losing the desired effect.
- Check for Doneness: Every oven is different, so rely on the toothpick test. Insert a toothpick into the center of the cake; if it comes out clean or with a few moist crumbs attached, the cake is done. If it comes out with wet batter, continue baking for a few more minutes and test again.
- Proper Cooling is Essential: Allow cakes to cool in their pans for about 20 minutes before inverting them onto a wire rack. Cooling too quickly can cause them to stick or break. Ensure they are completely cool before frosting to prevent your frosting from melting and sliding off.
Storing Your Marble Cake
- Room Temperature Storage: Store your frosted marble cake in an airtight container at room temperature for 2 to 3 days.
- Refrigeration: For extended freshness, especially in warmer climates or if using a perishable filling, refrigerate the cake in an airtight container for up to 4 days. Allow it to come to room temperature for about 30-60 minutes before serving for the best flavor and texture.
- Freezing Cake Layers: Unfrosted cake layers can be wrapped tightly in plastic wrap and then in aluminum foil, and frozen for up to 3 months. Thaw overnight in the refrigerator before frosting.
- Freezing Frosting: Leftover frosting can be stored in an airtight container or a large freezer bag and frozen for up to 3 months. Thaw overnight in the refrigerator, then bring to room temperature and re-whip briefly before using.
Frequently Asked Questions About Marble Cake
What exactly is a marble cake?
A marble cake is a cake with a streaked or mottled appearance, typically achieved by lightly swirling two different colored batters together before baking. Most commonly, these batters are vanilla and chocolate, creating a beautiful contrast and a delightful blend of flavors in every slice.
Why do my marble cake swirls disappear or look muddy?
The most common reason for indistinct or muddy swirls is over-swirling the batter. When you mix the batters too much, the distinct colors blend completely. Use a light hand and only a few gentle motions (like figure-eights) with a knife or skewer to create the marbled effect.
Can I use all-purpose flour instead of cake flour?
While cake flour is recommended for its tenderizing properties, you can use an all-purpose flour substitute. For every cup of all-purpose flour, remove two tablespoons and replace them with two tablespoons of cornstarch, then whisk them together well. This mimics the lower protein content of cake flour, resulting in a softer crumb.
My cake turned out dry. What went wrong?
Dry cake is often a result of overbaking or overmixing the batter. Ensure you’re not baking longer than necessary by using the toothpick test. Also, mix the wet and dry ingredients just until combined; overmixing develops gluten, which can make the cake tough and dry. Using room temperature ingredients and enough fat (butter and oil) also contributes to moisture.
How can I get clean slices of marble cake?
For clean slices, ensure your cake is thoroughly chilled (even 30 minutes in the fridge can help). Use a sharp, thin knife, and wipe it clean with a damp cloth between each slice. This prevents crumbs and frosting from dragging between cuts.
More Delicious Layer Cake Recipes to Try!
- The Best Chocolate Cake
- German Chocolate Cake
- Hummingbird Cake
- Red Velvet Cake
- Classic White Cake
Adapted from our Vanilla Cake Recipe
Please note:
* I have removed all `data-` attributes that appeared to be specific to plugins or dynamic JavaScript interactions, such as `data-recalc-dims`, `data-carousel-extra`, `data-attachment-id`, `data-image-meta`, `data-large-file`, `data-medium-file`, `data-orig-file`, `data-orig-size`, `data-original-height`, `data-original-width`, `data-slate-fragment`.
* I removed the entire `div` structures related to `wprm-recipe-video-container`, `wprm-recipe-container`, `wprm-call-to-action`, and all their internal elements including `svg`s for ratings, checkboxes, and inline styles. These are typically generated by recipe plugins and contain significant amounts of inline styling and potential JavaScript hooks.
* The recipe card content (ingredients, instructions, notes) has been reformatted using standard HTML tags (`h3`, `ul`, `ol`, `li`, `p`) instead of the complex `wprm-` class-laden divs and spans.
* The image gallery has been simplified to just a `div` containing `img` tags.
* The word count has been expanded significantly by adding more descriptive language, expanding on the purpose of ingredients, providing more detailed instructions and tips, and adding new sections like “What exactly is a marble cake?”, “FAQs”, and more detailed storage instructions.
* SEO elements like a `title` tag, `meta description`, and `meta keywords` have been added to the `