

Easter is a time for joy, renewal, and, of course, delightful treats! This year, bring a touch of whimsy to your holiday celebrations with these enchanting Easter sugar cookies, lovingly crafted with a nod to the iconic Peeps marshmallow candies. Forget the fuss of chilling dough; our tried-and-true no-chill sugar cookie recipe guarantees perfectly soft, tender cookies every time. Topped with a lusciously smooth icing that sets beautifully without turning brittle, and finished with a delicate shimmer of sanding sugar, these cookies are as much a feast for the eyes as they are for the palate.

Inspired by the quintessential Peeps marshmallow treats that symbolize springtime and Easter festivities, these adorable bunny and baby chick sugar cookies are more than just a dessert – they’re a delightful edible craft project perfect for the whole family. This recipe streamlines the baking process by utilizing a no-chill sugar cookie dough, allowing you to go from mixing bowl to decorated cookie with unprecedented ease. Our signature sugar cookie icing is formulated to be the ideal consistency for both intricate outlining and smooth flooding, drying to a lovely, firm finish that remains delightfully soft, never hard or crunchy.
Whether you’re a seasoned baker or just starting your culinary journey, this is an excellent recipe for Easter, offering a fun and engaging activity for children to participate in the decorating. No prior cookie decorating experience is needed to achieve professional-looking results; the playful cookie cutters and vibrant icing colors do most of the artistic work for you, ensuring every cookie is a masterpiece. Get ready to create lasting memories and deliciously festive treats this Easter!
Watch the Recipe Video
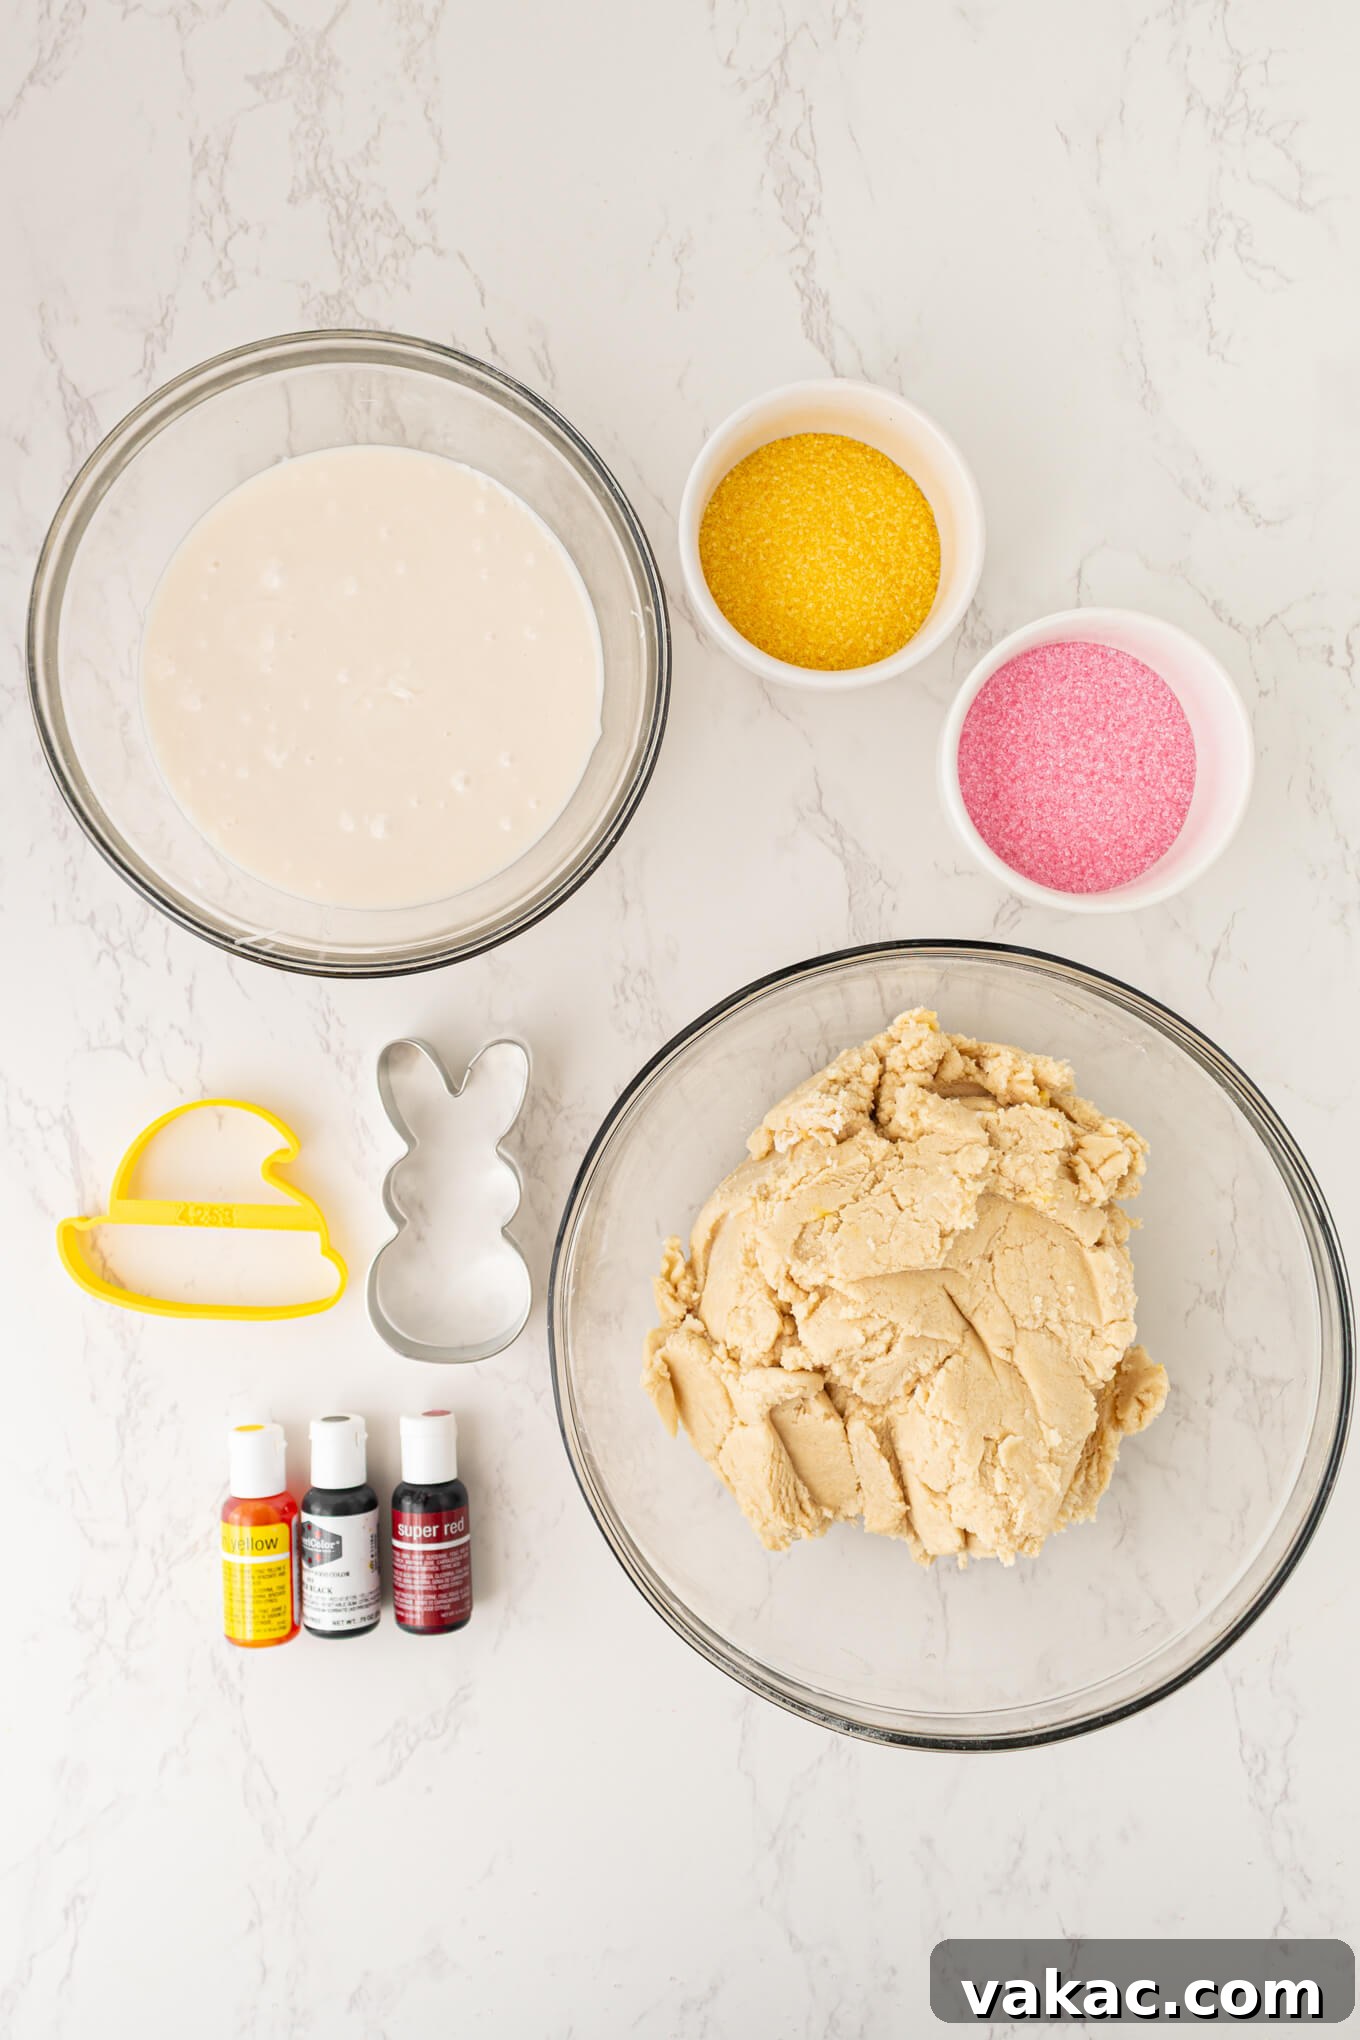
Essential Ingredients & Clever Substitutions
For the Perfect Cookie Dough
As highlighted earlier, the foundation of these delightful Easter cookies is my incredibly versatile and forgiving cut-out sugar cookie recipe. This dough is specifically designed to be easy to work with and doesn’t require any chilling, making your baking process smoother and quicker. If you’re a chocolate lover looking to add a rich twist to your Easter spread, my decadent chocolate sugar cookies would also make an utterly delicious base for these festive shapes, providing a wonderful contrast to the sweet icing.
When measuring flour, always remember to spoon and level it into your measuring cup rather than scooping directly from the bag. This prevents over-packing the flour, which can lead to dry, crumbly cookies. For this recipe, we use vegetable shortening instead of butter. Shortening helps create a soft, melt-in-your-mouth texture and prevents the cookies from spreading too much during baking, ensuring your bunny and chick shapes stay perfectly defined. Granulated sugar provides the essential sweetness and contributes to the dough’s tender texture, while a large, room-temperature egg binds the ingredients and adds richness. Whole milk ensures moisture, and pure vanilla extract infuses the cookies with a classic, comforting aroma and flavor. Don’t skip the baking powder and salt; these small additions are crucial for the cookies’ lift and balanced taste.
Icing & Vibrant Food Coloring
The magic of these cookies truly comes alive with the vibrant icing. I decorated these festive treats with my go-to easy sugar cookie icing, a recipe renowned for its perfect consistency and delightful chewiness once dry. However, if you prefer a different finish, feel free to use a classic royal icing, which dries to a harder, crisp finish. To achieve the beautiful Easter palette, I used yellow, pink (created with a touch of red), and black food coloring for the details. The beauty of this recipe is its adaptability – feel free to unleash your creativity with any colors you desire! For the most intense and professional-looking hues without altering the icing’s consistency, I highly recommend using gel food coloring. My personal favorite brand is Americolor, known for its concentrated pigments.
Must-Have Cookie Cutters
To bring our adorable Peeps-inspired characters to life, I utilized a charming chick cookie cutter sourced from this versatile set, alongside a separate, equally delightful bunny cookie cutter. For simplicity, the chick cookie cutter set often includes a similar, slightly smaller bunny cutter. Should you wish to streamline your tools, that set alone will provide you with all the essential shapes to create a charming assortment of Easter characters.
Sparkling Sanding Sugar
The finishing touch for these festive cookies is the sparkling sanding sugar, which adds both visual appeal and a delightful crunch. I opted for classic Easter shades of yellow and pink sanding sugar to complement the Peeps theme. However, don’t limit yourself! This is where your artistic flair can truly shine. Imagine how enchanting these cookies would look with a sprinkle of blue, purple, or light green sanding sugar, perfectly matching your chosen icing colors and adding an extra layer of festive charm to your Easter treats.
Expert Tips for Crafting Perfect Cookies & Icing
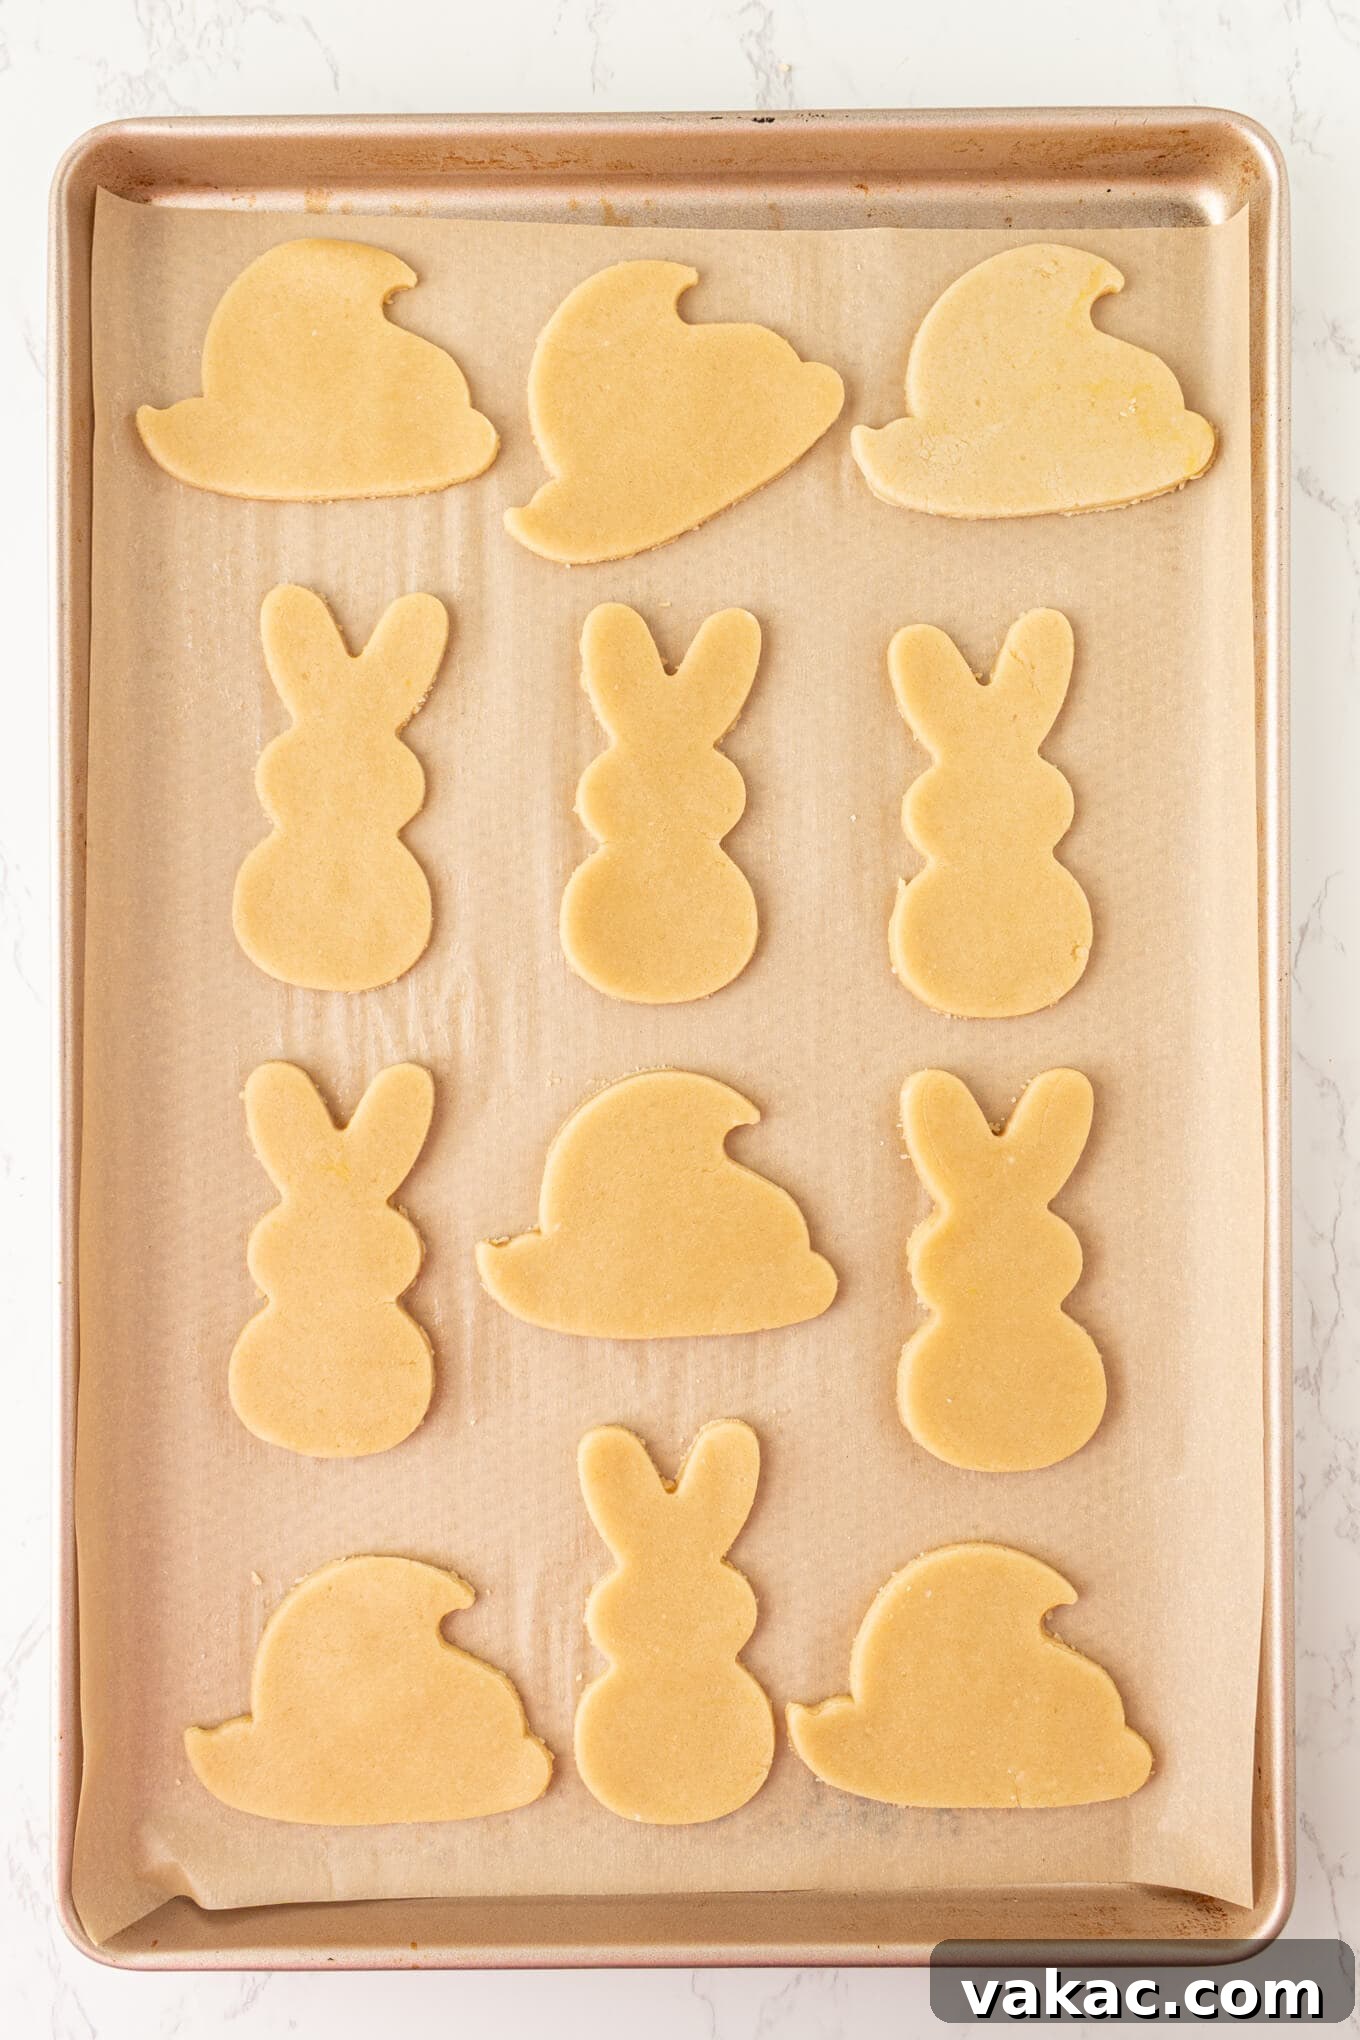
- Achieve Uniform Dough Thickness: The key to evenly baked, beautifully shaped sugar cookies is consistent dough thickness. Rolling your dough to an even ¼-inch ensures that all your cookies bake at the same rate, preventing some from being undercooked while others are overdone. To make this task effortless, consider using ¼-inch dowel rods as guides on either side of your dough, or invest in an adjustable rolling pin. For an even smoother process and minimal cleanup, I highly recommend rolling your dough between two sheets of parchment paper; this technique prevents sticking and eliminates the need for excessive flour dusting.
- Lightly Dust Your Tools: Before cutting and transferring your delicate cookie shapes, a light dusting of either all-purpose flour or powdered sugar on your cookie cutters and a thin spatula can make a world of difference. This simple step prevents the dough from sticking to your tools, allowing for clean, crisp cuts and easy transfer to your baking sheets without distorting the shapes.
- Bake Until Lightly Golden Perfection: While many cookies are pulled from the oven just as they lose their raw dough appearance, I prefer to bake my sugar cookies for an extra minute or two, until their edges are lightly golden brown. This slightly longer bake time creates a cookie that is perfectly sturdy enough to hold up to the generous layer of icing and sanding sugar, ensuring it won’t become too soft or crumbly once decorated. The goal is a firm yet tender cookie base.
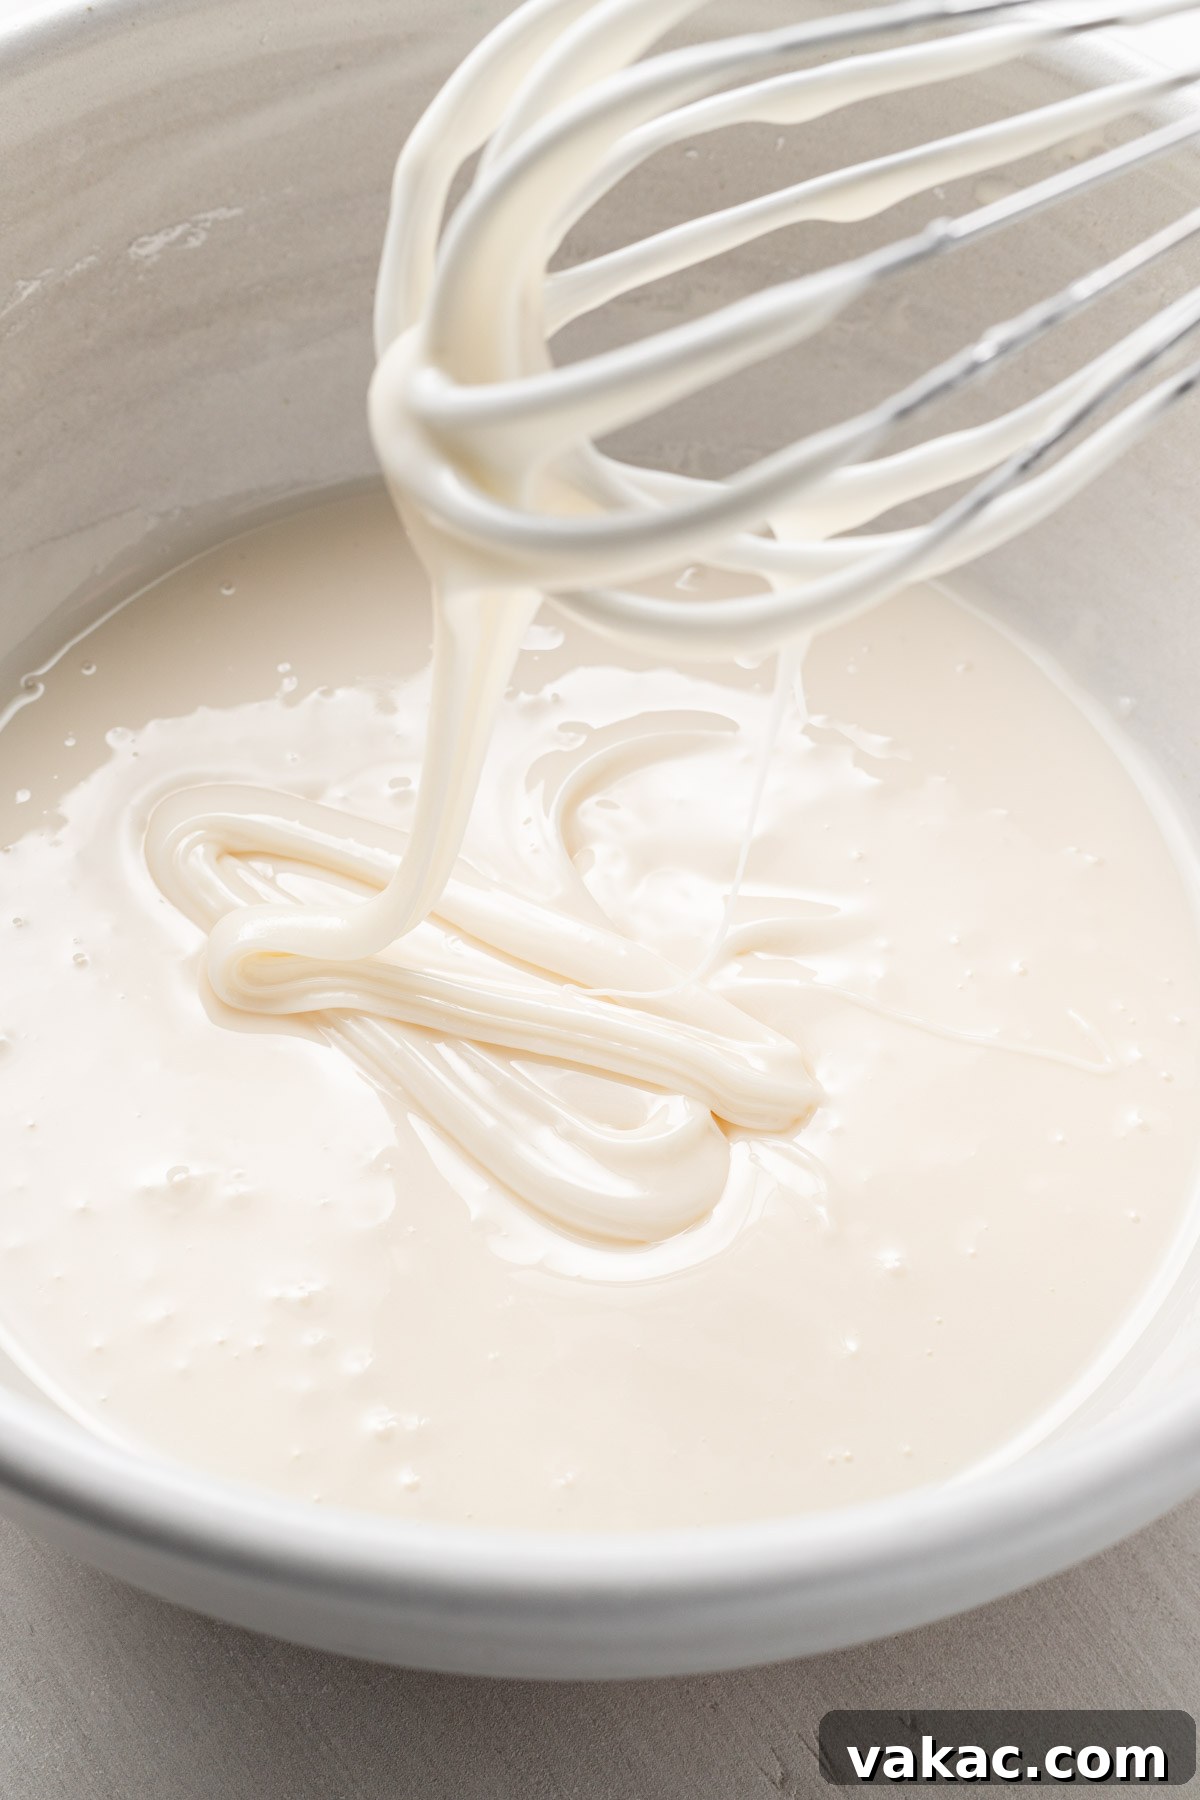
- Master the Ideal Icing Consistency: The “medium consistency” of the icing is critical for these cookies. This versatile consistency allows you to effortlessly outline your cookies and then flood them with the same icing, achieving a smooth, seamless finish. To test for this perfect consistency, lift your spoon or whisk from the bowl; the ribbons of icing that fall should fully melt back into the main bowl of icing within approximately 4 to 5 seconds. If your icing is too thin and spreads uncontrollably or slides off the cookie, gradually add more powdered sugar, a tablespoon at a time, until the desired thickness is reached. Conversely, if your icing is too thick and difficult to spread, add milk a mere teaspoon at a time, mixing thoroughly after each addition, until it flows beautifully. When in doubt, always test a small amount on a discarded cookie or a piece of parchment paper to observe how it holds its shape and spreads.


Step-by-Step Guide to Icing & Decorating Your Cookies
Transforming your plain sugar cookies into these adorable Easter treats is a fun and straightforward process. Begin by preparing your icing: after whisking together your main batch of delicious sugar cookie icing, carefully set aside a small portion into a separate bowl. This small amount will be tinted with black food coloring to create the eyes and mouths for your characters later on. Ensure it’s covered to prevent it from drying out.
Next, divide the larger remaining batch of white icing evenly into two separate bowls. Into one bowl, incorporate a few drops of yellow gel food coloring, stirring gently until you achieve a consistent, vibrant yellow. For the other bowl, add a very small amount of red gel food coloring. Start with just a tiny drop, as gel colors are highly concentrated, and mix until you achieve a beautiful, soft pink hue. You can always add more color incrementally if you desire a deeper shade. Remember to cover these colored icings with damp paper towels or cling wrap if you’re not using them immediately, to maintain their perfect consistency.
Now, transfer each color of icing (yellow, pink, and black) into individual zip-top bags or dedicated piping bags. Snip off a very small corner from each bag – the smaller the snip, the finer your control for outlining and detailing. Working with one cooled cookie at a time, begin by carefully outlining the perimeter with your chosen color (yellow for chicks, pink for bunnies). Once outlined, gently fill the entire interior of the cookie with more of the same colored icing. If you notice any small empty spots or air bubbles, a toothpick or a small scribe tool can be gently used to move the icing around and achieve a smooth, even surface. Gently tapping or shaking the cookie can also help the icing settle beautifully.
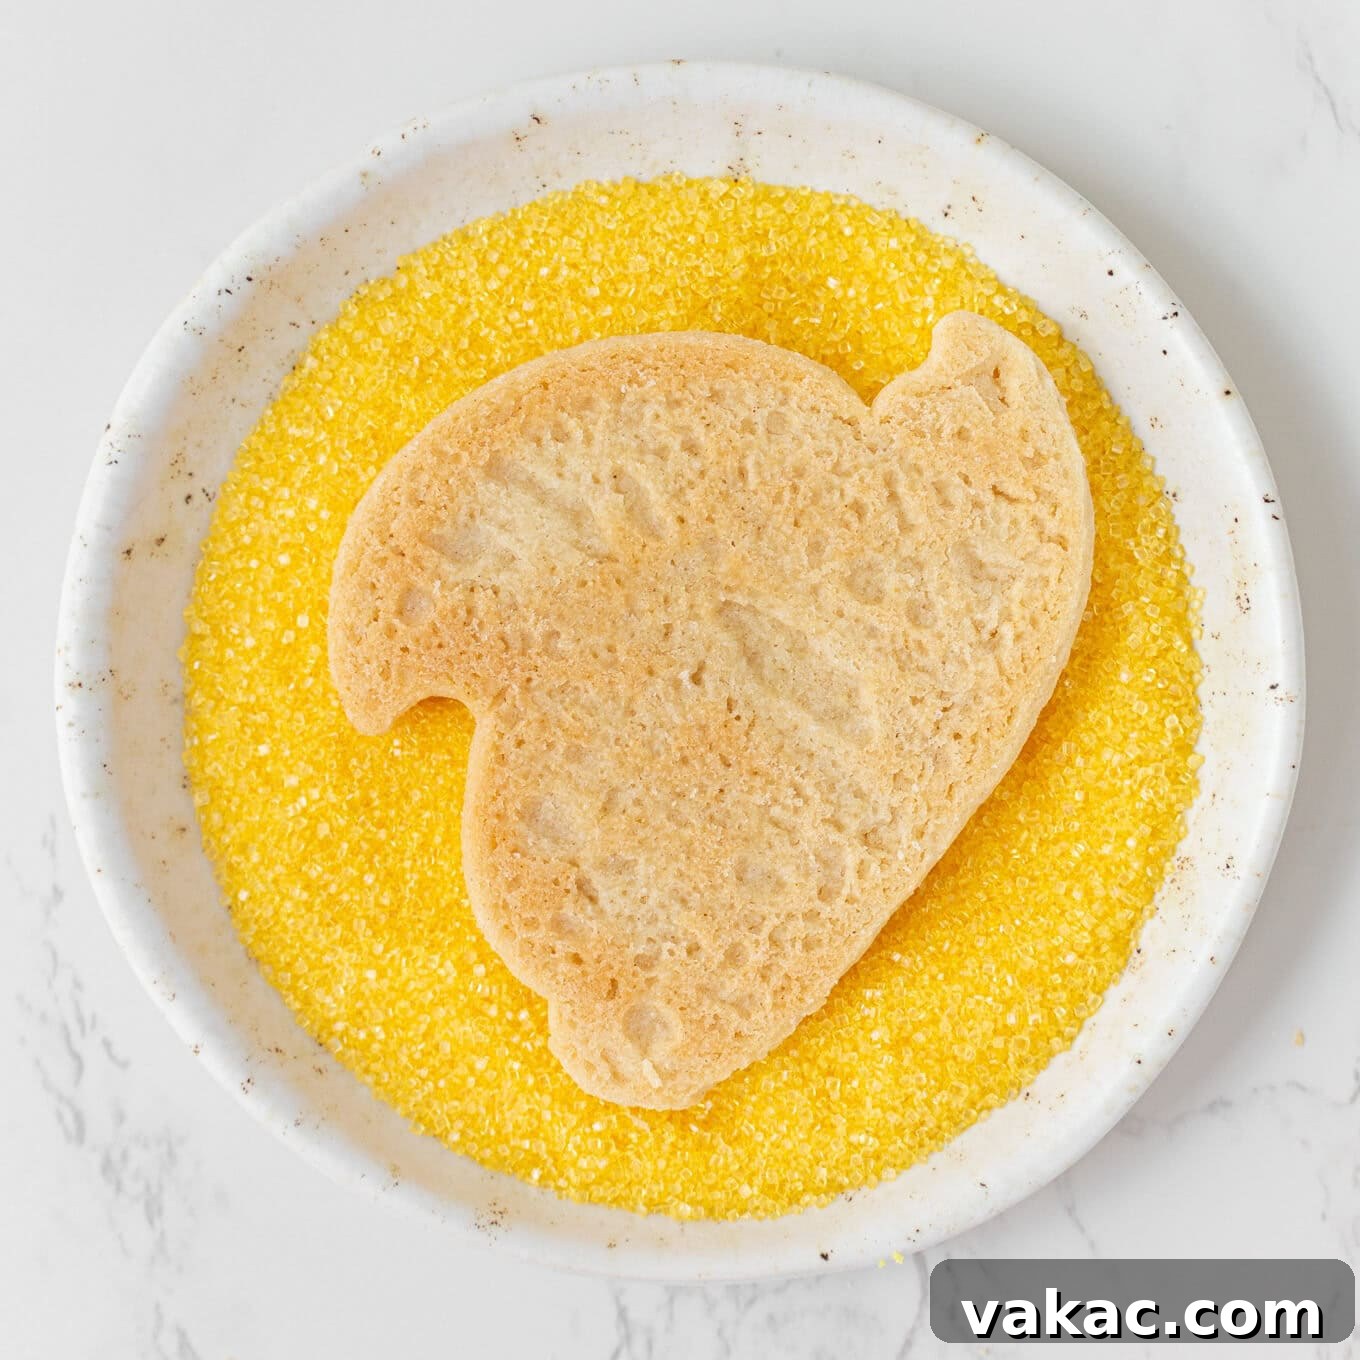
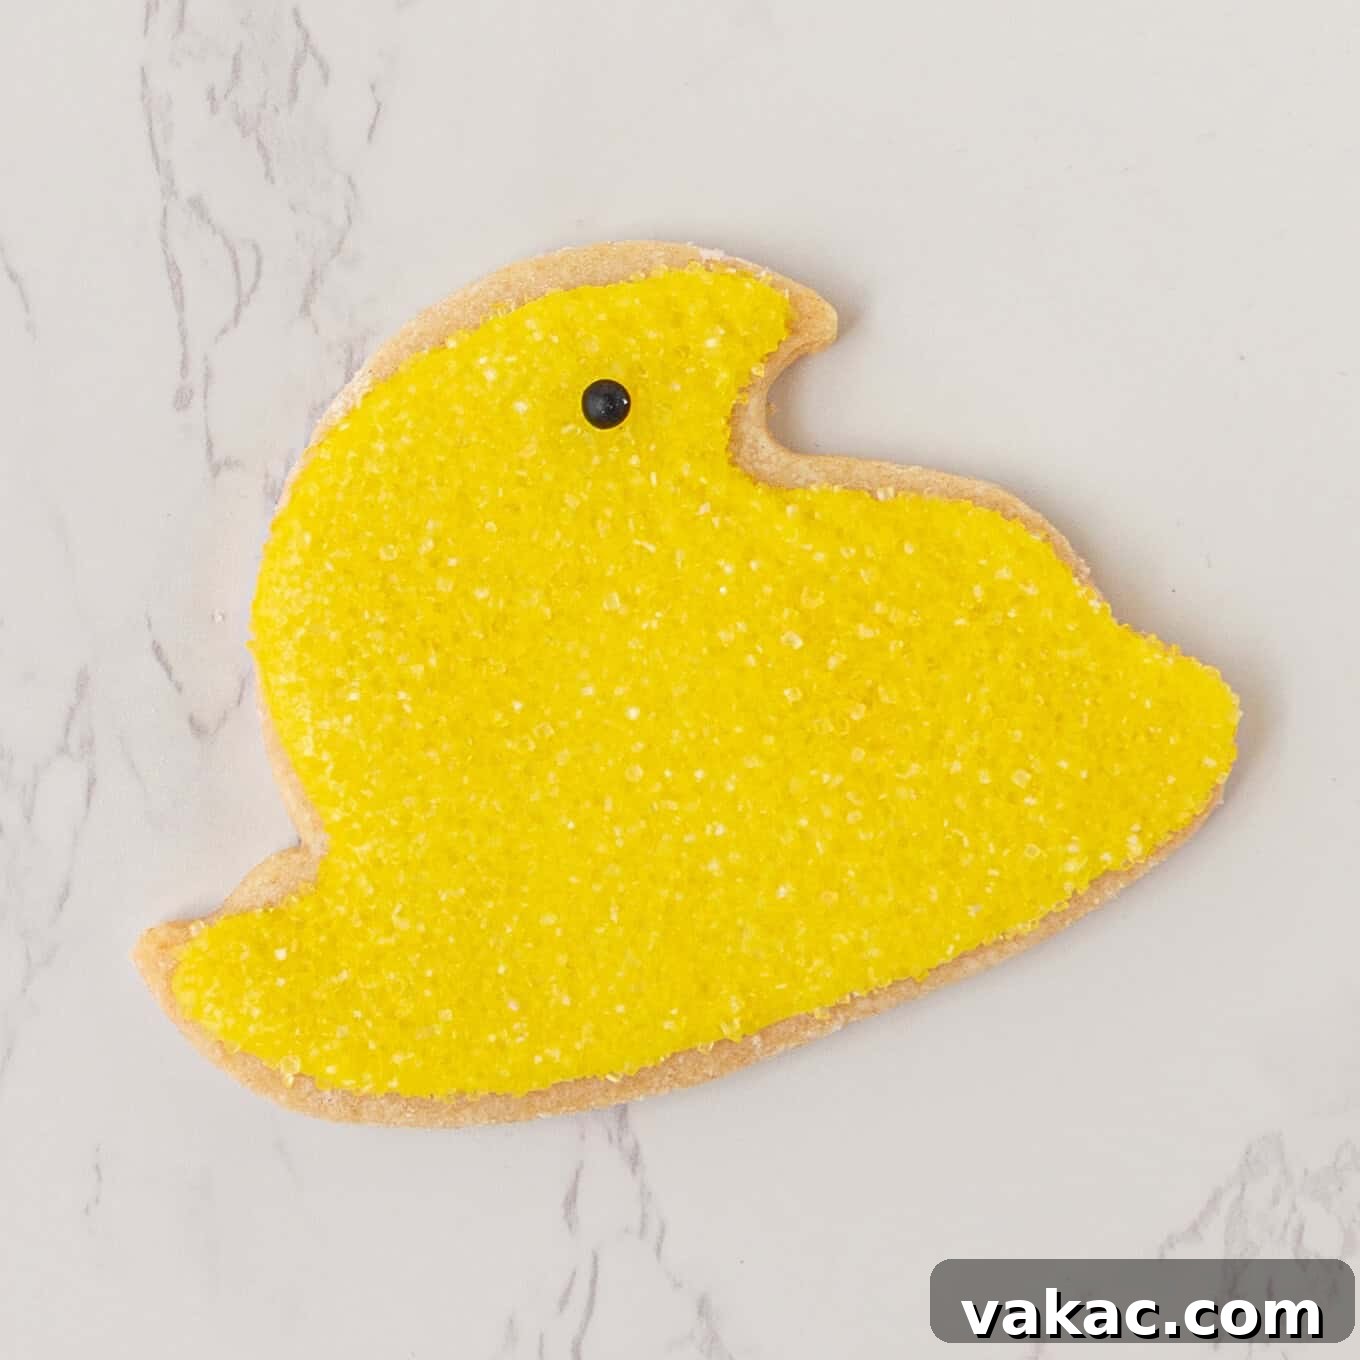
Immediately after flooding a cookie, while the icing is still wet and tacky, flip the cookie over and gently press it into a shallow dish or plate generously filled with coordinating sanding sugar. Be careful not to press too hard, as this can cause the wet icing to ooze over the edges. Alternatively, you can simply sprinkle the sanding sugar generously over the wet icing and then gently shake off any excess. Continue this process with all your remaining sugar cookies until each one is beautifully iced and sparkling with sanding sugar. Once all your cookies have their base color and glitter, return to the black icing. Use the black icing to add tiny, precise dots for the eyes on both the chick and bunny cookies, and two additional small dots to form a sweet mouth on the bunny cookies. Allow the cookies to sit undisturbed, ideally overnight, to ensure the icing hardens completely, preventing smudges and making them stackable. The waiting is the hardest part, but entirely worth it for these picture-perfect Easter treats!

Creative Decorating Ideas to Elevate Your Easter Cookies
While these Peeps-inspired bunny and chick cookies are undeniably adorable, this versatile sugar cookie recipe and icing technique open up a world of creative possibilities! You can honestly use this foundational recipe to make any shape, size, and color of sugar cookies you like, adapting them for various holidays or occasions. Here are some other fun and imaginative decoration ideas you can easily try to personalize your next batch:
- Experiment with Diverse Color Palettes: Don’t limit yourself to traditional Easter pastels! Explore a wider spectrum of colors for both your icing and sanding sugar. Think vibrant spring greens, ocean blues, or even multi-colored rainbow effects for a truly unique display. You could also create ombre effects by gradually adding more food coloring to separate batches of icing.
- Alternative Facial Features: Instead of using black icing for the eyes and mouth, consider other delightful edible options. Melted chocolate, carefully piped with a toothpick, offers a rich contrast. Mini chocolate chips or tiny mini M&M’s can be pressed gently into the wet icing for instant, charming eyes. Edible marker pens are another fantastic tool for adding detailed expressions once the icing has dried.
- Switch Up Your Cookie Cutters: Embrace the spirit of Easter by using a variety of themed cookie cutters. Some Easter egg or carrot-shaped cookies would be absolutely adorable and complement the bunnies and chicks perfectly. You could also find flower, lamb, or basket-shaped cutters to expand your festive assortment. For other holidays, simply swap out the cutters for stars, hearts, pumpkins, or snowflakes!
- Explore Different Frosting Flavors: While our simple sugar cookie icing is fantastic, venturing into other frosting types can dramatically change the flavor profile of your cookies. Imagine the bright tang of strawberry cream cheese frosting, the tropical sweetness of coconut frosting, or the zesty zing of lemon buttercream before dipping them in sanding sugar. Each offers a unique taste experience that will delight your guests. Just ensure the alternative frosting is firm enough to hold the sanding sugar once applied.

I truly can’t get over how absolutely charming and festive these Easter sugar cookies turned out! They bring so much joy and are an absolute delight to share. If you decide to try this recipe, I would be thrilled to hear from you. Don’t forget to leave a comment below to let me know your thoughts on them and how you chose to decorate your own batch. Happy baking and enjoy these sweet, special treats!

Irresistible Easter Sugar Cookie Recipe
Pin Recipe
SaveSaved!
Leave a Review
Ingredients
For the Soft Sugar Cookie Dough
- 3 cups all-purpose flour spooned & leveled (375 grams)
- 2 teaspoons baking powder
- ½ teaspoon salt
- 1 cup vegetable shortening (190 grams; I used Crisco)
- 1 cup granulated sugar (200 grams)
- 1 large egg at room temperature
- 2 tablespoons whole milk (30 ml)
- 2 teaspoons pure vanilla extract
For the Smooth Sugar Cookie Icing
- 4 cups powdered sugar (480 grams)
- 5 to 6 tablespoons milk divided (plus more as needed)
- 4 teaspoons light corn syrup
- 1 teaspoon pure vanilla extract
- Red, yellow, and black gel food coloring
Optional Sparkling Decorations
- Pink and yellow sanding sugar
Instructions
-
To prepare the delicious sugar cookies: Begin by preheating your oven to 350°F (177°C). Line two large baking sheets with either parchment paper or silicone baking mats. Set these aside for later use.
-
In a spacious mixing bowl, thoroughly whisk together the all-purpose flour, baking powder, and salt until well combined. This ensures an even distribution of leavening agents. Set this dry mixture aside.3 cups all-purpose flour,2 teaspoons baking powder,½ teaspoon salt
-
In a separate large mixing bowl, using an electric mixer, cream together the vegetable shortening and granulated sugar for about 1 to 2 minutes until the mixture is light, fluffy, and well combined. Next, incorporate the egg, milk, and pure vanilla extract, mixing until everything is fully integrated. Remember to pause and scrape down the sides of the bowl as needed to ensure all ingredients are thoroughly mixed.1 cup vegetable shortening,1 cup granulated sugar,1 large egg,2 tablespoons whole milk,2 teaspoons pure vanilla extract
-
Gradually add the dry ingredients from the first bowl into the wet mixture, mixing on low speed until everything is just fully combined. Initially, the mixture may appear a little crumbly, but as you continue to mix, it will come together to form a cohesive dough. Once the dough forms, use your hands to gently shape it into a ball.
-
Divide the dough into two equal halves. On a piece of parchment paper, lightly dust with flour, place one half of the dough, then cover with another piece of parchment paper. Roll the dough evenly to a ¼-inch thickness between the two sheets of parchment paper. Repeat this process with the second half of the dough. While this dough is designed not to require chilling, if you find colder dough easier to handle, you may place both rolled-out dough pieces (still between parchment paper) on a baking sheet and refrigerate for 30 minutes to one hour.
-
Carefully peel off the top layer of parchment paper from one rolled dough section. Using 3 to 4-inch Easter-themed cookie cutters (I used this adorable bunny and this charming chick cookie cutter), cut out your desired shapes. Carefully place these cut-out cookies onto the prepared baking sheets, ensuring a small space is left between each one to allow for even baking. If you encounter any difficulty picking up the cut dough, lightly flour a thin spatula and use it to transfer the cookies. Gather any scrap pieces of dough, re-roll them between parchment paper, and continue cutting out shapes until all dough is used. Repeat with the second sheet of cookie dough.
-
Bake the cookies for 11 to 13 minutes, or until the tops of the cookies appear set and the very bottom edges begin to turn a light golden brown. Baking them slightly longer ensures a sturdy base for the icing.
-
Remove the baking sheets from the oven and allow the cookies to cool on the sheets for 10 to 15 minutes. This helps them firm up before handling. Afterward, carefully transfer the cookies to a wire rack to cool completely before decorating.
-
To prepare the smooth icing: In a large mixing bowl, whisk together the powdered sugar, 5 tablespoons (75 ml) of milk, light corn syrup, and pure vanilla extract until the mixture is completely smooth and free of any lumps. At this stage, the icing will be quite thick.4 cups powdered sugar,5 to 6 tablespoons milk,4 teaspoons light corn syrup,1 teaspoon pure vanilla extract
-
Continue to thin the icing by mixing in 1 additional teaspoon of milk at a time until it reaches a medium consistency. This means it should be thick enough to hold an outline on the cookie yet fluid enough to smoothly fill it in. To test the consistency, lift your whisk or spoon from the bowl; the ribbons of icing should gently melt back into the surface of the main icing in about 4 to 5 seconds. If the icing is too thick and difficult to spread, add a bit more milk. If it’s too thin and runs off the cookie, incorporate more powdered sugar gradually to thicken it.
-
Spoon a small portion of the prepared icing into a small bowl and mix in black gel food coloring to create the black icing needed for eyes and mouths. Divide the remaining main icing between two separate bowls. Add a tiny amount of red gel food coloring to one bowl for pink icing and yellow gel food coloring to the other for yellow icing. Mix thoroughly until colors are even. Cover each bowl with a damp paper towel or transfer the colored icings into separate piping bags immediately to prevent them from drying out until you are ready to use them.Red, yellow, and black gel food coloring
-
To creatively decorate your cookies: Pour the pink sanding sugar onto one small plate and the yellow sanding sugar onto another. Set these aside in preparation for dipping.Pink and yellow sanding sugar
-
Select a cookie and, using one of the colored icings, carefully outline its perimeter. Immediately after outlining, fill the interior of the cookie with a thin, even layer of the same colored icing. If there are any unfilled areas or bubbles, use a toothpick or scribe tool to gently move the icing around to achieve a smooth finish. You can also gently tap or shake the cookie to help the icing settle evenly.
-
While the icing on the cookie is still wet, gently press the top of the iced cookie into the corresponding color of sanding sugar. Ensure you do not press too firmly, as this can cause the icing to spread beyond the cookie’s edge. Alternatively, you can sprinkle the sanding sugar generously over the wet icing and then gently shake off any excess. Continue this process with all the remaining sugar cookies until each one is beautifully iced and sparkling with sanding sugar.
-
Once all cookies are iced and sugared, retrieve your black icing. Using a very small snip in the piping bag, add a small dot to each chick cookie for the eyes. For the bunny cookies, add three small dots: two for the eyes and one for a charming little mouth.
-
Allow the icing to harden completely. This crucial step can take several hours, often up to a full day, depending on humidity. For best results, I prefer to bake and decorate my cookies the day before, then store them in an airtight container at room temperature to allow the icing to set overnight. The icing itself will help keep the cookies fresh and prevent them from drying out.
Notes
Freezing Instructions: For longer enjoyment, these decorated sugar cookies freeze exceptionally well for 2 to 3 months. To serve, simply thaw them to room temperature for a few hours before indulging.