
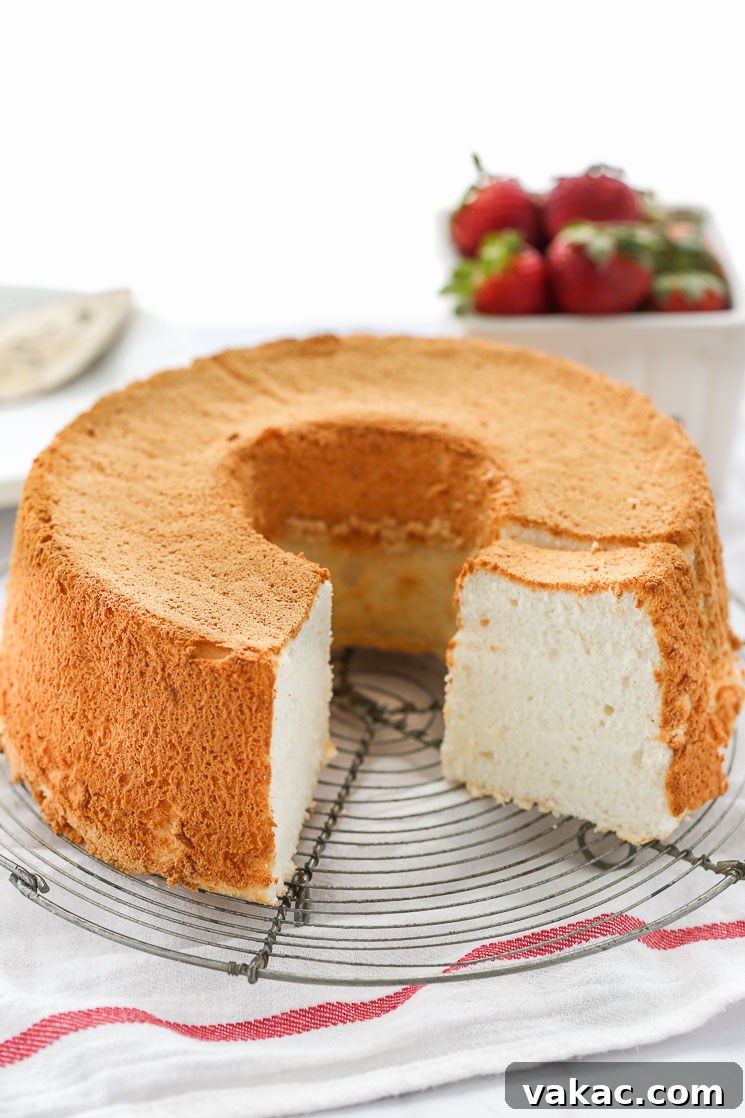
The quest for the perfect Angel Food Cake ends here. This isn’t just another recipe; it’s a gateway to creating an incredibly soft, spectacularly light, and wonderfully airy homemade cake that will consistently turn out flawless. Forget the store-bought mixes; once you experience the delicate crumb and cloud-like texture of a truly authentic Angel Food Cake, you’ll understand why this timeless dessert continues to captivate hearts.
Why Embrace Homemade Angel Food Cake?
Angel Food Cake holds a special place in the world of desserts, celebrated for its ethereal lightness and subtle sweetness. Unlike many cakes that rely on butter and whole eggs, Angel Food Cake achieves its characteristic texture from a foundation of whipped egg whites, making it fat-free and remarkably delicate. Making it from scratch, rather than a box mix, elevates the experience entirely, offering unparalleled freshness and a superior melt-in-your-mouth quality that simply can’t be replicated.
Just recently, we explored the simplicity of crafting your own homemade cake flour. Today, we’re putting that knowledge to perfect use with this recipe, demonstrating how the right ingredients, combined with proper technique, can transform simple components into a culinary masterpiece. Don’t be intimidated by the idea of baking from scratch; while it involves a few precise steps, the reward of a perfectly executed Angel Food Cake is immeasurable and truly worth every moment.
A Timeless Classic for Every Occasion
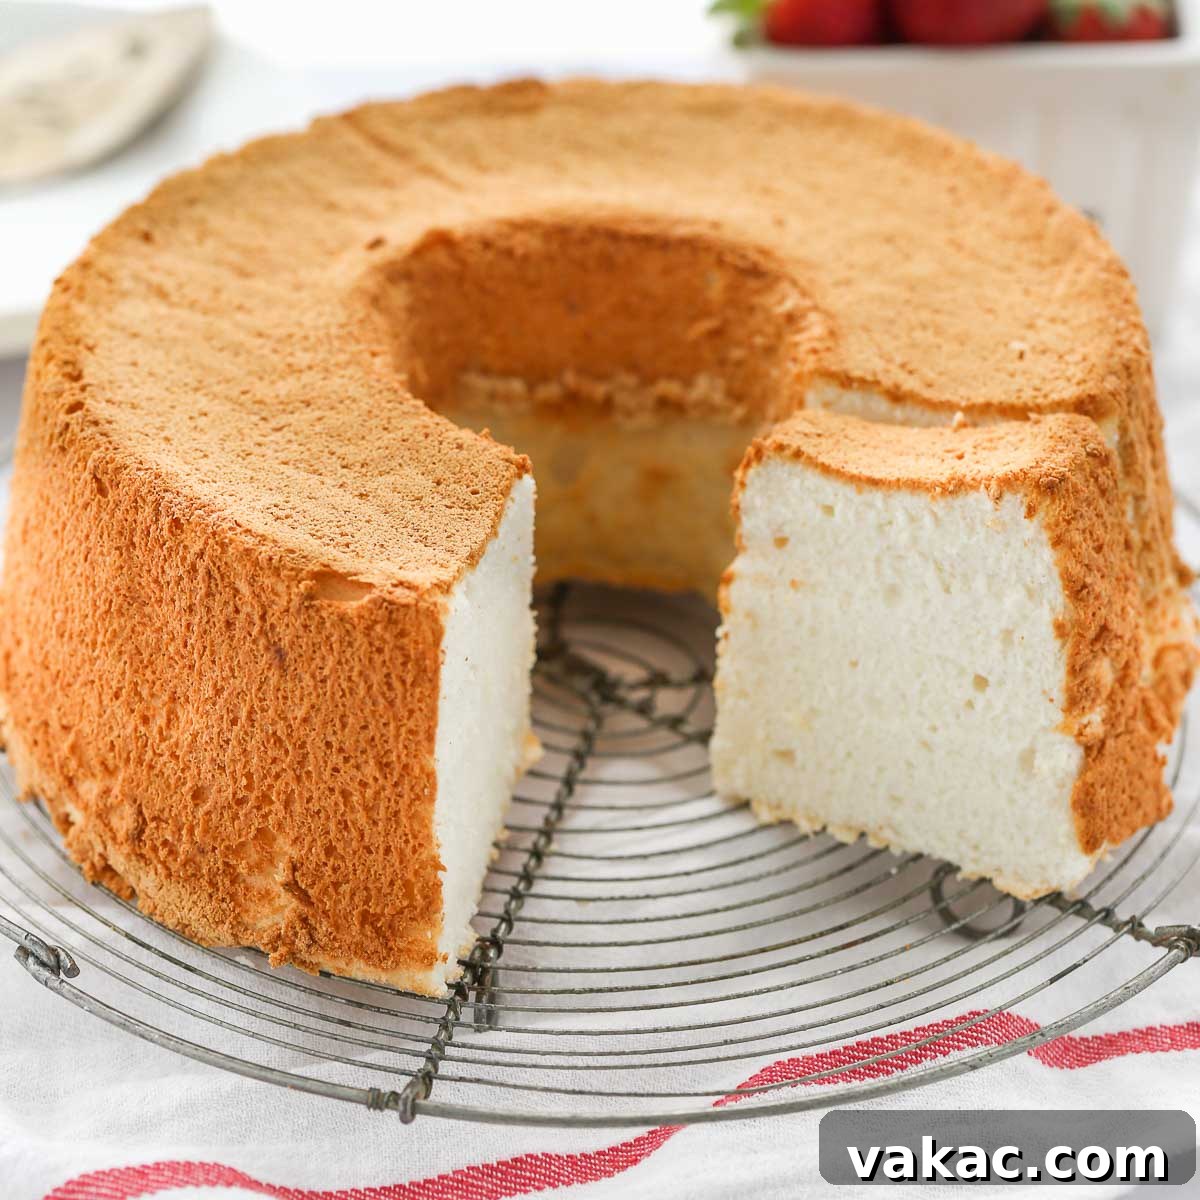
Angel Food Cake has graced tables for generations, a staple at spring gatherings, summer picnics, and holiday feasts. Its versatility allows it to be dressed up with an array of toppings or enjoyed in its pristine, unadorned state. The beauty of this cake lies not only in its taste but also in its striking appearance – a tall, pristine white cake that stands proudly, promising a delightful experience with every slice. This recipe will guide you to bake a cake so incredibly soft, light, and airy, it will undoubtedly become your go-to for all future celebrations.
Understanding the Magic: Essential Ingredients
Homemade Angel Food Cake is a testament to the power of a few high-quality ingredients. With just seven items, each playing a crucial role, it’s paramount to use precisely what the recipe calls for to achieve that signature light and airy texture. Let’s delve into what makes each component indispensable:
- Cake Flour: This isn’t just any flour. Cake flour boasts a lower protein content compared to all-purpose flour, which is the secret behind a truly tender, softer, and lighter cake. Its fine texture contributes to the delicate crumb of Angel Food Cake, preventing it from becoming tough. Using a homemade cake flour ensures you have the freshest and most suitable flour for this delicate dessert.
- Powdered Sugar: While some recipes might call for only granulated sugar, our tests have shown that a combination of granulated and powdered sugar yields superior results. Powdered sugar, also known as confectioners’ sugar, has an incredibly fine consistency. This allows the flour particles to disperse more evenly throughout the batter and makes it significantly easier to gently fold into the whipped egg whites, minimizing the risk of deflating them.
- Egg Whites: The very heart of Angel Food Cake! These provide the cake’s structure and volume. For optimal whipping, it’s absolutely crucial that your egg whites are at room temperature. Cold egg whites are resistant to whipping and won’t achieve the necessary volume or stability. Plan ahead by separating your eggs and letting the whites sit at room temperature for about 30 minutes before you begin baking. Be meticulous in separating, ensuring no trace of yolk contaminates the whites, as fat can prevent them from whipping properly.
- Cream of Tartar: Don’t even think about skipping this! Cream of tartar is an acidic ingredient that acts as a stabilizer for the egg whites. It helps them reach their maximum volume, creates a stronger foam, and prevents them from collapsing. Without it, your meringue would be less stable and prone to deflating, leading to a denser cake.
- Salt: A small but mighty ingredient, salt plays a vital role in balancing the sweetness of the batter. It enhances the overall flavor profile, ensuring the cake is deliciously sweet without being cloyingly so.
- Granulated Sugar: This sugar is progressively beaten into the egg whites, contributing not just sweetness but also critical structure. As it dissolves, it creates a stable, glossy meringue that can hold a significant amount of air, which is essential for the cake’s characteristic rise and lightness.
- Vanilla Extract: Pure vanilla extract is highly recommended for this recipe. Its warm, aromatic notes complement the subtle sweetness of the cake beautifully, adding depth and complexity to the overall flavor without overpowering the delicate egg white base.
Mastering the Method: Step-by-Step Baking Guide
Creating this exquisite cake involves a sequence of precise steps, each contributing to its legendary texture. Follow these instructions carefully, and you’ll be rewarded with a truly remarkable Angel Food Cake.
Preparation is Key
Begin by setting your oven rack to the lower third position. This placement helps the cake rise evenly without the top browning too quickly. Preheat your oven to 325°F (163°C). Adequate preheating is crucial for consistent baking. Importantly, ensure your angel food cake pan is *not* greased. This is vital because the cake needs to cling to the sides of the pan as it bakes to achieve its impressive height and structure. A greased pan would prevent it from climbing, resulting in a shorter, potentially denser cake.
Sifting for Success
In a medium bowl, combine the cake flour and powdered sugar. Now, embark on a crucial step: sifting this mixture not once, not twice, but three times. This meticulous process ensures the dry ingredients are perfectly aerated and free of lumps, leading to an incredibly fine and uniform crumb in the finished cake. Set this perfectly sifted mixture aside for later.
Whipping the Whites to Stiff Peaks
Using the bowl of a stand mixer fitted with the whisk attachment (or a large mixing bowl with an electric hand mixer), add your room-temperature egg whites. Begin beating them on low-medium speed until they become foamy and opaque, resembling a light froth. This is the initial stage of aeration.
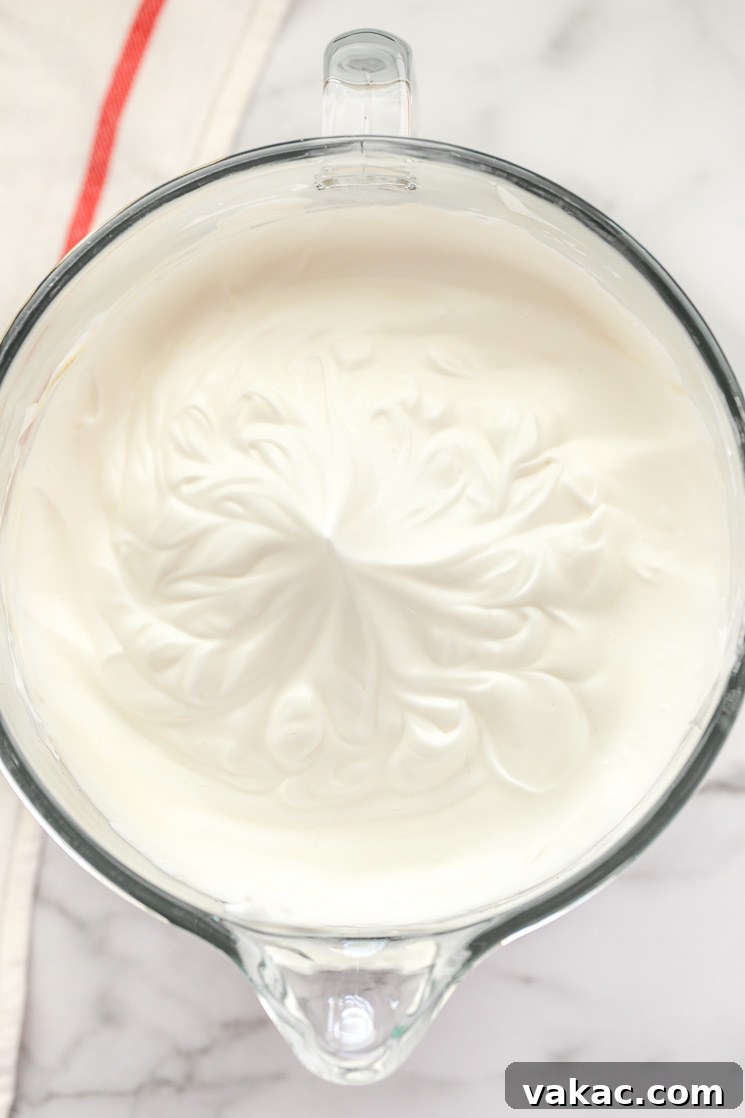
Next, add the cream of tartar and salt. These will help stabilize the developing foam. Increase the mixer speed to medium-high. Gradually, and this is key, add the granulated sugar, about one tablespoon at a time. This slow addition allows the sugar to dissolve properly into the egg whites, creating a stable, glossy meringue. Continue beating until stiff glossy peaks form. You’ll know they’re ready when you lift the whisk, and the peaks stand straight up without curling over at the tips. Finally, add the pure vanilla extract and mix on the lowest speed just until it’s fully combined, being careful not to overmix.
Gentle Folding: Preserving the Air
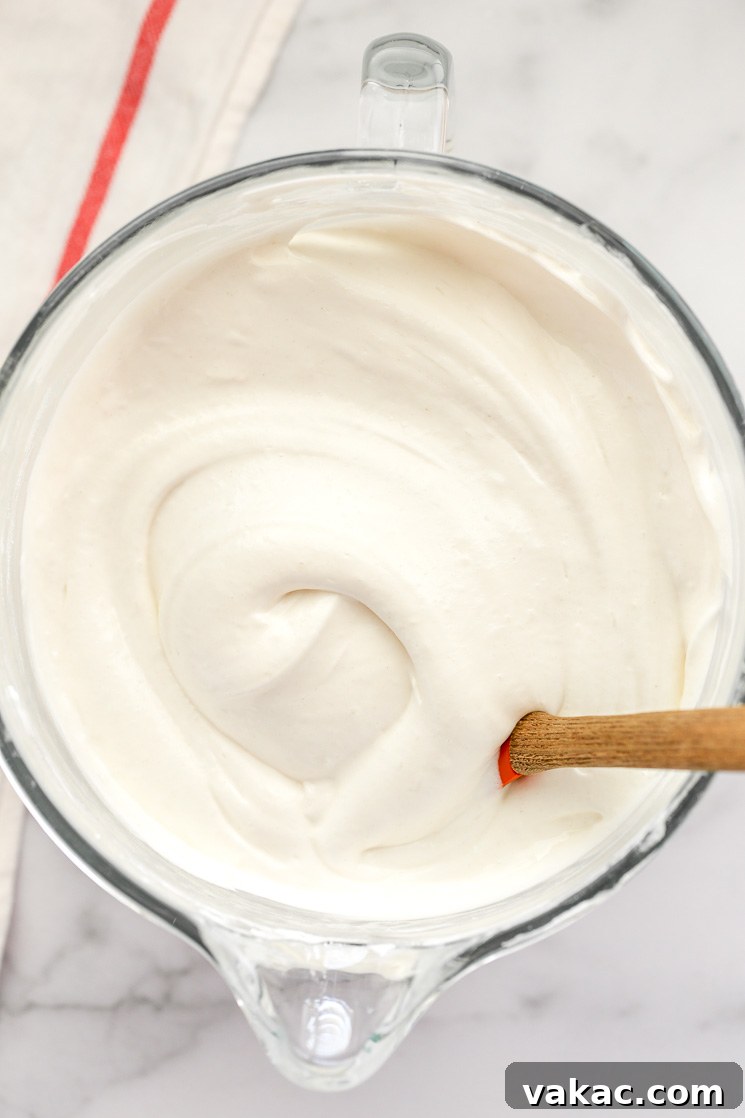
With your perfectly whipped meringue ready, it’s time to incorporate the dry ingredients. This step requires the utmost care to preserve all the air you’ve just incorporated. Rather than adding all the dry ingredients at once, which would weigh down and deflate the delicate egg whites, sift about one-fourth of the flour and powdered sugar mixture over the beaten egg whites. Then, using a rubber spatula, gently fold the dry ingredients into the whites. Use an upward, circular motion, scraping the bottom of the bowl and turning it slowly, until just combined. Repeat this process for the remaining dry ingredients, adding them in three more increments. The goal is to incorporate the flour without deflating the airy meringue, resulting in a homogeneous, fluffy batter.
Filling the Pan and Removing Air Pockets
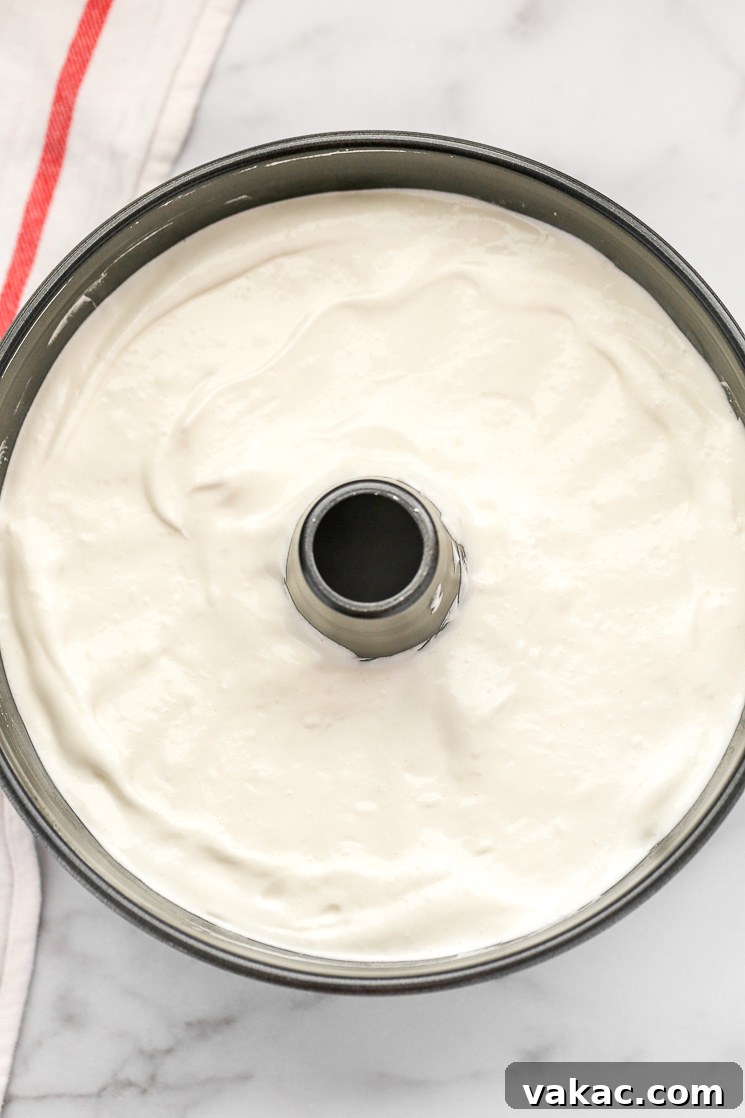
Once the batter is ready, carefully scoop it into your ungreased 10-inch angel food cake pan or tube pan. Smooth the top gently. Before placing it in the oven, take a thin knife or skewer and carefully cut through the batter in a zig-zag pattern around the pan. This crucial step helps to eliminate any large air pockets that might have formed during the transfer, preventing unsightly large holes in your finished cake. Smooth the top once more into an even layer.
Baking to Golden Perfection
Bake the cake in your preheated 325°F (163°C) oven for approximately 40-45 minutes. The cake is done when the top is a beautiful light golden brown, and a wooden toothpick inserted into the center comes out clean. Avoid opening the oven door too frequently during baking, as this can cause the cake to collapse.
The Non-Negotiable Upside-Down Cool
As soon as the cake is out of the oven, immediately invert the pan onto a wire rack. This step is absolutely critical. Angel Food Cake’s delicate structure is not fully set until it cools completely. Cooling it upside down prevents the cake from collapsing under its own weight, ensuring it retains its impressive height and airy texture. Most angel food cake pans are designed with small “feet” or a central tube that extends beyond the rim, allowing them to rest inverted. If your pan doesn’t have these features, you can carefully rest the inverted pan over the neck of a heat-safe bottle (like a glass soda bottle) until it is completely cool, which can take up to 2 hours. Once cooled, use a thin knife to gently loosen the sides of the cake from the pan before carefully removing it. Slice, serve, and savor the perfection!
Serving Suggestions & Flavor Pairings
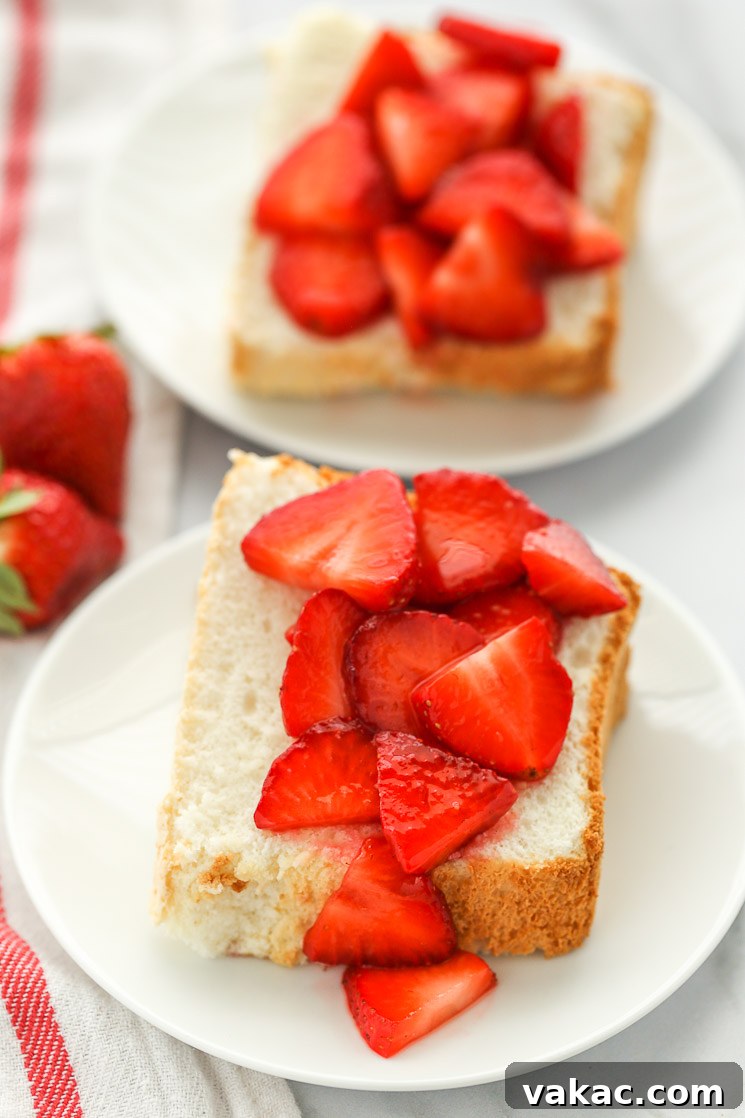
The beauty of Angel Food Cake lies in its light, neutral flavor, making it a perfect canvas for a myriad of toppings and accompaniments. While delightful on its own, here are some favorite ways to elevate your serving:
- Fresh Berries: A classic pairing! Sliced fresh strawberries, blueberries, raspberries, or a medley of berries tossed lightly in a touch of sugar bring a burst of freshness and a beautiful color contrast.
- Homemade Sauces: Drizzle your cake with a luscious homemade strawberry sauce or a vibrant homemade blueberry sauce. These fruit-forward sauces add moisture and intense fruit flavor.
- Whipped Cream: A dollop of freshly made whipped cream is an irresistible addition, adding another layer of airy softness and a touch of richness.
- Lemon Curd: For a delightful tangy counterpoint, a spoonful of bright and zesty microwave lemon curd offers a sophisticated flavor profile.
- Dulce de Leche: If you’re craving something rich and caramel-like, a drizzle of dulce de leche provides a luxurious sweetness that contrasts wonderfully with the cake’s lightness.
- Chocolate Shavings or Ganache: For the chocolate lovers, a light scattering of chocolate shavings or a thin drizzle of chocolate ganache can transform this classic into a decadent treat.
Angel Food Cake pairs wonderfully with a cup of tea or coffee, making it ideal for brunch, dessert, or an afternoon treat. Its elegant simplicity ensures it’s always a crowd-pleaser.
Storage & Freezing Tips
To ensure your Angel Food Cake remains as delicious as the day it was baked, proper storage is essential.
Storing Leftovers
Any leftover Angel Food Cake should be stored in an airtight container at room temperature for up to two days, or in the refrigerator for up to four days. Keeping it well-covered prevents it from drying out and absorbing other odors.
Freezing for Later
Yes, you can absolutely freeze Angel Food Cake! This is great for making ahead or saving leftovers. Wrap the cake tightly in plastic wrap, then place it in a freezer bag or a freezer-safe airtight container. It can be stored in the freezer for up to 3 months. When you’re ready to enjoy it, thaw the cake overnight in the refrigerator, then bring it to room temperature before serving for the best texture and flavor.
Troubleshooting Common Angel Food Cake Issues
Even experienced bakers can encounter challenges. Here’s a quick guide to common Angel Food Cake issues and how to prevent them:
- Cake Collapsed or Sank: This is a common issue. The main culprits are often greasing the pan (which prevents the cake from clinging and climbing), underbaking (the structure isn’t set), or not cooling it upside down immediately after baking. Ensure your pan is impeccably clean and ungreased, bake until a toothpick comes out clean, and always invert it to cool.
- Tough or Rubbery Texture: Overmixing the flour into the egg whites can develop gluten, leading to a tough cake. Always fold the dry ingredients gently and only until just combined. Deflating the egg whites by overworking them can also result in a dense, rubbery texture.
- Dense Layer at the Bottom: If you find a dense, slightly gummy layer at the bottom, it usually means the dry ingredients weren’t fully incorporated, or the folding technique wasn’t gentle enough, causing some of the flour mixture to settle. Ensure thorough but gentle folding.
- Sticky or Gummy Top: This can happen if the oven temperature is too low, leading to extended baking time and excess moisture buildup on the surface, or if the cake cools too slowly in a humid environment. Ensure your oven temperature is accurate.
- Cracked Top: While a few cracks are natural with Angel Food Cake, excessive cracking can indicate the oven temperature was too high, causing the exterior to set too quickly before the interior had a chance to fully rise.
Understanding these common issues will help you fine-tune your technique and achieve a perfect Angel Food Cake every time.
Pro Baking Tips for Angel Food Cake Success
- Always separate your egg whites and let them come to room temperature for about 30 minutes before whipping. This significantly improves their ability to whip up to full volume and stability.
- Sift the dry ingredients (cake flour and powdered sugar) together thoroughly, then gently fold them into the egg whites in four separate additions. This technique helps maintain the aeration in the egg whites and ensures an even distribution of dry ingredients.
- Never grease your angel food cake pan. The batter needs to cling to the sides of the pan as it bakes to rise to its full height and create its signature airy structure. Using a pan with a removable bottom can make removal much easier once cooled.
- Once the batter is in the pan, run a thin knife or skewer through it in a zig-zag motion. This removes any large air bubbles, preventing large holes from forming in your baked cake.
- After baking, cool the cake completely upside down in the pan. This is crucial to prevent the cake from collapsing on itself and maintaining its light, tall structure.
More Delightful Cake Recipes to Explore!
If you’ve enjoyed mastering this Angel Food Cake, you might love trying some of these other fantastic cake recipes:
- Banana Cake
- Rum Cake
- The Best Red Velvet Cake
- Classic White Cake
- Pineapple Upside Down Cake
Angel Food Cake Recipe
Summary
This is the ultimate Angel Food Cake recipe you will ever need! This homemade cake is super soft, light, airy, and turns out perfect every single time!
Prep Time: 25 mins
Cook Time: 45 mins
Cooling time: 2 hrs
Total Time: 1 hr 10 mins (plus cooling)
Servings: 12 slices
Ingredients
- 1 cup (115 grams) cake flour, spooned & leveled (homemade version here)
- 1 and 1/2 cups (180 grams) powdered sugar
- 1 and 1/2 cups egg whites, room temperature (approx. 10-12 large egg whites)
- 1 and 1/2 teaspoons cream of tartar
- 1/4 teaspoon salt
- 1 cup (200 grams) granulated sugar
- 1 and 1/2 teaspoons pure vanilla extract
Instructions
- Position oven rack to the lower third position. Preheat oven to 325°F (163°C).
- Sift the cake flour and powdered sugar together three times into a medium bowl. Set aside.
- In the bowl of a stand mixer fitted with the whisk attachment (or a large mixing bowl using an electric mixer), add the room temperature egg whites. Beat on low-medium speed until foamy.
- Add the cream of tartar and salt. Increase the speed to medium-high.
- Gradually add the granulated sugar, about one tablespoon at a time, and continue beating the egg whites until stiff, glossy peaks form. Add the vanilla extract and mix on low speed until just combined.
- Sift about one-fourth of the dry ingredients (flour and powdered sugar) over the beaten egg whites and gently fold it in using a rubber spatula. Repeat this process, folding in the remaining dry ingredients one-fourth at a time, until just combined and no streaks of flour remain.
- Scoop the batter into an ungreased 10-inch angel food cake pan or tube pan. Use a knife to cut through the batter in a zig-zag pattern to remove any large air pockets, then gently smooth the top into an even layer.
- Bake the cake at 325°F (163°C) for 40-45 minutes, or until the top is lightly golden brown and a toothpick inserted into the cake comes out clean.
- Remove the cake from the oven and immediately invert the cake pan onto a wire rack to cool completely (this can take up to 2 hours). Once cooled, use a thin knife to loosen the sides of the cake from the pan and carefully remove it. Slice into pieces, serve, and enjoy!
Notes
- You will need approximately 10-12 large egg whites to yield 1 and 1/2 cups for this recipe.
- Store leftover angel food cake in an airtight container at room temperature for up to two days, or in the refrigerator for up to four days.
- Freezing instructions: For longer storage, wrap the cooled cake tightly in plastic wrap, then place in a freezer bag or freezer-safe container. Store for up to 3 months. Thaw overnight in the refrigerator and bring to room temperature before serving.
- Recipe adapted from Better Homes and Gardens.
Cuisine: American
Course: Dessert
Author: Danielle Rye