

Effortless Perfection: The Ultimate Guide to Easy Fluffy Drop Biscuits
Imagine warm, tender, and incredibly flaky biscuits, fresh from the oven, without the fuss of rolling, cutting, or endless kneading. Our easy drop biscuit recipe delivers exactly that! Crafted with just seven simple ingredients, these culinary delights are ready to enjoy in less than an hour, making them perfect for any meal, any day of the week.
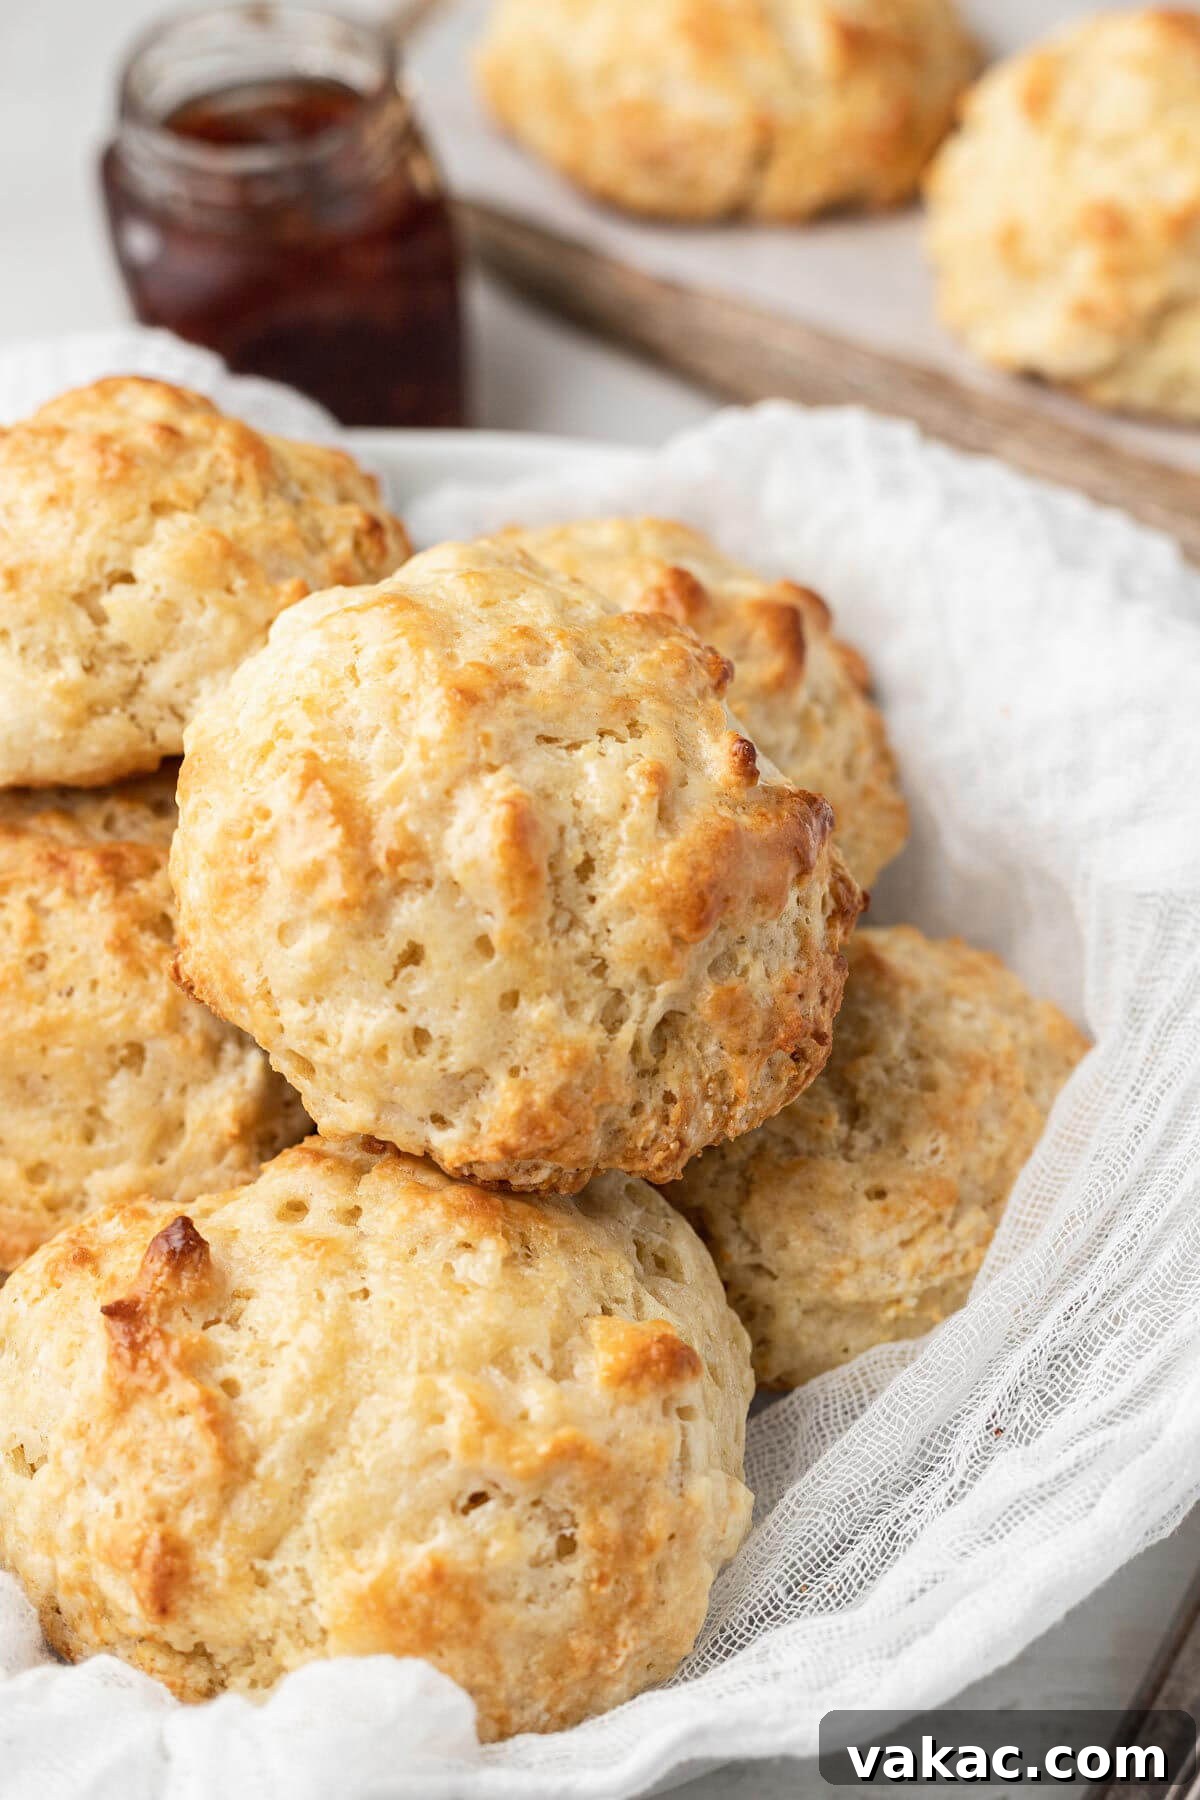
Classic buttermilk biscuits have always held a special place in the hearts of home bakers and food enthusiasts alike. Their towering layers and rich, buttery flavor are undeniably appealing. However, the traditional process of patting out dough, folding it multiple times, and meticulously cutting each individual biscuit can be quite time-consuming. When your craving for homemade biscuits strikes, but your schedule demands speed and simplicity, drop biscuits emerge as the ultimate solution.
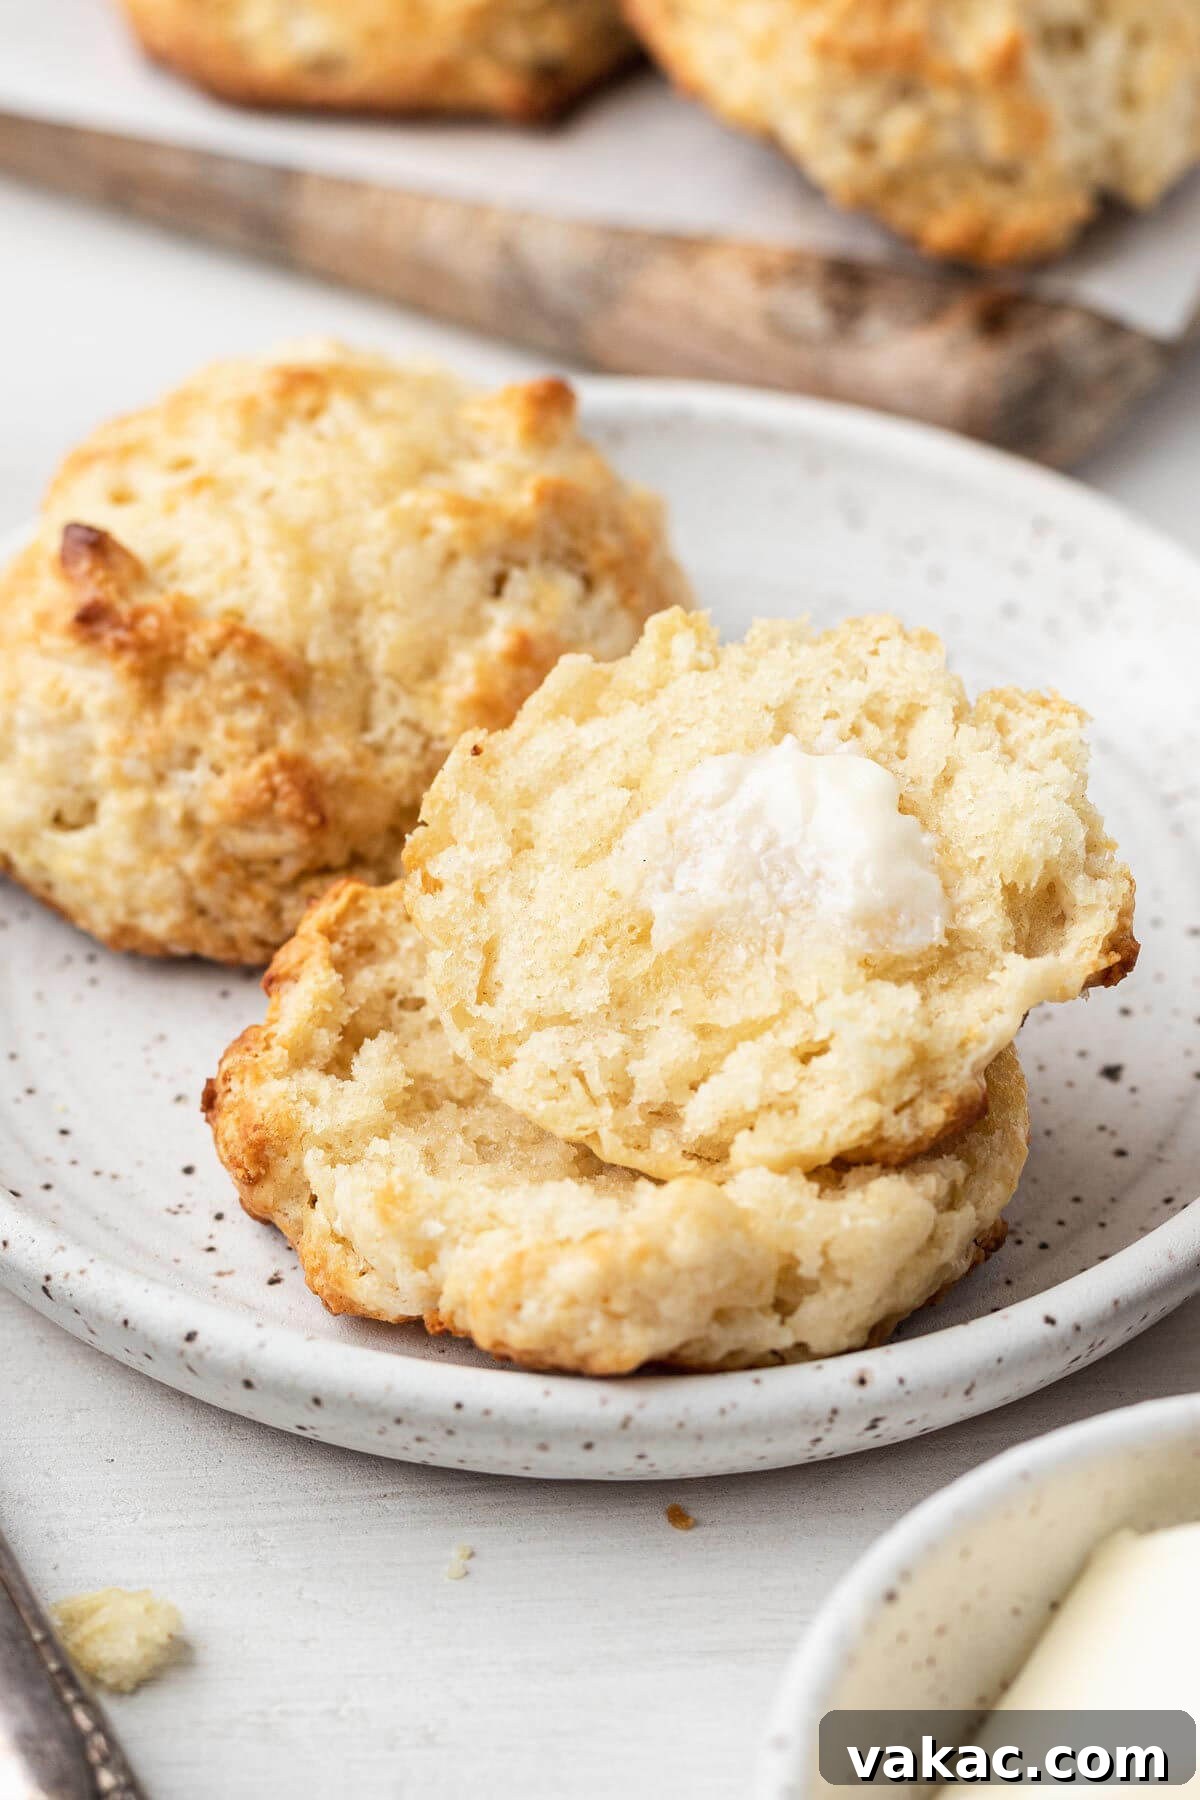
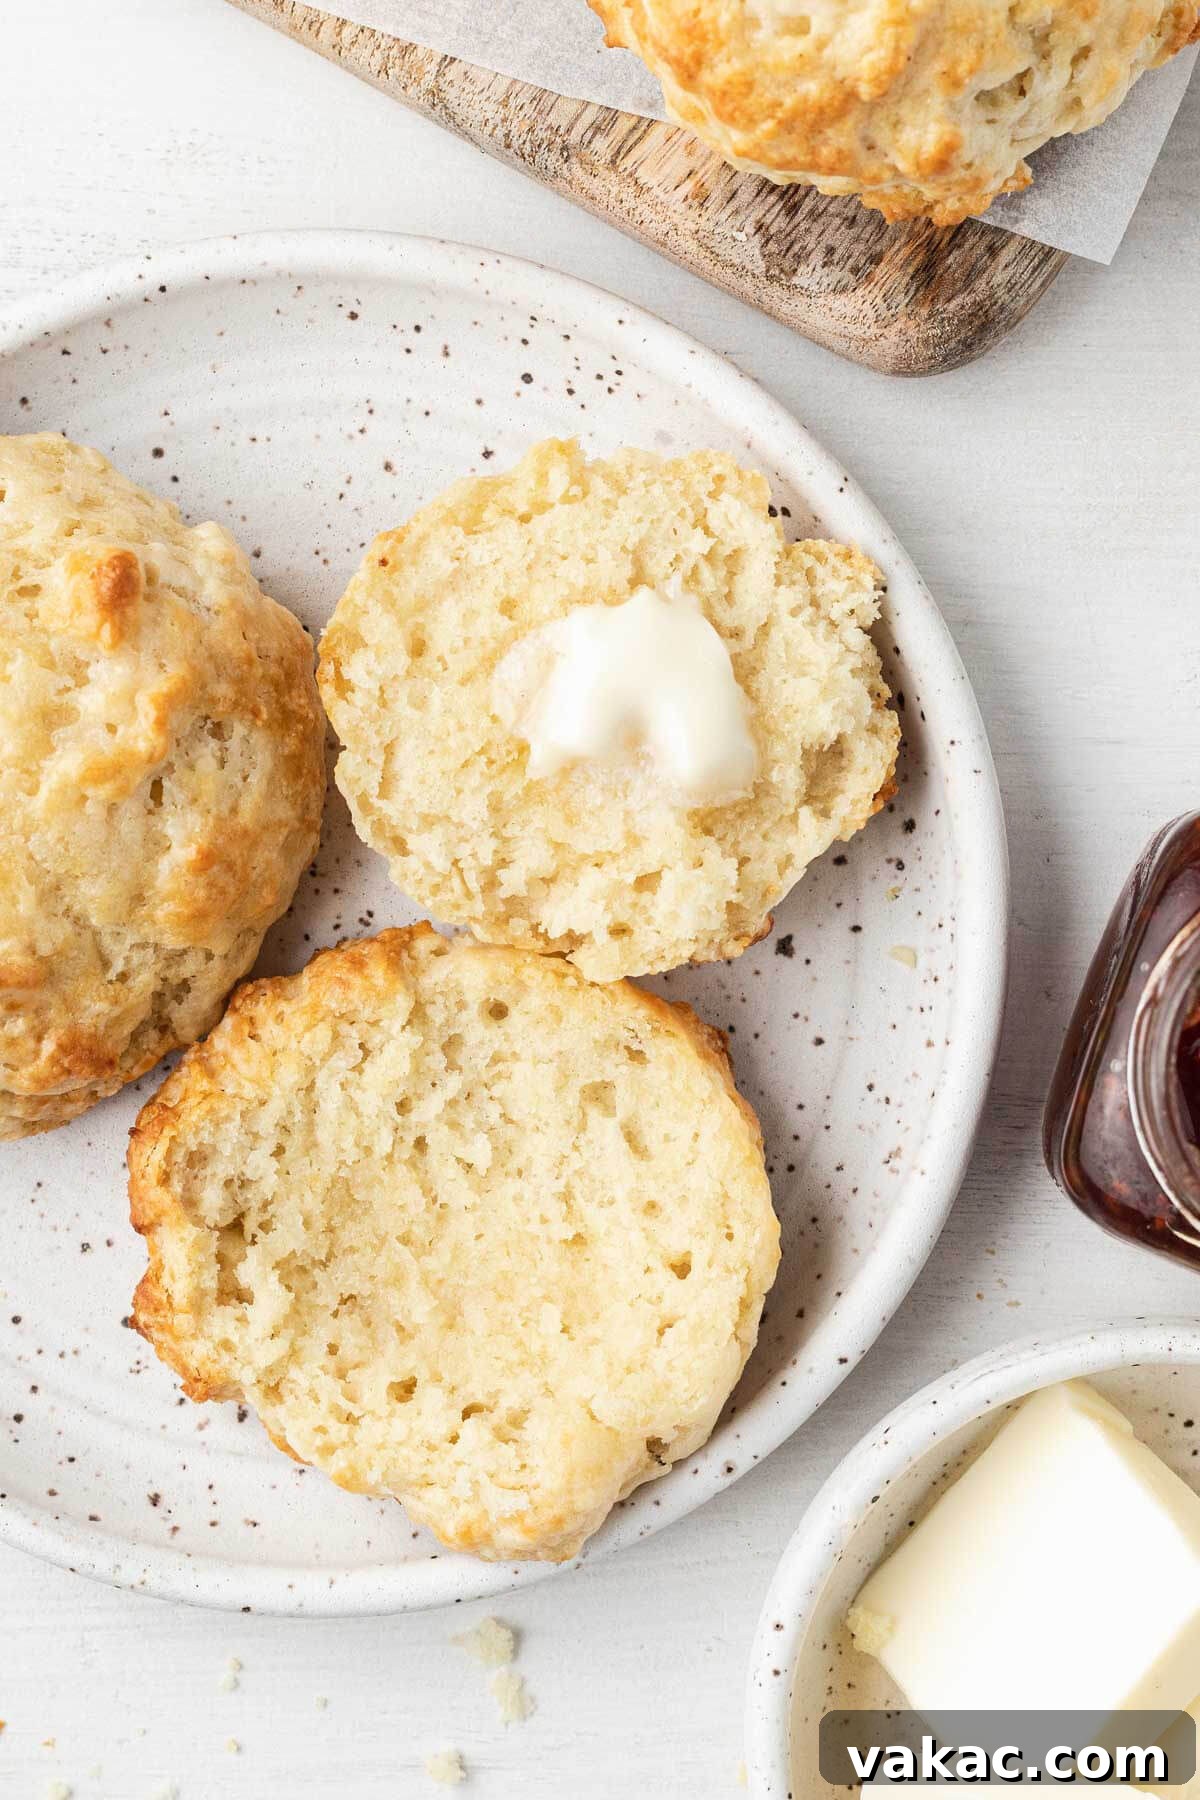
Drop biscuits, as their name suggests, skip the intricate shaping process entirely. The dough is simply mixed until combined, then scooped directly from the bowl onto a baking sheet. This straightforward method not only saves precious time but also minimizes mess, allowing you to enjoy fresh, warm biscuits with unprecedented ease. While they may boast a more rustic, irregular appearance compared to their uniform, cut counterparts, their flavor and texture are every bit as sensational. They are wonderfully soft, incredibly flaky, and possess that irresistible homemade charm that makes them a perfect accompaniment to a hearty bowl of soup or stew, or an essential base for comforting biscuits and gravy.
Why Choose Drop Biscuits? The Unrivaled Convenience
Beyond their delightful taste, drop biscuits offer several compelling advantages that make them a go-to recipe for busy individuals and families:
- Time-Saving: Eliminating the rolling and cutting steps drastically cuts down prep time. You can go from mixing bowl to golden biscuits in under an hour.
- Minimal Effort: No need for special tools like biscuit cutters or pastry boards. A single mixing bowl and a spoon or scoop are all you require.
- Less Mess: Fewer steps mean less flour on your countertop and less cleanup afterward.
- Rustic Charm: Their irregular shapes give them a homemade, comforting aesthetic that many find appealing. Each biscuit is uniquely charming.
- Beginner-Friendly: If you’re new to baking, drop biscuits are an excellent entry point into the world of homemade bread, building confidence without complex techniques.

Essential Ingredients for Flaky Drop Biscuits
The secret to truly spectacular drop biscuits lies not just in the technique, but also in the quality and temperature of your ingredients. Unlike many baking recipes that call for room temperature items, for these homemade drop biscuits, you want everything to be as cold as possible. This critical detail is what contributes to their exceptional flakiness and tender crumb. Let’s delve into the key players:
- All-Purpose Flour: The foundation of our biscuits. For accurate measurements and to prevent dense, dry biscuits, always spoon and level the flour into your measuring cup rather than scooping directly from the bag. This prevents over-packing and ensures a light texture.
- Baking Powder & Baking Soda: This dynamic duo is responsible for the biscuits’ rise and tender texture. Baking powder provides the initial lift, while baking soda reacts with the acidity in the buttermilk to give an extra boost and help with browning, creating that coveted golden crust.
- Granulated Sugar: Just a touch of sugar—typically two teaspoons—is all that’s needed to enhance the flavor of the dough, balancing the savory notes without making the biscuits overtly sweet.
- Salt: Essential for bringing out the flavors of all the other ingredients. If you opt to use salted butter, remember to reduce the amount of added salt in the recipe to about 3/4 teaspoon to maintain the perfect balance.
- Unsalted Butter (Cold): This is perhaps the most crucial ingredient for achieving those desirable flaky layers. It is absolutely vital that your butter is fridge-cold when added to the dry ingredients. As the cold butter pieces melt in the hot oven, they release steam, creating pockets of air that separate the layers of dough, resulting in an incredibly flaky biscuit.
- Buttermilk (Cold): The star liquid ingredient. Buttermilk not only adds a distinct tang and richness but also reacts with the baking soda to aid in leavening. You can use either reduced-fat or full-fat buttermilk; both will yield delicious results. If you find yourself without buttermilk, don’t fret! You can easily make your own substitute at home in about ten minutes using milk and a little lemon juice or vinegar. Ensure your homemade buttermilk is also chilled.
Step-by-Step Guide to Making Perfect Drop Biscuits
Creating these delightful buttermilk drop biscuits is surprisingly straightforward. You’ll be amazed at how quickly and easily they come together, requiring minimal equipment and just one mixing bowl for the majority of the process. Follow these simple steps for homemade biscuit perfection:
- Prepare Your Workspace and Oven: Begin by preheating your oven to a blazing 425°F (218°C). This high temperature is key to activating the leavening agents quickly and creating a crisp exterior while the interior stays tender. Line a large baking sheet with parchment paper or a silicone baking mat. This prevents sticking and makes cleanup a breeze.
- Combine Dry Ingredients: In a spacious mixing bowl, combine the all-purpose flour, baking powder, baking soda, granulated sugar, and salt. Use a whisk to thoroughly blend these ingredients, ensuring even distribution of the leavening agents. This prevents pockets of unmixed ingredients and promotes a uniform rise.
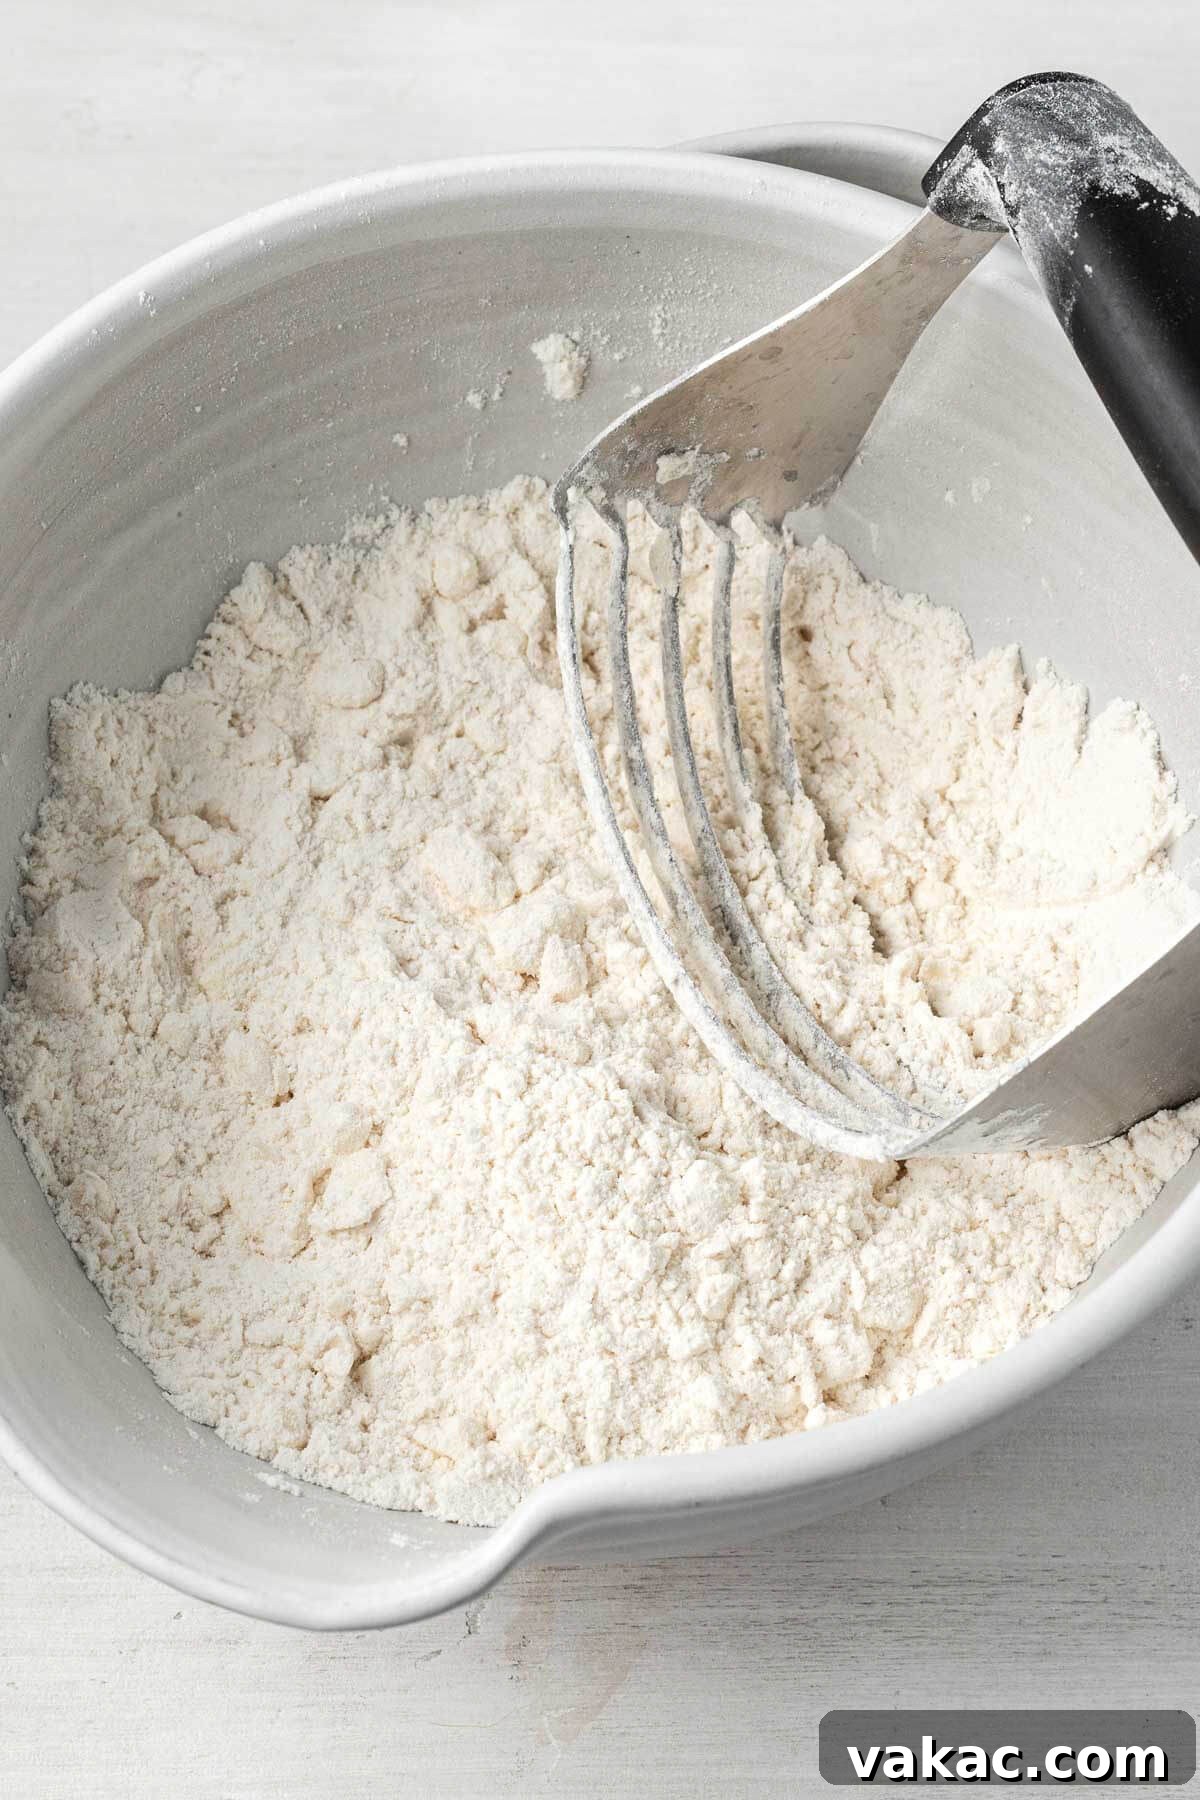
- Incorporate Cold Butter: Take 6 tablespoons of your very cold unsalted butter and cut it into small cubes. Add these cubes to the dry ingredients. Using a fork, a pastry cutter, or even two knives, work the butter into the flour mixture. The goal is to break the butter down until it resembles small pea-sized crumbs, with a few larger chunks still visible. Avoid using your hands too much, as the warmth from your hands can melt the butter, which we want to avoid. Those cold butter pockets are vital for flakiness! Reserve the remaining 2 tablespoons of butter for later.
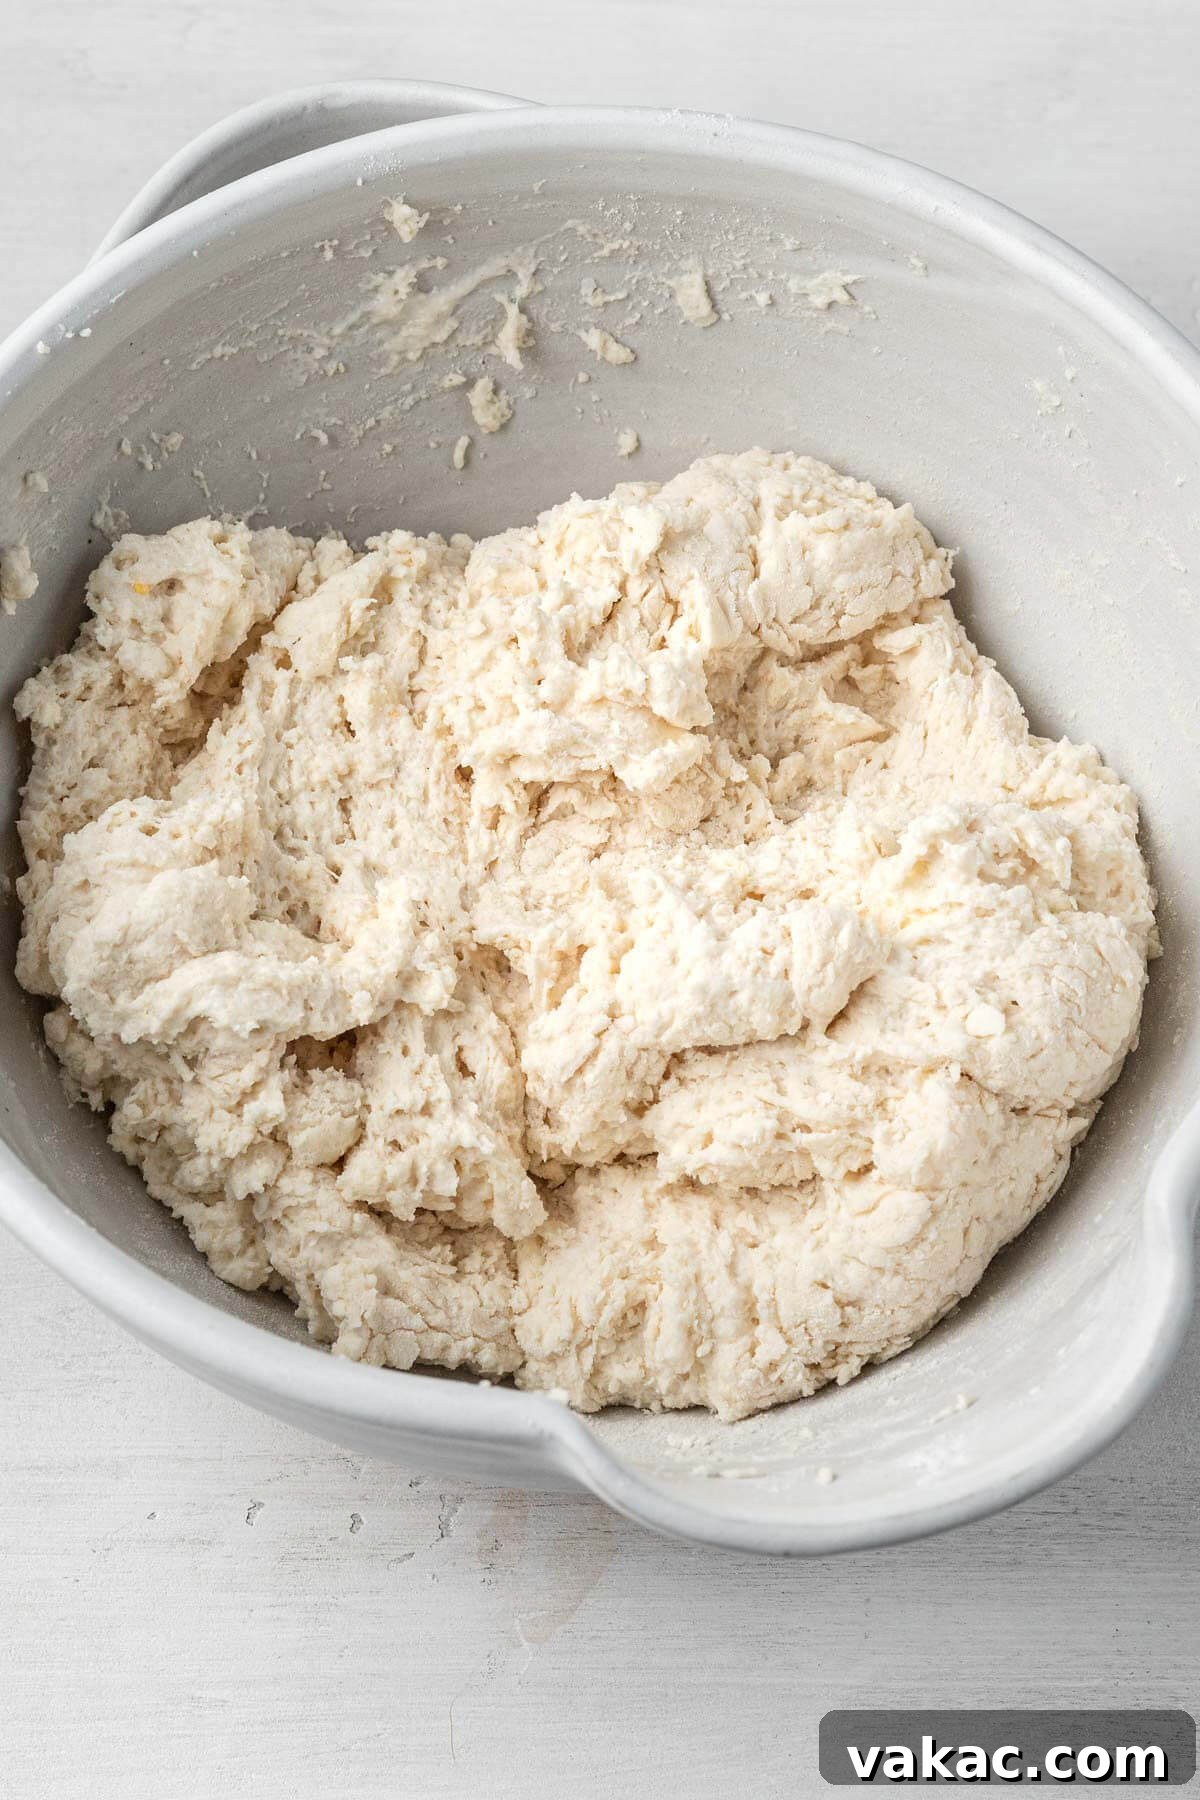
- Add Buttermilk and Mix Gently: Pour in the cold buttermilk. With a spoon or spatula, stir the mixture gently until the dough just comes together. It’s crucial not to overmix at this stage. Overworking the dough develops the gluten too much, leading to tough, chewy biscuits instead of soft, tender ones. A slightly sticky dough is perfectly normal and desired. If the dough appears excessively dry, you may add an additional 1 to 2 tablespoons of buttermilk, one spoonful at a time, until the right consistency is achieved.
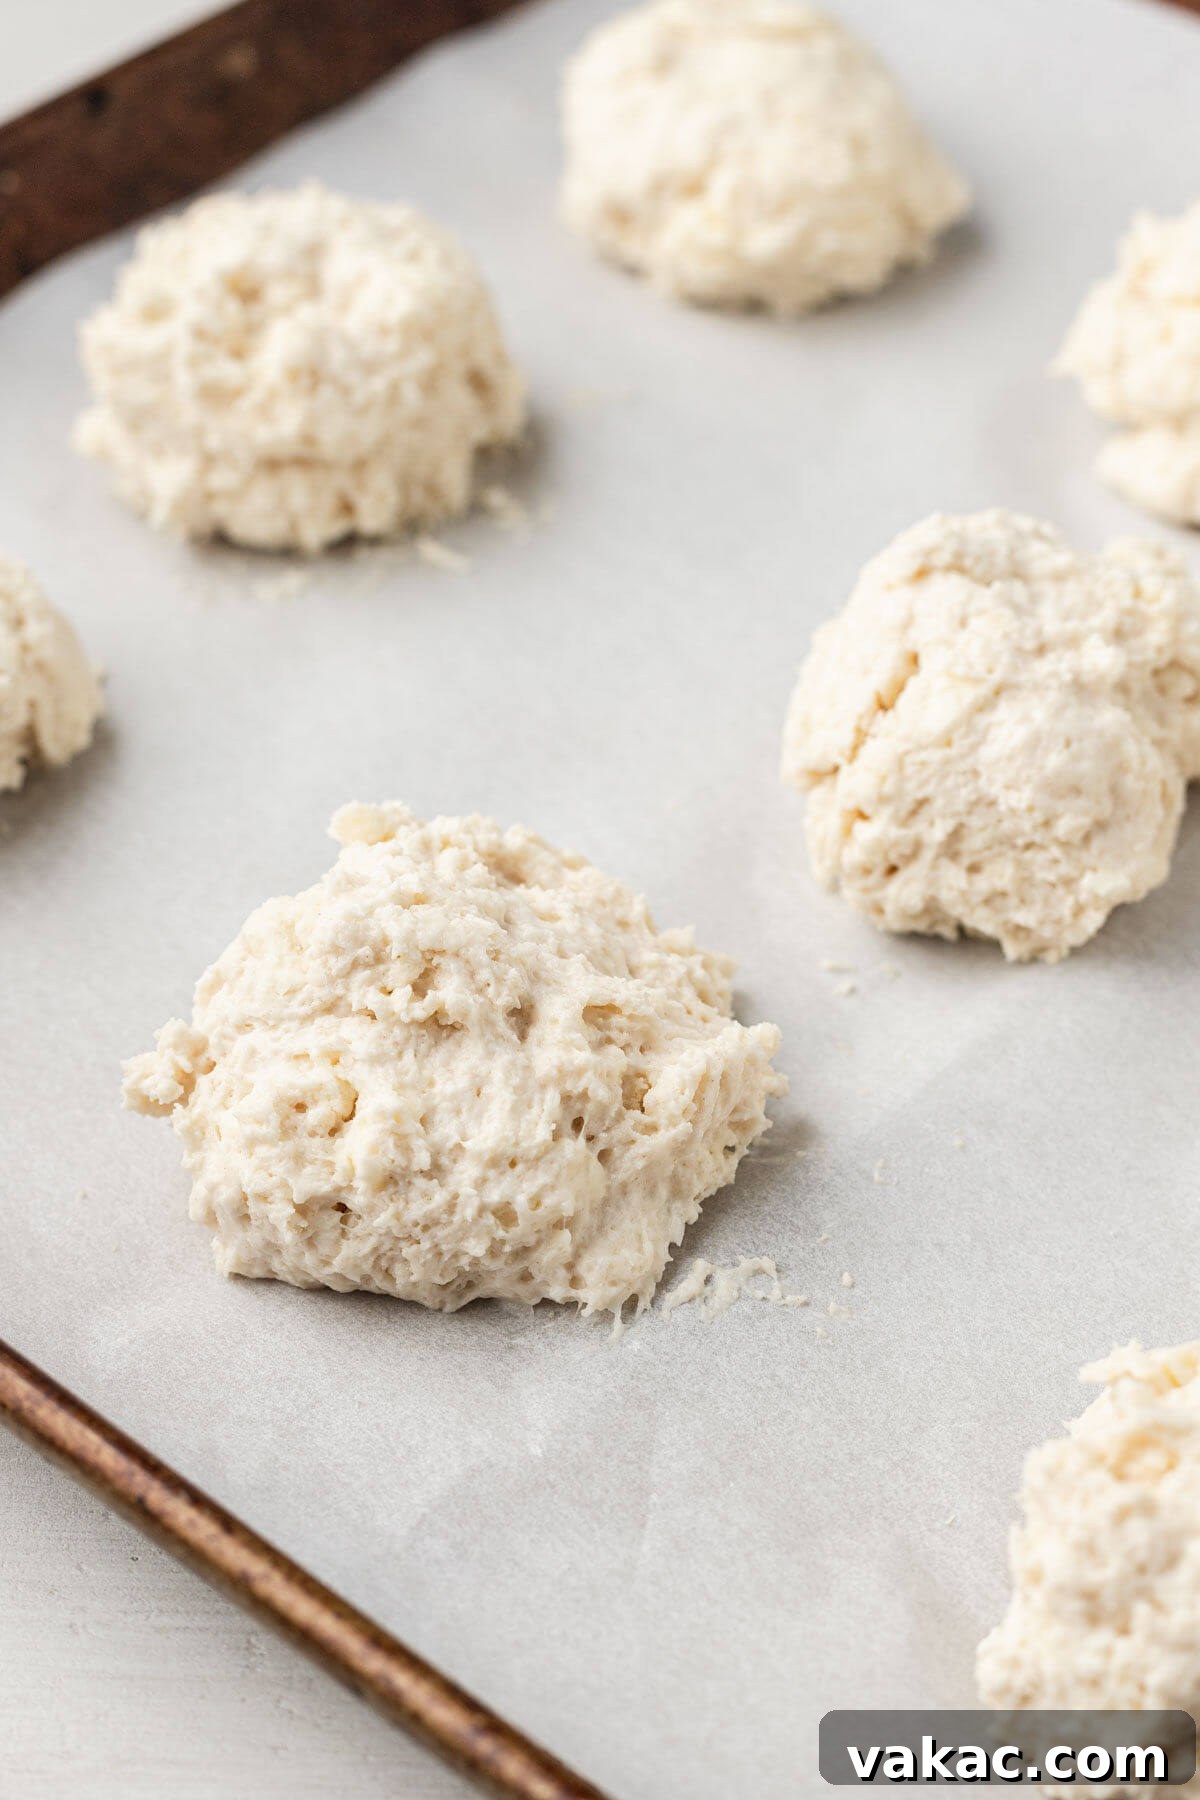
- Portion and Place on Baking Sheet: Using a 1/4 cup measuring cup (lightly coated with nonstick cooking spray to prevent sticking) or a large ice cream scoop, portion out mounds of dough. Drop these mounds onto your prepared baking sheet, leaving a little space between each biscuit to allow for expansion during baking. The rustic, irregular shape is part of the charm!
- Brush with Buttermilk: For an extra golden-brown top and a slightly richer flavor, lightly brush the tops of each biscuit with a little additional buttermilk before baking.
- Bake to Golden Perfection: Transfer the baking sheet to your preheated oven. Bake for approximately 15 to 20 minutes, or until the biscuits are beautifully golden brown on top and cooked through. Keep an eye on them towards the end of the baking time as ovens can vary.
- Finish with Melted Butter: Once the biscuits emerge from the oven, immediately melt the remaining 2 tablespoons of butter. Generously brush this melted butter over the warm tops of each biscuit. This adds an extra layer of rich flavor and a beautiful sheen.
- Cool Slightly and Serve: Allow the biscuits to cool for a few minutes on the baking sheet before transferring them to a wire rack or serving directly. They are best enjoyed warm!
Customizing Your Drop Biscuits: Endless Possibilities
One of the joys of making drop biscuits is how adaptable they are. While fantastic on their own, they serve as a perfect canvas for incorporating various mix-ins to suit your palate or complement your meal. Here are some fantastic options:
- Savory Enhancements:
- Cooked and Crumbled Bacon: Adds a smoky, salty crunch.
- Shredded Cheese: Cheddar, Gruyère, or Monterey Jack melt beautifully into the dough.
- Fresh Herbs: Chopped chives, rosemary, thyme, or dill can add a fragrant dimension.
- Parmesan Cheese: Grated Parmesan offers a sharp, umami boost.
- Everything Bagel Seasoning: Sprinkle on top before baking for a savory, textural crust.
- Garlic Powder & Onion Powder: For a more aromatic biscuit, blend these into the dry ingredients.
- Jalapeño: Finely diced for a touch of heat, especially good with cheese.
- Sweet Variations:
- Cinnamon Sugar: Mix a teaspoon of cinnamon and a tablespoon of sugar into the dry ingredients, and optionally sprinkle more on top before baking.
- Dried Fruit: Small amounts of dried cranberries, raisins, or chopped apricots can add sweetness and chewiness.
- Orange Zest: Grated orange zest adds a bright, citrusy note.
Experiment with different combinations to discover your personal favorite drop biscuit variation!
Scaling the Recipe: Halving or Doubling with Ease
This recipe is incredibly forgiving and easily scalable to fit your needs. Whether you’re baking for a small gathering or a larger crowd, you can confidently halve or double the recipe. Simply adjust all ingredient ratios proportionally, and then follow the baking instructions as written. Keep in mind that doubling the recipe might require you to bake in batches if your baking sheets are not large enough to accommodate all the biscuits with adequate spacing.

Storage and Freezing Instructions for Drop Biscuits
Freshly baked drop biscuits are best enjoyed warm, but you can certainly store them for later or prepare the dough in advance. Here’s how to ensure their freshness and longevity:
- Storing at Room Temperature: Once your biscuits have fully cooled, transfer them to an airtight container. Store them at room temperature, where they will remain fresh and delicious for up to four days. To reheat, a quick 20-30 second blast in the microwave will bring back their warmth and tenderness.
- Freezing Baked Biscuits: If you’ve baked too many or want to prep for future meals, cooled baked biscuits can be frozen. Wrap individual biscuits tightly in plastic wrap, then place them in a freezer-safe bag or container. They will keep well for up to 2-3 months. Reheat directly from frozen in a toaster oven or conventional oven at 300°F (150°C) for about 10-15 minutes, or until warmed through.
- Freezing Raw Biscuit Dough: For the ultimate convenience, you can freeze the raw biscuit dough. Scoop the dough mounds onto a parchment paper-lined baking sheet and place them in the freezer. Once the dough balls are solid (this usually takes 1-2 hours), transfer them to a freezer-safe bag or container. They can be stored in the freezer for up to 3 months. When you’re ready to bake, simply place the frozen dough balls on a prepared baking sheet and bake as directed, adding a few extra minutes to the baking time. If they start to brown too quickly, loosely cover them with aluminum foil until they are cooked through.
Expert Baking Tips for Success
Achieving truly great drop biscuits is simple, especially with a few insider tips:
- Dough Consistency is Key: The dough should be slightly sticky to the touch, not dry or crumbly. If your dough feels too dry, add buttermilk one tablespoon at a time until the desired stickiness is reached. This ensures a moist interior.
- Handle with Care (Avoid Overmixing): When incorporating the buttermilk, stir only until the dry ingredients are just moistened and the dough comes together. Overmixing is the enemy of tender biscuits, as it overdevelops the gluten, resulting in a tough texture. A few lumps are fine!
- Keep That Butter Cold: We can’t stress this enough! Cold butter is paramount for flaky biscuits. If your kitchen is warm or you’ve handled the dough quite a bit, don’t hesitate to place the baking sheet with the formed biscuits in the freezer for 10-15 minutes before baking. This re-chills the butter, guaranteeing maximum flakiness.
- Serving Versatility: Drop biscuits are incredibly versatile. They are phenomenal served with savory toppings like sausage gravy, alongside soups and stews, or as a dinner roll. For a sweeter treat, slather them with butter and your favorite jams, jellies, honey, or preserves. They also make an excellent base for strawberry shortcake!
- High Heat for High Rise: Baking at a high temperature (425°F/218°C) is crucial. The intense heat causes the moisture in the butter to turn into steam rapidly, forcing the layers of the biscuit apart and creating a high, fluffy rise.
More Savory Bread Recipes to Elevate Your Table!
If you’ve enjoyed the simplicity and deliciousness of these drop biscuits, you might love exploring other easy-to-make savory bread recipes:
- Classic Homemade Cornbread: A Southern staple, perfect with chili or BBQ.
- Hearty Beer Bread: Incredibly simple to make with just a few ingredients and a bottle of your favorite beer.
- Traditional Irish Soda Bread: A quick bread known for its dense texture and savory flavor.
- Irresistible Bacon Cheddar Biscuits: Another fantastic biscuit variation packed with flavor.
Recipe Video
For a visual guide and to see exactly how to prepare these incredible drop biscuits, watch the full video tutorial below:
(Video coming soon!)

Drop Biscuits Recipe
Prep Time: 20 mins
Cook Time: 20 mins
Total Time: 40 mins
No rolling or cutting dough required for these easy drop biscuits! They’re made with seven simple ingredients and take less than an hour to make.
Ingredients (Yields 10 biscuits)
- 2 cups all-purpose flour (spooned & leveled) (250 grams)
- 2 teaspoons baking powder
- ½ teaspoon baking soda
- 2 teaspoons granulated sugar
- 1 teaspoon salt
- ½ cup cold unsalted butter, divided (115 grams)
- 1 cup cold buttermilk (240 ml)
Instructions
- Preheat the oven to 425°F (218°C). Line a large baking sheet with parchment paper or a silicone baking mat and set aside.
- In a large mixing bowl, whisk the flour, baking powder, baking soda, granulated sugar, and salt together until well combined.
- Cube 6 tablespoons (85 grams) of the cold butter and add it to the dry ingredients. (Set aside the remaining 2 tablespoons (30 grams) for later.)
- Cut the butter into the dry ingredients using a pastry cutter or a fork until you have small pea-sized crumbs. Some larger chunks are acceptable.
- Add the cold buttermilk and stir only until the dough just comes together. Do not overmix the dough, or the biscuits will become tough. If the dough is too dry, add an extra 1 to 2 tablespoons (15 to 30 ml) of buttermilk as needed, one spoonful at a time.
- Scoop ¼ cup mounds of dough at a time onto the prepared baking sheet, ensuring you leave a little room between each one. You can use a ¼ cup measuring cup coated with nonstick cooking spray or a large scoop for this step.
- Brush the tops of each biscuit with a small amount of additional buttermilk.
- Bake for 15 to 20 minutes, or until the biscuits are beautifully browned and cooked through.
- Remove from the oven. Melt the remaining 2 tablespoons (30 grams) of butter. Brush the top of each warm biscuit generously with the melted butter.
- Allow to cool slightly on the baking sheet before serving to allow them to set.
Notes
- Storage Instructions: Baked and cooled biscuits may be stored in an airtight container at room temperature for up to 4 days. Reheat for 20 to 30 seconds in the microwave for best results, if desired.
- Freezing Instructions: Scoop the raw biscuit dough onto a parchment-lined baking sheet and transfer to the freezer. Once the biscuits are frozen solid, transfer them to a large freezer bag and freeze for up to 3 months. The biscuits may be baked from frozen, but you will need to add a few extra minutes to the baking time. If they begin to brown too much before they’re cooked through, simply cover with a piece of foil until they’re done.
Cuisine: American
Course: Breakfast, Side Dish
Author: Danielle Rye