
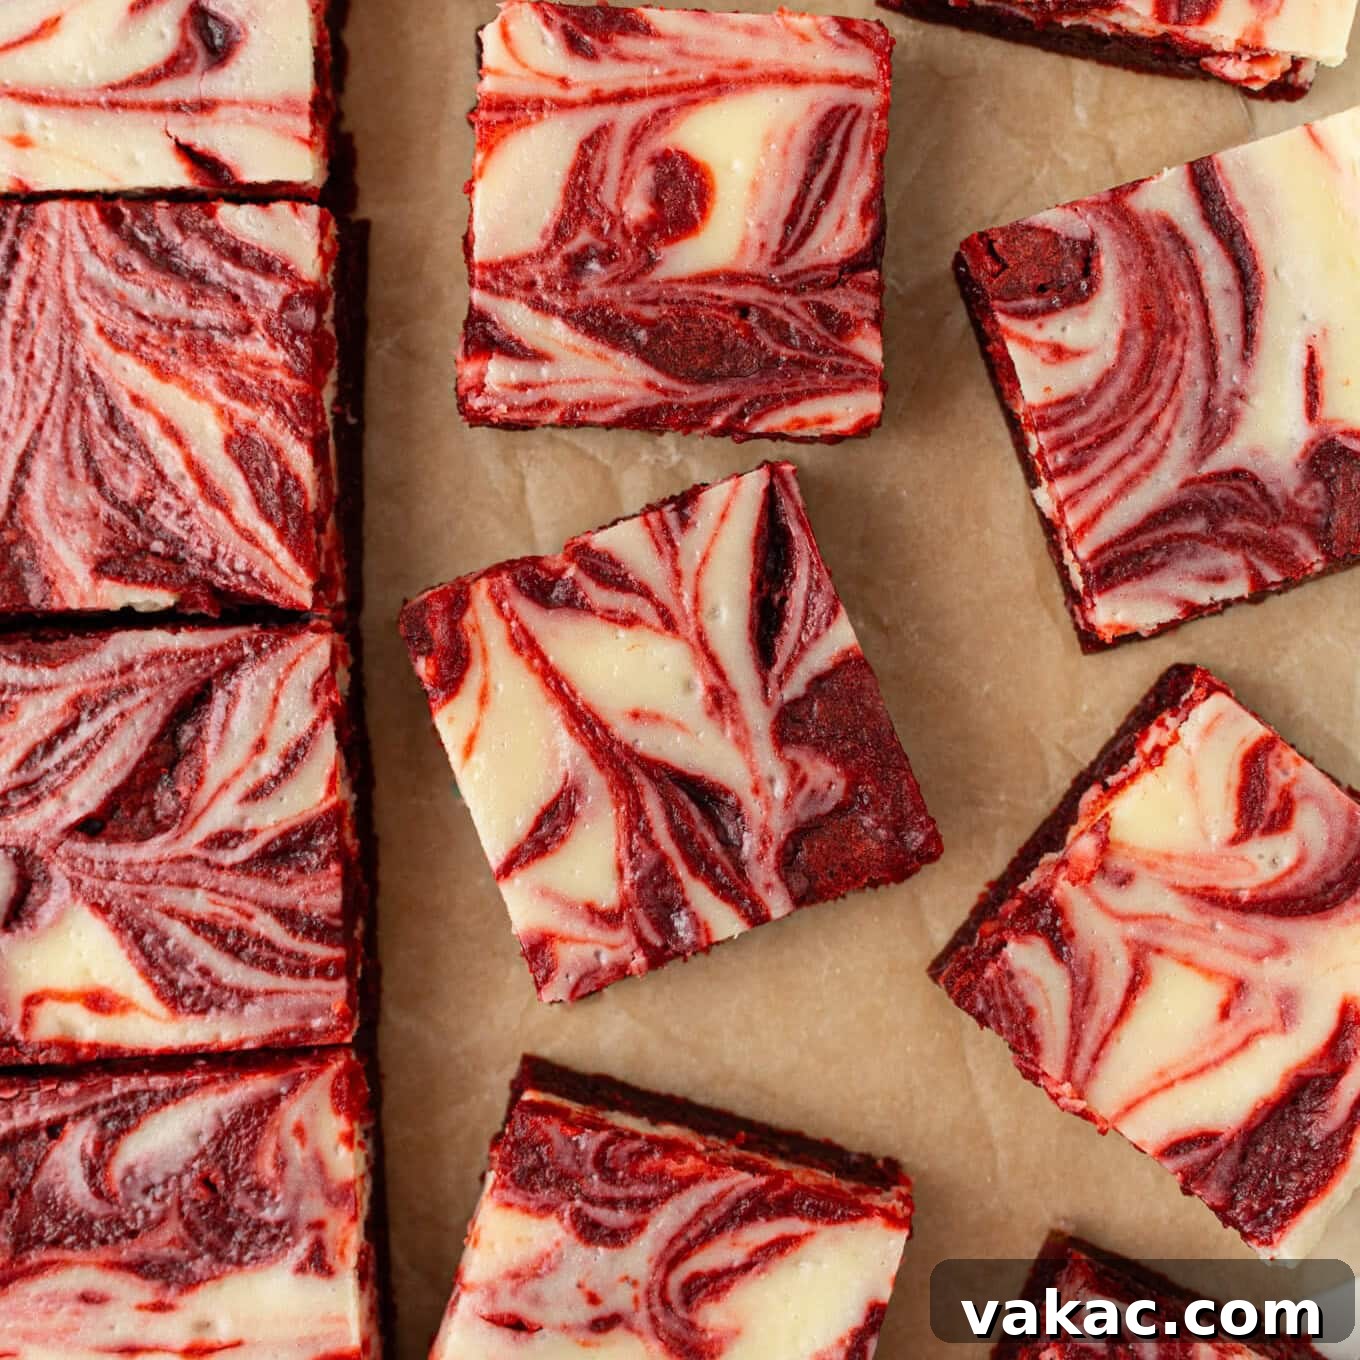
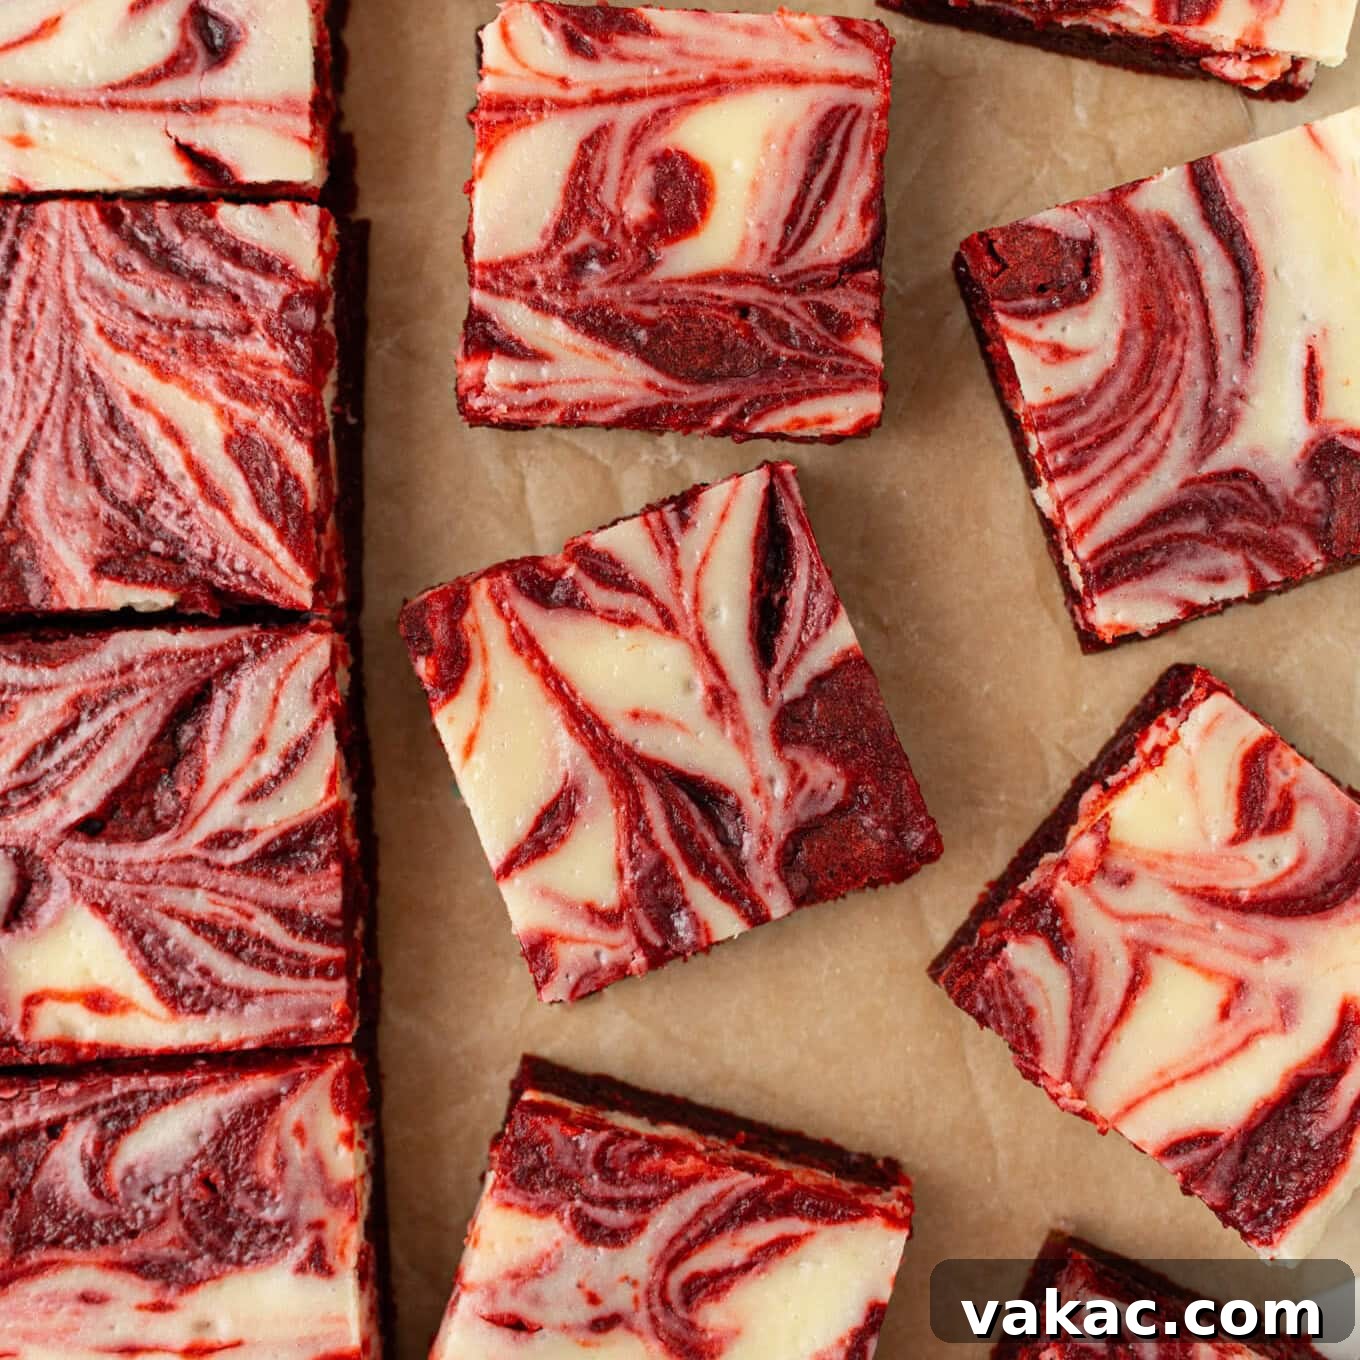
Prepare to delight your senses with these truly exceptional Red Velvet Cheesecake Brownies! This recipe delivers an unbelievably fudgy texture combined with a creamy, tangy cheesecake swirl, all in one stunning dessert. What sets these brownies apart is not just their incredible flavor, but also how remarkably quick and easy they are to prepare. Both the vibrant red velvet brownie batter and the luscious cheesecake topping are effortlessly mixed in separate bowls, streamlining your baking process. The captivating swirl, a visual hallmark of this decadent treat, is surprisingly simple to create, requiring nothing more than a butter knife or a humble toothpick to achieve a professional-looking finish. Get ready to impress with minimal effort!
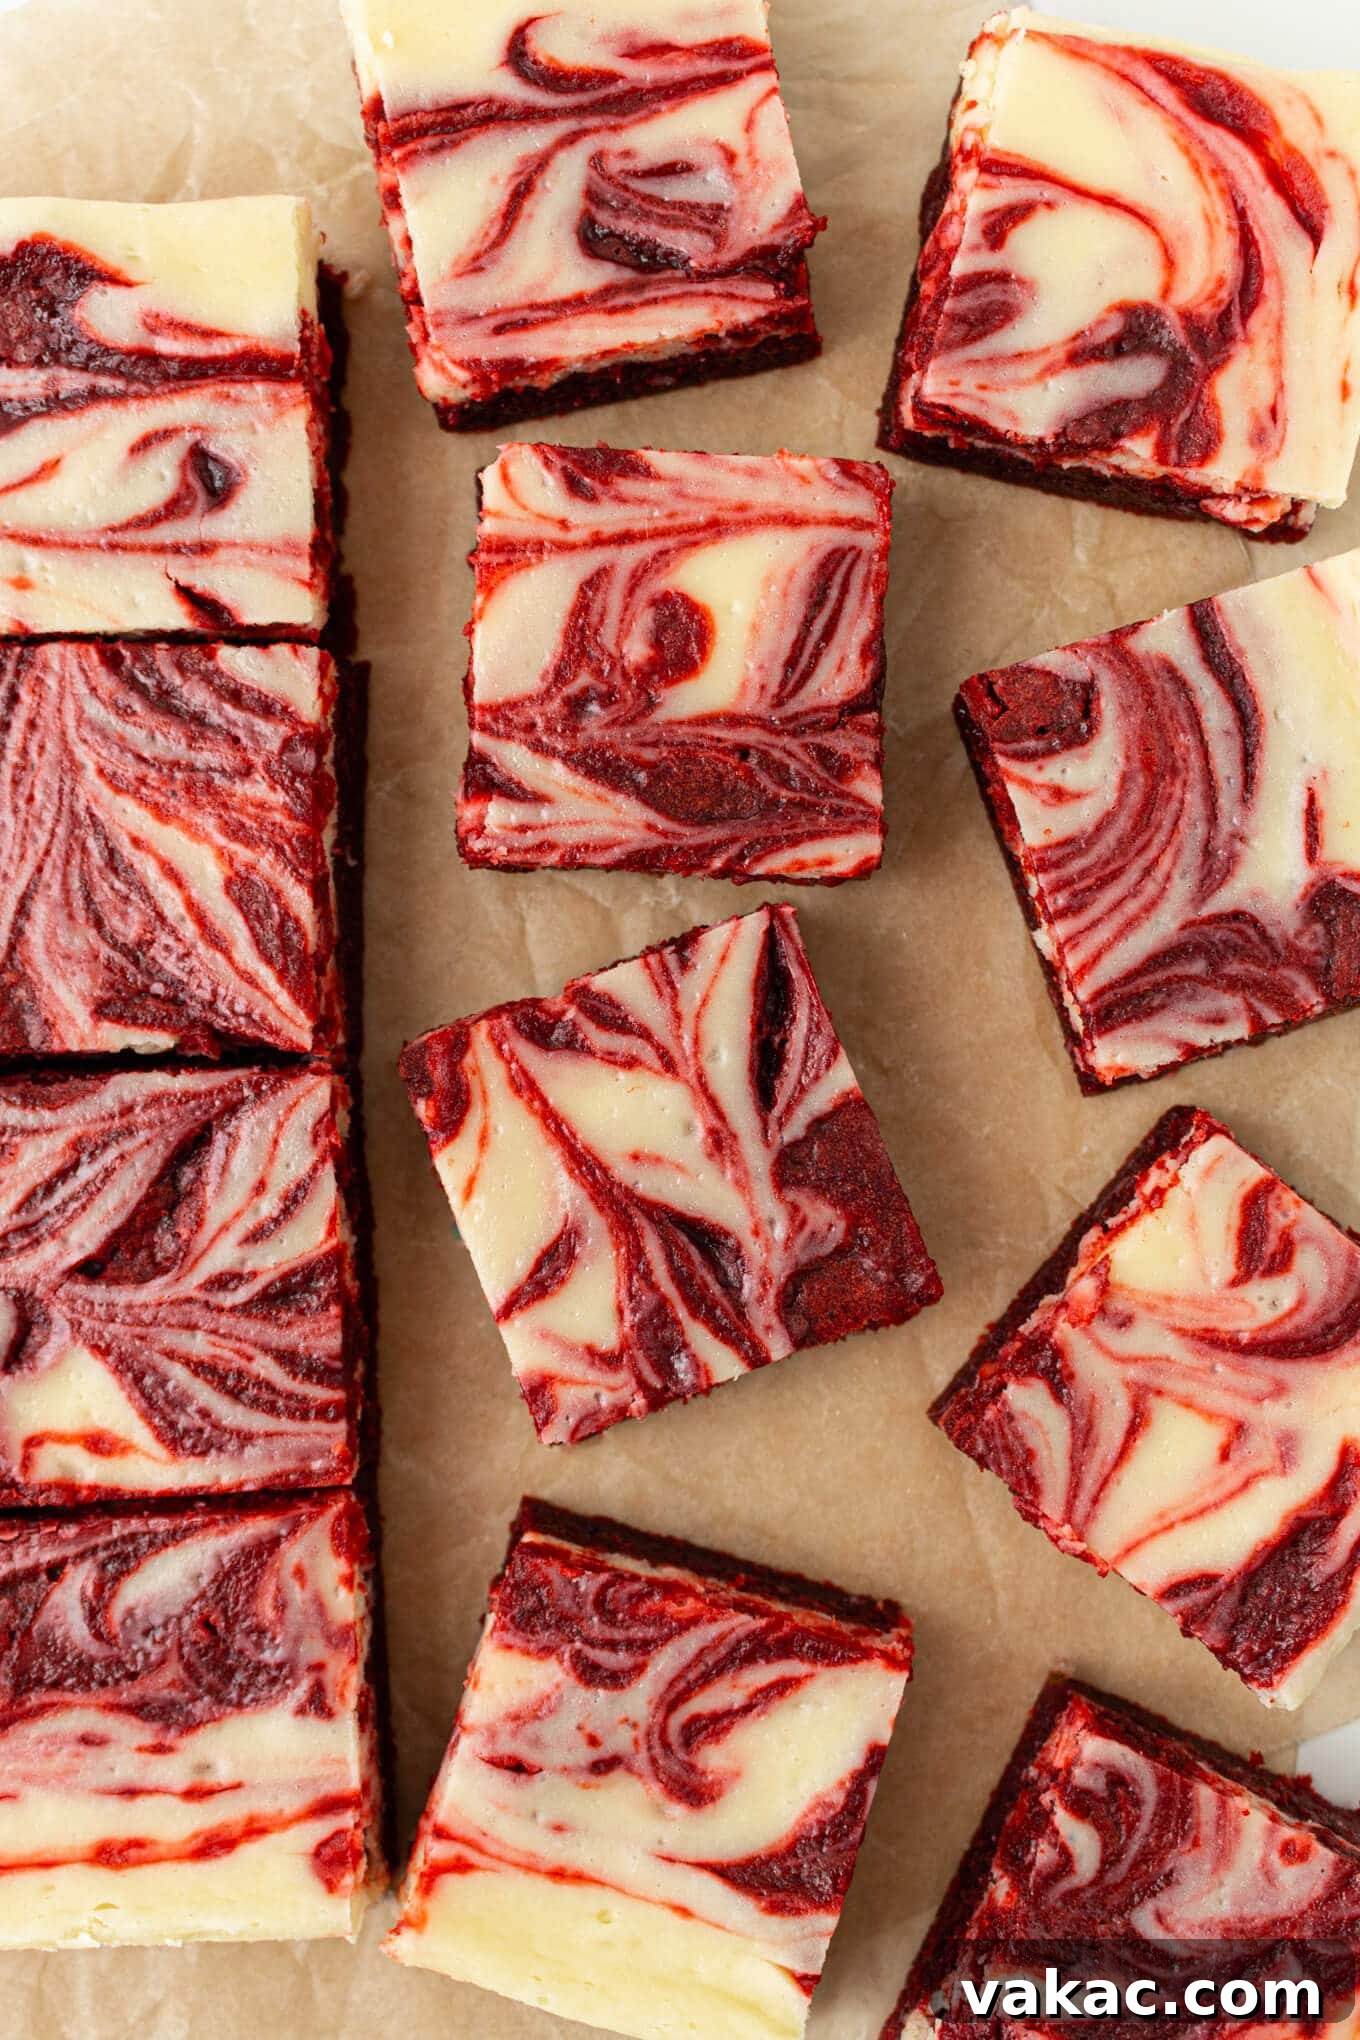
Indulge in the Best of Both Worlds: Red Velvet Meets Cheesecake
This innovative recipe brings together the comforting familiarity of classic cheesecake brownies with the sophisticated charm of red velvet cake. It’s a culinary match made in heaven, resulting in a dessert that is both simple to execute and profoundly delicious. My journey to perfecting these brownies involved adapting a beloved red velvet brownie recipe, fine-tuning it to ensure maximum fudginess and that iconic deep cocoa note. This was then paired with an incredibly straightforward cheesecake batter, made with just four essential ingredients, creating a beautiful contrast.
The end product is a batch of thick, exquisitely fudgy brownies where each layer holds its own, neither overshadowing the other. You’ll experience the distinct, rich cocoa undertones of the red velvet brownie alongside the bright, tangy creaminess of the cheesecake. This delightful interplay of flavors and textures is truly what makes these brownies so irresistible. They’re more than just a dessert; they’re an experience.
Beyond their exquisite taste, these Red Velvet Cheesecake Brownies are incredibly versatile for various occasions. Their vibrant color and elegant swirl make them an ideal choice for romantic celebrations like Valentine’s Day or anniversaries. Yet, their ease of assembly means they’re also perfect for a quick, impressive treat when unexpected guests arrive, or simply when you’re craving something special without all the fuss. Their beauty and deliciousness ensure they’re always a welcome addition to any gathering, big or small.
Demystifying Ingredients: Your Guide to Perfect Brownies
While the recipe itself is straightforward, understanding the role of key ingredients can elevate your Red Velvet Cheesecake Brownies from good to absolutely outstanding. Let’s dive into the specifics that ensure success.
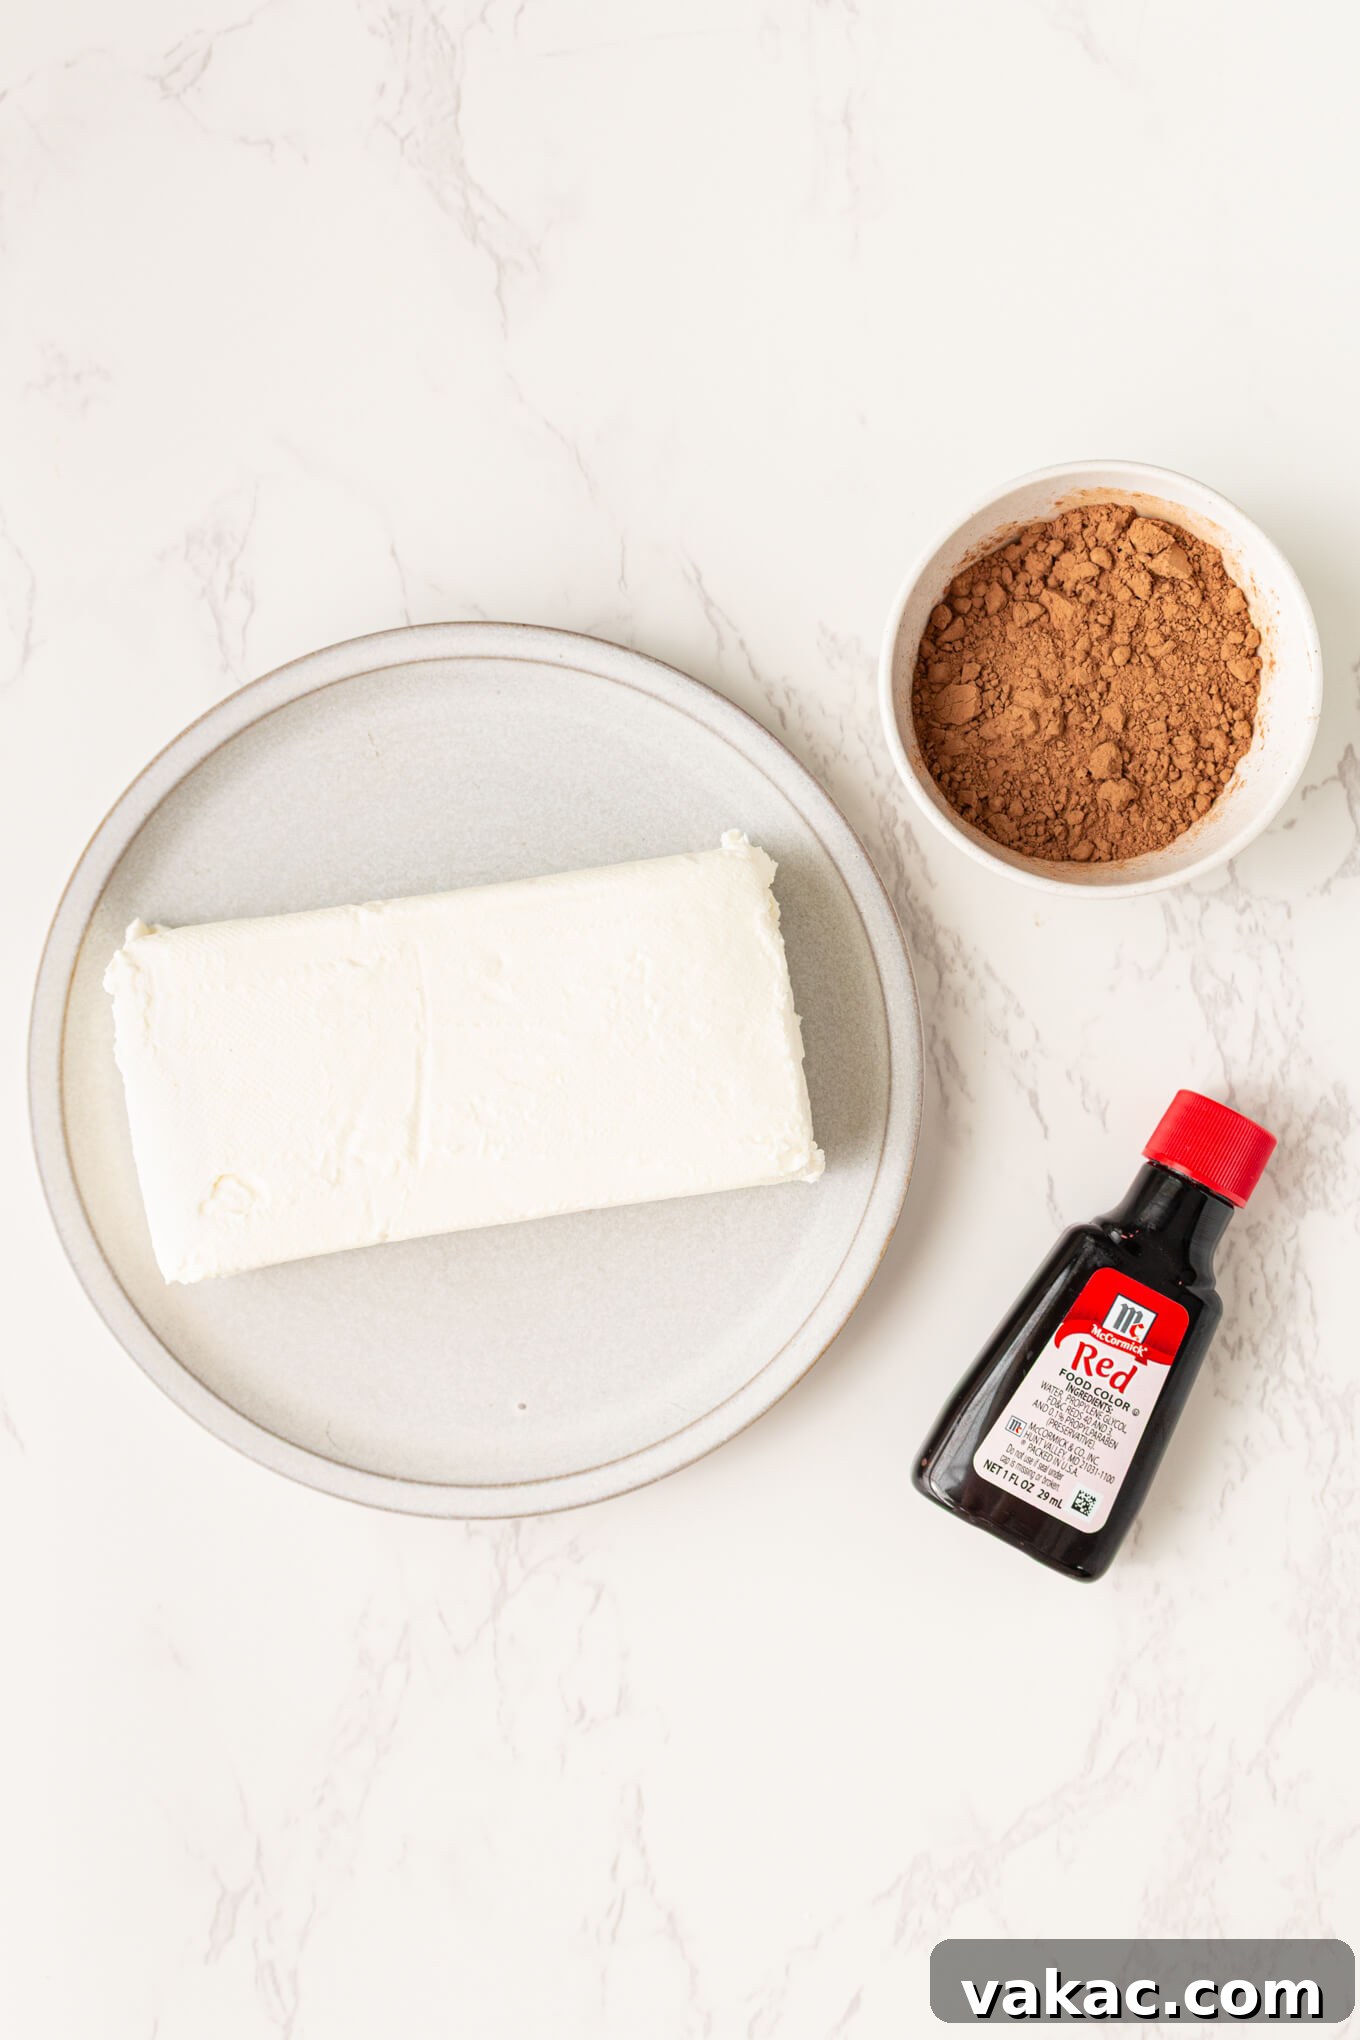
Cream Cheese: The Secret to a Silky Cheesecake Layer
The foundation of a perfect cheesecake swirl lies in your choice of cream cheese. It is absolutely essential to use a block of full-fat, foil-wrapped cream cheese. Varieties labeled “whipped,” “light,” or those sold in plastic tubs are simply not suitable for baking in this manner. These alternatives contain higher water content and various stabilizers that will result in a cheesecake layer that is too soft, potentially runny, and prone to cracking or sinking. For a dense, creamy, and beautifully set cheesecake layer that stands proudly against the fudgy brownie, always stick to the traditional brick-style cream cheese. Its higher fat content ensures the desired rich texture and stability.
Cocoa Powder: More Than Just Color
To achieve the authentic flavor profile and vibrant red hue synonymous with red velvet, I highly recommend using natural unsweetened cocoa powder, not Dutch process. The distinction is crucial: natural cocoa is acidic, which reacts with baking soda (often used in red velvet recipes, even if not explicitly in this brownie batter, it contributes to overall balance) to create a specific flavor and helps the red color pop. Dutch process cocoa, on the other hand, has been treated to neutralize its acidity, resulting in a darker color and a milder flavor. If you use Dutch process cocoa, your brownies will likely appear more brown than red, losing that signature appeal. Natural cocoa powder provides a slightly sharper, more complex chocolate flavor that perfectly complements the tangy cheesecake, enhancing the overall taste experience. For a deeper understanding of these two types, you might find this article on the difference between natural and Dutch process cocoa powder incredibly informative.
Red Food Coloring: The Signature Red Velvet Aesthetic
The striking red color is what gives “red velvet” its name and appeal. For the most vibrant results, liquid red food coloring is my go-to. However, not all food colorings are created equal. Opt for a high-quality brand to ensure a deep, true red without having to use an excessive amount, which can sometimes alter the batter’s consistency or flavor. My personal preference leans towards McCormick, a brand renowned for its consistent and potent coloring. Don’t be afraid to add the recommended amount; a good quality food coloring will deliver that iconic, eye-catching hue, transforming your brownies into a true red velvet masterpiece.
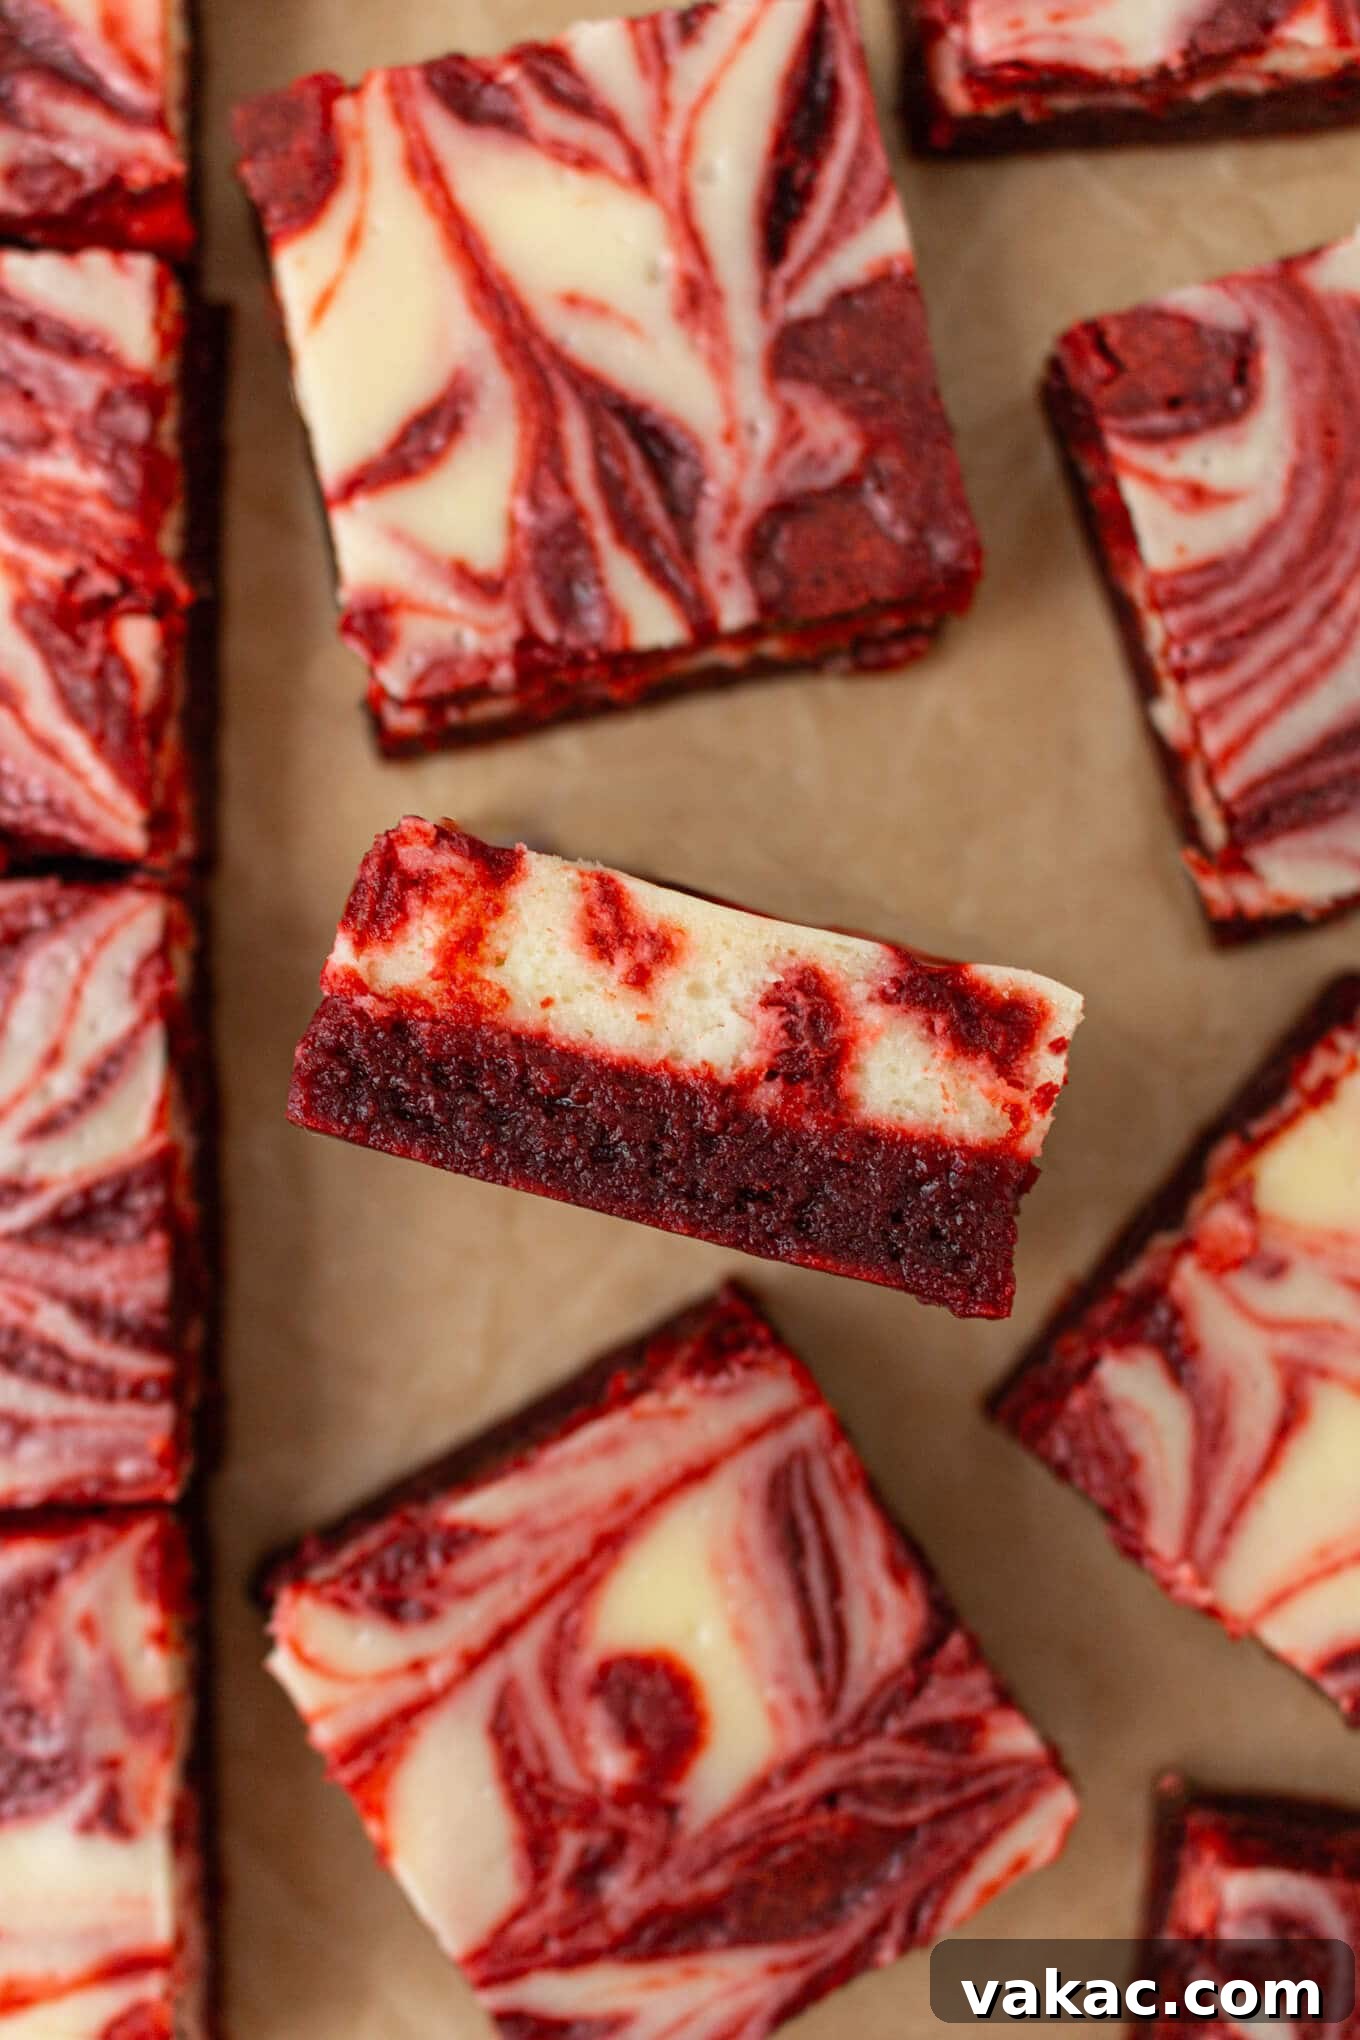
Achieving Brownie Perfection: Essential Tips for Success
Baking brownies can seem simple, but a few expert tips can make all the difference, ensuring your Red Velvet Cheesecake Brownies are flawlessly fudgy, beautifully structured, and utterly delicious. Pay close attention to these details:
- Always Line Your Pan for Easy Release: Given the incredibly moist and fudgy nature of these brownies, they can be quite delicate and prone to sticking. To guarantee seamless removal from the pan and clean, perfect slices, always line your baking pan with either parchment paper or aluminum foil. Make sure to leave a generous overhang on the sides; this acts as a convenient sling, allowing you to easily lift the entire cooled slab of brownies out. Don’t forget to lightly spray the lining with nonstick cooking spray for an extra layer of insurance against sticking. This simple preparatory step is crucial for a frustration-free experience.
- Crucial Room Temperature Ingredients: This is a non-negotiable step for optimal results. Using cold cream cheese and eggs directly from the refrigerator can lead to several problems: a lumpy cheesecake batter that won’t be smooth, and a higher risk of the cheesecake layer cracking during baking or cooling. Cold ingredients resist emulsifying properly, resulting in a less uniform texture. To quickly bring eggs to room temperature, place them in a bowl of warm water for 5 to 10 minutes. For cream cheese, you can either let the unopened package sit on the counter for at least an hour, or refer to my comprehensive guide on how to soften cream cheese quickly. Proper temperature ensures a smooth, homogeneous batter and a beautifully set cheesecake.
- Mindful Mixing of the Cheesecake Egg: When incorporating the egg into the cheesecake mixture, resist the urge to overmix. Excessive beating can incorporate too much air into the batter, causing the cheesecake layer to puff up excessively in the oven, only to dramatically crack and sink as it cools. The ideal cheesecake layer should be dense and creamy, not airy. To avoid this, mix the egg on the lowest speed setting of your stand or handheld mixer, just until it is barely combined and no streaks of yolk remain. Always stop and scrape down the sides and bottom of the bowl to ensure everything is fully incorporated without overworking.
- The Golden Rule: Do Not Overbake! This is perhaps the most vital tip for achieving that signature fudgy brownie texture. Determining doneness can be tricky, especially with a layered dessert. For genuinely fudgy brownies, you’re looking for a toothpick inserted into the center to come out *mostly* clean, with a few moist crumbs still attached. If the toothpick comes out completely clean, your brownies are likely overbaked, resulting in a drier, more cake-like texture rather than the rich, gooey fudginess you desire. A slightly underbaked brownie is preferable to an overbaked one for maximum indulgence. The residual heat in the pan will continue to cook them slightly as they cool.
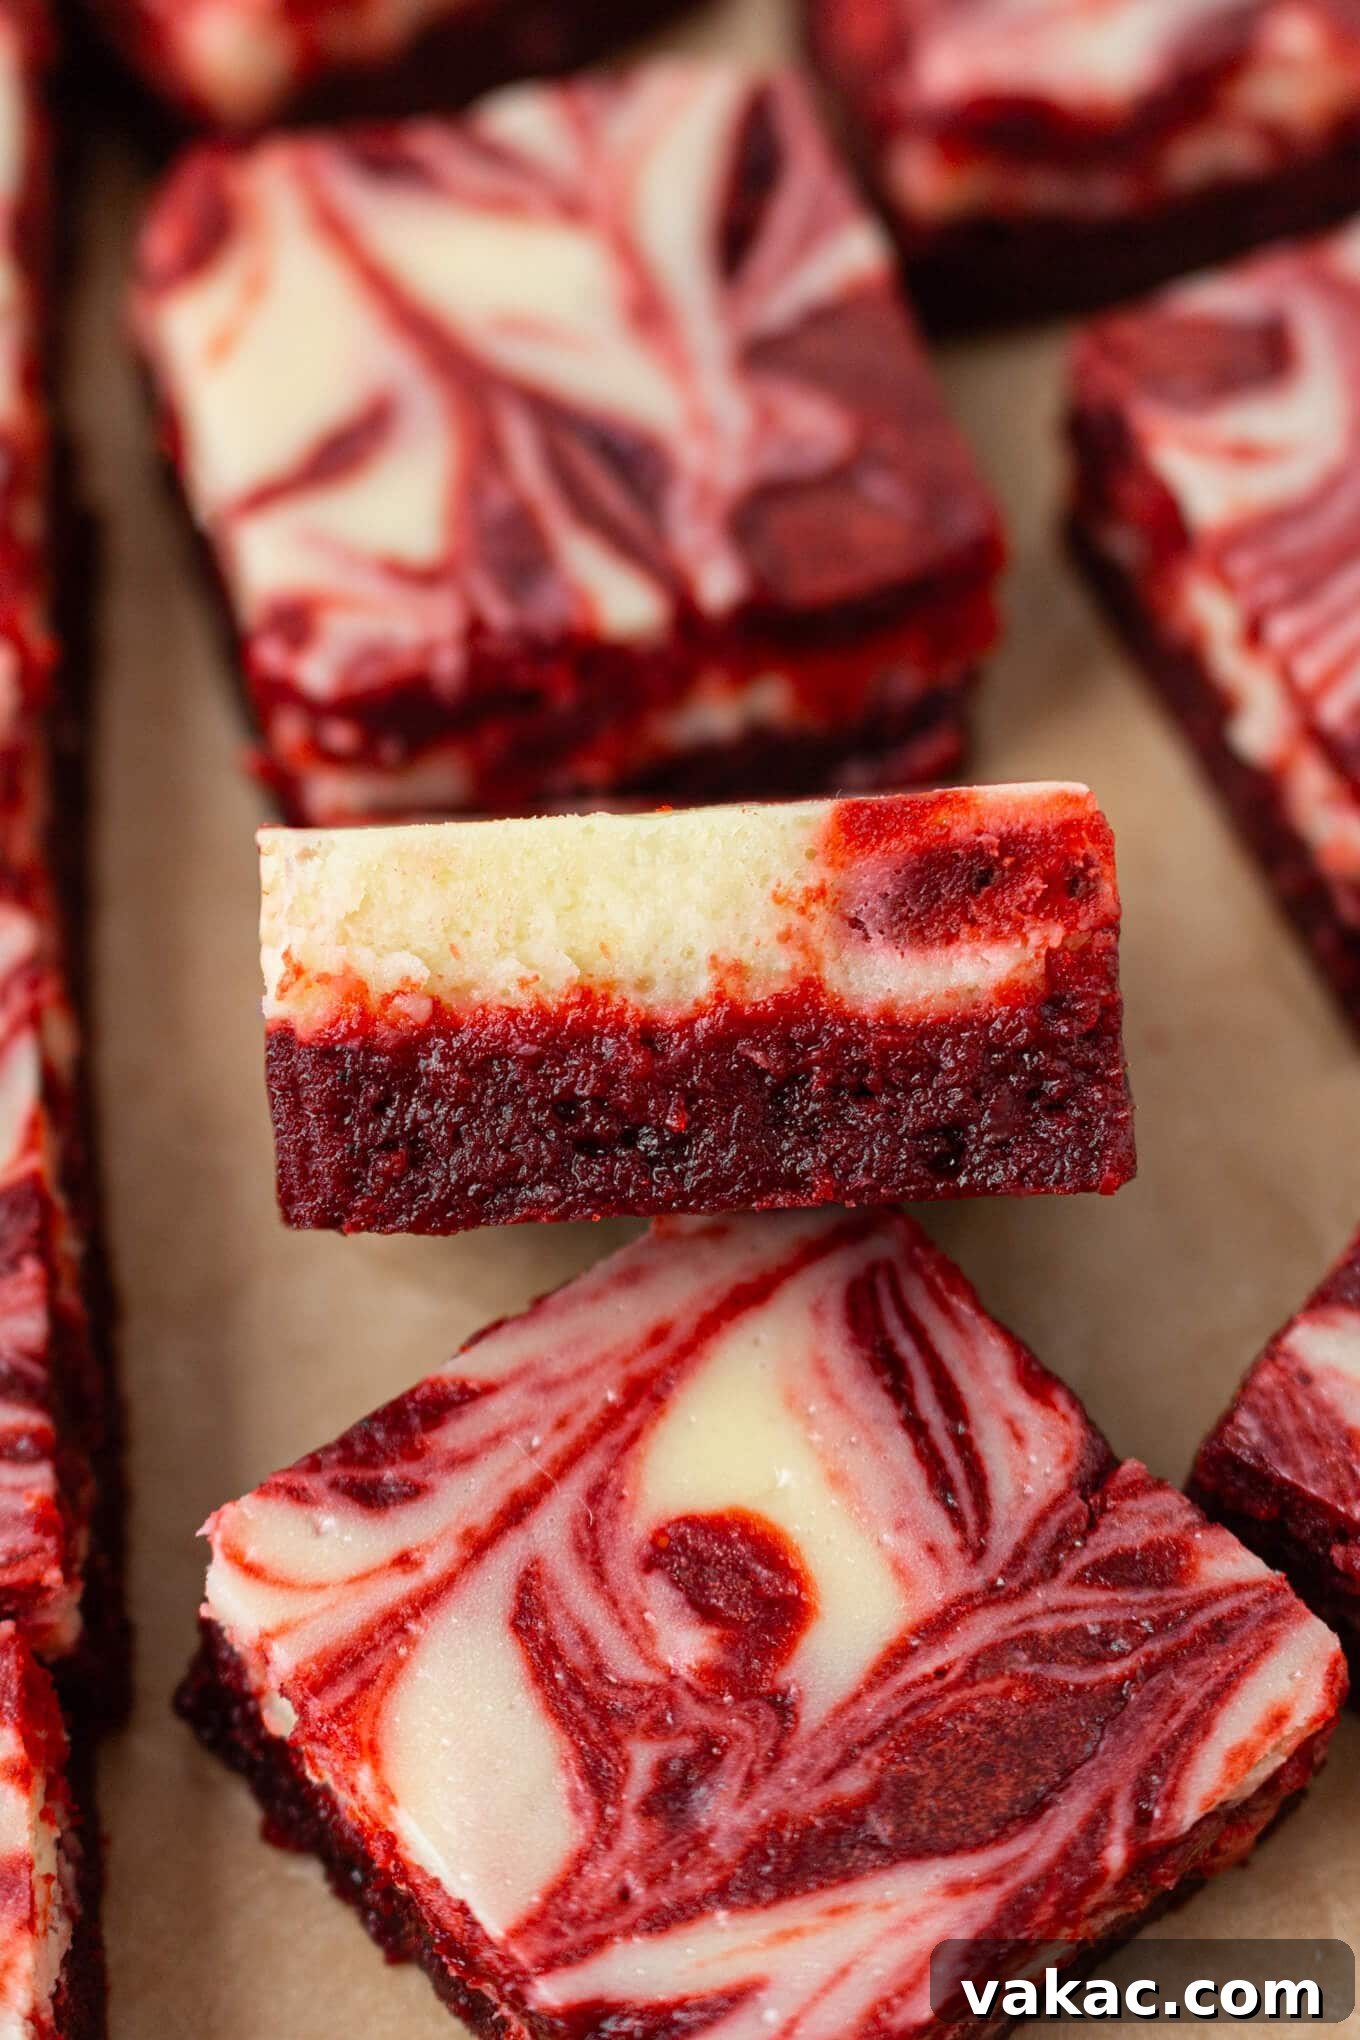
- Patience is Key: Cool Completely and Chill for Perfect Slices: While the aroma fresh out of the oven is intoxicating, it’s crucial to allow your Red Velvet Cheesecake Brownies to cool completely in the pan on a wire rack. For the cleanest, most precise slices and an even firmer set, I highly recommend chilling the brownies in the refrigerator for at least 2-3 hours, or even better, overnight. This chilling process solidifies both the brownie and cheesecake layers, making them much easier to cut without crumbling or smudging the beautiful swirl. Furthermore, the flavors deepen and meld together beautifully as the brownies chill, enhancing their overall deliciousness.
Creating the Iconic Swirl: A Simple Artistic Touch
The signature swirl is more than just a decorative element; it’s what makes these brownies visually captivating and adds to their gourmet appeal. While they would undoubtedly taste delicious without it, the marbled effect of the deep red velvet against the creamy white cheesecake truly elevates their presentation, making them ideal for any special occasion or simply to add a touch of elegance to your dessert spread.
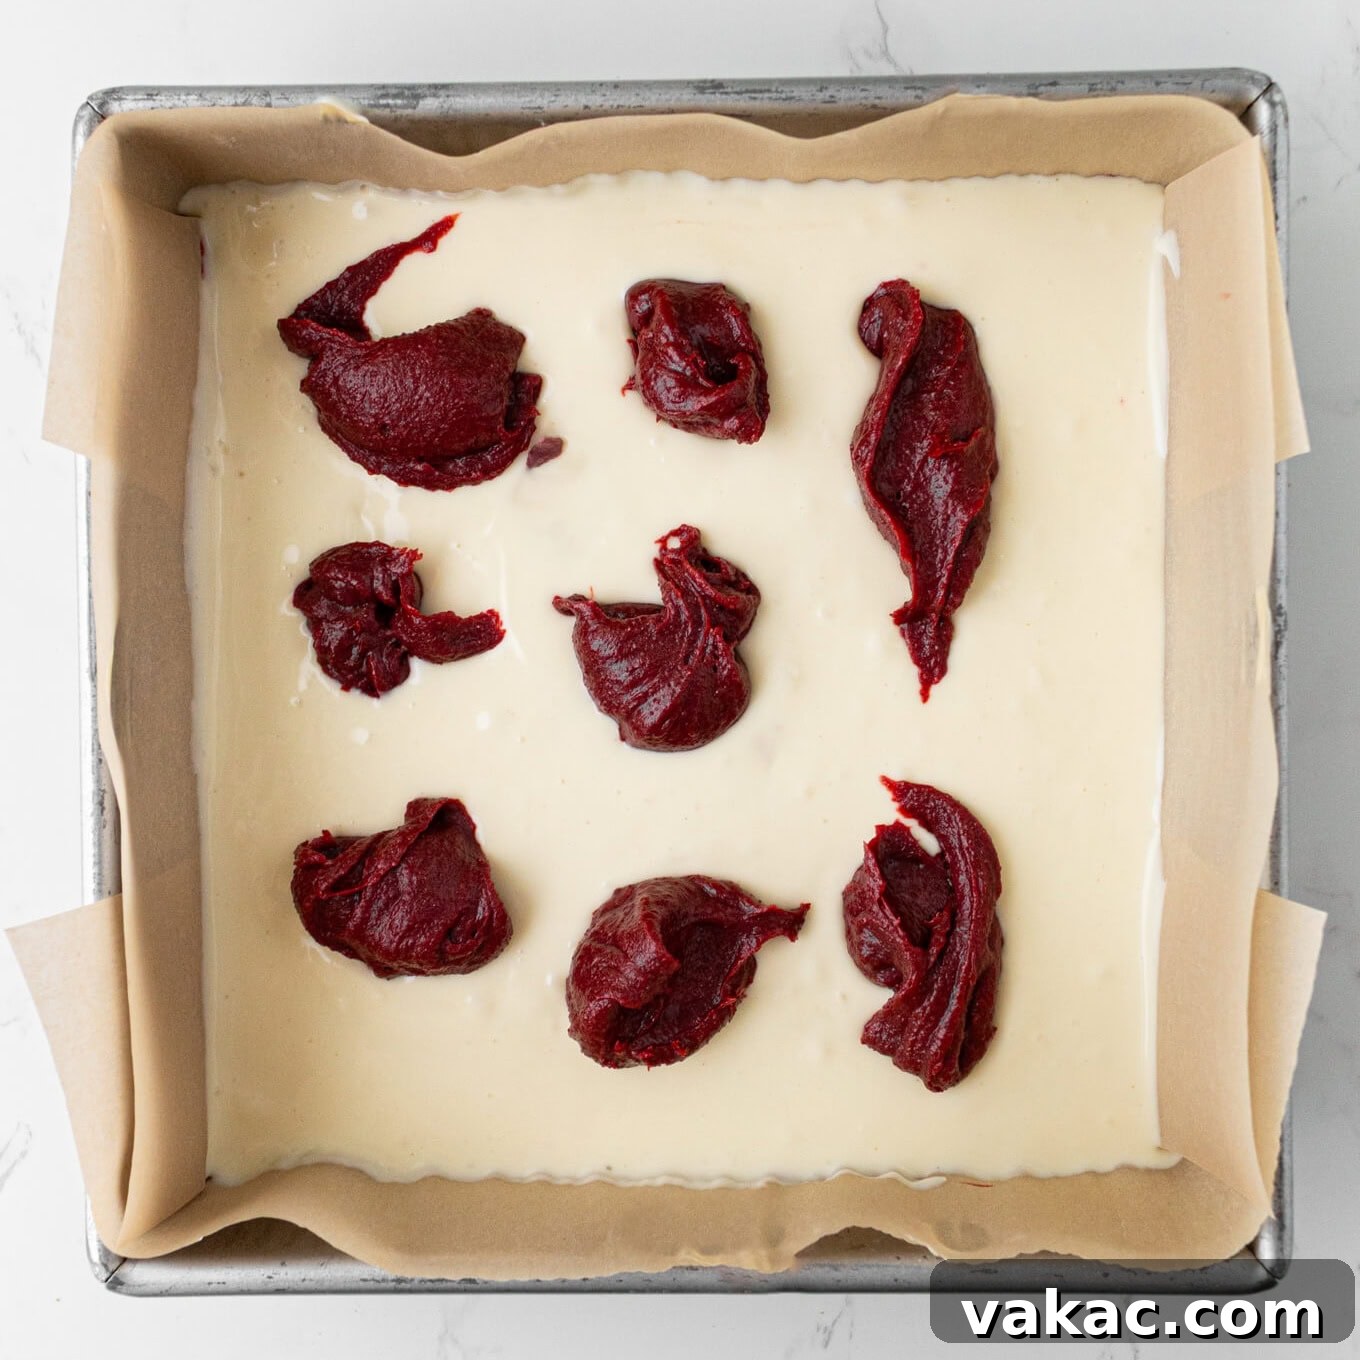
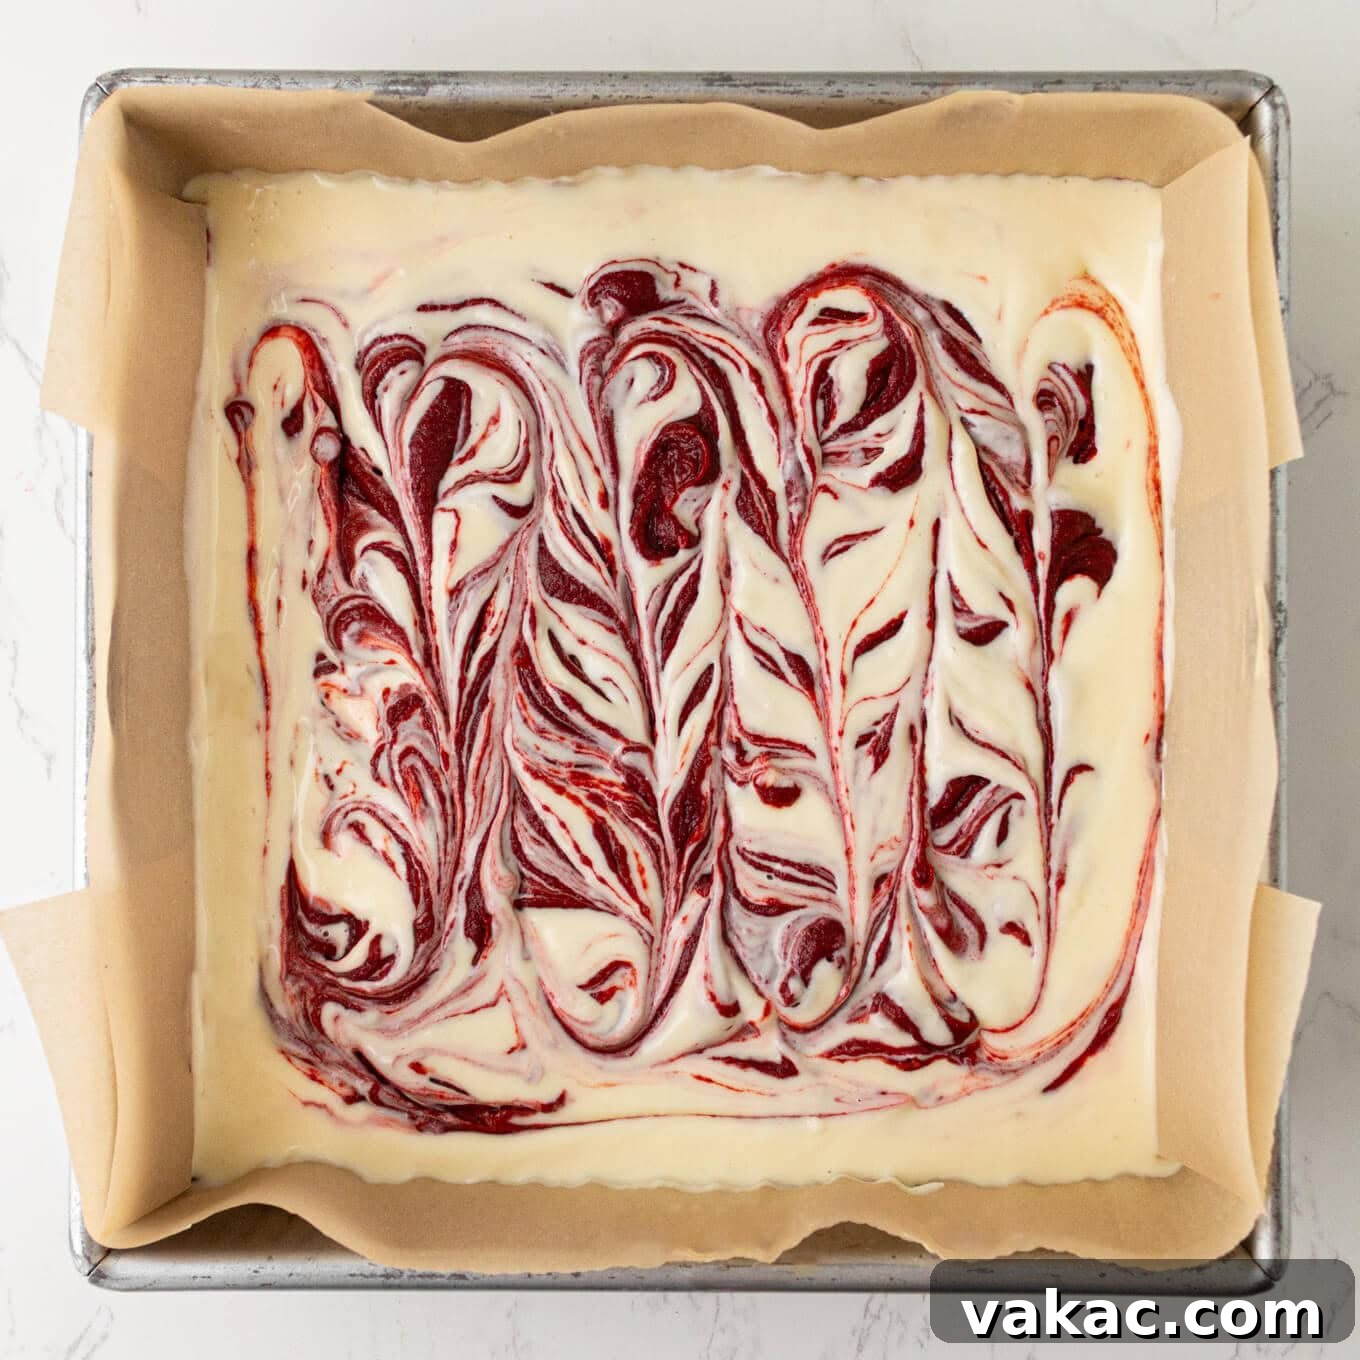
Achieving this artistic pattern is far simpler than it looks. Begin by pouring the majority of your rich red velvet brownie batter into your prepared, parchment-lined baking pan, spreading it evenly to form a consistent base layer. Next, carefully pour the smooth and tangy cheesecake mixture over the entire brownie layer. You can spread it gently with a spatula, ensuring not to mix it into the bottom layer. Now for the crucial step: take the reserved ¼ cup of red velvet brownie batter and spoon small, deliberate dollops of it strategically over the white cheesecake layer. Finally, with a butter knife, a thin wooden skewer, or even a simple toothpick, gently drag it through the dollops and cheesecake in a zigzag or swirling motion. The key is to make a few deliberate passes without overmixing, which would cause the colors to blend completely. The goal is to create distinct, beautiful streaks and swirls that highlight the contrast between the two layers.
Scaling Up Your Bake: Doubling This Recipe
Good news for those who can’t get enough of these delectable treats or are baking for a larger gathering: this recipe is perfectly adaptable for doubling! Simply multiply all the ingredient quantities by two. When you double the recipe, you’ll need to use a larger baking vessel, ideally a 9×13-inch pan, to accommodate the increased volume of batter and ensure even baking. It’s important to remember that a larger quantity of batter will likely require a slightly extended baking time. Start checking for doneness around the maximum bake time suggested for the original recipe, then continue baking in 5-10 minute increments, testing with a toothpick, until you achieve that desired moist-crumb stage. Always prioritize checking for doneness over strict adherence to a timer when adjusting recipe yields or pan sizes.
The Right Pan Makes All the Difference: Achieving Brownie Perfection
Believe it or not, the type of baking pan you choose can significantly influence the texture and quality of your brownies. For these fudgy Red Velvet Cheesecake Brownies, I cannot stress enough the importance of using a light-colored metal pan. Light-colored pans are superior heat conductors, distributing heat gently and evenly across the entire surface. This prevents the edges of your brownies from overcooking, becoming tough, or burning before the center has achieved its perfectly fudgy consistency. The result? Those highly sought-after chewy edges and a gloriously moist, gooey center that defines a truly exceptional brownie. From personal experience, this USA pan consistently delivers outstanding results.
While using a darker metal pan is possible, it’s crucial to understand its implications. Darker pans absorb more heat, leading to faster cooking of the edges and potentially a tougher, drier crust, while the center might still be underbaked. If you must use a dark pan, I recommend reducing your oven temperature by 25°F (about 15°C) and monitoring the brownies closely, as the baking time will likely be shorter. The goal is always a perfectly balanced brownie—chewy edges, fudgy center—and selecting the appropriate pan is your first step towards achieving this baking triumph.
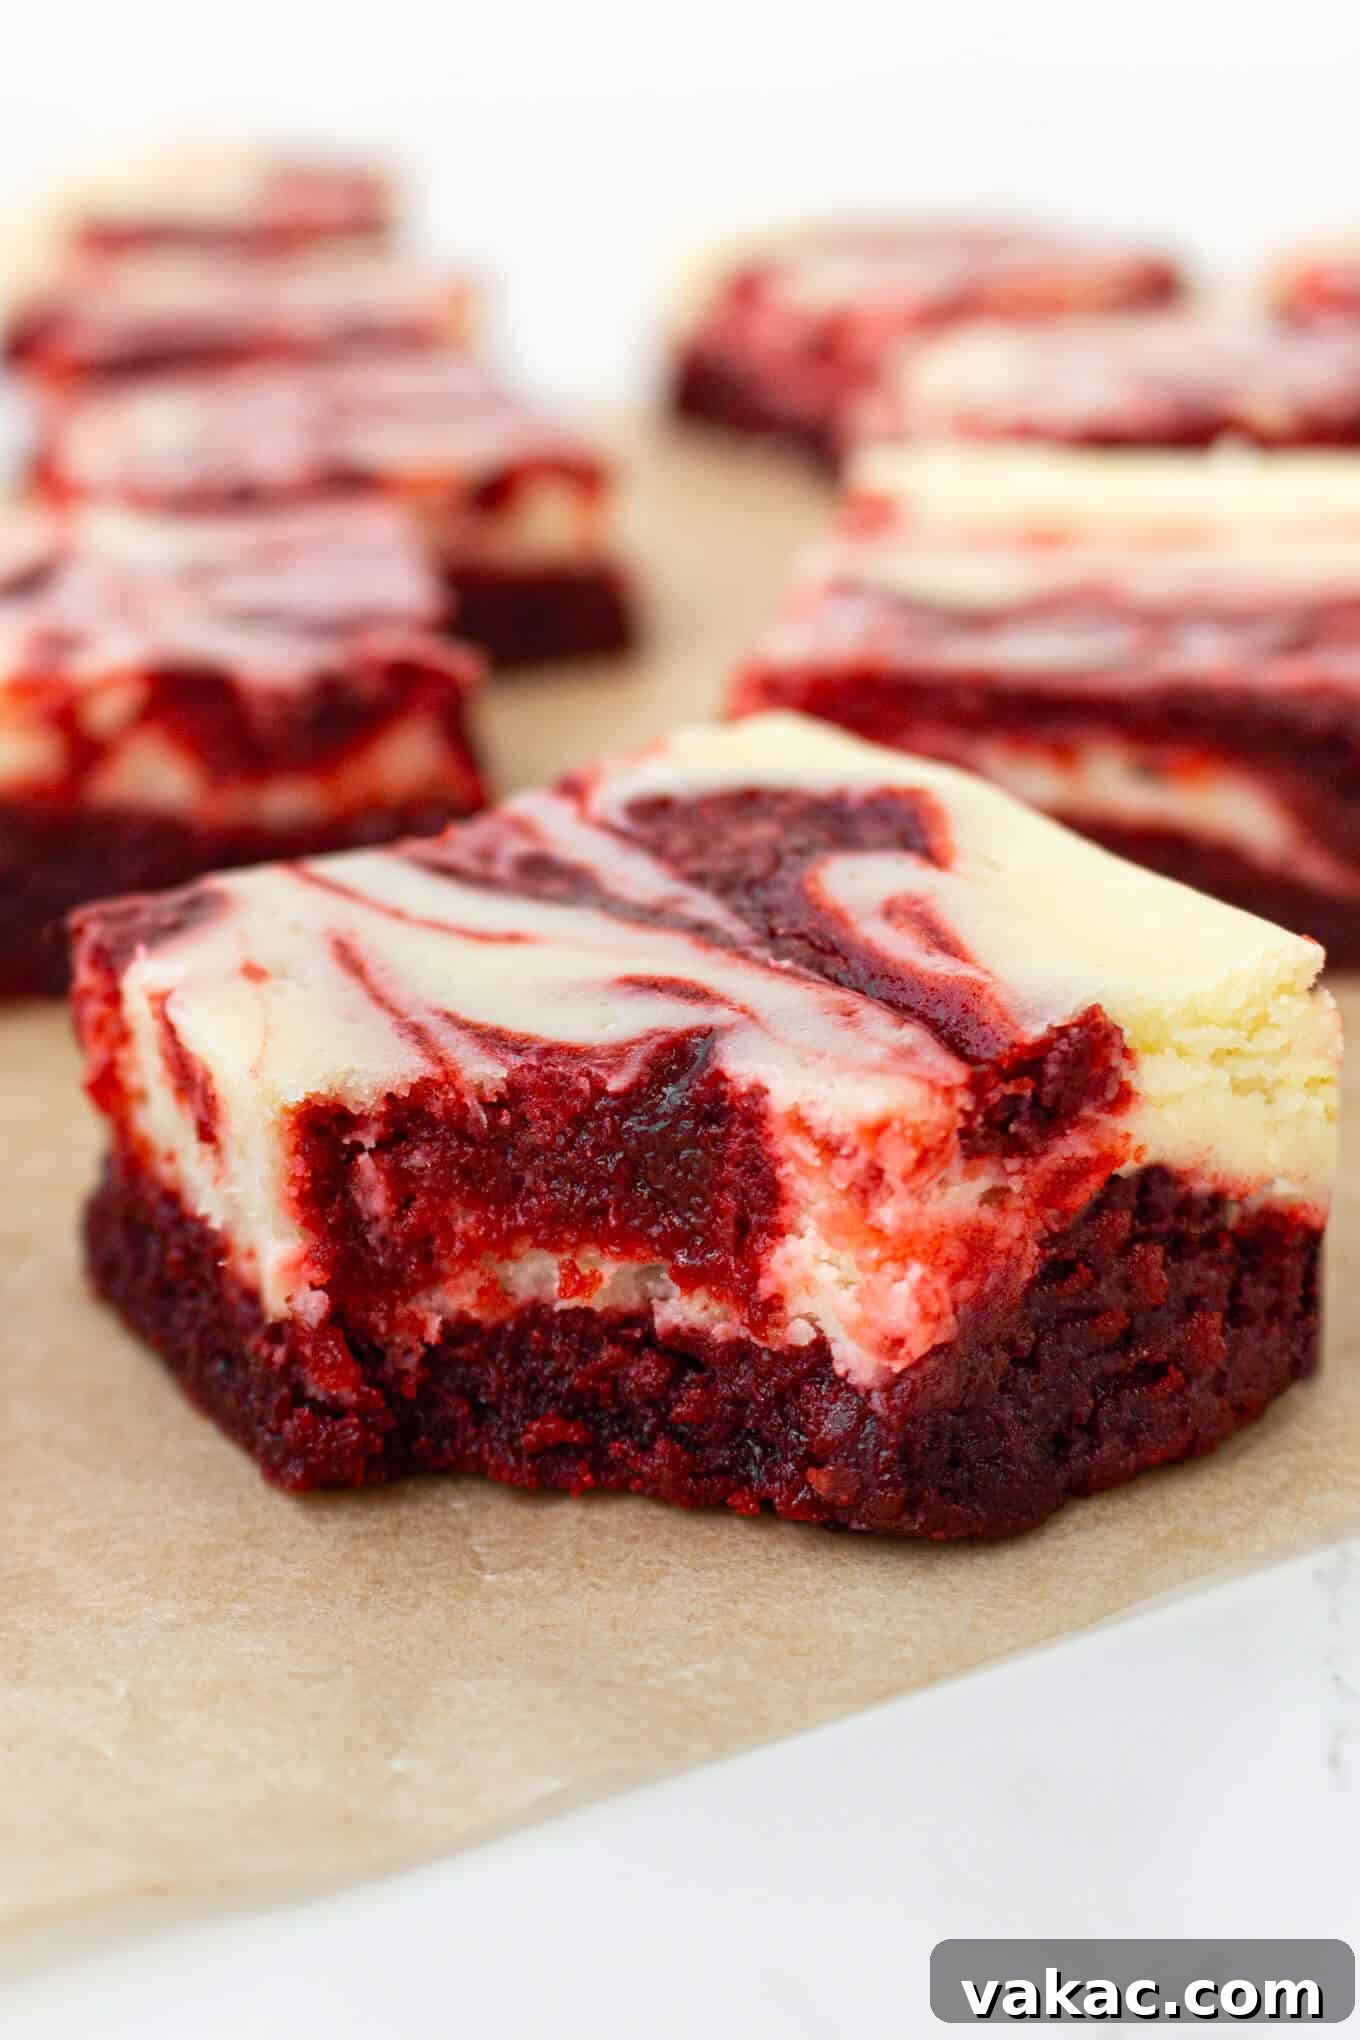
These Red Velvet Cheesecake Brownies are truly a game-changer, offering a decadent and visually stunning twist on a beloved classic. I’m incredibly excited to hear what you think! Please don’t hesitate to leave a comment below sharing your thoughts, your baking experience, and the ultimate question: after tasting these incredible cheesecake-swirled beauties, will you ever be able to go back to plain red velvet brownies again? I have a strong feeling the answer will be no!
Red Velvet Cheesecake Brownie Recipe
These fudgy red velvet cheesecake brownies are quick, easy, and absolutely irresistible! Both the brownie batter and the cheesecake topping are mixed in one bowl each, and the elegant swirled design is simply created with a butter knife.
Recipe Details
- Prep Time: 25 minutes
- Cook Time: 30 minutes
- Total Time: 55 minutes
- Yields: 16 brownies
Ingredients
Cheesecake Layer
- 8 ounces brick-style cream cheese, softened (1 block; 226 grams)
- ¼ cup granulated sugar (50 grams)
- ½ teaspoon pure vanilla extract
- 1 large egg, at room temperature
Red Velvet Brownie Layer
- ½ cup unsalted butter, melted and slightly cooled (1 stick; 113 grams)
- ⅔ cup granulated sugar (135 grams)
- ⅓ cup packed light brown sugar (70 grams)
- 1 large egg, at room temperature
- 1 large egg yolk, at room temperature
- 2 teaspoons liquid red food coloring (10 ml; McCormick brand recommended)
- 1 ½ teaspoons pure vanilla extract
- ¾ cup all-purpose flour, spooned & leveled (95 grams)
- 3 tablespoons unsweetened natural cocoa powder (17 grams; avoid Dutch process)
- ¼ teaspoon salt
Instructions
- Preheat your oven to 350°F (177°C). Prepare an 8-inch square baking pan by lining it with aluminum foil or parchment paper. Ensure there’s a generous overhang on the sides for easy removal of the brownies later. Lightly spray the lined pan with nonstick cooking spray and set it aside.
- To prepare the cheesecake layer: In a medium mixing bowl (or the bowl of a stand mixer fitted with a paddle attachment), beat the softened cream cheese until it is smooth and free of lumps. Add the granulated sugar and vanilla extract, mixing until they are fully combined. Stop and scrape down the sides of the bowl as needed to ensure everything is incorporated. Finally, mix in the room temperature egg on low speed until it is just combined. Be careful not to overmix the egg. Scrape around the bottom and sides of the bowl once more to ensure thorough mixing. Set this creamy mixture aside.
- To prepare the red velvet brownie layer: In a separate large mixing bowl, whisk together the melted and slightly cooled unsalted butter, granulated sugar, and packed light brown sugar until the mixture is well combined and smooth. Next, whisk in the room temperature large egg, egg yolk, vibrant red food coloring, and pure vanilla extract until all ingredients are fully incorporated and the batter achieves a uniform, rich red hue.
- Into the wet ingredients, sift the all-purpose flour, unsweetened natural cocoa powder, and salt. Gently whisk these dry ingredients into the wet mixture until they are just combined. Avoid overmixing, as this can develop the gluten in the flour and result in tougher, less fudgy brownies.
- To assemble and bake: Pour most of the prepared red velvet brownie batter into the lined 8-inch square baking pan. Reserve approximately ¼ cup of the brownie batter for the swirl. Spread the batter evenly across the bottom of the pan to create a consistent first layer.
- Carefully pour the creamy cheesecake layer over the red velvet brownie base. You can pour it directly or use large spoonfuls to distribute it across the entire surface, gently spreading it out with a spatula without disturbing the brownie layer underneath too much. Now, take the reserved ¼ cup of red velvet brownie batter and spoon small dollops of it randomly over the top of the cheesecake layer.
- Using a butter knife, a wooden skewer, or even a toothpick, gently drag it through the dollops of brownie batter and the cheesecake layer to create a beautiful swirled or marbled pattern. Make just a few passes to create distinct swirls; avoid overdoing it, as you want clear separation of colors.
- Bake the brownies for 27 to 30 minutes. To test for doneness, insert a toothpick into the center of the pan. It should come out mostly clean, with just a few moist crumbs clinging to it. If it comes out completely clean, the brownies are likely overbaked.
- Once baked, remove the pan from the oven and allow the brownies to cool completely in the pan on a wire cooling rack. Cooling is essential for the brownies to set properly and for the layers to firm up. For the cleanest slices and best texture, refrigerate the cooled brownies for at least 2 hours, or ideally overnight, before lifting them out of the pan using the foil or parchment overhang, slicing them into 16 even pieces, and serving. Enjoy every decadent bite!
Notes
- Storage Instructions: To maintain their optimal freshness and fudgy texture, store any leftover Red Velvet Cheesecake Brownies in an airtight container in the refrigerator for up to 4 days.
- Freezing Instructions: These brownies freeze wonderfully for longer storage. Wrap individual brownies tightly in plastic wrap, then place them in a freezer-safe bag or container. They will keep well for up to 3 months. Thaw them overnight in the refrigerator before serving.
Recipe Information
- Cuisine: American
- Course: Dessert
- Author: Danielle Rye
Did you make this delicious recipe?
We’d love to see your creations! Mention @livewellbakeoften on Instagram or tag #livewellbakeoften. Your feedback is appreciated!
Explore More Irresistible Red Velvet Desserts