
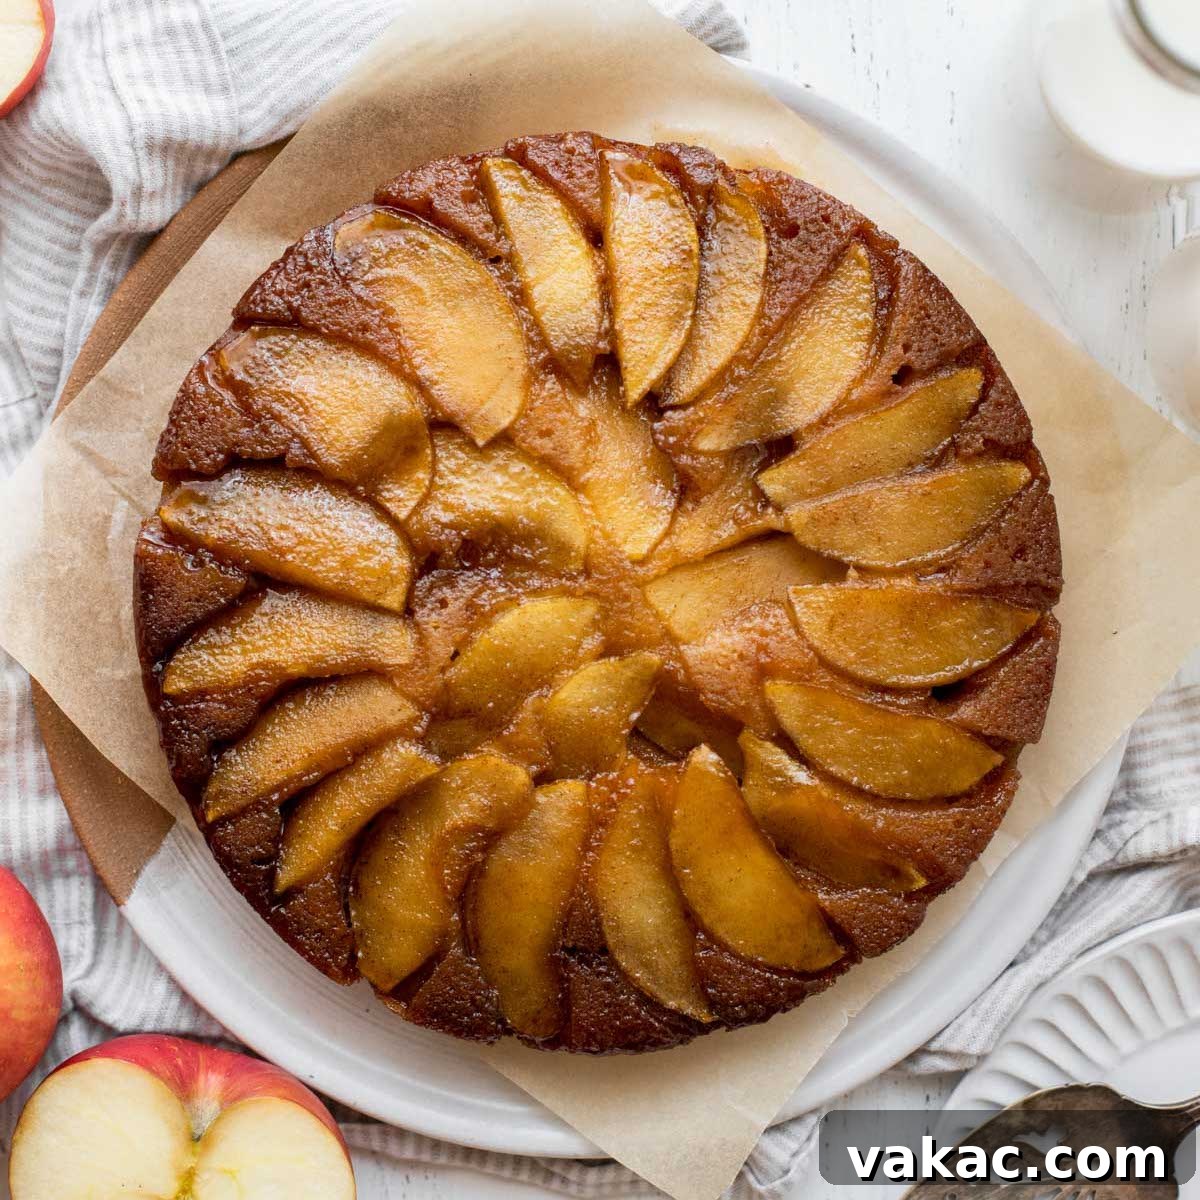
There’s a special kind of warmth that only autumn can bring, and for many, it arrives with the irresistible aroma of freshly baked apples and cinnamon. As the leaves begin their vibrant transformation and a crisp coolness fills the air, our kitchens beckon for comforting, seasonal treats. This **Apple Upside-Down Cake** is more than just a dessert; it’s a celebration of fall, a masterpiece of flavors and textures, and an absolute joy to bake.
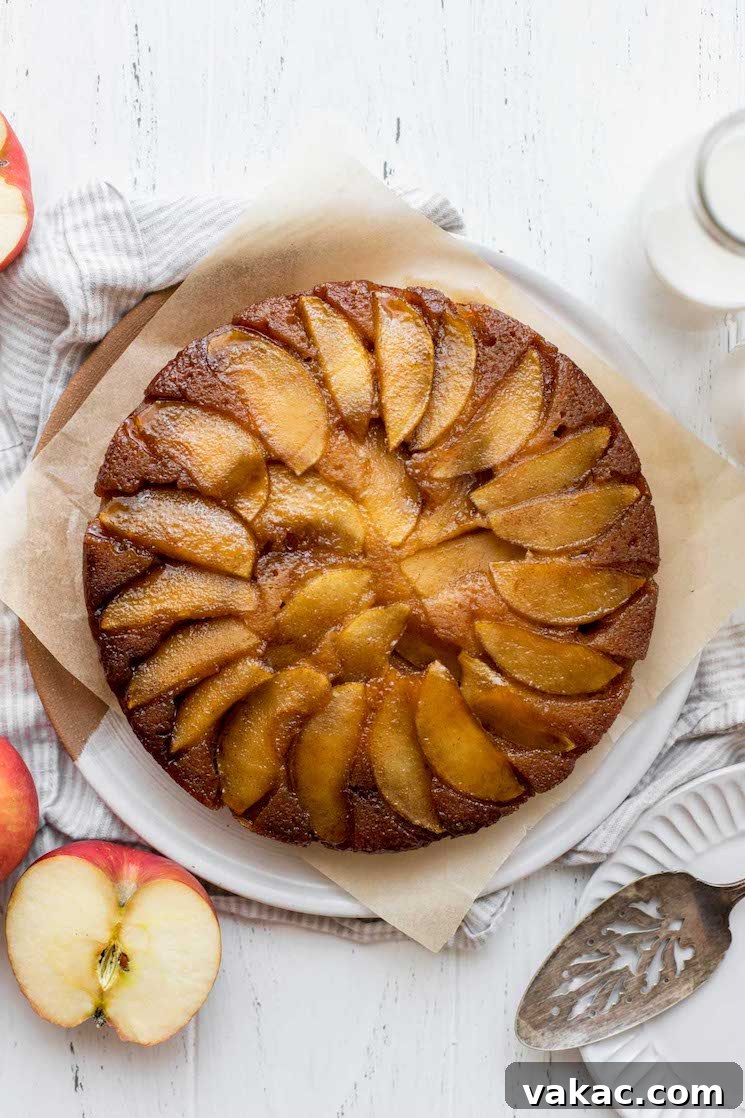
Inspired by the beloved classic, our Apple Upside-Down Cake takes everything you love about its pineapple cousin and infuses it with the rich, inviting spirit of autumn. This recipe features a luscious caramelized apple topping that glistens beautifully, perfectly complemented by a tender, fragrant cinnamon vanilla cake. It’s surprisingly easy to make, boasts a stunning presentation, and delivers an unforgettable taste experience. Get ready to impress your family and friends with this perfect fall dessert that’s guaranteed to become a new seasonal favorite!
Why This Apple Upside-Down Cake Will Become Your Fall Favorite
This isn’t just another apple cake; it’s *the* apple cake you’ll crave every autumn. What sets this particular recipe apart is its harmonious blend of simplicity, visual appeal, and profound flavor. The moment you flip it out of the pan, revealing the glossy, golden-brown apples nestled in a sticky caramel glaze, you’ll understand why this cake is so cherished. It’s a true showstopper, yet incredibly straightforward to prepare, making it accessible for bakers of all skill levels.
The flavor profile is a symphony of autumnal delights. Sweet, juicy apples are transformed into a tender, caramelized topping, infused with the warm, comforting notes of brown sugar and cinnamon. Beneath this exquisite layer lies a soft, moist vanilla cake, subtly spiced with ground cinnamon, creating a perfect balance that’s neither too sweet nor too rich. Each bite offers a delightful contrast between the caramelized fruit and the airy, fragrant cake crumb. Whether you’re hosting a fall gathering, enjoying a cozy evening by the fire, or simply want to fill your home with the inviting aroma of homemade baking, this Apple Upside-Down Cake is the ideal choice. Plus, with our comprehensive tips, you’ll achieve bakery-quality results every single time, from perfect apple slices to the ideal cake texture.
Crafting Your Caramelized Apple Upside-Down Cake
Creating this magnificent Apple Upside-Down Cake involves two delightful stages: preparing the rich, flavorful topping and mixing the light, tender cake batter. Both steps are designed to be simple, ensuring a successful bake even for those new to upside-down cakes.
The Irresistible Caramelized Apple Topping
The magic of an upside-down cake truly begins with its topping. For this apple version, we start with a luscious caramel base. Begin by melting unsalted butter, either quickly in the microwave or gently on the stovetop. The key is to melt it just until liquid. Once melted, whisk in the brown sugar and ground cinnamon until the mixture is smooth and well combined. This combination creates a deeply flavorful, aromatic caramel that will perfectly coat the apples and seep into the cake as it bakes.
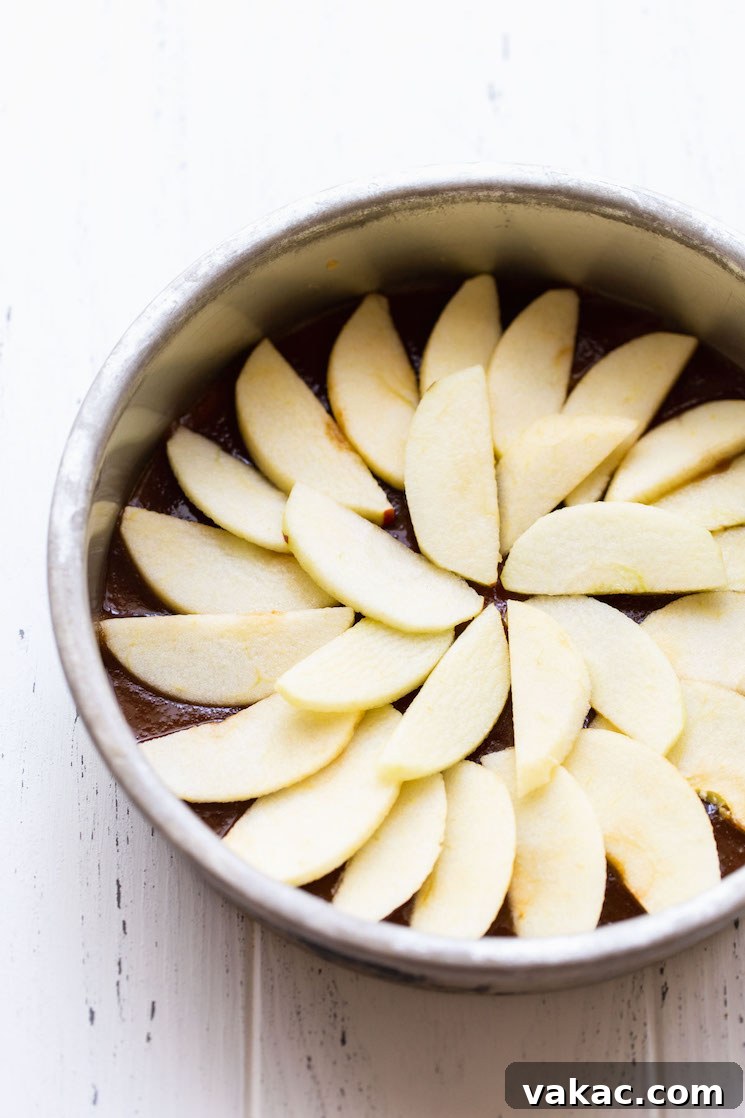
Next, prepare your 9-inch round cake pan. It’s crucial to spray the pan thoroughly with nonstick cooking spray to ensure a clean release later. Pour the brown sugar-cinnamon mixture into the prepared pan, spreading it evenly across the bottom with a spoon or spatula. This will be the foundation for our beautiful apple layer.
Now for the stars of the show: the apples! Select two medium baking apples. While Honeycrisp apples are a fantastic choice for their crisp texture and balanced sweetness, Fuji or Granny Smith apples also work wonderfully, offering a slight tartness that beautifully complements the sweet caramel. Peel, core, and slice your apples thinly, aiming for uniform slices of about 1/8 to 1/4 inch thick. Thinner slices ensure they cook through and become tender, while also allowing for an attractive arrangement. Carefully arrange these apple slices on top of the brown sugar-cinnamon mixture in your pan. Overlapping them in a circular pattern, as shown in the images, creates that stunning, professional finish when the cake is inverted.
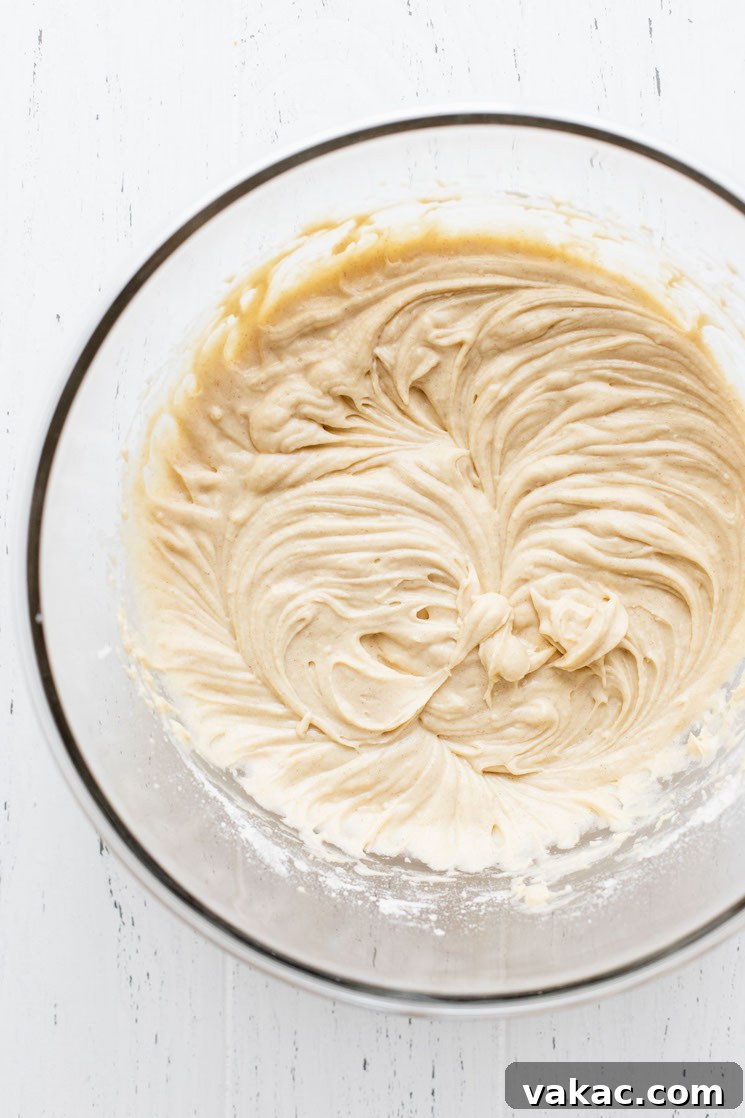
The Light and Fluffy Cinnamon Vanilla Cake Batter
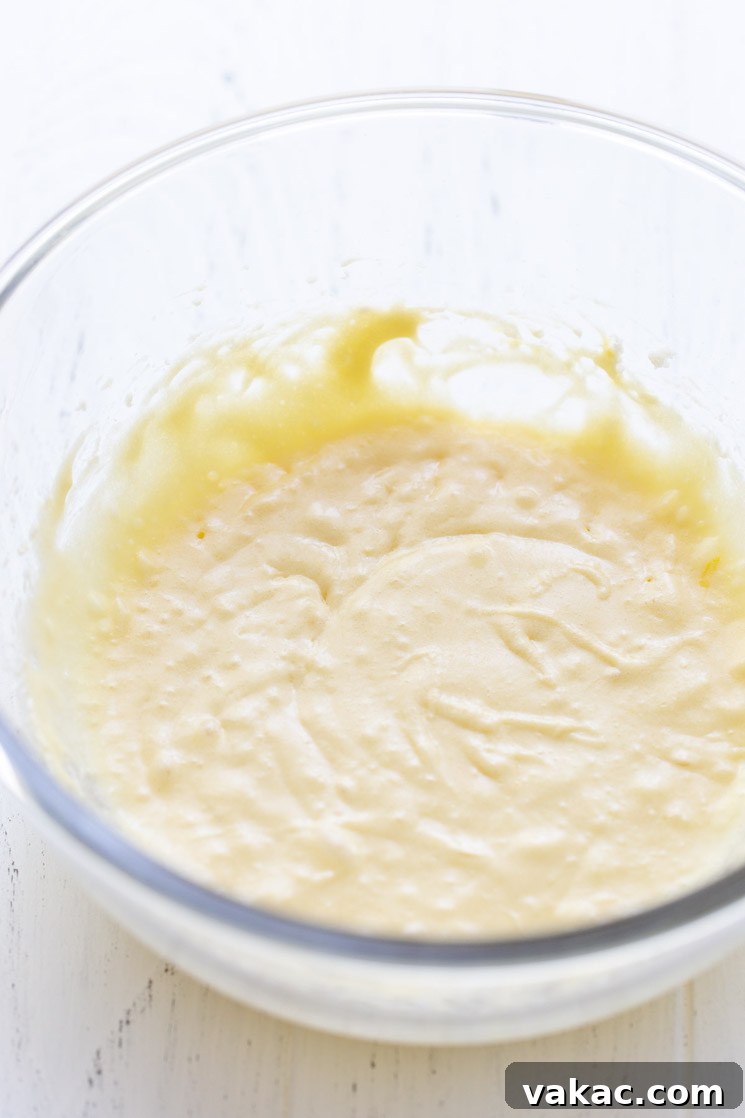
With the topping in place, it’s time to prepare the cake batter, ensuring it’s light, moist, and infused with comforting flavors. In a large bowl, whisk together your dry ingredients: all-purpose flour, baking powder, a touch of ground cinnamon for extra warmth, and a pinch of salt. Whisking them thoroughly ensures all leavening agents and spices are evenly distributed, leading to a consistent rise and flavor throughout the cake. Set this mixture aside.
In a separate, larger mixing bowl, begin by creaming one stick (1/2 cup or 115 grams) of softened unsalted butter with granulated sugar. This step is crucial for achieving a tender, airy cake crumb. Beat the butter and sugar together with an electric mixer for a full 3 to 4 minutes, or until the mixture becomes visibly light in color and fluffy in texture. This process incorporates air into the butter, which creates pockets in the batter, resulting in a wonderfully soft and tender cake. Don’t rush this step – it truly makes a difference in the final texture!
Next, beat in two large, room-temperature eggs, adding them one at a time and mixing well after each addition. Room temperature eggs emulsify better with the butter and sugar, contributing to a smoother batter. Stir in a teaspoon of pure vanilla extract, enhancing the cake’s overall aroma and flavor. Remember to occasionally stop the mixer and scrape down the sides of the bowl with a spatula to ensure all ingredients are thoroughly incorporated and no streaks of unmixed butter or sugar remain.
The final step for the batter involves alternating the addition of the dry ingredients with room-temperature milk or buttermilk. Begin by adding about one-third of your dry ingredients to the wet mixture, mixing on low speed until just combined. Then, add half of the milk, mixing just until incorporated. Repeat with another third of the dry ingredients, followed by the remaining milk, and finally, the last third of the dry ingredients. The key here is to mix each addition only until it’s just combined. Overmixing the batter can overdevelop the gluten in the flour, leading to a dense, tough cake. We want a light and fluffy cake, so be gentle and stop mixing as soon as the last streaks of flour disappear.
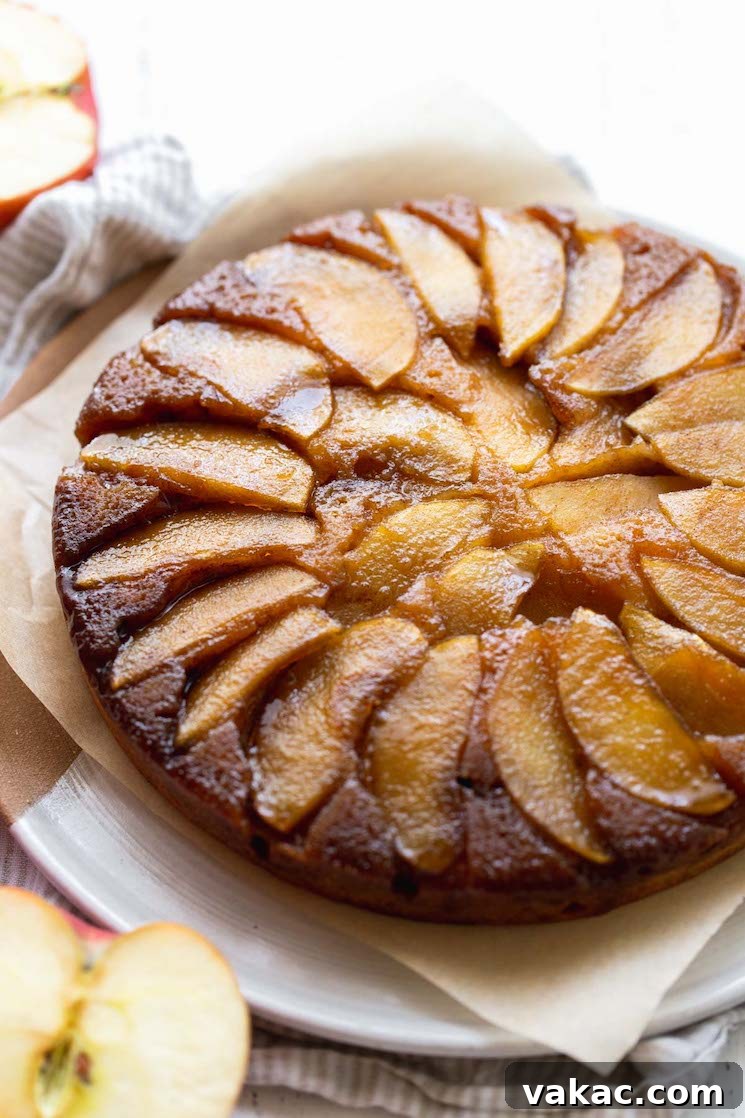
Assembly and Baking: The Grand Reveal
Once your cake batter is perfectly prepared, it’s time to bring everything together. Gently pour the batter directly over the beautifully arranged apple topping in your prepared cake pan. Use an offset spatula or the back of a spoon to carefully spread the batter into an even layer, making sure it covers all the apples uniformly. This ensures the cake bakes evenly and creates a flat base once inverted.
Now, bake your cake in a preheated oven at 350°F (177°C) for approximately 35 to 40 minutes. Baking times can vary slightly depending on your oven, so rely on the visual cues and the toothpick test. The cake is done when the top is golden brown and a wooden toothpick inserted into the center comes out clean, free of wet batter. If you see moist crumbs, bake for a few more minutes. Avoid opening the oven door too frequently during the baking process, especially in the first 20-25 minutes, as this can cause the cake to sink.
Once baked to perfection, remove the cake from the oven. This is a critical moment for a perfect upside-down cake! Allow the cake to cool in its pan on a wire rack for precisely 10 minutes. This brief cooling period allows the caramelized topping to set slightly and the cake structure to firm up, making it easier to release without sticking or breaking apart. After 10 minutes, carefully place your wire rack directly over the cake pan and, with a swift and confident motion, invert the cake onto the rack. Lift the pan slowly to reveal the magnificent, glistening apple topping. If any apples stick to the pan, simply retrieve them and place them back onto the cake. Let the cake cool completely on the wire rack before slicing and serving. Cooling fully ensures the caramel is firm and the cake slices cleanly, providing the best possible texture and flavor.
Expert Baking Tips for a Flawless Apple Upside-Down Cake
Baking Tips
- Choose the Right Apples: While Honeycrisp apples are a favorite for their balance of sweetness and tartness, and firm texture, other excellent choices include Fuji, Granny Smith (for a tarter kick), Gala, or Braeburn. Select apples that hold their shape well during baking and offer a pleasant flavor.
- Room Temperature Ingredients Are Key: Ensure your butter, eggs, and milk are all at room temperature before you begin mixing. Room temperature ingredients combine more smoothly and evenly, creating a uniform, emulsified batter. This leads to a finer crumb and a more tender, moist cake. Cold ingredients can cause the batter to curdle or become lumpy.
- Buttermilk for Added Moisture: You can use either regular milk or buttermilk in this recipe. However, buttermilk is highly recommended. Its acidity reacts with the baking powder, providing an extra lift, and it also contributes to a noticeably more moist and tender cake crumb with a subtle tangy depth of flavor. If you don’t have buttermilk, you can make a substitute by adding 1 tablespoon of lemon juice or white vinegar to a measuring cup, then filling it to the 1/2-cup mark with regular milk. Let it sit for 5-10 minutes until it slightly curdles before using.
- Proper Pan Preparation: Thoroughly grease your cake pan with nonstick cooking spray. For extra insurance, you can also line the bottom with a circle of parchment paper after greasing, then spray the parchment as well. This minimizes any chance of the caramelized topping sticking.
- Don’t Overmix the Batter: When adding the dry ingredients to the wet, mix only until just combined. Overmixing develops the gluten in the flour too much, which can result in a tough, chewy cake instead of the desired light and tender texture.
- The Toothpick Test: To ensure your cake is perfectly baked, insert a wooden toothpick into the very center. If it comes out clean (no wet batter attached), your cake is done. If there are wet crumbs, bake for a few more minutes and test again.
Serving Suggestions to Elevate Your Cake
This Apple Upside-Down Cake is incredibly delicious on its own, but a few simple additions can elevate it to an even more luxurious dessert. Serve it slightly warm or at room temperature for the best flavor and texture. A dollop of freshly whipped cream, a scoop of vanilla bean ice cream, or a drizzle of extra caramel sauce would all make fantastic accompaniments. For a truly decadent experience, consider pairing it with a sprinkle of toasted pecans or walnuts for added crunch. It’s also wonderful alongside a warm cup of coffee or tea, making it perfect for a fall brunch or an evening treat.
Freezing Instructions: Enjoy Later!
One of the many great things about this Apple Upside-Down Cake is how well it freezes, allowing you to enjoy a taste of fall whenever the craving strikes. Because of its moist, caramelized topping, the cake will stay fresh at room temperature for about 3 days when stored in an airtight container. For longer storage, freezing is an excellent option.
To freeze the entire cake, ensure it has completely cooled down to room temperature. Wrap the whole cake tightly with several layers of plastic wrap, then an additional layer of aluminum foil. For individual slices, wrap each slice securely in plastic wrap and then foil. Store the wrapped cake or slices in a large freezer-safe bag or an airtight freezer container. Properly stored, the cake or individual slices will maintain their quality for up to 3 months in the freezer. This makes it perfect for meal prepping desserts or having a special treat on hand for unexpected guests.
When you’re ready to enjoy, transfer the frozen cake (or slices) to the refrigerator and let it thaw overnight. For optimal taste and texture, remove it from the refrigerator a couple of hours before serving and let it come to room temperature on the counter. This gradual thawing process helps to maintain the cake’s moisture and prevents it from becoming dry or crumbly.
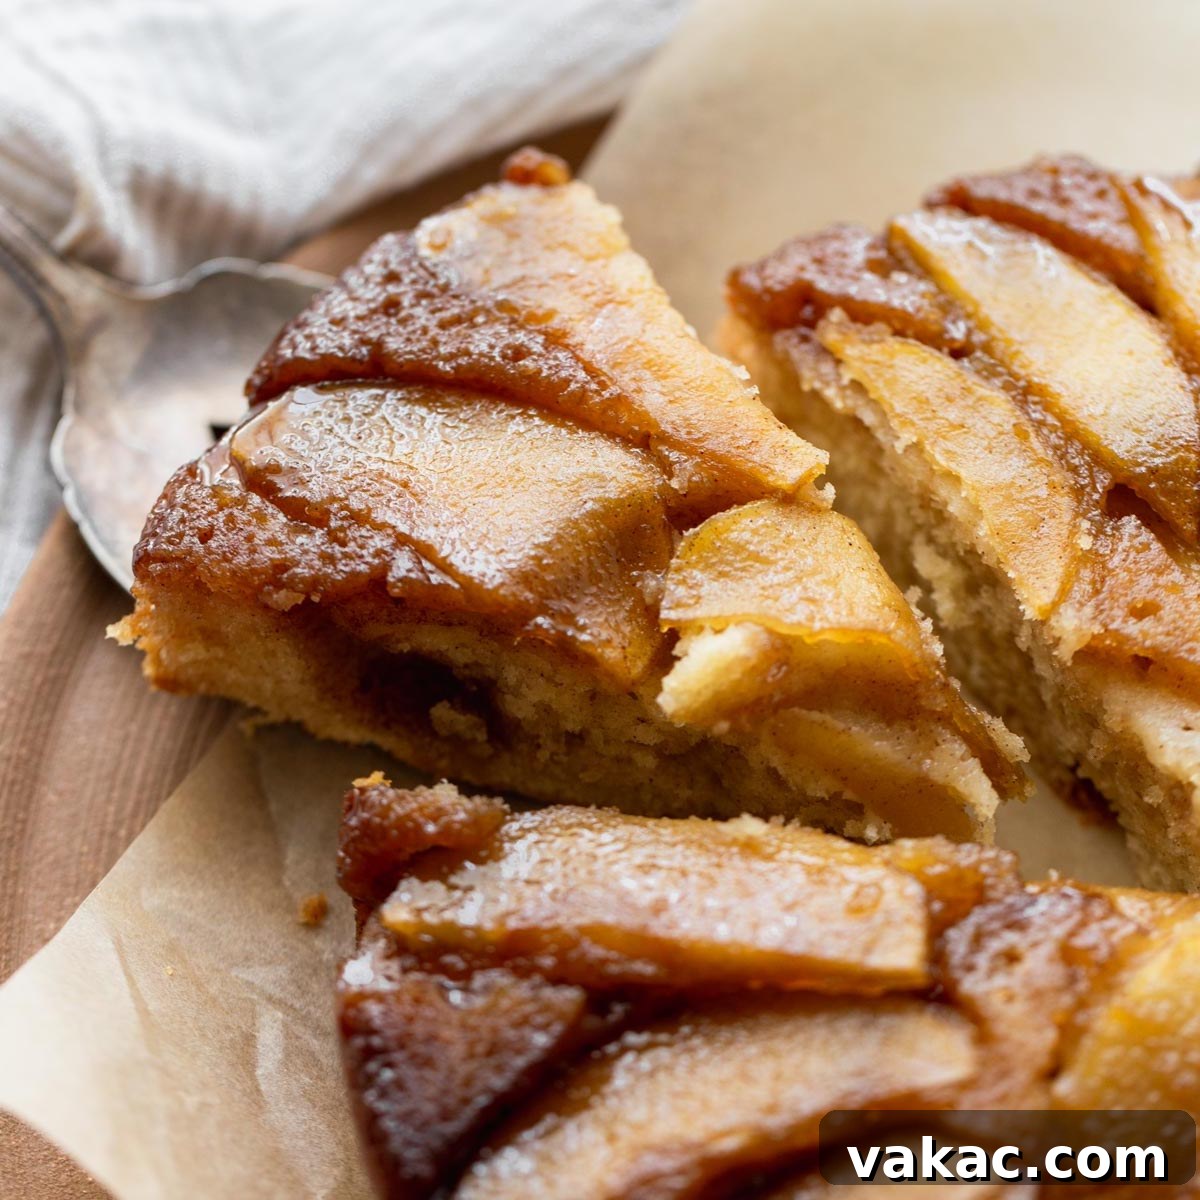
More Delicious Apple Recipes to Try
If you’ve fallen in love with baking with apples, there’s a whole world of delightful recipes waiting for you! Apples are incredibly versatile and bring a unique sweetness and texture to both sweet and savory dishes. Here are some more of our favorite apple-centric recipes that are perfect for any season, especially fall:
- Classic Apple Cake
- Timeless Apple Pie
- Comforting Apple Crisp Recipe
- Hearty Apple Oatmeal Cookies
- Fluffy Apple Muffins
Apple Upside-Down Cake
This Apple Upside-Down Cake features a caramelized apple topping and a cinnamon vanilla cake. Easy to make and perfect for fall!
Ingredients
Servings: 8 slices
Topping:
- 1/4 cup (60 grams) unsalted butter, melted
- 1/2 cup (100 grams) light brown sugar, packed
- 1/2 teaspoon ground cinnamon
- 2 medium apples, peeled, cored, and thinly sliced
Cake:
- 1 1/2 cups (190 grams) all-purpose flour (spooned & leveled)
- 1 teaspoon baking powder
- 1/4 teaspoon salt
- 1/2 teaspoon ground cinnamon
- 1/2 cup (115 grams) unsalted butter, softened to room temperature
- 2/3 cup (135 grams) granulated sugar
- 2 large eggs, room temperature
- 1 teaspoon vanilla extract
- 1/2 cup (120 ml) milk or buttermilk, room temperature
Instructions
- Preheat the oven to 350°F (177°C). Spray a 9-inch cake pan well with nonstick cooking spray and set aside.
- To make the topping: Combine the melted butter, brown sugar, and ground cinnamon in a mixing bowl and stir until fully combined. Pour the mixture into the prepared cake pan and evenly spread it on the bottom.
- Arrange the apple slices in an even layer on top and set aside.
- To make the cake: In a large mixing bowl, whisk together the flour, baking powder, salt, and cinnamon. Set aside.
- In a separate mixing bowl, beat the butter and sugar with an electric mixer for 3 to 4 minutes or until light and fluffy. Add the eggs one at a time, mixing well after each one, then mix in the pure vanilla extract. Stop and scrape down the sides of the bowl if needed and mix again.
- Add the dry ingredients on low speed in three additions alternating with the milk, beginning and ending with the dry ingredients. Mix in each addition until just combined, making sure not to overmix the batter.
- Pour the batter into the cake pan on top of the sliced apples.
- Bake for 35 to 40 minutes or until a wooden toothpick inserted into the center of the cake comes out clean.
- Remove from the oven and allow to cool for about 10 minutes in the pan, then flip the cake out of the pan and onto a cooling rack to cool completely.
Notes
Storage: Cake may be stored in an airtight container at room temperature for up to 3 days.
Freezing Instructions: Wrap the cooled cake or slices tightly with plastic wrap and store them in a large freezer bag or storage container. The cake or slices will freeze well for up to 3 months if stored properly. To thaw the cake, place it in the refrigerator overnight, then set it out for a couple of hours on the counter so that it can come to room temperature.
Apples: Honeycrisp, Fuji, or Granny Smith apples are great options for this cake.
Milk: You can use either milk or buttermilk in this cake, but buttermilk is preferred for a moister cake.
Cuisine: American
Course: Dessert
Author: Danielle Rye
Did you make this recipe? Mention @livewellbakeoften on Instagram or tag #livewellbakeoften.