

Delicious & Easy Mini Quiche Recipe: Your Guide to Perfect Brunch Bites
Welcome to the ultimate guide for crafting the most delectable mini quiches! These bite-sized wonders are a true crowd-pleaser, combining a golden, flaky pie crust with a rich, savory egg filling. Effortlessly customizable with your favorite ingredients, mini quiches are ideal for busy mornings, elegant holiday brunches, or any occasion where a convenient, yet gourmet, treat is desired. Say goodbye to soggy crusts and uneven fillings – we’ll walk you through creating perfect mini quiches every time.
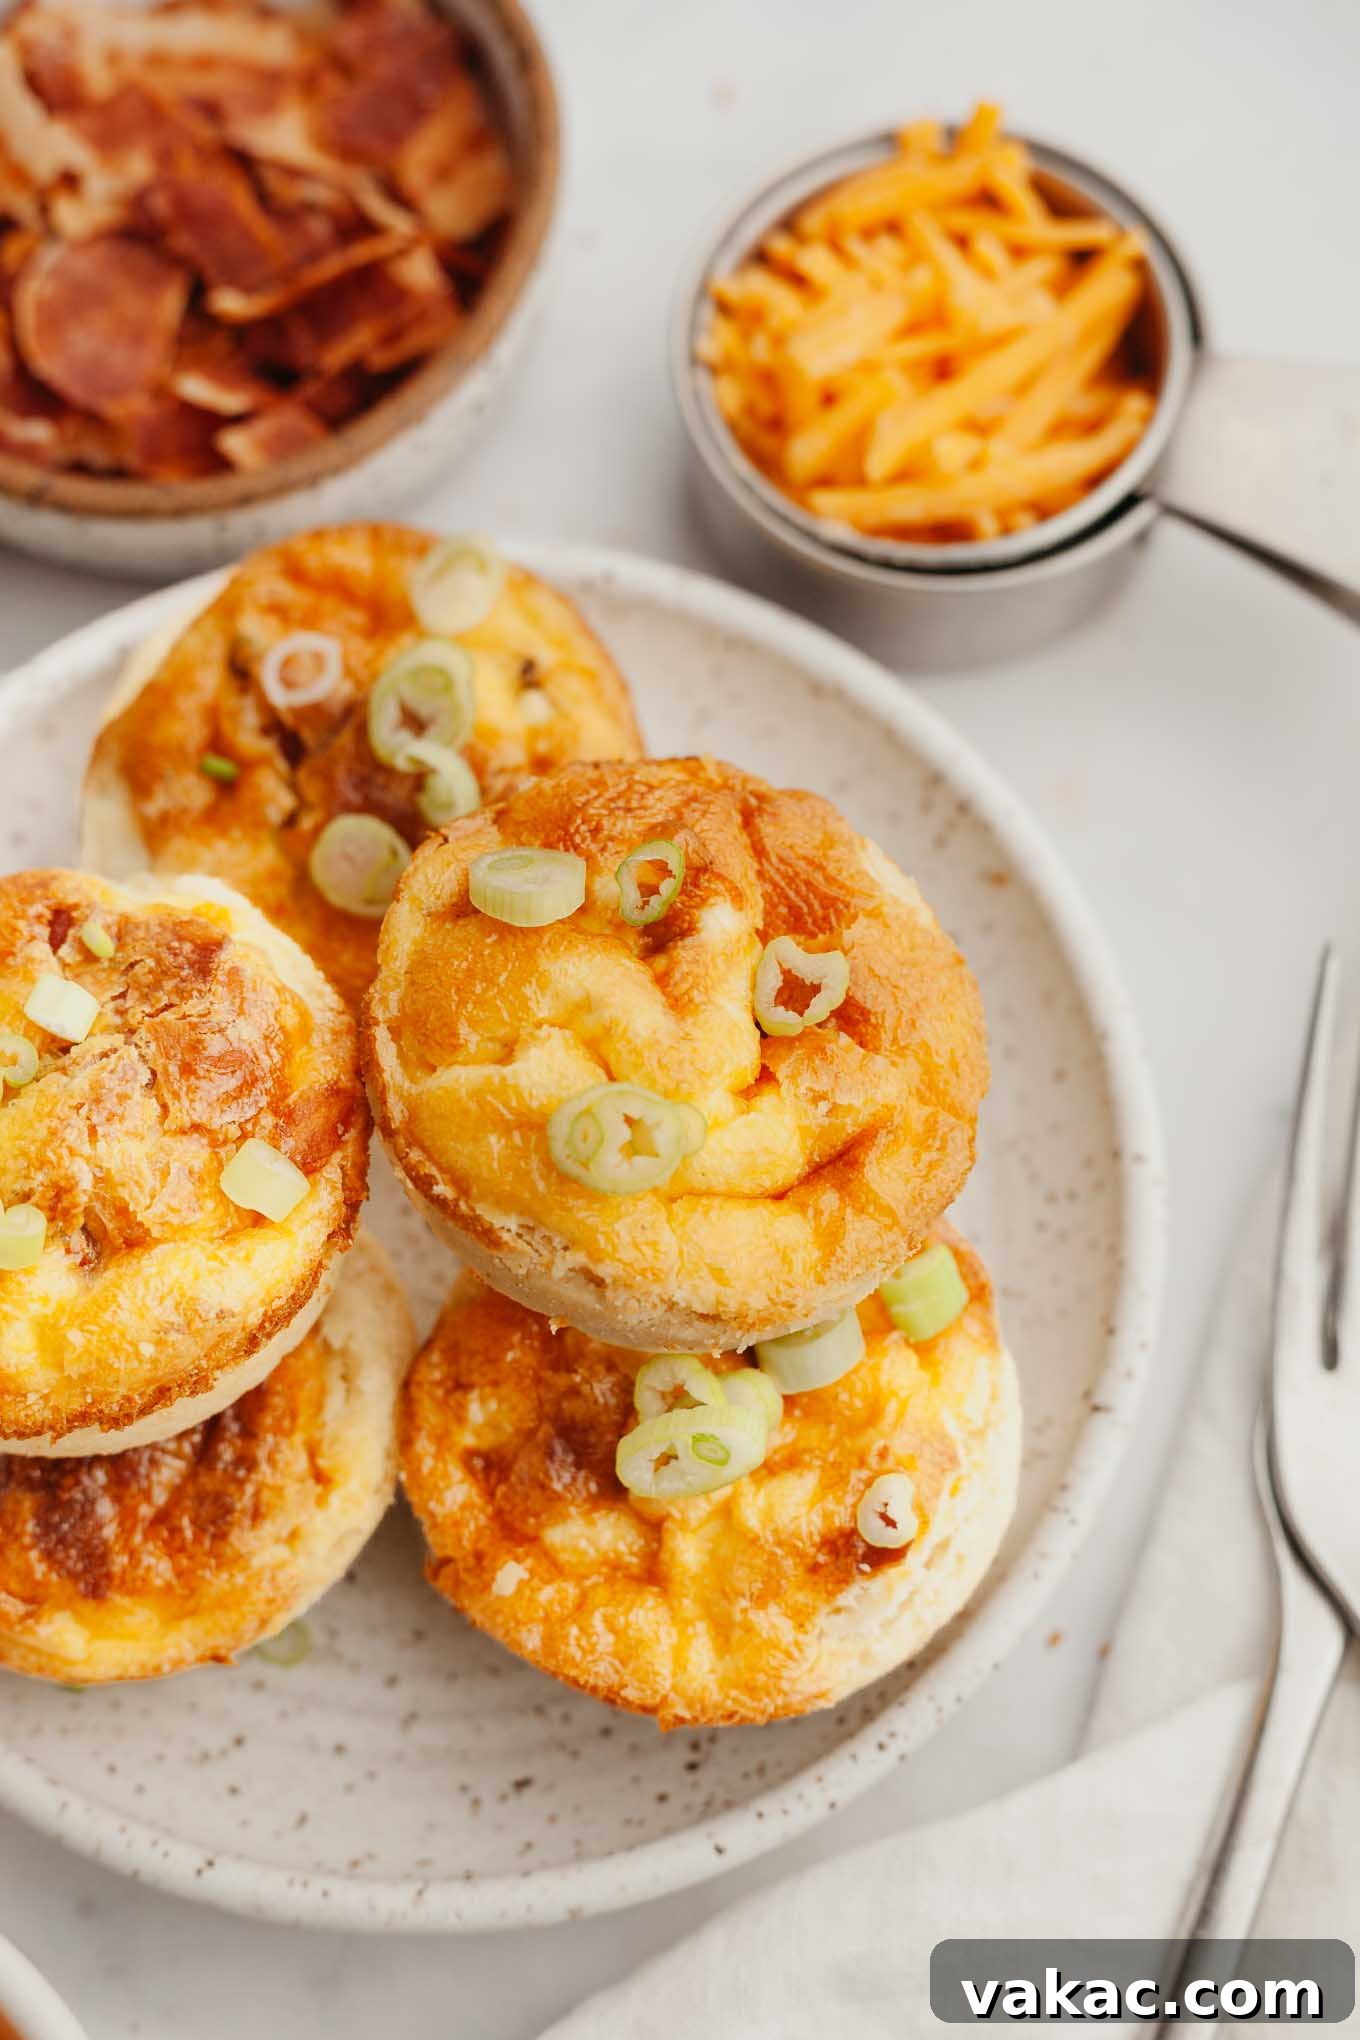
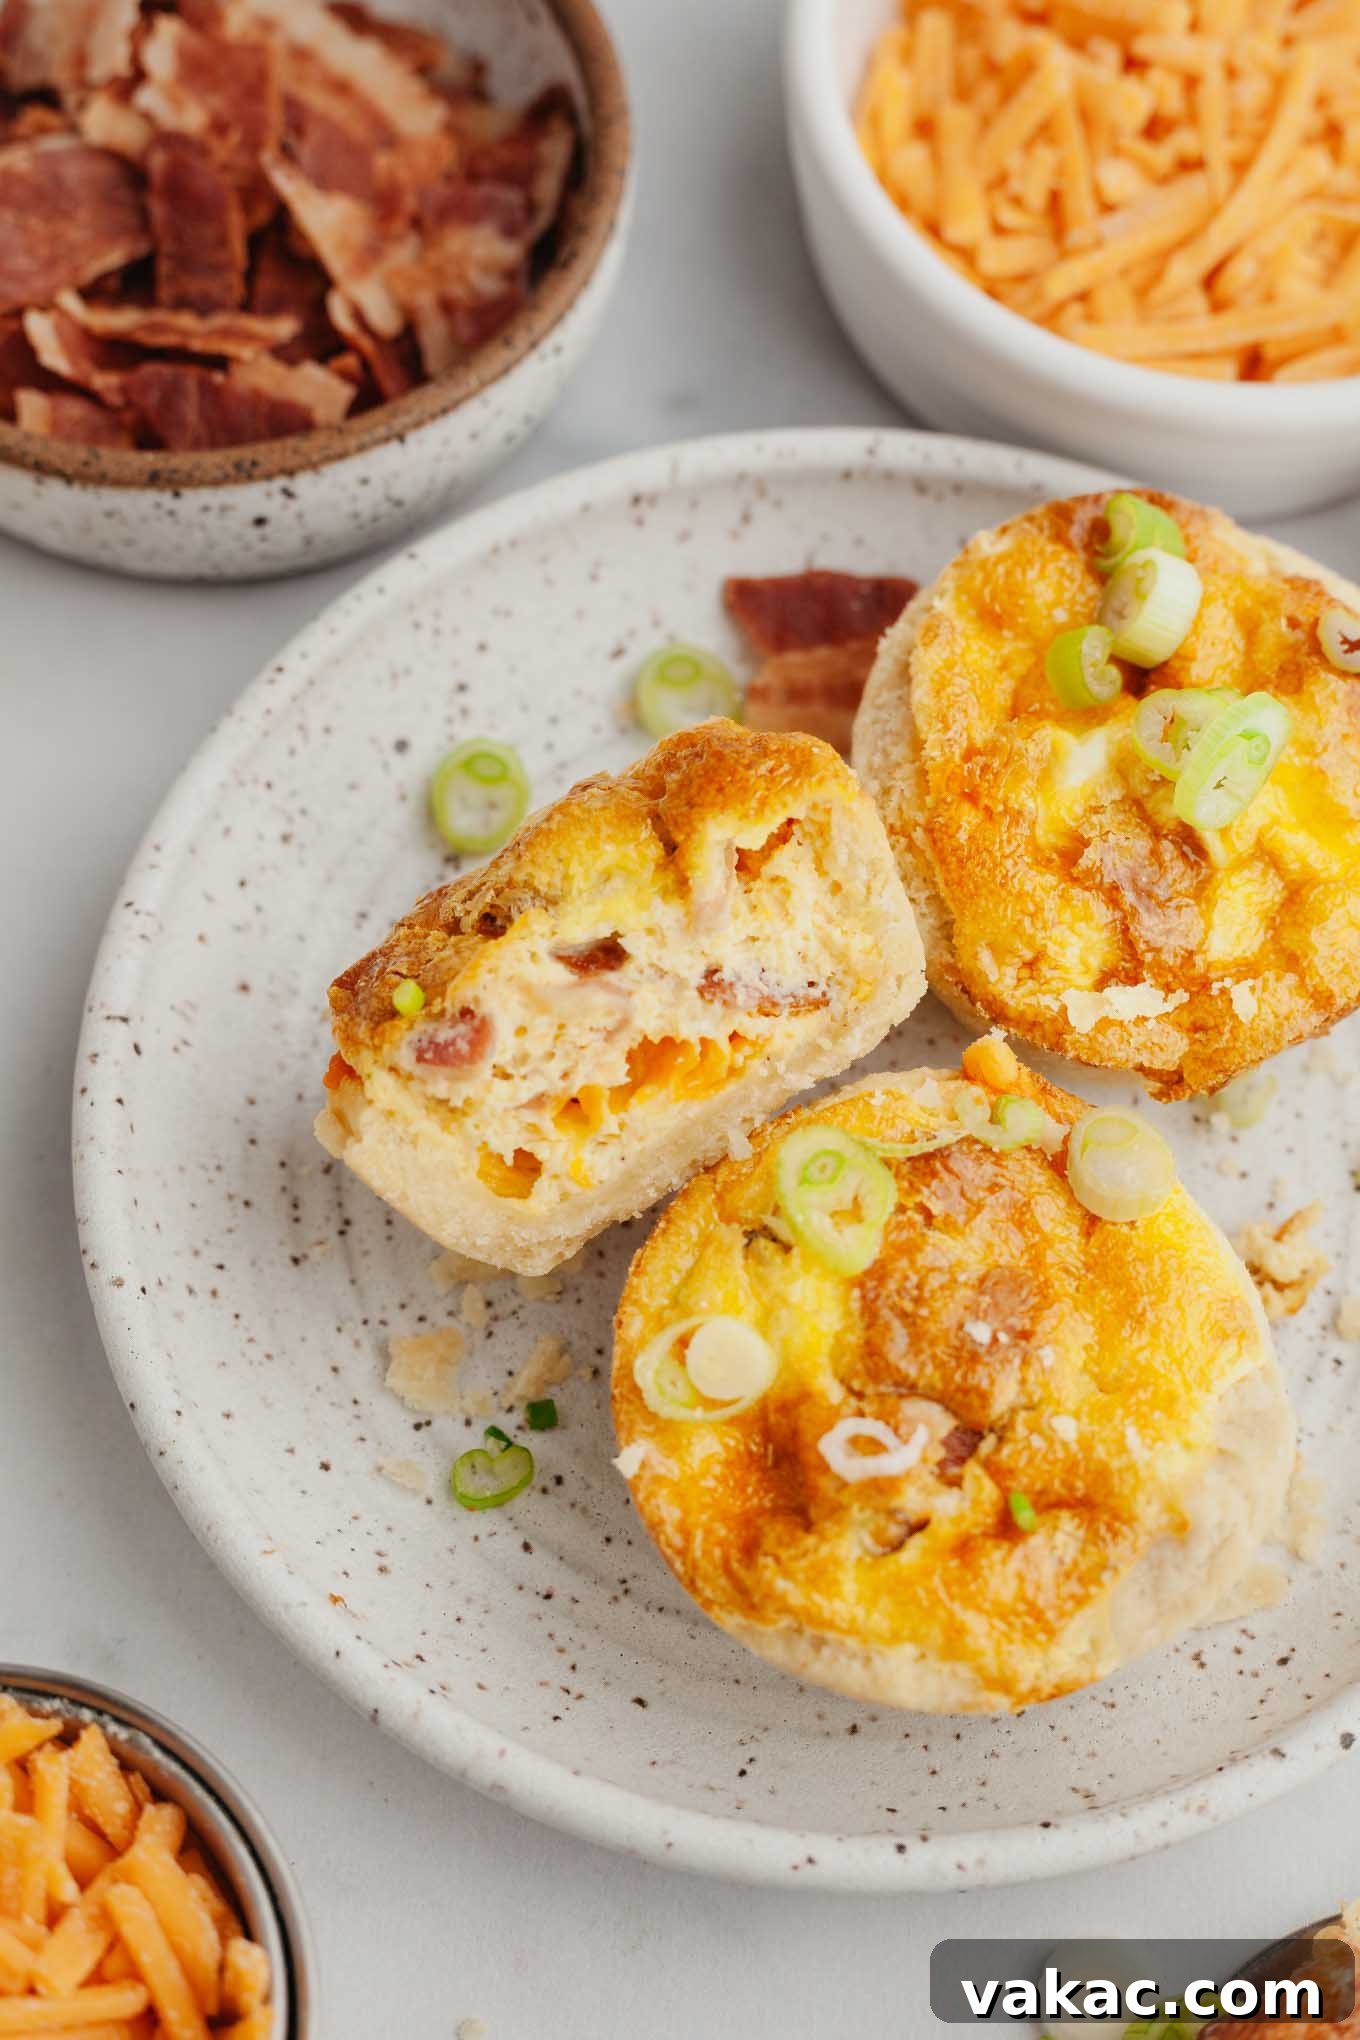
Much like their full-sized counterparts, these mini quiches are bursting with flavor, often featuring a classic combination of salty bacon, fresh chopped green onions, and gooey shredded cheddar cheese. The key difference, and what makes them truly special, is their preparation in a muffin pan. This method transforms a traditional pie into individually portioned delights that are incredibly easy to serve, eat, and transport. No more struggling with slicing a large quiche – simply grab and go!
Mini quiches shine on breakfast and brunch buffets, allowing guests to serve themselves with ease. Their make-ahead potential is another huge advantage; prepare them in advance, refrigerate, and simply reheat before serving. This convenience makes them a perfect addition to any festive spread, from an Easter brunch menu to elegant bridal or baby showers. The beauty of this recipe also lies in its adaptability, as the filling can be easily customized to suit any palate or dietary preference. We’ll explore a variety of delicious variations to inspire your culinary creativity.
Why Choose Mini Quiches for Your Next Meal?
Beyond their charming appearance, mini quiches offer several practical benefits that make them superior to a standard large quiche for many occasions:
- Perfect Portion Control: Each mini quiche is a single serving, making it easy to manage portions for individuals or larger groups. This is particularly useful for events where guests might want to sample various dishes.
- Ultimate Portability: Their individual size makes them incredibly easy to pack for breakfasts on the go, school lunches, picnics, or office potlucks. Forget messy slices; these are designed for convenience.
- Appealing Presentation: Mini quiches are inherently adorable and add an elegant touch to any spread. Arrange them on a platter, and they become an instant focal point, inviting guests to indulge.
- Faster Baking Time: Because they are smaller, mini quiches cook much quicker than a full-sized quiche, saving you time in the kitchen.
- Versatile Customization: The individual nature means you can offer a variety of fillings in one batch, catering to different tastes or dietary needs without making multiple full-sized quiches.
Key Ingredients for Flawless Mini Quiches
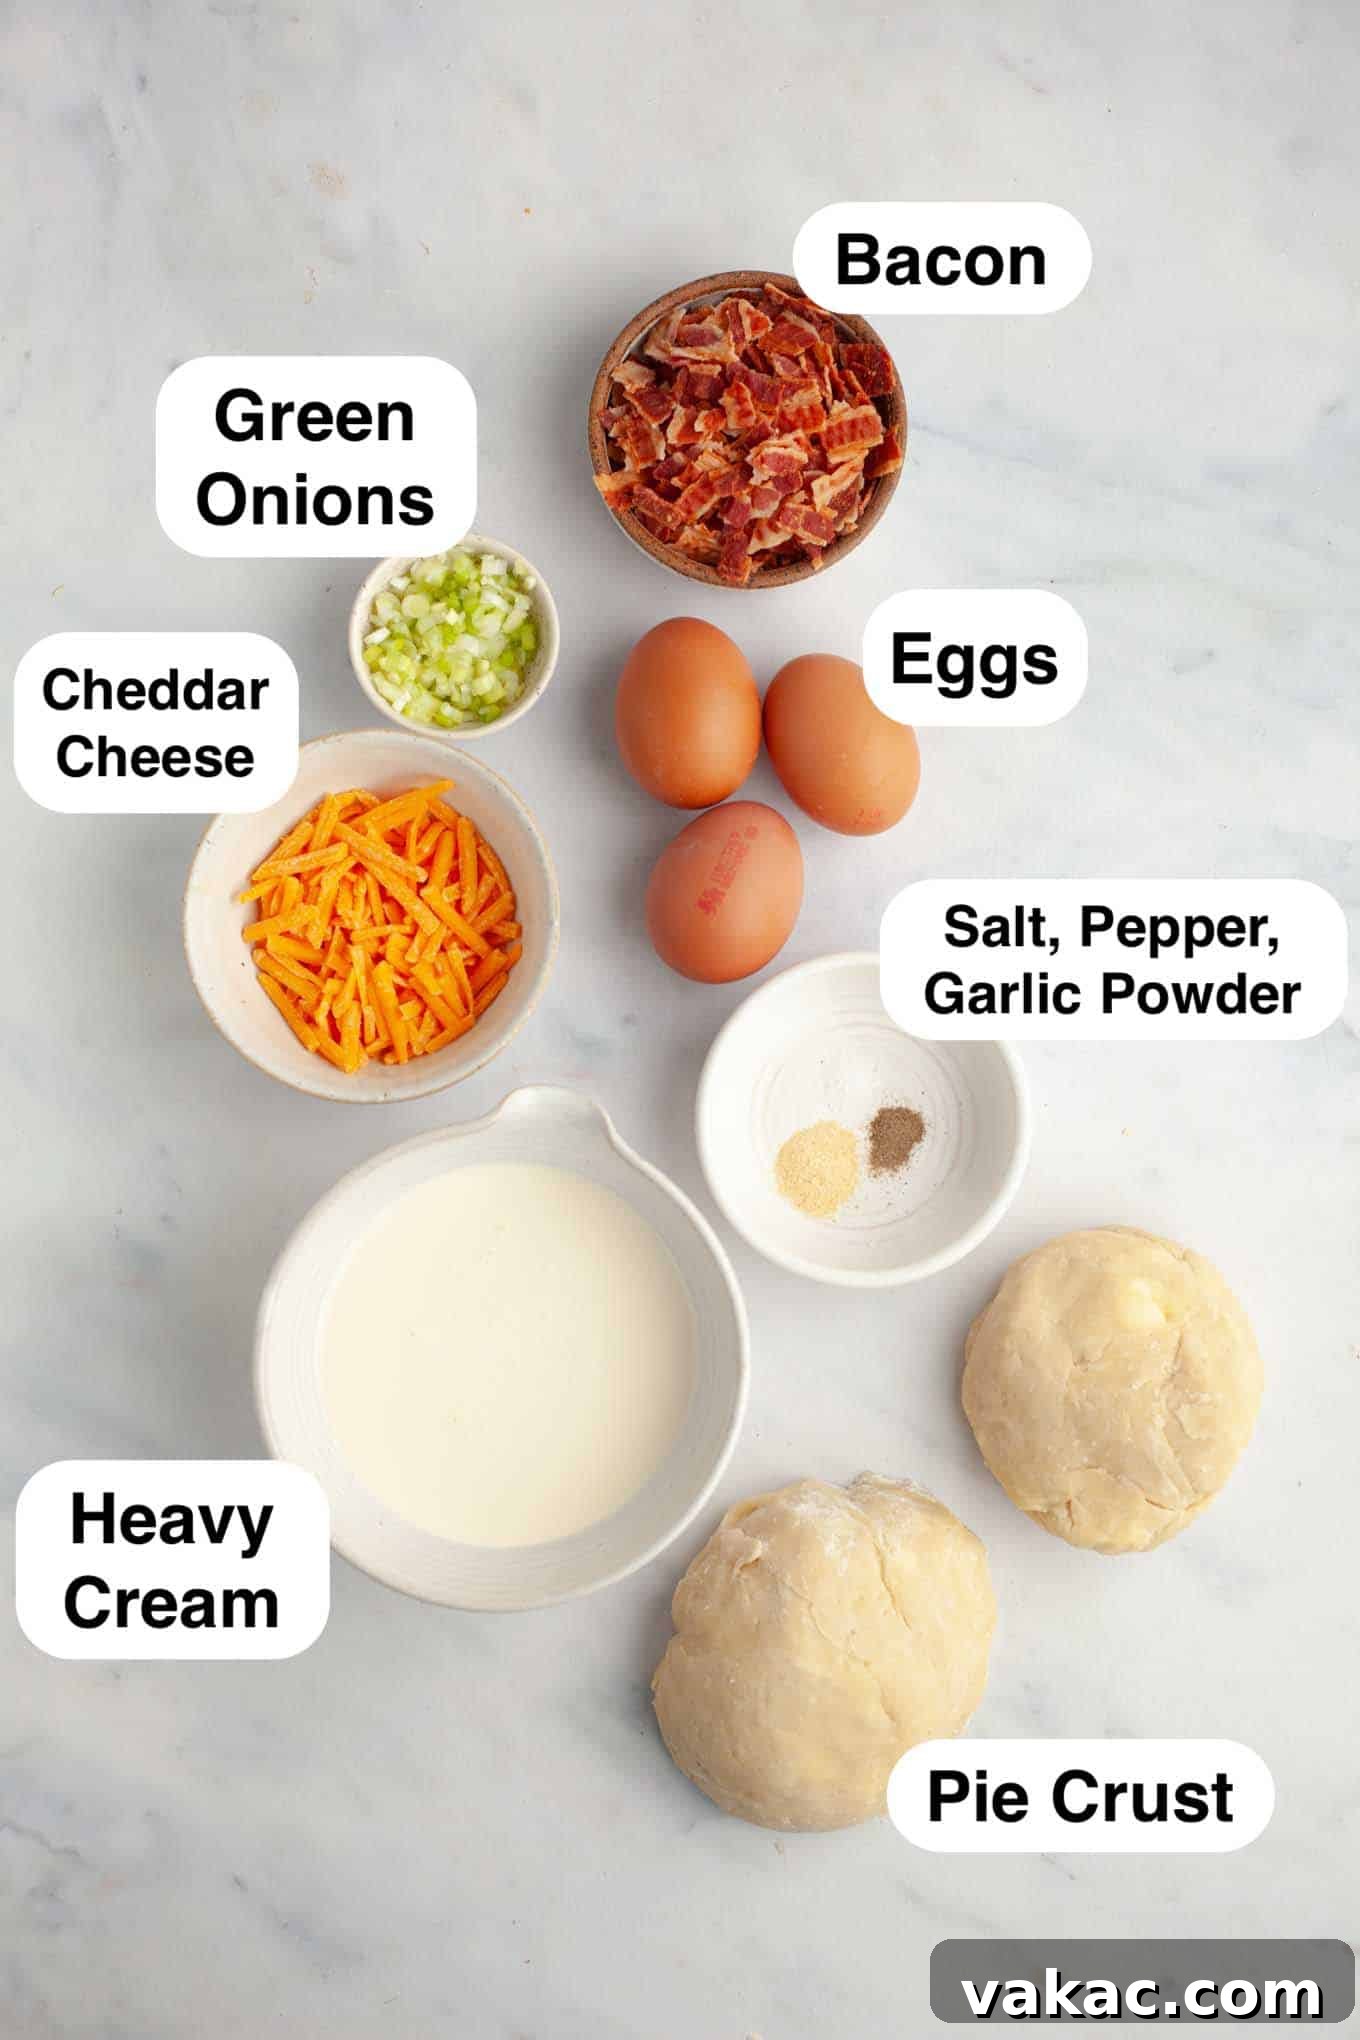
Crafting exceptional mini quiches begins with selecting the right ingredients. Here’s a closer look at what you’ll need and some tips for each component:
- Pie Crust: The foundation of any great quiche is a wonderfully flaky crust. If you’re opting for homemade, one batch of a standard homemade pie crust recipe should yield about 12 mini circles. For convenience, store-bought pie crusts work beautifully; you’ll likely need two to achieve 12 mini quiches. Look for all-butter pie crusts for the best flavor and flakiness.
- Eggs: Three large eggs are all it takes for this recipe’s rich filling. Fresh, high-quality eggs will contribute to a more vibrant color and superior texture in your quiches. Ensure they are at room temperature for easier whisking and better incorporation with the cream.
- Heavy Cream: This is the secret to a luxuriously creamy quiche filling. Using heavy cream ensures a rich, smooth texture that truly melts in your mouth. While you can substitute with half and half, be aware that your quiches will be slightly less creamy and may have a firmer set. Whole milk can also be used, but the texture will be lighter still.
- Bacon: My personal favorite mix-in, bacon adds a delightful smoky and salty crunch. You have options here: purchase pre-cooked, crumbled bacon for a time-saver, or cook your own crispy bacon in the oven or on the stovetop. Ensure it’s fully cooked and finely chopped for even distribution within the mini quiches.
- Cheese: Grated cheddar cheese offers a classic, sharp flavor and excellent melt. However, feel free to experiment! Other fantastic choices include creamy Gruyere, tangy feta, mild Swiss, pungent goat cheese, or spicy pepper jack. For the best melting and flavor, I highly recommend grating your own cheese from a block. Pre-shredded packaged cheeses often contain anti-caking agents that can hinder smooth melting.
- Green Onions: Finely chopped green onions provide a fresh, mild oniony bite that beautifully balances the richness of the bacon and cheese. While optional, they add a touch of color and a pleasant herbaceous note. You can also experiment with chives or other fresh herbs like dill or parsley.
- Spices: A simple blend of salt, black pepper, and garlic powder enhances the overall flavor of the egg filling without overpowering the other ingredients. Be mindful of the salt content if your bacon or cheese is particularly salty, and adjust accordingly.
Step-by-Step Guide to Crafting Your Mini Quiches
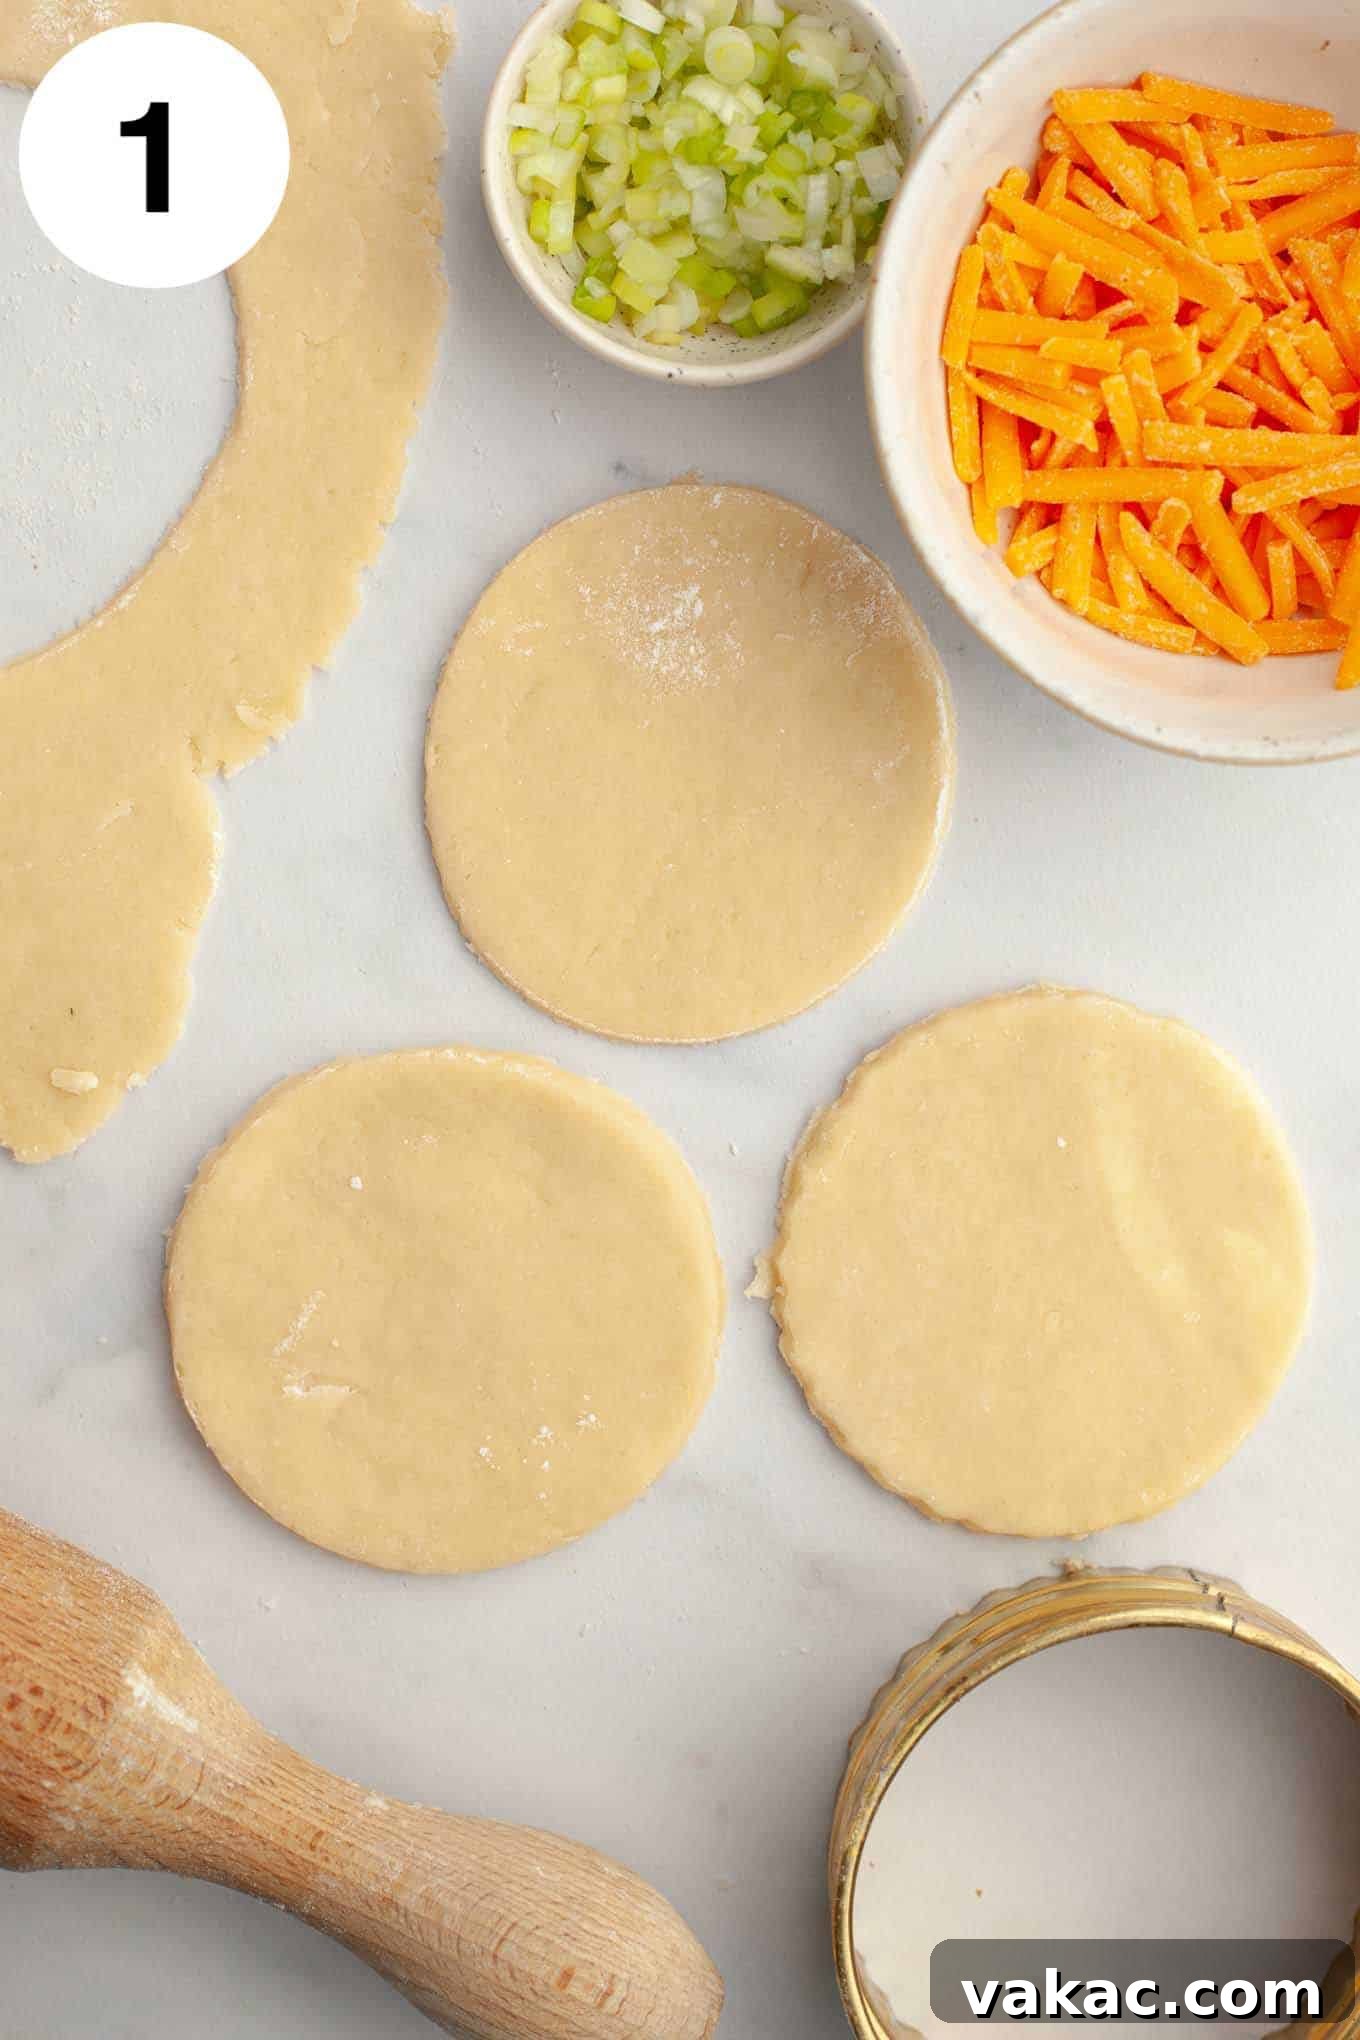
- Prepare the Pie Crusts: Begin by lightly flouring your work surface to prevent the pie crust from sticking. Roll out your pie crust (homemade or store-bought) to an even ⅛-inch thickness. Using a 3.5-inch round cookie cutter or the rim of a standard drinking cup, cut out 12 circles. Gather and re-roll any scrap dough as needed to achieve all 12 circles.
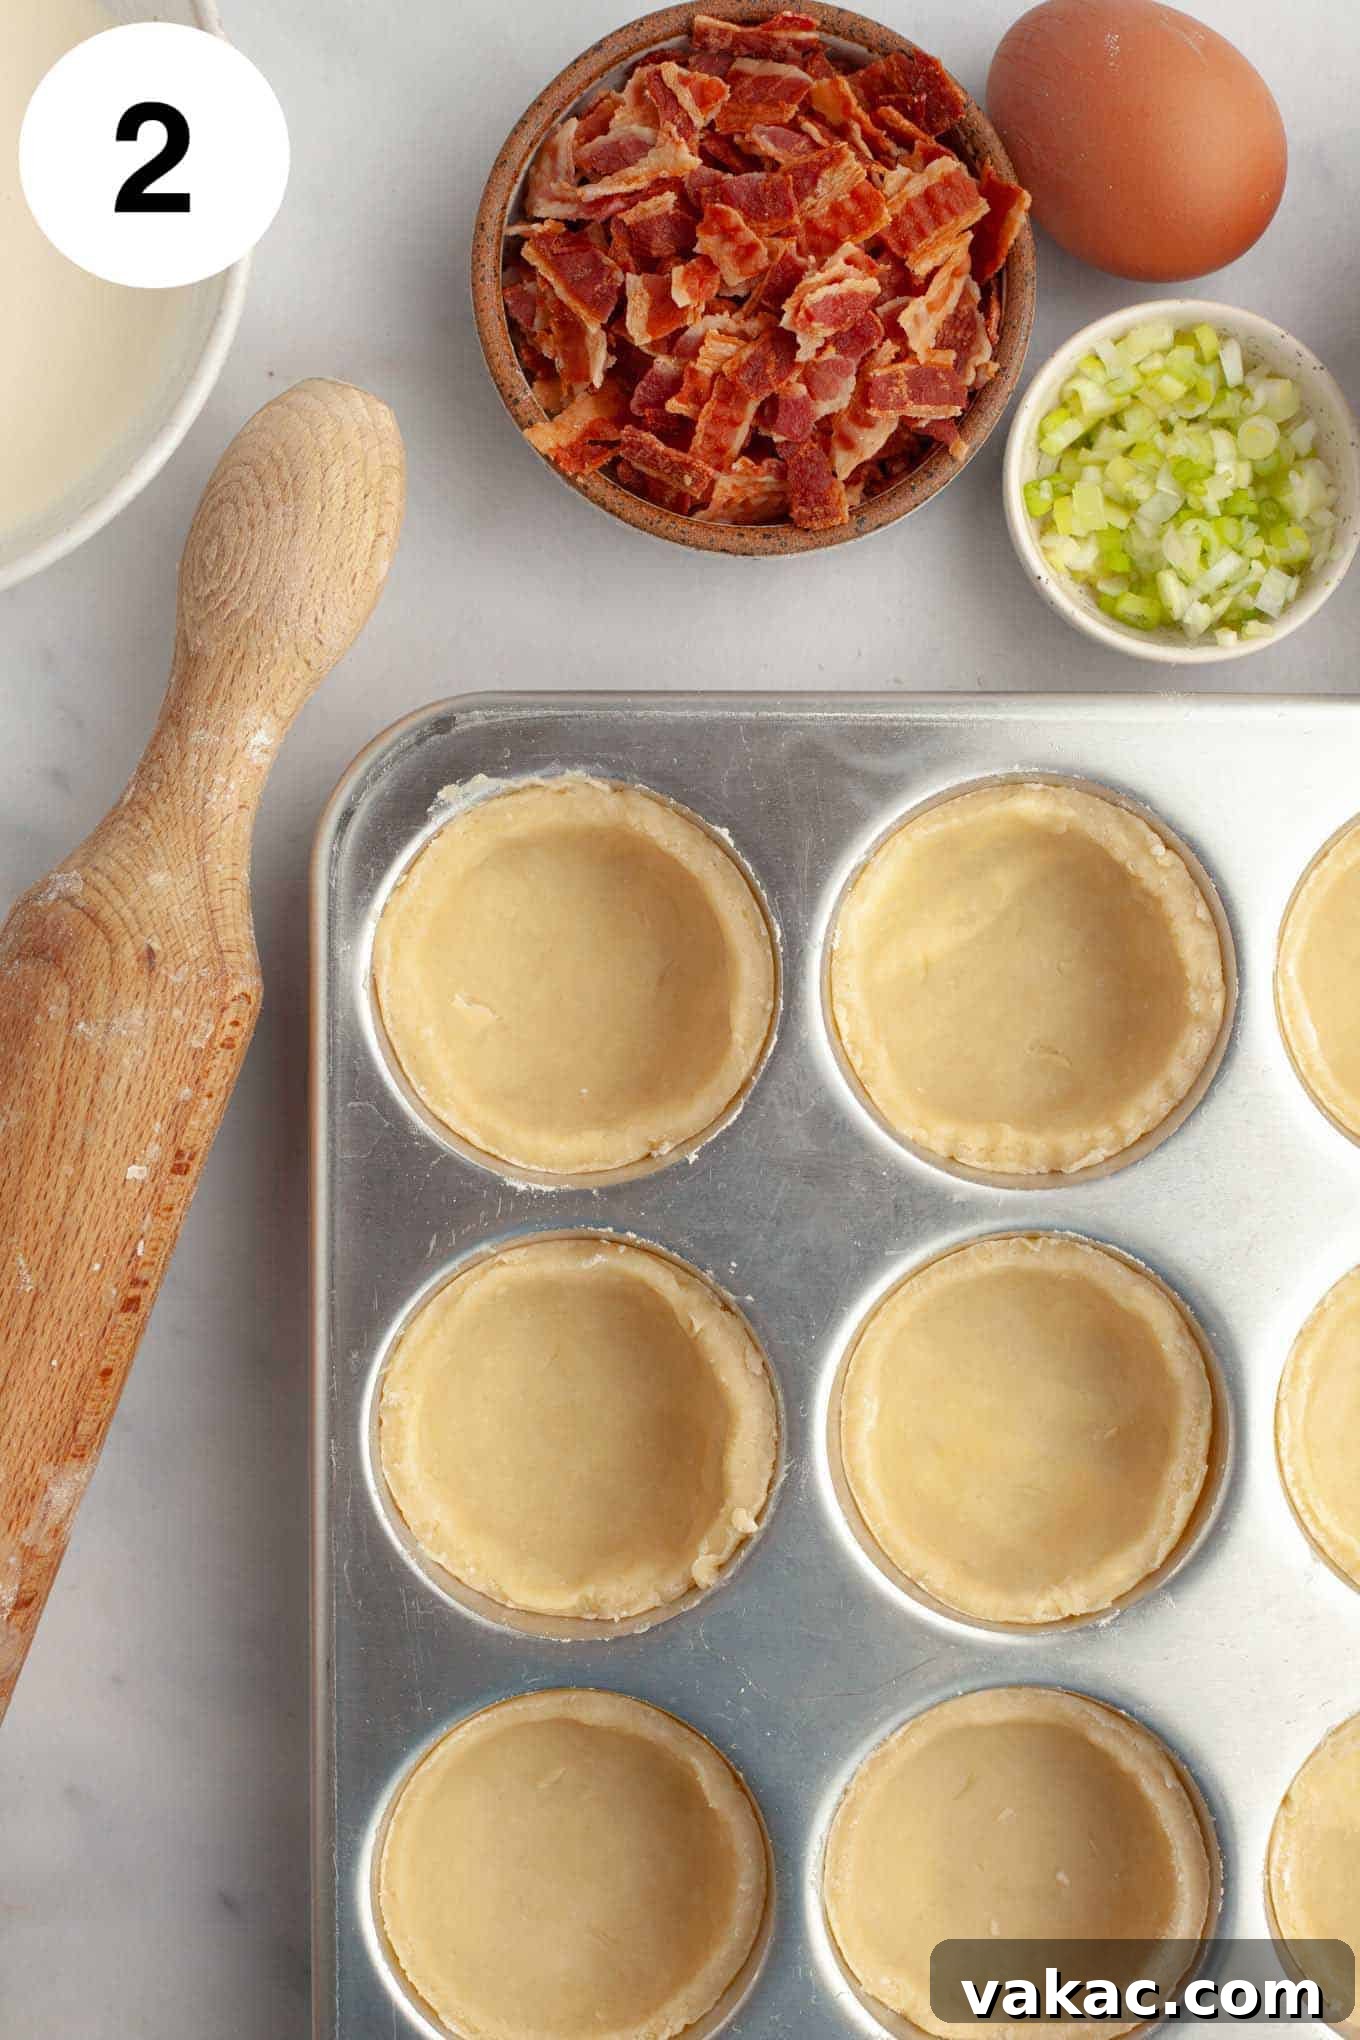
- Arrange Crusts in Muffin Pan: Generously grease a standard 12-cup muffin tin with nonstick cooking spray. Carefully transfer each pie crust circle into a muffin cavity. Gently press the dough down and around the sides, ensuring it fits snugly and reaches all the way up the rim of each cup. This creates a sturdy shell for your filling. Place the muffin pan in the refrigerator while you prepare the egg mixture; chilling helps prevent the crust from shrinking during baking.
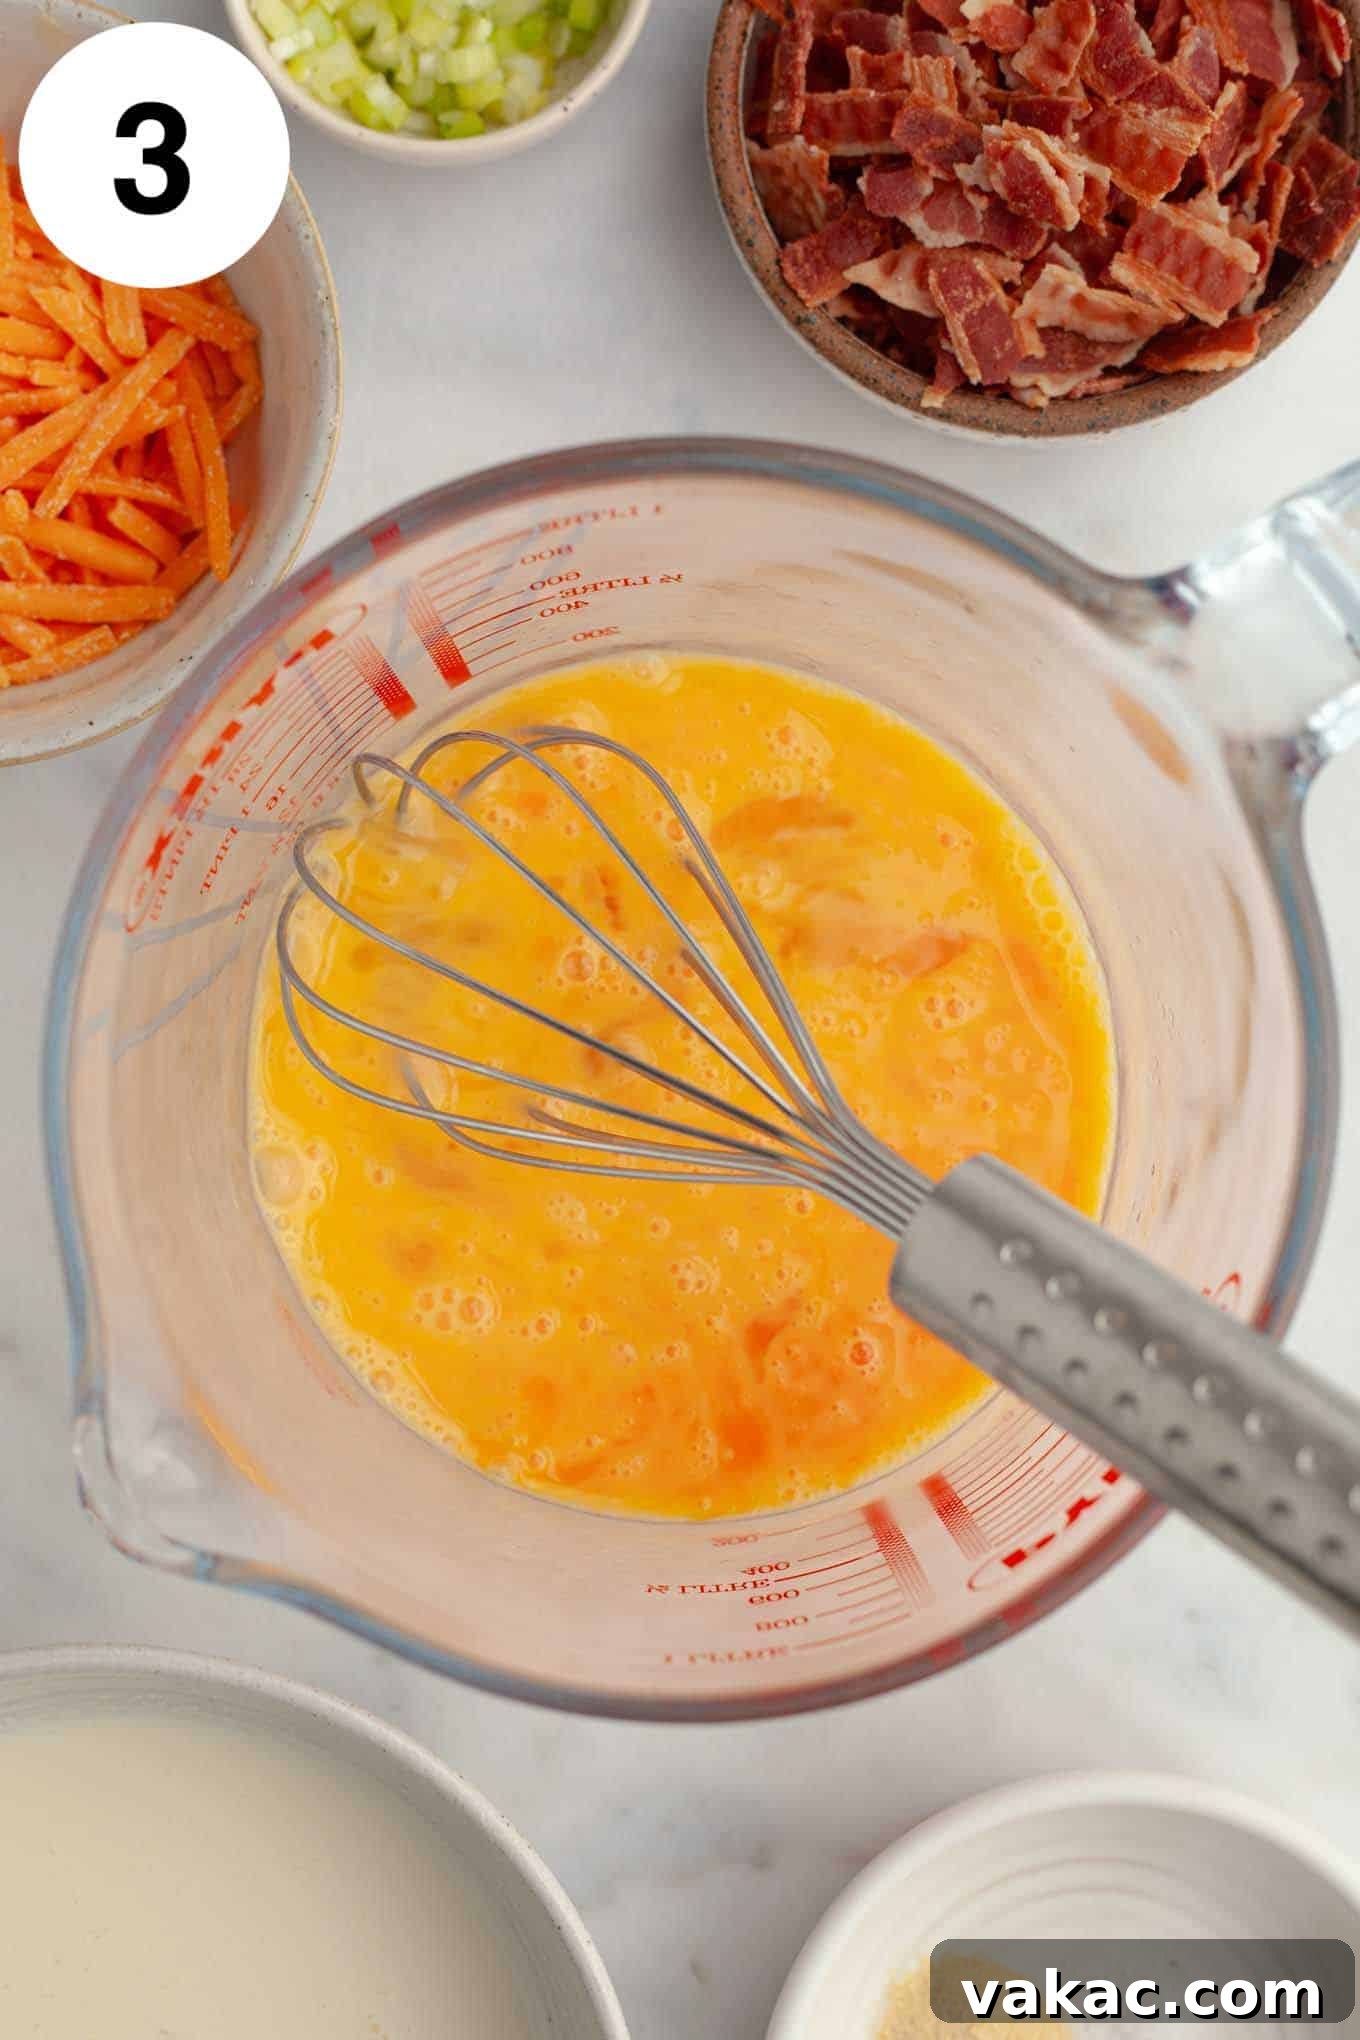
- Whisk the Velvety Filling: In a large mixing bowl or a liquid measuring cup with a spout (which makes pouring easier), lightly beat the eggs until just combined and pale yellow. Avoid over-whisking at this stage, as incorporating too much air can lead to a spongy texture in your final quiches.
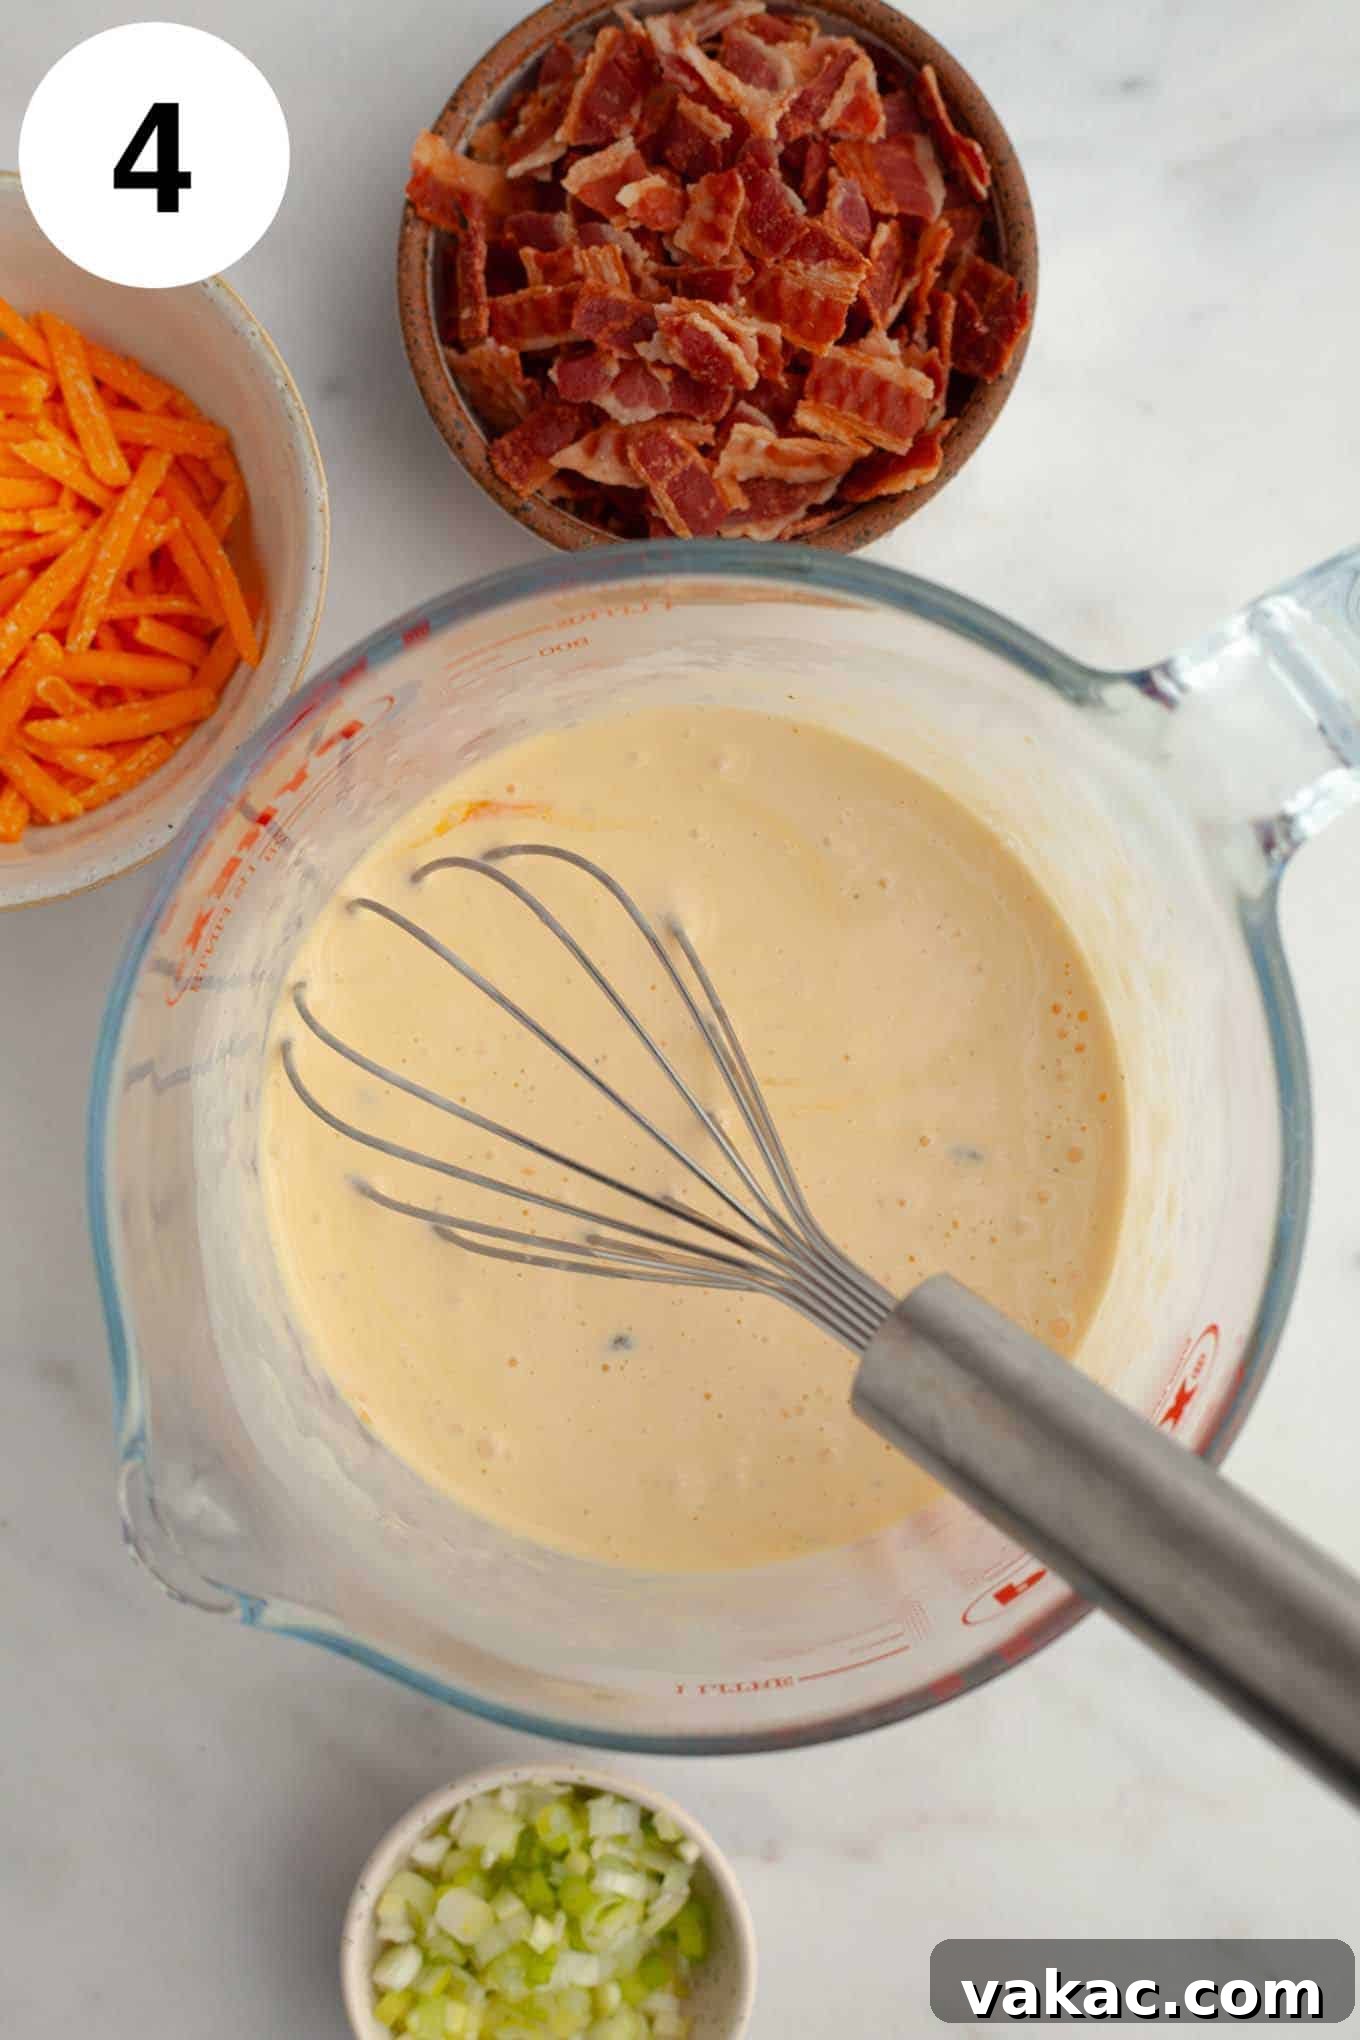
- Complete the Filling Mixture: Add the heavy cream, garlic powder, salt, and black pepper to the beaten eggs. Whisk gently until all ingredients are just combined. Again, be careful not to overmix; a few gentle stirs are sufficient to integrate everything without introducing excess air.
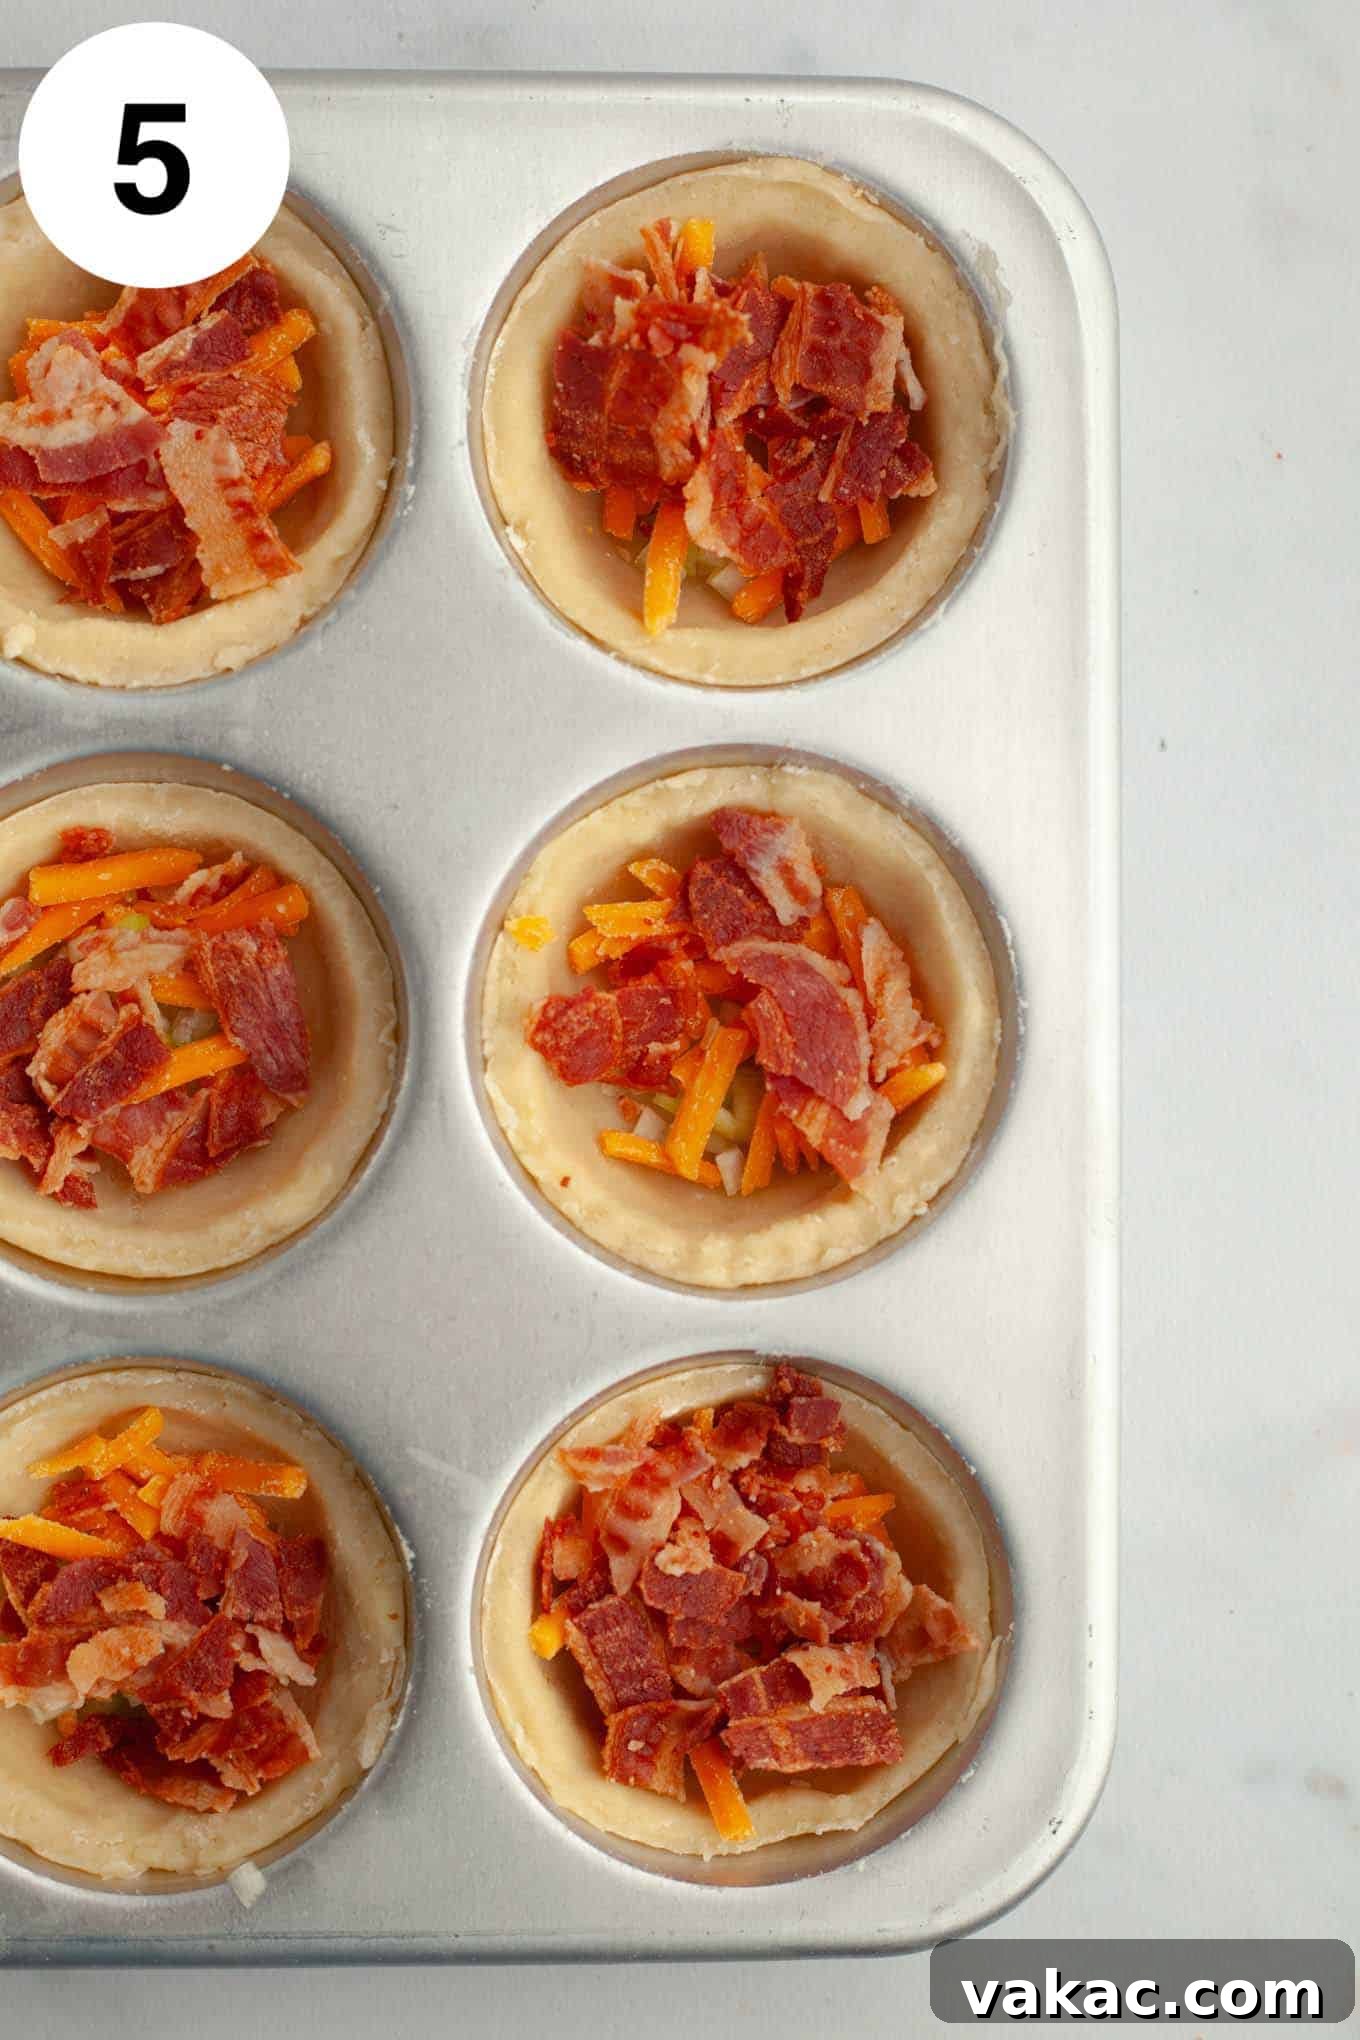
- Assemble with Mix-ins and Filling: Remove the chilled muffin pan from the refrigerator. Evenly divide your chopped bacon, shredded cheese, and finely chopped green onions among the 12 pie crusts in the muffin cups. You can gently mix them into the egg filling beforehand if you prefer, but I find that distributing them directly into the crusts ensures each mini quiche has a balanced amount of every delicious component.
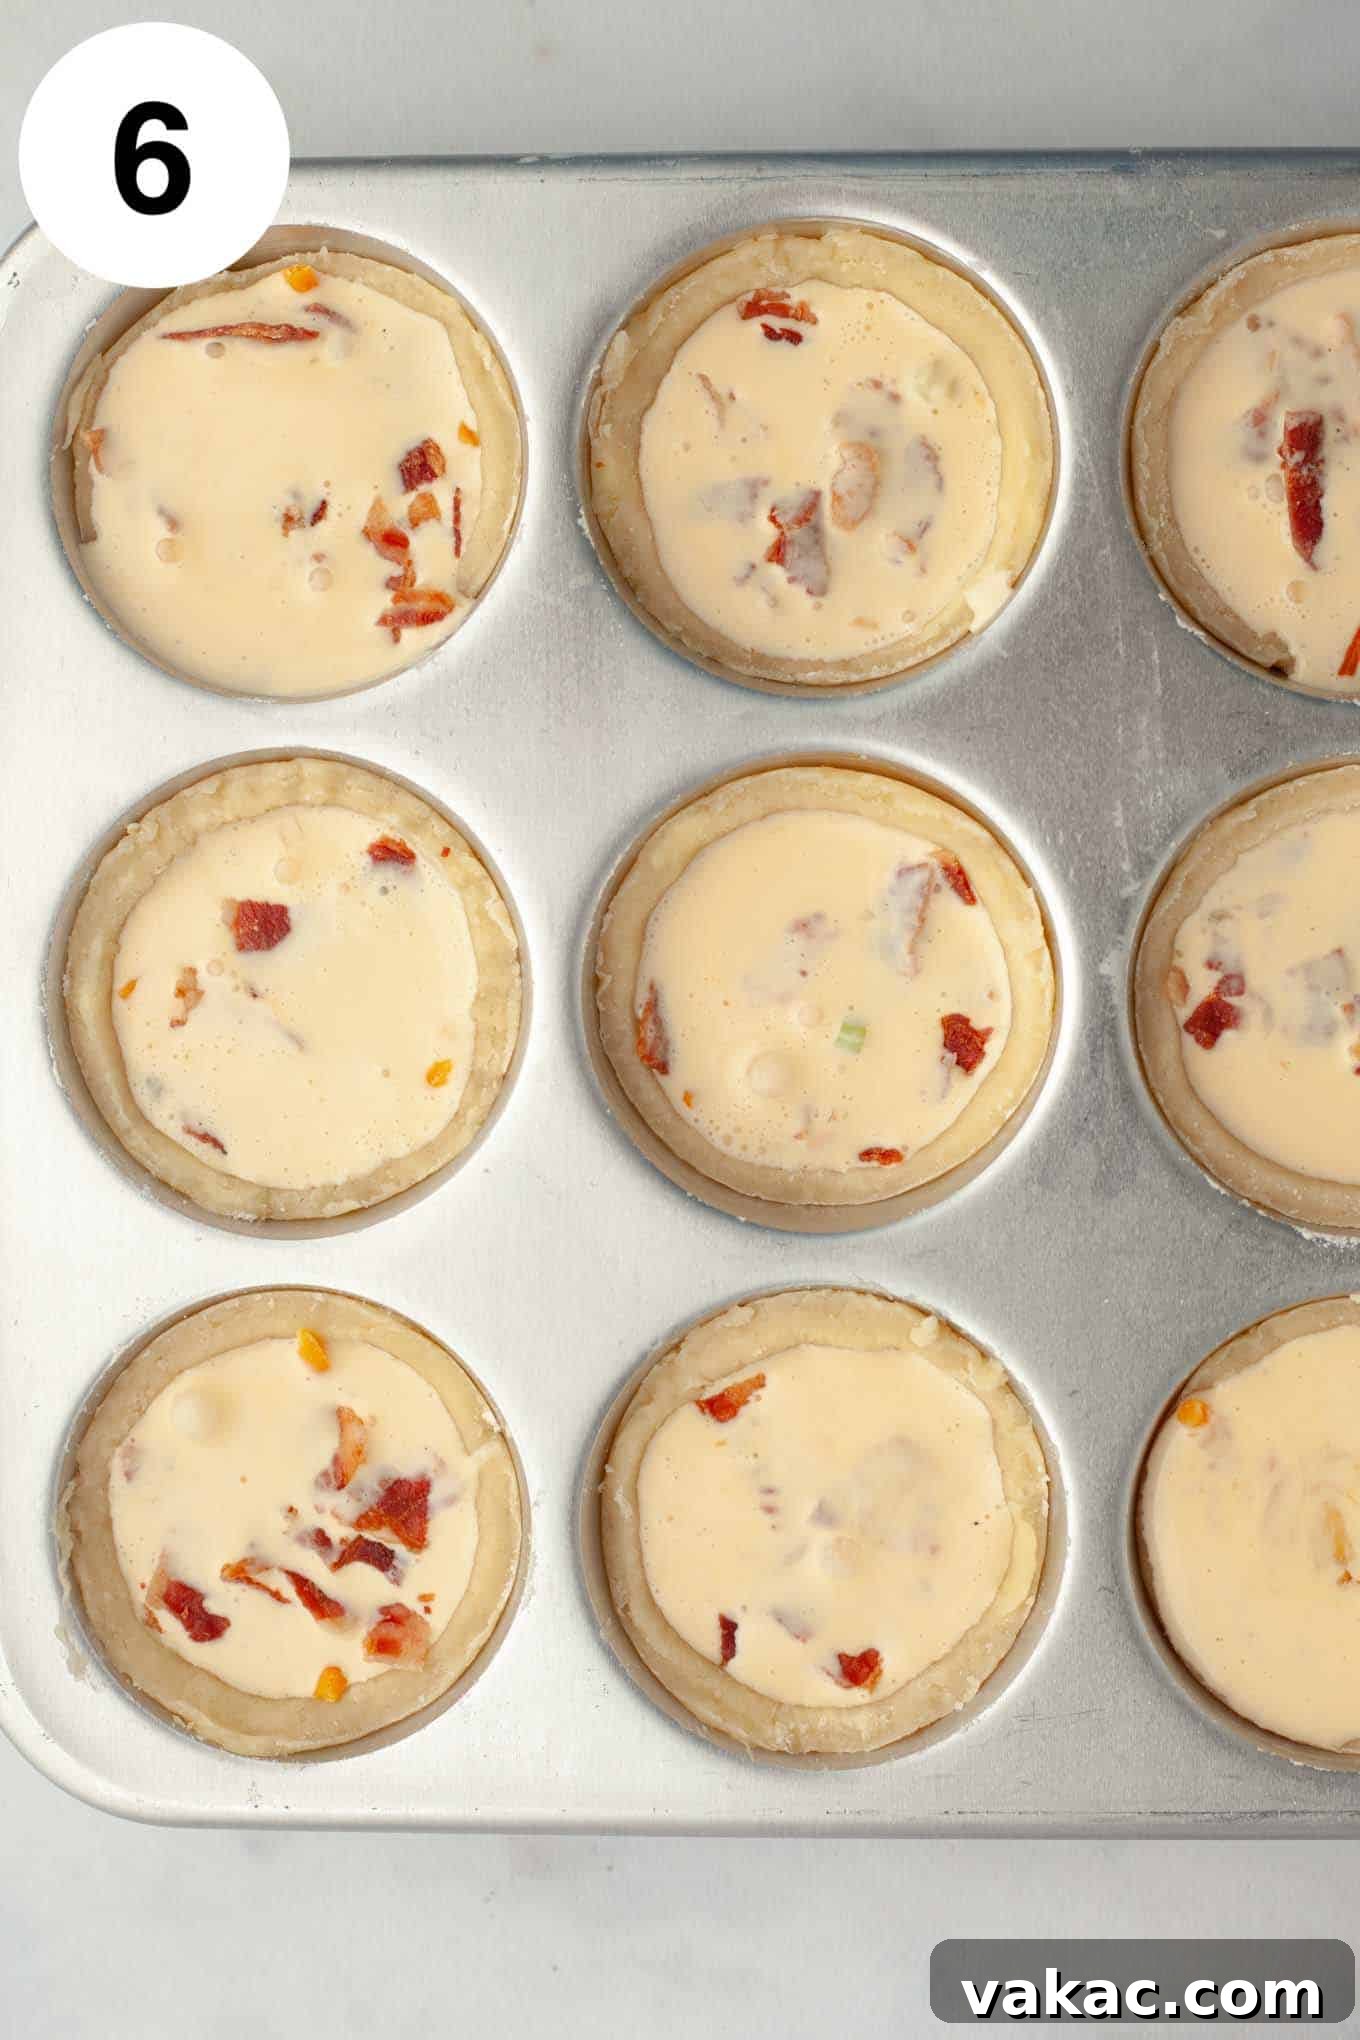
- Pour and Bake to Golden Perfection: Carefully pour the egg mixture over the mix-ins in each crust, filling each one almost to the top, leaving a small amount of space for expansion during baking. If any mix-ins are clustered, use a toothpick to gently spread them out. Bake in a preheated oven at 375°F (190°C) for 18 to 23 minutes, or until the tops are set, slightly puffy, and a toothpick inserted into the center comes out clean.
- Cooling for Optimal Texture: Once baked, remove the muffin pan from the oven and transfer it to a wire rack. Allow the mini quiches to cool in the pan for about 10 minutes. This crucial step allows the filling to set properly, preventing it from collapsing when removed. After 10 minutes, carefully remove the quiches from the pan and transfer them back to the wire rack to cool slightly further before serving. Piping hot quiches can burn your mouth, and the flavors develop as they cool a bit.
Make-Ahead & Storage Solutions for Ultimate Convenience
One of the many charms of mini quiches is their make-ahead potential, making them a fantastic option for entertaining or meal prepping. You can prepare these delightful bites up to four days in advance. Simply store them in an airtight container in the refrigerator once they have completely cooled. While the pie crust may soften slightly over time, the quiches will retain their wonderful flavor and texture.
When ready to serve, for the best experience, I recommend letting the refrigerated quiches sit on your counter for about 20 minutes to take the chill off. If you prefer them warm, you can easily reheat them. A quick blast in the microwave for 20-30 seconds per quiche is usually sufficient. Alternatively, for a crisper crust, reheat them in a preheated oven at 300°F (150°C) for 5-10 minutes, or until warmed through.
Freezing Instructions:
Mini quiches also freeze exceptionally well, extending their shelf life for up to 3 months. To freeze, allow the baked quiches to cool completely. Arrange them in a single layer on a baking sheet and flash freeze for about an hour until solid. Then, transfer the frozen quiches to a freezer-safe airtight container or freezer bags, layering them with parchment paper to prevent sticking. When ready to enjoy, thaw them overnight in the refrigerator. Reheat as desired in the microwave or oven.
Unleash Your Creativity: Mini Quiche Variations
The beauty of this mini quiche recipe lies in its incredible versatility. The filling is a blank canvas, ready for you to experiment with different mix-ins. Use these suggestions as a springboard for your own culinary adventures, or simply use whatever fresh ingredients you have on hand in your fridge!
- Protein Power-Ups: Instead of bacon, try chopped ham, cooked crumbled sausage (breakfast sausage, Italian sausage), diced cooked chicken, or even smoked salmon for a more gourmet touch. Vegetarian options include cooked black beans or crumbled firm tofu seasoned with savory spices.
- Cheese Dreams: While cheddar is a classic, don’t limit yourself! Explore other cheeses like creamy Monterey Jack, pungent blue cheese, nutty Parmesan, or even a blend of Italian cheeses. The possibilities are endless.
- Herbaceous Accents: Beyond green onions, fresh chives, dill, parsley, or even a hint of thyme can add lovely aromatic notes to your quiches. Finely chop any fresh herbs to ensure they integrate well into the small quiche size.
- Vibrant Veggies: Incorporate any sautéed vegetables you love, but remember to chop them finely since these are mini quiches! Popular choices include spinach (make sure to squeeze out excess moisture), mushrooms, bell peppers, onions, asparagus, or sun-dried tomatoes. Ensure any raw vegetables are cooked down slightly to remove excess water before adding to the filling, preventing a watery quiche.
- Spicy Kick: Add a pinch of cayenne pepper, a dash of hot sauce to the filling, or finely diced jalapeños for those who enjoy a little heat.
Expert Tips for Mini Quiche Success
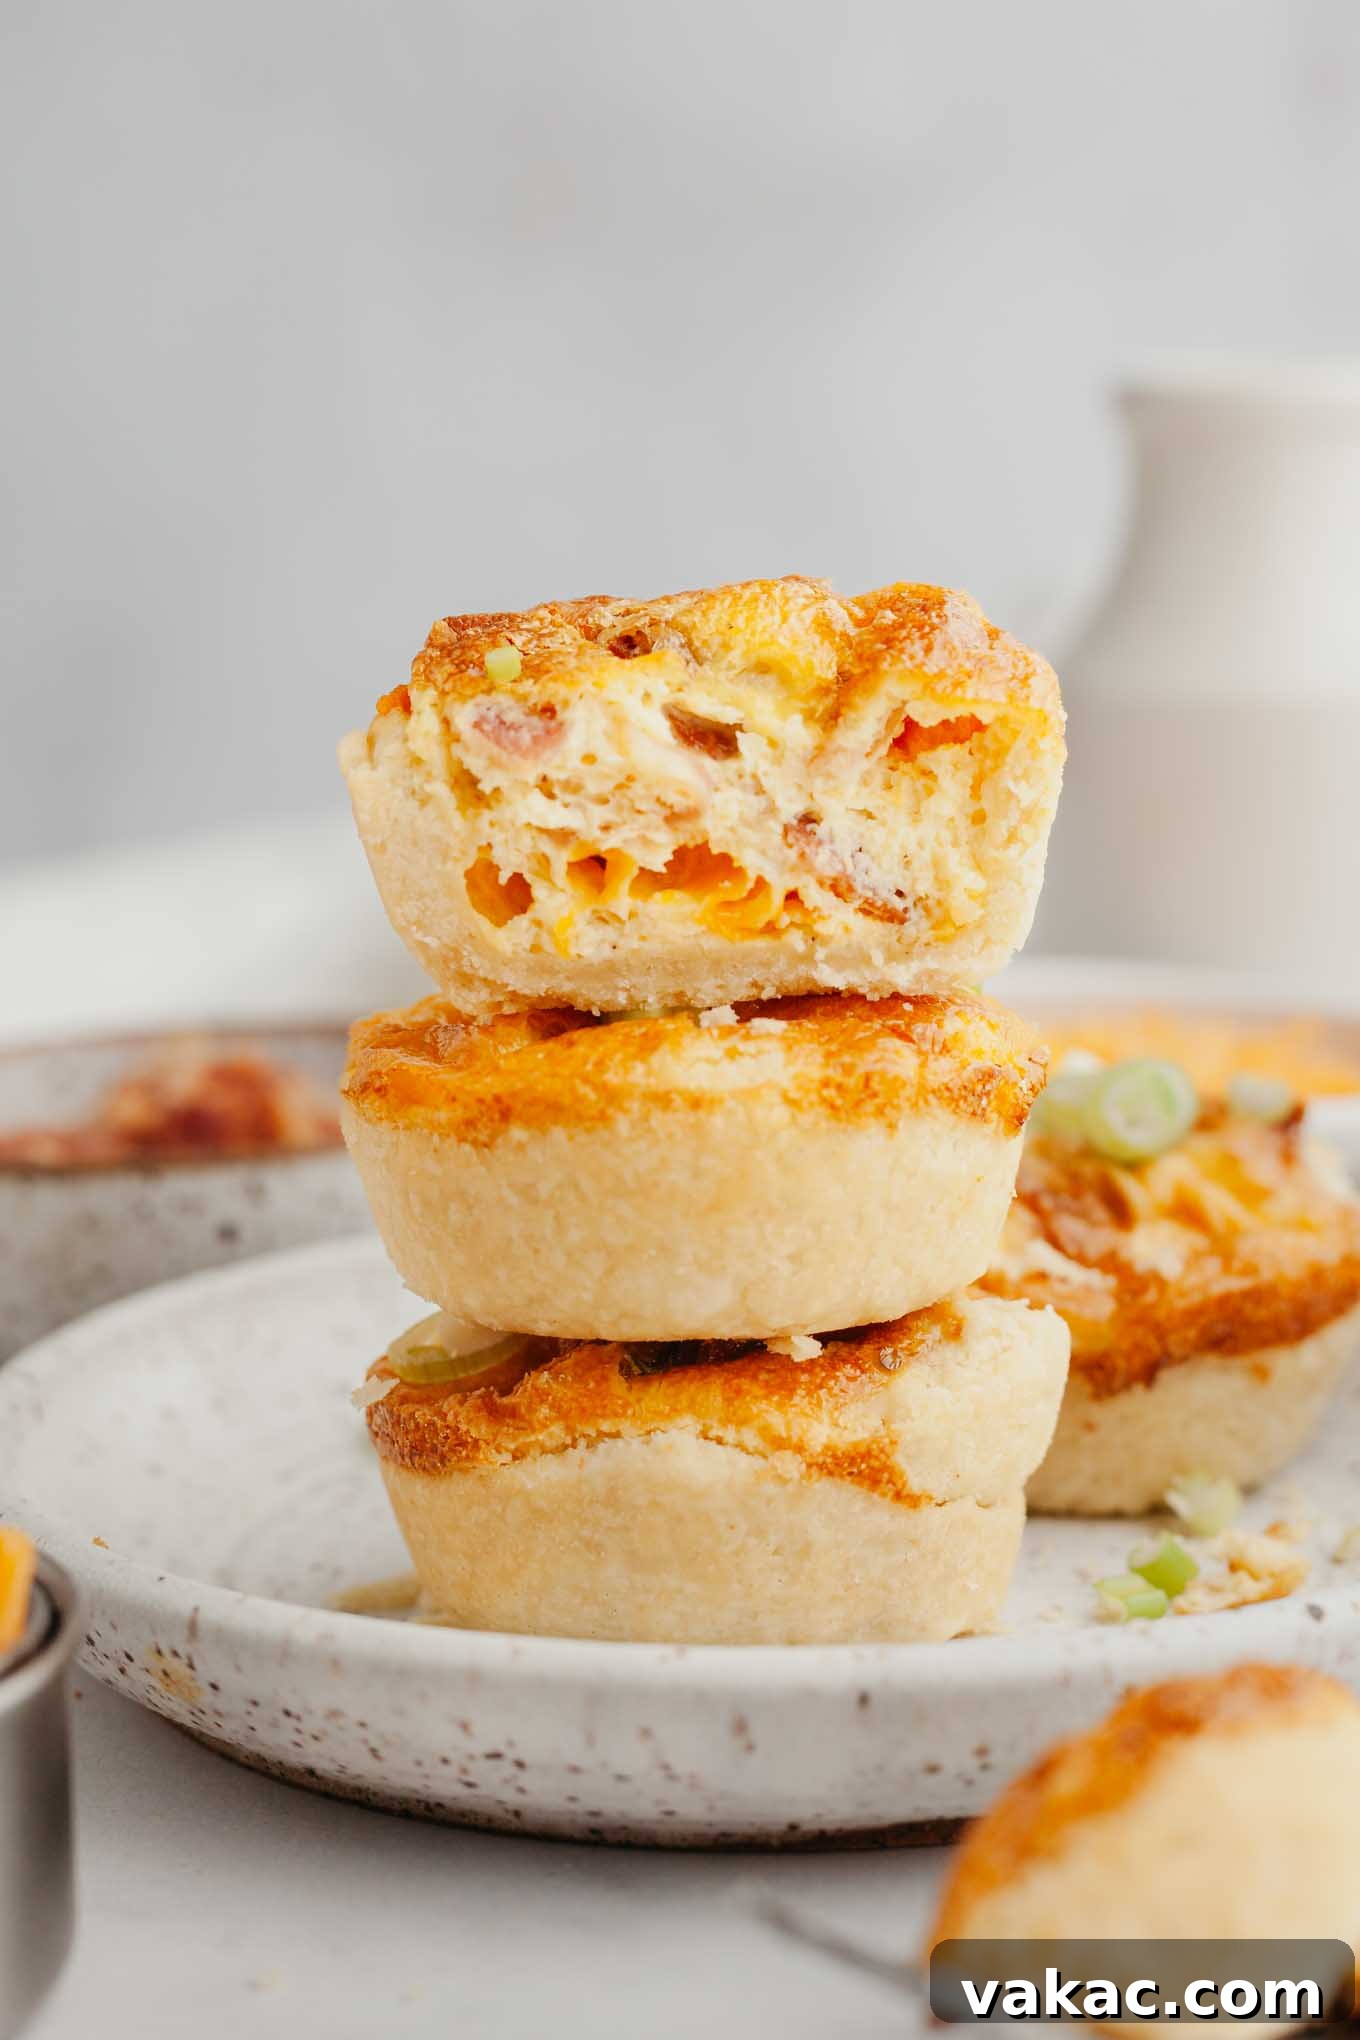
- Don’t Over-Thicken the Crust: While a sturdy crust is good, an overly thick pie crust can lead to an undercooked center in your mini quiches. Aim for an even ⅛-inch thickness when rolling. Since these mini quiches bake relatively quickly (around 20 minutes), a thinner crust ensures it bakes through completely and crisps up beautifully.
- Avoid Overmixing the Filling: When whisking the eggs and cream, mix just until combined. Aggressive or prolonged whisking incorporates too much air into the mixture, which can result in a spongy, airy, or rubbery texture rather than the desired smooth, creamy custard.
- Monitor Baking Closely: Begin checking your quiches around the 18-minute mark. Overbaking can lead to a dry, cracked filling. You’ll know they’re perfectly done when the centers are set, slightly puffed, and a gentle jiggle of the pan doesn’t reveal any liquid wobble in the middle. A toothpick inserted into the center should come out clean.
- Allow for Proper Cooling: Patience is key! Letting the quiches cool for 10 minutes in the muffin pan and then slightly longer on a wire rack is essential. This allows the delicate custard filling to fully set, preventing it from crumbling or collapsing when you remove them. Plus, it saves your mouth from burning on piping hot filling!
- Prevent a Soggy Bottom: To ensure a crisp crust, avoid overfilling the quiches. Also, if your mix-ins (especially vegetables like spinach or mushrooms) contain a lot of moisture, pre-cook and drain them thoroughly before adding to the quiche.
- Consider Your Mix-ins’ Saltiness: Adjust the amount of added salt in your egg mixture based on your chosen mix-ins. If you’re using salty bacon, ham, or strong cheeses, you might need less added salt to maintain balance.
Serving Suggestions: What Pairs Well with Mini Quiches?
Mini quiches are incredibly versatile and can be the star of your meal or a delightful accompaniment. Here are some ideas for creating a balanced and delicious spread:
- For Brunch: Pair them with a fresh fruit salad, a vibrant green salad with a light vinaigrette, crusty bread or croissants, and a selection of cheeses. Beverage-wise, mimosas, bloody marys, freshly squeezed orange juice, and hot coffee or tea are perfect complements.
- As an Appetizer: Serve mini quiches alongside other small bites like bruschetta, miniature skewers, or deviled eggs. They make an elegant starter for any gathering.
- Light Lunch: Enjoy a couple of mini quiches with a simple side salad for a satisfying and easy lunch.

Mini Quiche Recipe
40 mins
20 mins
1 hr
Pin Recipe
Leave a Review
Ingredients
- 1 homemade pie crust or 2 store-bought pie crusts
- 3 large eggs
- ¾ cup heavy cream (180 ml)
- ¼ teaspoon garlic powder
- ⅛ teaspoon salt omit if bacon or ham is salty
- ⅛ teaspoon black pepper
- ¾ cup fully cooked chopped bacon (45 grams)
- ½ cup shredded cheddar cheese (40 grams)
- 1 to 2 tablespoons finely chopped green onions (5 to 10 grams; I prefer to use 2 tablespoons)
Instructions
-
Preheat the oven to 375°F (190°C). Spray a 12-count muffin pan with nonstick cooking spray.
-
Roll the pie crusts out to ⅛-inch thickness on a lightly floured surface. Using a 3.5-inch cookie cutter (or a cup) cut out 12 circles from the pie crusts. Re-roll any scrap pieces of pie dough as needed to cut out the circles.
-
Place each circle of pie crust in each cavity of the prepared muffin pan. Gently press the dough down and around the sides, making sure the dough fits snuggly in the pan. Transfer the muffin pan to the refrigerator while you make the filling.
-
In a large mixing bowl or measuring cup, lightly beat the eggs. Add the heavy cream, garlic powder, salt, and pepper and whisk until just combined. Make sure not to over beat the eggs to avoid incorporating too much air.
-
Remove the muffin pan from the refrigerator. Sprinkle the bacon, shredded cheese, and chopped green onions evenly between all 12 pie crusts in the muffin pan. Then, carefully pour the egg mixture over the mix-ins, filling each one almost to the top. If needed, use a toothpick to move the mix-ins around so they’re evenly distributed.
-
Bake for 18 to 23 minutes or until the tops of the quiches are firm and set and a toothpick inserted into the center comes out clean.
-
Remove from the oven and transfer the pan to a wire rack. Cool in the pan for 10 minutes, then remove from the pan and transfer the mini quiches back to the wire rack to cool slightly before serving.
Notes
Did you make this recipe?
Mention @livewellbakeoften on Instagram or tag #livewellbakeoften.