
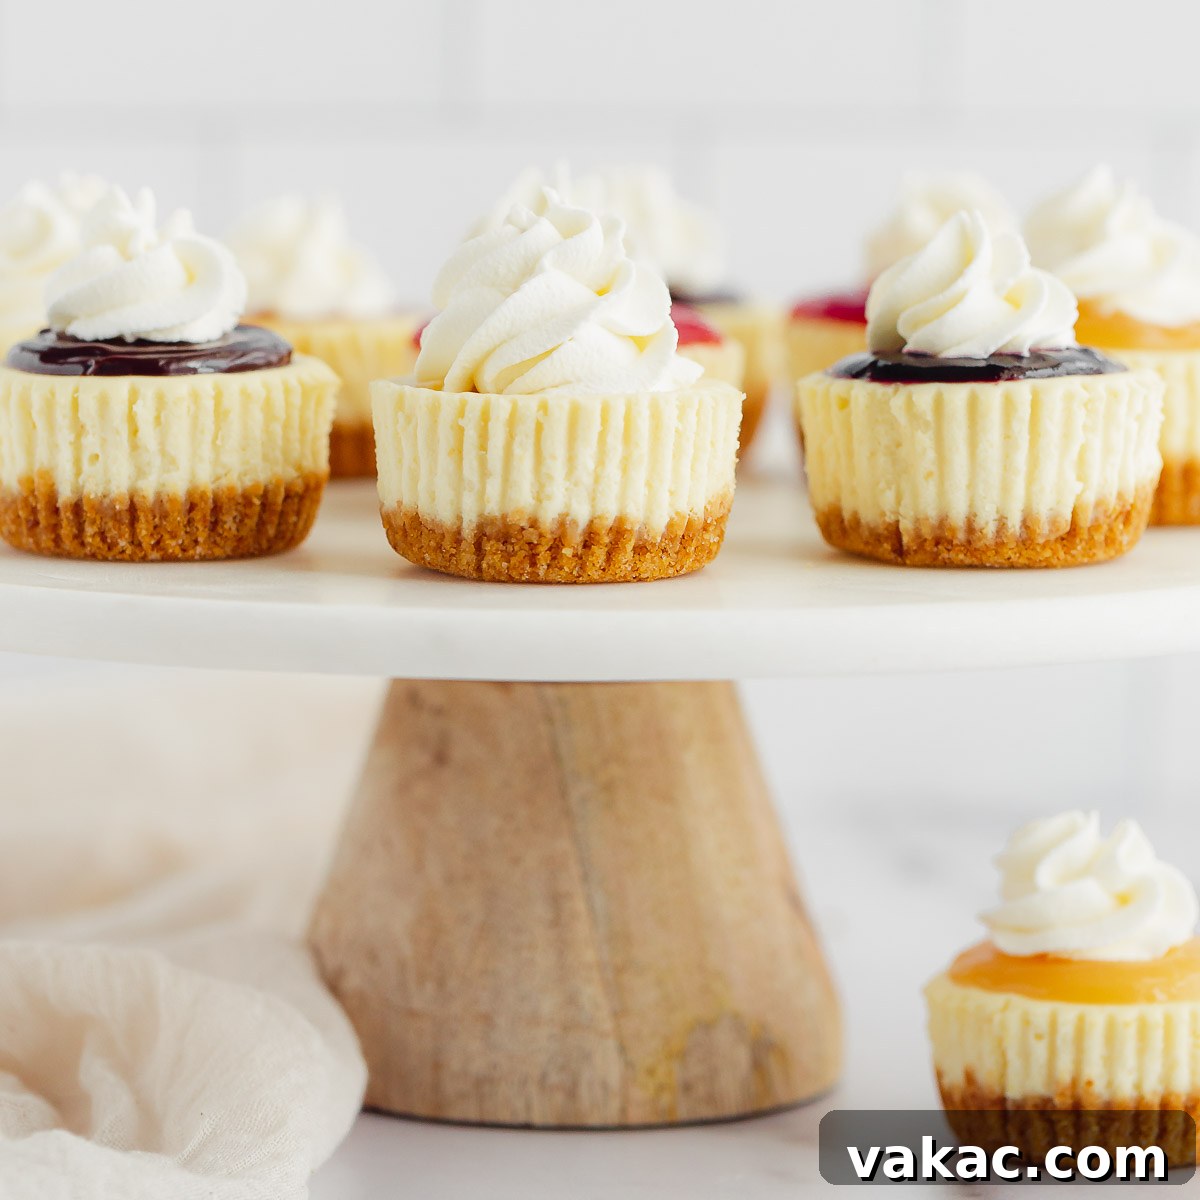
These Mini Cheesecakes offer the perfect blend of a buttery homemade graham cracker crust and an incredibly smooth, creamy cheesecake filling. This recipe simplifies the cheesecake-making process, making it wonderfully easy to create these delightful individual desserts, complete with a variety of delicious topping ideas!
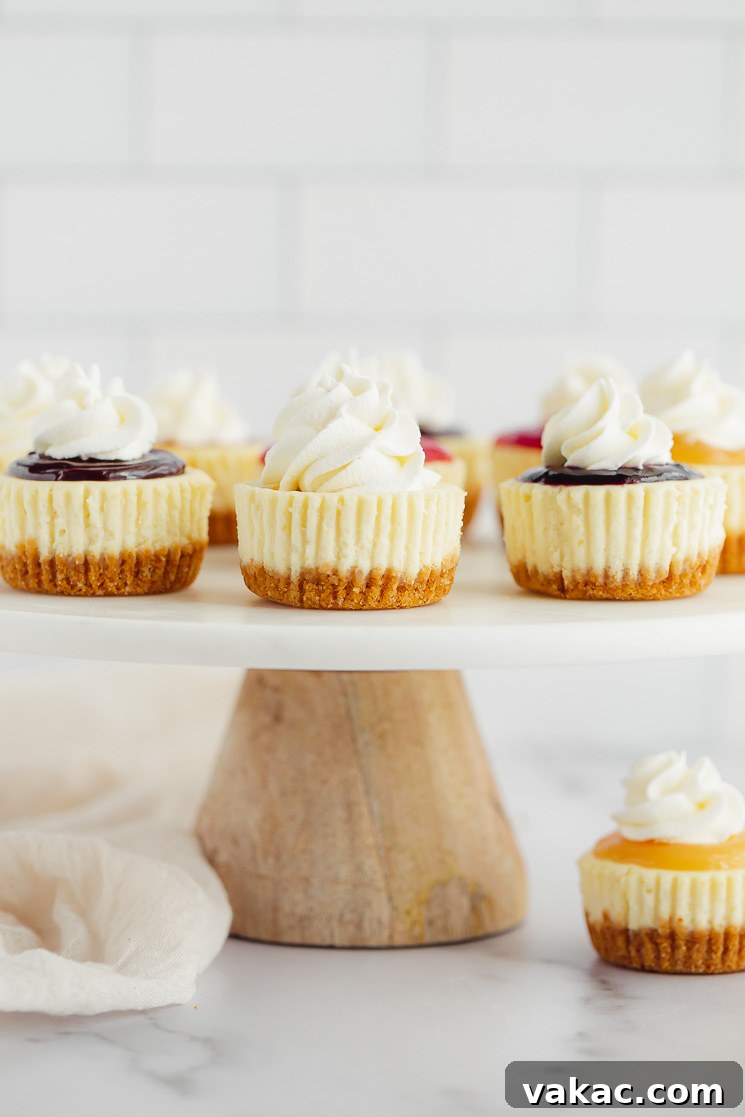
Easy Homemade Mini Cheesecakes: A Recipe for Sweet Perfection
If you’re a longtime follower of our culinary adventures, you’ll know my fondness for mini desserts runs deep. From the comforting warmth of mini apple pies to the bright zest of mini lemon blueberry cheesecakes, and the nutty richness of mini pecan pies, I simply can’t get enough of these perfectly portioned delights!
Today, we’re diving into one of my absolute favorite mini dessert recipes: these incredible mini cheesecakes. What makes them stand out? Their sheer versatility and foolproof preparation. The graham cracker crust comes together in mere minutes, requiring just a handful of pantry staples. The cheesecake filling itself is a dream – luxuriously smooth and wonderfully creamy. Best of all, they bake in just about 25 minutes, and there’s no need to fuss with a water bath, making this an ideal recipe for both novice and experienced bakers alike.
These mini cheesecakes are a blank canvas for your creativity. Enjoy them plain, or elevate them with virtually any topping imaginable. This recipe yields a dozen exquisite mini cheesecakes, perfect for sharing, but it’s also incredibly adaptable. You can easily halve the recipe for a smaller batch or double it to feed a crowd. To inspire your culinary imagination, I’ve even included a list of seven fantastic topping options for you to explore!
The Perfect Graham Cracker Crust: Foundation of Flavor
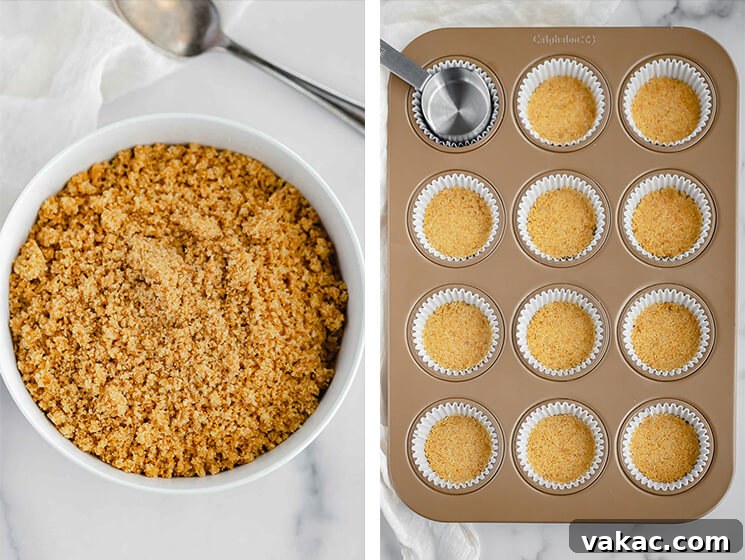
Every exceptional cheesecake begins with an outstanding crust, and our mini cheesecakes are no exception. This homemade graham cracker crust is not only simple to prepare but also delivers a delightful buttery crunch that perfectly complements the smooth filling. It’s a straightforward blend of graham cracker crumbs, granulated sugar, and melted butter. While store-bought graham cracker crumbs offer a convenient shortcut, crushing your own yields a fresher flavor and allows you to control the crumb texture. Typically, about 8 full graham cracker sheets will give you the one cup of crumbs needed for this recipe.
How to Prepare Your Crust:
- Combine Dry Ingredients: In a medium mixing bowl, thoroughly stir together the graham cracker crumbs and sugar until they are uniformly combined. This ensures every bite of your crust has that perfect balance of sweetness and cracker flavor.
- Incorporate Melted Butter: Pour the melted unsalted butter over the crumb mixture. Mix well, ensuring all the crumbs are evenly moistened. The butter acts as a binding agent, creating a cohesive crust that holds its shape.
- Prepare Your Muffin Pan: Line a standard 12-count muffin pan with cupcake liners. This crucial step makes it incredibly easy to remove the finished mini cheesecakes from the pan and simplifies serving. No sticking, no fuss!
- Form the Crust Bases: Evenly distribute the moistened graham cracker mixture among all 12 cupcake liners. To achieve a sturdy and stable base, use a 1/4-cup or 1/3-cup measuring cup to firmly press the crust mixture down into each liner. This creates a compact, even layer that won’t crumble when you bite into your cheesecake.
- Pre-bake for Perfection: Bake the crusts in a preheated oven at 325°F (163°C) for just 5 minutes. This short bake time helps to set the crust, preventing it from becoming soggy once the filling is added. Once baked, remove the pan from the oven and set it aside while you prepare the luscious cheesecake filling.
Crafting the Silky Smooth Cheesecake Filling
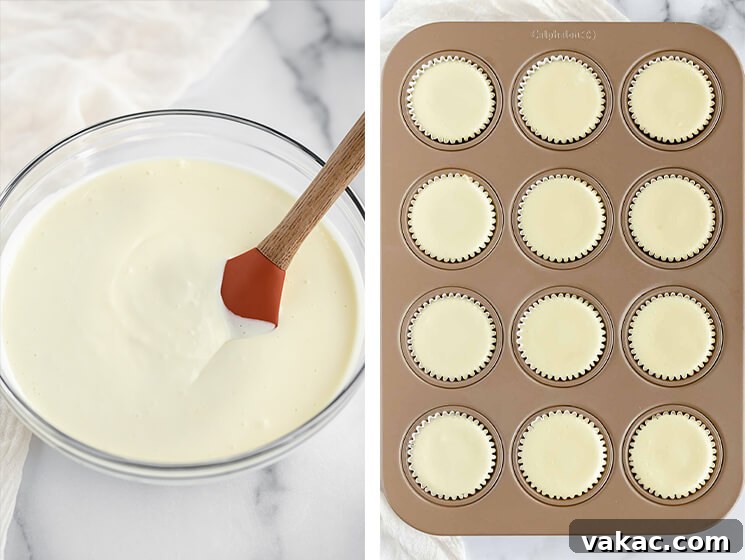
The heart of these mini cheesecakes is their incredibly smooth and creamy filling, made from a thoughtful combination of key ingredients. Each component plays a vital role in achieving that perfect cheesecake texture and rich flavor profile:
- Cream Cheese: For an undeniably rich flavor and the best possible texture, always opt for full-fat, brick-style cream cheese. Ensure it’s softened to room temperature before mixing. Using cold cream cheese will result in a lumpy filling, no matter how much you mix it. Avoid cream cheese spreads in tubs, as their consistency is different and won’t yield the desired results.
- Sour Cream: This ingredient is a secret weapon in cheesecake making. The sour cream helps to break up the natural thickness of the cream cheese, contributing significantly to a creamier, more tender filling. Its slight tang also adds a pleasant depth of flavor that balances the sweetness. If sour cream isn’t available, an equal amount of plain full-fat Greek yogurt can be used as a suitable substitute. Make sure it’s also at room temperature.
- Granulated Sugar & Vanilla Extract: A precise 1/2 cup (100 grams) of granulated sugar sweetens these mini cheesecake bites to perfection. Coupled with a teaspoon of pure vanilla extract, these ingredients create the classic, comforting cheesecake flavor we all adore. Using pure vanilla extract makes a noticeable difference compared to artificial versions.
- Eggs: Eggs are crucial for providing structure and binding the cheesecake filling together as it bakes. Like the cream cheese and sour cream, it’s essential that the eggs are at room temperature. This helps them incorporate more smoothly and evenly into the batter, reducing the risk of overmixing.
Mixing the Filling to Perfection:
Begin by mixing the softened cream cheese and room-temperature sour cream together until the mixture is completely smooth and creamy, with no lumps visible. A stand mixer with a paddle attachment or an electric hand mixer works best for this. Next, add the granulated sugar and vanilla extract, continuing to mix until they are fully incorporated. Remember to stop and scrape down the sides of the bowl after each addition to ensure all ingredients are evenly blended. Once these first four ingredients are well combined, it’s time to add the eggs.
Add the eggs one at a time, mixing on low speed until just combined. This step is critical: overmixing the eggs can incorporate too much air into the cheesecake batter, which can cause the cheesecakes to puff up excessively in the oven and then crack as they cool. Gentle mixing ensures a dense, silky-smooth final product.
Once your filling is ready, evenly distribute the luscious batter over the pre-baked graham cracker crusts in each of the 12 cupcake liners, filling each one nearly to the top. Then, bake them for approximately 17-20 minutes.
Baking Brilliance: No Water Bath Required!
One of the most appealing aspects of this mini cheesecake recipe is the absence of a water bath. While traditional full-sized cheesecakes often require a water bath to ensure even baking, prevent cracking, and maintain a creamy texture, mini cheesecakes are far more forgiving. Their smaller size means they bake quicker and are less susceptible to the temperature fluctuations that can cause larger cheesecakes to crack. The quick bake time and consistent oven temperature are all you need for a perfectly set, crack-free mini cheesecake.
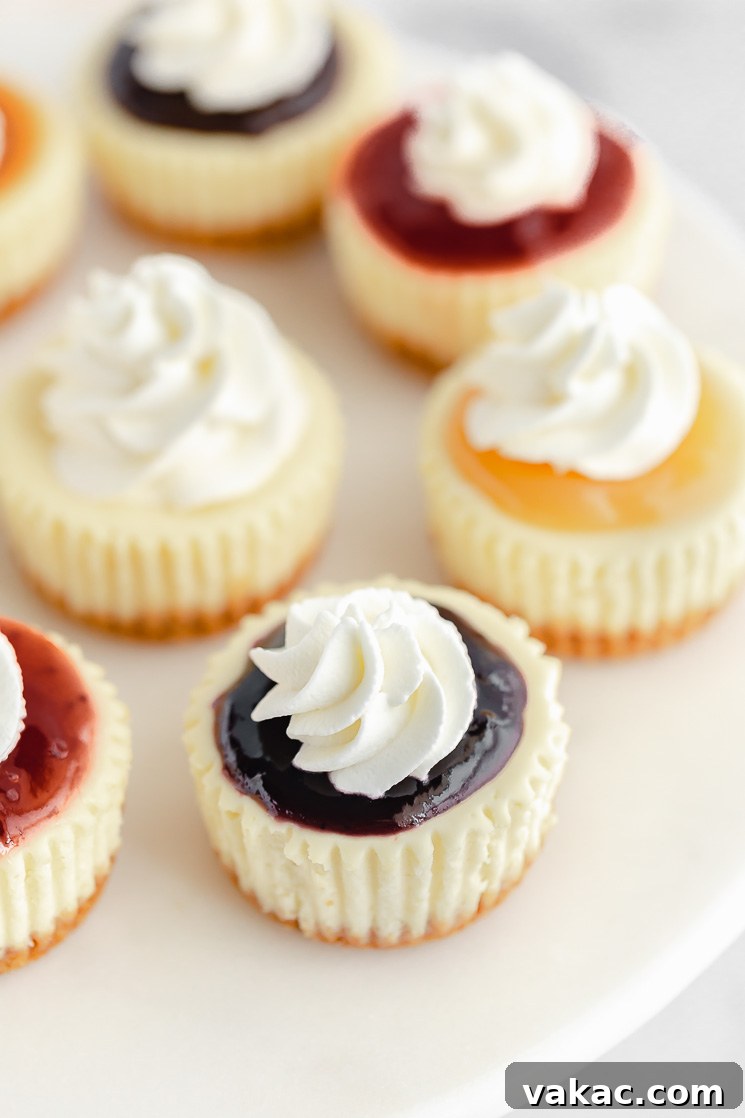
Cooling and Chilling: The Final Touch for Perfection
Once your mini cheesecakes emerge from the oven, resist the urge to immediately remove them. Allowing them to cool gradually is a crucial step for achieving the perfect texture and preventing any potential cracks. Let them cool completely in the muffin pan for about an hour. This slow cooling helps the cheesecakes set properly and maintain their beautiful shape.
After they have cooled to room temperature in the pan, carefully remove them from the muffin pan. The cupcake liners should make this process effortless. Transfer the cooled mini cheesecakes to an airtight container and refrigerate them for at least 3-4 hours, or ideally, overnight. This chilling period is essential; it allows the cheesecake to firm up completely, enhancing its creamy texture and deepening its flavors. Patience truly is a virtue when it comes to cheesecake!
Frequently Asked Questions (FAQ’s)
How do you know when the mini cheesecakes are done baking?
You’ll know your mini cheesecakes are perfectly baked when their tops puff up slightly and appear set. The edges should be fully firm, but the very center will still have a slight jiggly quality when you gently shake the pan. Don’t worry if the center seems a bit soft; the cheesecakes will continue to set and firm up considerably as they cool down to room temperature and then chill in the refrigerator.
Can you freeze mini cheesecakes?
Absolutely! Mini cheesecakes freeze exceptionally well, making them an excellent make-ahead dessert option. To freeze, ensure they are completely cooled and chilled. You can then place them in a freezer-safe bag or an airtight container, where they will keep beautifully for up to 3 months. When you’re ready to enjoy them, simply transfer them to the refrigerator and allow them to thaw overnight.
Can I use a mini cheesecake pan instead of a muffin pan?
Yes, a specialized mini cheesecake pan will work perfectly for this recipe! Due to the slightly smaller cavity size compared to a standard muffin pan, you might find that this recipe yields around 16 mini cheesecakes instead of 12. Adjust your baking time slightly if needed, keeping an eye on the “done-ness” indicators.
How do I prevent my mini cheesecakes from cracking?
Cracking is a common concern with cheesecakes. For mini cheesecakes, the main culprits are overmixing the eggs (which incorporates too much air) and sudden temperature changes. Ensure all your filling ingredients are at room temperature, mix the eggs in gently on low speed until just combined, and allow the cheesecakes to cool gradually in the pan after baking before chilling.
Can I make the crust with different cookies?
Certainly! While graham crackers are classic, you can get creative with your crust. Crushed Oreo cookies, shortbread biscuits, or even ginger snaps make fantastic alternative crusts. Just ensure you use the same ratio of crumbs to melted butter and sugar (adjust sugar if your cookies are already very sweet).
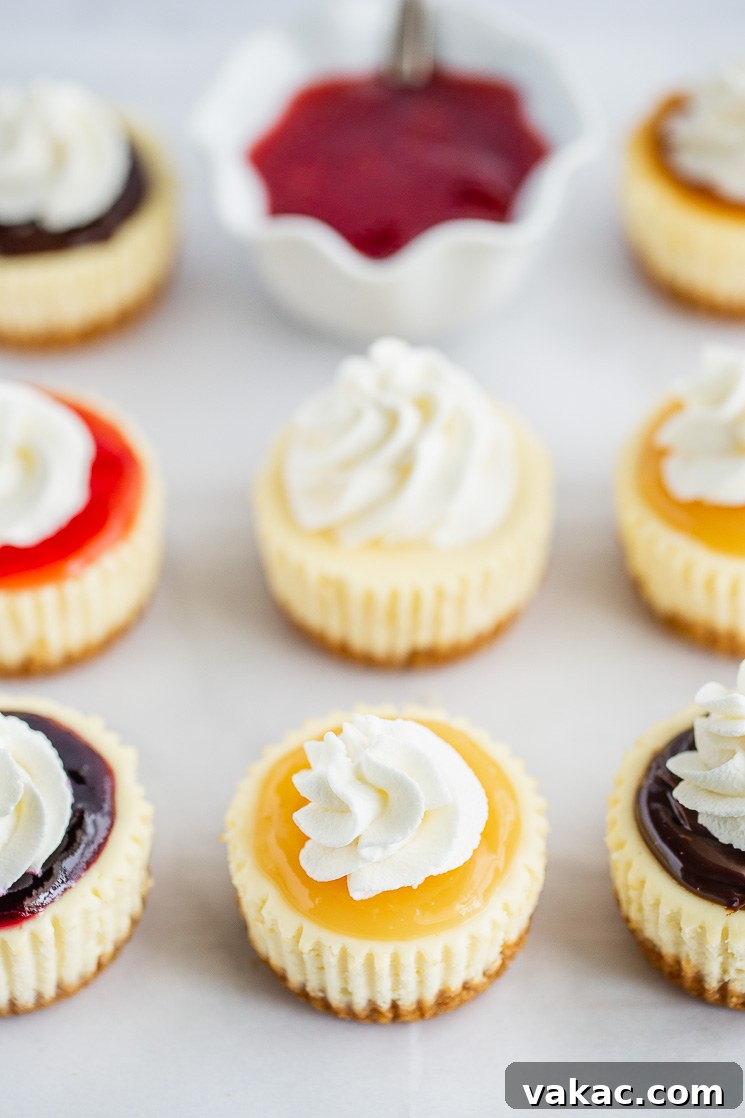
Unleashing Your Creativity: Endless Topping Possibilities
One of the most exciting aspects of these mini cheesecakes is their incredible adaptability when it comes to toppings. They are perfect as a blank canvas, ready to be adorned with whatever your heart desires. Here are some of my all-time favorite suggestions to get you started, ranging from classic fruit sauces to decadent chocolate drizzles:
- Homemade Whipped Cream: Light, airy, and delicately sweet, a dollop of freshly made whipped cream is a timeless and elegant topping that complements the rich cheesecake beautifully.
- Salted Caramel Sauce: Drizzle a generous amount of sticky, sweet, and slightly salty caramel sauce over your cheesecakes for a sophisticated and irresistible treat.
- Chocolate Ganache: A silky smooth and rich chocolate ganache creates a luxurious cap for your mini cheesecakes, perfect for the true chocolate lover.
- Homemade Blueberry Sauce: A vibrant, sweet, and slightly tart blueberry sauce adds a burst of fruity freshness and a beautiful pop of color.
- Homemade Strawberry Sauce: Similar to blueberry, a homemade strawberry sauce brings bright, summery flavors and a lovely natural sweetness.
- Dulce de Leche: This thick, creamy caramel confection offers a deeply sweet and rich flavor that pairs wonderfully with the tang of cheesecake.
- Homemade Lemon Curd: For a burst of bright, citrusy flavor, a spoonful of tangy homemade lemon curd is an exquisite choice that cuts through the richness of the cheesecake.
Beyond these, don’t hesitate to experiment with fresh berries, chopped nuts, chocolate shavings, or even a sprinkle of cinnamon sugar. The possibilities are truly endless!
Expert Baking Tips for Flawless Mini Cheesecakes
Achieving bakery-quality mini cheesecakes is easy when you keep a few expert tips in mind:
- Use the Right Pan: For this specific recipe, ensure you are using a regular or standard 12-count muffin pan, not a mini muffin pan. The size difference is crucial for the correct baking time and yield.
- Pack the Crust Firmly: To ensure your graham cracker crust remains intact and doesn’t crumble, it’s vital to press the mixture down very firmly into the liners. I find that using the bottom of a 1/4-cup or 1/3-cup measuring cup provides the perfect tool for achieving a compact, even layer.
- Room Temperature Ingredients are Non-Negotiable: This is perhaps the most important tip for a truly smooth and creamy cheesecake filling. Set out your cream cheese, sour cream, and eggs at least an hour (or even two) before you plan to start mixing. Room temperature ingredients combine effortlessly, preventing lumps and creating a uniformly smooth batter. Cold ingredients will simply not emulsify properly.
- Embrace Full-Fat: For the most luxurious texture and rich flavor, I highly recommend using full-fat cream cheese and full-fat sour cream. While reduced-fat options might work, they often compromise on the creamy consistency and decadent taste.
- Gentle Egg Incorporation: When it comes to adding the eggs, restraint is key. Mix them in one at a time, on a low speed, until they are *just* combined. Overmixing at this stage is the leading cause of cracks in cheesecakes, as it incorporates too much air, which then expands and contracts, leading to fissures.
- Avoid Opening the Oven Door: During baking, try to resist the temptation to frequently open the oven door. Fluctuations in oven temperature can also contribute to cracking. Peek through the oven window if you must check on their progress.
- Gradual Cooling is Key: Just as important as gentle mixing is proper cooling. Allow the cheesecakes to cool completely in the muffin pan on a wire rack before attempting to remove them or chill them. This slow, controlled cooling prevents sudden temperature shock that can cause cracks and helps them set beautifully.
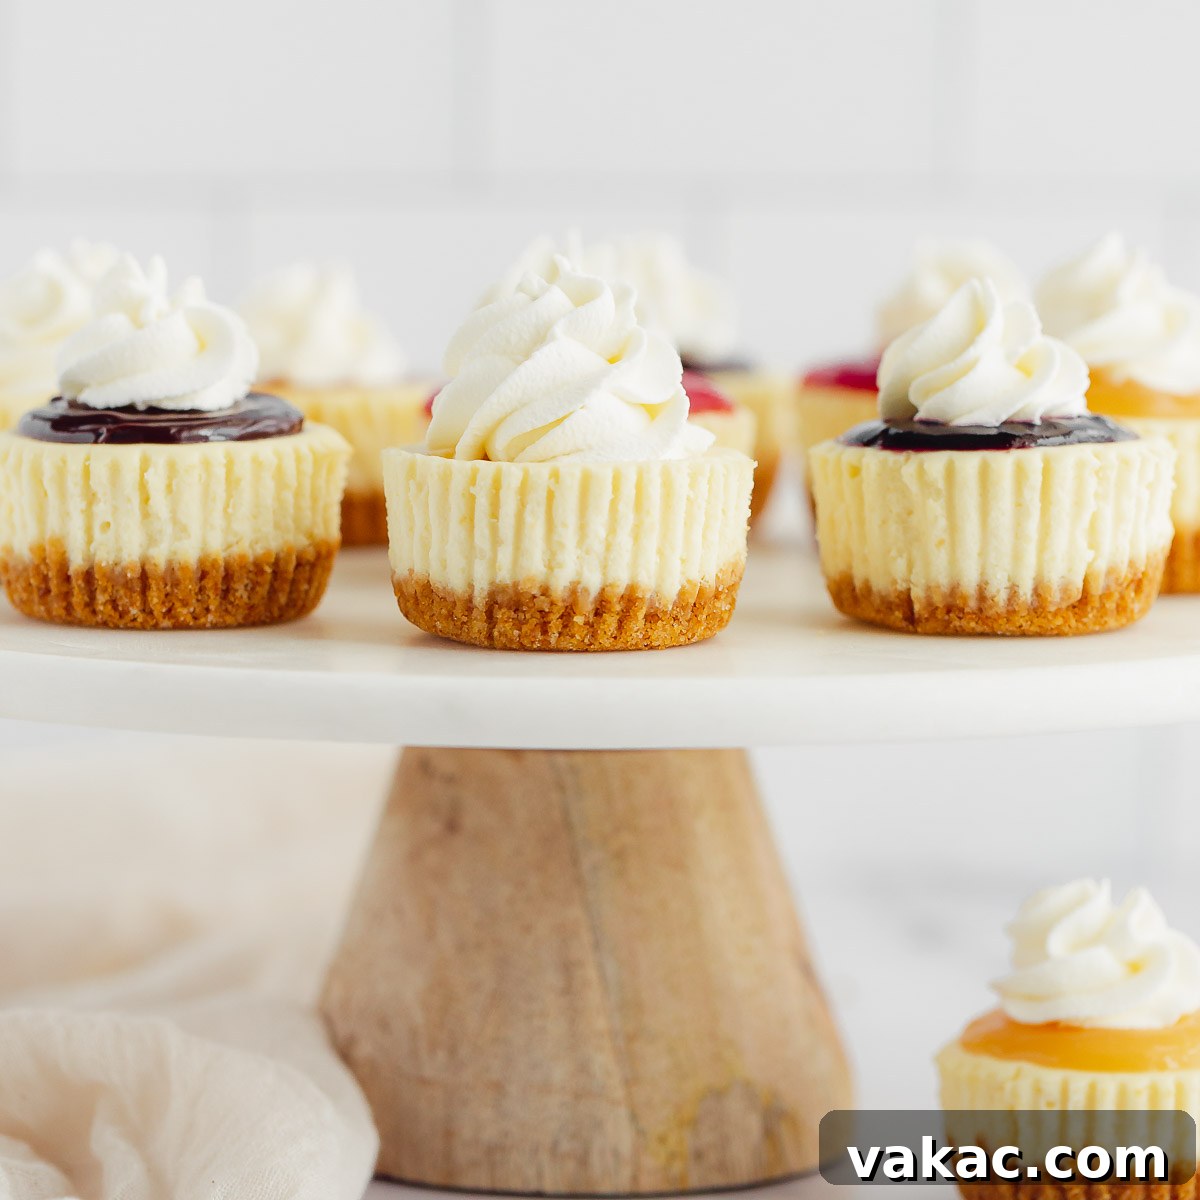
Mini Cheesecakes
Prep Time: 30 mins
Cooling time: 4 hrs
These Mini Cheesecakes feature a homemade graham cracker crust with a smooth and creamy cheesecake filling. This recipe is incredibly easy to make and includes several different topping options to use too!
Print Recipe
Pin Recipe
Ingredients (Servings: 12 mini cheesecakes)
For the graham cracker crust:
- 1 cup (120 grams) graham cracker crumbs
- 3 tablespoons (40 grams) granulated sugar
- 3 and 1/2 tablespoons (50 grams) unsalted butter, melted
For the cheesecake filling:
- 16 ounces (452 grams) brick-style cream cheese, softened to room temperature
- 1/3 cup (80 grams) sour cream, room temperature
- 1/2 cup (100 grams) granulated sugar
- 1 teaspoon pure vanilla extract
- 2 large eggs, room temperature
Instructions
To make the graham cracker crust:
- Preheat oven to 325°F (163°C). Line a 12-count muffin pan with cupcake liners and set aside.
- In a large mixing bowl, stir together the graham cracker crumbs and sugar. Add the melted butter and mix until all of the crumbs are moistened. Evenly distribute the mixture between all 12 liners and firmly press it down into one even layer.
- Bake at 325°F (163°C) for 5 minutes. Remove from the oven and set aside. Keep oven temperature at 325°F (163°C).
To make the cheesecake filling:
- In the bowl of a stand mixer fitted with the paddle attachment, or in a large mixing bowl using an electric mixer, mix the cream cheese and sour cream together until smooth and creamy. Add the sugar and vanilla extract and mix until fully combined, stopping to scrape down the sides of the bowl as needed. Mix in the eggs, one at a time, on low speed until just combined.
- Evenly distribute the batter between all 12 liners in the cupcake pan, filling each one almost all the way to the top.
- Bake at 325°F (163°C) for 17-20 minutes or until the tops of the cheesecakes are set.
- Remove from the oven and allow to cool in the pan for 1 hour. Carefully remove from the pan and chill in an airtight container in the refrigerator for 3-4 hours or overnight.
Notes
- Store leftover mini cheesecakes in an airtight container in the refrigerator for up to 4 days.
- Freezing Instructions: Mini cheesecakes will freeze well for up to 3 months. Thaw overnight in the refrigerator.
- Graham Cracker Crumbs: To make this recipe a little easier, you can use store-bought graham cracker crumbs. If you’re crushing your own graham crackers, you’ll need about 8 full-sheets to get 1 cup of crumbs.
- Cream Cheese: Make sure to use bricks of cream cheese and not cream cheese spread in a tub. I recommend using full-fat cream cheese for the best results.
- Sour Cream: Full-fat sour cream works best in this recipe. You may also replace the sour cream with an equal amount of plain Greek yogurt.
- Eggs: If you forget to set your eggs out ahead of time, simply place them in a bowl of warm water for 5-10 minutes to bring them to room temperature.
Cuisine: American
Course: Dessert
Author: Danielle Rye
Did you make this recipe?
Mention @livewellbakeoften on Instagram or tag #livewellbakeoften.