
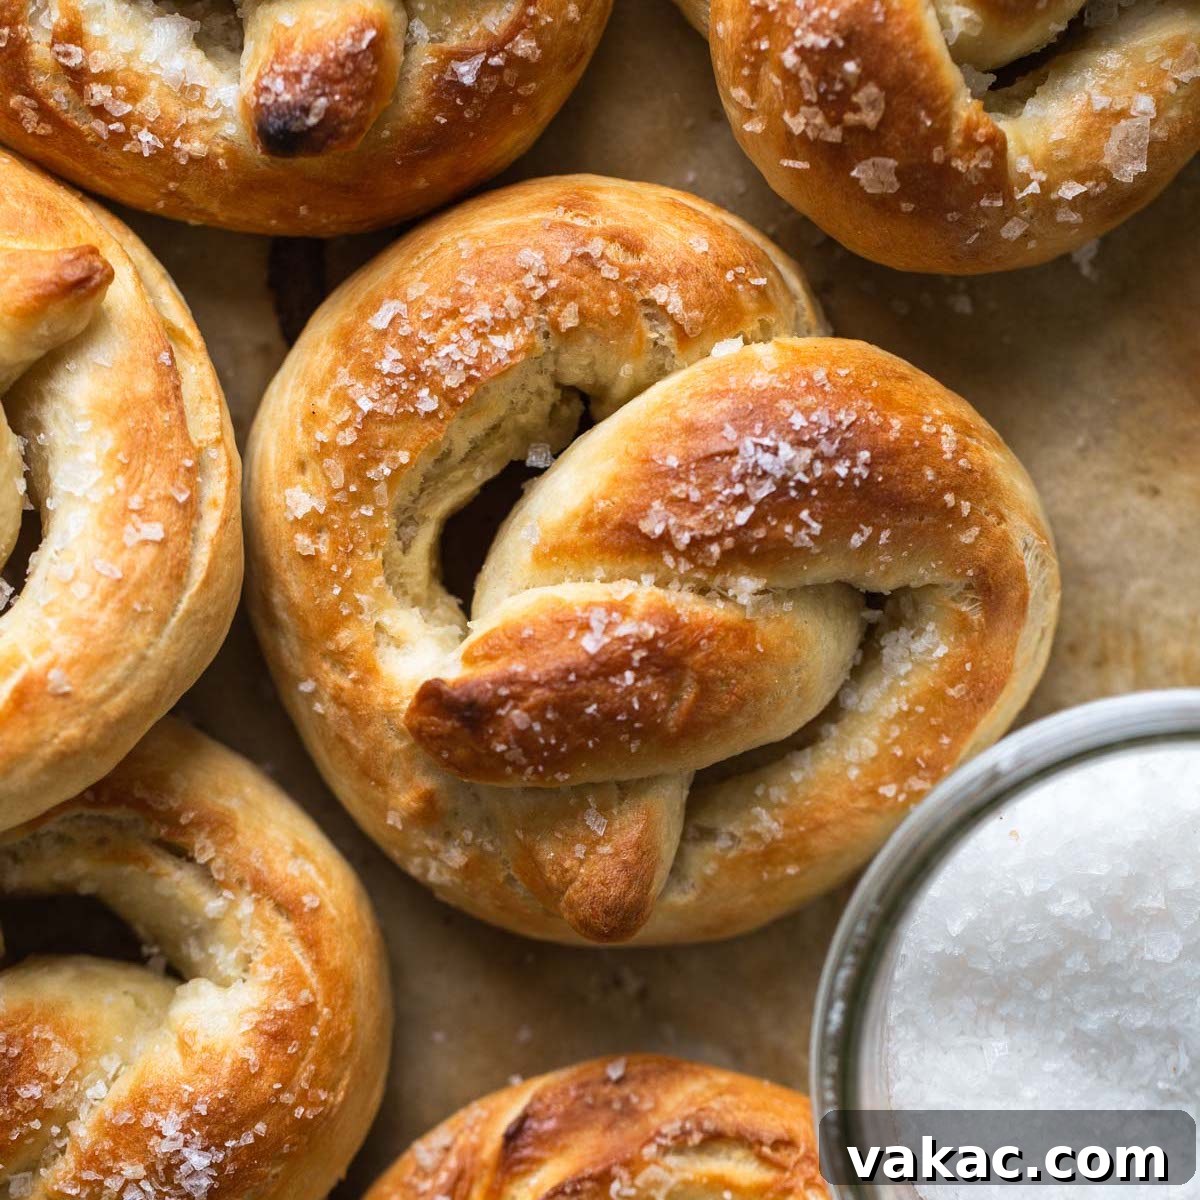
Mastering Homemade Soft Pretzels: An Easy Recipe for Bakery-Quality Bites
There’s an undeniable charm to a warm, soft pretzel, fresh from the oven, offering that perfect balance of chewy interior and slightly crisp, salty exterior. While the allure of mall pretzels is strong, the satisfaction and superior taste of homemade soft pretzels are truly unmatched. Many believe making pretzels from scratch is a daunting task reserved for professional bakers, but I’m here to assure you that it is not only entirely achievable but also incredibly rewarding. This comprehensive guide will walk you through every step, from selecting the right ingredients to perfecting the classic pretzel twist, ensuring your homemade soft pretzels turn out perfectly every time.
Imagine the aroma filling your kitchen, the simple joy of shaping the dough with your own hands, and the incredible flavor of a warm pretzel dipped in your favorite sauce. Whether you’re looking for a delightful snack, an impressive appetizer for game day, or just a fun baking project, this soft pretzel recipe is your gateway to pretzel perfection. While shaping the dough might seem like the trickiest part at first, with a little practice and the detailed visual steps provided, you’ll soon be twisting like a pro. Prepare to elevate your baking game and impress everyone with these irresistible, bakery-quality homemade soft pretzels!
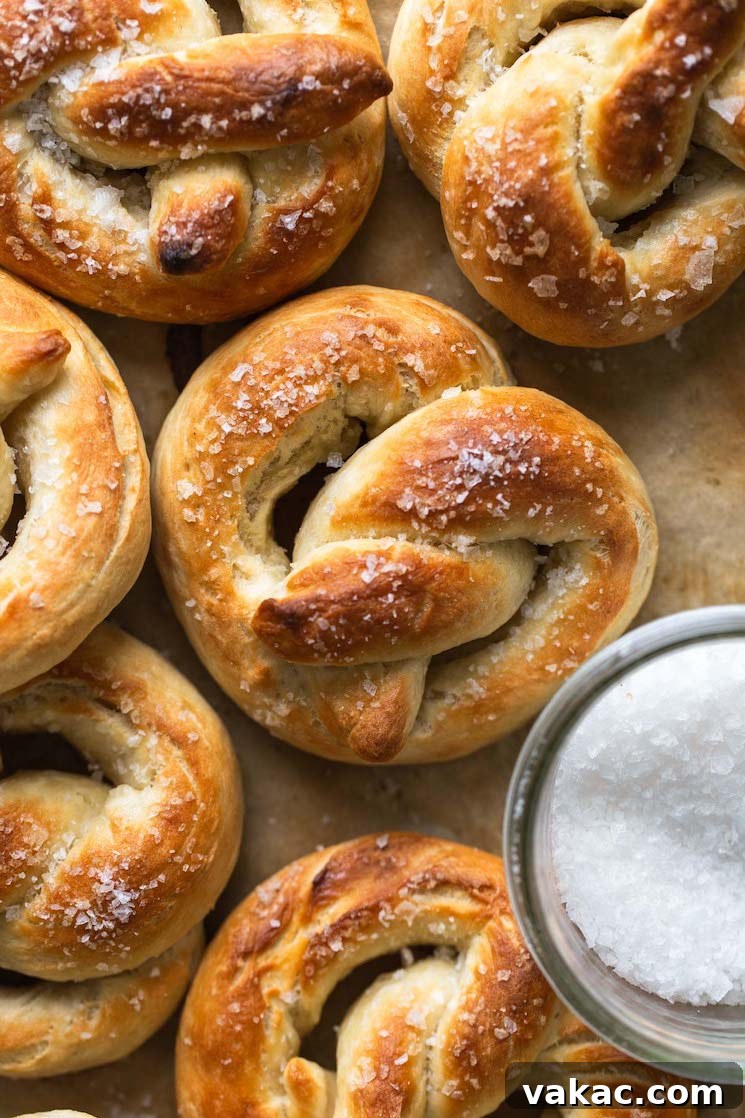
The Irresistible Allure of Soft Pretzels
Who can resist the warm, doughy embrace of a freshly baked soft pretzel? For many, the memory is tied to bustling shopping malls, where the scent of warm pretzels wafts through the air, beckoning you closer. There’s absolutely no shame in loving those nostalgic treats. However, much like many culinary delights, the homemade version surpasses its commercial counterpart in flavor, freshness, and sheer satisfaction.
Making soft pretzels at home isn’t just about the end product; it’s an experience. It’s a chance to get your hands messy, to witness the magic of yeast, and to create something truly delicious from basic pantry staples. And the best part? It’s far easier than you might imagine. Forget complicated techniques or obscure ingredients; this recipe relies on fundamental baking principles and readily available items to produce truly exceptional pretzels.
The only aspect that might give new bakers pause is the shaping of the dough. But rest assured, it’s a skill that’s quickly mastered with a few attempts. To help you along, this guide includes detailed, step-by-step instructions and photos to illustrate the pretzel-shaping process, ensuring your pretzels have that iconic twist every time. Once you’ve perfected your technique, you’ll find yourself reaching for this recipe again and again. These pretzels aren’t just a snack; they’re a centerpiece, perfect for dipping into your favorite sauces during gatherings or simply enjoying as a comforting treat.
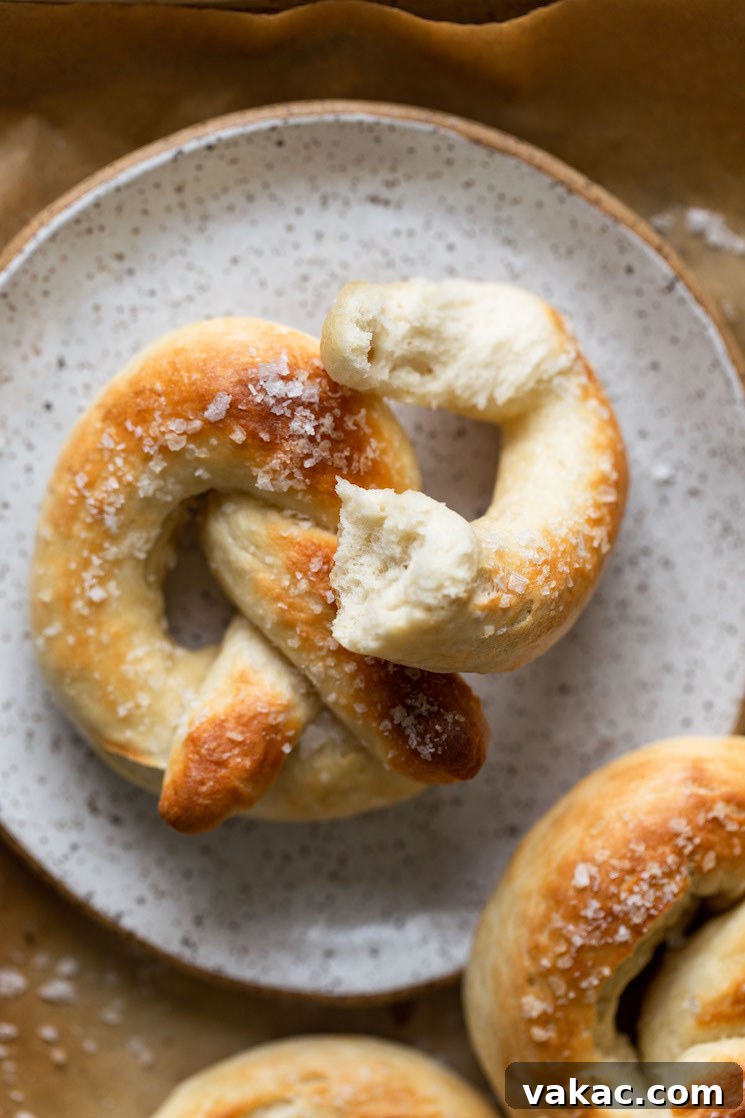
Essential Ingredients for Your Homemade Soft Pretzels
One of the beauties of this soft pretzel recipe is its reliance on common kitchen staples. You likely have most, if not all, of these ingredients in your pantry right now. The star player, of course, is yeast, which gives these pretzels their signature light and airy texture. Let’s delve into the specific role each ingredient plays in creating the perfect soft pretzel.
- Warm Water: The foundation of our dough, water needs to be precisely between 105°F to 115°F (40°C to 46°C). This temperature range is crucial because it’s warm enough to activate the active dry yeast without being so hot that it kills it. Using a thermometer is highly recommended for accuracy.
- Granulated Sugar: You’ll only need a tablespoon, but this small amount is mighty! Sugar acts as “food” for the yeast, helping it to activate and proof (the process where yeast sits in warm water and sugar, producing foam). This initial foaming is your indicator that the yeast is alive and ready to work its magic.
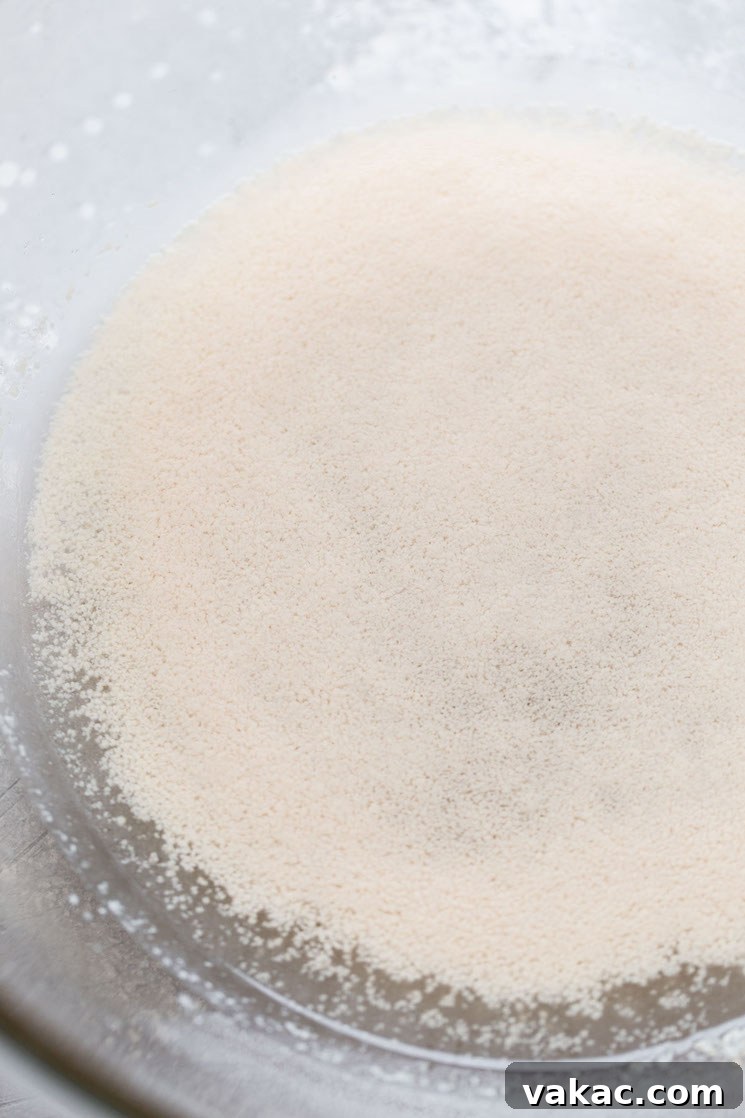
- Active Dry Yeast: The leavening agent that gives pretzels their rise and airy texture. As mentioned, it needs warm water and sugar to activate. If your yeast mixture doesn’t become foamy after 5-10 minutes, your yeast may be old or inactive, and you’ll need to start with a fresh batch. Don’t skip this crucial test!
- Salt: Table salt is incorporated into the dough to enhance its flavor and balance the sweetness. For the classic pretzel topping, coarse sea salt is sprinkled generously on top just before baking, providing that iconic salty crunch and taste.
- Unsalted Butter: Melted butter adds richness, tenderness, and flavor to the pretzel dough. Using unsalted butter allows you to control the overall saltiness of your pretzels, especially since additional salt is added to the dough and as a topping.
- All-Purpose Flour: The primary structural component of our pretzels. It’s essential to measure flour correctly to avoid a tough or dense dough. The “spoon and level” method is highly recommended: spoon flour into your measuring cup and then level it off with a straight edge, rather than scooping directly from the bag. This prevents over-measuring.
- Baking Soda: This is the secret ingredient for that authentic pretzel flavor and dark, chewy crust. The baking soda is dissolved in boiling water to create a “baking soda bath.” A quick dip in this alkaline solution causes the Maillard reaction to occur rapidly during baking, giving pretzels their characteristic deep brown color and distinctive taste that sets them apart from regular bread.
How to Craft Delicious Homemade Soft Pretzels
Making homemade soft pretzels involves a few distinct stages, each contributing to the final chewy, flavorful result. Follow these steps carefully, and you’ll be enjoying fresh pretzels in no time!
Step 1: Activating the Yeast (Proofing)
In a large mixing bowl, combine the warm water (remember, 105°F to 115°F or 40°C to 46°C is ideal) and granulated sugar. Give it a quick whisk to dissolve the sugar. Then, gently sprinkle the active dry yeast over the surface. Do not stir it in vigorously at this stage; simply let it sit. Set the bowl aside for about 5 to 10 minutes. During this time, the yeast will activate, and the mixture should become visibly foamy on top. This foam indicates that your yeast is alive and active – a crucial sign of a successful dough. If you don’t see foam, your yeast might be expired, or the water temperature was off, and you’ll need to start over with fresh yeast.
Step 2: Mixing the Dough
Once your yeast is foamy and active, add the melted and slightly cooled unsalted butter and the salt to the yeast mixture. Stir until well combined. Next, begin adding the all-purpose flour gradually. Start by mixing in 2 cups of flour until just combined, then incorporate the final 1 to 1.5 cups. The exact amount of flour can vary based on humidity and how accurately your flour was measured. Continue adding flour, a little at a time, until the dough comes together as a thick, slightly sticky mass that is no longer excessively sticky to the touch.
Step 3: Kneading the Dough
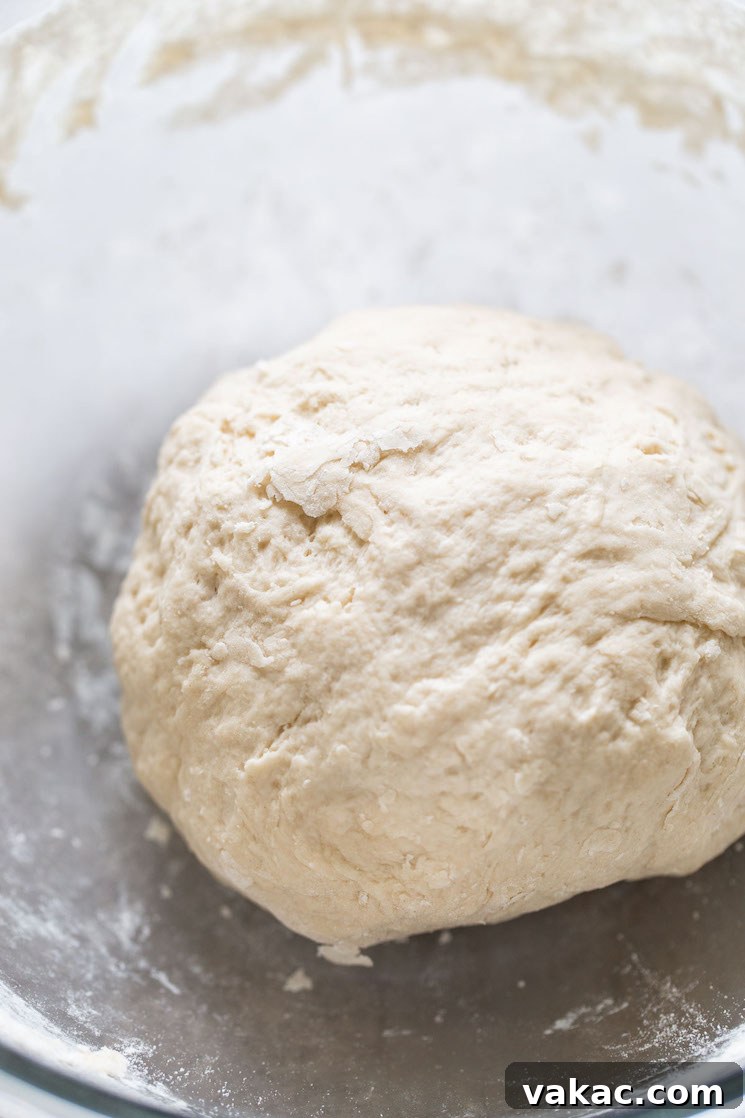
Turn the dough out onto a lightly floured surface. Knead the dough for 3 to 5 minutes. If kneading by hand, push the dough away from you with the heels of your hands, fold it back, rotate, and repeat. If using a stand mixer with a dough hook, knead on low speed. The dough should become smooth, elastic, and spring back when gently poked. This kneading process develops the gluten, which gives the pretzels their characteristic chewiness. After kneading, shape the dough into a smooth ball.
Step 4: Resting the Dough
Place the dough ball back into the mixing bowl (you can lightly grease the bowl first to prevent sticking, though it’s often not strictly necessary for this short rest). Cover the bowl loosely with plastic wrap or a clean kitchen towel. Allow the dough to rest in a warm place for 10 minutes. This brief rest period allows the gluten to relax, making the dough easier to handle and shape, and helps the yeast become even more active.
Step 5: Preparing the Baking Soda Bath
While the dough is resting and you’re preparing to shape the pretzels, get your baking soda bath ready. In a large pot (one that’s wide enough to comfortably submerge a pretzel), pour 9 cups of water. Add the ½ cup of baking soda and whisk thoroughly until it dissolves completely. Bring this mixture to a rolling boil over high heat. Keep it at a steady simmer while you work on shaping the pretzels.
Step 6: Shaping the Pretzels
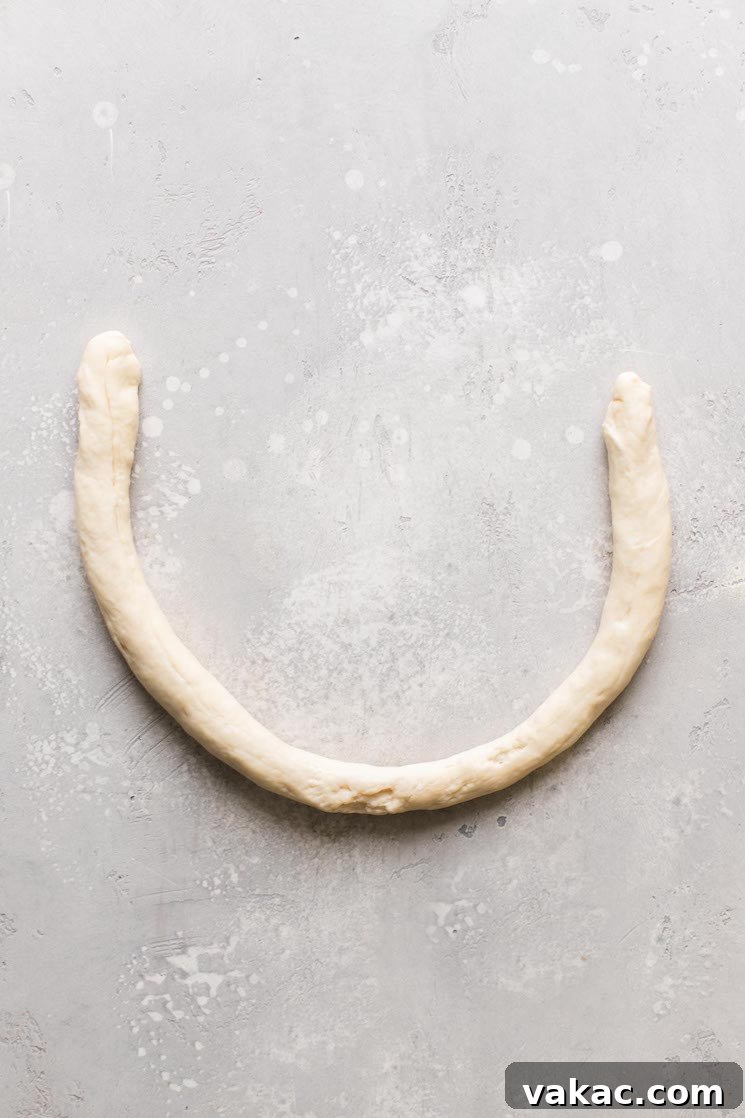
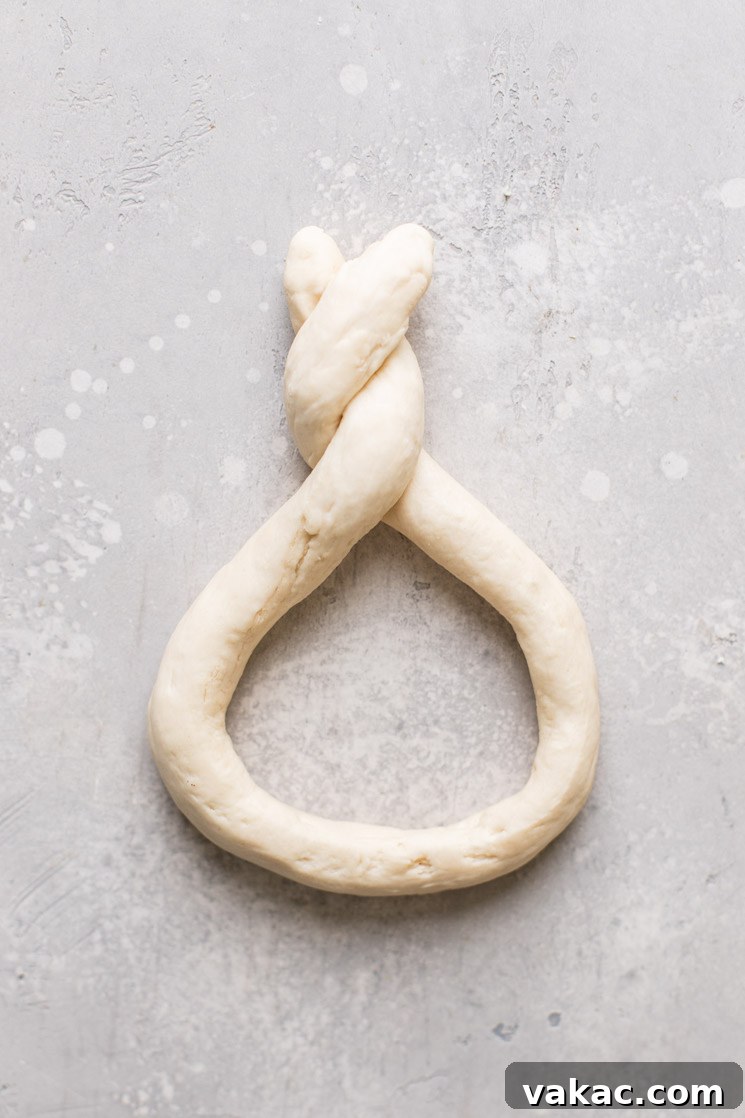
Once the dough has rested, turn it out onto a clean, lightly floured surface. Using a sharp knife or a dough scraper, divide the dough into eight equal-sized pieces. To shape each pretzel, take one piece of dough and roll it out into a long rope, approximately 20 to 22 inches in length. Aim for a consistent thickness along the entire rope. Next, create a U-shape with the rope. Take the two ends, cross them over each other, and then twist them once. Finally, bring the twisted ends down and press them firmly onto the bottom curve of the U-shape, forming the classic pretzel knot. Place the shaped pretzels on a baking sheet lined with parchment paper.
Step 7: The Baking Soda Bath
With your baking soda bath simmering, it’s time for the crucial dip. Using a large slotted spoon or spatula, carefully lower one shaped pretzel into the boiling baking soda solution. Submerge it completely. It’s vital not to leave the pretzels in the bath for too long; 20 seconds total (about 10 seconds per side) is typically sufficient. Over-dipping can result in a strong, unpleasant metallic taste. The bath gives the pretzels their deep brown color and unique chew. Gently lift the pretzel out, allowing any excess water to drip off, then transfer it back to your prepared baking sheet.
Step 8: Baking and Broiling
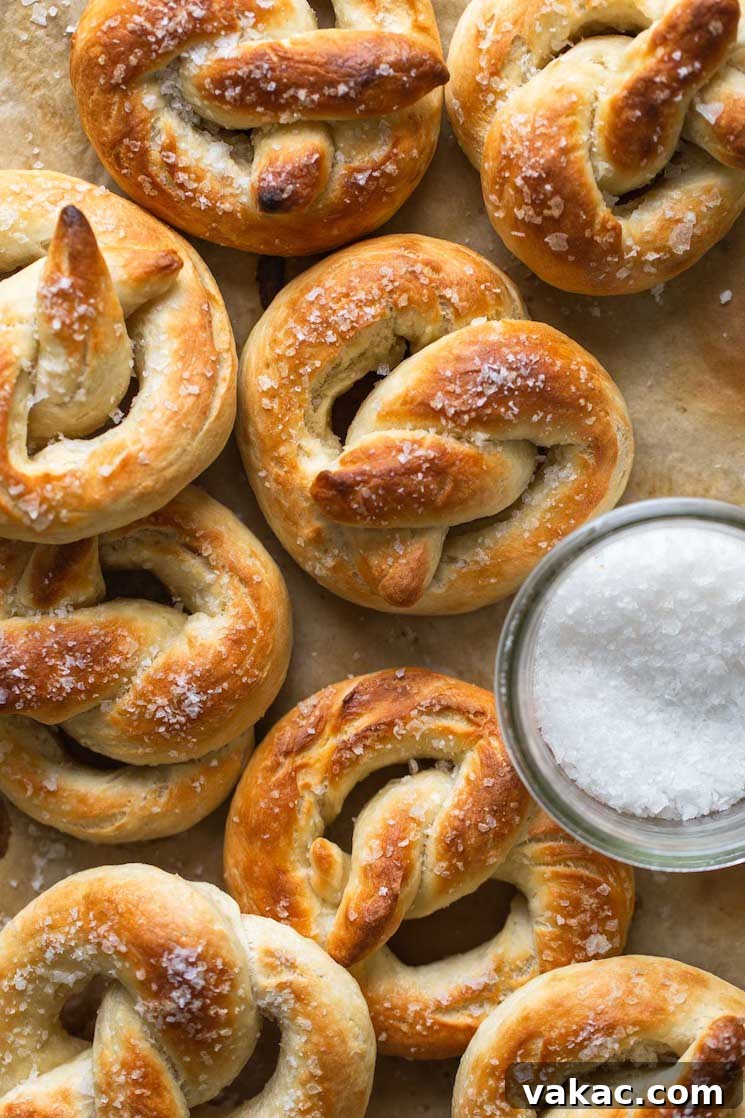
Preheat your oven to 425°F (218°C). Once all pretzels are shaped and bathed, brush the tops with melted butter and generously sprinkle them with coarse sea salt. Bake the pretzels for about 8 to 10 minutes, or until they are puffed and light golden brown. For that perfectly dark, glossy, and slightly crispy crust, turn your oven to the broiler setting and broil for an additional 2 to 3 minutes. Keep a very close eye on them during this stage, as they can go from beautifully golden to burnt in a matter of seconds. As soon as they reach your desired color, remove them from the oven. For an extra touch of richness, you can brush them with any remaining melted butter immediately after they come out of the oven.
Creative Ways to Enjoy Your Soft Pretzels
While freshly baked soft pretzels are absolutely divine on their own, their versatile flavor makes them a fantastic canvas for a variety of dips, sauces, and toppings. Here are some delicious ideas to elevate your pretzel experience:
- Classic Yellow Mustard: The tangy bite of classic yellow mustard is a timeless pairing with the salty, chewy pretzel.
- Spicy Jalapeño Dip: For those who love a kick, a creamy jalapeño dip adds a delightful warmth and spice. Try a homemade jalapeño popper dip for extra indulgence.
- Creamy Nacho Cheese: A warm, gooey nacho cheese sauce provides a rich, savory counterpoint, perfect for game day snacking.
- Sweet Dulce de Leche: Don’t limit pretzels to savory. The caramel-like sweetness of dulce de leche offers a surprising and utterly addictive combination.
- Decadent Chocolate Sauce: For a true dessert pretzel, a luscious chocolate sauce turns these soft bites into a sweet dream.
- Olive Oil and Balsamic Vinegar: A more sophisticated option, dipping into a good quality olive oil with a splash of balsamic vinegar offers a light yet flavorful experience.
- Homemade Salted Caramel Sauce: Elevate the sweet pretzel game even further with a rich and buttery salted caramel sauce. The balance of sweet and salty is pure heaven.
- Robust Beer Cheese Dip: A hearty and flavorful beer cheese dip is the ultimate companion for a savory pretzel, especially when enjoyed with friends.
Expert Baking Tips for Pretzel Perfection
To ensure your homemade soft pretzels are always a success, keep these essential baking tips in mind:
- Allow the Dough to Rest: The 10-minute resting period after kneading is crucial. Skipping this step can lead to a tough, difficult-to-shape dough and ultimately, dense pretzels. Resting allows the gluten to relax, making the dough pliable and easier to work with.
- Don’t Omit the Sugar: Even though it’s a small amount, the tablespoon of granulated sugar is vital for activating the yeast. It provides the yeast with the necessary “food” to proof and become foamy. Without it, your yeast may not activate properly, resulting in flat, lifeless pretzels.
- Watch Closely Under the Broiler: The broiler step is key for achieving that beautiful, dark brown, glossy pretzel crust. However, broilers can be intense and temperamental. Pretzels can go from perfectly golden to burnt in a matter of seconds. Stay by your oven and check them frequently, pulling them out as soon as they reach your desired color.
- Mind the Water Temperature for Yeast: As highlighted earlier, accurate water temperature is paramount for yeast activation. Water that is too cold won’t activate the yeast, while water that is too hot will kill it, preventing your dough from rising.
- Avoid Over-Dipping in Baking Soda Bath: While the baking soda bath is essential for flavor and color, leaving pretzels in for too long (more than 20-30 seconds total) can impart a strong, metallic, or soapy flavor. A quick dip is all that’s needed.
- Measure Flour Accurately: Using the spoon and level method for flour ensures you don’t add too much. Excess flour can make your dough stiff, difficult to knead, and lead to dry, tough pretzels.
The Fascinating History of Pretzels
The pretzel’s origins are steeped in history and legend, dating back to 7th-century Europe. One popular theory suggests that the pretzel was invented by an Italian monk who twisted leftover strips of dough into the shape of children’s arms crossed in prayer, offering them as rewards for learning prayers. He called them “pretiola,” meaning “little rewards.” From there, pretzels traveled across Europe, becoming a symbol of good luck, prosperity, and spiritual wholeness.
Over centuries, pretzels evolved, with different regions developing their own variations, from soft, chewy versions to hard, crunchy ones. German immigrants brought pretzels to America in the 18th century, particularly to Pennsylvania, where they became incredibly popular and integrated into local culture. Today, pretzels are enjoyed worldwide, a testament to their enduring appeal and simple, satisfying deliciousness.
Fun Variations and Customizations
While the classic coarse sea salt topping is iconic, soft pretzels are incredibly versatile and can be customized to suit any taste. Here are a few ideas to get creative:
- Cinnamon Sugar Pretzels: Skip the baking soda bath for a softer texture, then brush with butter after baking and immediately toss in a mixture of granulated sugar and cinnamon. Perfect for a sweet treat!
- Garlic Parmesan Pretzels: After brushing with butter, sprinkle with garlic powder and grated Parmesan cheese before baking.
- Everything Bagel Pretzels: Brush with an egg wash (instead of butter) before baking, then sprinkle generously with “everything bagel” seasoning.
- Cheese-Stuffed Pretzels: Before shaping, flatten each dough piece, place a small cube of cheddar or mozzarella cheese in the center, and then carefully wrap the dough around it before rolling and shaping.
- Glazed Pretzels: For a sweet, soft pretzel that’s not cinnamon sugar, drizzle with a simple powdered sugar glaze after they cool slightly.
Common Questions About Making Soft Pretzels (FAQ)
Can I make the dough ahead of time?
Yes, you can! After kneading and the 10-minute rest, place the dough in a lightly oiled bowl, cover it tightly with plastic wrap, and refrigerate for up to 24 hours. When you’re ready to bake, let the dough come to room temperature for about 30 minutes before proceeding with shaping and boiling.
My pretzels are tough, what went wrong?
Tough pretzels are usually a sign of too much flour or over-kneading. Ensure you measure your flour accurately using the spoon and level method, and knead only for the recommended 3-5 minutes until the dough is smooth and elastic, but not overworked.
How do I store leftover soft pretzels?
Store cooled pretzels in an airtight container at room temperature for up to 3 days. To reheat, microwave for 15-20 seconds or warm in a 350°F (175°C) oven for a few minutes until soft and warm.
Can I freeze homemade soft pretzels?
Absolutely! Cooled, baked pretzels freeze beautifully. Place them in a single layer on a baking sheet to flash freeze for about an hour, then transfer them to a large freezer-safe bag. They can be stored for up to 3 months. Thaw at room temperature and reheat as desired before serving.
What if my yeast doesn’t foam?
If your yeast mixture doesn’t foam after 5-10 minutes, it means your yeast is inactive. This could be due to old yeast, water that was too hot (killing the yeast), or water that was too cold (not activating it). Discard the mixture and start again with fresh yeast and properly tempered water.
Soft Pretzel Recipe
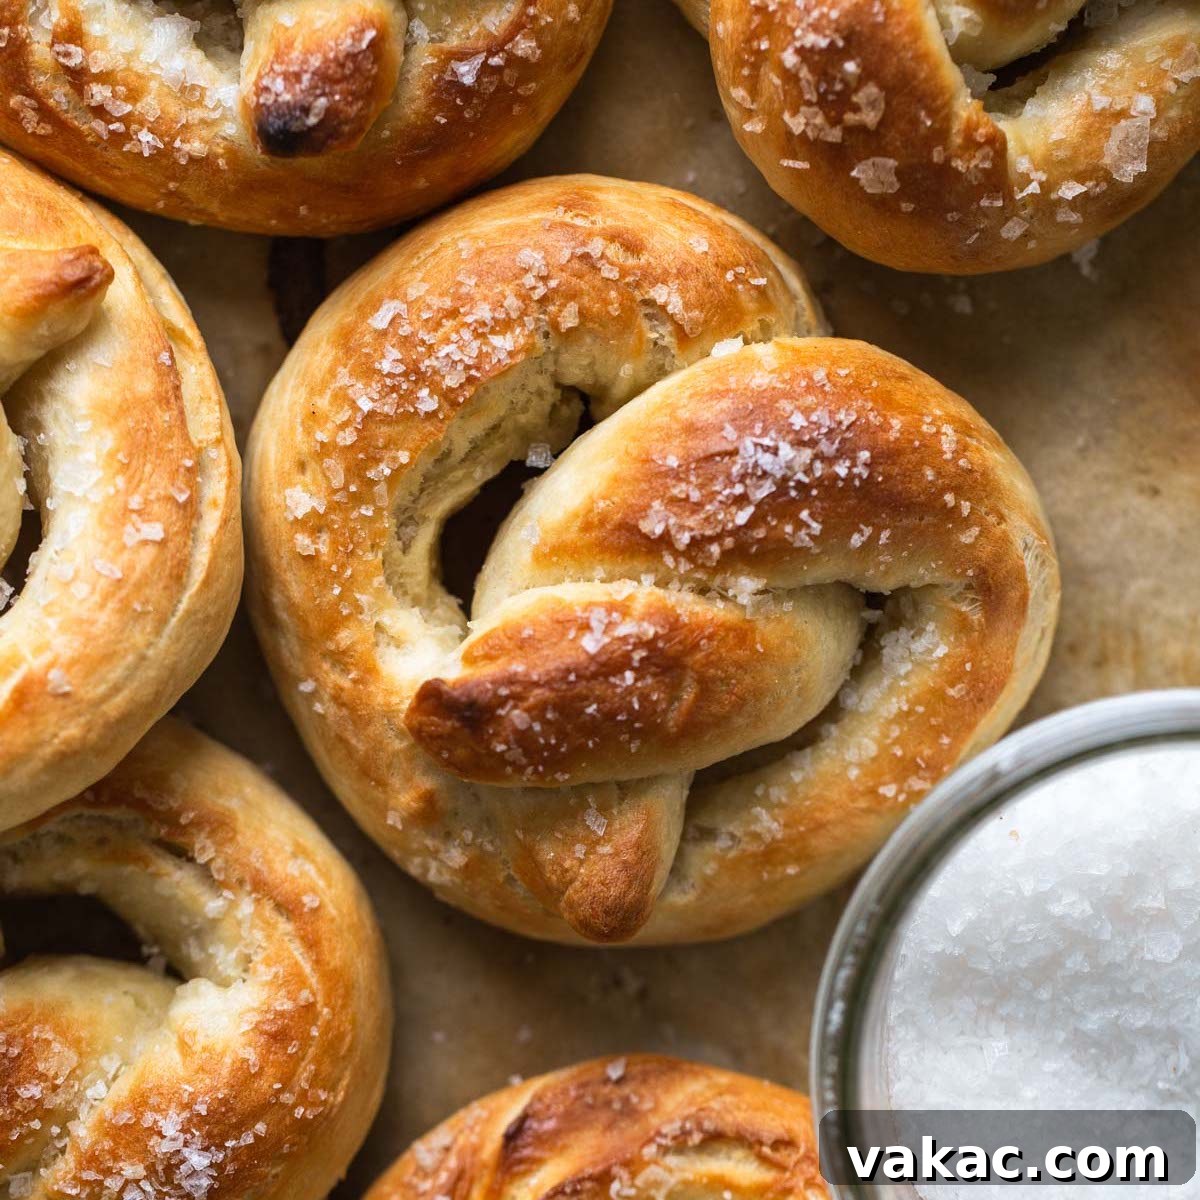
Not sure if making homemade soft pretzels is doable? It absolutely is! This soft pretzel recipe calls for a handful of basic ingredients, and I walk you through the process of shaping them step by step.
Cook Times:
- Prep Time: 40 mins
- Cook Time: 13 mins
- Resting Time: 10 mins
- Total Time: 1 hr 3 mins
Ingredients
Yields: 8 pretzels
- 1 cup (240 ml) warm water (105°F to 115°F)
- 1 tablespoon (12 grams) granulated sugar
- 1 packet (2 1/4 teaspoons) active dry yeast
- 1 teaspoon salt
- 2 tablespoons (30 grams) unsalted butter, melted and slightly cooled
- 3 to 3 ½ cups (375 to 440 grams) all-purpose flour, spooned & leveled
- 9 cups water (for baking soda bath)
- 1/2 cup (125 grams) baking soda
Topping:
- 2 tablespoons (30 ml) unsalted butter, melted
- Coarse sea salt
Instructions
- Preheat the oven to 425°F (218°C). Line a large baking sheet with parchment paper or a silicone baking mat and set aside.
- In a large mixing bowl, whisk the warm water and sugar together. Gently stir in the yeast and allow to stand for 5 minutes until foamy.
- Add the melted butter and salt to the foamy yeast mixture and stir until fully combined.
- Mix in 2 cups (250 grams) of flour until just combined, then mix in 1 more cup (125 grams) of flour until just combined. Add more flour, a little at a time, if needed until the dough is thick and no longer sticky.
- Place the dough on a lightly floured surface and knead for 3 to 5 minutes until smooth and elastic, then shape the dough into a ball.
- Cover the dough and allow it to rest for 10 minutes.
- While the dough rests, pour 9 cups of water into a large pot over high heat, add the baking soda, whisk until well combined, and bring to a boil.
- Using a knife, divide the dough into 8 equal pieces. Roll out each piece into a rope about 20-inches in length, ensuring consistent thickness.
- Take the ends of each rope and create a U-shape. Twist the ends over each other once, then press them onto the bottom of the U to form the classic pretzel shape.
- Using a slotted spoon or spatula, gently dip each pretzel into the boiling baking soda water for 20 seconds (10 seconds on each side). Gently lift the pretzel out of the water and allow any excess water to drip off.
- Transfer the pretzels to the prepared baking sheet. Brush generously with the melted butter and top with coarse sea salt.
- Bake for 8 to 10 minutes or until baked through and light golden brown. Then, turn the oven to broil and bake for 2 to 3 more minutes or until the tops are deep brown and glossy (be sure to keep a close eye on them so that they don’t burn).
- Remove the pretzels from the oven and, if desired, brush with any remaining butter for extra shine and flavor.
- Allow to cool slightly on the baking sheet for a few minutes before serving warm.
Notes
- Storage Instructions: Pretzels may be stored in an airtight container at room temperature for up to 3 days. Reheat in the microwave for 15 to 20 seconds, or in an oven at 350°F (175°C) for a few minutes, if desired.
- Freezing Instructions: Baked and cooled pretzels freeze well in a large freezer bag for up to 3 months. Place them on the counter to thaw to room temperature and reheat before serving.
- Water Temperature: Your water for yeast activation should be between 105°F to 115°F (40°C to 46°C). Water that is too hot can kill the yeast, while water that is too cold will prevent it from activating.
Recipe Meta
- Cuisine: American
- Course: Appetizer, Snack
- Author: Danielle Rye