
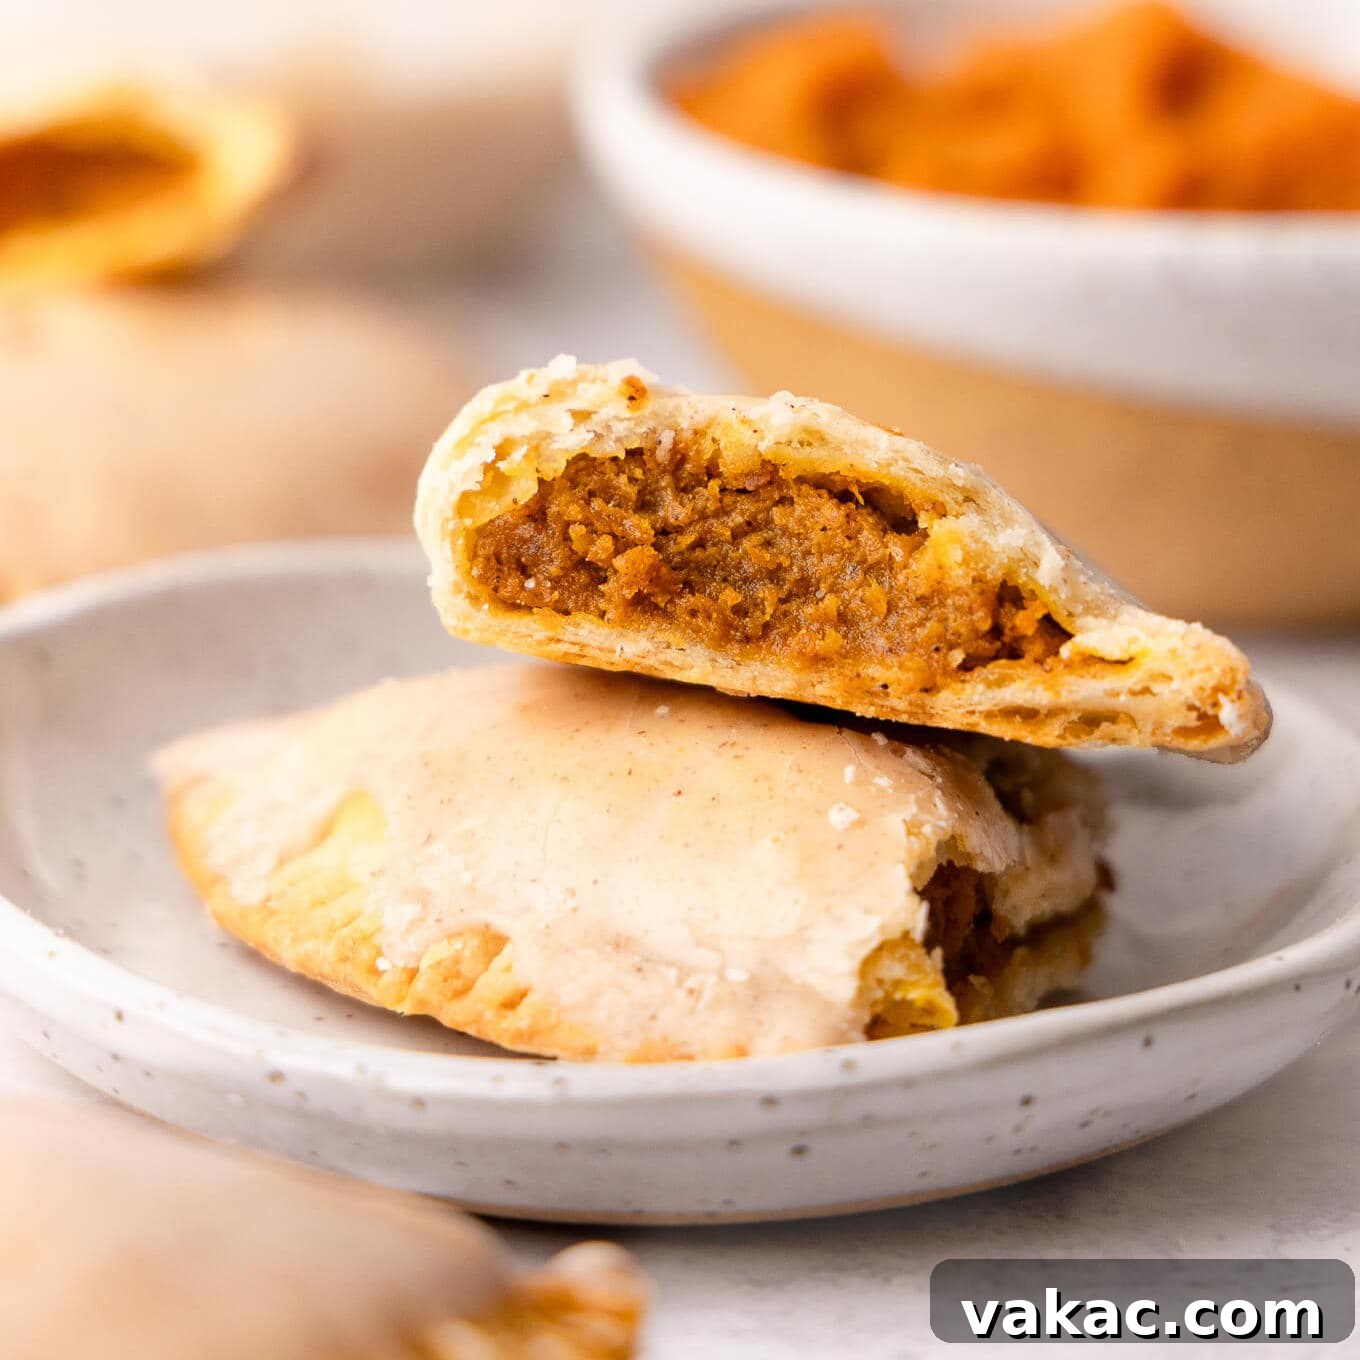
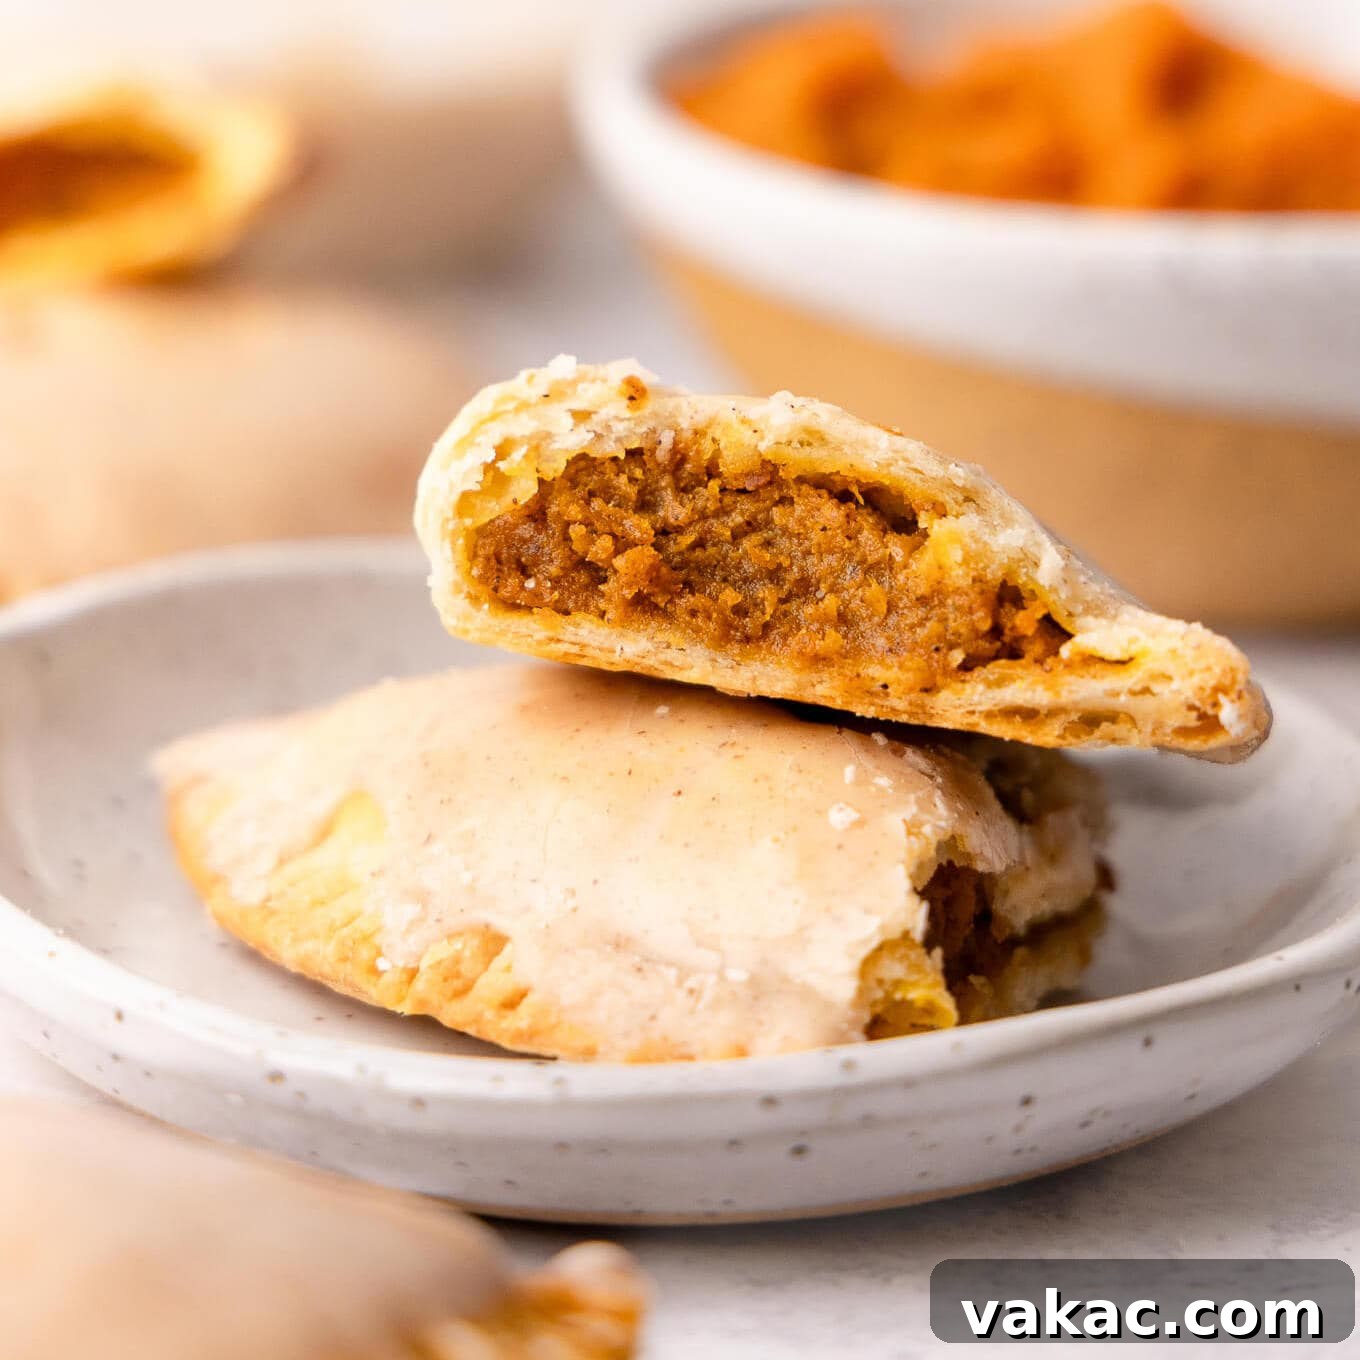
Delightful, portable, and bursting with fall flavors, these adorable pumpkin hand pies are a seasonal sensation! Each golden, flaky pastry pocket is generously filled with a rich, spiced pumpkin pie filling, then finished with a sweet, aromatic pumpkin spice icing drizzle. Perfect for Thanksgiving, holiday gatherings, or simply a cozy autumn treat, these make-ahead desserts are as easy to prepare as they are to enjoy – no forks required!
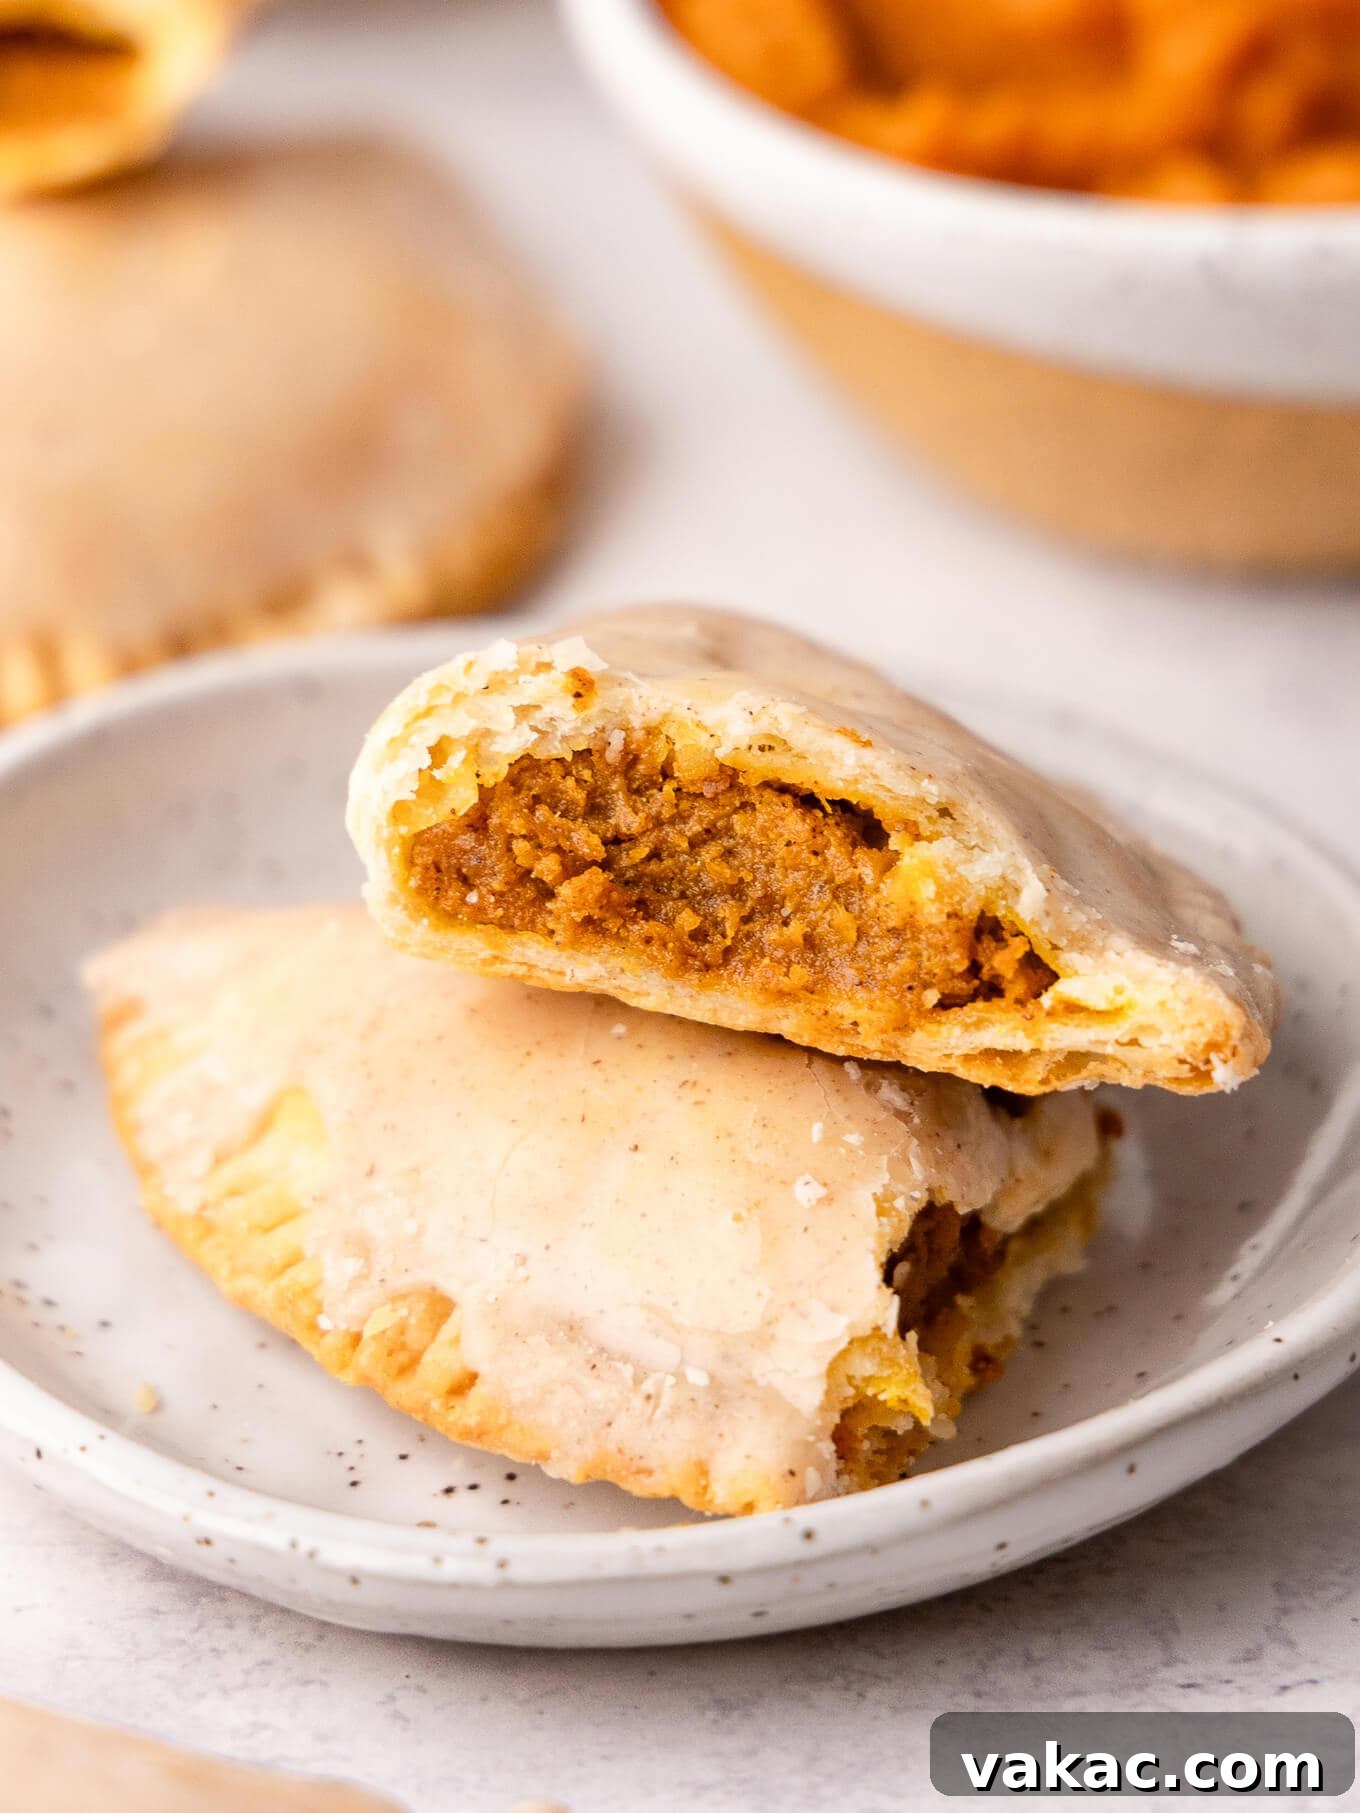
Pumpkin pie is a quintessential autumn dessert, a timeless classic that evokes warmth and celebration. While a traditional slice of classic pumpkin pie is always a hit, sometimes you need a dessert that’s a little more convenient and shareable. That’s where these charming pumpkin hand pies truly shine! Over the years, I’ve enjoyed creating various takes on this beloved dessert, from mini pumpkin pies to pumpkin pie bars, each offering a unique way to savor those comforting flavors. Now, I’m thrilled to share a truly handheld version that transforms everyone’s favorite Thanksgiving dessert into a perfectly portioned, on-the-go treat!
Much like my popular apple hand pies, this spiced pumpkin rendition is designed for simplicity and convenience. You’ll find the assembly process straightforward, making them an ideal make-ahead dessert option for busy hosts. Forget complicated crimping techniques or elaborate decorating; these hand pies are crafted for rustic elegance and effortless eating. Their self-contained nature means guests can easily grab one (or two!) without needing utensils, making them a fantastic addition to any buffet or casual gathering.
These individual pumpkin hand pies are destined to be the star of your Thanksgiving feast or any holiday dessert table. Their charming appearance and irresistible flavor will undoubtedly have your family and friends clamoring for the recipe, making you the undisputed dessert champion!
Watch The Full Recipe Video
For a visual guide to making these delightful pumpkin hand pies, check out our detailed recipe video. It walks you through each step, ensuring perfect results every time!
Essential Ingredient Notes & Smart Substitutions
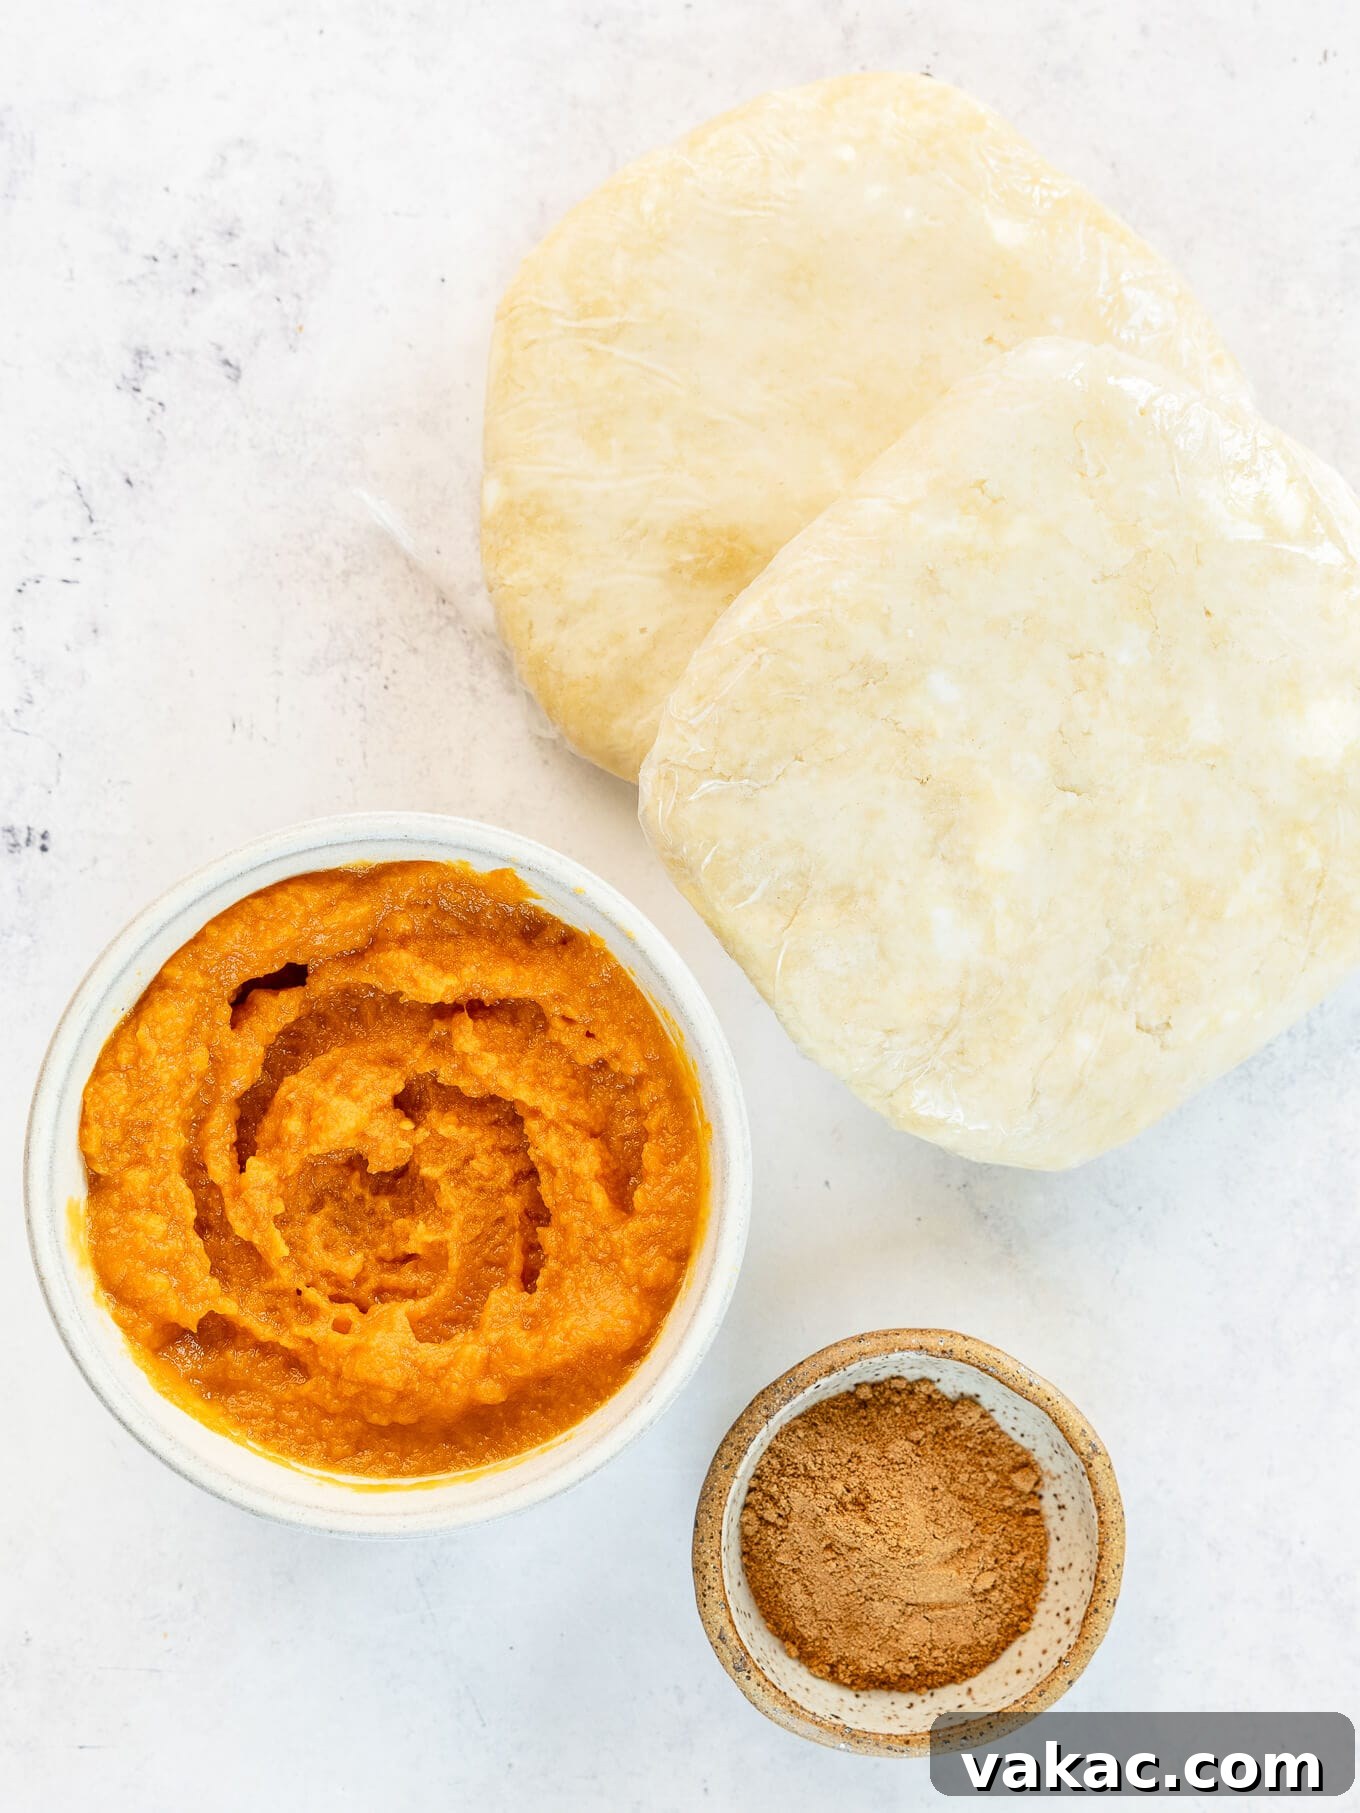
Crafting the perfect pumpkin hand pie begins with understanding your ingredients. Here’s a deeper dive into the key components and how to ensure the best flavor and texture for your flaky delights.
Pie Crust: The Foundation of Flakiness
For an unparalleled taste and texture, I cannot stress enough the importance of using homemade pie crust for these pumpkin hand pies. While store-bought crusts offer convenience, they often lack the rich buttery flavor and incredible flakiness that homemade dough provides. During my recipe testing, I found that hand pies made with store-bought crusts simply didn’t achieve the same beautiful golden-brown color or delicate crispness as those prepared with a freshly made crust. The extra effort for homemade dough is truly worth it for the superior outcome – you’ll be rewarded with a pastry that bakes up perfectly tender and golden.
Pumpkin Puree: The Heart of the Filling
When selecting your pumpkin puree, always scrutinize the ingredient label carefully. You’re looking for pure pumpkin puree, not the pre-sweetened or spiced pumpkin pie filling. The latter contains added sugars and spices that will throw off the balance of this recipe. If you’re fortunate enough to have homemade pumpkin puree on hand, a small but significant tip is to strain it through a cheesecloth. This step helps remove excess moisture, resulting in a richer, more concentrated pumpkin flavor and a filling that sets beautifully without becoming watery.
Pumpkin Pie Spice: The Essence of Autumn
The right blend of spices is crucial for that classic, cozy pumpkin flavor. I’ve been perfecting my homemade pumpkin pie spice mix for years, and it truly makes a difference. Crafting your own blend allows you to customize the ratios to your preference and ensures you always have a fresh, potent mix ready for all your autumnal baking endeavors – think beyond these hand pies to treats like my delightful pumpkin snickerdoodles! Of course, a high-quality store-bought variety will work in a pinch, but for the most vibrant flavor, I highly recommend mixing your own.
Mastering the Art of Rolling Out Your Pie Crust
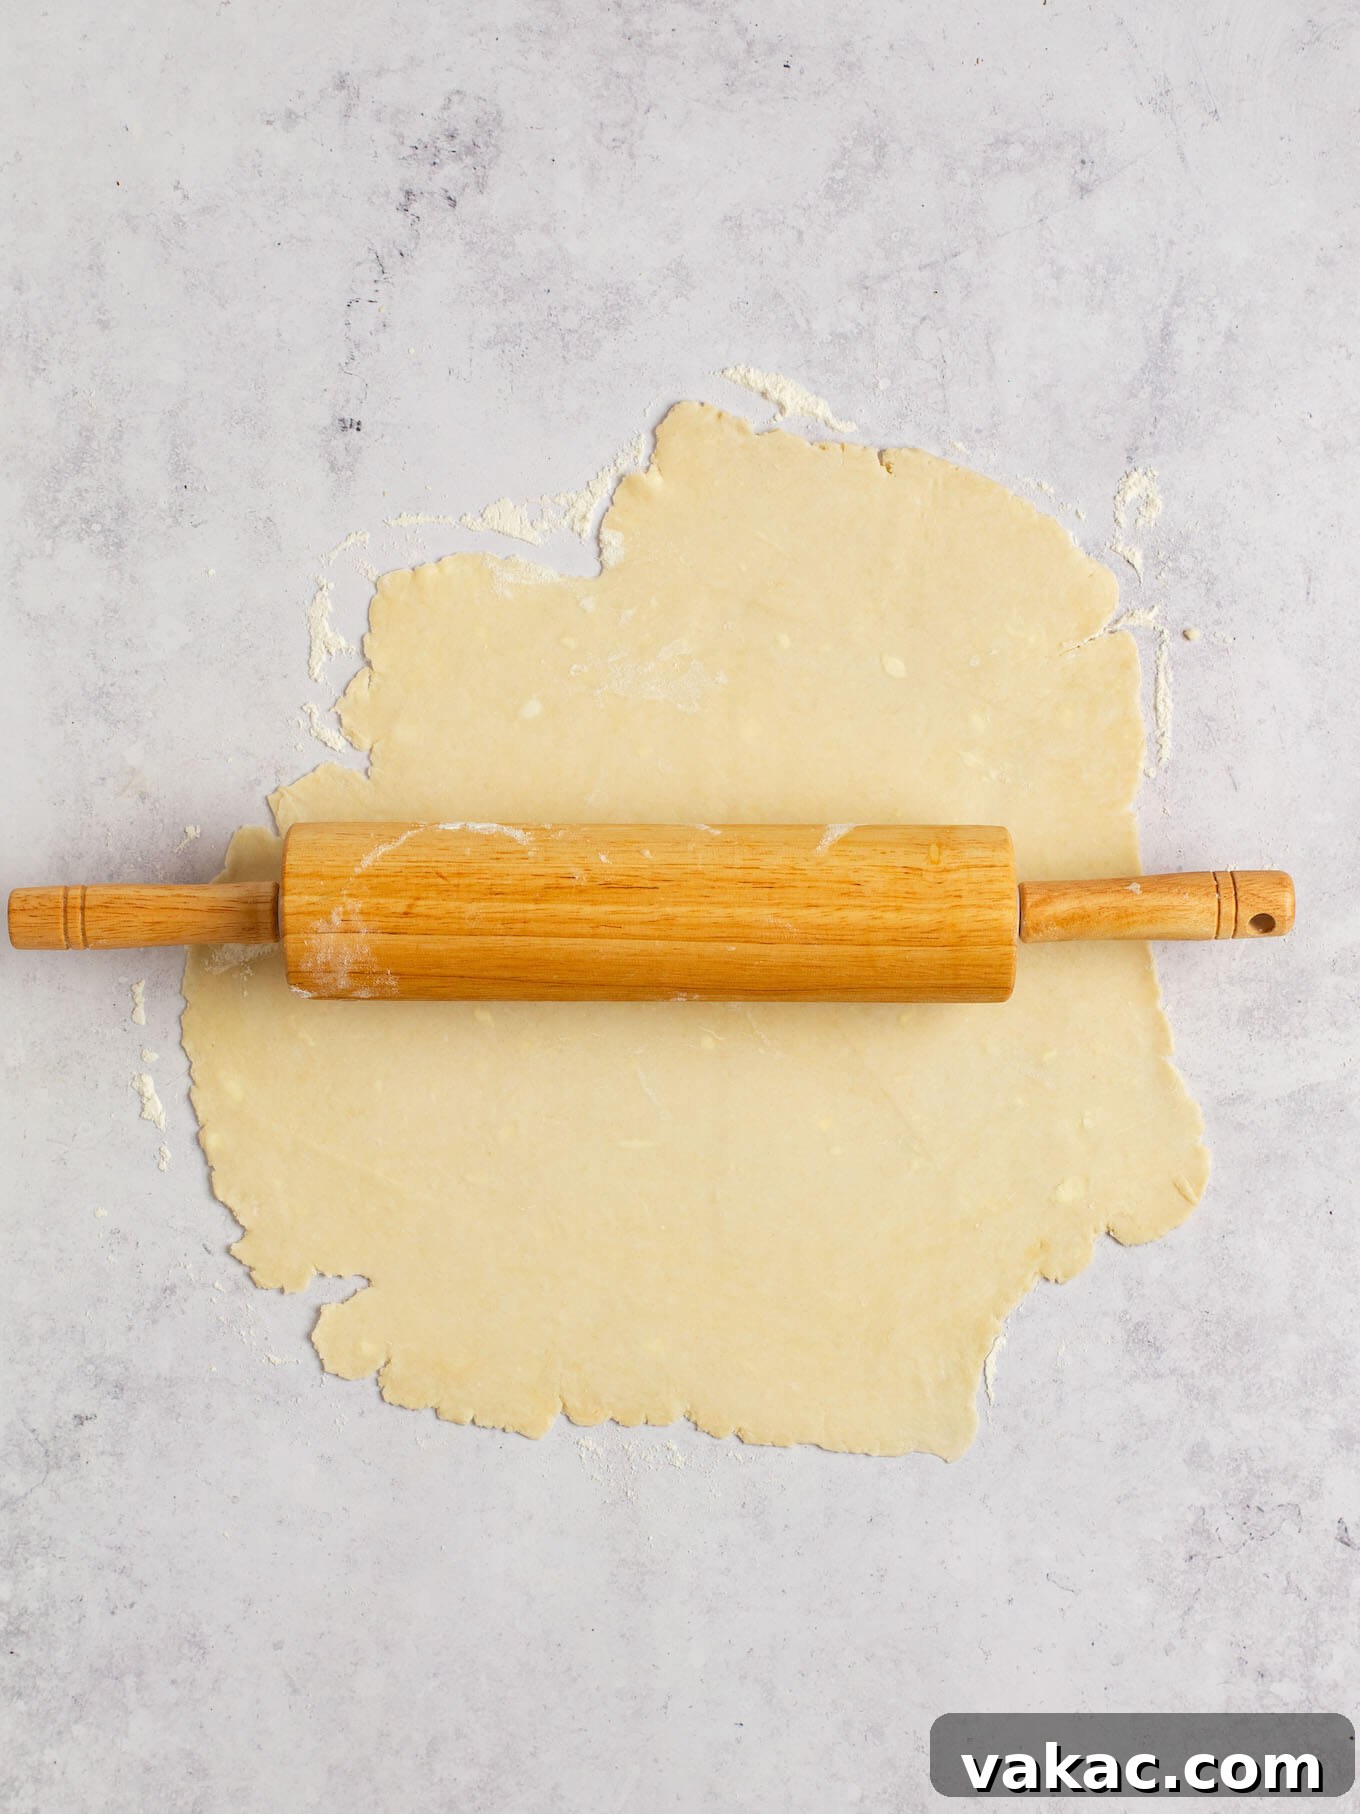
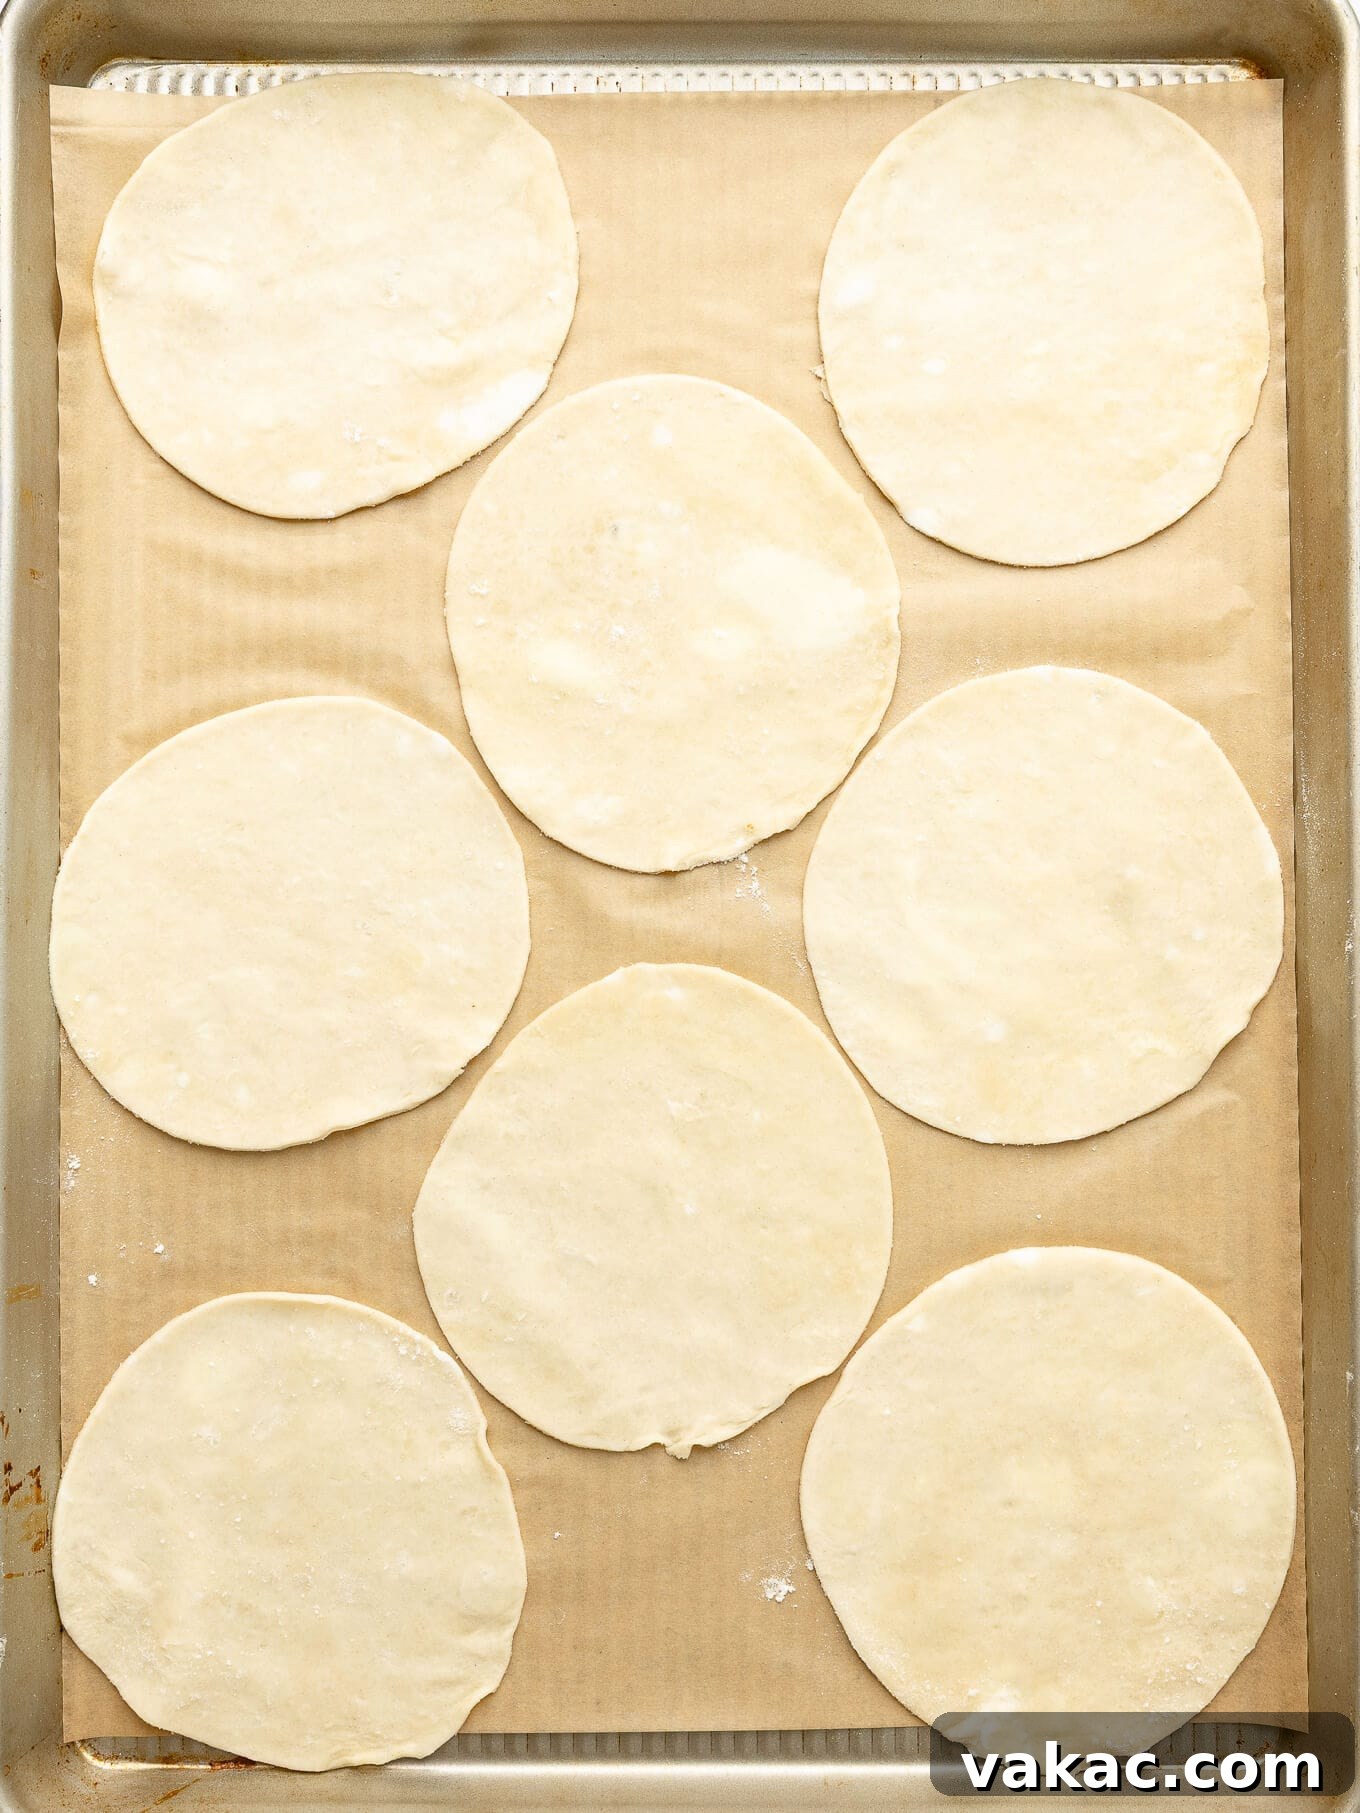
Achieving a perfectly flaky crust for your hand pies starts with properly rolling out the dough. While it might seem daunting at first, it’s a straightforward process with a few key considerations. The most important tip is to keep your work surface and dough consistently floured to prevent sticking. A thin, even crust is paramount; aim for about ⅛ inch thick. If the crust is too thick, it won’t seal properly, increasing the risk of your delicious pumpkin pie filling leaking out during baking. A thin crust ensures a delicate, crispy bite and a secure seal.
Here’s a detailed guide to rolling out your pie dough like a pro:
- Prepare Your Surface: Begin by lightly dusting a clean, dry work surface with flour. This creates a non-stick barrier.
- Position the Dough: Place one chilled circle of pie dough onto the floured area. Sprinkle a little more flour directly onto the top of the dough.
- Begin Rolling: Using a rolling pin, start gently rolling out the pie dough from the center outwards. After a few rolls, give the dough a quarter turn. This technique helps ensure an even thickness and a perfectly round shape, preventing it from sticking to the counter in one spot.
- Flour as Needed: Throughout the rolling process, don’t hesitate to sprinkle both your work surface and the top of the dough with extra flour as needed. This constant re-flouring is your best friend in preventing sticking and tears. Continue rolling and turning until your dough reaches the desired ⅛-inch thickness. Remember, consistency is key for beautiful, uniformly baked hand pies.
For those who prefer a visual demonstration, you can watch my precise method for rolling out pie crust in my comprehensive pumpkin pie video. The video is cued to start exactly at the 50-second mark, so you can jump right into the action and see these techniques in practice!
Crafting Perfection: How to Expertly Assemble Your Hand Pies
Assembling these delightful pumpkin hand pies is a simple yet crucial stage that ensures their beautiful shape and prevents any filling from escaping during baking. Follow these steps for perfectly sealed and irresistibly delicious hand pies:
- Precision Cutting: Start by cutting your rolled-out pie dough into uniform circles. I typically use a 5-inch cookie cutter for this purpose, and this versatile set has served me well. If you don’t have a cookie cutter of that size, a bowl or a wide-mouthed glass can work just as effectively. The key is to avoid going any smaller than 5 inches in diameter, as smaller circles can be tricky to fill and seal without spillage.
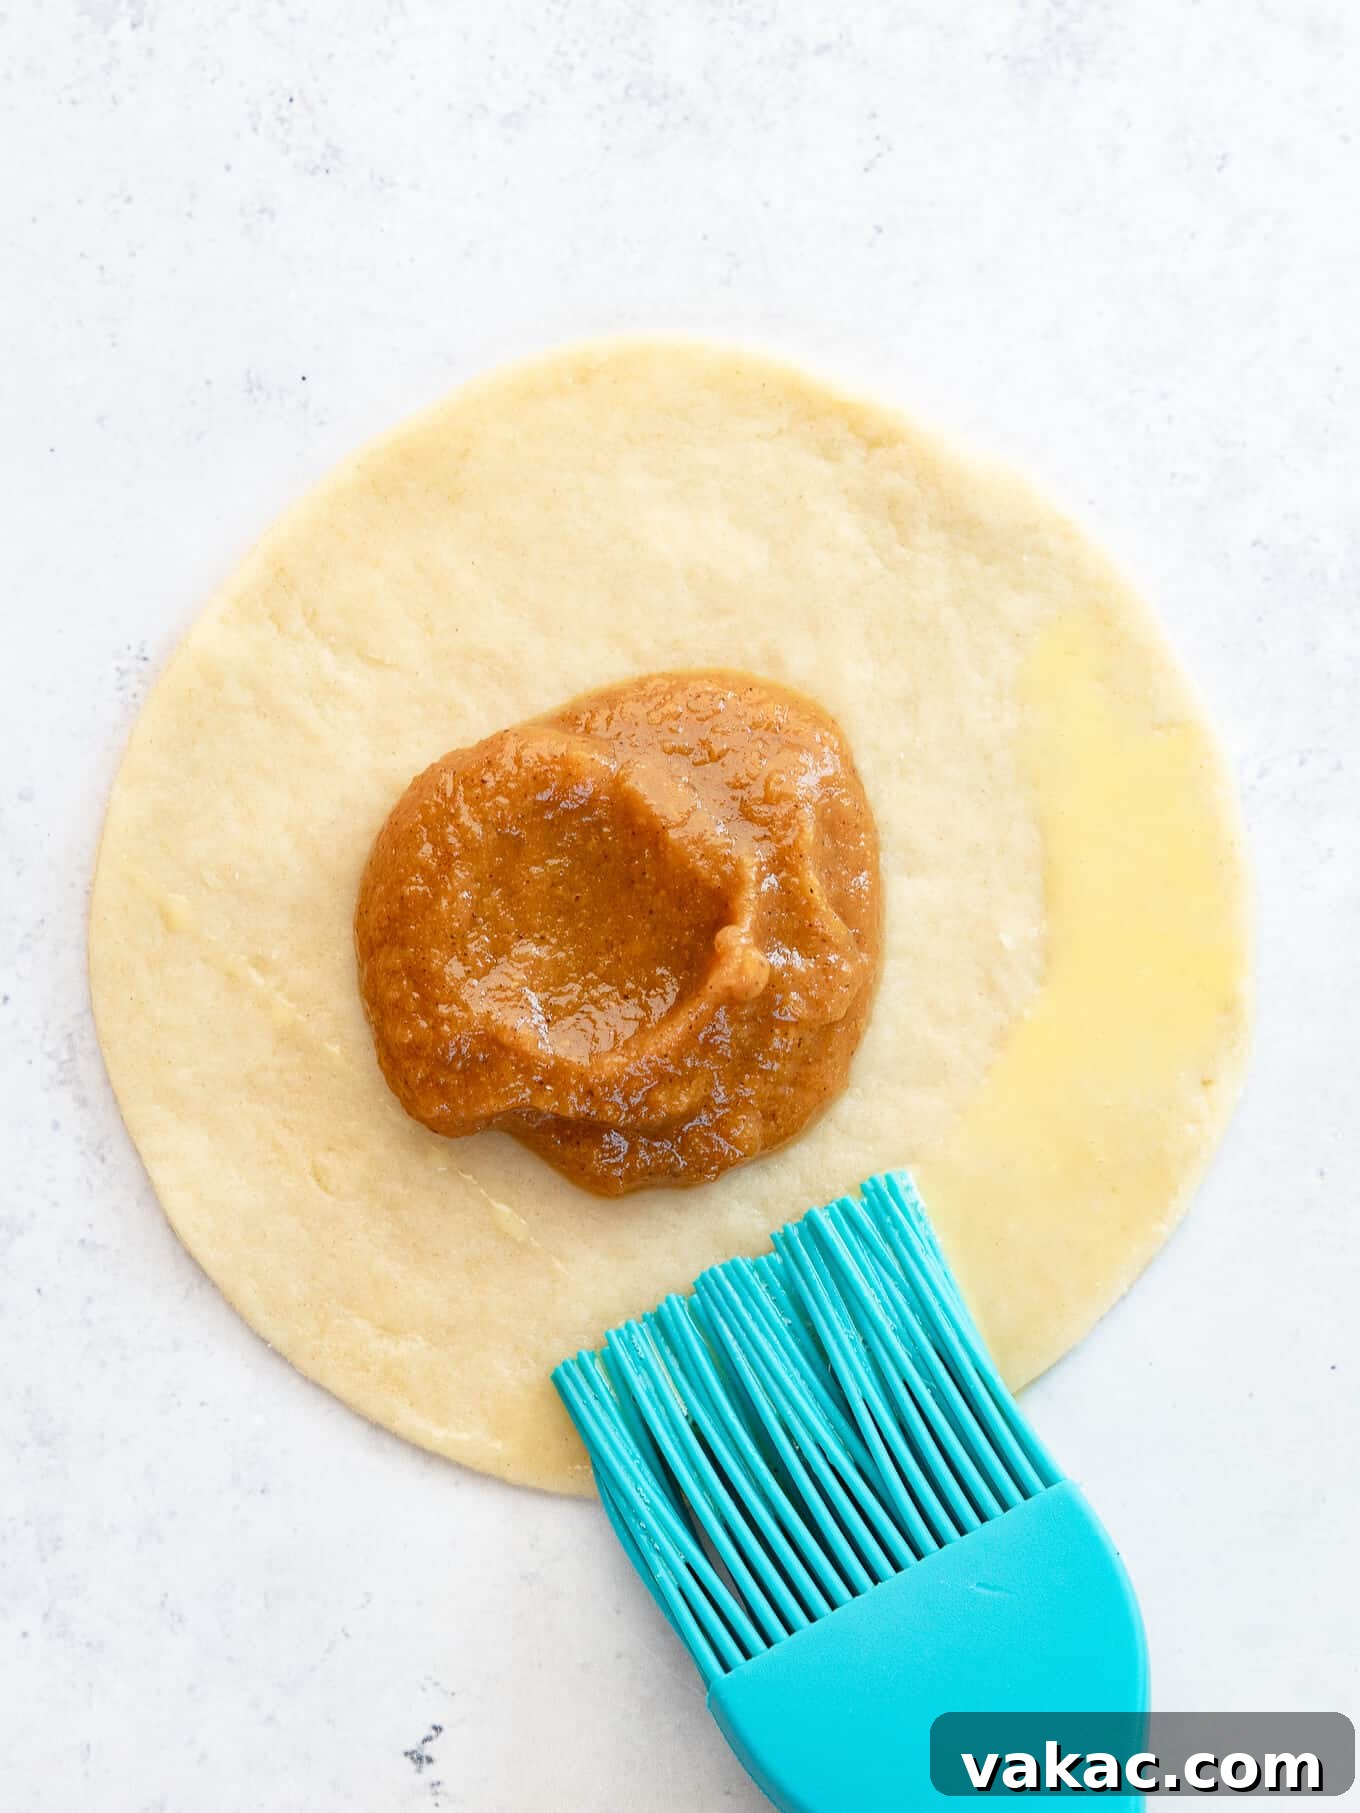
- Generous Filling: Carefully spoon the luscious pumpkin pie filling into the center of each dough circle. For consistent portioning and ease, I highly recommend using a 1.5 tablespoon cookie scoop. This ensures each pie gets the perfect amount of filling. Be mindful not to overfill; exceeding this amount can lead to the hand pies leaking their delicious contents as they bake, which can create a sticky mess and compromise the flaky crust.
- The Essential Egg Wash Seal: Before folding, lightly brush one half of the pie dough circle’s edge with an egg wash. This acts as a culinary glue, helping the two halves of the crust adhere securely together when folded. A thin, even coating is all you need to ensure a strong, leak-proof seal.
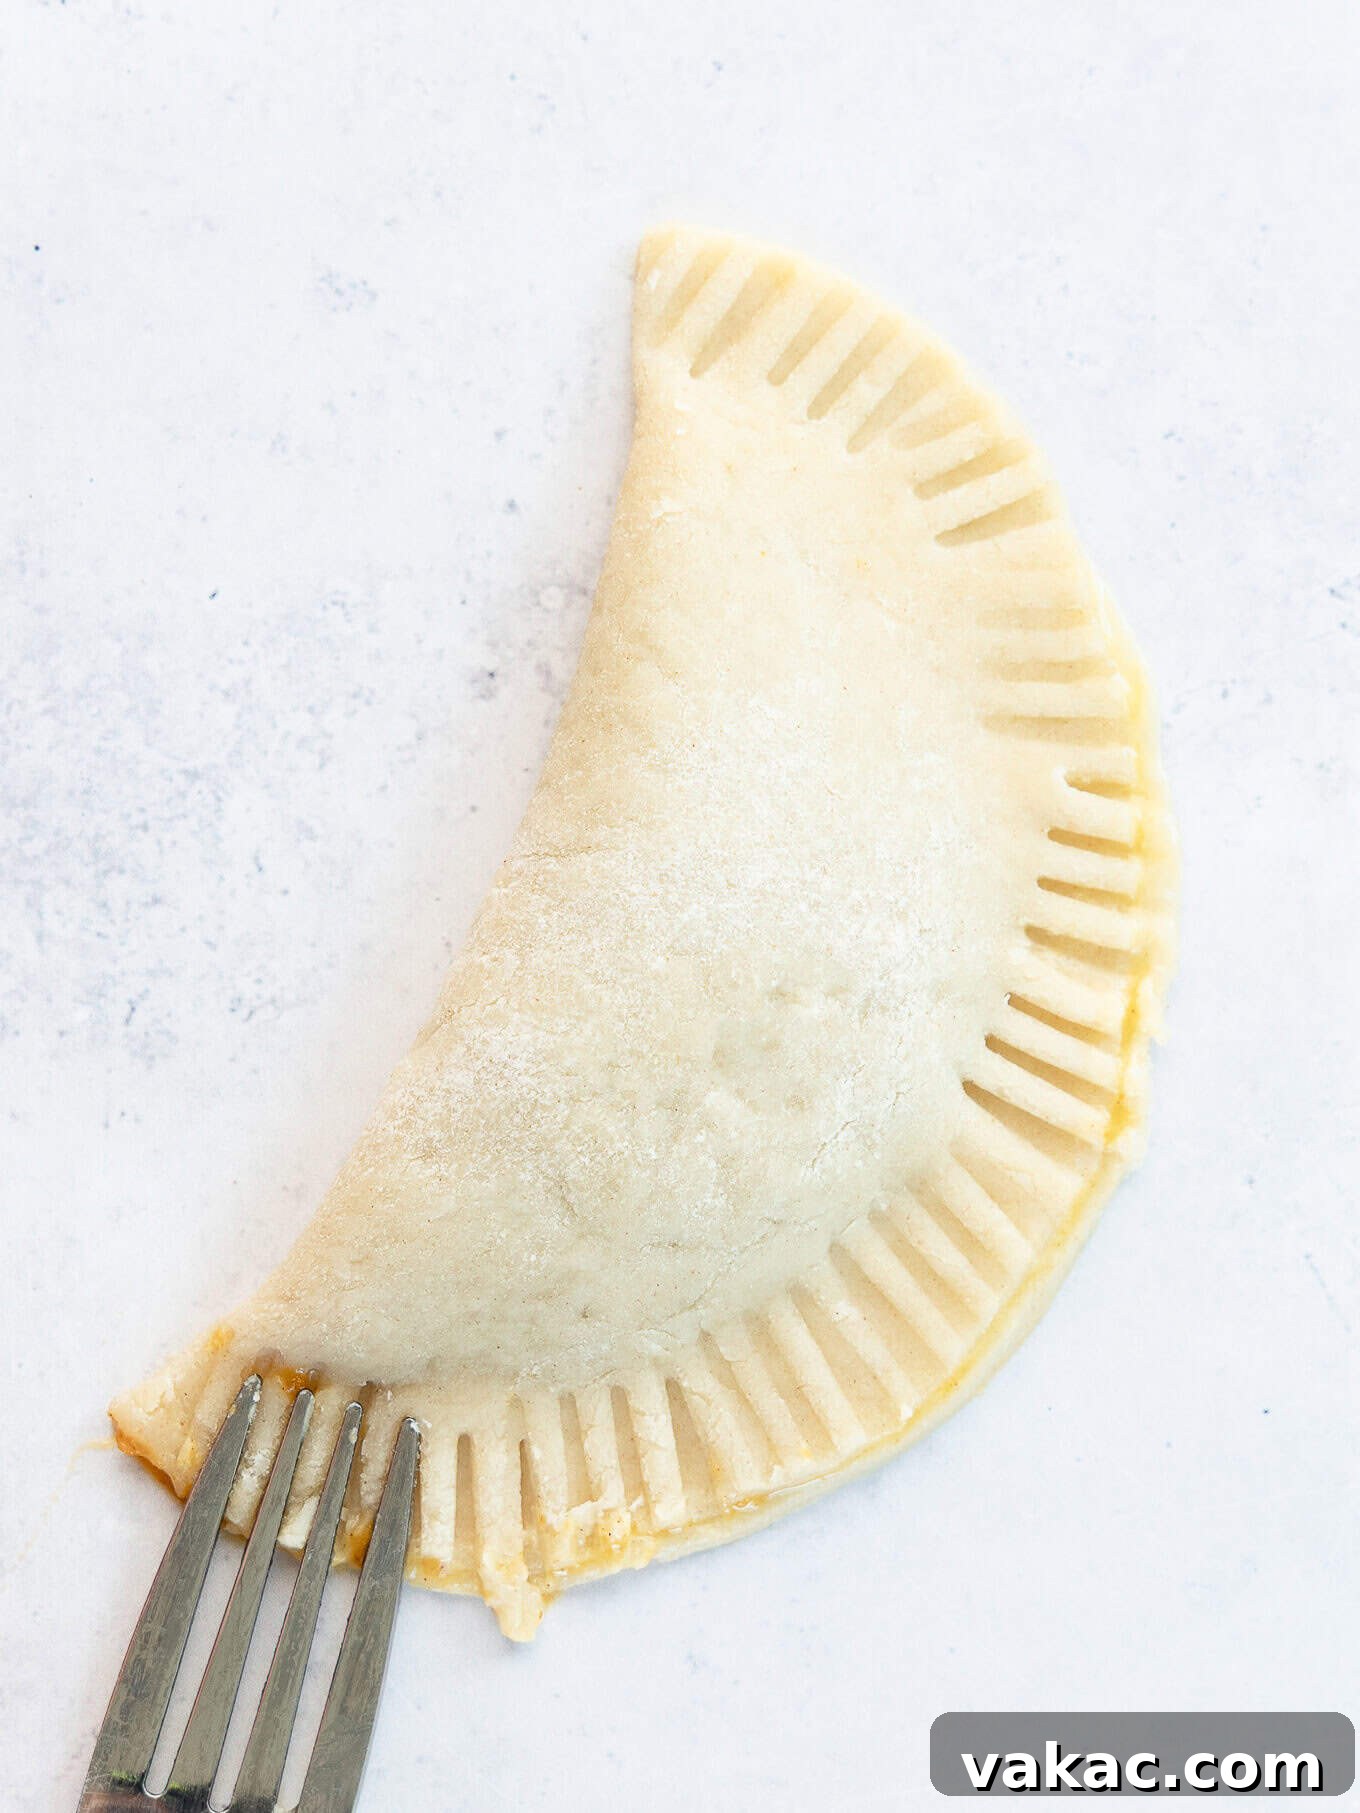
- Fold, Press, and Crimp: Once the filling is in place and the egg wash applied, carefully fold the dough over to create a semi-circle. Gently press the edges together with your fingertips first to form an initial seal. Then, using the tines of a fork, crimp along the entire curved edge of the pie crust. This not only creates a beautiful, rustic border but also provides a more secure seal, minimizing the chance of the filling escaping.
- The Critical Chill: After assembling all your hand pies, resist the urge to bake them immediately. Instead, transfer the baking sheets with the pies back to the refrigerator for a crucial chilling period (10-15 minutes). This step allows the butter or fat in the pie crust to firm back up. When this cold fat melts rapidly in the hot oven, it releases steam, creating tiny air pockets that result in those coveted flaky layers in your pie crust. Skipping this step can lead to a less tender, less flaky pastry.
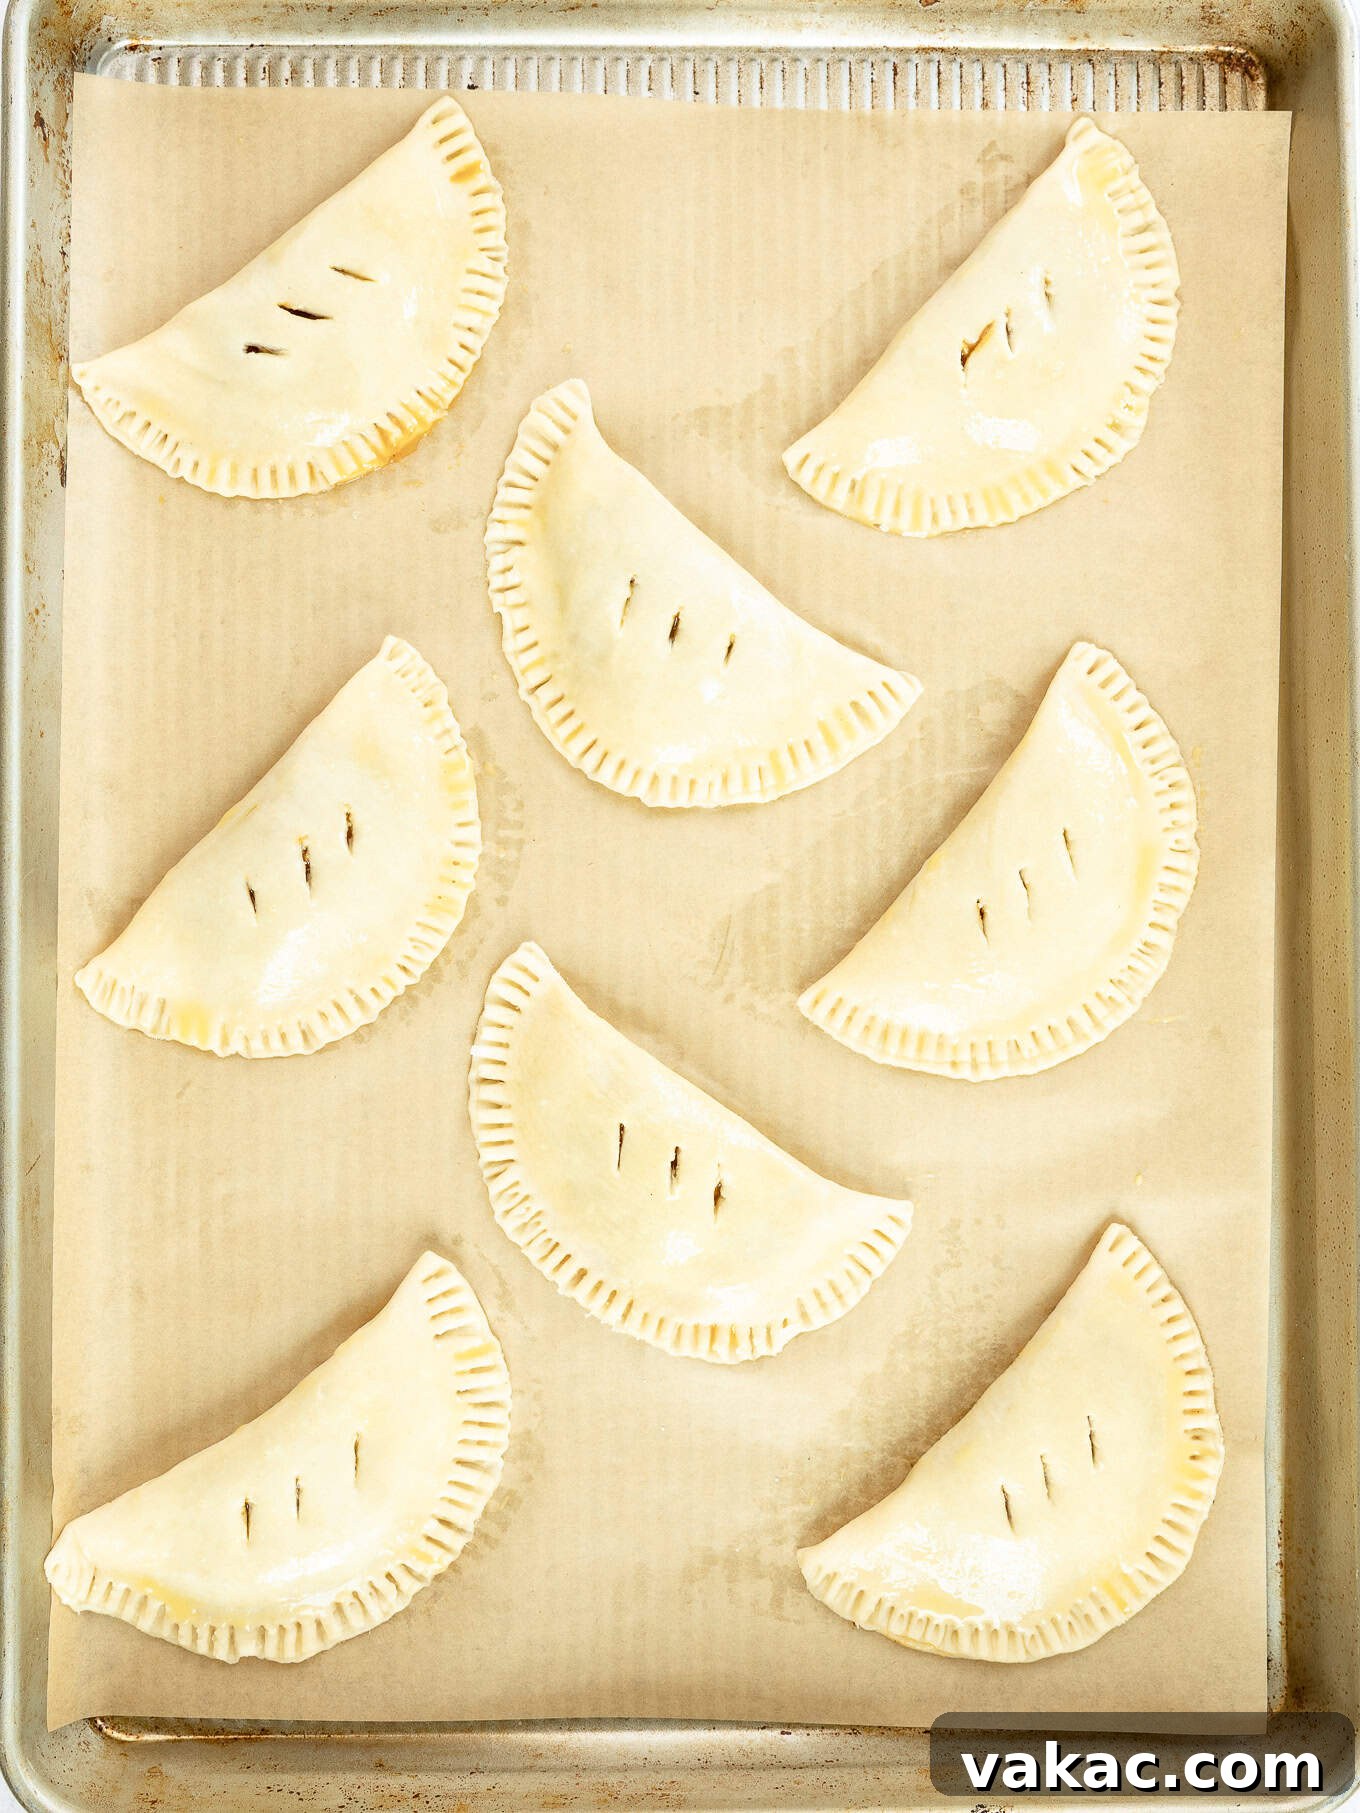
- Enhance Browning and Vent Steam: Before baking, prepare a simple egg wash (one large egg whisked with one tablespoon of milk or water) and brush it evenly over the top of each hand pie. This egg wash contributes to a gorgeous golden-brown crust and a slight sheen, making your pies even more appealing. Immediately after, use a sharp knife to cut two or three small slits into the top of each pie. These slits are vital for allowing steam to vent during baking, preventing the crust from cracking, bursting open, or becoming soggy from trapped moisture. To ensure the vents remain open throughout baking, gently push each slit apart slightly with the knife tip.
- Double-Check Your Seal (Optional but Recommended): For ultimate peace of mind, especially if you’re prone to leaky pies, consider a final gentle crimp of the edges with your fork before baking. This extra step provides an additional layer of security, reinforcing the seal and significantly reducing the risk of your hand pies popping open in the oven. It might seem like a small detail, but trust me, preventing a messy leak is well worth the extra few seconds!
Exploring Delicious Icing Options for Your Pumpkin Hand Pies
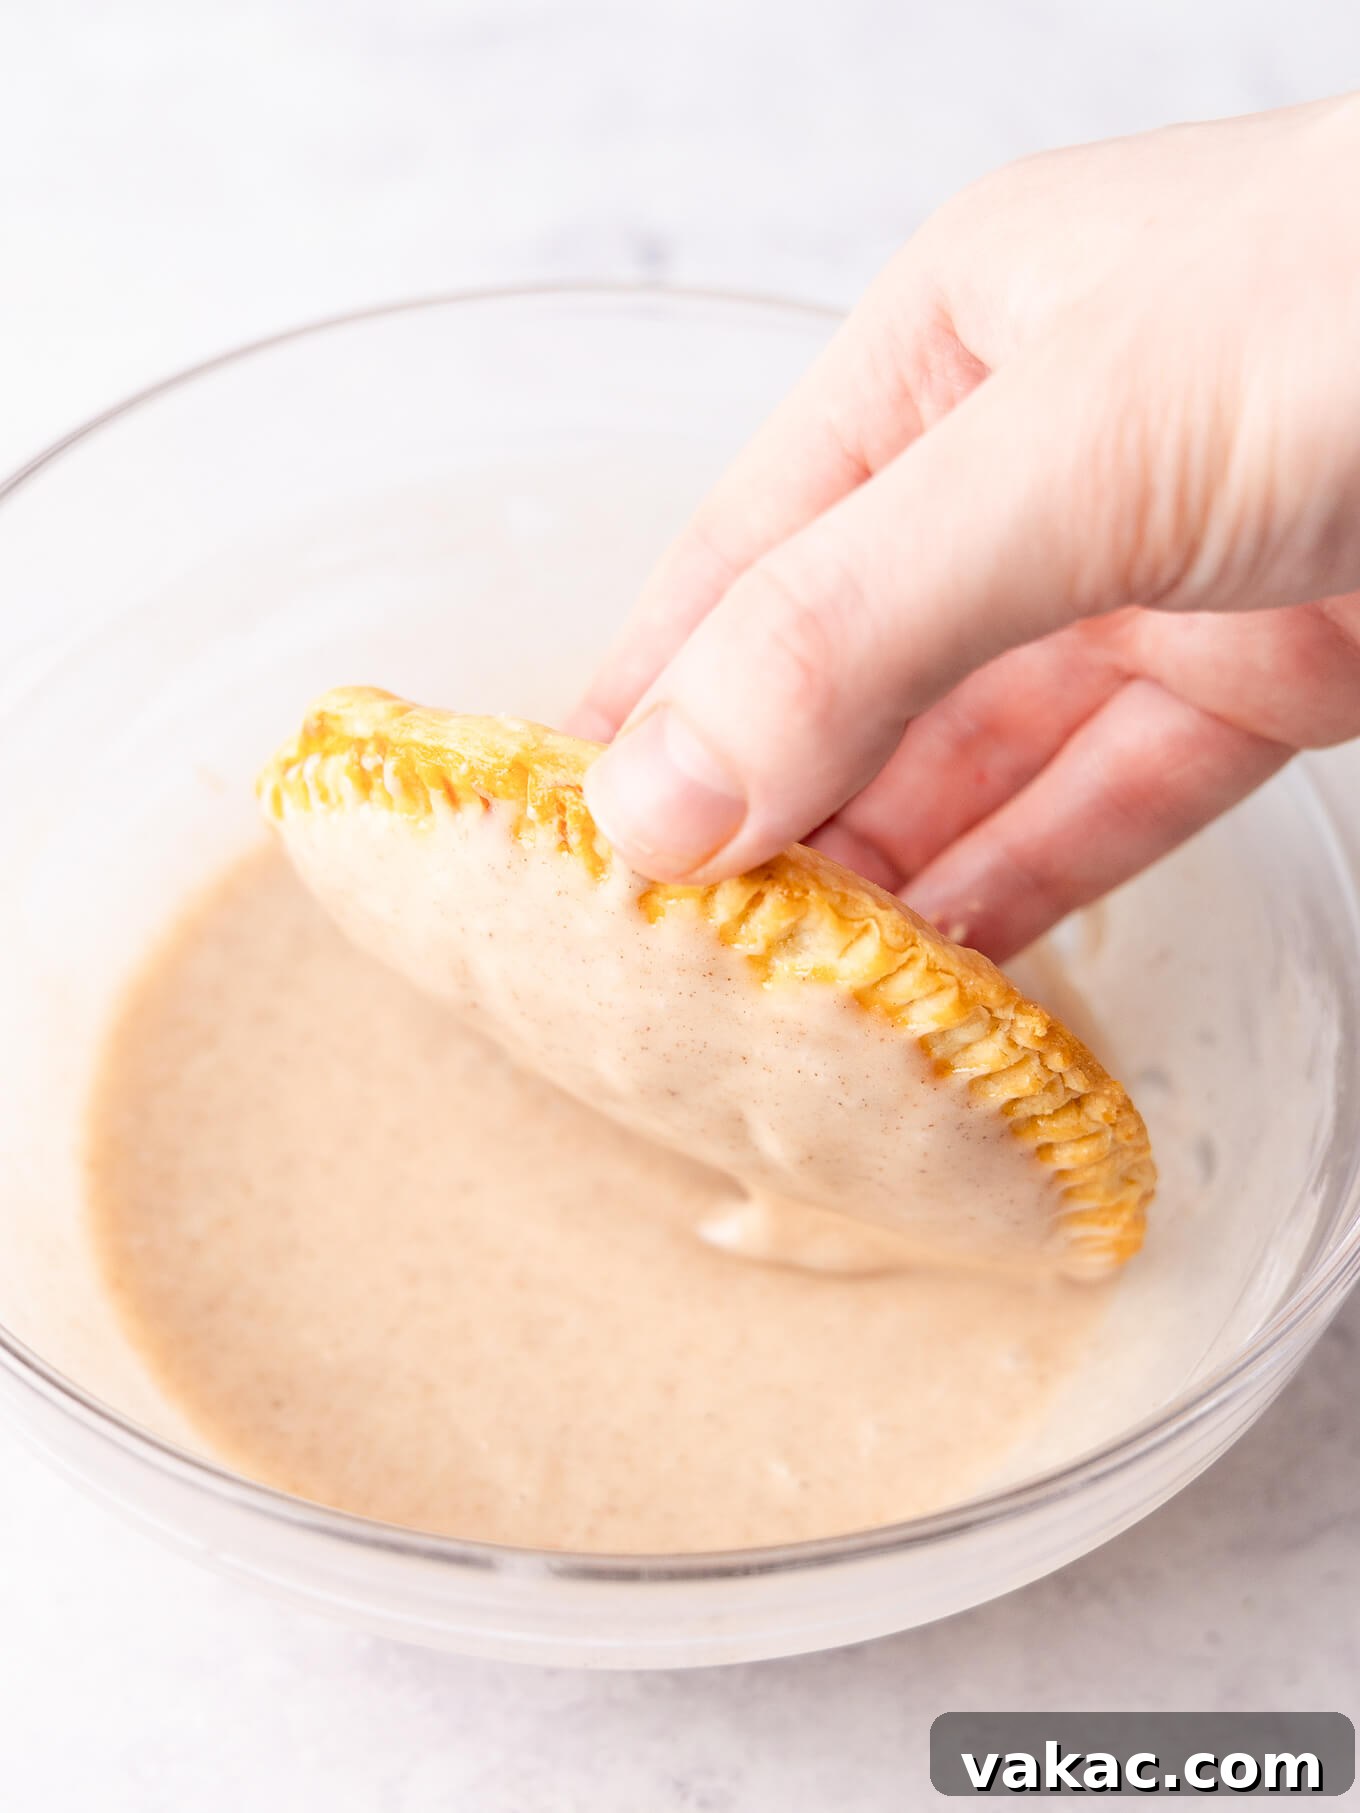
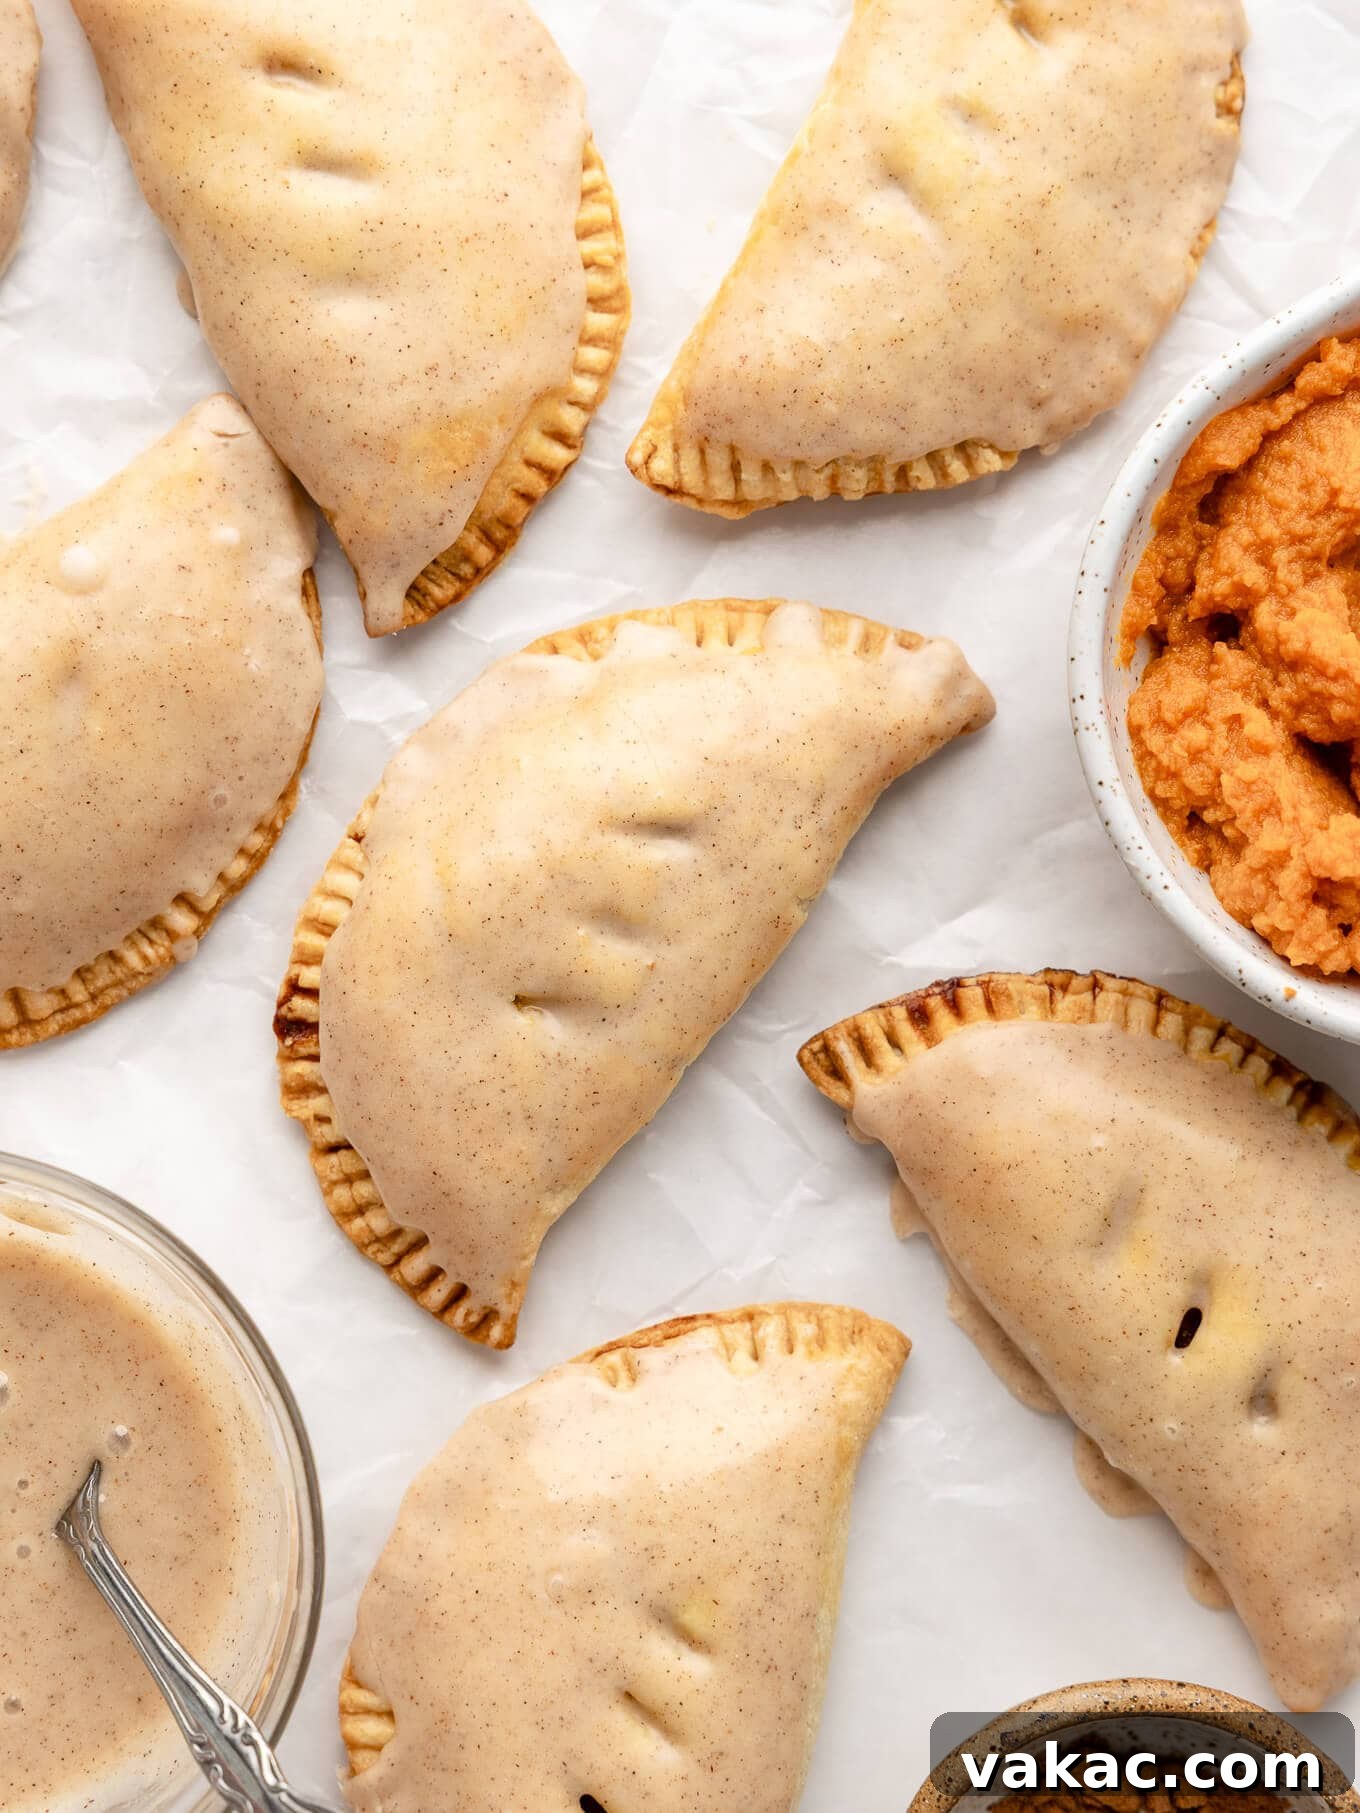
While the spiced pumpkin filling is the heart of these hand pies, a delectable icing is the crown that completes their charm. For this recipe, I’ve chosen a simple yet incredibly flavorful vanilla icing infused with a touch of extra pumpkin pie spice, which beautifully complements the filling. However, feel free to get creative and customize your topping!
If you prefer a more subtle sweetness, you can easily omit the pumpkin pie spice from the icing recipe for a classic, plain vanilla glaze. This allows the robust pumpkin flavor of the filling to take center stage. For those seeking an alternative flavor profile, the rich maple cinnamon glaze from my pumpkin scones recipe would be an absolutely exquisite choice, adding another layer of warm, autumnal spice. Imagine the delicate balance of maple and cinnamon drizzled over these flaky pastries – pure bliss!
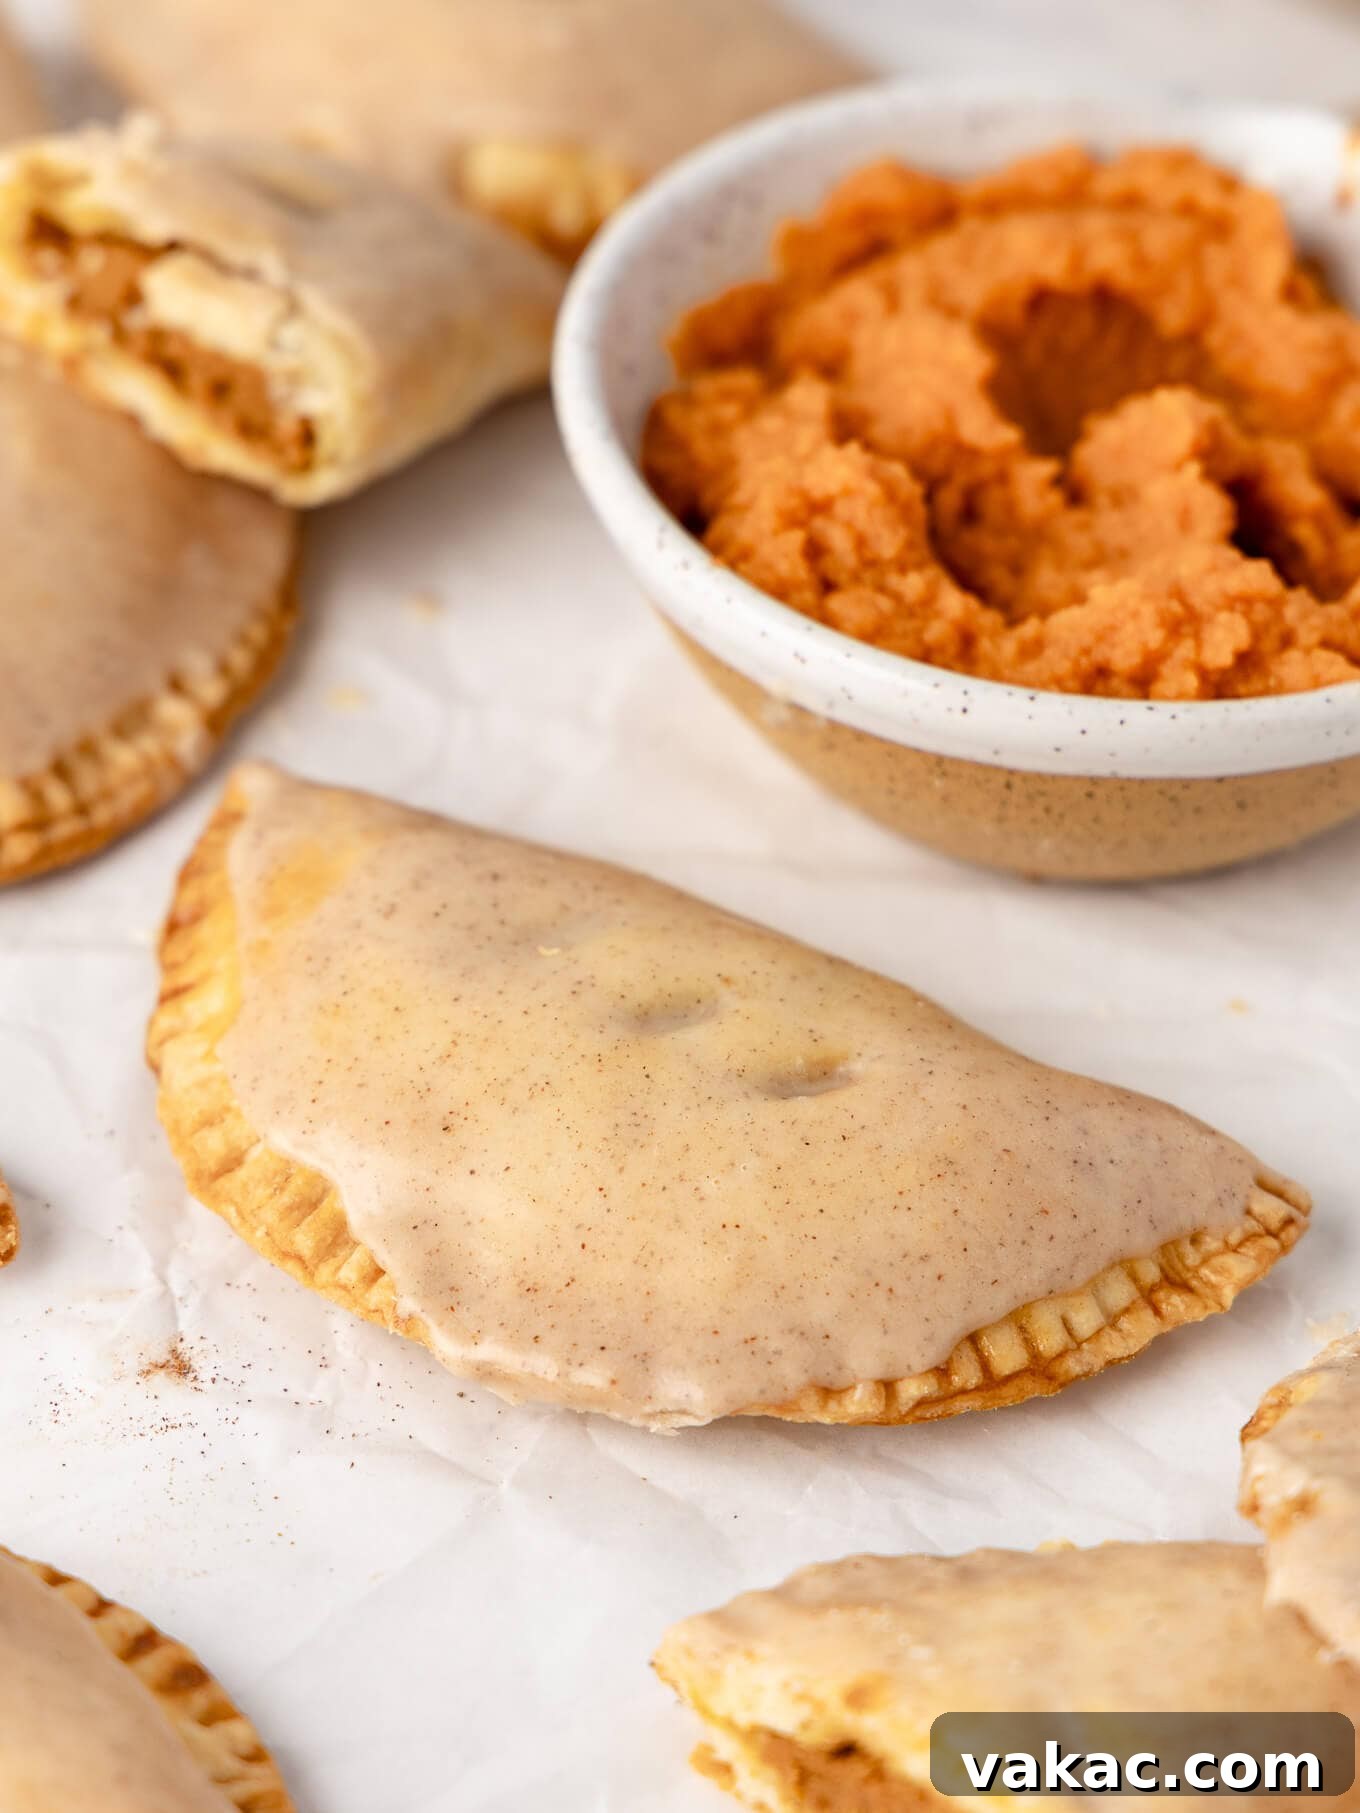
Beyond icing, these hand pies are also wonderfully versatile when it comes to serving. A dollop of homemade whipped cream is always a delightful accompaniment, providing a light and airy contrast. For an extra festive touch, consider serving them alongside a fluffy mound of pumpkin spice whipped cream – it elevates the pumpkin theme to new heights and adds a luxurious finish. Whether glazed, topped, or both, these hand pies are sure to impress!
Frequently Asked Questions & Baking Tips
Can I Cut This Recipe In Half?
Absolutely! This recipe is easily adaptable if you wish to make a smaller batch of pumpkin hand pies. When it comes to measuring a partial egg for the pumpkin pie filling, a simple trick is to lightly beat a whole large egg and then use exactly half of it. This ensures you maintain the correct moisture and binding properties in your filling without waste.
Can I Use A Different Shape To Cut Them?
Technically, yes, you can experiment with different shapes, but based on my experience, I strongly recommend sticking with large round shapes. I once tried making charming pumpkin-shaped pies, envisioning them as a festive touch. However, I quickly discovered they were surprisingly difficult to crimp and seal properly due to their intricate edges. The pumpkin filling also had a tendency to ooze out in the oven, creating a messy situation on the baking sheet.
While novelty shapes can be appealing, a large round cookie cutter simplifies the entire process immensely. Your hand pies will seal more effectively, bake more uniformly, and taste just as incredibly delicious, without the added frustration or cleanup!
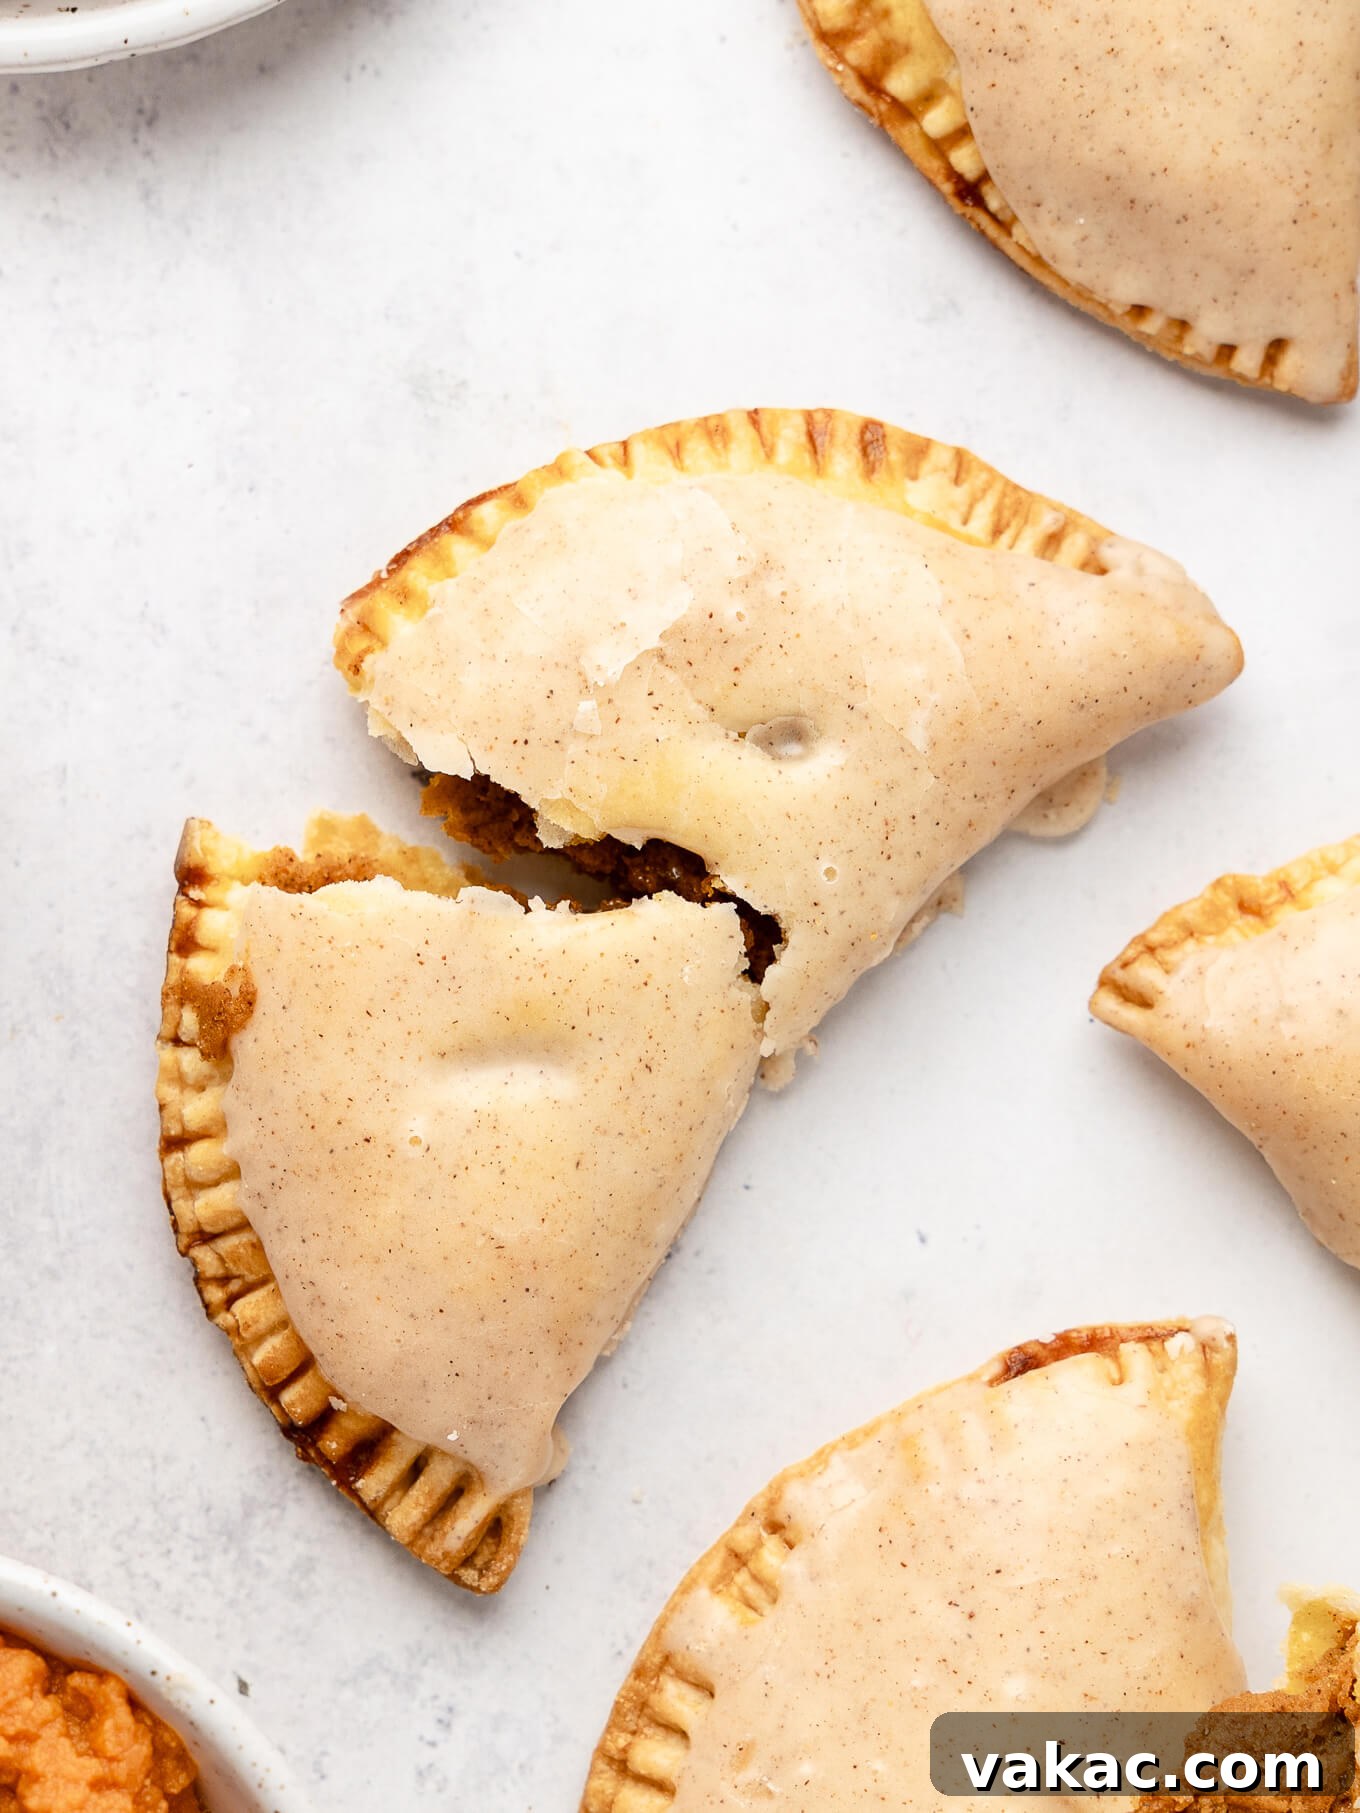
These pumpkin hand pies are truly a triumph of seasonal baking! The luscious, perfectly spiced pumpkin filling nestled within a buttery, flaky pie crust, all crowned with a sweet and aromatic pumpkin spiced icing, creates an irresistible symphony of flavors and textures in every single bite. They are perfectly portable, easy to share, and make an unforgettable addition to any autumn celebration. I encourage you to try them and experience the joy of homemade goodness. Enjoy every delightful moment!
Pumpkin Hand Pie Recipe
1 hour hr 25 minutes mins
25 minutes mins
1 hour hr 25 minutes mins
This year, elevate your holiday dessert table by making these effortlessly charming pumpkin hand pies! They’re a breeze to serve, incredibly easy to eat without a fork, and packed with all the beloved flavors of traditional pumpkin pie in a convenient, portable package.
Pin Recipe
Ingredients
16 pies
Pie Crust
- 2 homemade pie crusts
Pumpkin Pie Filling
- 1 cup pumpkin puree (250 grams)
- 1 large egg
- ½ cup packed light or dark brown sugar (100 grams)
- 1 ½ teaspoons pumpkin pie spice
Egg Wash
- 1 large egg
- 1 tablespoon milk (15 ml)
Pumpkin Spice Icing
- 1 ½ cups powdered sugar (180 grams)
- 2 to 3 tablespoons milk
- 1 teaspoon pumpkin pie spice
- ½ teaspoon pure vanilla extract
Instructions
-
Preheat your oven to 400°F (204°C). Prepare two large baking sheets by lining them with parchment paper or silicone baking mats, then set them aside.
-
To prepare the pie crusts: On a lightly floured surface, carefully roll out your homemade pie crusts to a uniform thickness of ⅛ inch. It’s crucial not to roll them any thicker than ⅛ inch, as a thicker crust will make sealing more difficult and could cause the hand pies to burst open during baking.
2 homemade pie crusts
-
Using a 5-inch cookie cutter (or a similarly sized round object), cut out 16 circles from the rolled pie crusts. Gather any scrap pieces of dough, gently re-roll them, and cut out additional circles as needed until all dough is used. Place the cut-out pie crust circles onto the prepared baking sheets and transfer them to the refrigerator to chill while you prepare the filling.
-
To make the pumpkin pie filling: In a large mixing bowl, combine the pumpkin puree, a large egg, packed light or dark brown sugar, and pumpkin pie spice. Whisk all the ingredients together thoroughly until they are fully combined and smooth.
1 cup pumpkin puree, 1 large egg, ½ cup packed light or dark brown sugar, 1 ½ teaspoons pumpkin pie spice
-
To assemble and bake the hand pies: Retrieve the chilled pie crust circles from the refrigerator. Spoon 1 ½ tablespoons of the prepared pumpkin pie filling into the center of one pie crust circle (a 1 ½ tablespoon cookie scoop works perfectly for this). Using a pastry brush or your finger, lightly brush some of the egg wash (prepared in step 6) around the edge of one half of the pie crust circle. Fold the dough over the filling to create a semi-circle, then gently press the edges together with your fingers to seal. Next, use a fork to crimp the edges of the pie crust, creating a decorative and secure seal. Repeat this filling, folding, and sealing process for all remaining pie crust circles.
-
Once all the hand pies are assembled, transfer both baking sheets back to the refrigerator and chill for an additional 10 to 15 minutes. This chilling step is vital for achieving a flaky crust.
-
To make the egg wash: In a separate small mixing bowl, combine one large egg and one tablespoon of milk. Lightly whisk or beat with a fork until the egg and milk are fully combined and smooth.
1 large egg, 1 tablespoon milk
-
Remove the chilled hand pies from the refrigerator. Using a pastry brush, gently brush the top of each pie with the egg wash. Then, with a sharp knife, carefully cut 3 small slits into the top of each pie to allow steam to escape during baking. If any edges appear to have loosened during chilling, re-crimp them gently with a fork to ensure they are fully sealed.
-
Bake the hand pies in the preheated oven for 20 to 25 minutes, or until their tops are beautifully golden brown (I personally prefer to bake mine closer to the 25-minute mark for deeper color and crispness). Once baked, remove them from the oven and set aside on a wire rack to cool slightly for about 15 minutes before icing.
-
To make the pumpkin spice icing: In a large mixing bowl, combine the powdered sugar, 2 tablespoons of milk, pumpkin pie spice, and pure vanilla extract. Whisk vigorously until all ingredients are well combined and no lumps remain, achieving a smooth consistency. If the icing appears too thick, add an additional ½ teaspoon of milk at a time, mixing thoroughly after each addition (I typically find an extra 2 teaspoons of milk to be ideal). The goal is an icing that is thin enough to easily dip the pies into, yet thick enough to adhere nicely and set on the pies.
1 ½ cups powdered sugar, 2 to 3 tablespoons milk, 1 teaspoon pumpkin pie spice, ½ teaspoon pure vanilla extract
-
Once the hand pies have cooled slightly, dip the top of each pie into the prepared pumpkin spice icing. Allow any excess icing to drip off, then transfer the glazed pies back to the baking sheets to allow the icing to set and harden. If you have any leftover icing and desire a thicker coating, you can dip the top of each pie again after the first layer has partially set.
Notes
Storage Instructions: To maintain freshness, these delicious pumpkin hand pies can be stored in an airtight container at room temperature for up to 4 days. For longer preservation, refrigerate for up to a week.
Freezing Instructions: These hand pies freeze exceptionally well, making them perfect for meal prepping or enjoying later. Simply place cooled, un-iced or iced pies in a freezer-safe container or bag, separating layers with parchment paper, and freeze for 2 to 3 months. When ready to serve, thaw them to room temperature. For a warm treat, you can gently reheat them in a low oven after thawing.
American
Dessert
Danielle Rye
Did you make this recipe?
Share your creations! Mention @livewellbakeoften on Instagram or tag #livewellbakeoften. We love seeing your baking triumphs!