
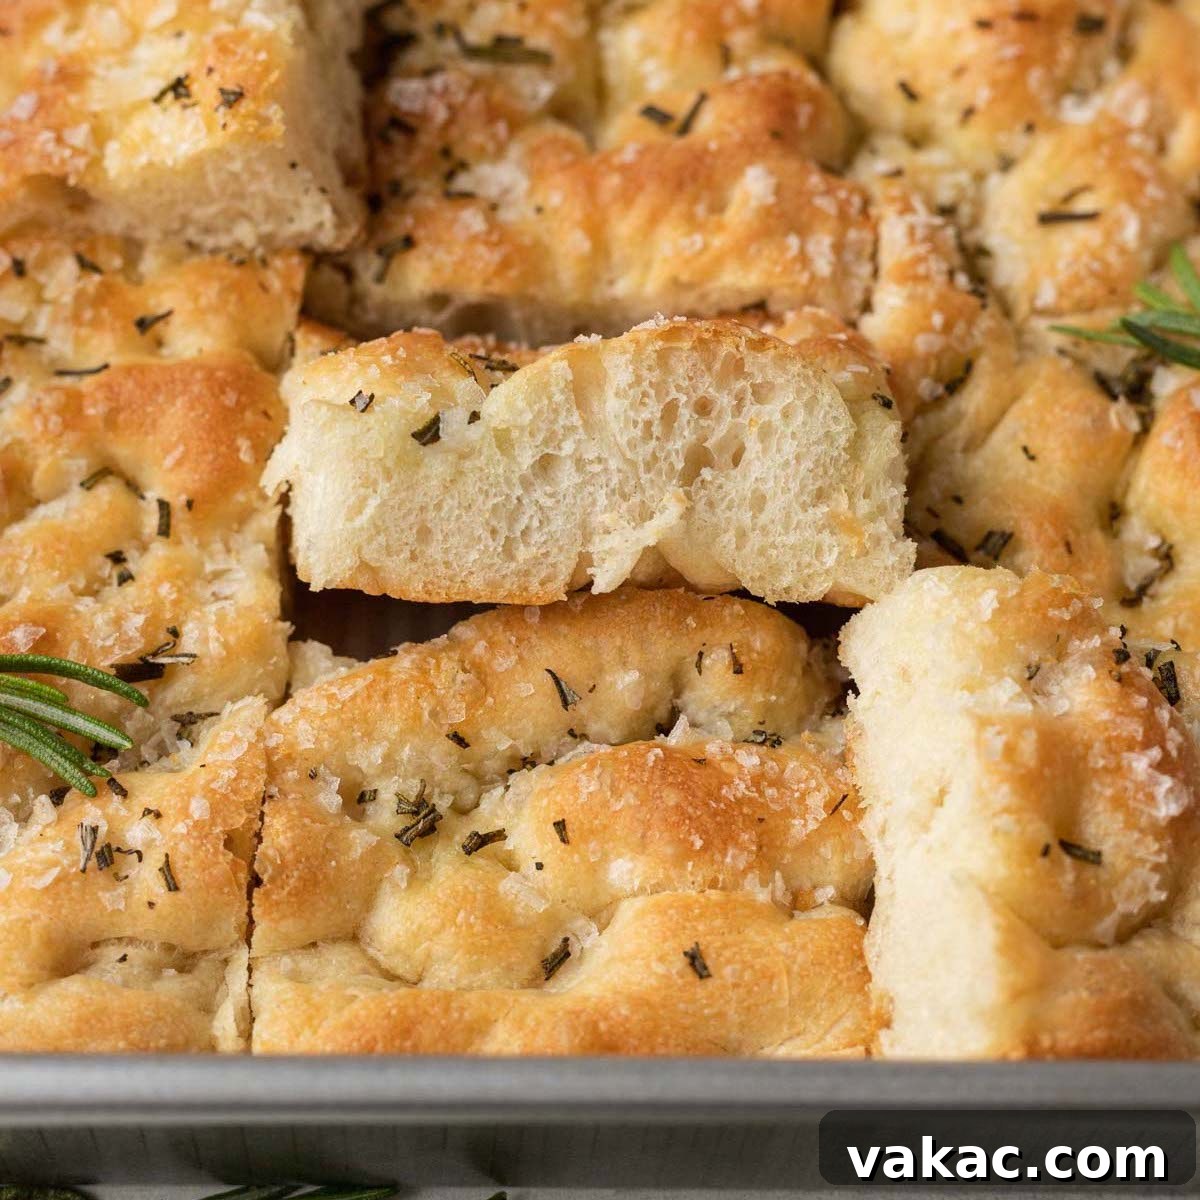
Golden and crispy on the outside, incredibly tender and springy on the inside, this homemade focaccia bread is a culinary delight perfect for any occasion. Whether you’re seeking to elevate your favorite Italian sauces and soups or crafting gourmet sandwiches, this versatile flatbread promises to impress. Infused with aromatic rosemary and kissed with flaky sea salt, our easy focaccia recipe will guide you to baking perfection right in your own kitchen.
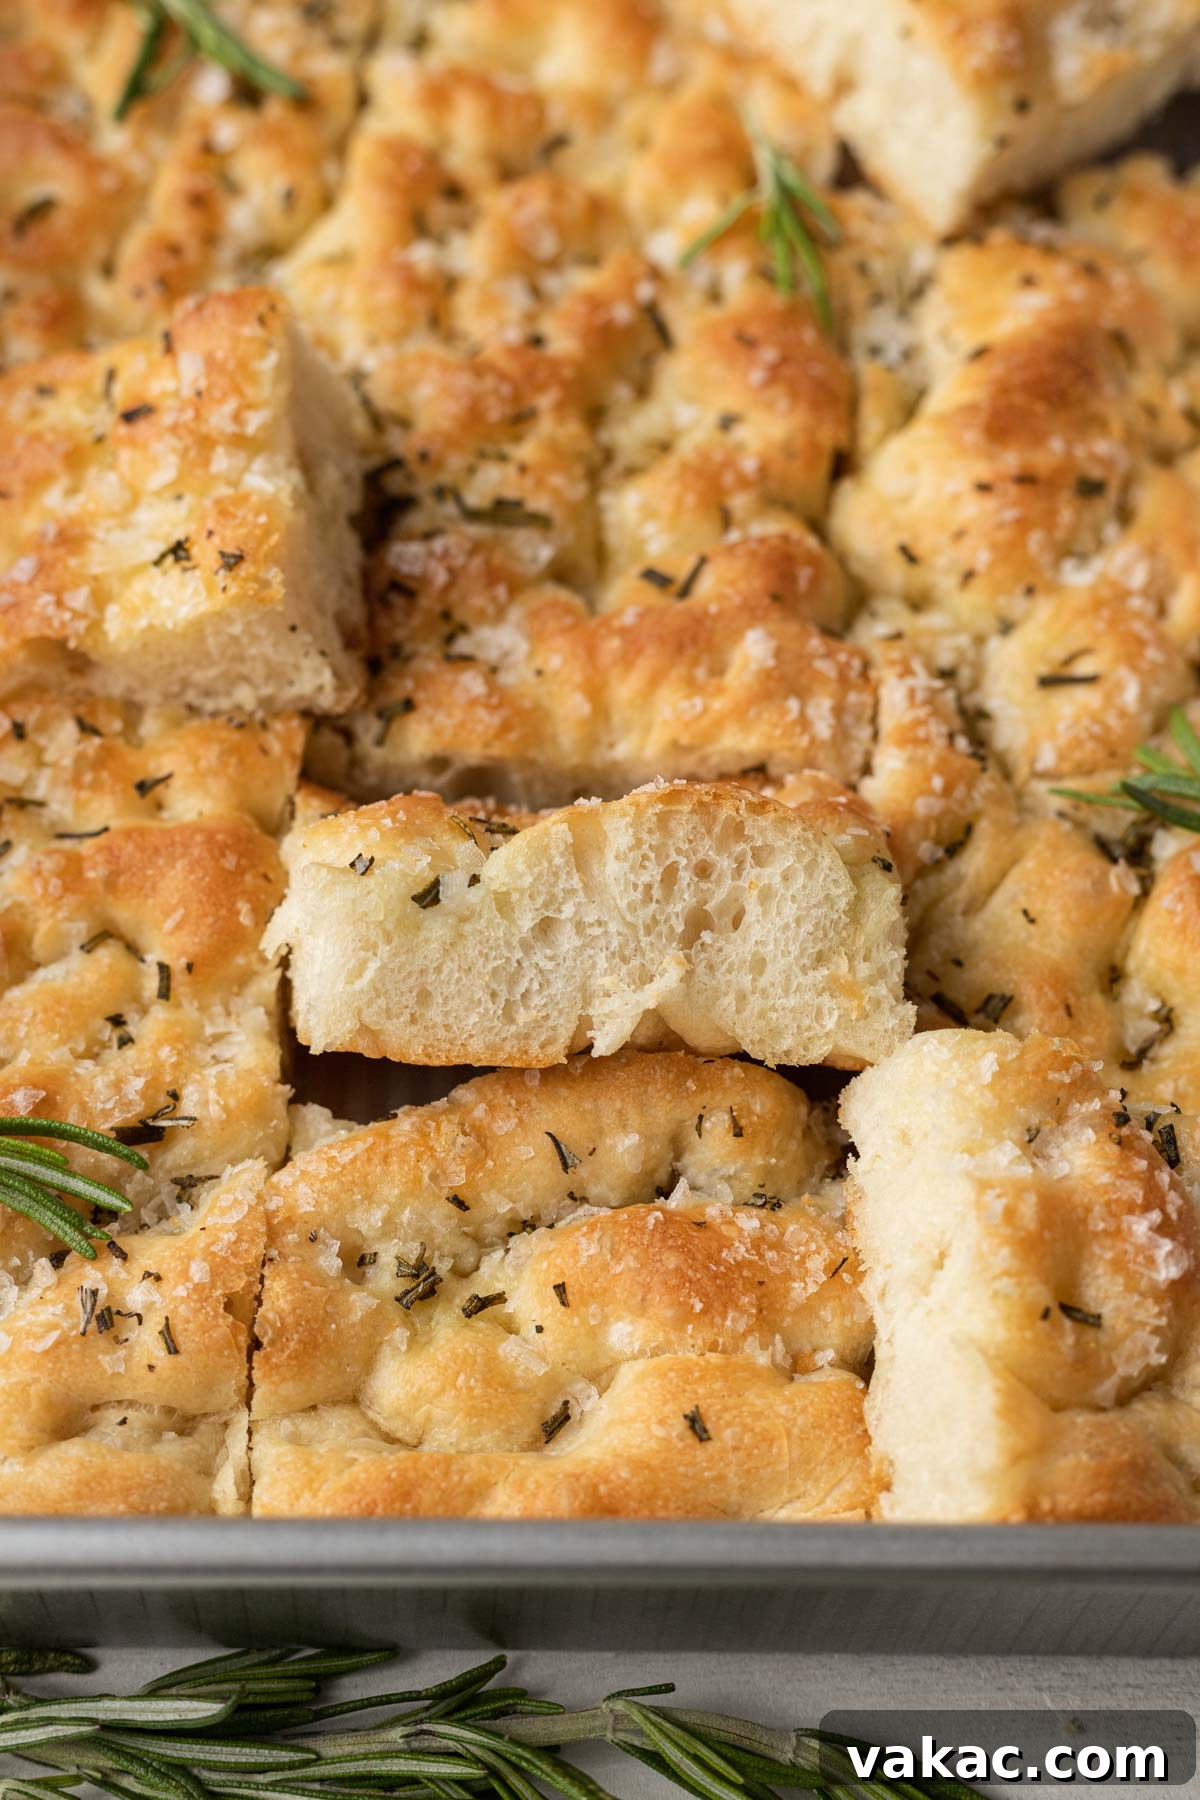
Discovering Focaccia Bread: A Journey into Italian Flatbread Perfection
Focaccia is more than just bread; it’s a celebrated type of Italian flatbread, renowned for its distinct texture and rich flavor profile. Made with a simple yet effective blend of flour, yeast, olive oil, and water, its hallmark is a golden, dimpled surface often adorned with fresh herbs, coarse sea salt, and sometimes even vegetables like cherry tomatoes or olives. Originating from Liguria, a region in northwest Italy, focaccia has been enjoyed for centuries, evolving into various regional forms, each with its unique twist.
While some versions might feature onions or even cheese baked directly into the dough, in this particular recipe for homemade focaccia bread, we embrace simplicity and classic elegance. Our focus is on achieving an exceptionally flavorful bread, thanks to the generous use of high-quality extra virgin olive oil and a subtle hint of honey in the dough, complemented by a rustic topping of flaky sea salt and fresh rosemary. This combination delivers an authentic taste that is both comforting and sophisticated.
Though the idea of baking bread from scratch might seem daunting, this easy focaccia recipe is remarkably approachable. However, like any good artisan bread, the dough does require a bit of patience and attention during its rising stages. In the following sections, we will walk you through my preferred method for making this incredible focaccia, including all the essential tips and tricks to ensure your baking success, even if you’re a beginner.
Essential Ingredients for Your Perfect Rosemary Focaccia
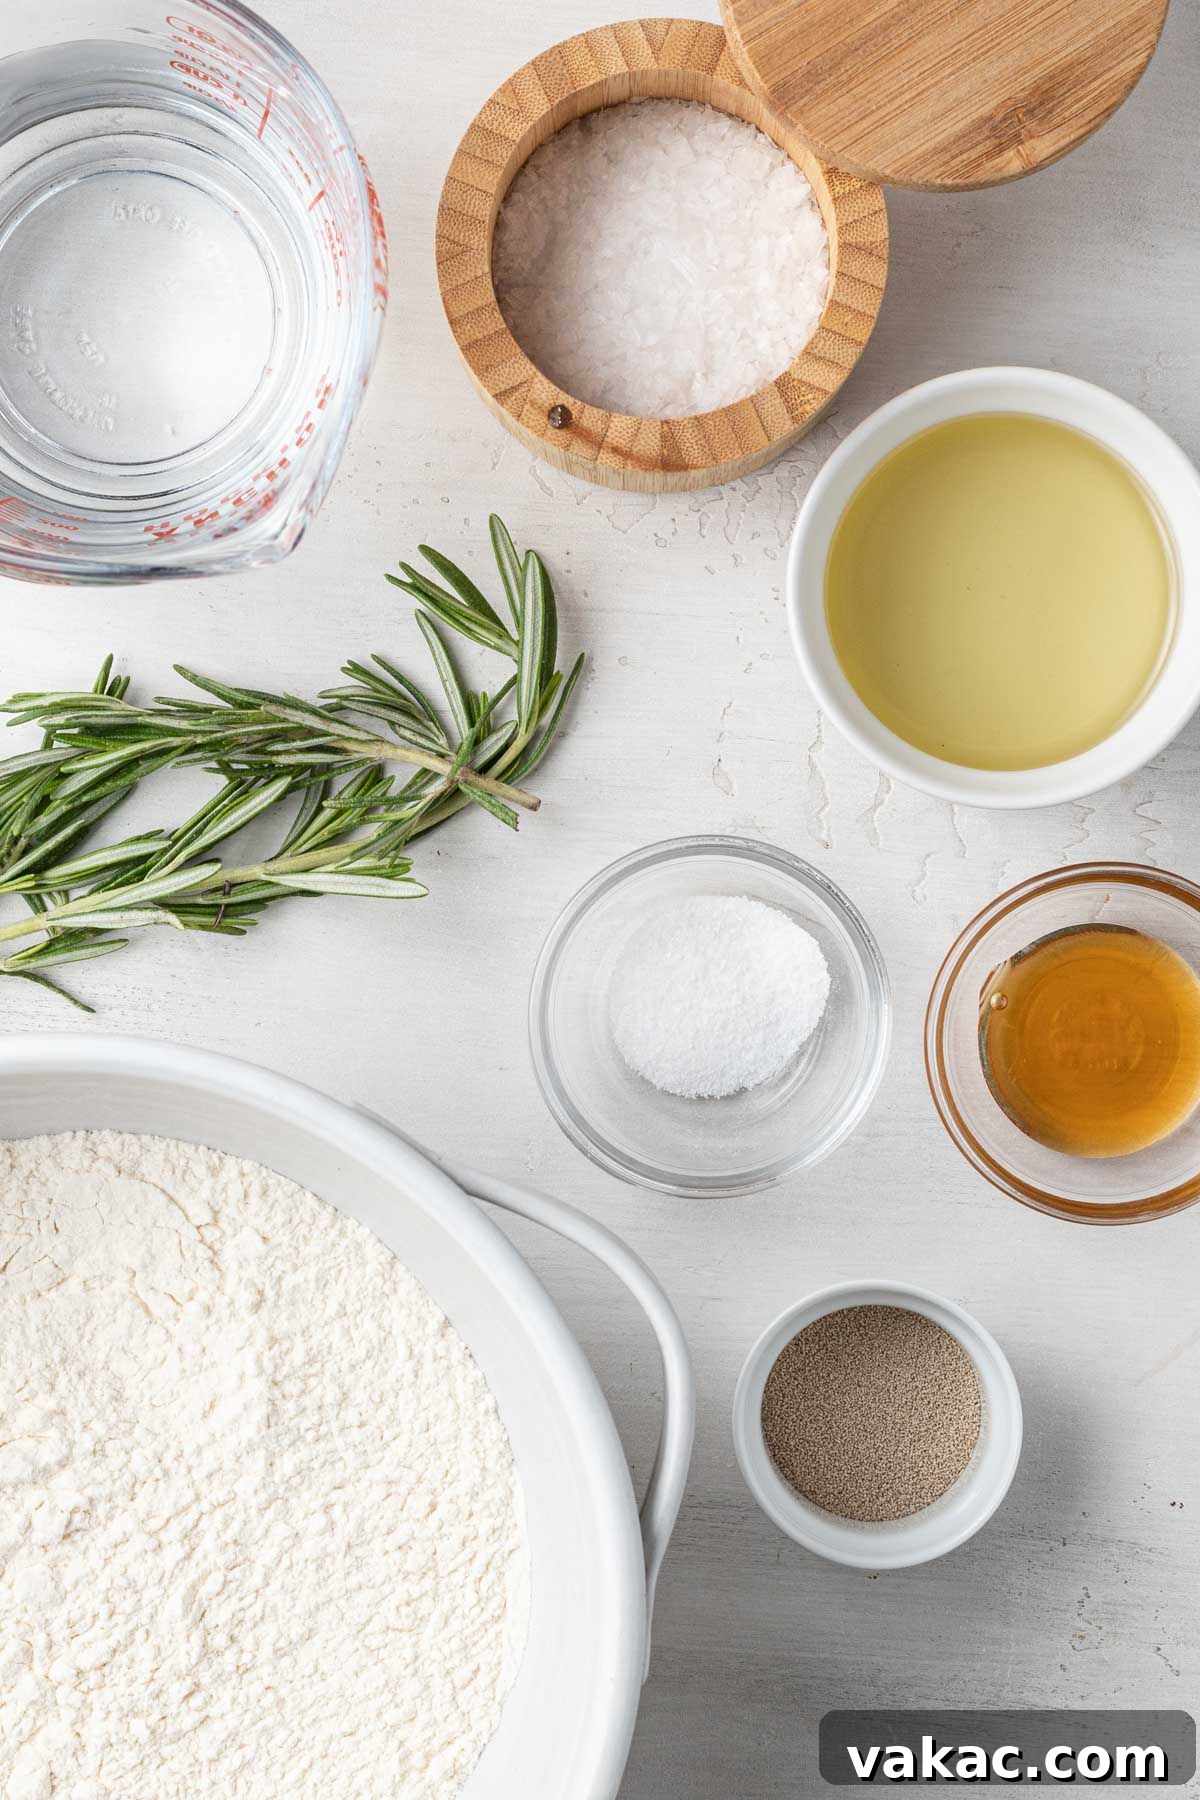
Crafting this delightful rosemary focaccia requires only a handful of basic ingredients, most of which you likely already have in your pantry. The quality of these ingredients, particularly the olive oil, significantly impacts the final flavor and texture of your bread. Here’s a detailed look at what you’ll need and why each component is crucial:
- Warm Water: The foundation of any yeasted bread, warm water is essential for activating the yeast. It should be comfortably warm to the touch, ideally between 105°F and 115°F (40°C-46°C). If the water is too hot, it will kill the yeast, preventing your dough from rising. If it’s too cold, the yeast won’t activate properly, leading to a sluggish rise.
- Honey: Just a couple of teaspoons of honey serve a dual purpose. Firstly, it provides a vital food source for the yeast, helping it to become active and robust. Secondly, it adds a subtle sweetness and richness to the dough, enhancing the overall flavor profile of your focaccia without making it overtly sweet. You can substitute with sugar if preferred.
- Active Dry Yeast: This recipe calls for one 0.25-ounce package (or 2 ¼ teaspoons) of active dry yeast. Yeast is the magical leavening agent that makes your focaccia light and airy. Ensure your yeast is fresh and active for optimal results. If your yeast doesn’t foam after mixing with warm water and honey, it’s likely expired, and you’ll need to start with a fresh packet.
- All-Purpose Flour: To keep this recipe simple and accessible, we’re using standard all-purpose flour. This versatile flour provides a good balance of protein for gluten development, which is crucial for the focaccia’s characteristic chewy texture. When measuring flour, always spoon and level it into your measuring cup rather than scooping directly. This prevents over-measuring, which can lead to a dense, dry bread.
- Sea Salt: Salt is indispensable in bread making. Fine sea salt is incorporated into the dough to enhance its flavor and regulate yeast activity. For the beautiful, crunchy topping, we’ll use flaky sea salt, which adds both texture and a burst of savory flavor. If you only have fine sea salt or regular table salt on hand, that’s perfectly acceptable for both the dough and the topping, though the flaky variety offers a superior finish.
- Extra Virgin Olive Oil: This is perhaps the most critical ingredient for authentic focaccia. High-quality extra virgin olive oil enriches the dough, contributing to its tender crumb and distinctive flavor. It’s also generously used to grease the baking pan, preventing sticking and creating that desirable crispy bottom crust, and drizzled over the top before baking for a golden, aromatic finish. Don’t skimp on the olive oil – it’s key to focaccia’s identity!
- Fresh Rosemary: The fragrant, earthy notes of fresh rosemary are a classic pairing with focaccia. While fresh is preferred for its vibrant aroma and texture, dried rosemary can be used as a convenient substitute. Feel free to experiment with other fresh herbs like thyme, oregano, or a mix of Italian herbs to customize your focaccia to your taste.
Mastering the Stretch & Fold Method for Fluffy Focaccia
When it comes to developing gluten in focaccia dough, there are two primary approaches: traditional kneading or the stretch and fold method. After extensive testing, I’ve found that the stretch and fold technique yields a significantly superior result for this focaccia recipe, producing a bread with an incredibly airy, open crumb structure and a perfect chew.
The stretch and fold method is particularly well-suited for high-hydration doughs, which tend to be stickier and more challenging to knead by hand. Instead of continuous forceful kneading, this gentle technique involves periodically stretching a portion of the dough and folding it back over itself. This action gradually strengthens the gluten network, trapping air and building elasticity without the need for a stand mixer or strenuous manual labor. It’s a method that might take a bit longer in terms of total time due to the resting periods between folds, but the actual hands-on time is minimal, making it surprisingly easy and ideal for beginner bakers.
The beauty of stretch and fold lies in its efficiency. It allows the gluten to develop naturally during short rest periods, creating a strong yet extensible dough. Typically, this process is repeated about four times over an hour or two, with each set of folds contributing to the dough’s structure and texture. By consistently stretching and folding all four “corners” or sides of the dough, you evenly develop the gluten, leading to a consistent and delightful crumb. Below, I’ll provide explicit, step-by-step instructions to ensure your dough reaches its full potential, guaranteeing a perfect focaccia every time.
Baking Your Own Focaccia: A Step-by-Step Guide
While this focaccia dough is straightforward to prepare, it is a “hands-on” baking experience that rewards patience and attention to detail. Follow these steps for a beautifully risen, flavorful rosemary focaccia:
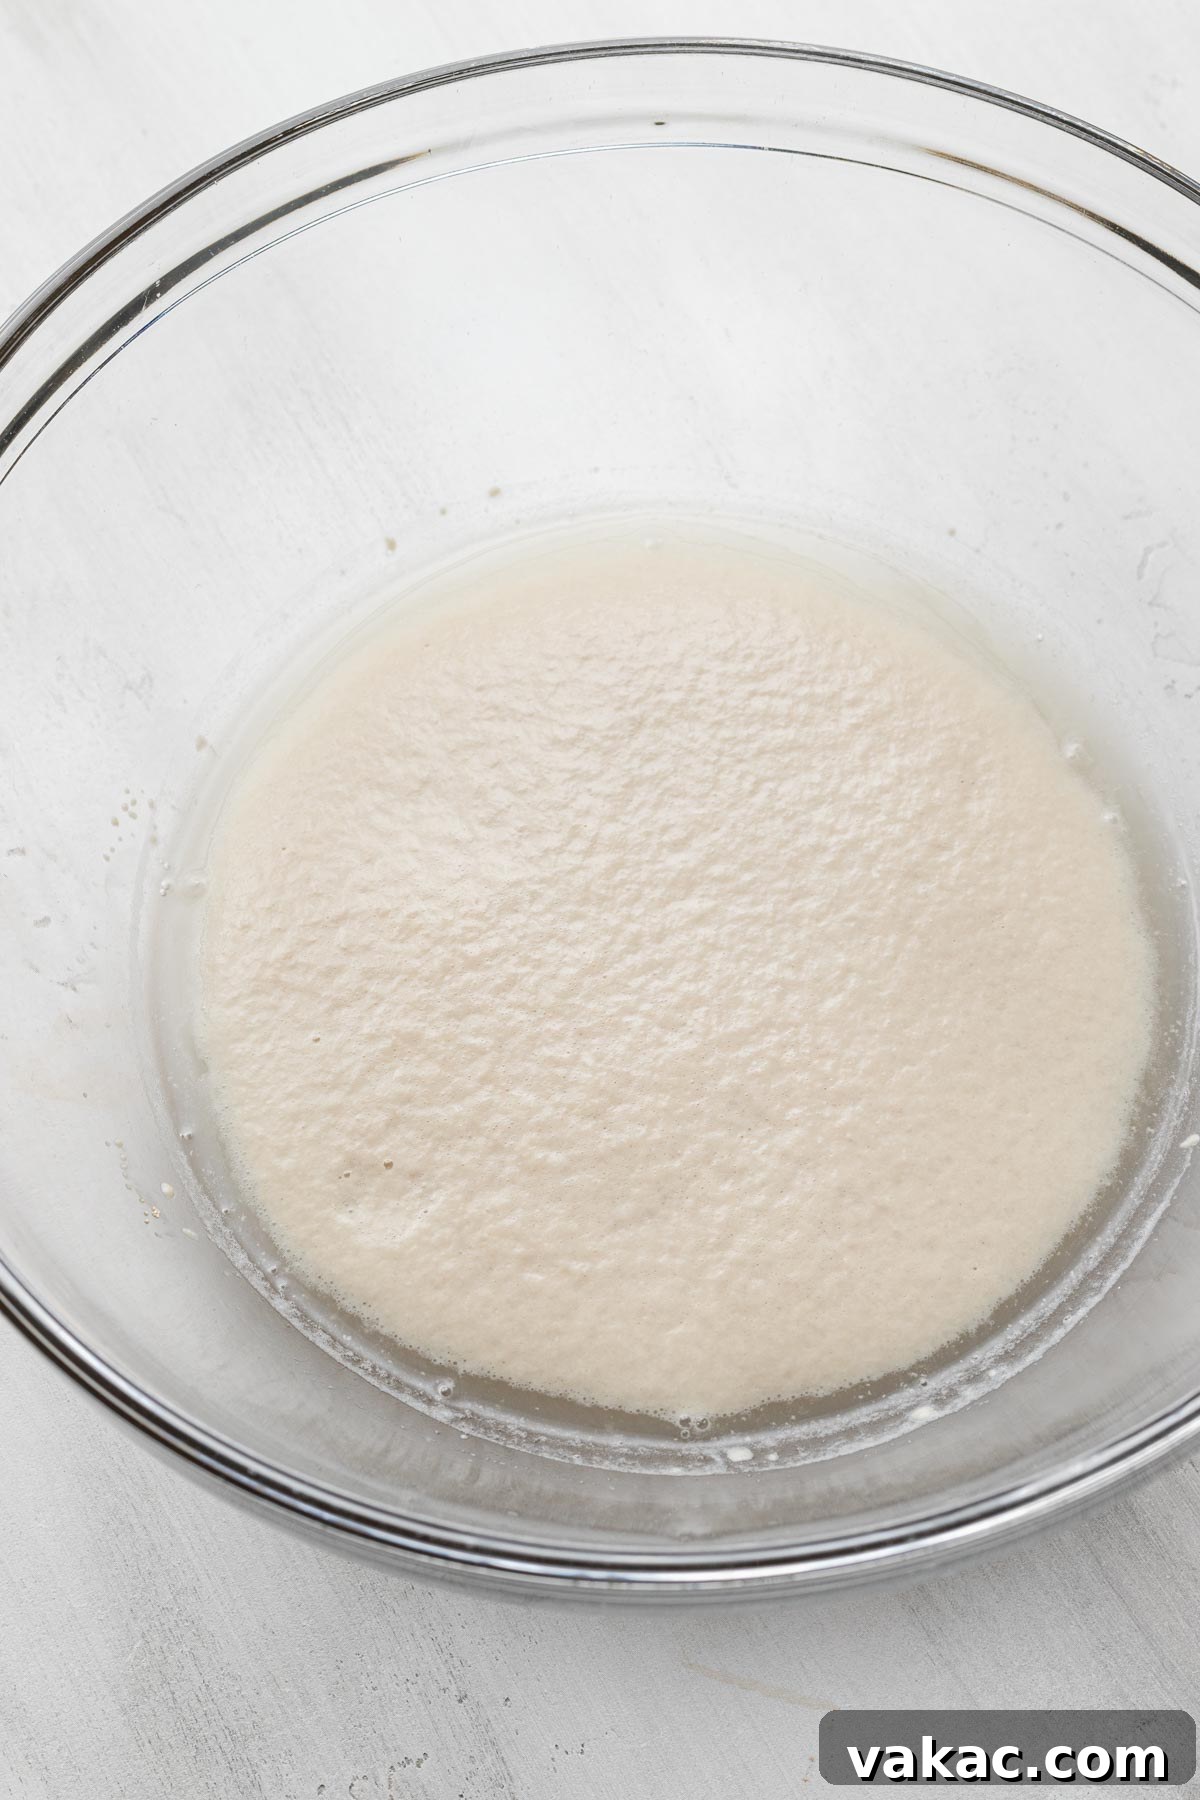
- Activate the Yeast (The Foundation of Rise): In a large mixing bowl, combine your warm water (remember, 105-115°F is ideal) and honey. Sprinkle the active dry yeast evenly over the surface. Give it a gentle stir, then set the bowl aside in a warm spot for 5 to 10 minutes. During this time, the yeast will “bloom” – you should see a foamy layer develop on the surface. This foam is a clear indicator that your yeast is alive and active, ready to leaven your dough. If no foam appears, your yeast may be old or the water temperature was off; discard the mixture and start again with fresh yeast and carefully measured water.
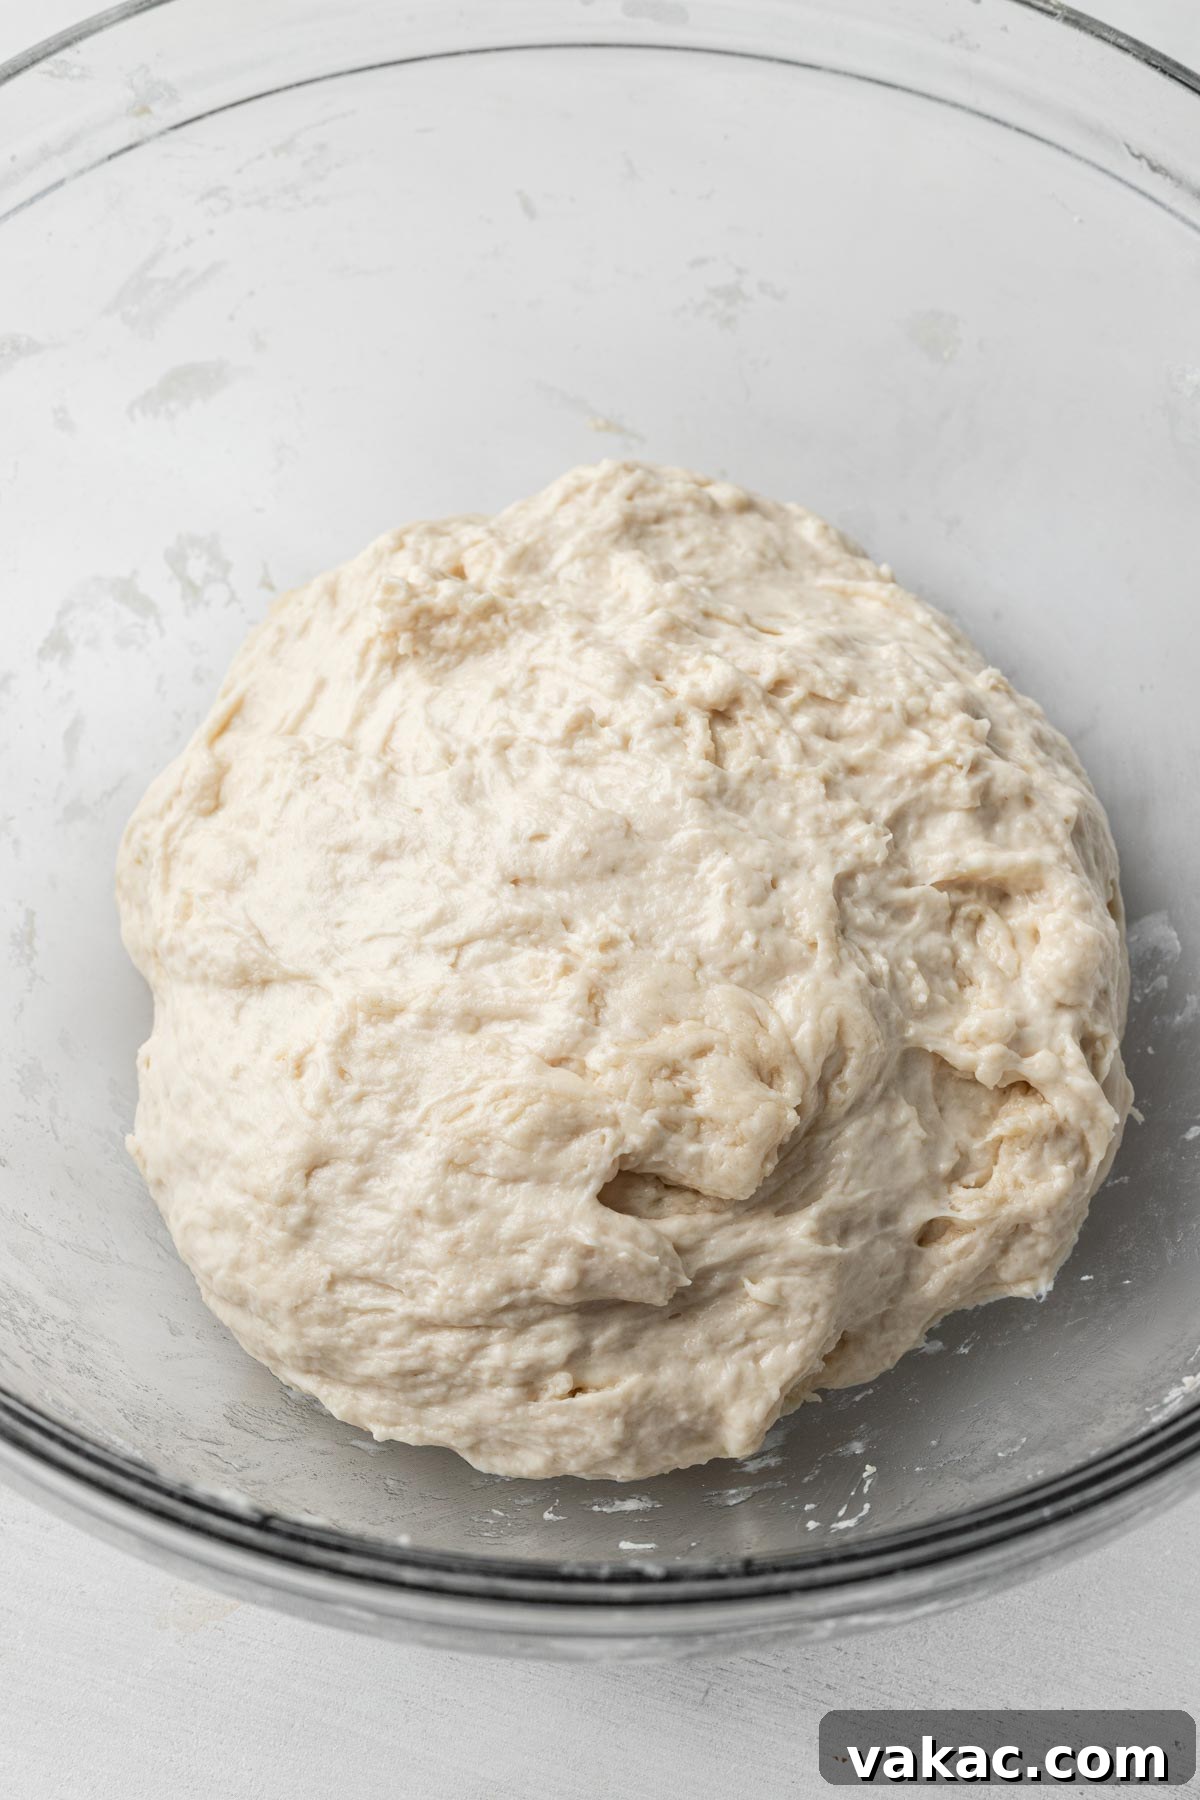
- Prepare the Dough (Mixing the Essentials): Once your yeast is visibly active and foamy, add the all-purpose flour and fine sea salt to the mixture. Using a sturdy spoon or your hands, mix until all the ingredients are just combined and a shaggy dough forms. At this point, add 2 tablespoons of extra virgin olive oil directly into the dough. Continue to mix with your hands until the olive oil is fully incorporated and the dough comes together more cohesively. The dough will be sticky, but that’s perfectly normal for a high-hydration dough.
- Initial Rise (First Proof): Scrape down the sides of the bowl to gather the dough into a ball. Cover the bowl tightly with a clean kitchen towel or plastic wrap to prevent a skin from forming. Place the bowl in a warm, draft-free place for an initial rise of 30 minutes. This short rest allows the gluten to start relaxing and developing, preparing it for the stretch and fold process.
Detailed Stretch & Fold Technique
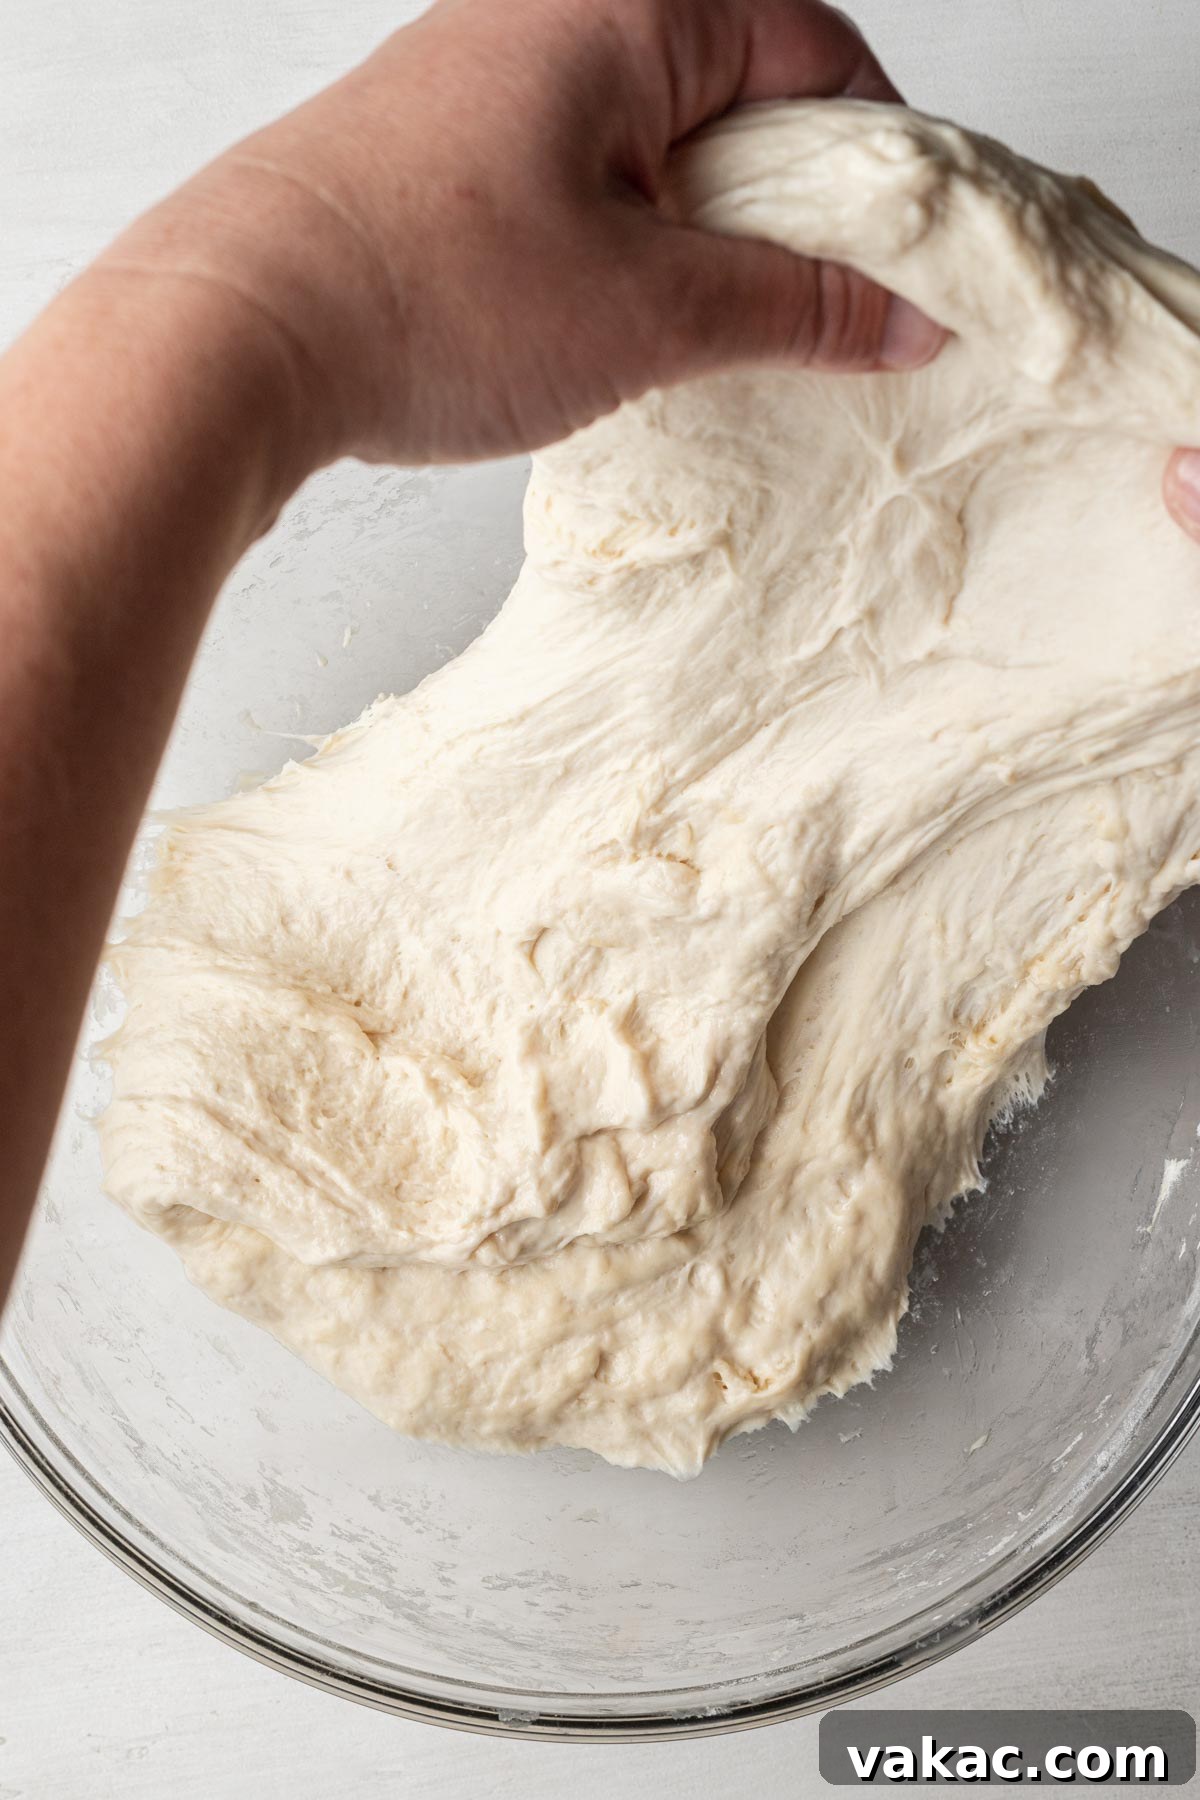
After the initial 30-minute rise, your dough is ready for its first set of stretch and folds. To prevent the sticky dough from adhering to your hands, lightly wet them with cold water before you begin. This simple trick makes the process much cleaner and easier.
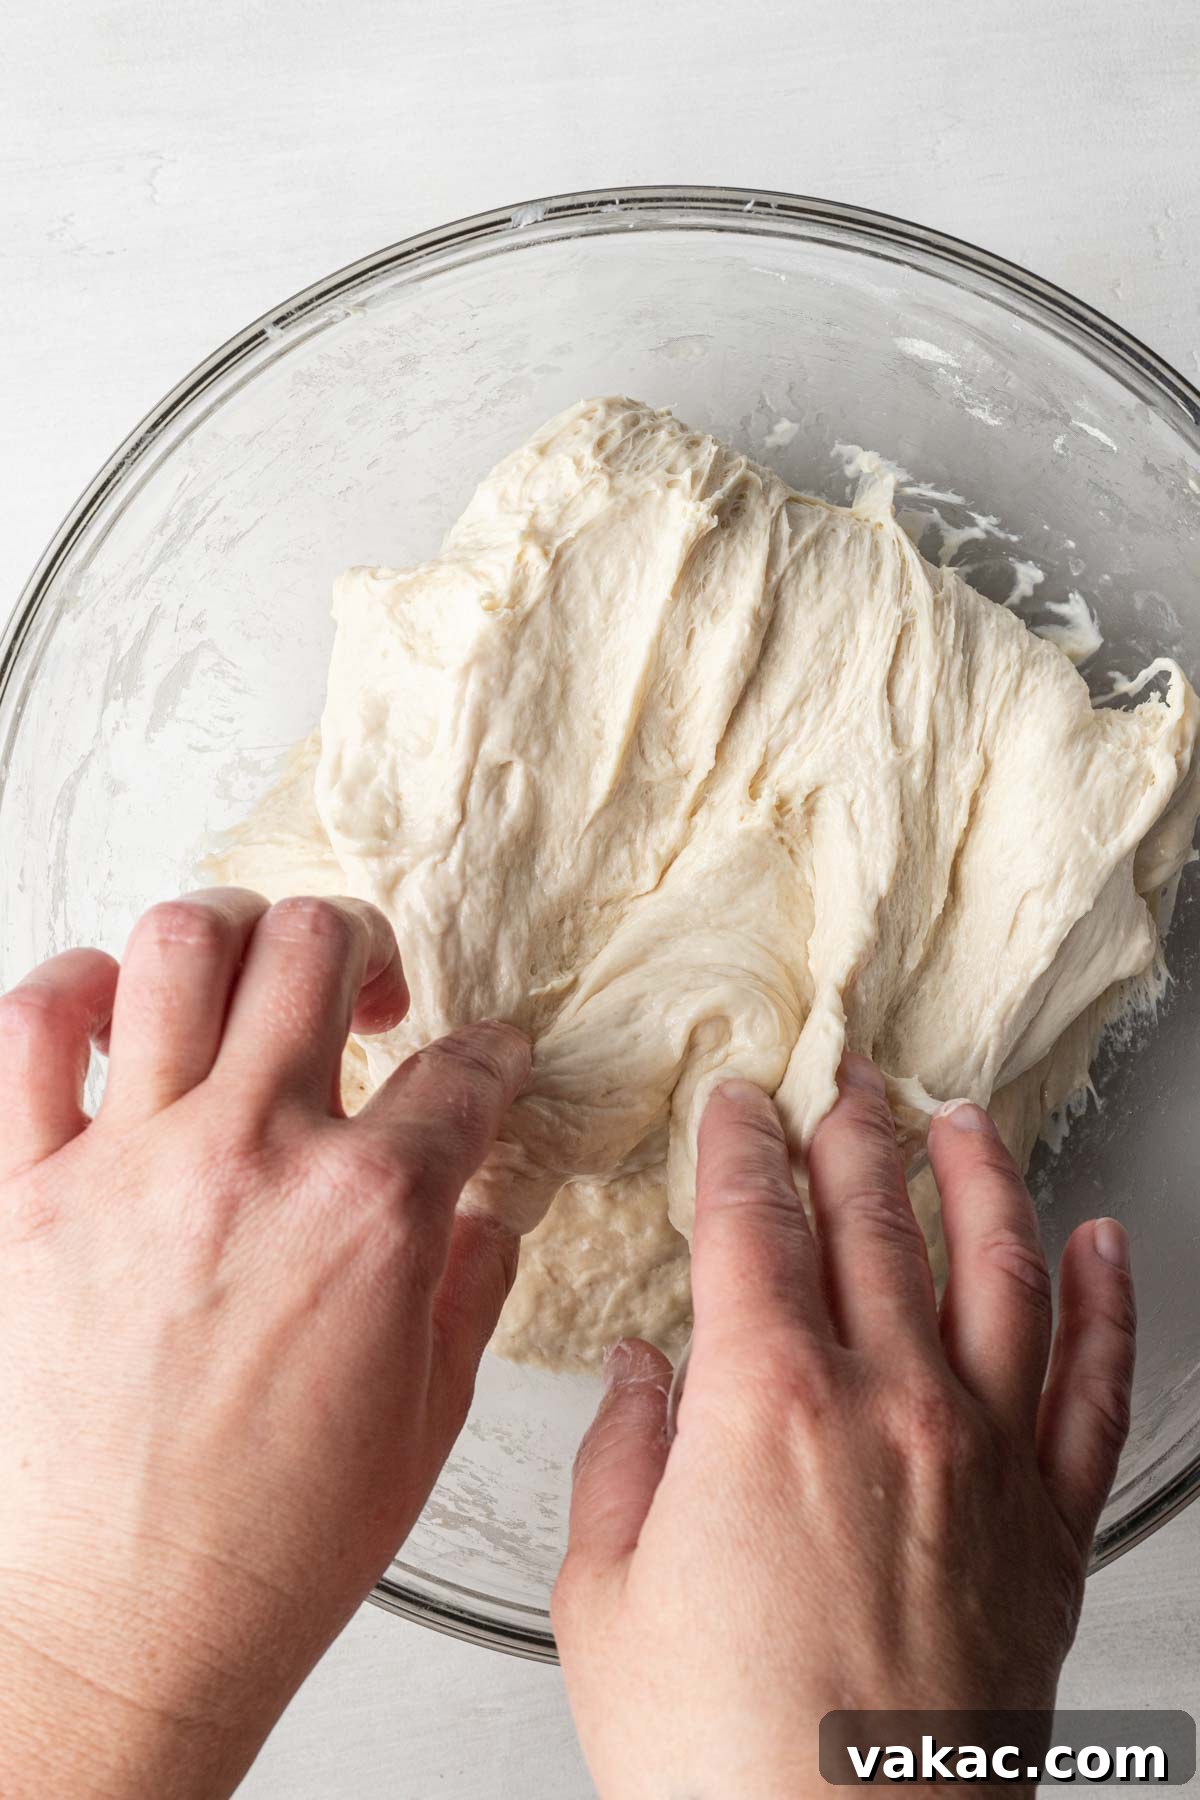
- First Stretch: Gently slide one hand under a portion of the dough, grasping one “corner” or side. Carefully stretch this portion of the dough upwards as far as it can go without tearing. You’ll feel the dough resist and become taut.
- First Fold: Once stretched, fold the lifted dough back over itself, pressing it gently into the center of the dough mass.
- Repeat and Rotate: Rotate the bowl one quarter-turn (90 degrees). Repeat the stretch and fold process with the new “corner” of dough. Continue this for a total of four stretches and folds, ensuring each side of the dough has been worked once.
- Subsequent Folds & Resting: After completing the first set of four stretch and folds, cover the bowl again with a towel and return it to your warm spot. You will need to repeat this entire stretch and fold process three more times over the course of the next hour, performing a set of folds approximately every 20 minutes. Each time you perform the folds, you’ll notice the dough becoming smoother, more elastic, and less sticky. By the final set, it should have a noticeable bounce and strength.
Final Shaping and Baking
- Prepare the Baking Pan: After the last stretch and fold (approximately 1 hour and 30 minutes into the total rising time), it’s time to prepare your baking pan. Generously grease a 9×13-inch metal baking pan with 2 tablespoons of extra virgin olive oil. Ensuring the entire bottom and sides are coated will not only prevent sticking but also contribute to the characteristic crispy bottom crust of the focaccia. A metal pan is highly recommended for achieving the best crispy texture.
- Transfer and Relax the Dough: Carefully transfer the dough to the prepared baking pan. It will likely not fill the pan completely yet. Gently stretch the dough a little to begin shaping it. Cover the pan with a clean towel and let the dough rest for 10 to 15 minutes. This brief relaxation period is crucial, as it allows the gluten to loosen, making the dough much easier to stretch and press into the corners of the pan without tearing. After resting, use lightly oiled hands to gently stretch and press the dough to evenly fit the entire 9×13-inch pan.
- Final Rise (Second Proof): Once the dough is shaped in the pan, cover it again with a towel and let it rise in a warm, draft-free place for another 45 minutes. During this final proof, the dough will become visibly puffy and aerated, preparing for its ultimate transformation in the oven.
- Preheat the Oven: Approximately 15 to 20 minutes before your focaccia is ready for baking (i.e., towards the end of its final rise), preheat your oven to a high temperature of 450°F (230°C). A hot oven ensures a rapid rise and a beautifully browned, crispy crust.
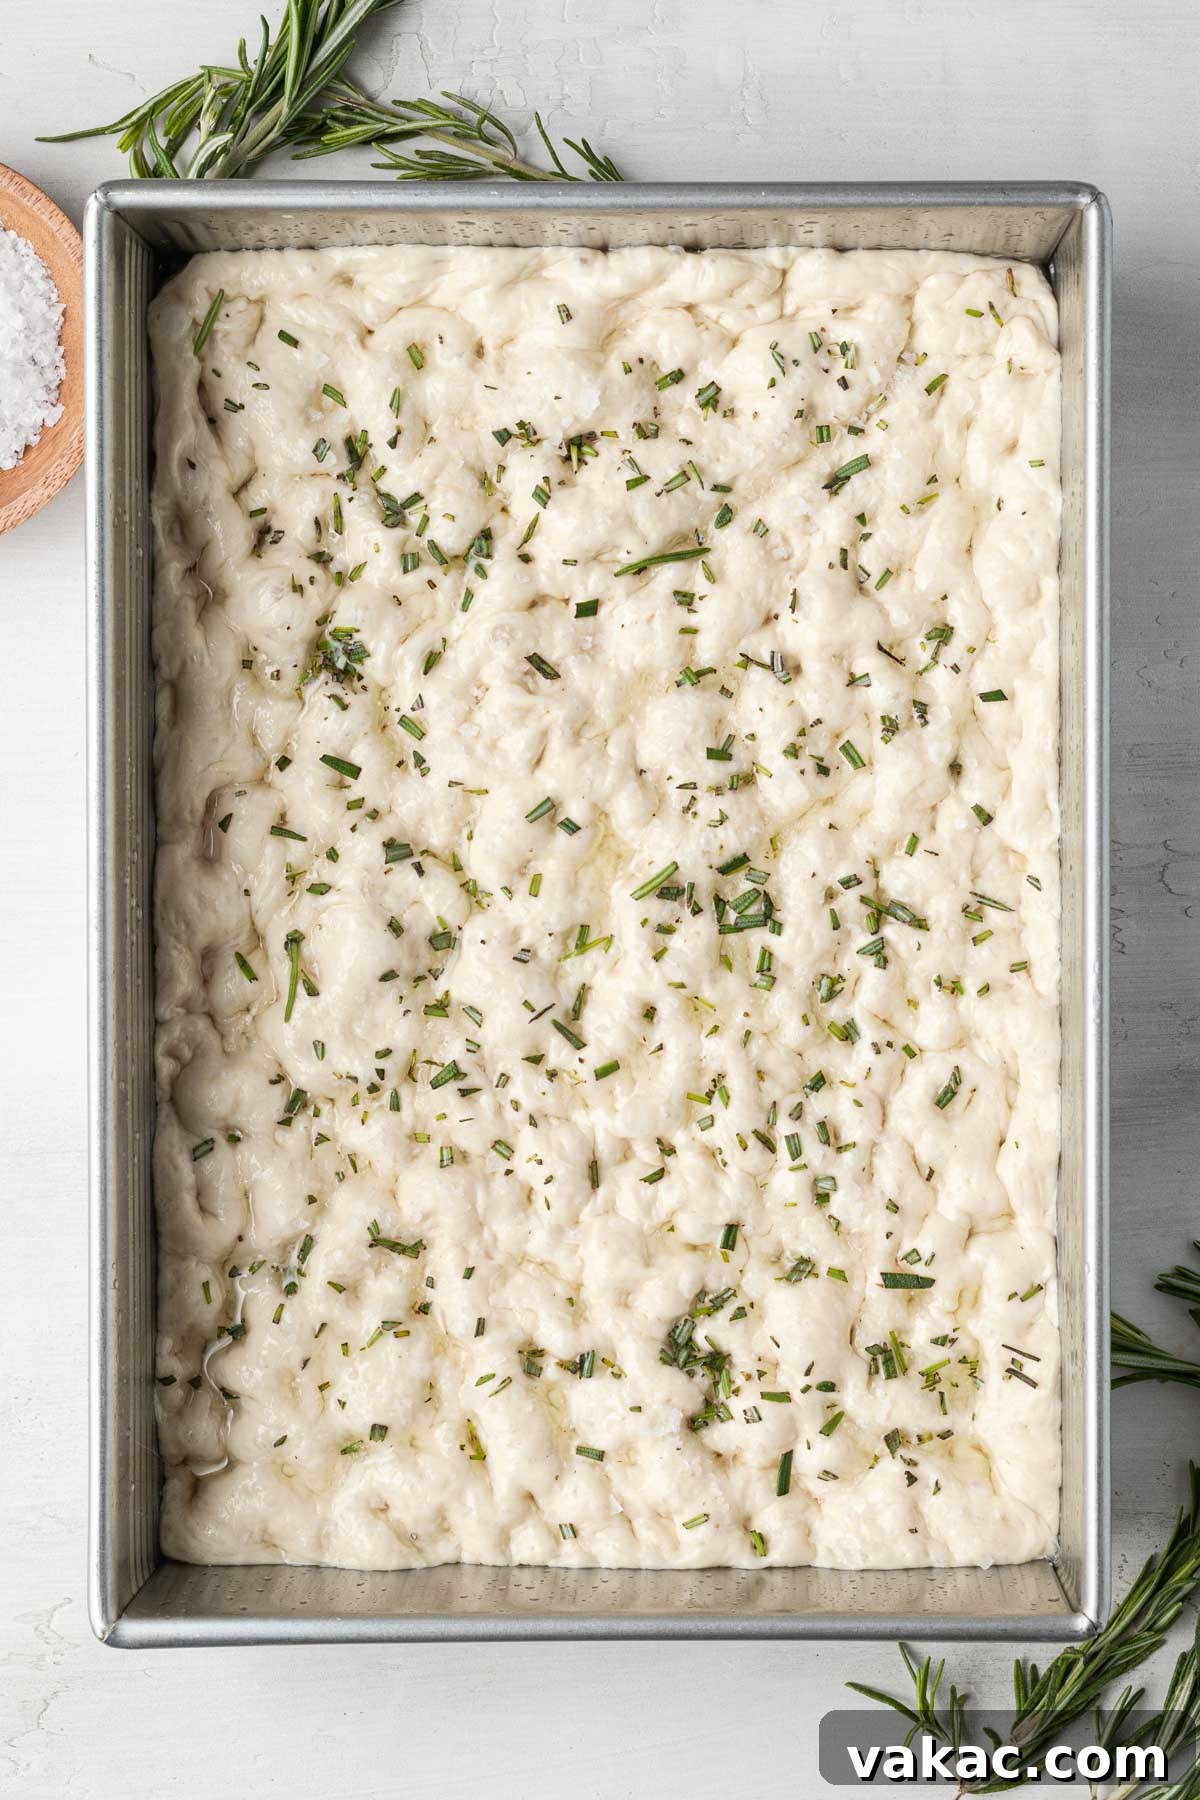
- Dimple and Adorn: Lightly coat your fingertips with a little olive oil or wet them with cold water. Gently but firmly press your fingers into the dough, creating characteristic dimples all over the surface. These dimples prevent large air bubbles from forming during baking and create little pockets for the olive oil and toppings to gather. Drizzle the dough generously with the remaining 2 tablespoons of extra virgin olive oil, ensuring it pools slightly in the dimples. Finally, sprinkle liberally with flaky sea salt and your freshly chopped rosemary (or other chosen herbs).
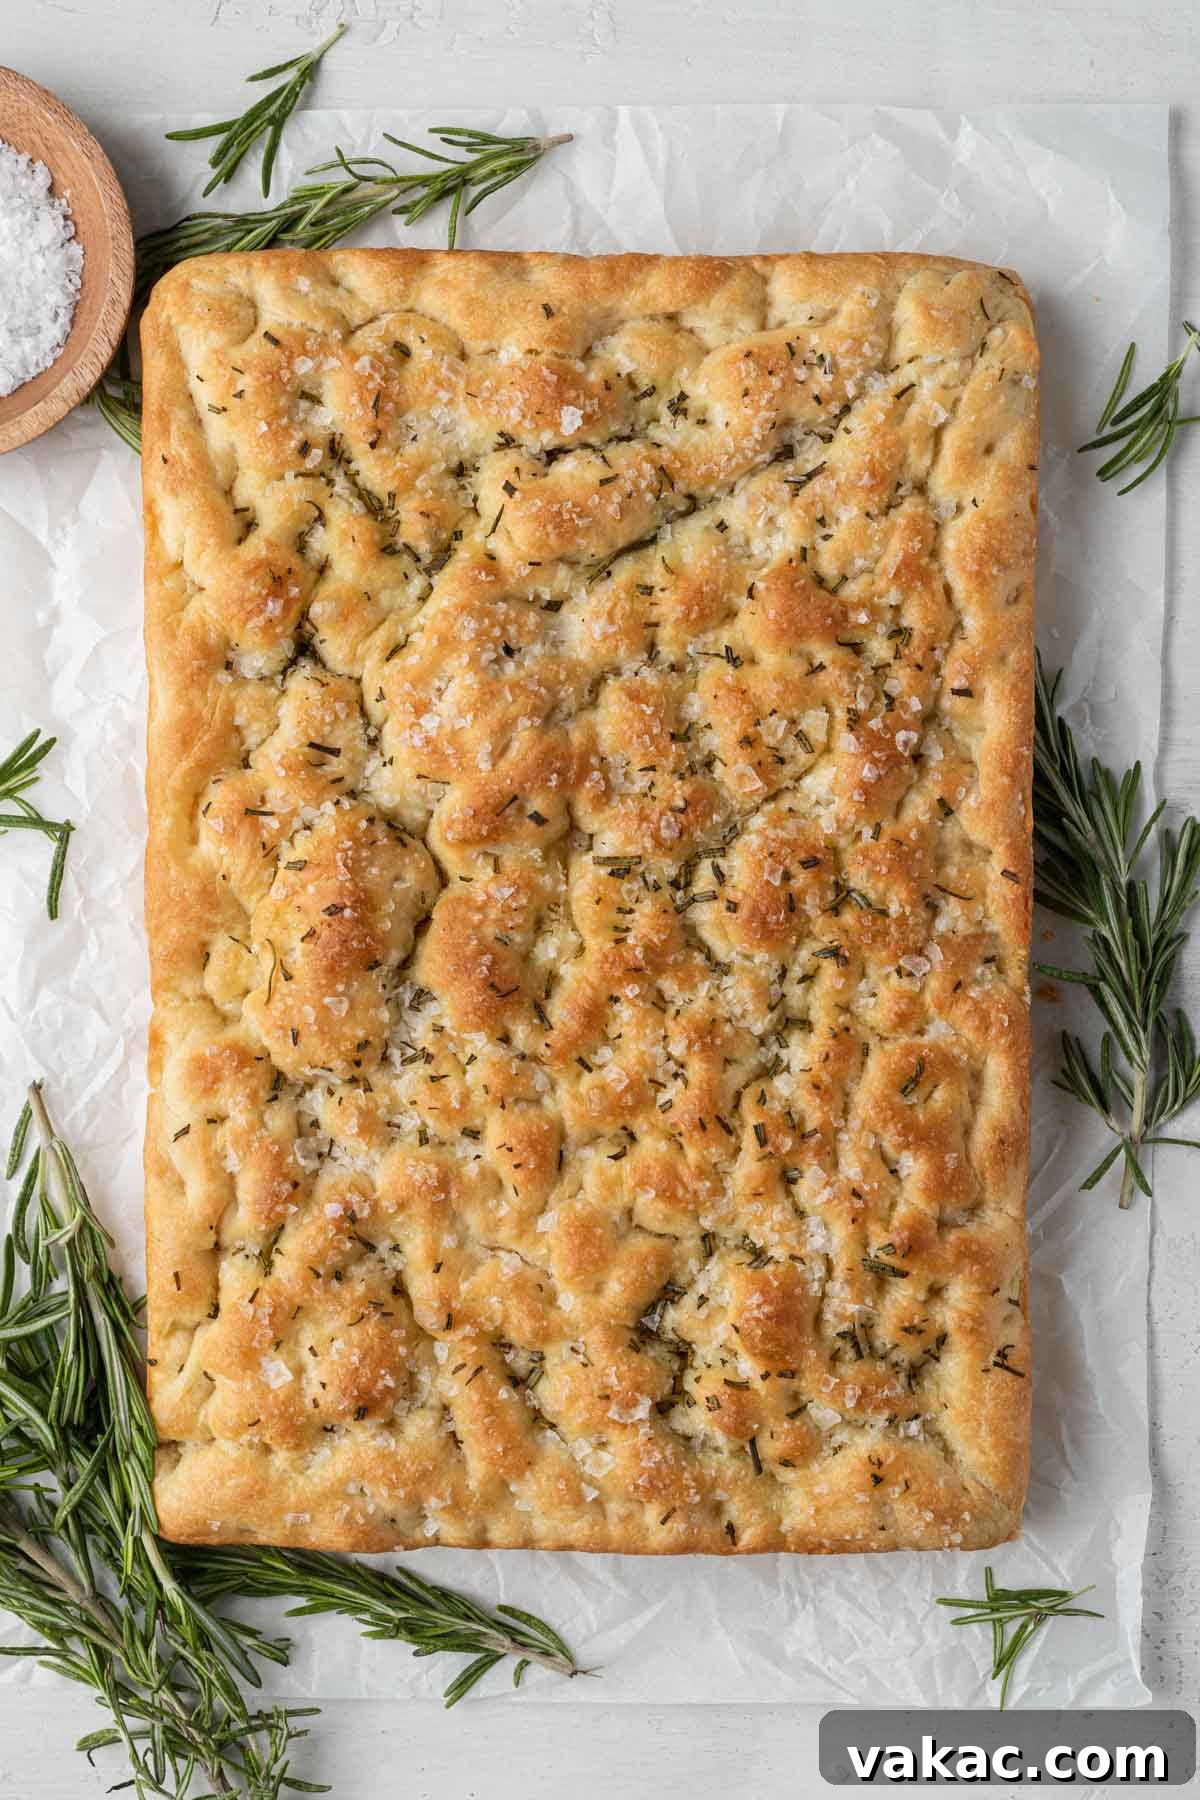
- Bake to Golden Perfection: Carefully transfer the pan to your preheated oven. Bake for approximately 20 to 25 minutes. The focaccia is perfectly baked when the crust turns a beautiful golden brown and feels crispy to the touch. The internal temperature, if measured, should be around 200-210°F (93-99°C).
- Cooling for Optimal Texture: Once baked, remove the focaccia from the oven. Allow it to cool in the pan for about 5 minutes. This short cooling period helps the bread set. Then, carefully slide a thin spatula or knife under the bread to loosen it, and transfer it to a wire cooling rack to cool completely. Cooling on a rack prevents the bottom crust from becoming soggy from trapped steam, preserving its desired crispiness.
How Long to Bake Focaccia and What to Look For
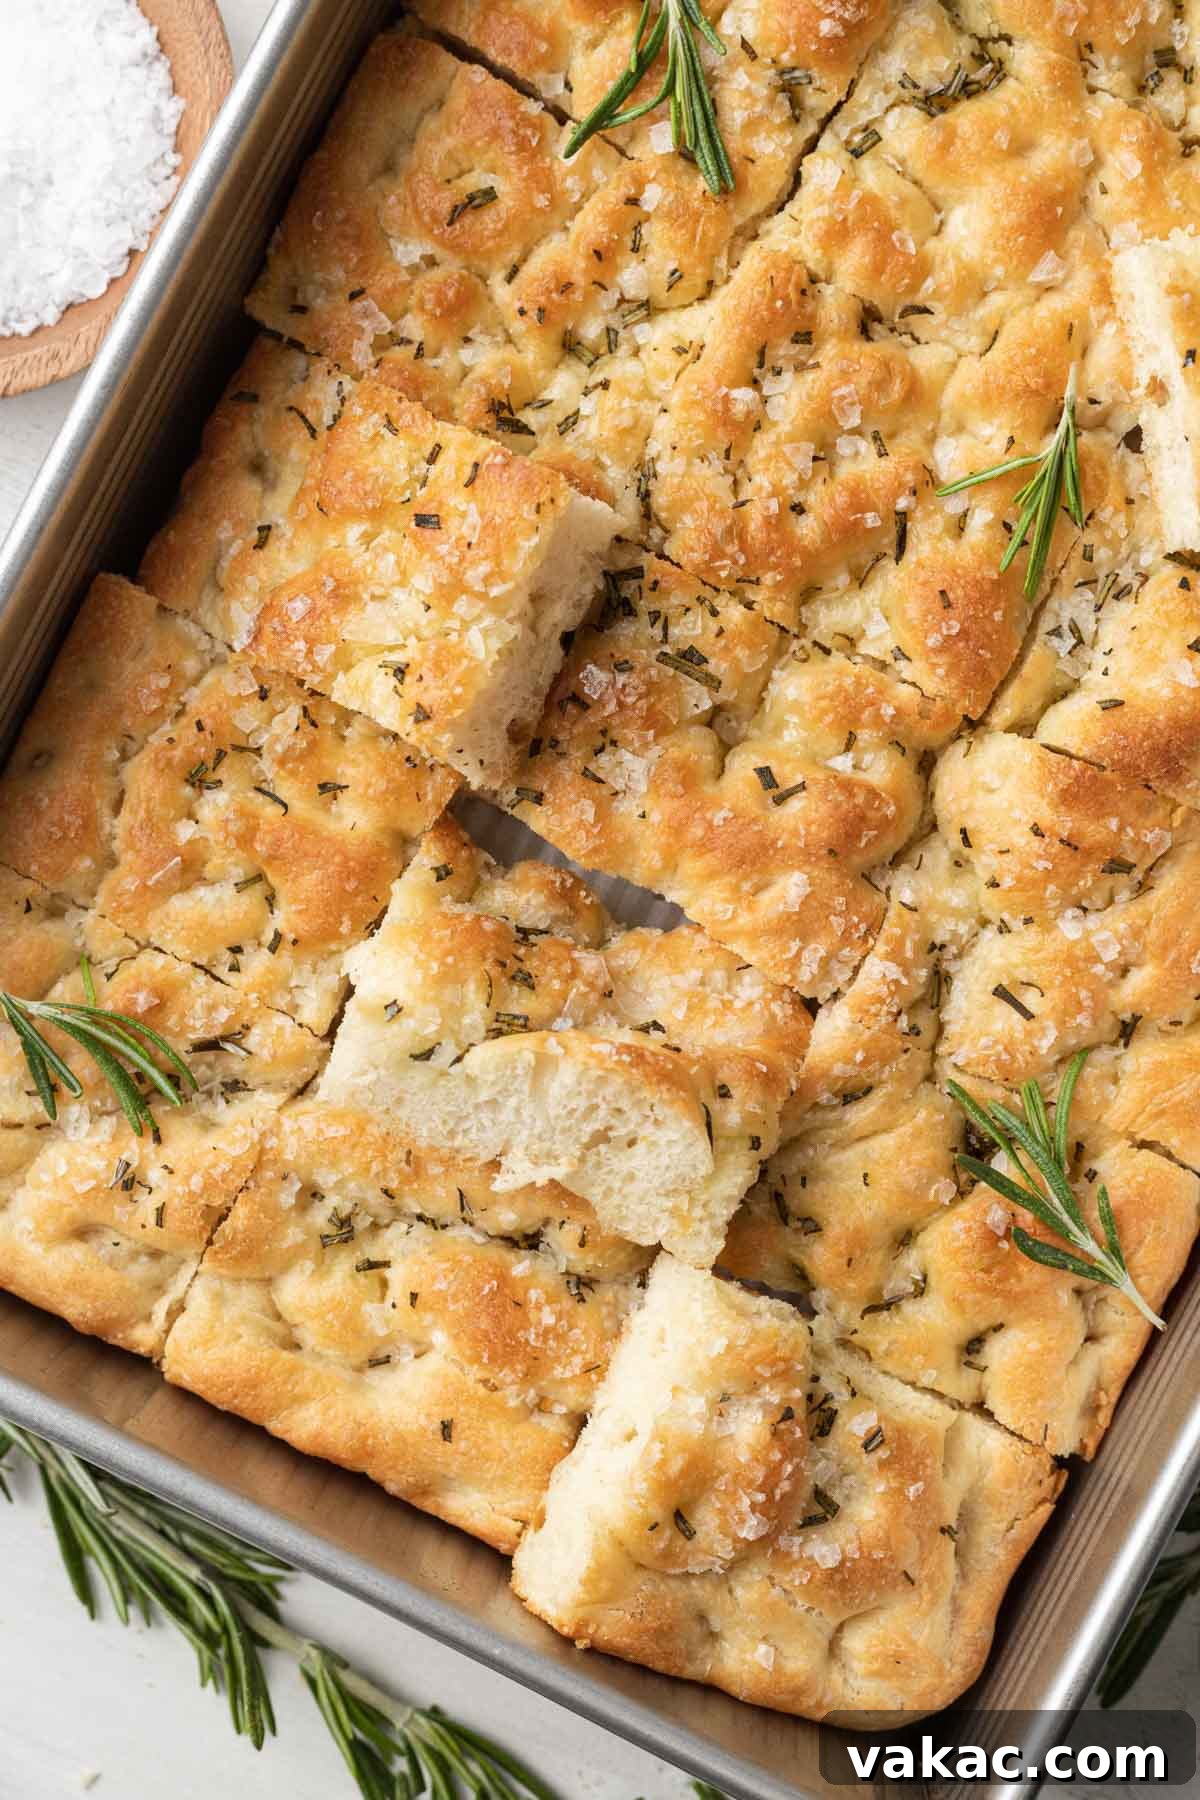
For a standard 9×13-inch pan of focaccia bread, the ideal baking time is typically 20 to 25 minutes at a high oven temperature of 450°F (230°C). However, oven temperatures can vary, so it’s always best to rely on visual cues for doneness. Your focaccia is perfectly baked when its crust achieves a beautiful, deep golden-brown hue and feels distinctly crispy when gently tapped. The internal crumb should be soft, airy, and fully cooked. Avoid under-baking, which can result in a doughy center, or over-baking, which can lead to a dry, tough texture.
Versatile Ways to Enjoy Your Homemade Focaccia
The beauty of this herb focaccia lies in its incredible versatility. It’s much more than just a side dish; it can be the star of your meal! Here are numerous delightful ways to savor your freshly baked focaccia:
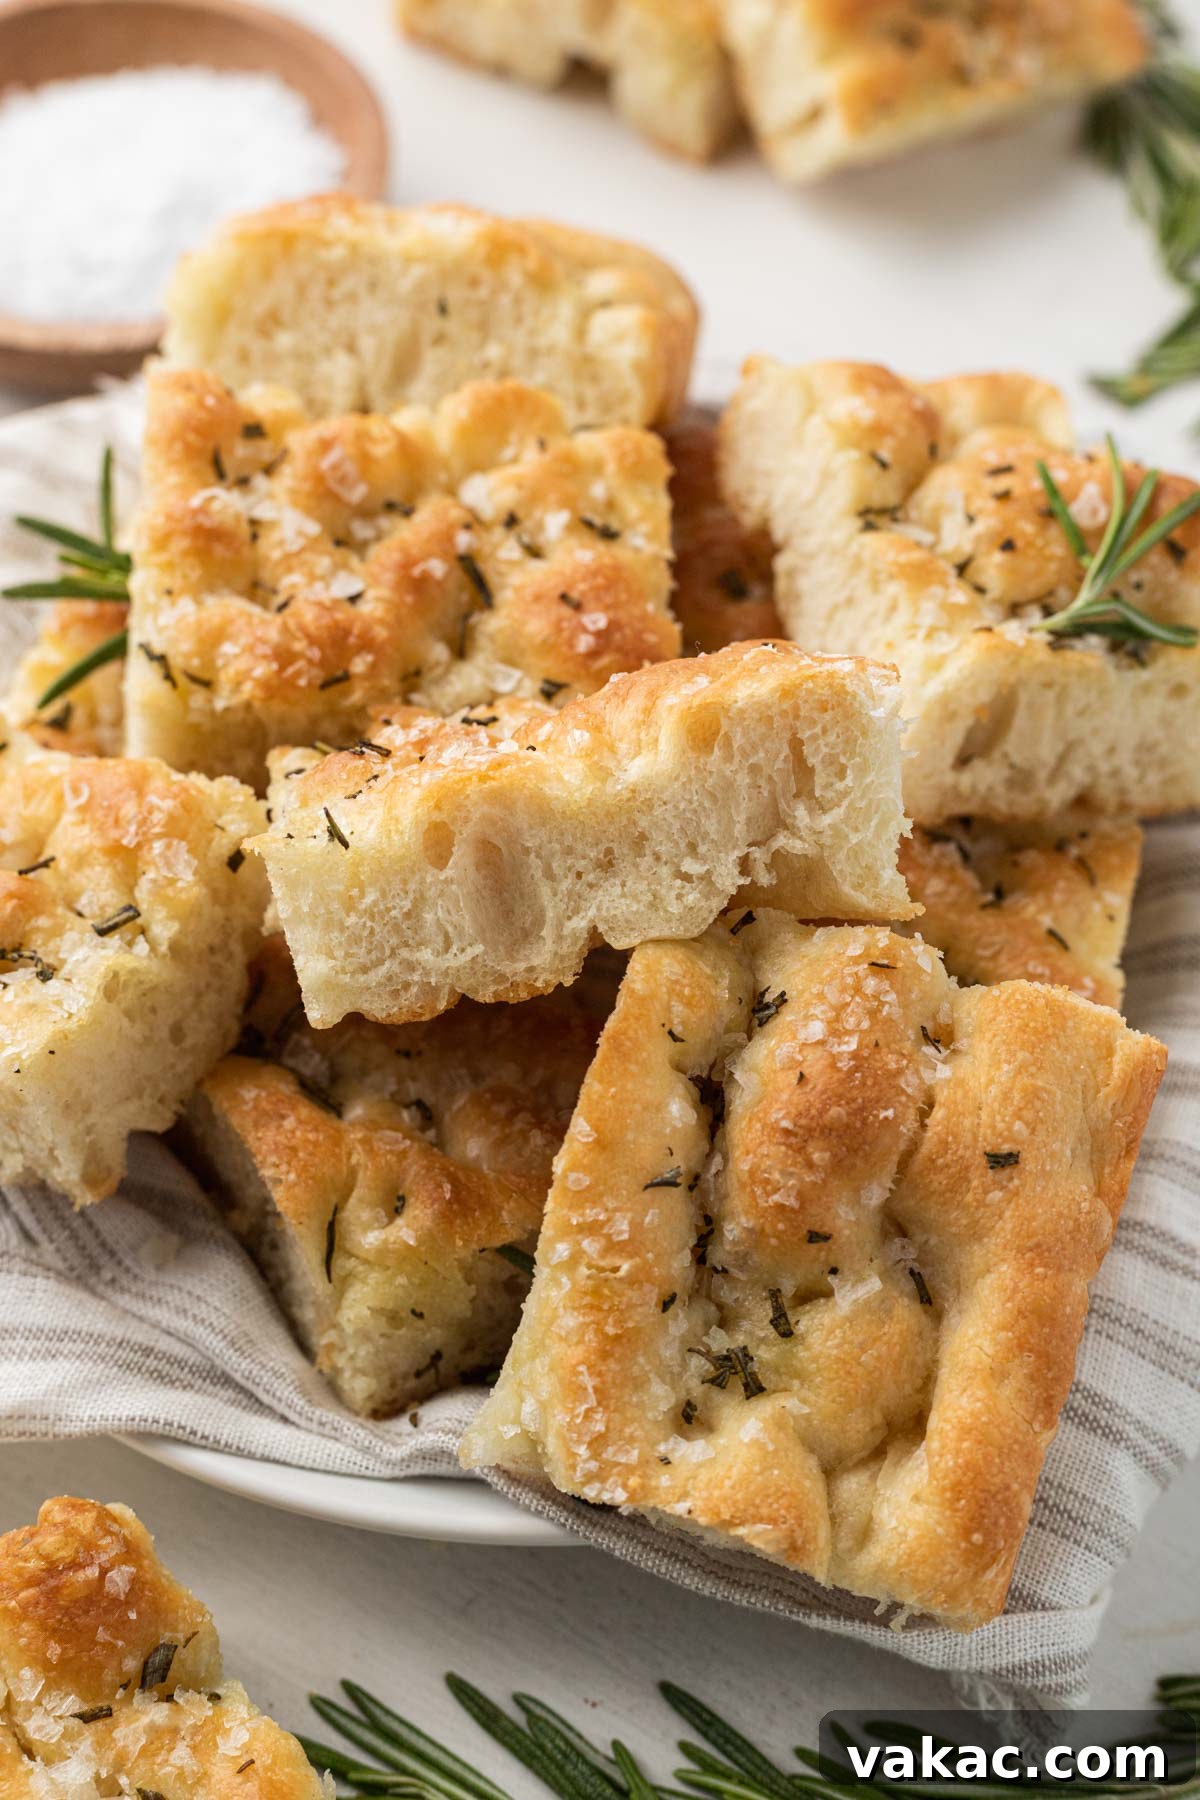
- Sandwich Perfection: This is arguably my favorite way to use focaccia! Its sturdy yet soft structure makes it an ideal bread for creating gourmet sandwiches. Slice it horizontally and fill it with your favorite deli meats, cheeses, roasted vegetables, and spreads. Think Italian deli-style sandwiches with prosciutto, mozzarella, and basil, or a hearty vegetarian option with grilled eggplant, roasted red peppers, and pesto.
- Accompaniment to Italian Classics: Serve warm slices alongside your favorite Italian entrees. It’s excellent for soaking up rich pasta sauces, like a robust marinara or a creamy Alfredo, or complementing dishes like lasagna and chicken parmesan.
- Dipping Delight: Focaccia is absolutely divine when dipped into flavorful liquids. Pair it with a hearty tomato soup, a comforting minestrone, or a simple bowl of high-quality extra virgin olive oil seasoned with a pinch of black pepper and balsamic vinegar.
- Elevated Bread Basket Addition: Impress your guests by including a basket of warm focaccia slices, perhaps with a small dish of olive oil for dipping, as part of your appetizer spread or alongside a main course.
- Homemade Croutons: Don’t let any leftover focaccia go to waste! Cut stale focaccia into cubes, toss with a little olive oil and extra herbs, then bake until crisp to make incredibly flavorful homemade croutons for salads or soups.
- Sidekick to Salads: A simple green salad or a vibrant Caprese salad finds a perfect partner in a slice of rosemary focaccia. The bread provides a satisfying texture contrast and a flavorful base.
- Bruschetta Base: Lightly toast slices of focaccia, then top with classic bruschetta ingredients like diced tomatoes, fresh basil, garlic, and a drizzle of balsamic glaze for a flavorful appetizer.
- Breakfast Bliss: For a unique breakfast, lightly toast a slice and top with scrambled eggs, avocado, or even a spread of cream cheese and jam.
Pro Baking Tips for Flawless Focaccia
Achieving bakery-quality focaccia at home is entirely within reach with a few expert tips:
- Temperature Control is Key: Always use a thermometer to check your water temperature before adding yeast. The ideal range is 105°F to 115°F (40°C to 46°C). Water that is too hot will kill the yeast, while water that is too cold will inhibit its activity, resulting in a dense, unrisen dough. This precision ensures your yeast is happy and hardworking.
- Create a Warm Environment for Rising: Dough needs warmth to rise efficiently. If your kitchen is cool, you can create a makeshift warm proofing spot. One effective method is to set a heating pad to its lowest setting, place a clean dish towel over it, and then place your dough-filled bowl on top. Alternatively, you can preheat your oven to its lowest setting (around 170°F/75°C) for just 5 minutes, then turn it off and let the dough rise inside with the door slightly ajar.
- Choose the Right Pan: For that coveted crispy bottom crust, a metal baking pan (like aluminum or steel) is highly recommended. Unlike glass or ceramic, metal conducts heat more efficiently and evenly, contributing to a superior crispy texture.
- Embrace Herb Creativity: While fresh rosemary and flaky sea salt are classic for a reason, don’t hesitate to personalize your focaccia with other herbs. About 1 tablespoon of finely chopped fresh herbs like thyme, oregano, marjoram, or even a mix of Mediterranean herbs will add wonderful complexity. Dried herbs can also be used, typically in a smaller quantity (about ½ to ¾ teaspoon for every tablespoon of fresh).
- Don’t Rush the Rise: Bread baking requires patience. Allow the dough to complete its rising stages fully. A properly proofed dough will be light, airy, and significantly increased in volume. Rushing this process will result in a denser focaccia.
- Quality Olive Oil Matters: Since olive oil is such a prominent flavor in focaccia, invest in a good quality extra virgin olive oil. It makes a noticeable difference in both the taste and the richness of your bread.
- Dimpling Technique: When dimpling the dough, make sure your fingers are well-oiled or wet to prevent sticking. Press firmly but not so hard that you deflate all the air from the dough. The goal is to create indentations, not flatten it completely.
More Delicious & Easy Bread Recipes to Explore!
If you loved making this focaccia, you might enjoy trying these other simple and satisfying bread recipes:
- Homemade Cornbread
- Beer Bread
- Irish Soda Bread
- Drop Biscuits
- Bacon Cheddar Biscuits
Recipe Video Guide
For a visual walkthrough of the entire focaccia baking process, including the crucial stretch and fold technique, please refer to the recipe video. (Note: Video content is often embedded using JavaScript. This placeholder ensures the section is noted while adhering to the HTML-only output request.)
Focaccia Bread
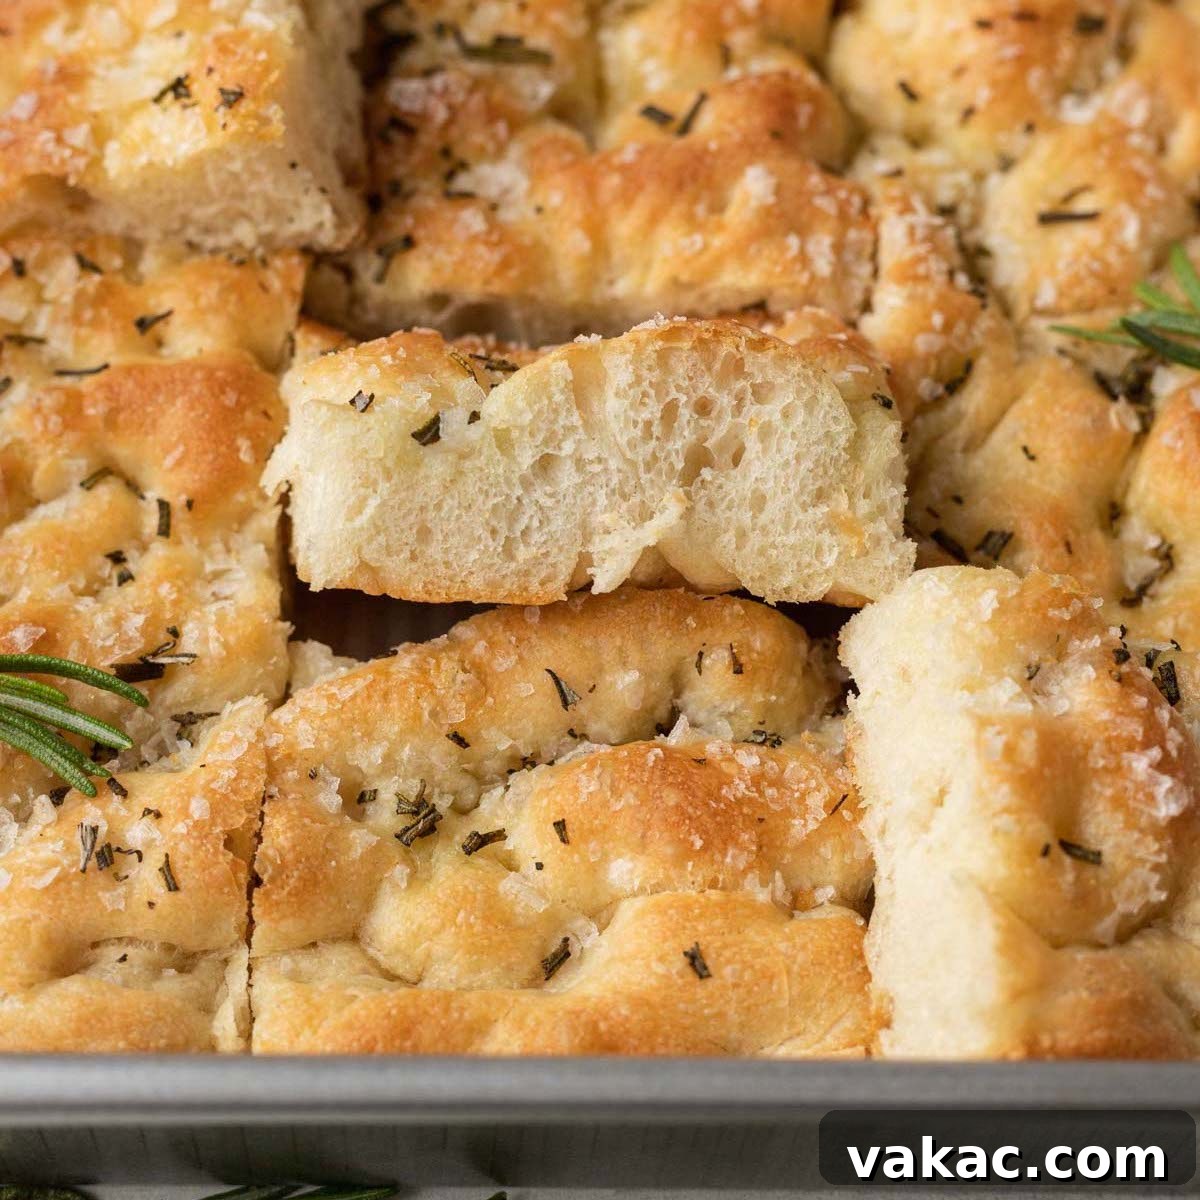
Golden and crispy on the outside and springy on the inside, this focaccia bread is perfect for mopping up your favorite Italian sauces, soups, and more. Or, use your homemade focaccia to make sandwiches!
Ingredients (Yields: 12 slices)
- 1 ⅓ cups warm water (about 105°F to 115°F / 40°C to 46°C)
- 2 teaspoons honey (13 grams)
- 2 ¼ teaspoons active dry yeast (0.25 ounce package; 7 grams)
- 3 ¼ cups all-purpose flour, spooned & leveled (405 grams)
- 1 ½ teaspoons fine sea salt (for dough)
- 6 tablespoons extra-virgin olive oil, divided (for dough, pan, and topping)
- Flaky or regular sea salt for topping
- 1 tablespoon freshly chopped or dried rosemary (for topping)
Instructions
- In a large mixing bowl, combine the warm water and honey. Sprinkle the yeast on top and gently stir. Let it sit for 5 to 10 minutes, or until the mixture becomes foamy. This indicates the yeast is active.
- Once foamy, add the all-purpose flour and fine sea salt to the yeast mixture. Mix until the dough just comes together into a shaggy mass. Then, add 2 tablespoons of extra-virgin olive oil and mix it into the dough with your hands until well incorporated.
- Scrape down the sides of the bowl, cover it with a clean kitchen towel, and allow the dough to rise in a warm place for 30 minutes.
- After 30 minutes, lightly wet your hands with cold water to prevent sticking. Perform the stretch and fold method: gently stretch one corner of the dough upwards as far as it can go without tearing, then fold it back over itself towards the center. Rotate the bowl one quarter-turn and repeat this process three more times, until all four sides have been stretched and folded.
- Cover the dough again and let it rise in a warm place for 1 more hour. During this hour, repeat the stretch and fold process three additional times, approximately every 20 minutes (a total of 3 more sets of folds).
- After the final stretch and fold, grease a 9×13-inch metal baking pan generously with 2 tablespoons of extra virgin olive oil. Ensure the entire bottom and sides are coated.
- Transfer the dough to the prepared baking pan. Gently stretch it slightly, then cover and let it relax for 10-15 minutes. This makes it easier to work with. After relaxing, use lightly oiled hands to gently stretch and press the dough to fit the entire pan evenly.
- Cover the dough in the pan and let it rise for a final 45 minutes in a warm place.
- Towards the end of the final rise (about 15-20 minutes before it’s ready), preheat your oven to 450°F (230°C).
- Lightly oil your fingertips (or wet them with cold water) and press them firmly into the risen dough to create characteristic dimples all over the surface.
- Drizzle the focaccia dough with the remaining 2 tablespoons of extra-virgin olive oil, allowing it to pool in the dimples. Sprinkle generously with flaky sea salt and freshly chopped rosemary.
- Bake for 20 to 25 minutes, or until the bread is beautifully golden brown on top and cooked through.
- Remove from the oven and allow the focaccia to cool in the pan for 5 minutes. Then, carefully slide a thin spatula or knife under the bread to loosen it, and transfer it to a wire cooling rack to cool completely.
- Cool for at least 10 to 15 minutes before slicing and serving. Enjoy your homemade focaccia!
Notes
Storage Instructions: Focaccia is best enjoyed fresh on the day it’s baked. However, leftovers can be stored in a large, airtight zip-top bag or wrapped tightly in plastic wrap at room temperature for up to 2 days. For best results, reheat slices in a warm oven (around 350°F / 175°C) for 5-10 minutes until warmed through and crisp.
Freezing Instructions: To freeze, wrap cooled focaccia slices tightly in plastic wrap, then aluminum foil. Freeze for up to 1 month. Thaw at room temperature and reheat in the oven.
Did you make this recipe? We’d love to see your creations! Share your photos on Instagram and mention @livewellbakeoften or tag #livewellbakeoften.