
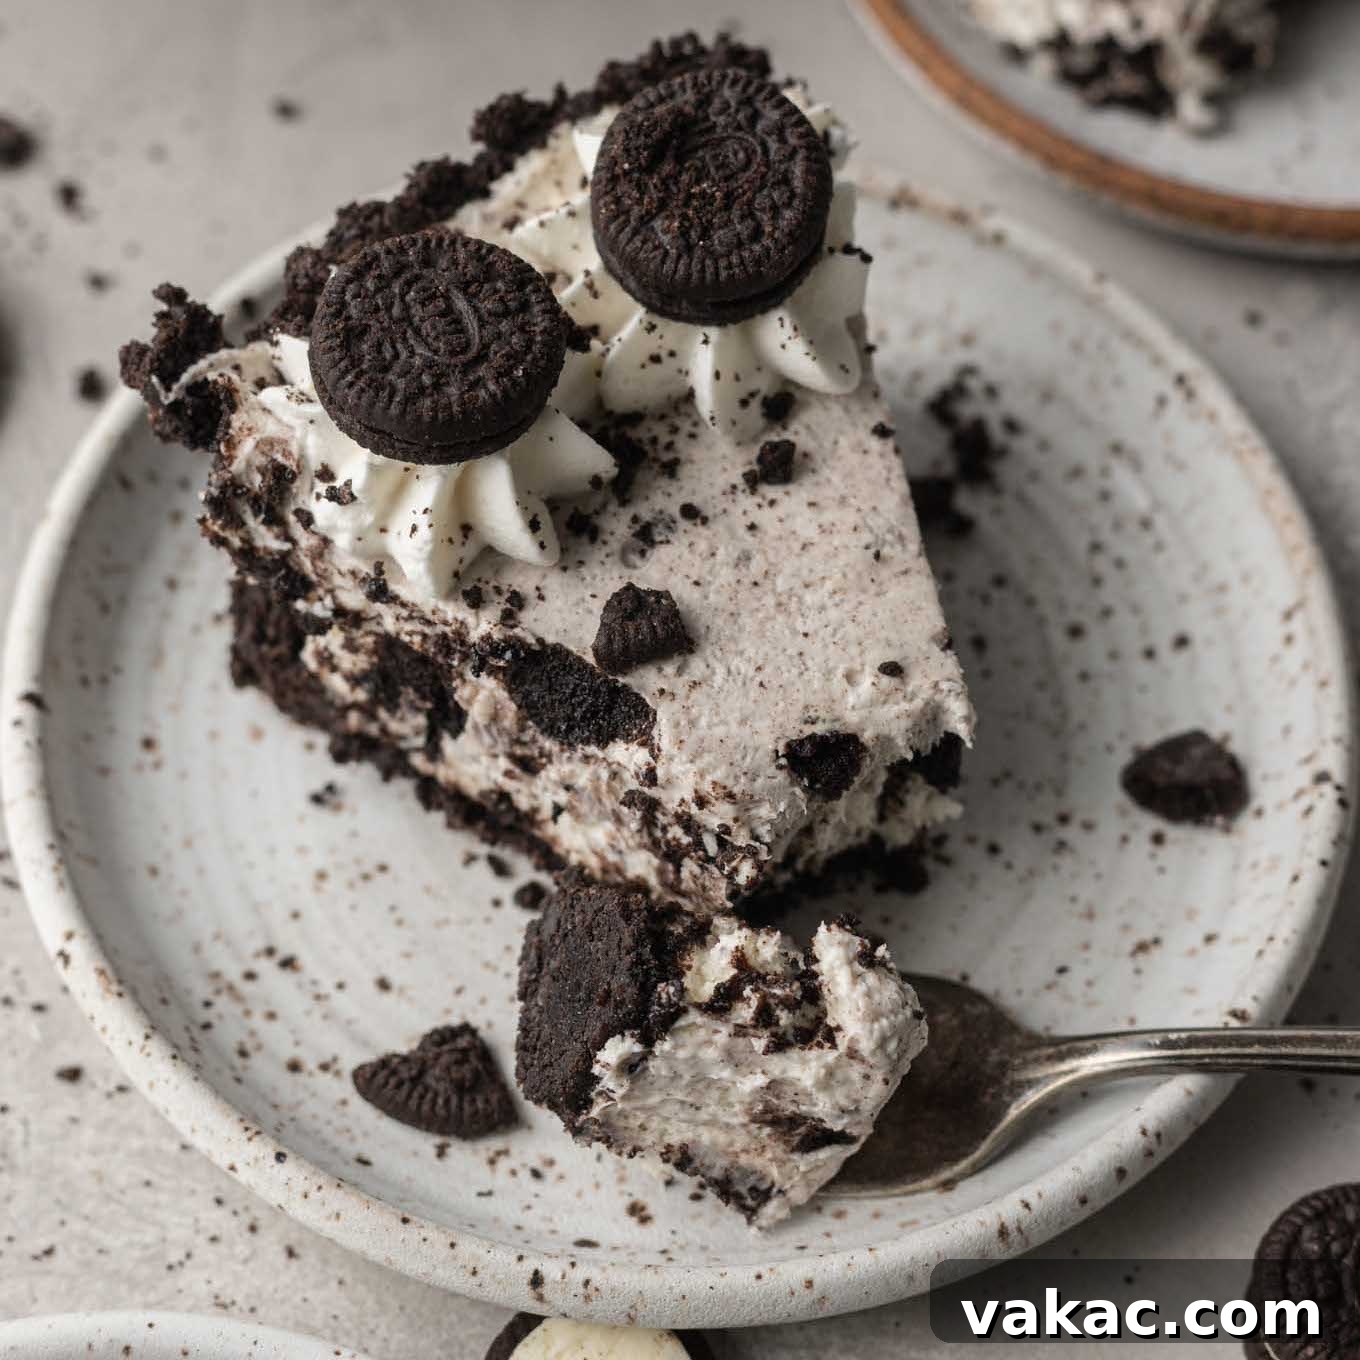
This Oreo pie is a true delight, boasting a rich Oreo cookie crust that perfectly cradles a smooth, velvety, and irresistibly creamy Oreo filling. It’s an incredibly decadent dessert that’s surprisingly easy to whip up, making it an instant crowd-pleaser for any occasion. Prepare to be amazed by its simplicity and incredible flavor!
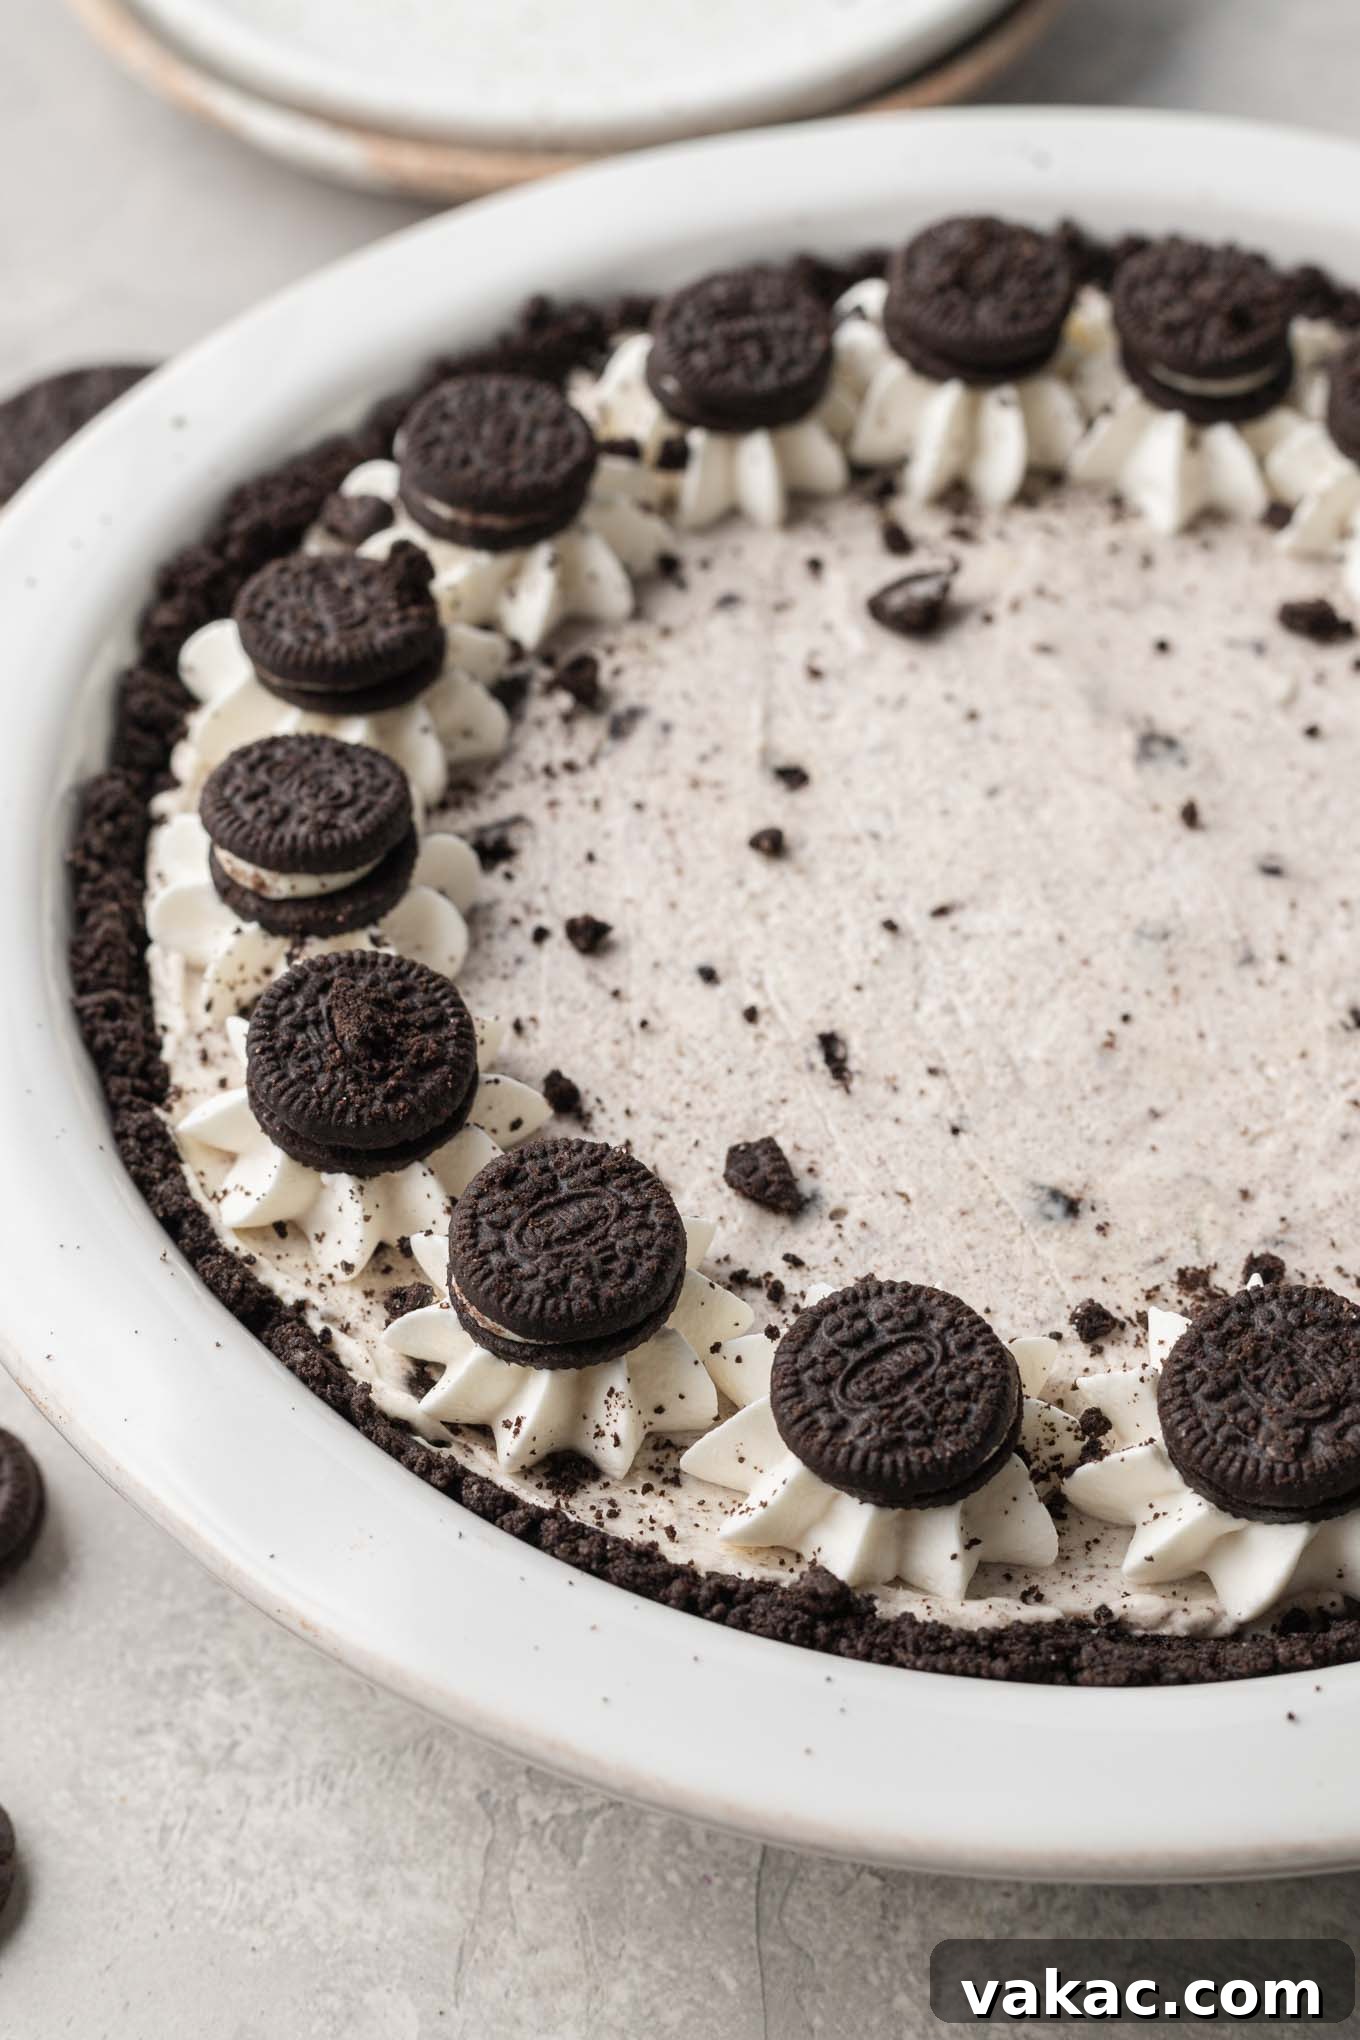
When the holidays roll around, or any time a special dessert is called for, traditional baked pies like classic pumpkin pie or rich pecan pie often take center stage. While these are undeniably delicious, sometimes you need a show-stopping dessert that doesn’t require turning on your oven. That’s where the magic of no-bake pies comes in, offering delightful alternatives such as the sweet banoffee pie or the decadent peanut butter pie.
Inspired by these wonderful no-bake options and the timeless appeal of America’s favorite cookie, I’m thrilled to share this straightforward yet incredibly satisfying Oreo pie recipe. It draws inspiration from my popular no-bake Oreo cheesecake recipe, thoughtfully adapted and scaled to fit perfectly into a standard pie dish. This recipe promises all the creamy goodness you crave, packed with iconic Oreo flavor in every bite.
If you’re searching for a simple, stress-free dessert that will impress your guests and leave them asking for the recipe, look no further. This no-bake Oreo pie is the answer, guaranteeing smiles and satisfied sweet cravings. It’s the perfect addition to your holiday spread, a summer potluck, or just a treat for a regular weeknight!
Indulge in the Ultimate No-Bake Oreo Pie: Your New Favorite Dessert!
Welcome to the world of effortless decadence with this fantastic no-bake Oreo pie recipe! Forget complicated steps and long baking times; this dessert is all about maximizing flavor with minimal fuss. From its crunchy cookie crust to its silky-smooth, rich filling, every component is infused with that classic Oreo taste we all adore. Whether you’re a seasoned baker or a kitchen novice, you’ll find this recipe incredibly approachable and utterly rewarding. It’s truly the best way to enjoy Oreos in pie form!
Why This No-Bake Oreo Pie is an Absolute Must-Try
There are countless reasons why this Oreo pie deserves a spot in your recipe collection, but here are just a few compelling ones:
- Effortlessly Easy & Quick: With a prep time of just 30 minutes and no extensive baking required (unless you opt for a sturdier crust), this pie comes together quickly. Most of the magic happens in the fridge!
- Irresistibly Creamy and Rich: The filling is a luxurious blend of cream cheese, powdered sugar, vanilla, and whipped cream, packed with crushed Oreos, creating a texture that melts in your mouth.
- A True Crowd-Pleaser: Who doesn’t love Oreos? This pie appeals to all ages and taste buds, making it the perfect dessert for family gatherings, dinner parties, or any celebration.
- Mostly No-Bake: While a brief bake for the crust is recommended for superior structure, it’s technically optional, making this an ideal dessert for hot summer days or when your oven is occupied.
- Versatile & Customizable: Easily adapted with different Oreo flavors or toppings, you can personalize this pie to suit any preference or occasion.
- Make-Ahead Friendly: This pie requires chilling, which means it’s a fantastic make-ahead option, freeing up your time on the day you plan to serve it.
Essential Ingredients for Your Dream Oreo Pie
Creating this dream pie starts with a carefully selected list of ingredients. Each plays a vital role in achieving that perfect balance of crunch, creaminess, and iconic Oreo flavor. Here’s a deeper dive into what you’ll need and why:
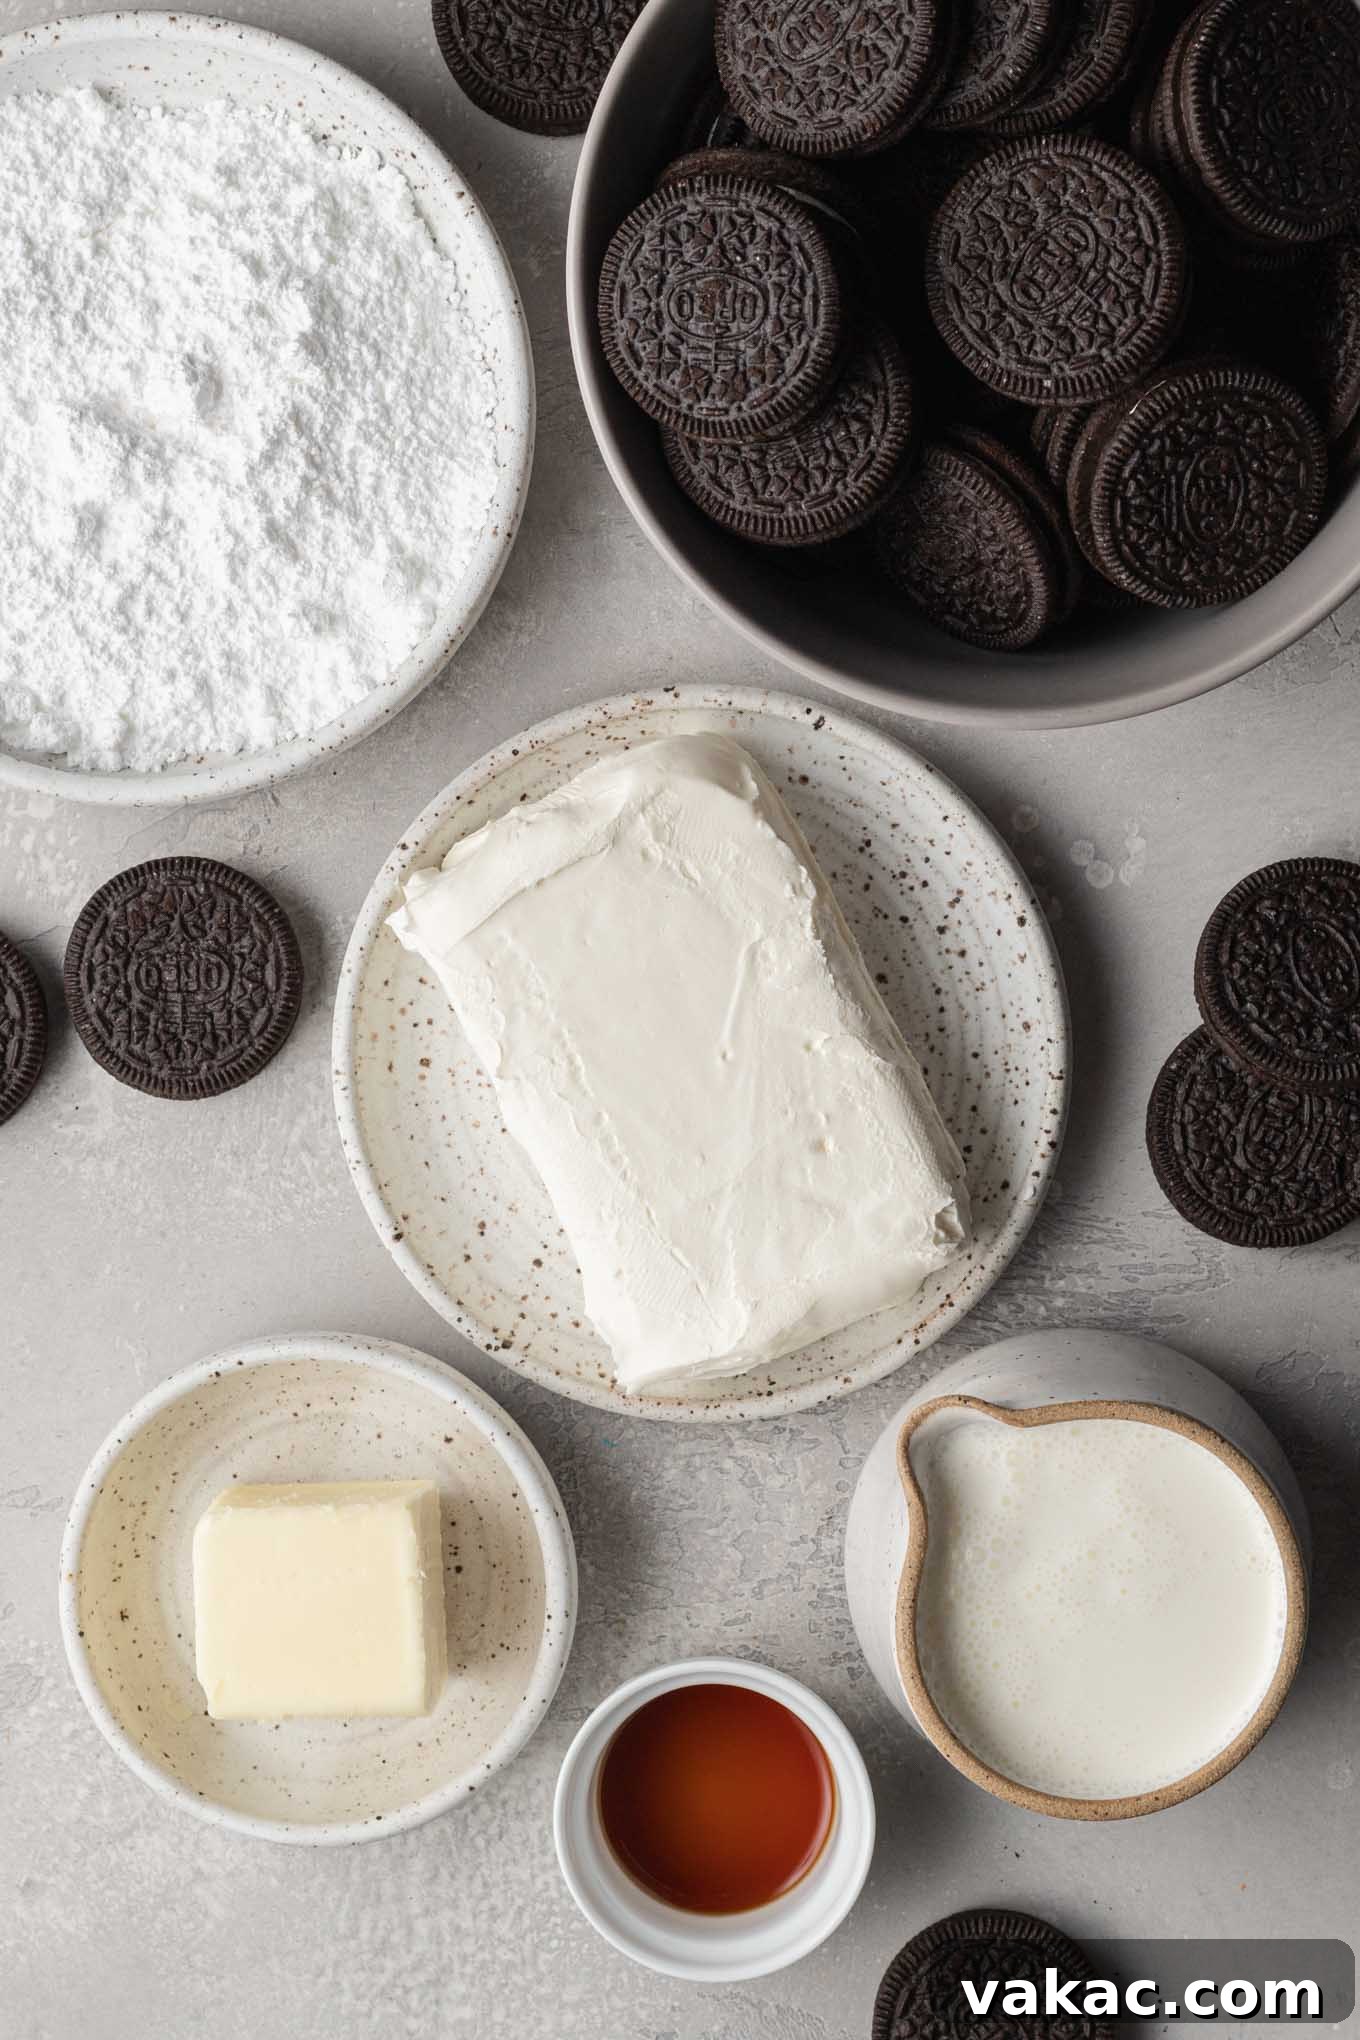
- Oreos: The star of the show! You’ll need about 34 Oreos in total—roughly 24 for the crust and 10 for the creamy filling. Having a few extra for garnishing is always a good idea. I often buy a family-size package to ensure I have plenty. Both regular and Double Stuf Oreos work beautifully here; the choice is yours! Remember, we use the entire cookie, cream filling and all, for both the crust and the chopped filling pieces.
- Unsalted Butter: Essential for binding the cookie crumbs into a cohesive, sturdy crust. As with most baking, unsalted butter gives you more control over the overall saltiness of the dessert. However, if salted butter is all you have on hand, it can be used for the crust without significantly impacting the final taste.
- Cream Cheese: This is the foundation of our smooth, stable, and easily sliceable filling. For the best results, always use full-fat, brick-style cream cheese. Avoid using spreadable or whipped cream cheese from a tub, as these have a different consistency and water content that will prevent your pie from setting up correctly. Ensure it’s softened to room temperature for a lump-free, silky filling.
- Powdered Sugar (Confectioners’ Sugar): In no-bake fillings, powdered sugar is preferred over granulated sugar for two main reasons: it dissolves instantly, ensuring a smooth, grit-free texture, and it also helps to thicken the filling, contributing to its creamy yet firm consistency.
- Heavy Whipping Cream: This ingredient is crucial for creating the light, airy, yet stable body of the pie filling. It must be cold and have a minimum of 36% milk fat to whip up properly into stiff peaks. Lighter creams or half-and-half will not achieve the desired volume or stability.
- Pure Vanilla Extract: A touch of high-quality pure vanilla extract enhances the overall flavor profile, adding warmth and depth that complements the chocolate and cream cheese beautifully. Avoid imitation vanilla for the best taste.
Tools You’ll Need for This Easy Oreo Pie
Gathering your tools before you start will make the process even smoother:
- 9-inch Pie Plate: The ideal size for this recipe, ensuring a perfect crust-to-filling ratio.
- Food Processor: The quickest and easiest way to turn Oreos into fine crumbs for the crust. If you don’t have one, a sturdy plastic bag and a rolling pin work just as well!
- Stand Mixer or Handheld Electric Mixer: Essential for creaming the cream cheese and whipping the heavy cream to perfection.
- Large Mixing Bowls: You’ll need at least two: one for the cream cheese mixture and another for whipping the cream.
- Measuring Cups and Spoons: For accurate ingredient measurements.
- Rubber Spatula: Indispensable for scraping down bowls and gently folding in whipped cream.
- Plastic Wrap: For chilling the pie thoroughly.
Crafting Your Oreo Masterpiece: Step-by-Step Instructions
Let’s dive into making this incredible no-bake Oreo pie. Follow these steps for a dessert that will earn rave reviews!
1. The Perfect Oreo Crust: Foundation of Flavor
A great pie begins with a phenomenal crust, and our Oreo crust is no exception. It’s simple, crunchy, and sets the stage for the creamy filling.
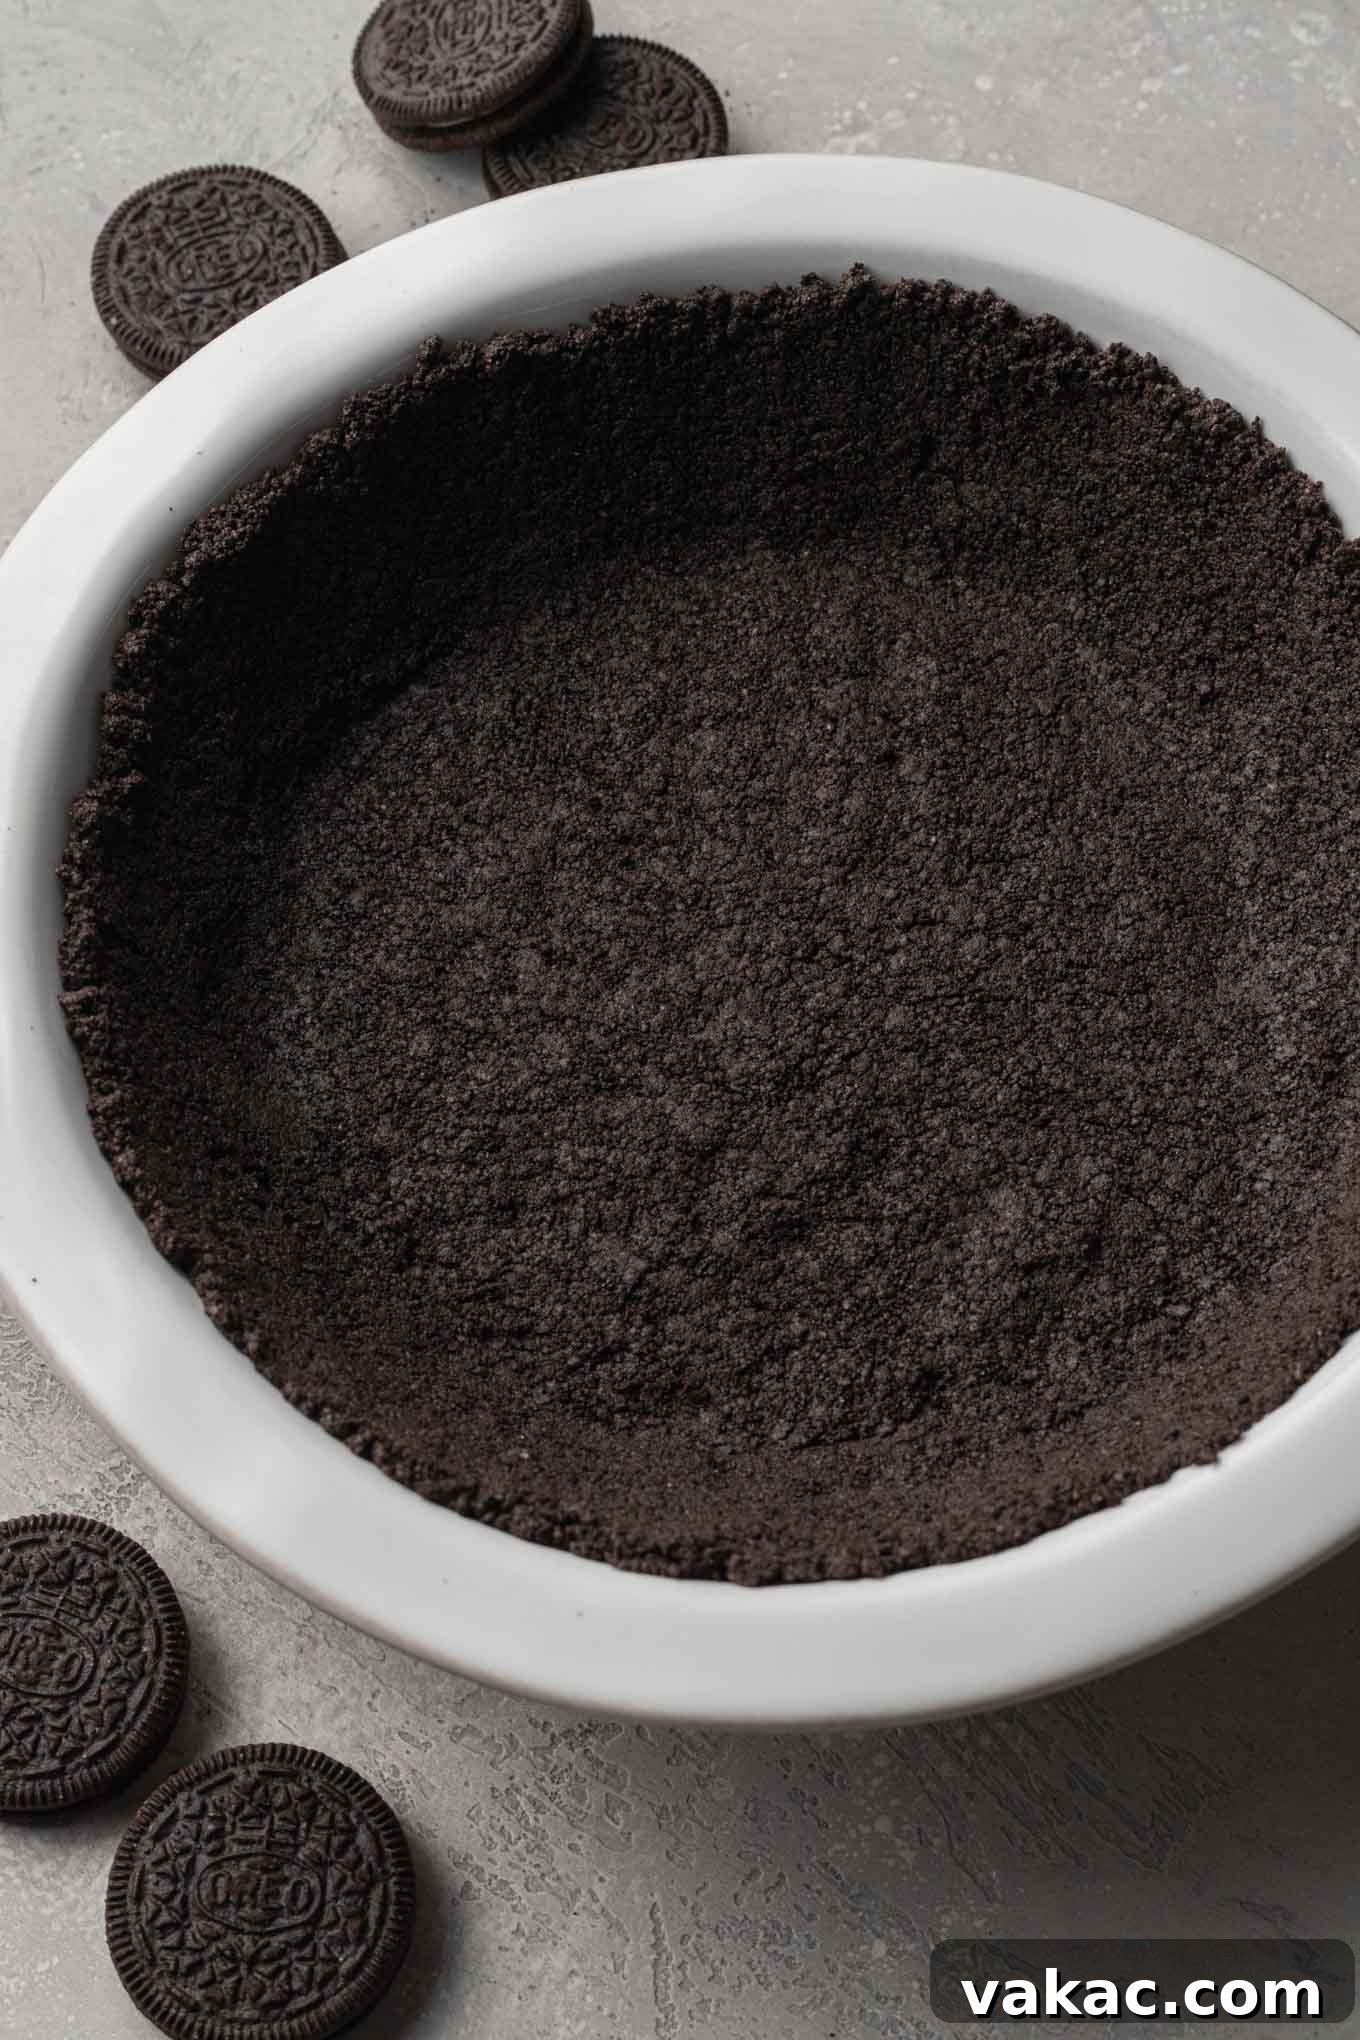
- Prepare the Crust Mixture: Begin by preheating your oven to 350°F (180°C). While the crust baking is technically optional for a “no-bake” pie, a quick bake makes it incredibly sturdy and much easier to slice without crumbling. Place 24 whole Oreos (with their cream filling) into a food processor and pulse until they form fine, even crumbs. If you don’t have a food processor, place the Oreos in a sturdy plastic bag, seal it, and crush them with a rolling pin until uniformly fine. Transfer the cookie crumbs to a medium mixing bowl. Add 4 tablespoons of melted unsalted butter and stir until all the crumbs are moistened and resemble wet sand.
- Press into the Pie Plate: Scoop the buttered Oreo crumb mixture into a 9-inch pie plate. Use the bottom of a measuring cup or a flat-bottomed glass to firmly and evenly press the crumbs into the bottom and up the sides of the pie dish. This compaction is key to a stable crust.
- Bake (Optional but Recommended): For a more robust and less crumbly crust, bake it in the preheated oven for about 10 minutes. This helps to set the butter and create a firmer foundation. If you prefer a completely no-bake approach, you can skip this step and simply chill the crust for at least 30 minutes in the refrigerator before adding the filling. Once baked, remove the crust from the oven and set it aside to cool completely to room temperature before proceeding. A warm crust will melt your filling!
Note: For even more detailed guidance on achieving the ultimate Oreo crust, feel free to refer to my dedicated Oreo pie crust recipe. It truly is easier than you might imagine!
2. The Luxuriously Creamy Oreo Filling & Assembly
Now for the star of the show: the rich, creamy, and undeniably delicious Oreo filling!
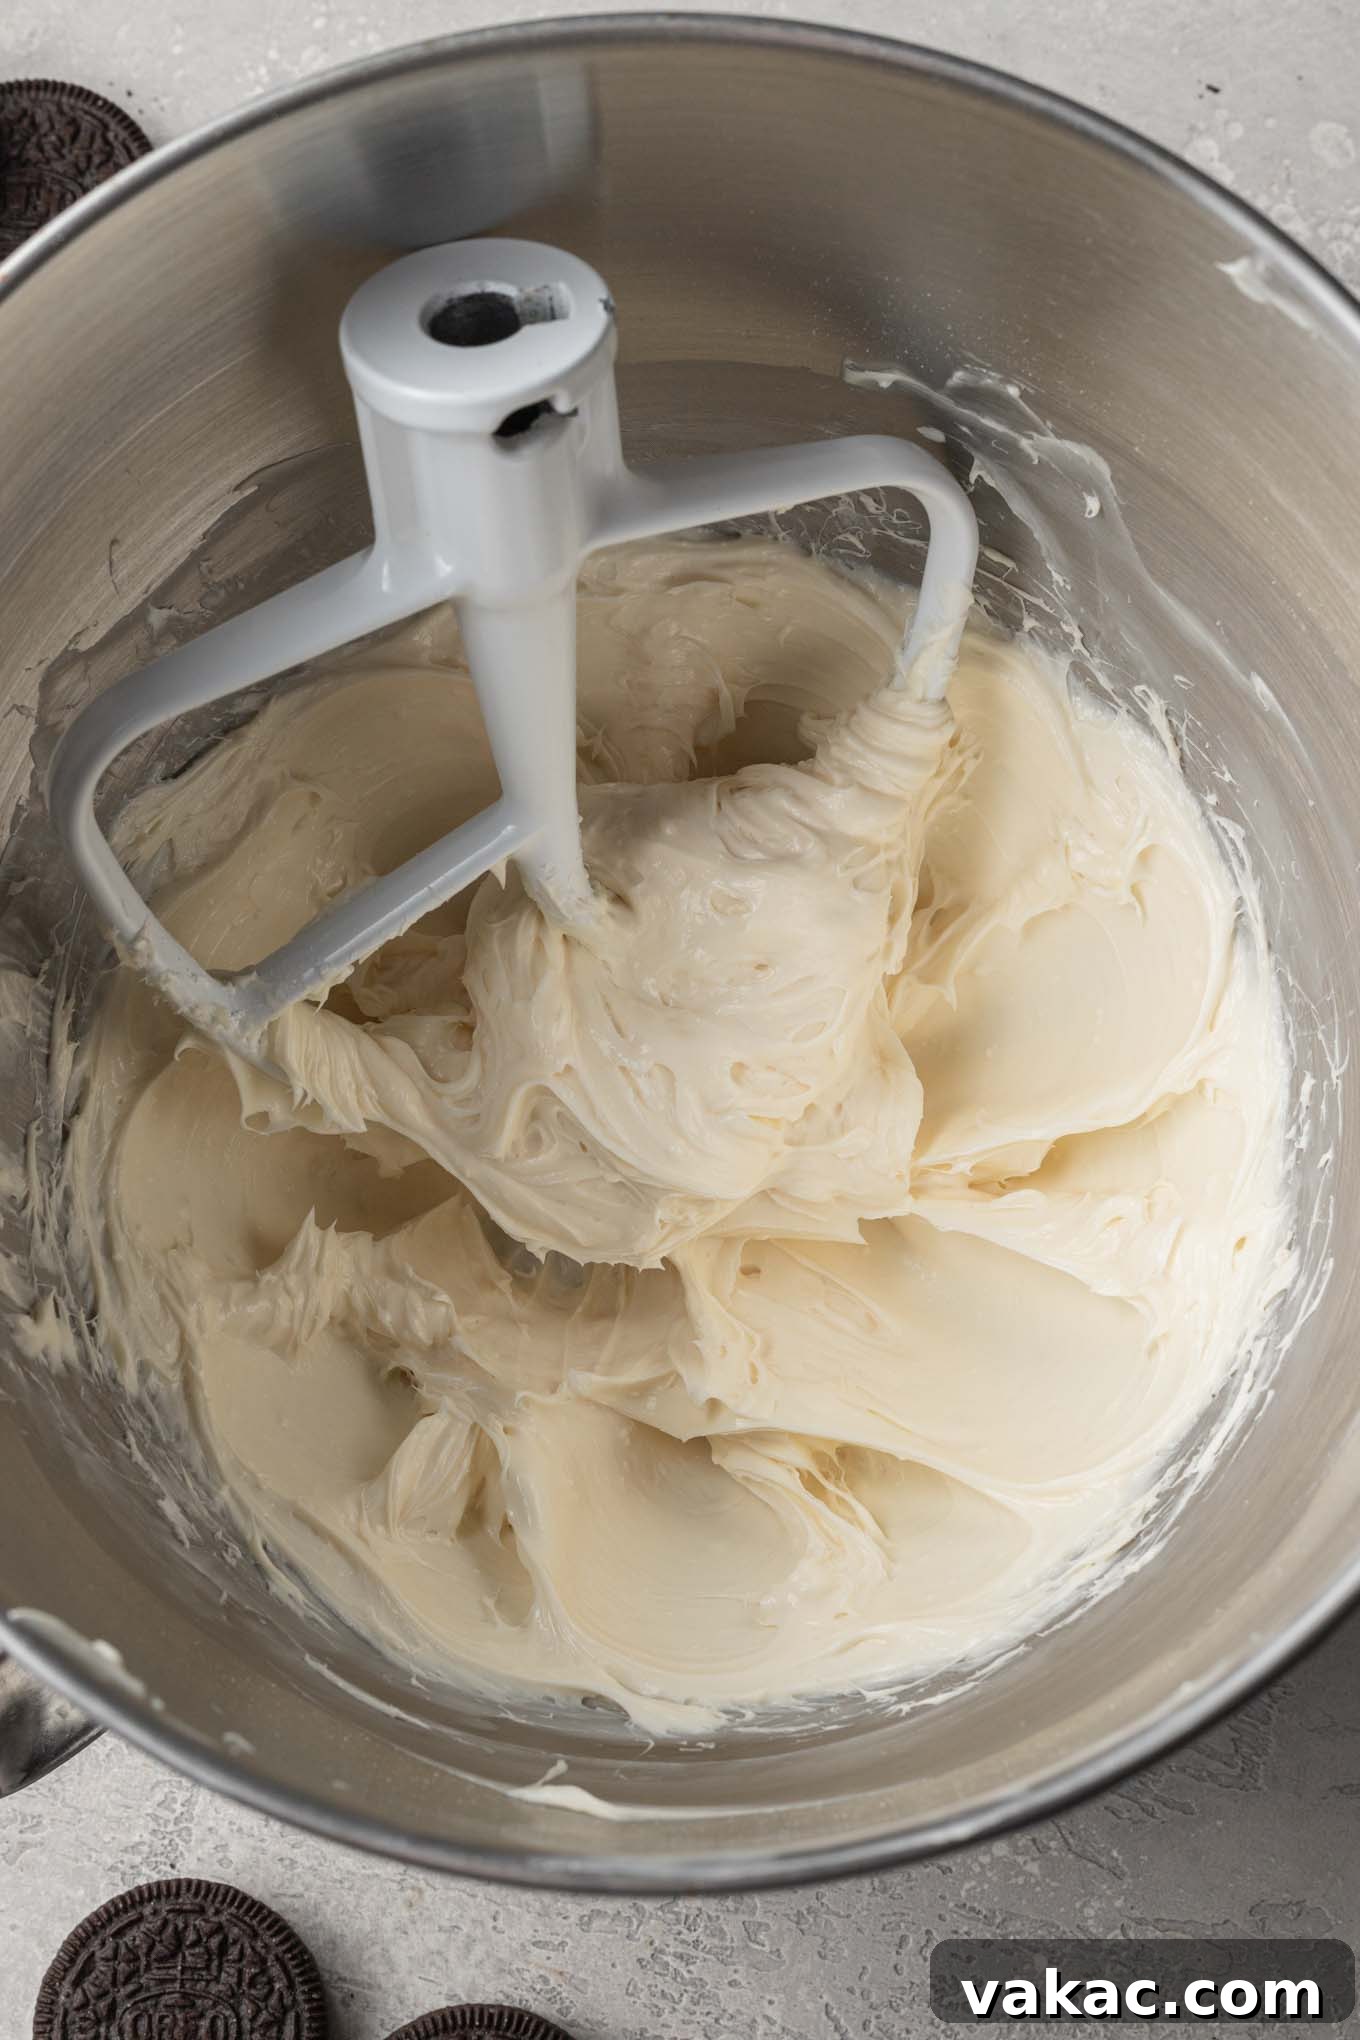
- Prepare the Cream Cheese Mixture: In the bowl of a stand mixer fitted with the paddle attachment, or in a large mixing bowl using a handheld electric mixer, beat the softened brick-style cream cheese on medium speed until it is completely smooth and free of lumps, about 1-2 minutes. Stop and scrape down the sides of the bowl as needed. Add the powdered sugar and pure vanilla extract, then continue to mix until all ingredients are well combined and the mixture is light and fluffy. Set this aside.
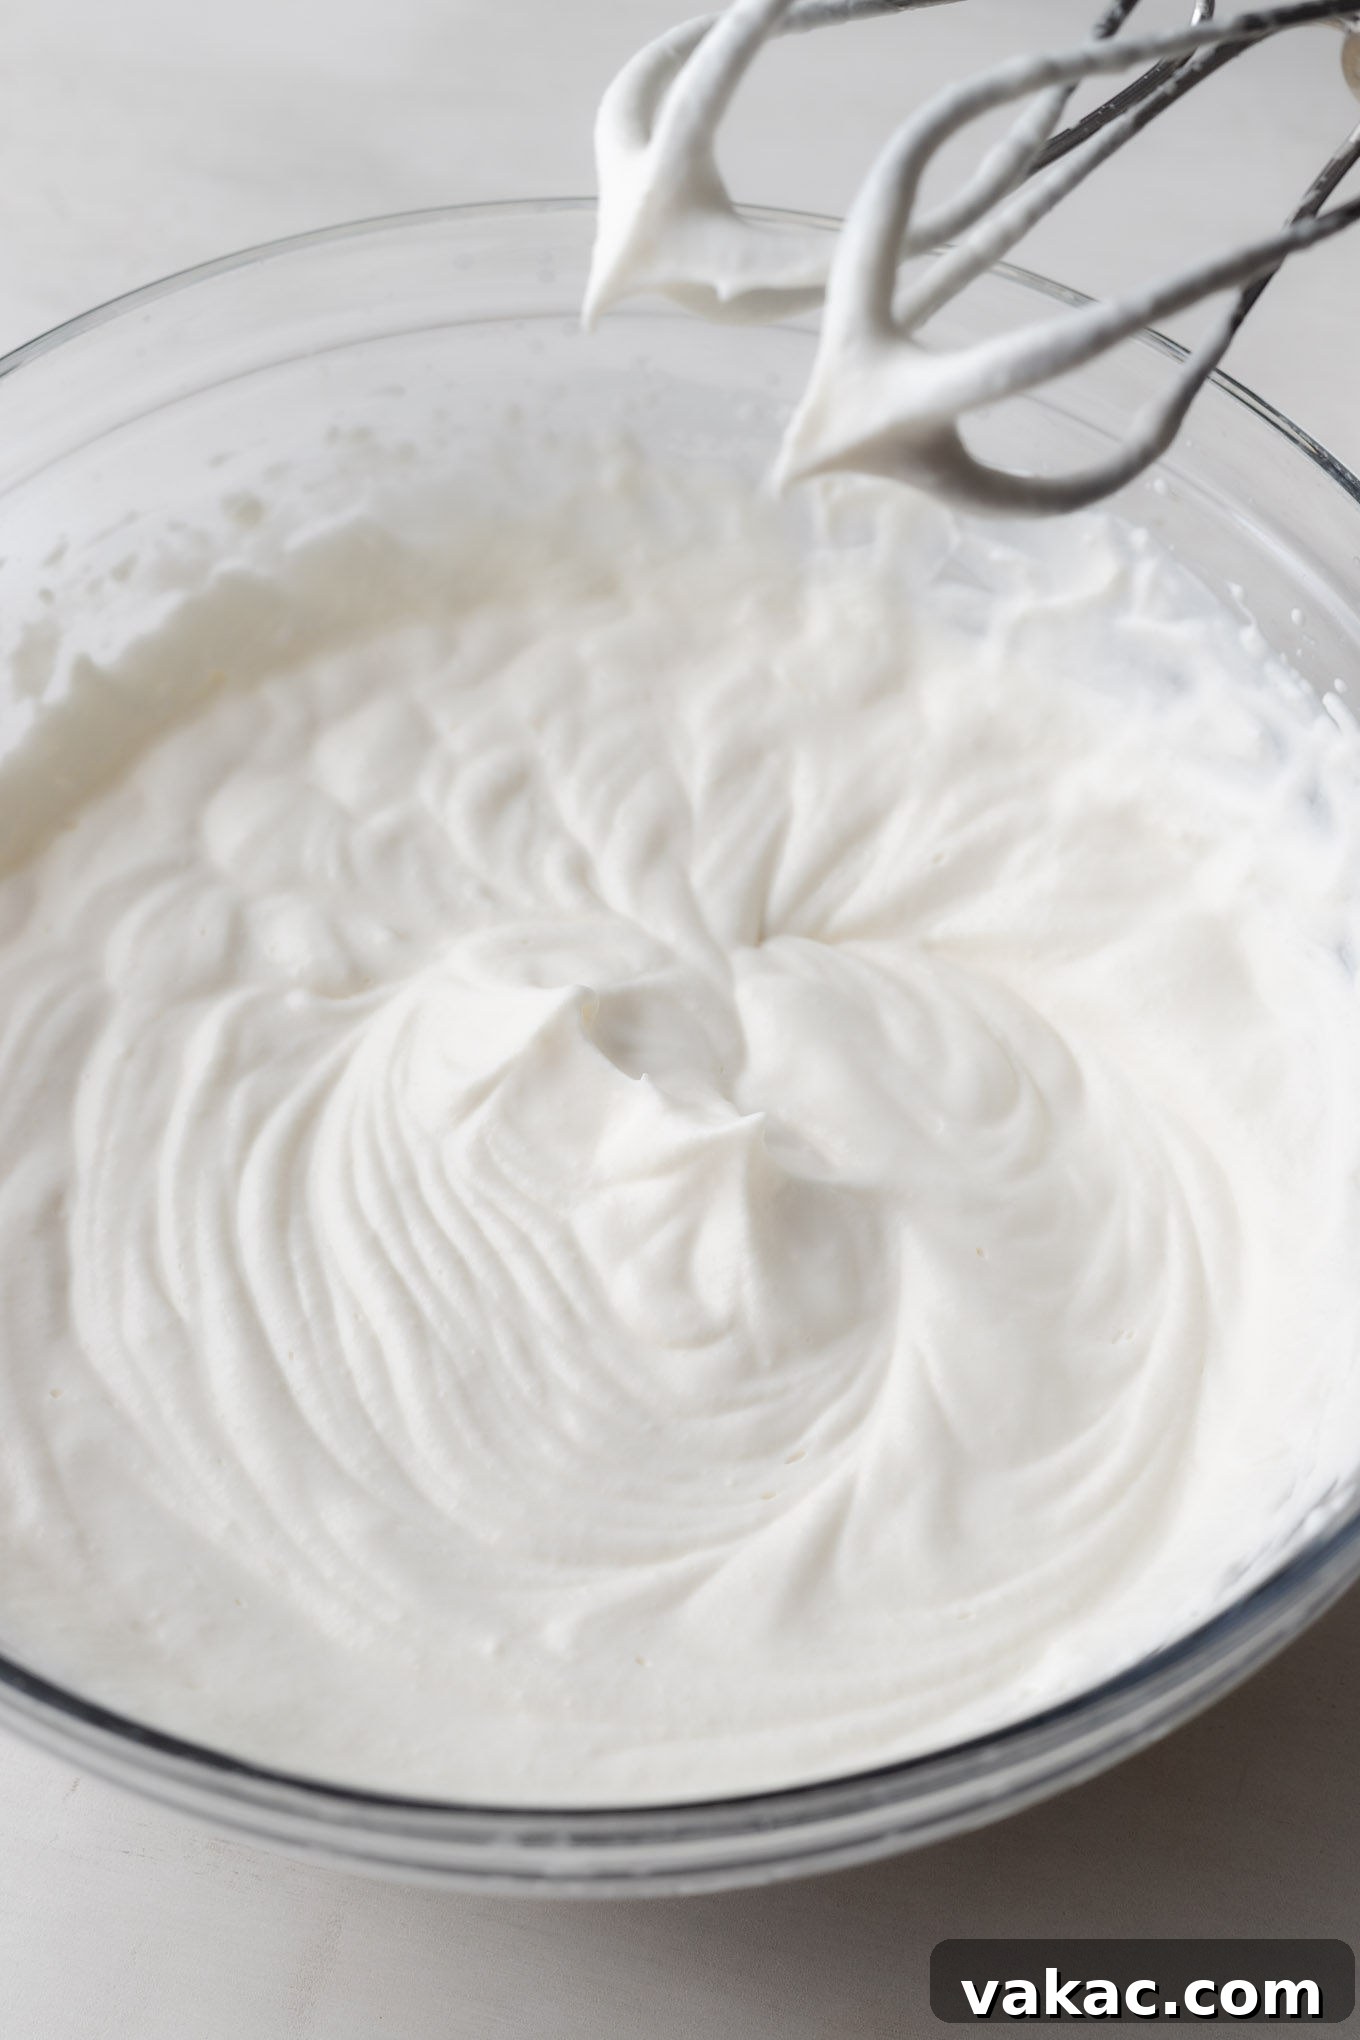
- Whip the Heavy Cream: In a separate, clean, and preferably chilled mixing bowl, pour the cold heavy whipping cream. Begin beating on low speed, gradually increasing to medium-high. Continue to beat until the heavy cream thickens and forms stiff peaks. Stiff peaks mean that when you lift the beaters, the peaks stand straight up without drooping. Be careful not to overmix, or it can turn grainy.
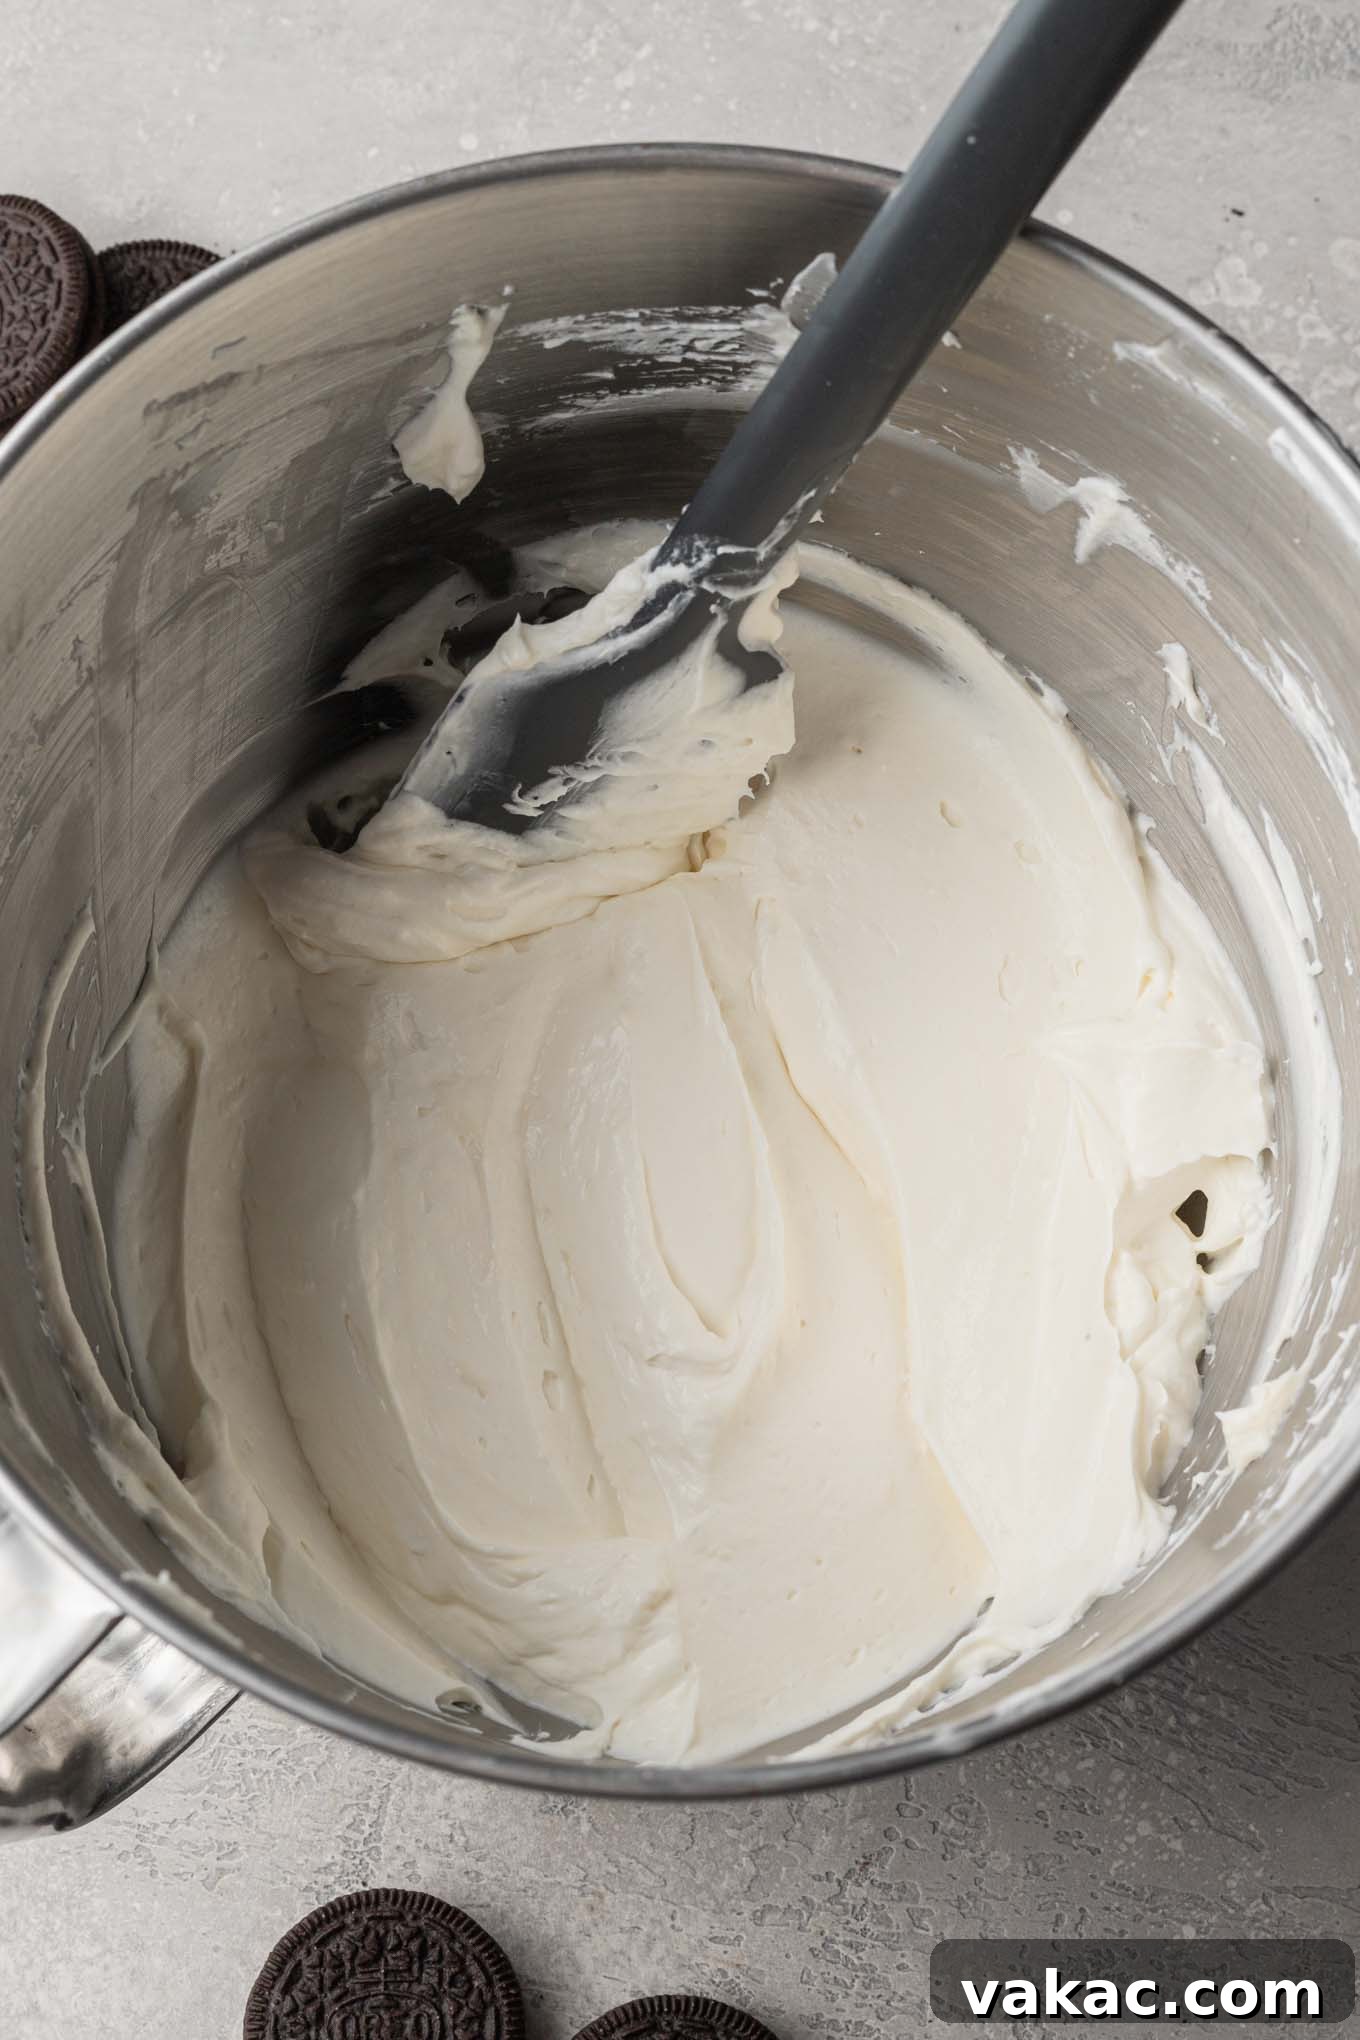
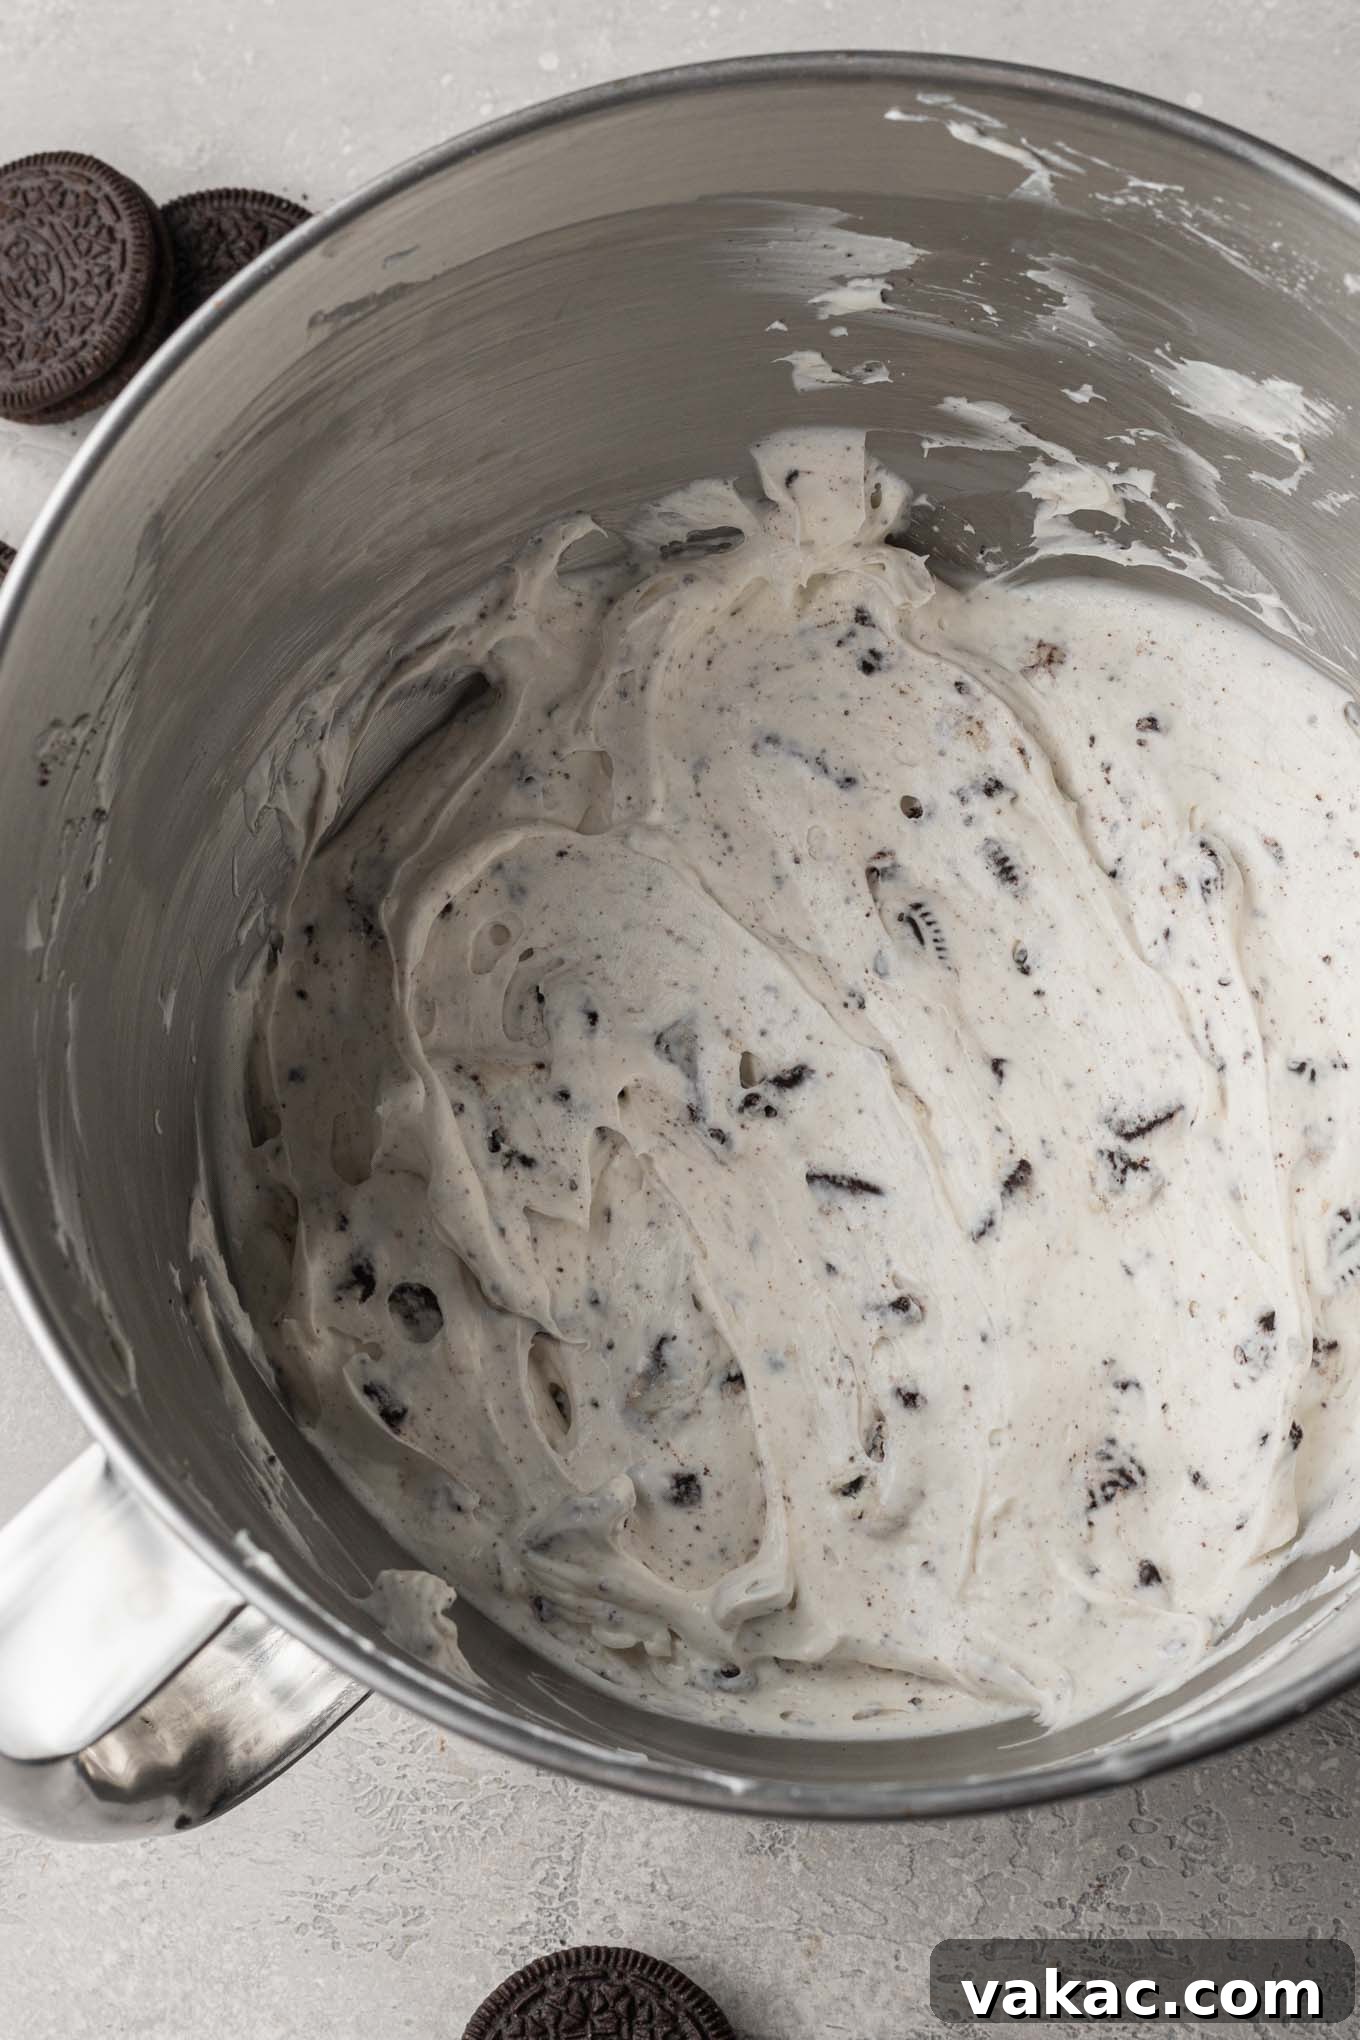
- Combine and Add Oreos: Gently add about half of the whipped cream to the cream cheese mixture. Using a rubber spatula, carefully fold it in until just combined. Overmixing at this stage can deflate the whipped cream, leading to a less airy filling. Fold in the remaining whipped cream using the same gentle technique. You can also mix it in on the lowest speed setting of your mixer for a few seconds if preferred, but be vigilant to not overmix. Finally, gently fold in the 10 chopped Oreos until they are evenly distributed throughout the creamy filling.
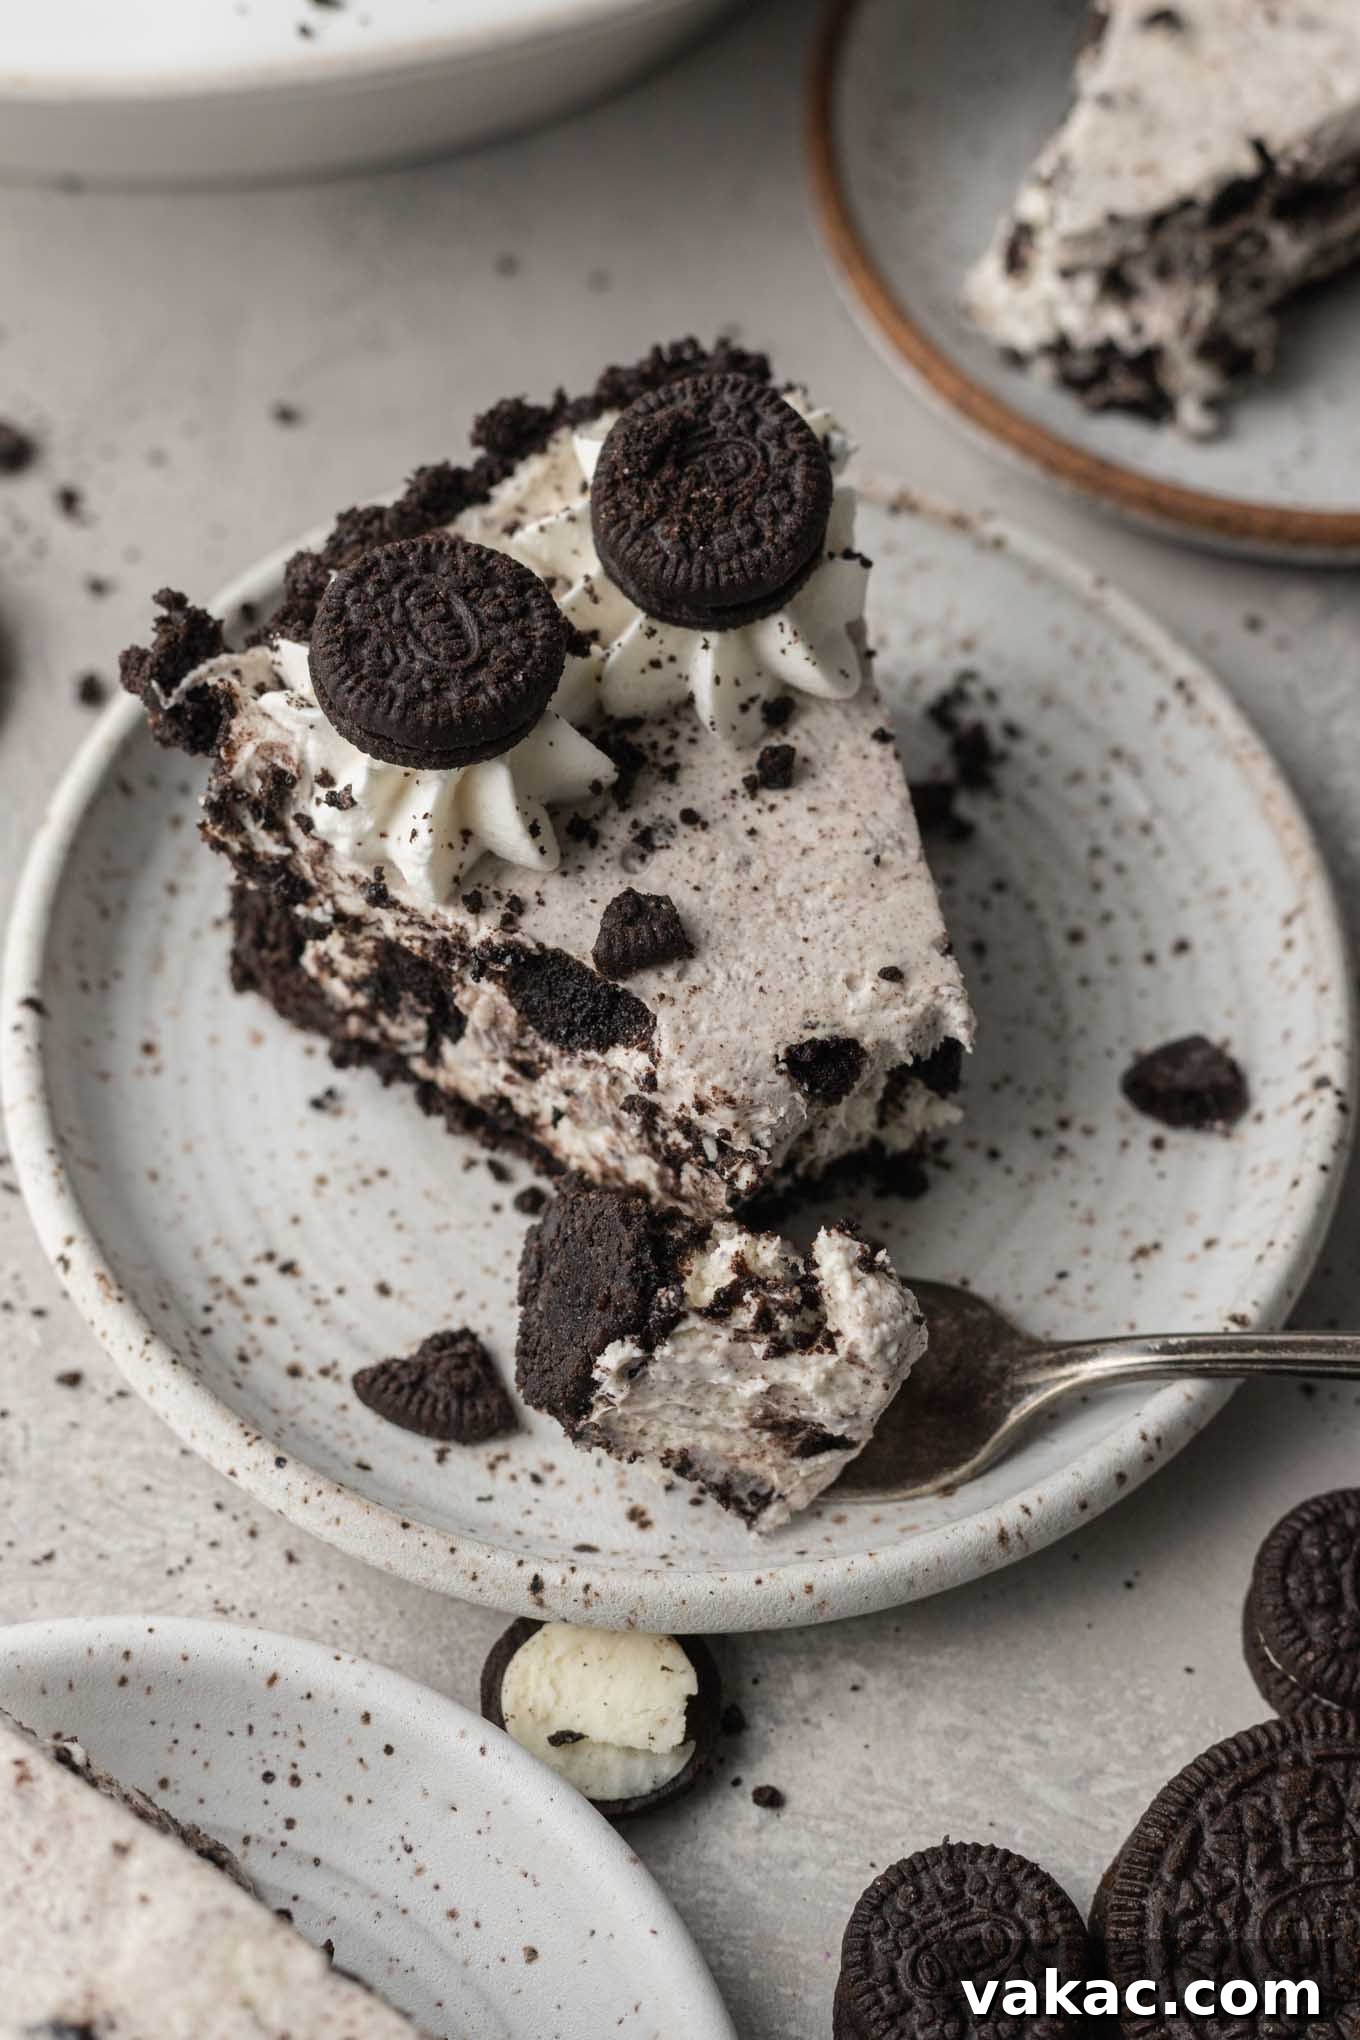
- Fill the Crust and Chill: Carefully spoon the luscious Oreo filling into your completely cooled pie crust. Use a spatula to gently spread the filling into an even layer, ensuring it reaches all edges of the crust. Cover the pie tightly with plastic wrap to prevent any odors from the fridge affecting its flavor and to keep the surface fresh. Transfer the pie to the refrigerator and let it chill for at least 6 hours, or ideally, overnight. This chilling period is crucial for the pie to set properly, making it firm enough to slice cleanly and ensuring the flavors meld beautifully.
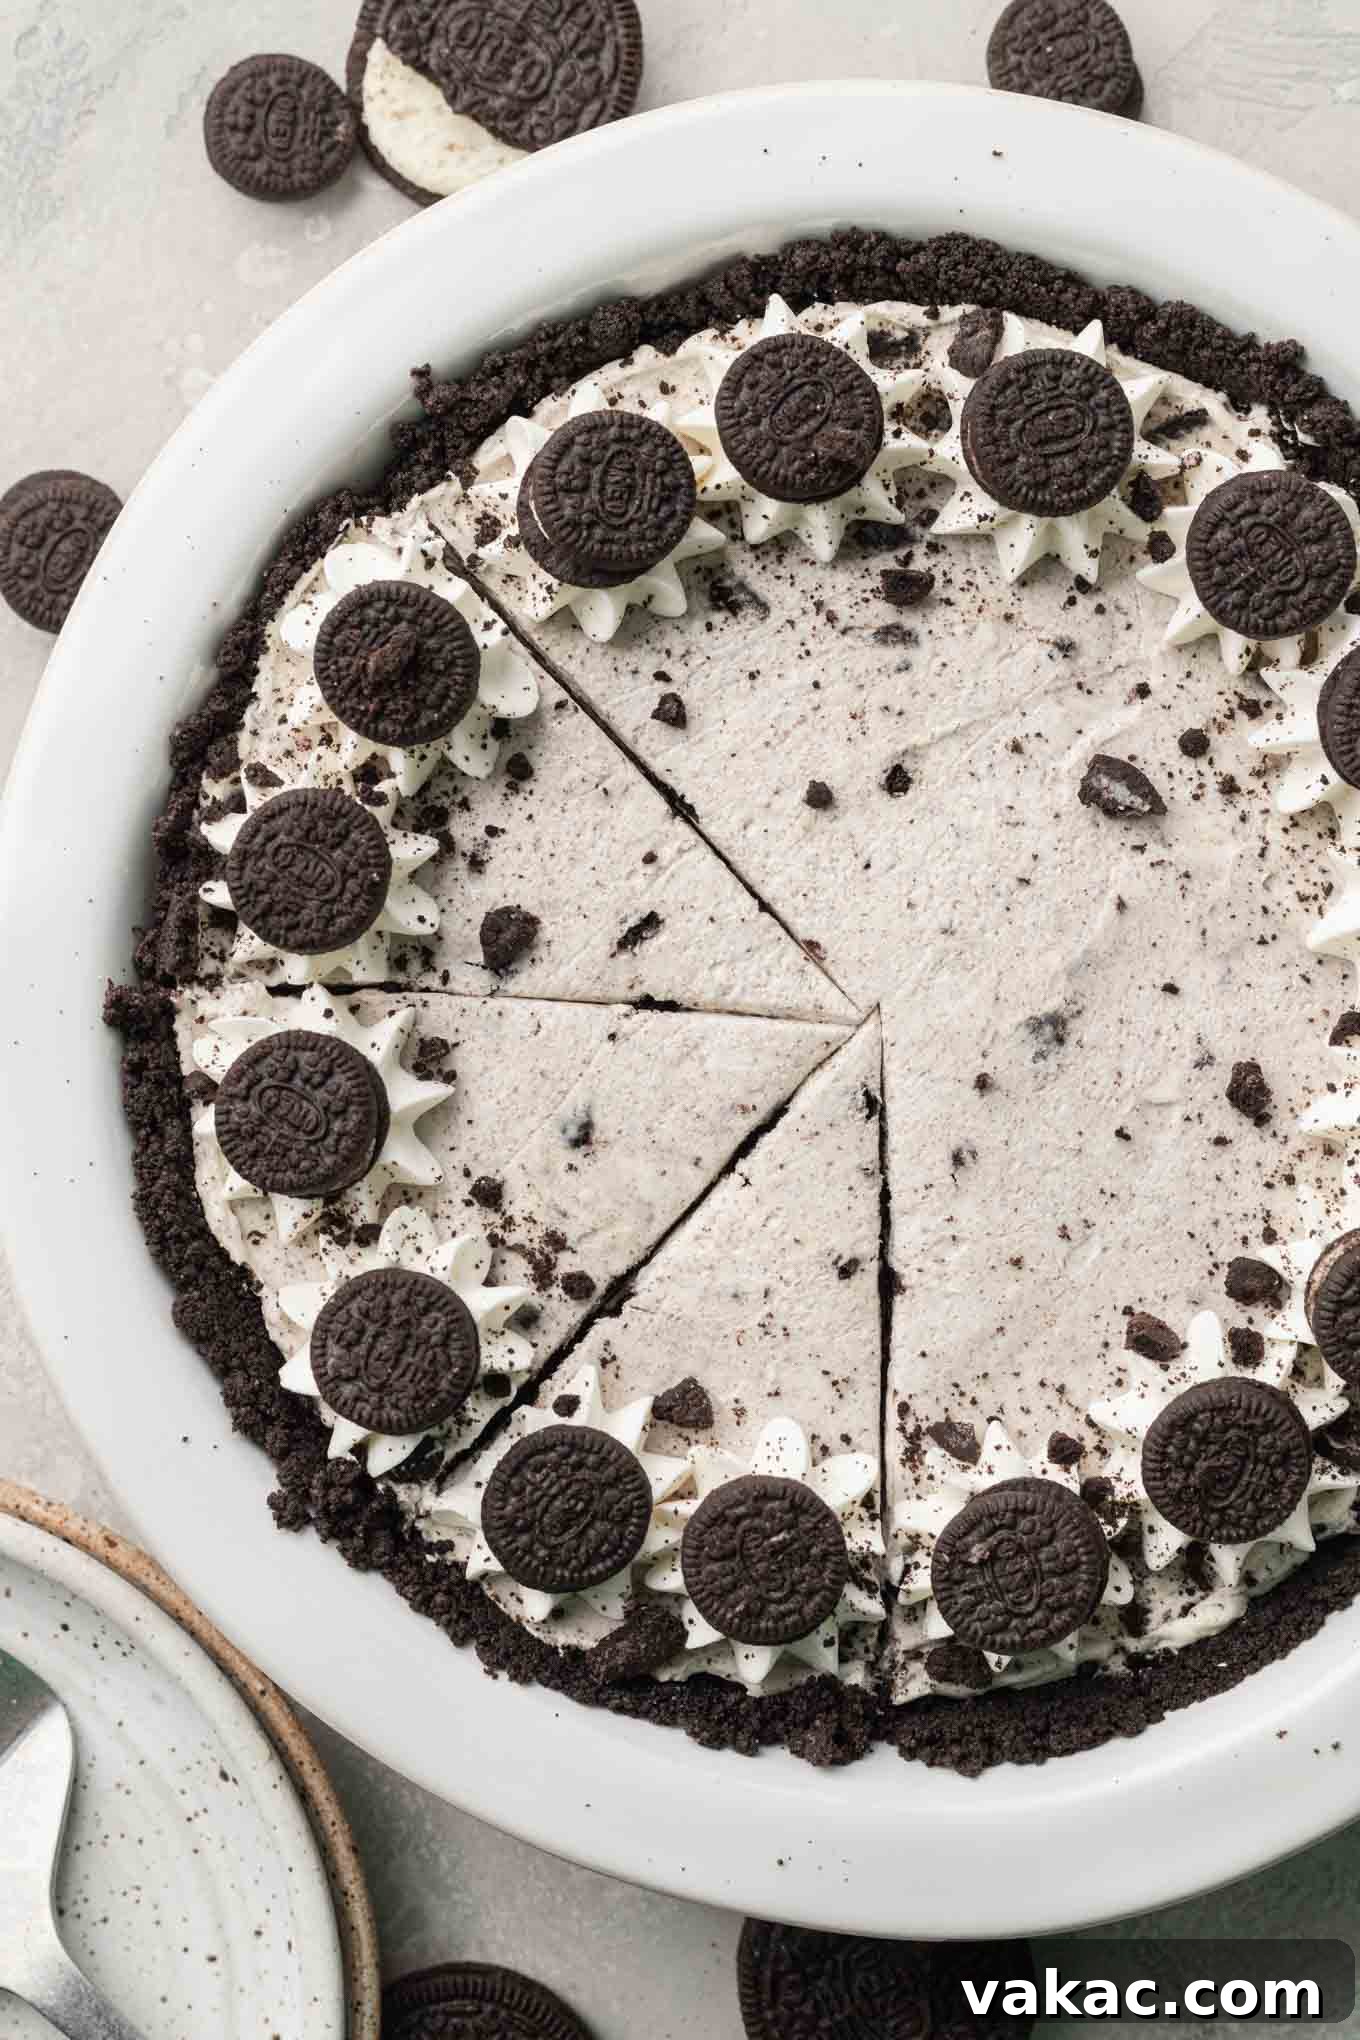
- Decorate and Serve: Just before serving, unleash your creativity with decorations! I love to pipe elegant swirls of homemade whipped cream around the edges of the pie. For an extra touch of Oreo goodness and visual appeal, sprinkle some mini Oreos or additional chopped regular Oreos over the top. Slice with a sharp knife and serve your perfectly chilled, homemade Oreo pie.
Elevate Your Oreo Pie: Creative Recipe Variations
While this Oreo pie recipe is absolutely phenomenal as is, it also serves as a fantastic canvas for your culinary imagination. Here are some simple yet delicious ways you can customize it and truly make it your own:
- Add a Decadent Ganache Layer: For the ultimate chocolate lover, consider adding a luscious layer of chocolate ganache over the set pie filling before decorating. I recommend using the simple 1:1 ratio detailed in my post on how to make chocolate ganache for a perfect consistency.
- Create Adorable Mini Pies: Turn this recipe into individual treats! Line a muffin pan with cupcake liners, press a small amount of the Oreo crust mixture into the bottom of each, and then pipe or spoon the filling on top. Chill as directed. These are perfect for portion control and party servings.
- Experiment with Different Oreo Flavors: Don’t limit yourself to just the classic! Oreos come in a vast array of exciting flavors. Imagine a “Golden Oreo Pie” with a vanilla twist, or seasonal delights like “Carrot Cake Oreo Pie,” “Mint Oreo Pie” for a refreshing kick, or a rich “Peanut Butter Oreo Pie” for nut butter fans. Any flavor will work wonderfully!
- Make it Gluten-Free: It’s incredibly easy to adapt this recipe for those with gluten sensitivities. Simply swap out the regular Oreos for gluten-free Oreos, which are readily available. All other ingredients in this recipe are typically gluten-free, but it’s always wise to double-check labels to be absolutely certain.
- Introduce More Mix-ins: Boost the texture and flavor by folding in additional mix-ins to the creamy filling. Think miniature chocolate chips, white chocolate chips, a drizzle of caramel, or even a sprinkle of chopped toasted nuts (if not making for those with nut allergies).
Expert Tips for a Flawless Oreo Pie
Achieving pie perfection is simple with these crucial tips:
- Ensure the Pie Crust is Completely Cool: This cannot be stressed enough! If you bake your crust, it must cool completely to room temperature before you add the filling. A warm crust will cause the creamy filling to melt and not set properly, resulting in a soggy bottom and a runny pie.
- Soften Your Cream Cheese to Room Temperature: Cold cream cheese will result in a lumpy filling. For an incredibly smooth and creamy texture, ensure your brick-style cream cheese is softened at room temperature for at least an hour (or gently microwave in 15-second intervals until pliable).
- Do Not Overmix the Whipped Cream: When folding the whipped cream into the cream cheese mixture, be gentle and only mix until just combined. Overmixing can cause the light and airy whipped cream to deflate, leading to a dense, heavy filling that won’t set as beautifully.
- Keep the Cream Filling in the Oreos: For both the crust and the chopped Oreos in the filling, use the entire cookie – cream and all! This contributes to the authentic Oreo flavor and texture throughout the pie.
- Chilling Time is Non-Negotiable: The minimum 6-hour chilling period (and preferably overnight) is absolutely essential. This allows the filling to firm up properly, ensuring clean, perfect slices and a stable pie. Patience is key for a beautifully set no-bake pie.
- Use Cold Ingredients for Whipped Cream: For best results, use very cold heavy whipping cream and even chill your mixing bowl and whisk attachment for 10-15 minutes before whipping. This helps the cream whip up faster and hold its peaks better.
Storage & Make-Ahead Instructions
One of the many advantages of this no-bake Oreo pie is how well it stores and how perfectly suited it is for making ahead of time:
- Storage: Any leftover Oreo pie should be covered tightly with plastic wrap or stored in an airtight container in the refrigerator. It will stay fresh and delicious for up to 4 days.
- Make-Ahead: This pie is an ideal make-ahead dessert! Since it requires a minimum of 6 hours to chill, you can easily prepare it the day before your event. In fact, chilling it overnight often yields the best results, as the flavors have more time to meld and the filling sets to its optimal firmness.
- Freezing: Yes, you can freeze this Oreo pie! Once completely set, wrap the entire pie (or individual slices) tightly in plastic wrap, then an additional layer of aluminum foil. It can be frozen for up to 1 month. Thaw in the refrigerator overnight before serving. Note that the texture of the crust might be slightly softer after freezing and thawing.
Classic No-Bake Oreo Pie
This Oreo pie features an Oreo crust with a smooth and creamy Oreo filling. It’s incredibly rich, delicious, and easy to make!
Prep Time: 30 minutes
Cook Time: 10 minutes (optional for crust)
Chilling Time: 6 hours
Total Time: 6 hours 40 minutes
Servings: 8 slices
Ingredients
Oreo Crust
- 24 Oreos
- 4 tablespoons unsalted butter, melted (60 grams)
No-Bake Oreo Pie Filling
- 8 ounces brick-style cream cheese, softened (226 grams)
- ⅔ cup powdered sugar (80 grams)
- 1 teaspoon pure vanilla extract
- 1 cup cold heavy whipping cream (240 ml)
- 10 Oreos, chopped
Optional Toppings
- Homemade whipped cream
- Mini or regular Oreos, chopped
Instructions
- To make the Oreo crust: Preheat the oven to 350°F (180°C).
- Add 24 Oreos to a food processor and process until you have fine crumbs. Scoop the crumbs into a mixing bowl, add the melted butter, and mix until well combined.
- Scoop the mixture into a 9-inch pie plate and firmly press it down into an even layer on the bottom and up around the sides of the dish. If needed, use the bottom of a measuring cup to help pack the crust into the pie dish.
- Bake for 10 minutes. Remove from the oven and set aside to cool completely.
- To make the Oreo pie filling: Using a stand mixer fitted with the paddle attachment, or in a large mixing bowl using a handheld mixer, beat the softened cream cheese until smooth and creamy.
- Add the powdered sugar and vanilla extract to the cream cheese mixture and mix until well combined, stopping to scrape down the sides of the bowl as needed. Set aside.
- Pour the cold heavy whipping cream into a separate, chilled mixing bowl. Start mixing on low speed, then increase the speed to medium-high until the mixture thickens and stiff peaks form.
- Add half of the whipped cream to the cream cheese mixture and gently fold it in with a spatula or mix it in on low speed with your mixer until just combined. Then, gently fold in the remaining whipped cream.
- Gently fold in the 10 chopped Oreos into the creamy filling until evenly distributed.
- Scoop the filling into the completely cooled pie crust and carefully spread it around into one even layer.
- Cover the pie tightly with plastic wrap and transfer to the fridge to chill for at least 6 hours, or ideally overnight, to allow it to set completely.
- If desired, pipe homemade whipped cream around the edges and top with additional mini or chopped Oreos right before serving for a beautiful presentation.
Notes
Storage Instructions: Cover tightly and refrigerate any leftover pie for up to 4 days. For longer storage, see freezing tips above.
Cuisine: American
Course: Dessert
Author: Danielle Rye
More Delicious Oreo Creations You’ll Love!
If you’ve fallen in love with this Oreo pie, then you’re in for a treat! The versatility of Oreos means there are endless delicious possibilities. Explore more delightful recipes that celebrate everyone’s favorite cookie: