
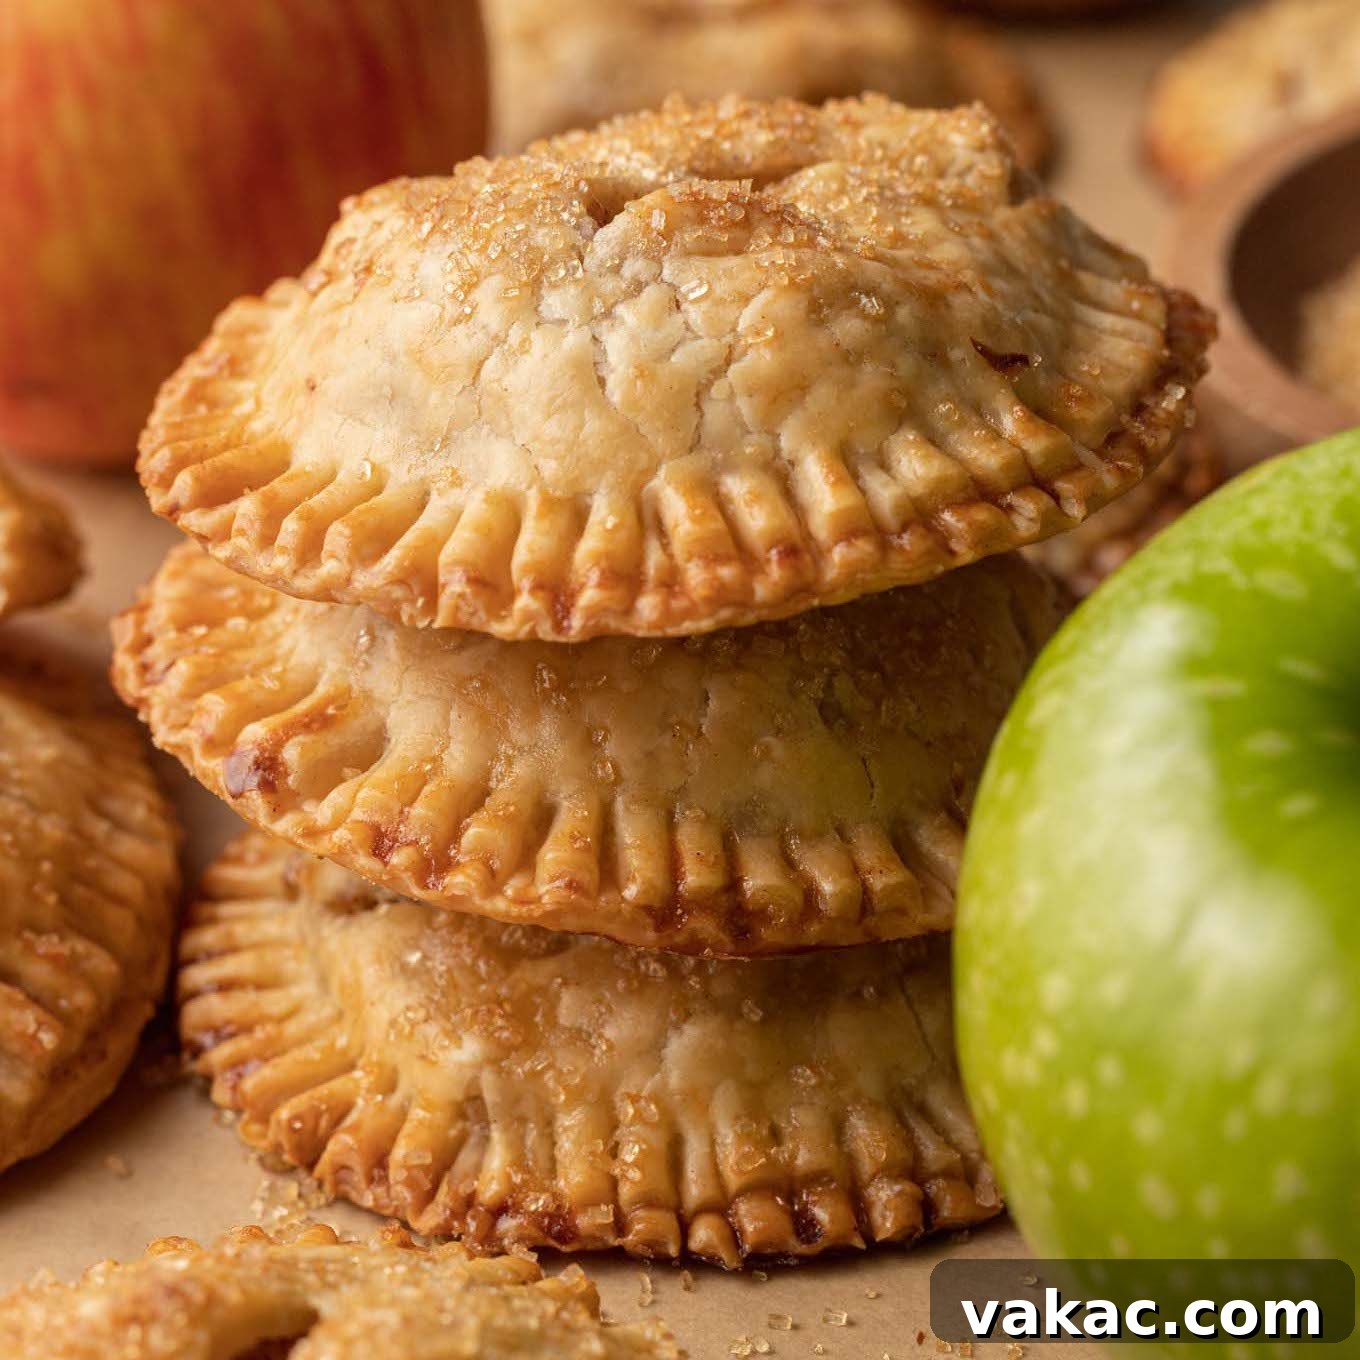
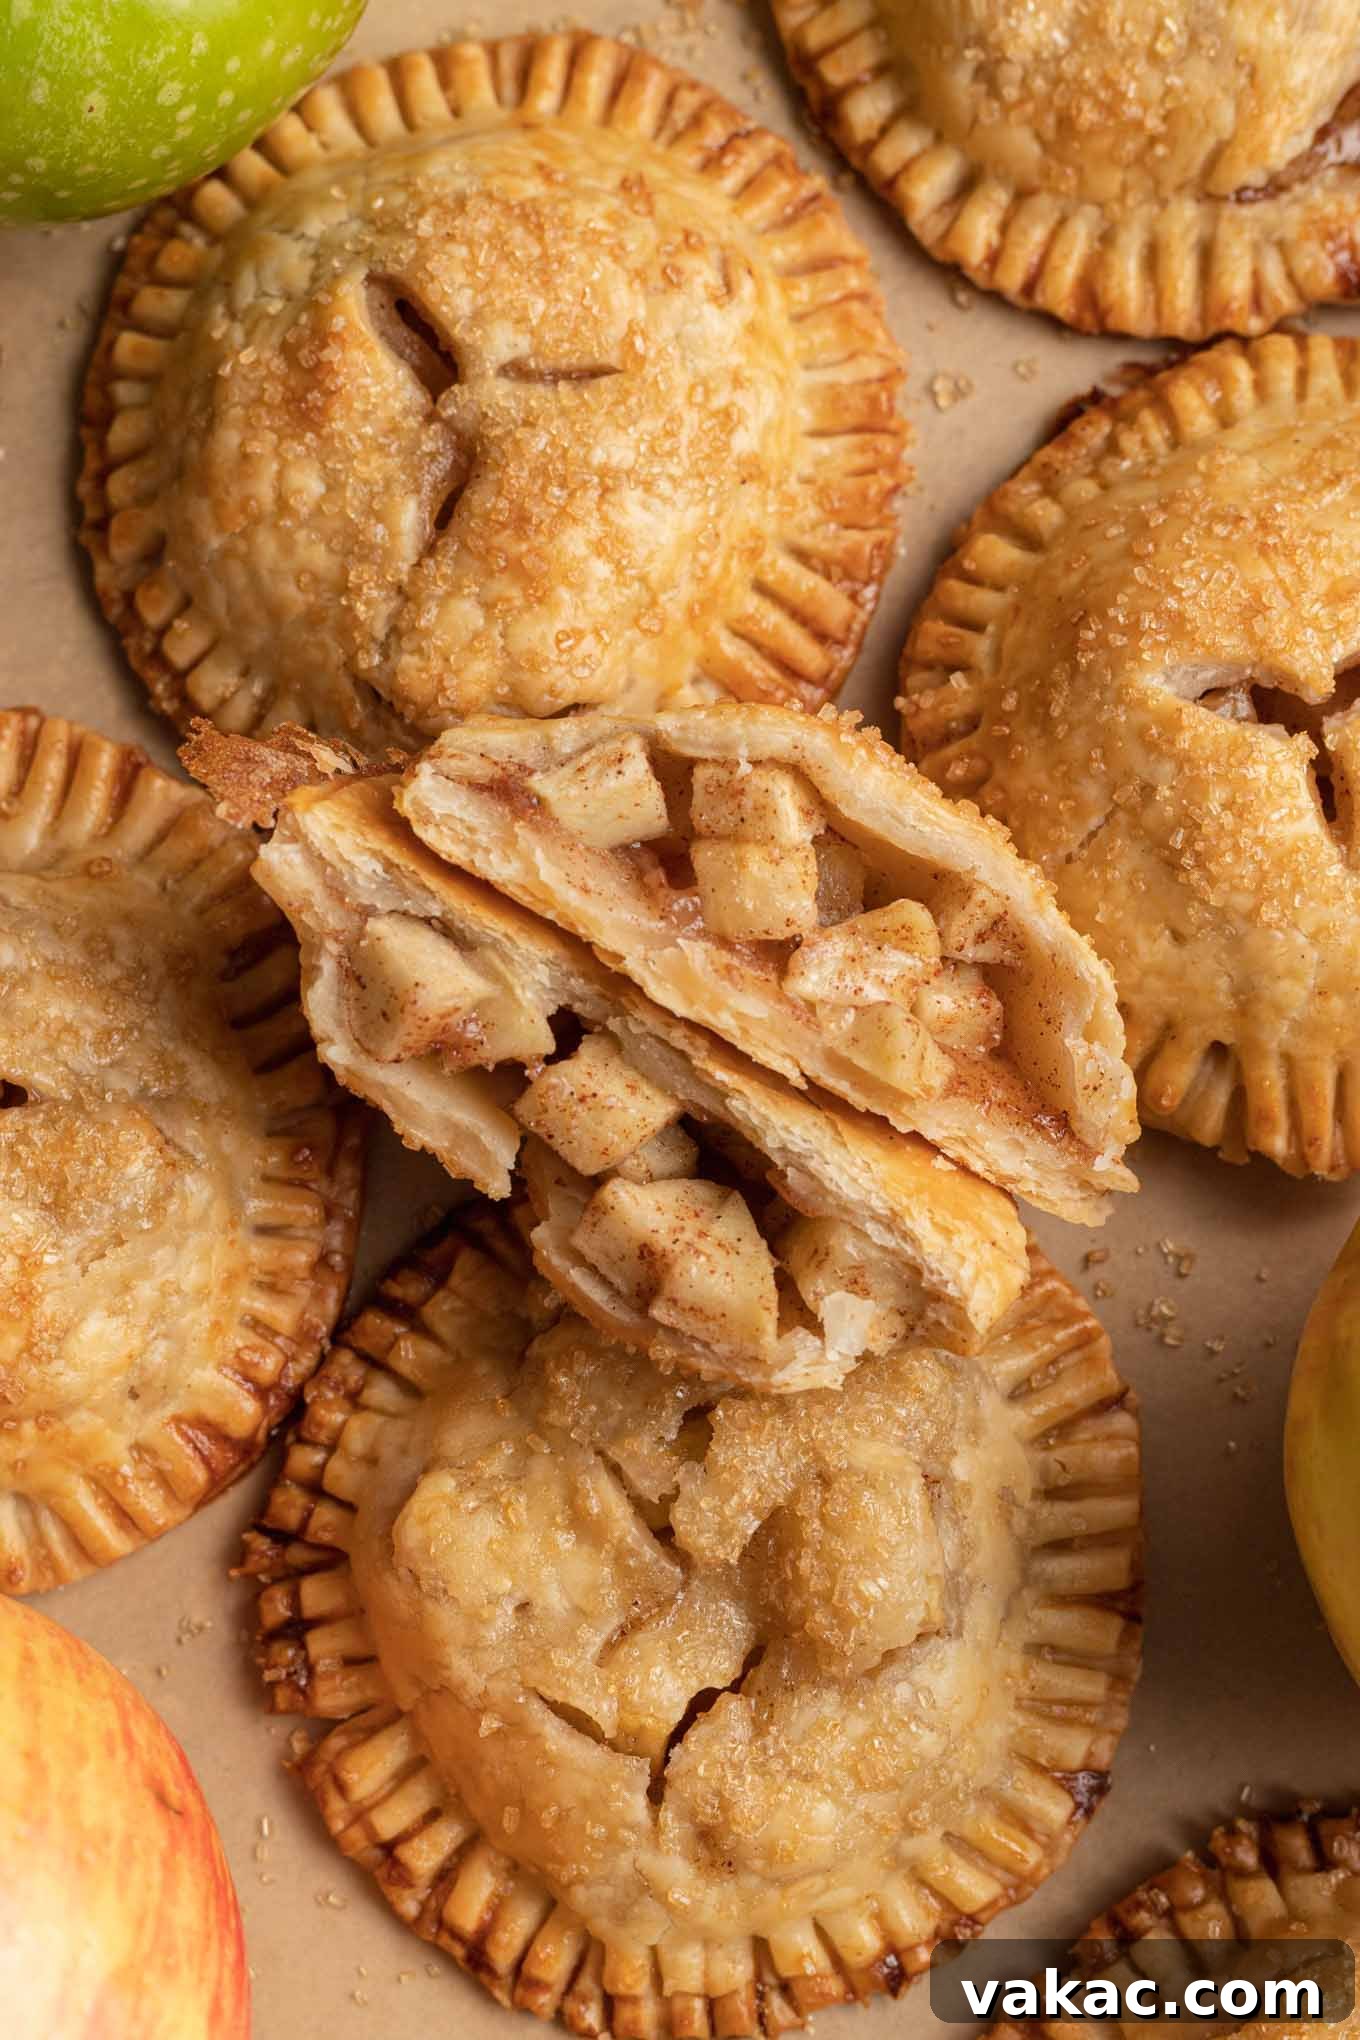
Welcome to the ultimate guide for crafting the most delightful **Apple Hand Pies**, a charming twist on the traditional American apple pie that’s perfect for any occasion, especially during the vibrant autumn season. Imagine sinking your teeth into a warm, flaky pastry, bursting with a sweet, spiced apple filling – all without the need for a fork or plate! These individual portions of pure bliss are not just desserts; they are portable bundles of comfort, ideal for holiday gatherings, casual parties, thoughtful gifting, or simply as a cozy treat enjoyed with a cup of coffee.
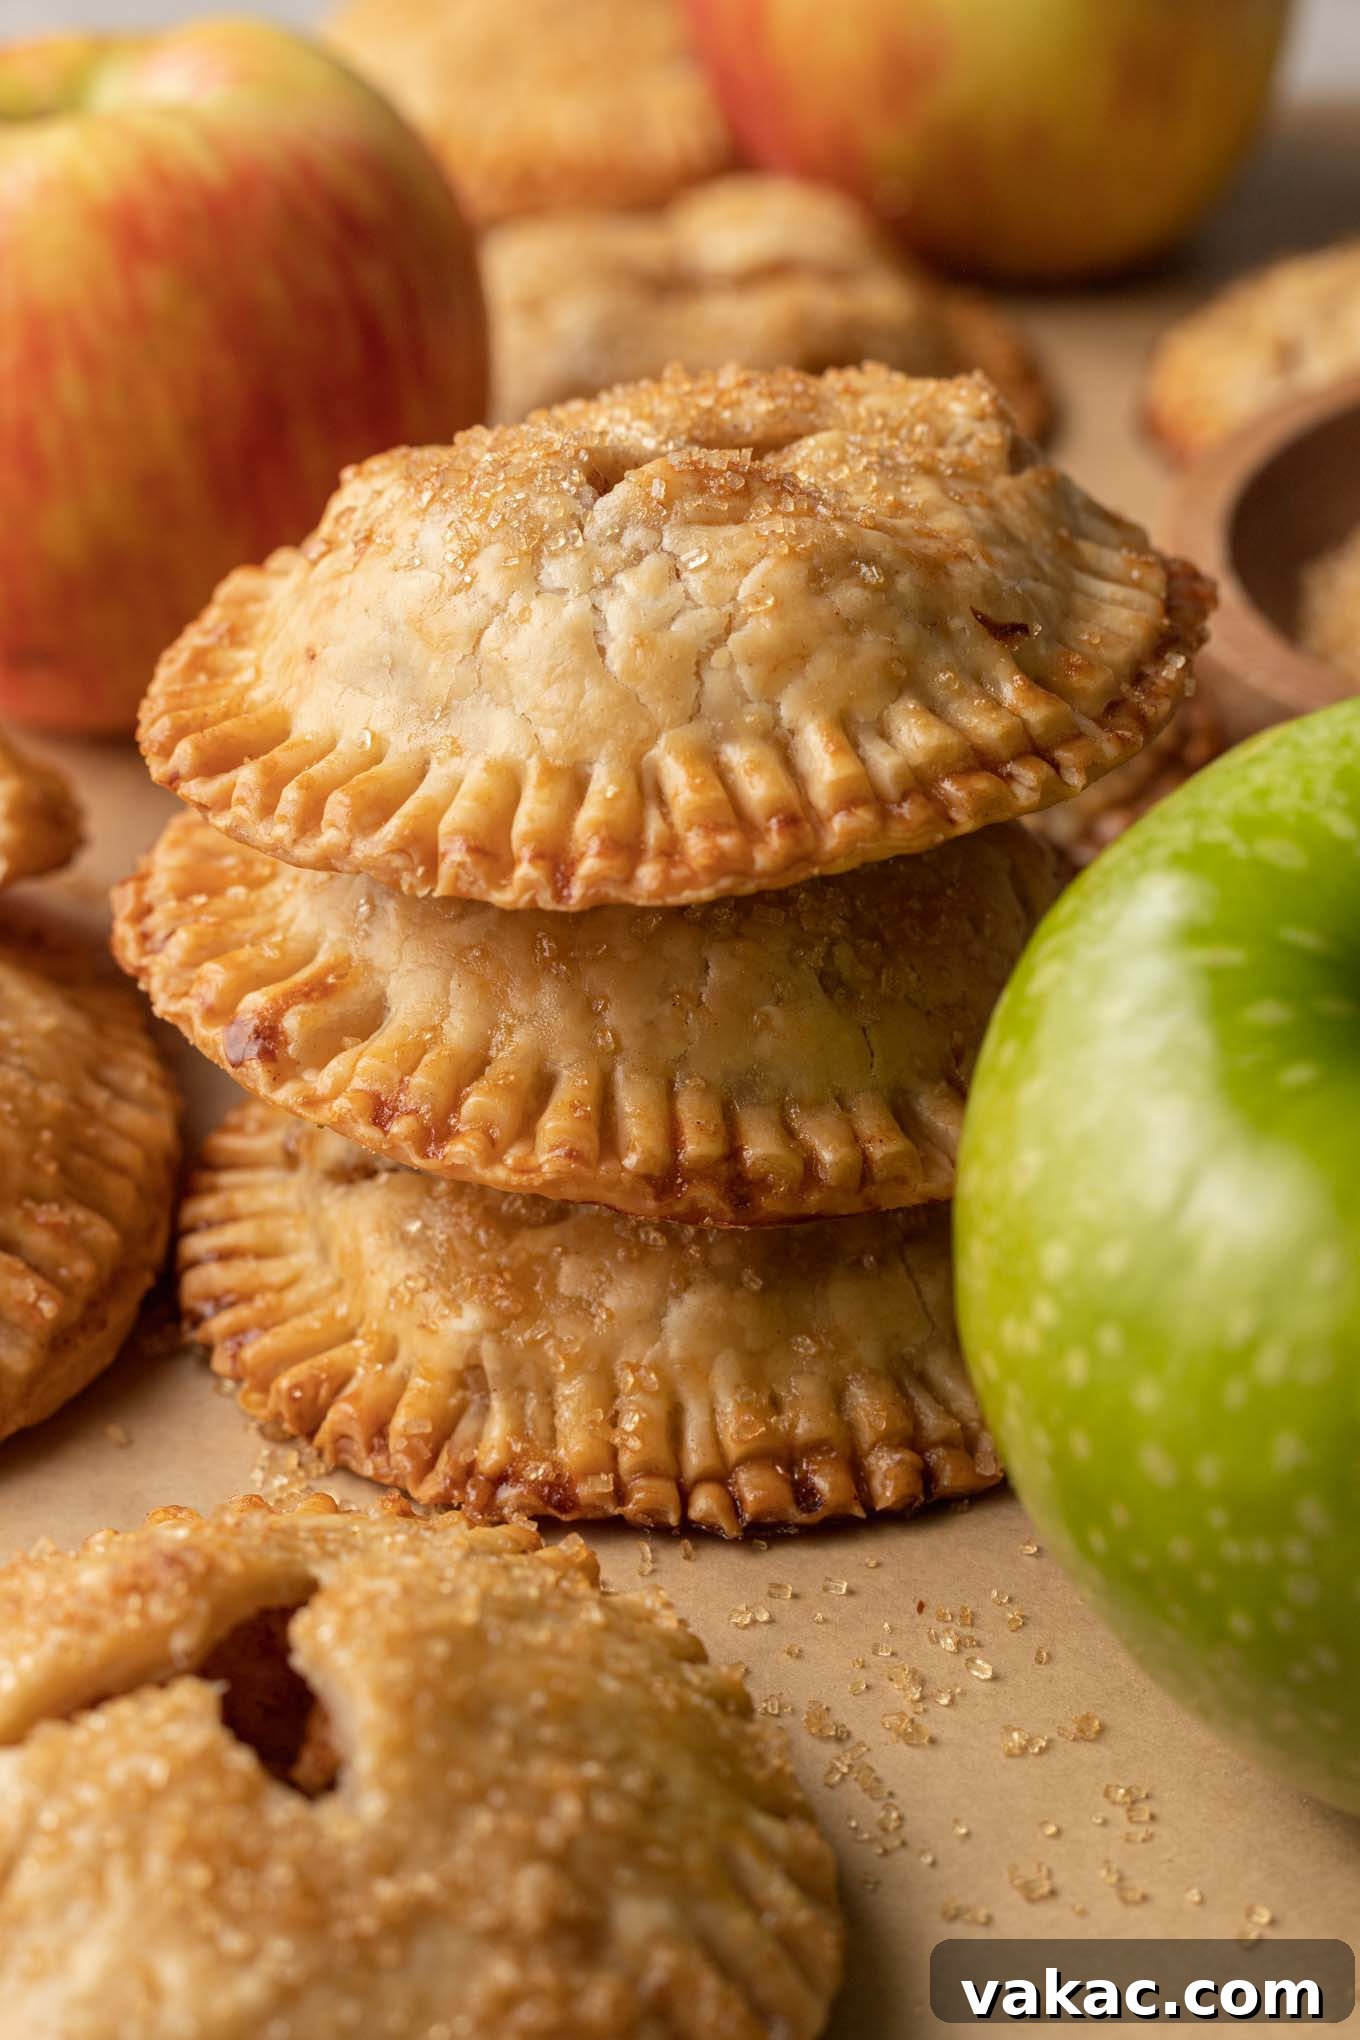
There’s an undeniable allure to handheld desserts, offering convenience and a touch of whimsy. Our **homemade apple hand pies** capture the essence of a classic apple pie – from the buttery, golden crust to the tender, spiced apple chunks – but in a perfectly portioned, easy-to-manage package. They embody everything you love about homemade apple pie: the crisp, shattering pastry, the soft and yielding fruit, and the comforting aroma of cinnamon and nutmeg, all concentrated into a personal-sized delicacy. This makes them a fantastic choice for entertaining, as guests can effortlessly grab a pie and mingle, eliminating the fuss of cutting and serving a large pie.
Planning ahead for a festive occasion or simply want to brighten someone’s day? **Apple hand pies** are incredibly versatile. They can be prepared in advance, baked, and then beautifully displayed on a platter, ready for your friends and family to enjoy. Whether it’s Thanksgiving, a cozy fall evening, a potluck, or a school bake sale, these mini pies are always a hit. For an extra touch of indulgence, I highly recommend gently warming individual hand pies in the microwave or oven and serving them à la mode with a scoop of vanilla ice cream or a dollop of freshly whipped cream. The contrast of warm pie and cool cream is simply irresistible, elevating this humble pastry to an extraordinary dessert experience.
Essential Ingredients for Perfect Apple Hand Pies
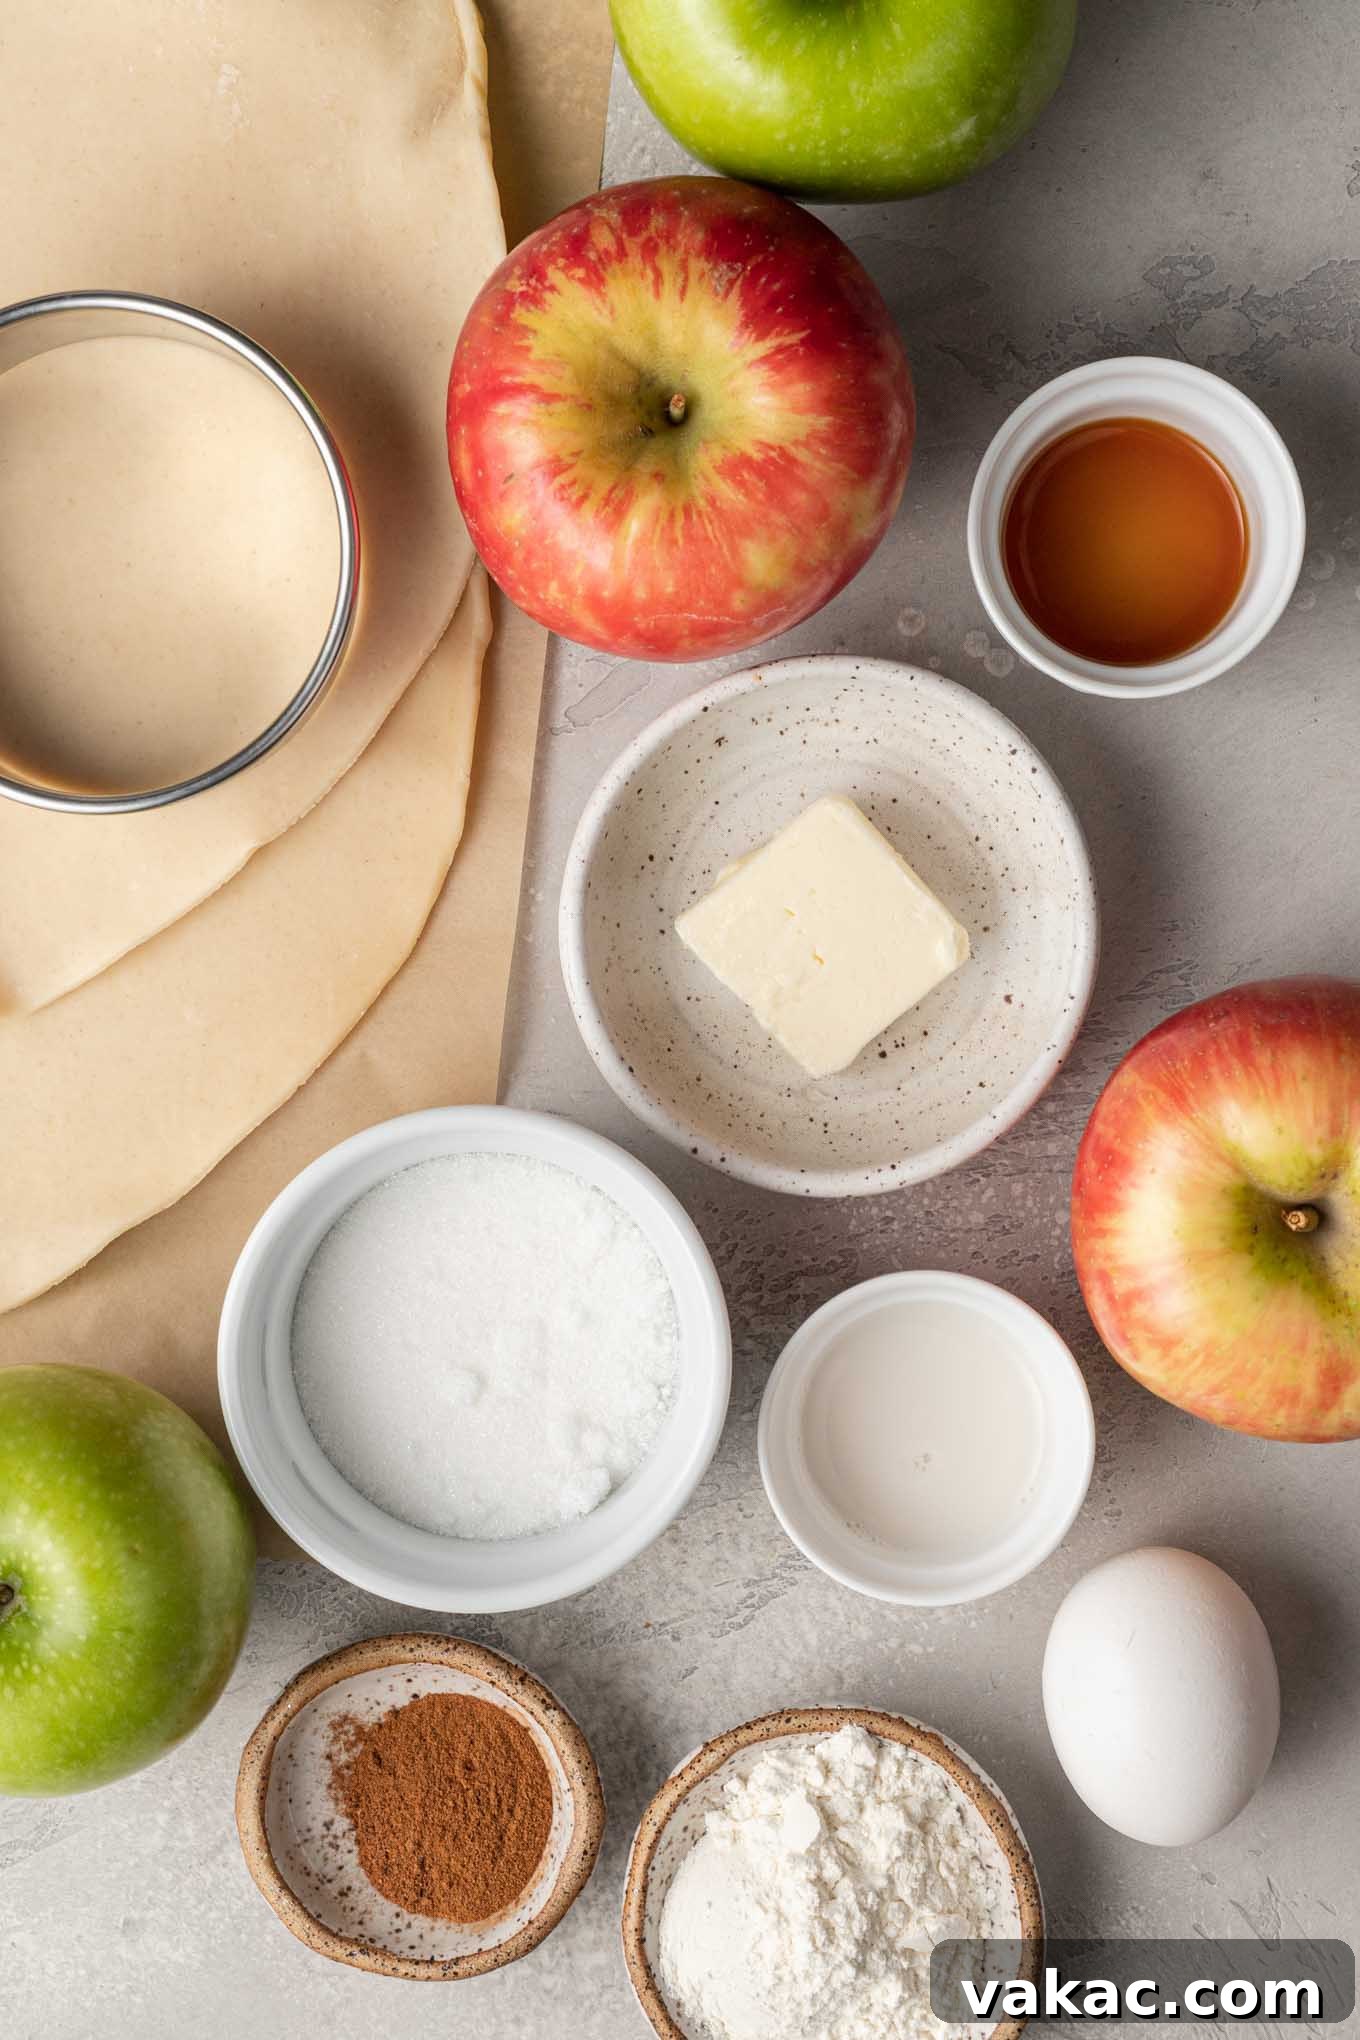
Creating these delectable **apple hand pies** utilizes many of the same wholesome ingredients you would find in a traditional apple pie, ensuring that classic, comforting flavor profile. The beauty lies in the simplicity and the quality of each component. Here’s a detailed look at what you’ll need to assemble these delightful individual apple pies:
- Pie Crust: The foundation of any great pie. While a homemade pie crust offers an unparalleled flaky, buttery texture, store-bought pie crusts are a fantastic shortcut for convenience without compromising too much on taste. Opt for a good quality brand if going the store-bought route. Whichever you choose, ensure it’s well-chilled before rolling for the best results.
- Apples: The star of the show! The type of apples you select significantly impacts the filling’s texture and flavor. I highly recommend using a mix of firm, tart, and sweet apples. My personal favorites for this recipe are a combination of crisp Granny Smith apples, known for their tartness that balances the sweetness, and Honeycrisp apples, which offer a delightful sweetness and retain their shape beautifully during baking. Other excellent baking apple varieties include Pink Lady, Fuji, Braeburn, or even Gala.
- Granulated Sugar: This provides the necessary sweetness to complement the natural tartness of the apples, creating a balanced and irresistible filling. Adjust the quantity slightly based on the sweetness of your chosen apples and your personal preference.
- All-Purpose Flour: A crucial ingredient for thickening the apple filling. It helps absorb the juices released by the apples during baking, preventing a watery filling and ensuring a luscious, well-set interior for your hand pies.
- Pure Vanilla Extract: A splash of pure vanilla extract enhances all the other flavors in the filling, adding a warm, aromatic depth that is quintessential to apple desserts. Always opt for pure vanilla extract for the most authentic and rich flavor.
- Ground Cinnamon & Nutmeg: These are the classic warming spices that give apple pie its signature cozy aroma and taste. Ground cinnamon provides a sweet, woody spice, while a touch of ground nutmeg adds an earthy, slightly pungent warmth. Feel free to adjust the amounts to suit your personal spice preference – some prefer a bolder cinnamon presence, others a more subtle hint.
- Egg & Milk for Egg Wash: Whisking an egg with a tablespoon of milk creates an egg wash. Brushing this mixture over the pie crusts before baking gives them a beautiful, glossy, golden-brown finish and adds a subtle richness to the crust. It’s a simple step that makes a big visual difference.
- Butter: Small cubes of butter placed on top of the apple filling before sealing the pies melt into the apples, making the filling richer and even more luxurious. While optional, it adds an extra layer of flavor and a slightly more tender texture to the baked apples. Even a small amount makes a noticeable difference.
Step-by-Step Guide: How to Craft Irresistible Apple Hand Pies
Making **apple hand pies** is a rewarding baking project that’s much simpler than it looks. The process involves a few straightforward steps, from preparing your flaky crust to assembling and baking these individual treats. Follow along for perfectly golden, fruit-filled pastries every time:
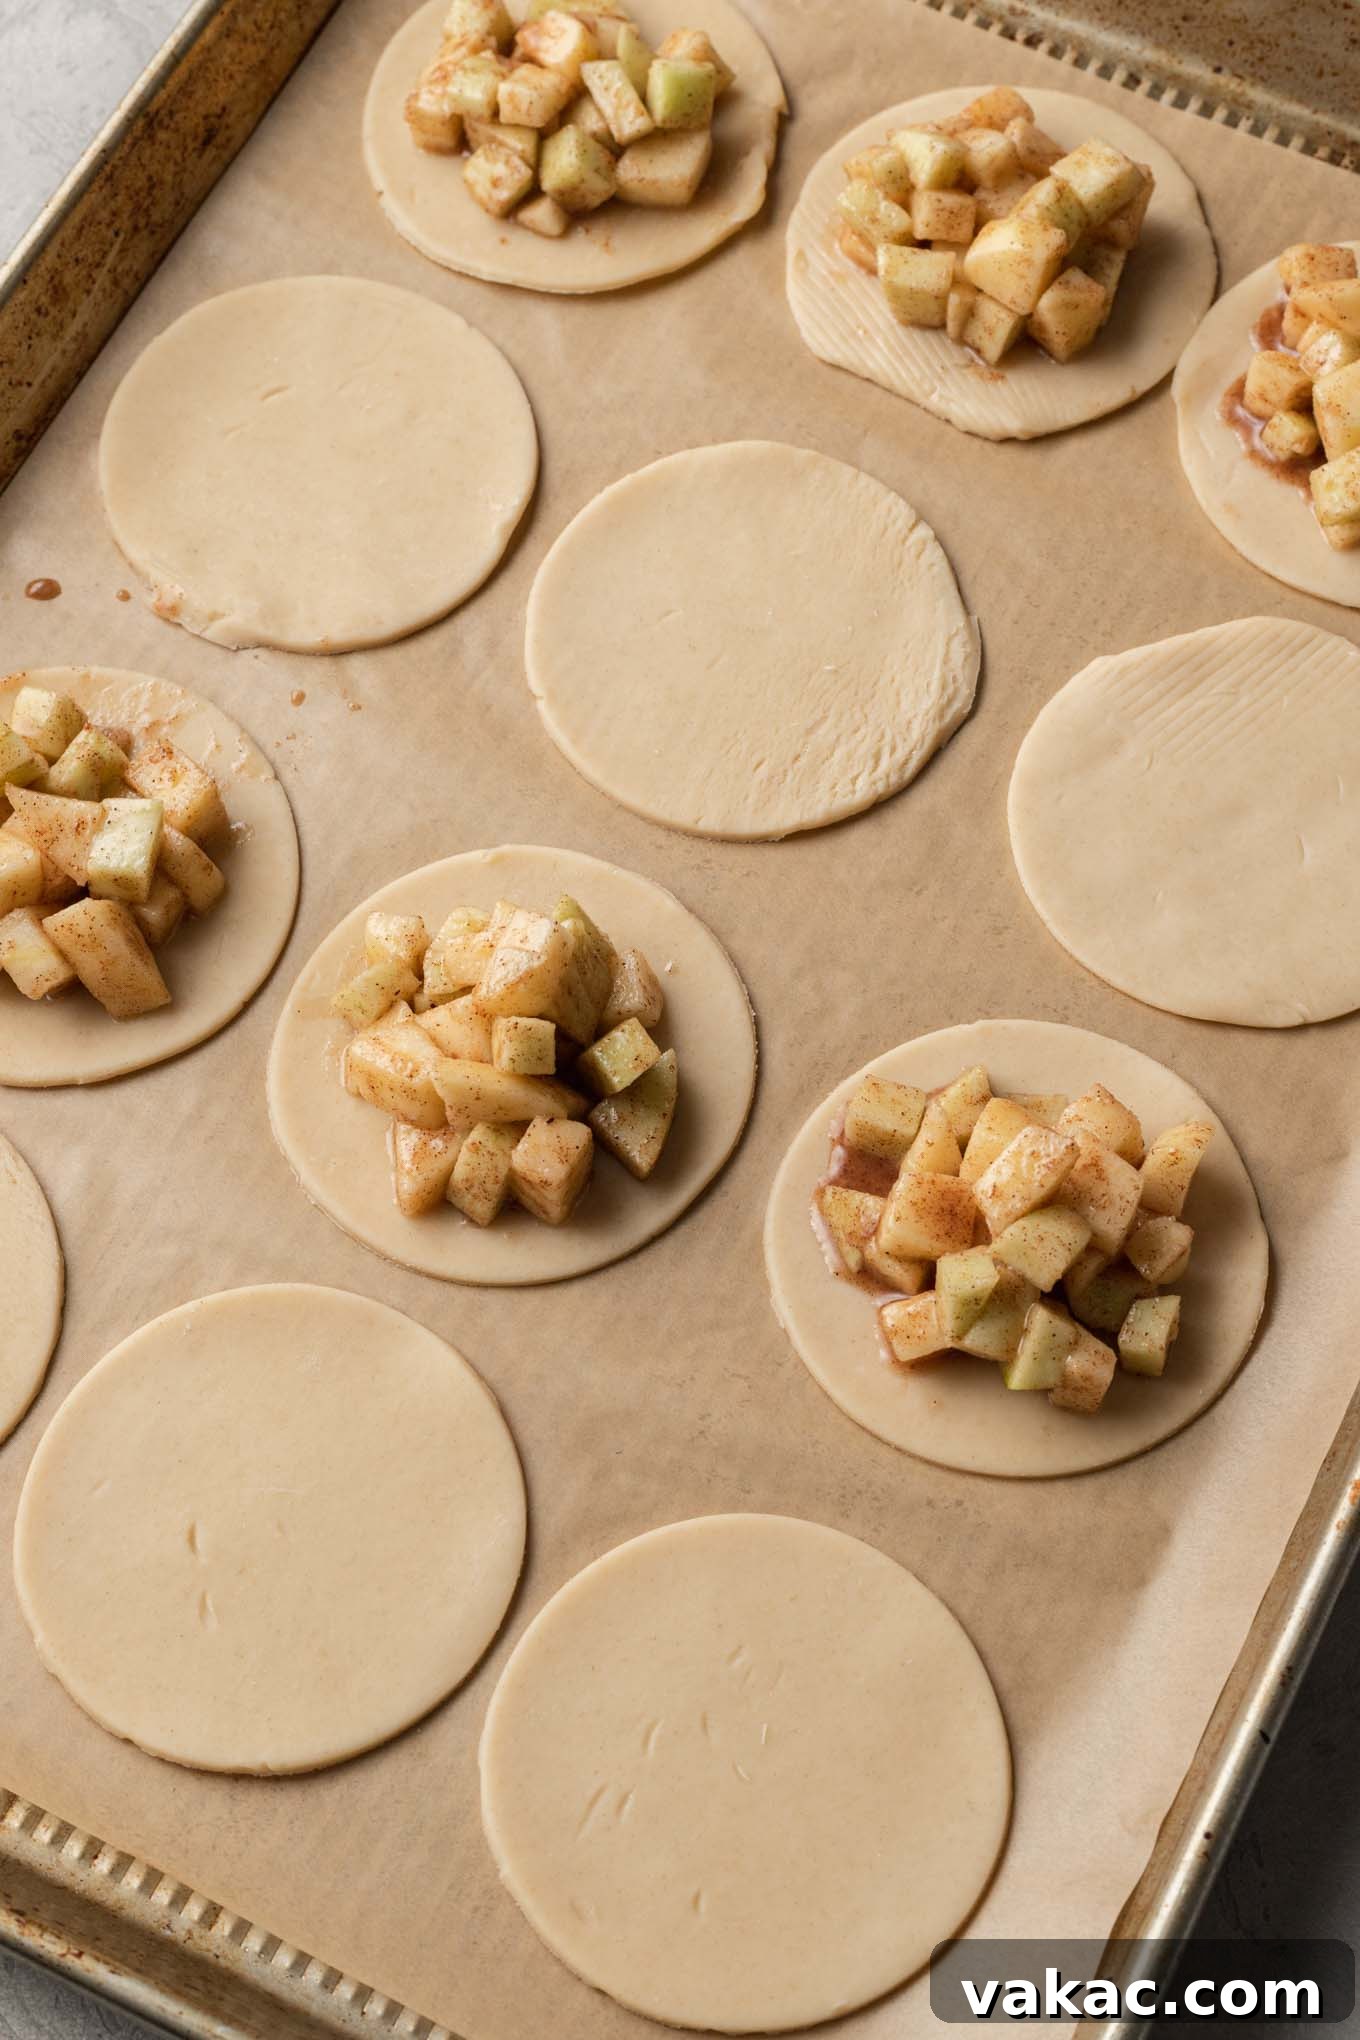
- Prepare the Pie Dough: Begin by rolling out both of your pie crusts on a lightly floured surface. Aim for a uniform thickness of approximately 1/8 inch. Using a 3.5-inch round cookie cutter or the rim of a suitable glass, cut out as many circles as possible. Gather any scrap dough, re-roll it, and cut out more circles until you have about 18 to 20 in total. Chill these circles on a baking sheet while you prepare the filling; this helps prevent shrinkage and ensures a flaky crust.
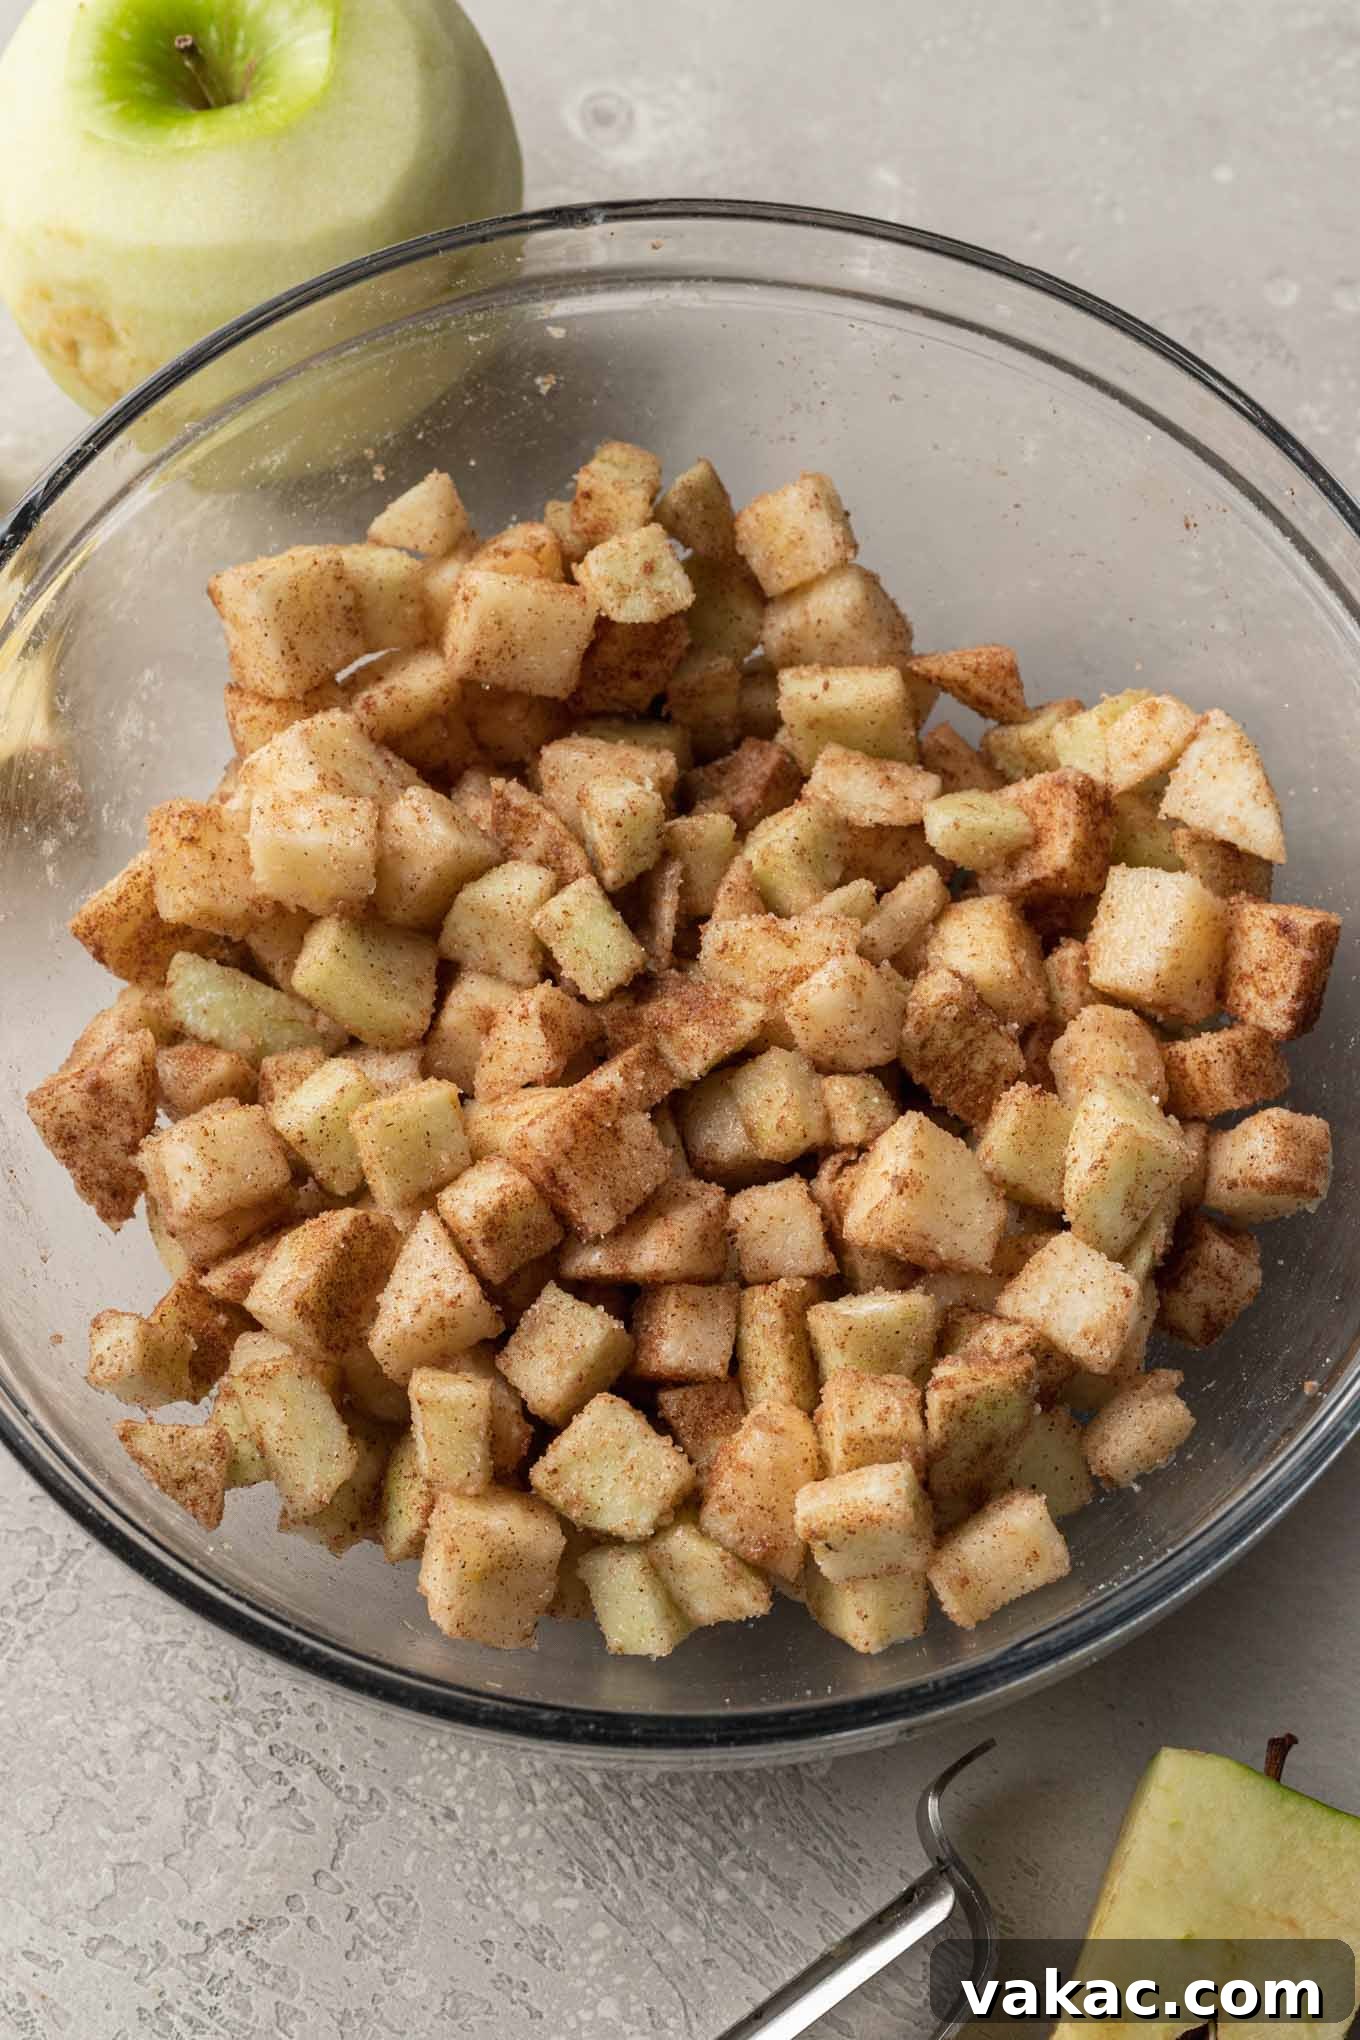
- Craft the Apple Pie Filling: In a large mixing bowl, combine your finely chopped apples with the granulated sugar, all-purpose flour, pure vanilla extract, ground cinnamon, and ground nutmeg. Toss everything together gently until all the apple pieces are thoroughly coated with the sweet and spicy mixture. Ensure the apples are diced into small, uniform pieces for even baking and easy biting.
- Assemble the Hand Pies: Retrieve your chilled pie dough circles. Arrange half of them on your prepared baking sheets. Spoon a generous portion of the apple filling onto the center of each of these circles, leaving a small border around the edge. On top of the filling, place one or two small cubes of butter. This butter will melt during baking, enriching the apple filling beautifully.
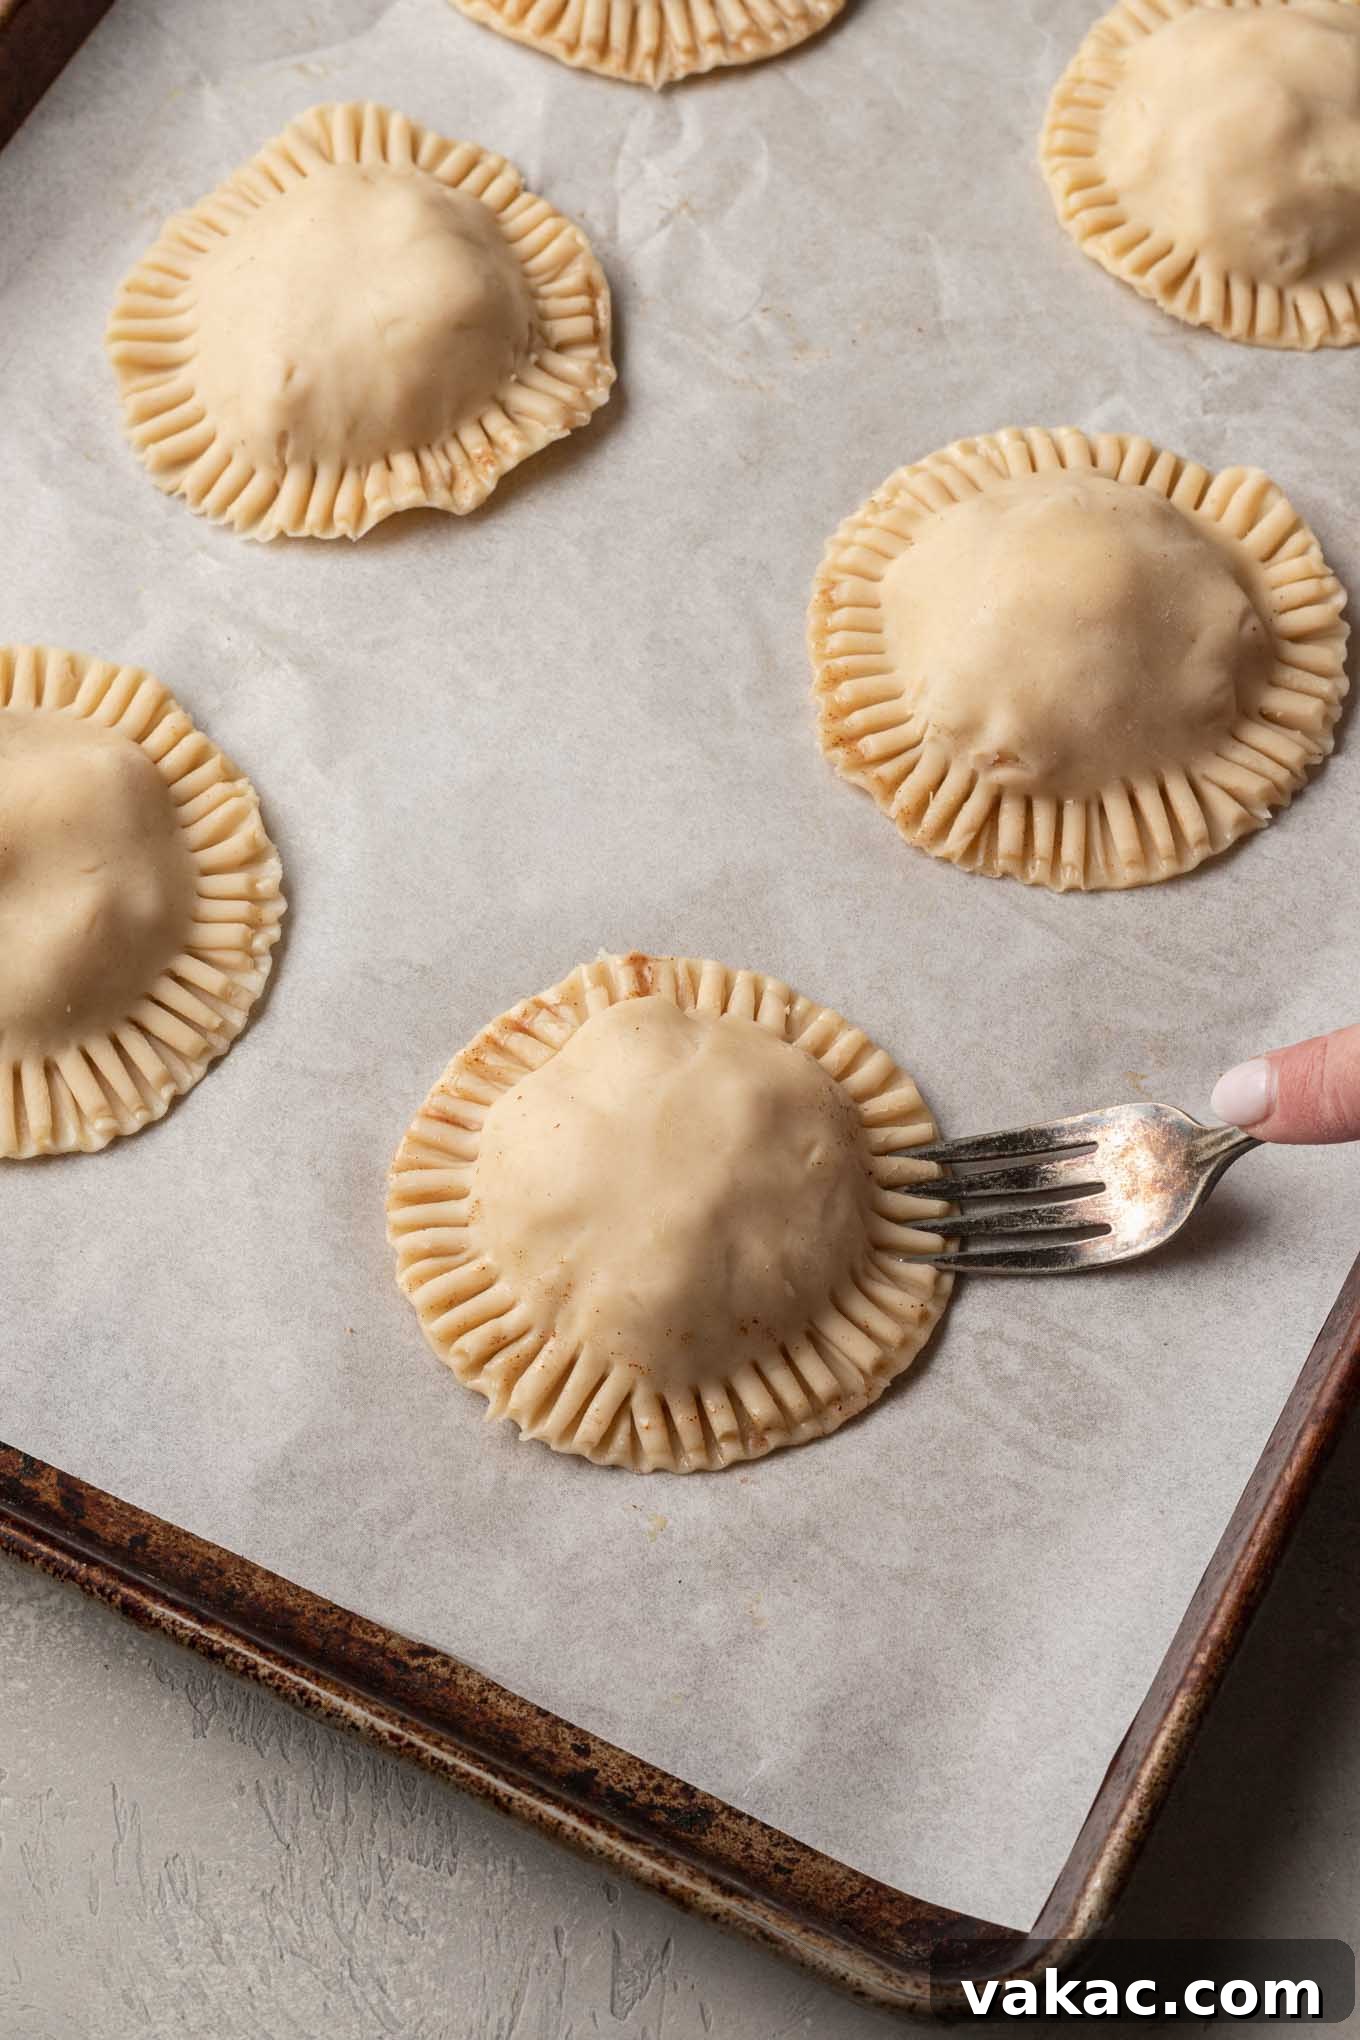
- Seal the Hand Pies: Take the remaining half of the plain pie dough circles and carefully place one over each of the filled circles, aligning the edges. To seal them securely and prevent any delicious filling from leaking out, use the tines of a fork to crimp all around the edges of each hand pie. For an even stronger seal, you can lightly moisten the edges of the bottom crust with a tiny bit of water or egg wash before placing the top crust on.
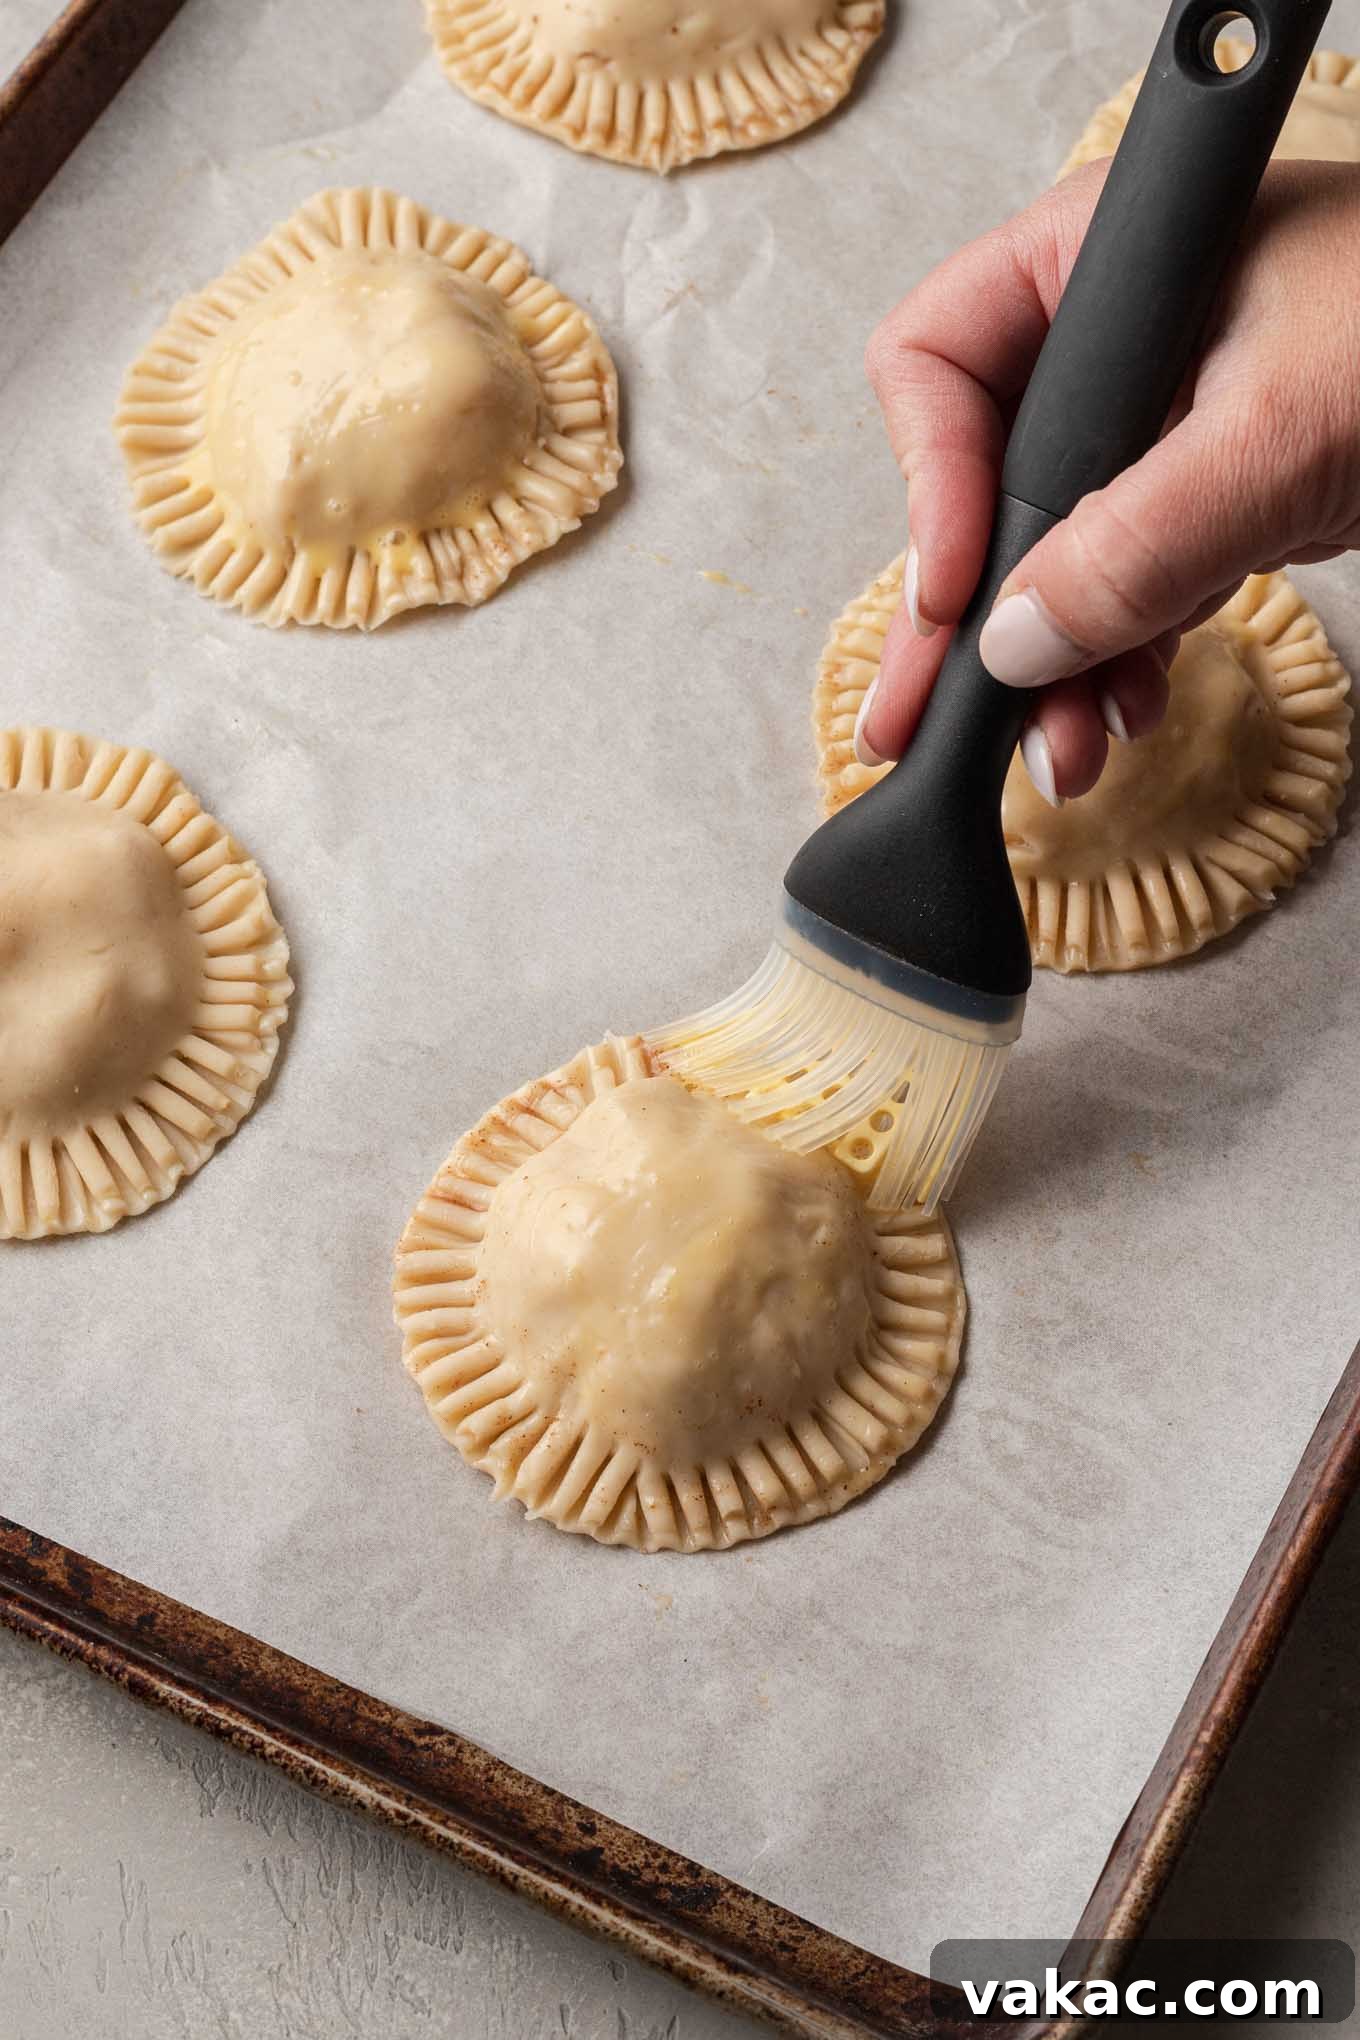
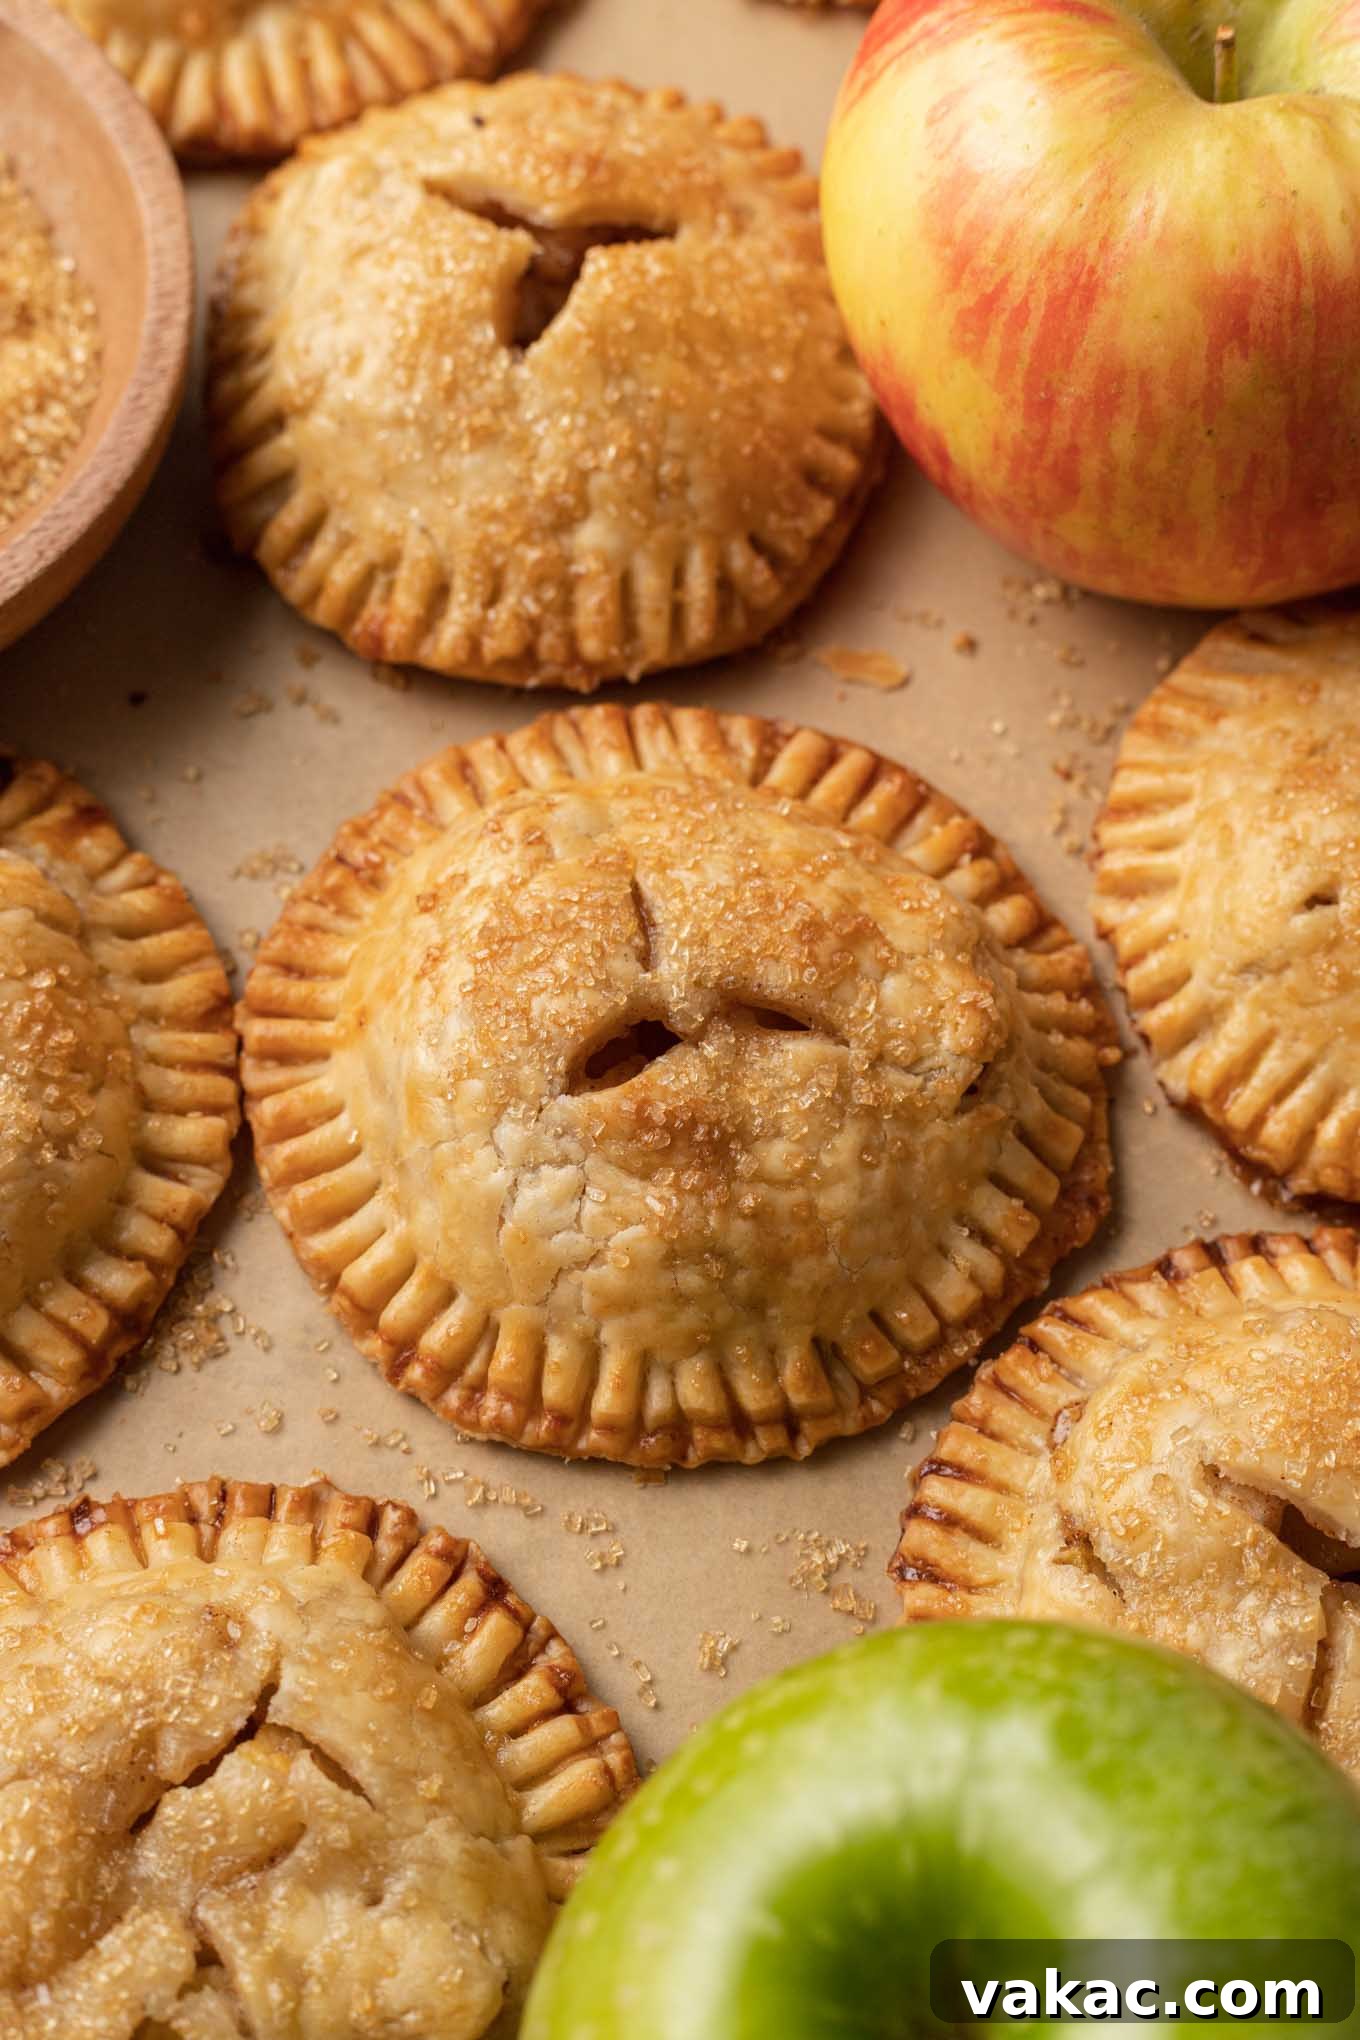
- Bake to Golden Perfection: Before baking, prepare an egg wash by whisking one large egg with a tablespoon of milk in a small bowl. Brush the top of each hand pie generously with this egg wash to ensure a beautiful golden sheen. For an optional touch of sparkle and crunch, sprinkle a pinch of coarse sugar over each pie. Finally, cut two to three small slits in the center of the top crust of each hand pie; these vents are crucial for allowing steam to escape during baking, preventing soggy crusts and ensuring the filling cooks thoroughly. Bake the hand pies in a preheated oven until they are beautifully golden brown and the filling is visibly bubbling, indicating it’s perfectly cooked.
Frequently Asked Questions About Apple Hand Pies
Here are some common questions and helpful answers to ensure your **apple hand pie** baking experience is a complete success:
No, for these hand pies, there is no need to pre-cook the apple filling on the stove. As long as you dice your apples into small, uniform pieces (about ¼ to ½ inch), they will soften perfectly within the baking time of the hand pies. The direct baking in the oven allows the apples to slowly tenderize and release their juices, which then thicken with the flour in the filling, creating a wonderfully saucy interior.
Absolutely! This recipe is incredibly versatile. You are more than welcome to experiment with other fruit fillings. Consider using cherry, berry, peach, or even a mixed fruit filling. Just ensure the fruit is diced small enough and the filling has a similar consistency to the apple pie filling to bake evenly within the pastry circles. Adjust sugar and spices according to the fruit’s natural sweetness and flavor profile.
For the perfect balance of flavor and texture, I highly recommend using a blend of firm, tart, and sweet apples. My top choices are Granny Smith for its bracing tartness that cuts through the sweetness, and Honeycrisp for its delightful crunch and sweet-tart flavor that holds up well during baking. Other fantastic baking apples include Pink Lady, Fuji, Braeburn, and Gala. Avoid overly soft or mealy apple varieties, as they tend to turn mushy when baked.
While the filling for these hand pies is delicious, I specifically formulated the ingredient ratios and cooking method for individual hand pies. If your goal is to make a full-sized traditional apple pie, I strongly recommend following a recipe specifically designed for that purpose, such as my tested and perfected classic apple pie recipe. The amount of filling, thickener, and baking time will differ significantly for a larger pie dish to ensure it sets properly and bakes evenly.
There are a few key tips to avoid a soggy bottom or top crust. Firstly, ensure your pie dough is well-chilled before baking; cold fat creates steam, leading to a flaky crust. Secondly, don’t skip cutting the small slits on top of the pies; these vents allow steam from the cooking apples to escape instead of building up and making the crust wet. Finally, make sure your oven temperature is accurate and bake until the crust is thoroughly golden brown, which indicates it’s cooked through and crisp.
Yes, these hand pies are excellent for making ahead! You can prepare and bake them completely, then store them at room temperature for up to 2 days or in the refrigerator for 3-4 days in an airtight container. For longer storage, see the freezing instructions in the Notes section of the recipe card. Reheat gently in the oven or microwave before serving for the best experience.
While delicious on their own, apple hand pies truly shine with a few simple accompaniments. A scoop of rich vanilla ice cream, a dollop of fluffy whipped cream, or a drizzle of warm salted caramel sauce elevates them into an unforgettable dessert. They are also fantastic with a sprinkle of powdered sugar, a sprinkle of extra cinnamon, or alongside a hot cup of coffee or tea for a cozy afternoon treat.
Expert Baking Tips for Flawless Apple Hand Pies
Achieving perfectly golden, flaky, and flavorful **apple hand pies** is easy with these tried-and-true baking tips. Whether you’re a novice or an experienced baker, these pointers will help you avoid common pitfalls and enhance your results:
- Uniform Apple Chopping: Ensure you meticulously peel and core your apples before chopping them. The key to evenly baked, tender filling is to chop the apples into small, uniform pieces, ideally about ¼ to ½ inch dice. Inconsistent sizes can lead to some pieces being crunchy while others are mushy.
- Creative Cookie Cutter Alternatives: Don’t own a 3.5-inch round cookie cutter? No problem! Improvise by using the rim of a large mug, a drinking glass, or even a canning jar lid of a similar size. Just make sure the edges are relatively sharp to get clean cuts in your dough.
- The Importance of Steam Vents: Never forget to cut two to three small slits into the top crust of your hand pies before baking. These tiny openings are crucial; they allow steam to escape from the apple filling as it cooks. Without them, steam can build up, making your crust soggy and potentially causing the pies to burst.
- Chill Your Dough: Keeping your pie dough as cold as possible throughout the process is vital for a flaky crust. Cold butter in the dough creates steam during baking, which separates the layers of dough, resulting in that desirable flaky texture. If your dough becomes too warm while working with it, pop it back into the refrigerator for 10-15 minutes.
- Perfect Your Seal: When crimping the edges of your hand pies with a fork, press firmly but gently. This ensures a tight seal, which is essential to prevent the filling from oozing out during baking. If the edges feel dry, a tiny dab of water or egg wash can help them adhere better.
- Monitor Baking Time: Ovens can vary, so keep a close eye on your hand pies during the last few minutes of baking. They are ready when the crust is beautifully golden brown, and you can see the apple filling bubbling through the slits. This indicates that the filling is hot and properly cooked.
- Serving Enhancements: While apple hand pies are undeniably delicious as they are, they are also wonderfully complemented by various toppings. Consider serving them with a generous dollop of homemade whipped cream, a scoop of creamy vanilla ice cream, or a luscious drizzle of salted caramel sauce. A simple dusting of powdered sugar also adds an elegant touch.
Apple Hand Pies Recipe Card
Get ready to bake a batch of these irresistible individual apple pies with our detailed recipe card below. This recipe is designed to yield beautifully golden, flaky pastries filled with a perfectly spiced apple mixture, ideal for sharing or savoring all by yourself!
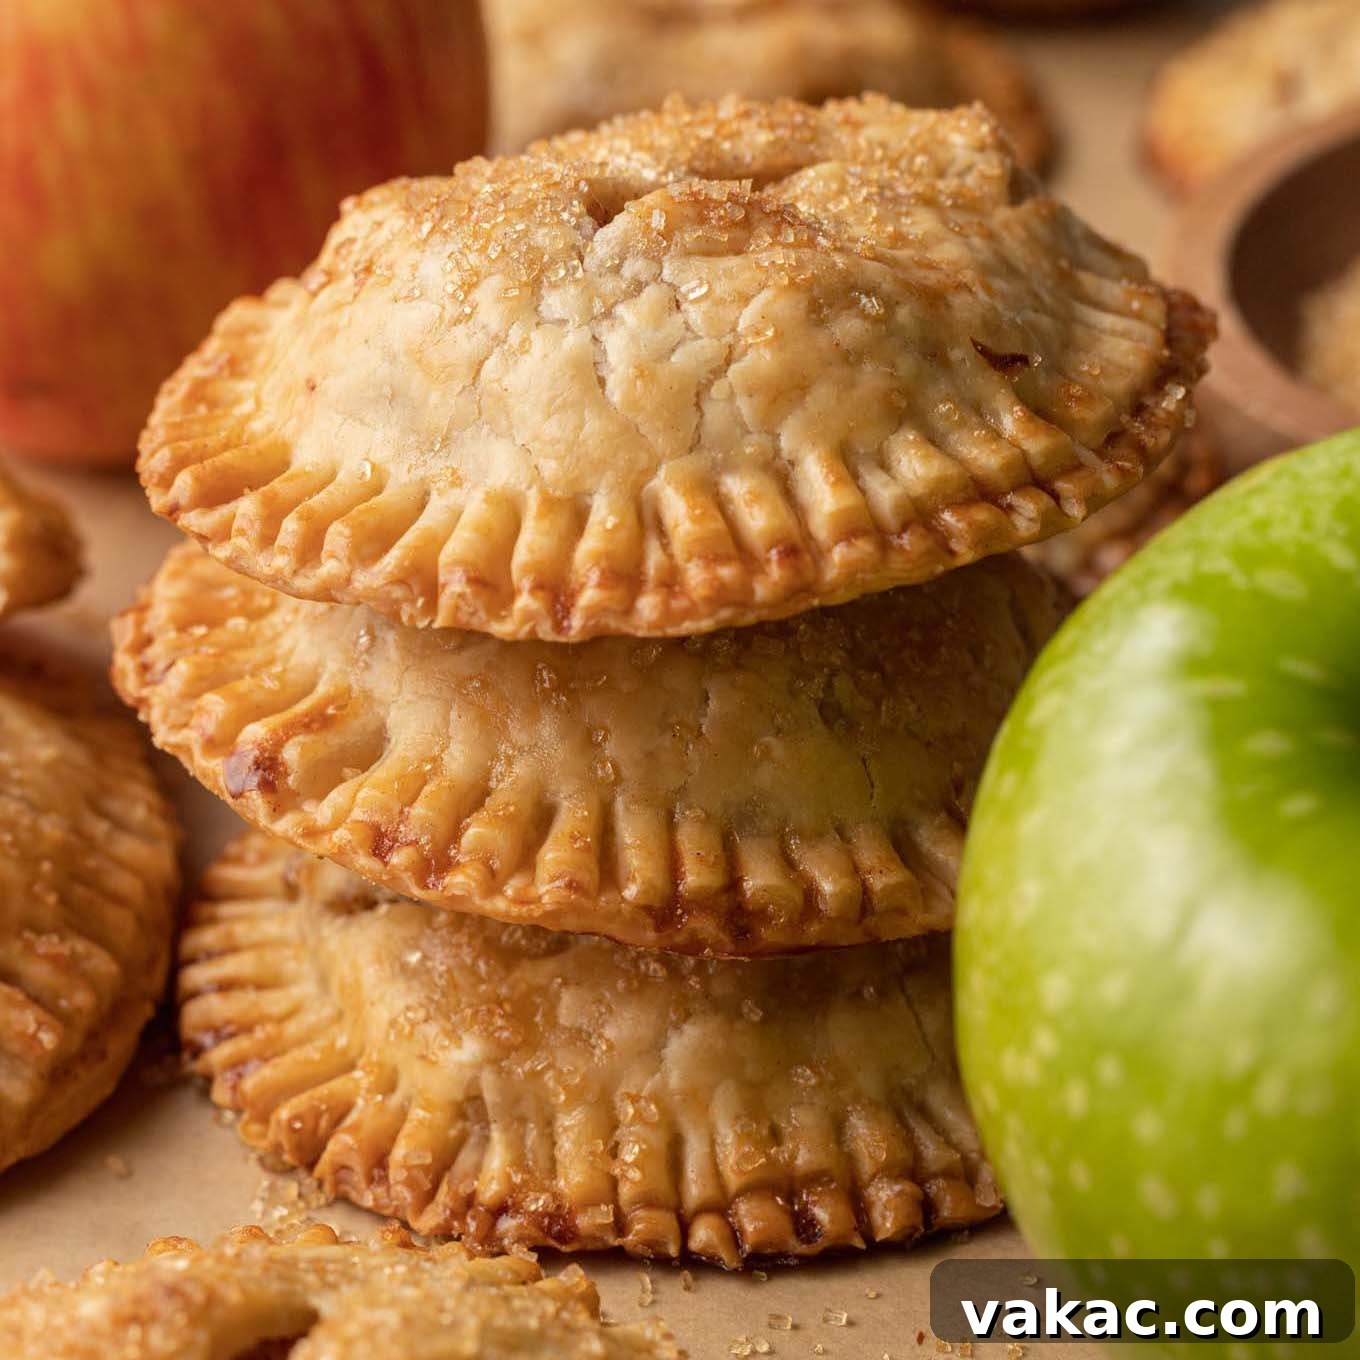
Apple Hand Pies
Pin Recipe
Leave a Review
Ingredients
- 2 pie crusts (homemade or store-bought)
- 2 cups chopped apples (240 grams)
- ¼ cup granulated sugar (50 grams)
- 2 tablespoons all-purpose flour (15 grams)
- ½ teaspoon pure vanilla extract
- ½ to 1 teaspoon ground cinnamon (adjust to your personal preference)
- ⅛ teaspoon ground nutmeg
- 1 large egg lightly beaten
- 1 tablespoon milk (15 ml)
- 1 tablespoon butter (15 grams) cubed into small pieces (optional)
- coarse sugar for sprinkling on top (optional)
Instructions
-
Preheat your oven to 400°F (204°C). Prepare 1 to 2 large baking sheets by lining them with parchment paper or silicone baking mats. Set these aside.
-
On a lightly floured clean surface, carefully roll out both pie crusts to an even thickness of about 1/8-inch. Using a 3.5-inch round cookie cutter (or a similar-sized cup or glass rim), cut out as many circles as possible from the rolled dough. Gather any dough scraps, gently re-roll them, and cut out additional circles until you have approximately 18 to 20 circles in total. Place the cut-out pie crust circles onto the prepared baking sheets and transfer them to the refrigerator to chill thoroughly while you prepare the filling. This chilling step is important for maintaining the shape and flakiness of the crust.
-
In a spacious mixing bowl, combine the chopped apples, granulated sugar, all-purpose flour, pure vanilla extract, ground cinnamon, and ground nutmeg. Toss all the ingredients together thoroughly until the apples are evenly coated with the spice and sugar mixture.
-
In a separate small bowl, whisk together the large egg and milk until they are well combined and uniform. Set this egg wash aside for later.
-
Remove the chilled pie crust circles from the refrigerator. Evenly distribute the prepared apple pie filling between half of the circles. Make sure to leave a clear border of about ½ inch around the edges of each circle, as this space is needed for sealing. Place 1 to 2 small pieces of the cubed butter directly on top of the filling on each pie.
-
Carefully place the remaining (unfilled) pie crust circles over the top of the filled circles, aligning the edges as closely as possible. To seal the pies securely and prevent the filling from escaping, gently dampen the edges of the bottom crust with a little water or the egg wash (if needed) before pressing the top crust down. Then, use the tines of a fork to firmly crimp all around the sealed edges.
-
Brush the top surface of each pie generously with the whisked egg wash. For a beautiful finish and a slight crunch, sprinkle with coarse sugar (optional). Using a sharp knife or small paring knife, cut 2 to 3 small slits into the top of each pie. These slits are essential for allowing steam to escape during baking, preventing a soggy crust and ensuring the filling cooks evenly.
-
Transfer the baking sheets to your preheated oven and bake for 18 to 22 minutes, or until the pies achieve a beautiful golden brown color on top and the apple filling is visibly bubbling through the slits. Once baked, remove the hand pies from the oven and allow them to cool slightly on the baking sheets before serving. They are delightful warm but also excellent at room temperature.
Notes
Freezing Instructions: To freeze baked hand pies, first allow them to cool completely. Arrange them in a single layer on a parchment paper-lined baking sheet and place in the freezer for 2 to 3 hours, or until fully frozen solid. Once frozen, wrap each pie tightly in plastic wrap, then transfer them to a freezer-safe bag or airtight container. They can be frozen for up to 3 months. Thaw at room temperature before reheating and serving.
Ground Cinnamon Adjustment: The amount of ground cinnamon can be adjusted to your personal preference. For those who adore a strong cinnamon flavor, using 1 teaspoon will create a more pronounced spice profile in these pies. If you prefer a milder taste, ½ teaspoon is perfectly sufficient.
Explore More Easy & Delicious Apple Desserts!
If you’re a fan of the delightful flavors of apple, especially during the crisp autumn months, then you’ll love exploring these other fantastic apple dessert recipes. From comforting classics to innovative treats, there’s an apple dessert for every craving and occasion. Expand your baking repertoire and savor the sweet, spiced taste of apples in new and exciting ways!