
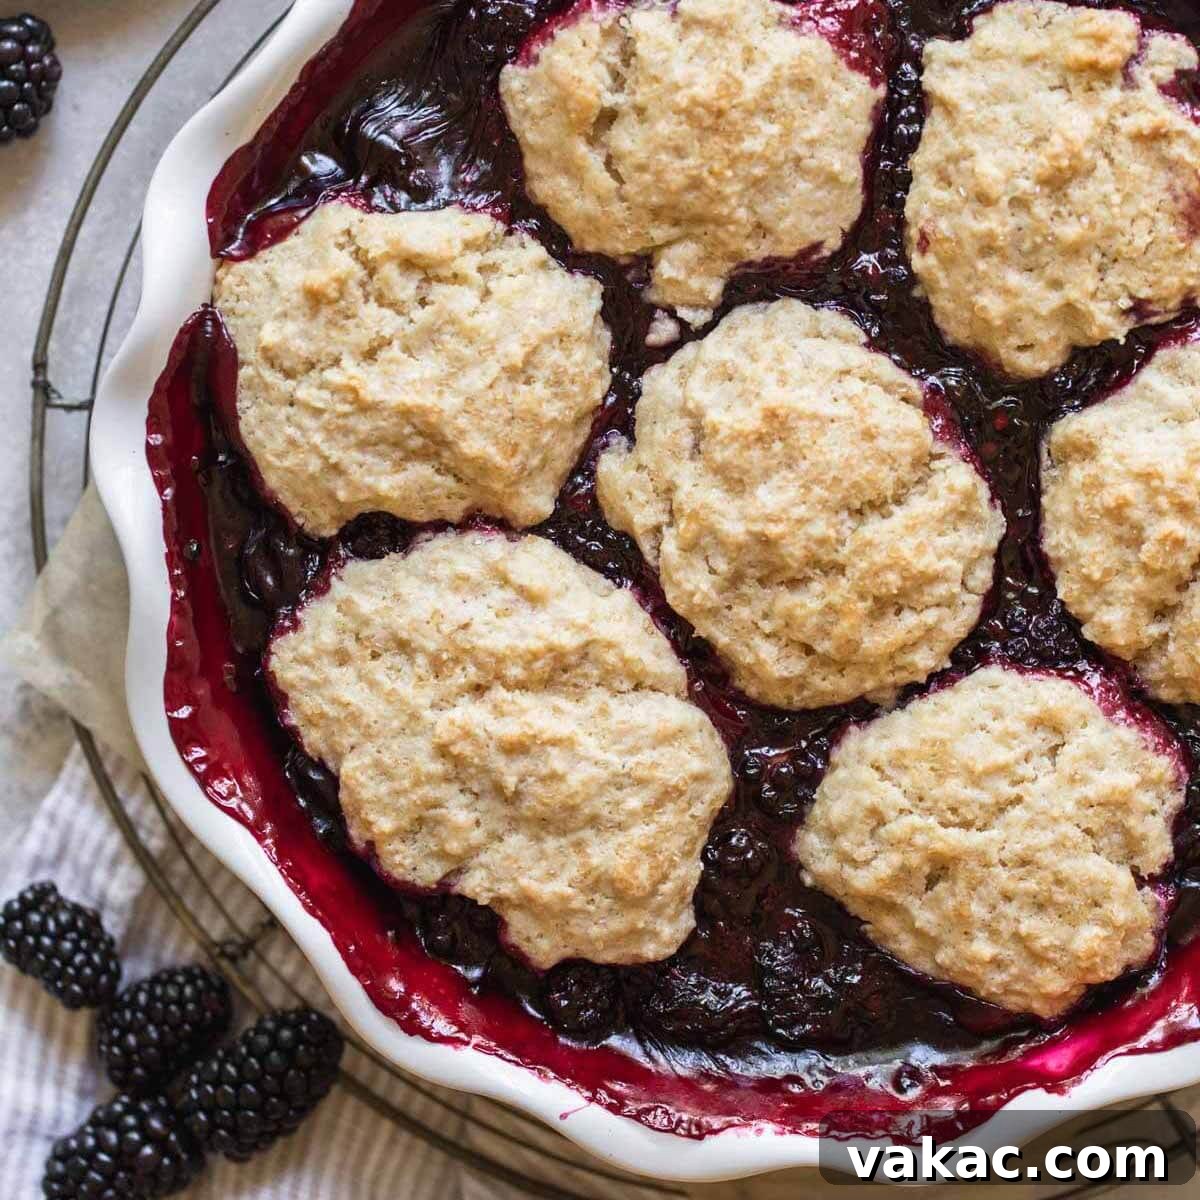
Indulge in the irresistible charm of a classic Homemade Blackberry Cobbler, featuring a luscious, sweet blackberry filling crowned with a tender, golden cinnamon-sugar biscuit topping. This versatile recipe allows you to use either fresh, peak-season blackberries or convenient frozen berries, ensuring you can savor this comforting dessert any time of the year!
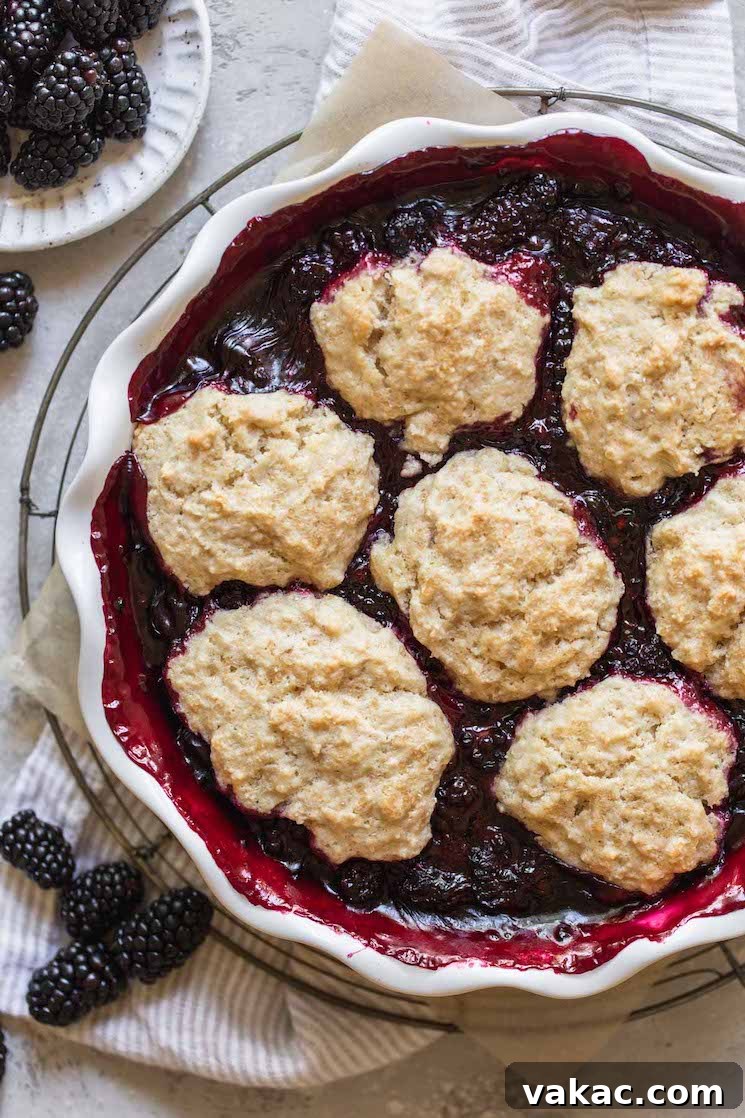
The Ultimate Blackberry Cobbler: A Timeless Dessert for Any Season
As summer graces us with its warmth and blackberry bushes burst with ripe, juicy fruit, there’s no better time to whip up a truly comforting classic: homemade blackberry cobbler. This delightful dessert captures the essence of the season with its vibrant fruit filling and a tender, sweet biscuit topping. However, the true beauty of this particular recipe lies in its incredible adaptability. Whether you’re gathering sun-kissed berries from your garden or reaching for a bag of frozen ones from your freezer, this cobbler delivers warmth, sweetness, and a touch of nostalgia with every single spoonful. It’s surprisingly simple to prepare and promises a truly exceptional biscuit topping that will have everyone at your table asking for a second helping!
Beyond its undeniably delicious taste, this comprehensive guide comes packed with invaluable tips and expert information to help you achieve cobbler perfection every single time. From selecting the best berries to mastering the delicate balance of the biscuit topping, we’ve got every detail covered. And, of course, no blackberry cobbler experience is truly complete without a generous scoop of creamy vanilla bean ice cream melting deliciously over the warm, fruity goodness. Get ready to bake a dessert that’s not just food, but a cherished memory in the making.
Why This Homemade Blackberry Cobbler Will Be Your New Favorite
- Effortless Elegance: Despite its impressive presentation and delectable, rich flavor, this cobbler is remarkably straightforward to make. It’s perfect for both novice bakers looking for a rewarding project and experienced cooks seeking a reliable, crowd-pleasing dessert.
- Seasonal & Beyond: Enjoy the vibrant taste of blackberries all year long! This recipe shines equally with fresh, plump summer berries or readily available frozen ones, making it a truly versatile and dependable dessert for any occasion, from a summer barbecue to a cozy winter evening.
- Perfectly Balanced Flavors: The sweet-tart blackberry filling offers a burst of fruity goodness, beautifully complemented by a tender, golden-brown biscuit topping. Subtly spiced with cinnamon and sugar, the topping adds a comforting warmth that pairs exquisitely with the fruit.
- Customizable Sweetness: The sweetness of blackberries can vary, so this recipe provides flexibility. You can easily adjust the sugar content to suit your personal preference or to accommodate the natural sweetness level of your chosen berries.
- A Timeless Crowd-Pleaser: A classic dessert that appeals universally to all ages, this blackberry cobbler is an ideal choice for family gatherings, potlucks, holiday meals, or simply as a comforting treat for a cozy night in.
- Warm & Comforting: There’s nothing quite as satisfying as a warm fruit cobbler served straight from the oven. The bubbling fruit and tender biscuits create an aroma that fills the home, promising pure comfort with every bite, especially when served à la mode.
- Simple Ingredients, Big Flavor: Made with common pantry staples and fresh or frozen fruit, this recipe proves that you don’t need exotic ingredients to create something truly extraordinary and bursting with flavor.
Essential Ingredients for Your Perfect Blackberry Cobbler
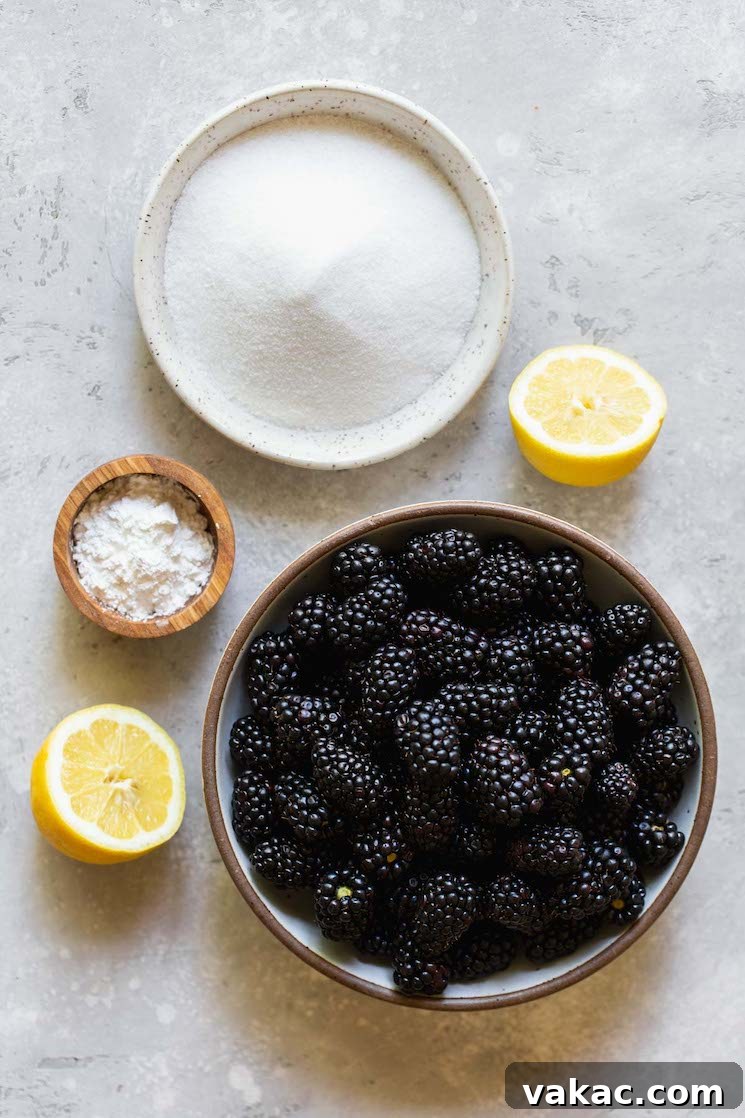
Crafting this delightful homemade blackberry cobbler requires two distinct yet equally important components: the vibrant fruit filling and the irresistibly fluffy biscuit topping. Each ingredient plays a crucial role in achieving the desired texture, flavor, and overall success of this beloved dessert. Pay close attention to the quality and preparation of each for the best results.
For the Sweet & Tangy Blackberry Filling:
- Blackberries: The undisputed star of our cobbler! You will need approximately 5 cups of blackberries for this recipe. For optimal flavor, seek out berries that are plump, deep purple or almost black, and slightly soft to the touch – these visual cues indicate full ripeness and maximum natural sweetness. As previously mentioned, both fresh and frozen blackberries integrate beautifully into this recipe. If you opt for frozen berries, there’s no need for thawing; simply add them straight to the saucepan. Just be aware that frozen berries contain more water, which might necessitate a few extra minutes on the stovetop for the filling to properly soften and thicken.
- Granulated Sugar: This key ingredient provides the necessary sweetness to balance the inherent tartness of the blackberries, culminating in a perfectly palatable and delectable filling. Depending on the natural sweetness of your chosen berries and your personal taste preference, you have the flexibility to adjust the amount of sugar, potentially reducing it if your berries are exceptionally sweet.
- Cornstarch (also known as Cornflour): An indispensable thickening agent for the fruit filling. Cornstarch effectively transforms the released berry juices into a thick, luscious, and glossy sauce, which is crucial for preventing a runny cobbler. It is activated by heat, so pre-cooking the filling on the stovetop ensures it reaches the ideal, spoonable consistency before baking.
- Fresh Lemon Juice: A squeeze of fresh lemon juice is a culinary game-changer here! It masterfully brightens the overall flavor profile of the blackberry filling, providing a delightful zing that cuts through the sweetness and elevates the berries’ natural taste. Do not be tempted to skip this ingredient, as it truly makes a significant difference in enhancing the complexity and vibrancy of the dessert.
For the Irresistible Cinnamon Sugar Biscuit Topping:
- All-Purpose Flour: This forms the foundational structure of our biscuit topping, providing it with its classic tender crumb and airy texture. Accurate measurement of flour is paramount; always employ the spoon and level method (gently spoon flour into a dry measuring cup, then level off the top with a straight edge) to avoid compacting the flour, which can unfortunately lead to a dense and dry topping.
- Granulated Sugar: Beyond merely adding sweetness, sugar in the biscuit topping plays a vital role in its development. It contributes to the beautiful golden-brown crust and helps create that delicate, melt-in-your-mouth texture that makes cobbler so appealing.
- Baking Powder & Salt: These are the essential leavening agents responsible for giving the biscuits their characteristic lift, height, and wonderfully tender texture. Baking powder reacts with moisture and heat to create crucial air pockets within the dough, while a touch of salt expertly enhances and balances all the other flavors in the dish, preventing the topping from tasting flat or bland.
- Ground Cinnamon: A thoughtful addition of ground cinnamon imparts a warm, inviting, and aromatic spice note that pairs exquisitely with the sweet-tart blackberries. While optional, it is highly recommended for achieving that classic cobbler aroma and taste. If you don’t have cinnamon on hand, or prefer a different spice profile, a pinch of nutmeg or allspice could also work, or you can simply omit it for a pure, unadulterated biscuit flavor.
- Cold Unsalted Butter: This ingredient is absolutely crucial for achieving a truly tender and flaky biscuit topping. The butter must be cold and cut into small cubes. When these cold butter pieces are cut into the flour mixture, they create small pockets of fat. As the cobbler bakes, this cold butter melts, releasing steam and thereby creating those highly desirable light, airy, and flaky layers within the biscuit. Using unsalted butter also grants you precise control over the overall saltiness of your finished dish.
- Milk: Provides the necessary moisture to bring the biscuit dough together. While whole milk is often preferred for its slightly richer flavor and texture contribution, 2%, 1%, skim, or even a non-dairy alternative like unsweetened almond milk will work perfectly well, providing sufficient liquid without significantly compromising the final texture of the topping.
Step-by-Step Guide: How to Make the Perfect Blackberry Cobbler
Creating this delicious homemade blackberry cobbler is a remarkably straightforward process, broken down into two main stages: preparing the vibrant fruit filling and mixing the irresistible biscuit topping. Following these detailed steps will ensure you achieve a perfectly baked, comforting dessert with ease, ready to impress!
1. Prepare Your Oven and Baking Dish:
Begin by preheating your oven to 400°F (204°C). Ensuring the oven is at the precise correct temperature before the cobbler goes in is crucial for promoting even baking and achieving that perfect golden-brown crust. Next, lightly but thoroughly spray an 8-inch square baking pan or a 9-inch round pie dish with non-stick cooking spray. This essential step will prevent the luscious fruit filling from sticking to the pan and make serving your beautiful cobbler much easier and cleaner.
2. Cook the Blackberry Filling:
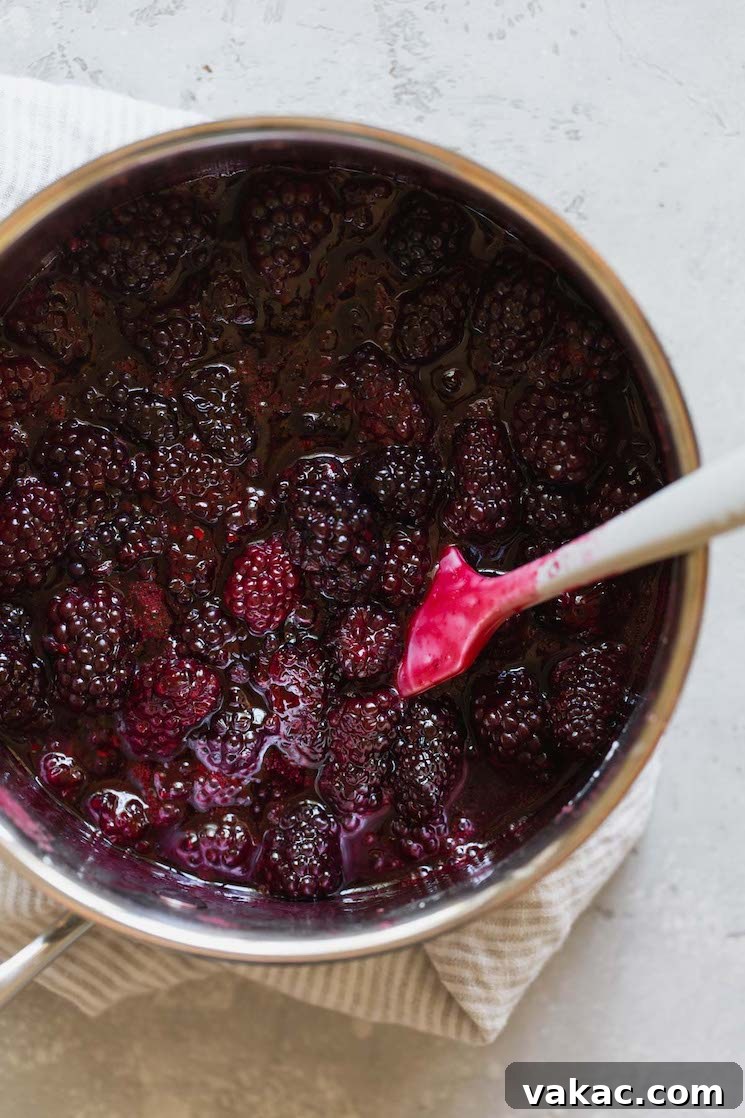
One of the true secrets to a superior cobbler is ensuring the fruit filling is not only tender but also perfectly thickened. Since the biscuit topping bakes relatively quickly (typically within 20-25 minutes), pre-cooking the fruit filling on the stovetop is vital. This technique provides the blackberries with ample time to soften properly and allows their released juices to thicken to a syrupy consistency, preventing a watery cobbler. In a large saucepan, combine your fresh or frozen blackberries, granulated sugar, cornstarch, and fresh lemon juice. Stir these ingredients together until everything is uniformly combined and the cornstarch is fully dissolved. Place the saucepan over medium heat, stirring occasionally to prevent any sticking or scorching at the bottom. Bring the mixture to a gentle boil, then reduce the heat slightly and allow it to simmer for approximately 3 to 5 minutes, or until the blackberries have visibly softened and the filling has thickened to a rich, glossy, and syrupy consistency. You’ll notice the sauce transforming from watery to a more robust, flavorful glaze.
3. Transfer the Filling to the Baking Dish:
Once the blackberry filling has achieved the desired consistency and is bubbling gently, carefully remove the saucepan from the heat. With caution, pour the hot, aromatic blackberry filling into your previously prepared baking dish, spreading it evenly across the bottom. Set the dish aside to cool slightly while you proceed with preparing the delectable biscuit topping. This brief cooling period helps to prevent the cold biscuit dough from getting too warm too quickly when it’s placed on top of the fruit.
4. Prepare the Cinnamon Sugar Biscuit Topping:
While your delightful blackberry filling cools slightly, shift your focus to preparing the exquisite biscuit topping. In a medium-sized mixing bowl, meticulously whisk together the all-purpose flour, granulated sugar, baking powder, ground cinnamon, and salt. Ensure these dry ingredients are thoroughly combined and evenly distributed. Next, introduce your crucial cold, cubed unsalted butter. Using a pastry cutter, two knives, or even your clean fingertips, “cut in” the butter into the flour mixture until it closely resembles coarse meal with distinct small, pea-sized crumbs. The fundamental key here is to keep the butter as cold as humanly possible and, crucially, to avoid overworking it with your hands, as excessive handling can warm the butter and develop gluten, which will lead to a tough, rather than tender, biscuit. Finally, pour in the milk and stir gently and briefly until the ingredients are just combined. Mix only until no dry streaks of flour remain in the bowl; overmixing will regrettably develop the gluten too much, resulting in a less tender and flaky topping.
5. Assemble and Bake the Cobbler:
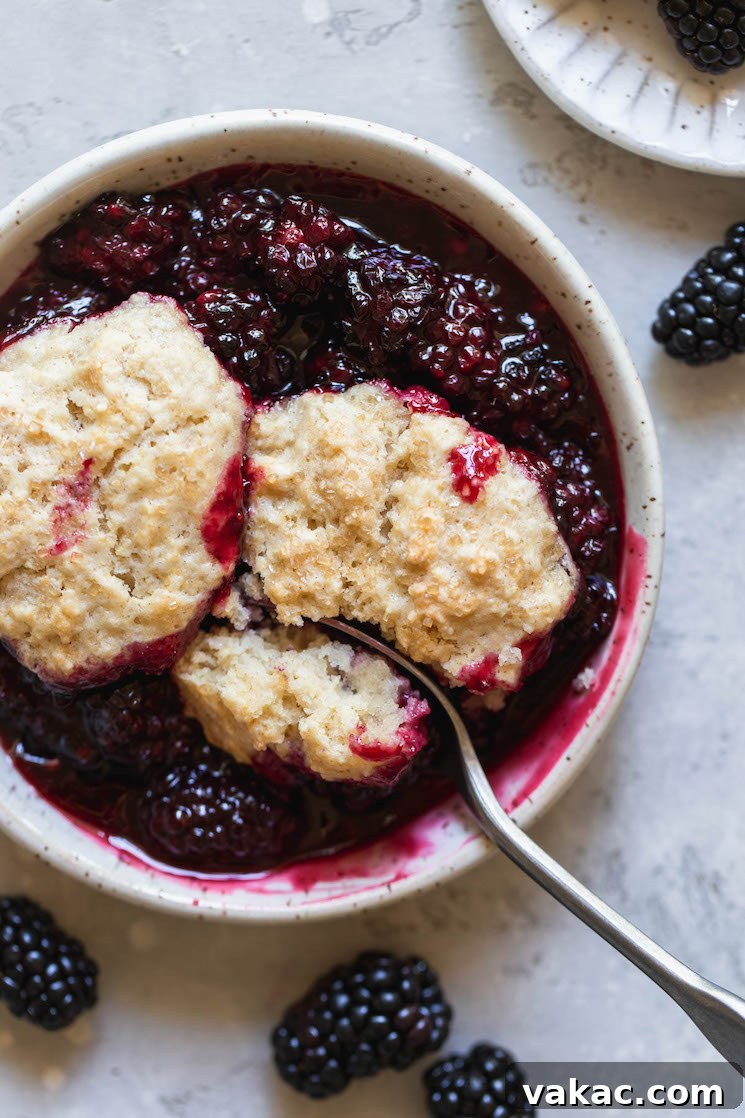
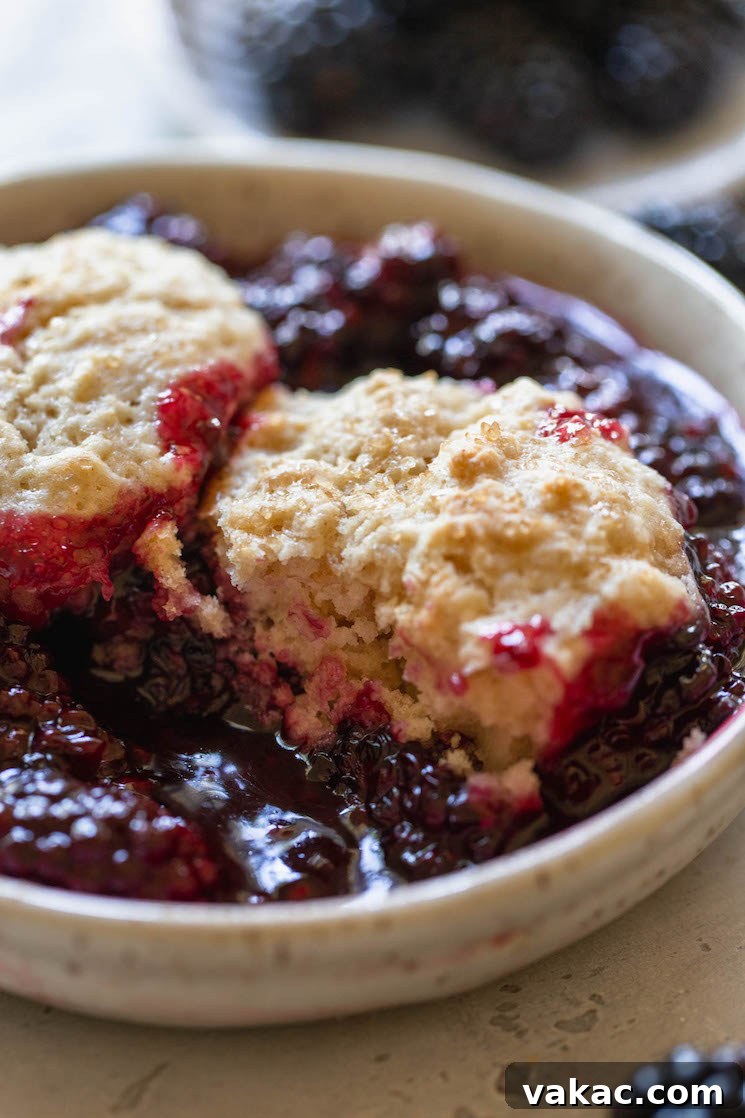
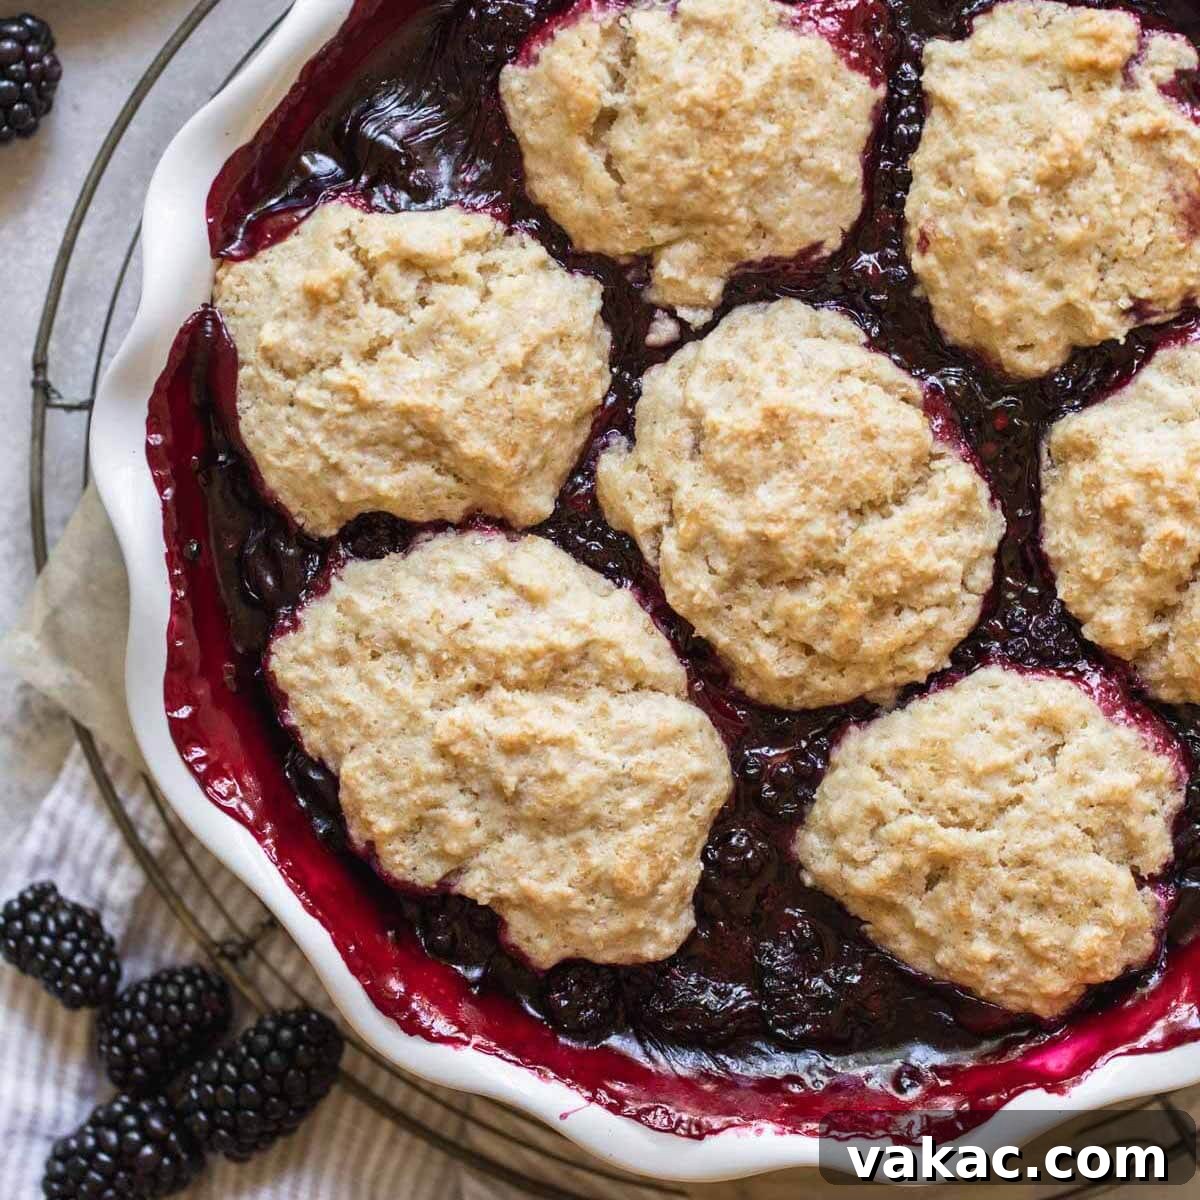
With both delicious components now ready, it’s time for the exciting assembly phase of your cobbler! Take generous spoonfuls of the prepared biscuit topping dough and gently drop them evenly over the warm, prepared blackberry filling. For an 8-inch square dish, aim for about 9 spoonfuls, distributing them strategically to cover most of the surface area. If you’re using a 9-inch round pie dish, approximately 7 spoonfuls usually work perfectly to create an attractive, rustic topping. For an extra touch of sparkle and a delightful textural crunch, consider sprinkling a generous amount of coarse sugar (such as turbinado or demerara sugar) or even just regular granulated sugar over the biscuit topping before placing it in the oven. This thoughtful addition adds a beautiful glistening finish and an extra layer of sweetness. Carefully place the assembled cobbler into your preheated oven. Bake for approximately 20 to 25 minutes, or until you observe the blackberry filling visibly bubbling enticingly around the edges, and the biscuit topping has transformed into a beautiful golden brown color and is cooked thoroughly. A simple test: a toothpick inserted into the center of a biscuit should emerge clean, indicating it’s perfectly done.
6. Cool Before Serving for Optimal Enjoyment:
Once your blackberry cobbler is baked to golden perfection, carefully remove it from the oven. It’s incredibly tempting to dive in immediately, but allowing it to cool for a crucial 20 to 30 minutes is highly recommended for the best experience. This essential cooling period allows the fruit filling to set further, achieving its ideal thick, saucy consistency, and crucially prevents it from being excessively hot, ensuring you can enjoy it at the perfect warm temperature without burning your tongue. Furthermore, during this cooling phase, the flavors within the cobbler meld and deepen beautifully, resulting in an even more harmonious and delightful dessert.
How To Prepare Blackberry Cobbler Ahead of Time
While this blackberry cobbler is undeniably at its best when enjoyed fresh from the oven, certain components can be intelligently prepared in advance. This strategy can significantly save you time and effort, making it an ideal dessert solution, especially when you are entertaining guests or planning for a busy week.
- Preparing the Filling in Advance: You can completely cook the blackberry filling ahead of time. Once it’s fully prepared and removed from the heat, transfer the warm filling into a clean, heat-proof dish or an airtight container. Allow it to cool entirely at room temperature before securely covering it. The cooled filling can then be stored safely in the refrigerator for up to 2 days. When you’re ready to assemble and bake, simply scoop the chilled filling directly into your chosen baking pan. Do keep in mind that starting with a cold filling may slightly increase your overall baking time, so plan accordingly.
- Prepping the Biscuit Topping Components: It is generally not recommended to fully mix the biscuit topping dough too far in advance. This is because the butter can soften and the leavening agents (like baking powder) can begin to lose their potency over time, potentially resulting in a less tender and airy biscuit. However, you can efficiently prepare the dry ingredients and cut in the butter beforehand. In a bowl, thoroughly whisk together the all-purpose flour, granulated sugar, baking powder, ground cinnamon, and salt. Then, proceed to cut in the cold, cubed butter until the mixture achieves a coarse crumbly texture. Cover this dry mixture tightly and store it in the refrigerator for up to 2 days.
- Assembling and Baking from Prepped Components: When you are ready to bake your spectacular cobbler, begin by preheating your oven to 400°F (204°C) and preparing your baking pan with non-stick spray. Scoop the pre-cooked, chilled blackberry filling into the prepared pan. Retrieve your prepped biscuit topping mixture from the refrigerator, add the specified amount of milk, and stir just until combined – remember to avoid overmixing. Generously drop spoonfuls of this freshly mixed biscuit topping over the cold fruit filling. Place the assembled cobbler in the oven and bake as directed. Since both the filling and the topping components will be cold when they enter the oven, be prepared to extend the baking time by an additional 5 to 10 minutes, monitoring closely. The ultimate goal is for the fruit filling to be robustly bubbling and the biscuit topping to be beautifully golden brown and fully cooked through.
Tips for Storing & Reheating Your Delicious Blackberry Cobbler
Proper storage is essential to ensure you can enjoy your delightful blackberry cobbler for several days after it’s baked. Here’s how to best maintain its freshness and reheat it for optimal enjoyment, preserving its wonderful flavors and textures:
- Storing the Baked Cobbler: Once your homemade blackberry cobbler has cooled completely to room temperature (this is important to prevent condensation), cover it tightly with plastic wrap or aluminum foil. Alternatively, you can transfer individual servings into airtight containers. For best results and to maintain its freshness and prevent any spoilage (especially due to the fruit filling), store the cobbler in the refrigerator for 2 to 3 days.
- Reheating Individual Servings (Microwave): For a quick and convenient reheat, place an individual serving of cobbler in a microwave-safe bowl or plate. Heat it in short 30-second increments, checking frequently, until it is warmed through to your desired temperature. While microwaving is excellent for quickly softening the fruit filling, be aware that the biscuit topping might lose some of its original crispness and become slightly softer.
- Reheating the Whole Cobbler or Larger Portions (Oven): If you’re looking to reheat a larger portion or the entire cobbler, using the oven is your superior choice for restoring some of that desirable crispness to the biscuit topping. Begin by preheating your oven to a moderate 300°F (150°C). Cover the cobbler loosely with aluminum foil. This prevents the topping from over-browning or drying out during the reheating process. Bake for approximately 20 minutes, or until the fruit filling is warm and gently bubbling. For an extra crisp topping, you may remove the foil for the last few minutes of reheating.
- Freezing Baked Cobbler (for longer storage): While this recipe primarily focuses on fresh enjoyment, you can indeed freeze a baked blackberry cobbler for extended storage. Allow the cobbler to cool completely to room temperature. Then, wrap it meticulously in several layers of plastic wrap, followed by a layer of heavy-duty aluminum foil, ensuring it’s airtight. You can freeze the cobbler for up to 2-3 months. To enjoy, thaw the frozen cobbler overnight in the refrigerator, then reheat using the oven method as described above for the best texture.
Expert Baking Tips for the Best Blackberry Cobbler Ever
Achieving a truly exceptional blackberry cobbler is all about paying attention to a few key details. These expert tips will guide you to a perfect dessert every single time:
- Strategic Order of Operations: Always prioritize preparing your blackberry filling first. This allows the hot fruit mixture ample time to cool slightly while you dedicate your attention to mixing the biscuit topping. Starting with a slightly cooled filling is crucial; it prevents the cold butter in your topping from melting prematurely, which is a key factor in achieving a tender and flaky biscuit.
- Embracing Fresh or Frozen Blackberries: Both fresh and frozen blackberries yield a truly delicious cobbler! If you’re using frozen blackberries, there’s no need to thaw them beforehand. Simply add them directly to the saucepan as directed in the recipe. Just keep in mind that frozen berries contain more water content, so the filling might require a few extra minutes on the stovetop to thicken appropriately and reach the desired consistency.
- Customizing Sweetness Levels: The natural sweetness of blackberries can vary considerably depending on ripeness and variety. If your berries are particularly sweet, or if you simply prefer a less sweet dessert, feel free to reduce the granulated sugar in the filling from the recommended 3/4 cup (150 grams) down to 1/2 cup (100 grams). A good tip: taste a small amount of the cooked filling before assembling if you’re unsure about the sweetness level.
- The Secret to Tender Biscuits: Avoid Overworking the Dough: When you’re making the biscuit topping, the golden rule for achieving that wonderfully tender, melt-in-your-mouth texture is to avoid overworking the dough, especially once the milk is added. Stir only until the dry ingredients are just moistened and no visible streaks of flour remain. Overmixing develops gluten, which will, unfortunately, lead to tough, chewy biscuits instead of light and flaky ones.
- The Reign of Cold Butter: Ensure your butter is meticulously cold and cut into small, uniform cubes before you incorporate it into the flour mixture. This isn’t just a suggestion; it’s a fundamental technique for biscuit perfection. These cold butter pieces create tiny steam pockets within the dough during baking, which are ultimately responsible for that wonderfully flaky and tender biscuit texture we all crave.
- Elevate with Coarse Sugar: For an extra touch of gourmet sparkle and a delightful textural crunch, consider sprinkling a generous amount of coarse sugar (such as turbinado or demerara sugar) over the biscuit topping just before it goes into the oven. This thoughtful addition not only creates a beautiful, glistening finish but also adds a subtle extra layer of sweetness and a pleasant crispness. Granulated sugar also works well for a simpler, yet still appealing, finish.
- Checking for Perfect Doneness: Knowing exactly when your cobbler is done is crucial. The cobbler is perfectly baked when the fruit filling is visibly bubbling actively around the edges of the dish and the biscuit topping has transformed into a beautiful golden brown color and is cooked thoroughly throughout. If you notice the topping browning too quickly during baking, you can easily loosely tent the dish with aluminum foil for the remainder of the bake time to prevent over-browning.
- Optimal Serving Temperature: While the aroma of a freshly baked cobbler is undeniably irresistible, allowing it a brief cooling period (around 20-30 minutes) after removing it from the oven is highly beneficial. This resting time allows the fruit filling to set further and prevents it from being excessively hot, making it the perfect temperature for serving without scalding your tongue. Moreover, during this slight cool-down, the complex flavors within the cobbler have a chance to meld and deepen, enhancing the overall taste experience.
More Irresistible Fruit Desserts to Try!
If you’re a devoted fan of fruit-filled treats and comforting baked goods, we encourage you to explore some of these other delightful and equally rewarding recipes:
- Homemade Peach Cobbler
- Classic Strawberry Shortcake
- Easy Peach Crisp
- Refreshing Fruit Salad
- Delightful Blueberry Lemon Bread with Lemon Glaze
Blackberry Cobbler
Rated 5 out of 5 stars based on 1 review
Prep Time: 35 mins
Cook Time: 25 mins
Total Time: 1 hr
This classic Homemade Blackberry Cobbler features a perfectly sweet and tangy blackberry filling beneath a tender, golden cinnamon-sugar biscuit topping. Whether you use fresh, seasonal berries or convenient frozen ones, this easy-to-make dessert is a delightful treat you can enjoy any time of the year!
Pin Recipe
Ingredients
Servings: 6 servings
For the blackberry filling:
- 5 cups (700 grams) fresh or frozen blackberries
- 3/4 cup (150 grams) granulated sugar
- 2 and 1/2 tablespoons (22 grams) cornstarch or cornflour
- 1 tablespoon (15 ml) fresh lemon juice
For the topping:
- 1 cup (125 grams) all-purpose flour (spooned & leveled) (see how to measure flour for best results)
- 1/3 cup (65 grams) granulated sugar
- 1 teaspoon baking powder
- 1/4 teaspoon ground cinnamon
- 1/4 teaspoon salt
- 3 tablespoons (45 grams) cold unsalted butter, cubed
- 1/3 cup + 1 tablespoon (95 ml) milk
- Coarse sugar for sprinkling on top (optional, for extra crunch and sparkle)
Instructions
To make the blackberry filling:
- Preheat the oven to 400°F (204°C). Thoroughly spray an 8-inch square baking pan or a 9-inch round pie dish with non-stick cooking spray and set it aside.
- Combine the blackberries, granulated sugar, cornstarch, and fresh lemon juice in a large saucepan and mix until all ingredients are well combined and the cornstarch is dissolved. Place the saucepan over medium heat, stirring occasionally, until the berries release their juices and the mixture comes to a boil. Allow it to boil gently for 3-5 minutes, or until the blackberries are softened and the mixture has visibly thickened to a syrupy consistency.
- Remove the filling from the heat. Carefully pour the hot blackberry filling into the prepared baking dish, spreading it evenly, and set it aside to cool slightly while you prepare the topping.
To make the topping:
- In a medium-sized mixing bowl, whisk together the all-purpose flour, granulated sugar, baking powder, ground cinnamon, and salt until they are thoroughly combined. Cut in the cold, cubed unsalted butter using a pastry cutter, two knives, or your fingertips until the mixture resembles coarse meal with small, pea-sized crumbs. Then, gently stir in the milk until the ingredients are just combined and no dry streaks of flour remain. Be careful not to overmix the dough.
- Drop equal-sized spoonfuls of the biscuit topping evenly over the warm blackberry filling. For an 8-inch square pan, aim for about 9 spoonfuls; for a 9-inch round dish, approximately 7 spoonfuls work well. If desired, sprinkle the topping with coarse sugar or granulated sugar for an enhanced finish.
- Bake the cobbler for 20 to 25 minutes, or until the fruit filling is bubbling actively around the edges and the biscuit topping is beautifully golden brown and cooked through. Remove the cobbler from the oven and set it aside to cool for 20 to 30 minutes before serving. This allows the filling to set and the flavors to meld perfectly.
Notes
- Storage: Once the cobbler has cooled completely to room temperature, cover it tightly with plastic wrap or foil and store it in the refrigerator for up to 3 days. To reheat individual servings, use the microwave in 30-second increments until warmed through. Alternatively, reheat the entire cobbler in a 300°F (150°C) oven for about 20 minutes, or until thoroughly warmed.
- Blackberries: The sweetness of blackberries can vary. If your berries are naturally very sweet or you prefer a less sweet dessert, you may reduce the granulated sugar in the filling from 3/4 cup (150 grams) to 1/2 cup (100 grams).
- Milk for Topping: While whole milk is often preferred for its richness in the biscuit topping, 2%, 1%, skim, or even a non-dairy alternative like unsweetened almond milk will work perfectly well without compromising the texture significantly.
- To prepare ahead of time:
- Filling: Cook the blackberry filling as directed, then transfer it to a heat-proof bowl. Allow it to cool completely, then cover tightly and store in the refrigerator for up to 2 days.
- Topping Dry Ingredients: In a separate bowl, whisk together all the dry ingredients for the biscuit topping, then cut in the cold butter. Cover this mixture tightly and store it in the refrigerator for up to 2 days.
- Assembly & Baking: When ready to bake, preheat your oven and prepare your baking pan. Scoop the chilled filling into the pan. Add the milk to your prepped dry topping mixture and stir just until combined. Drop spoonfuls of this freshly mixed topping over the cold filling and bake. Keep in mind that when starting with cold components, you may need to increase the baking time by 5 to 10 minutes.
Cuisine: American
Course: Dessert
Author: Danielle Rye
Did you make this delicious recipe? We’d love to see it! Mention @livewellbakeoften on Instagram or tag your creation with #livewellbakeoften.