
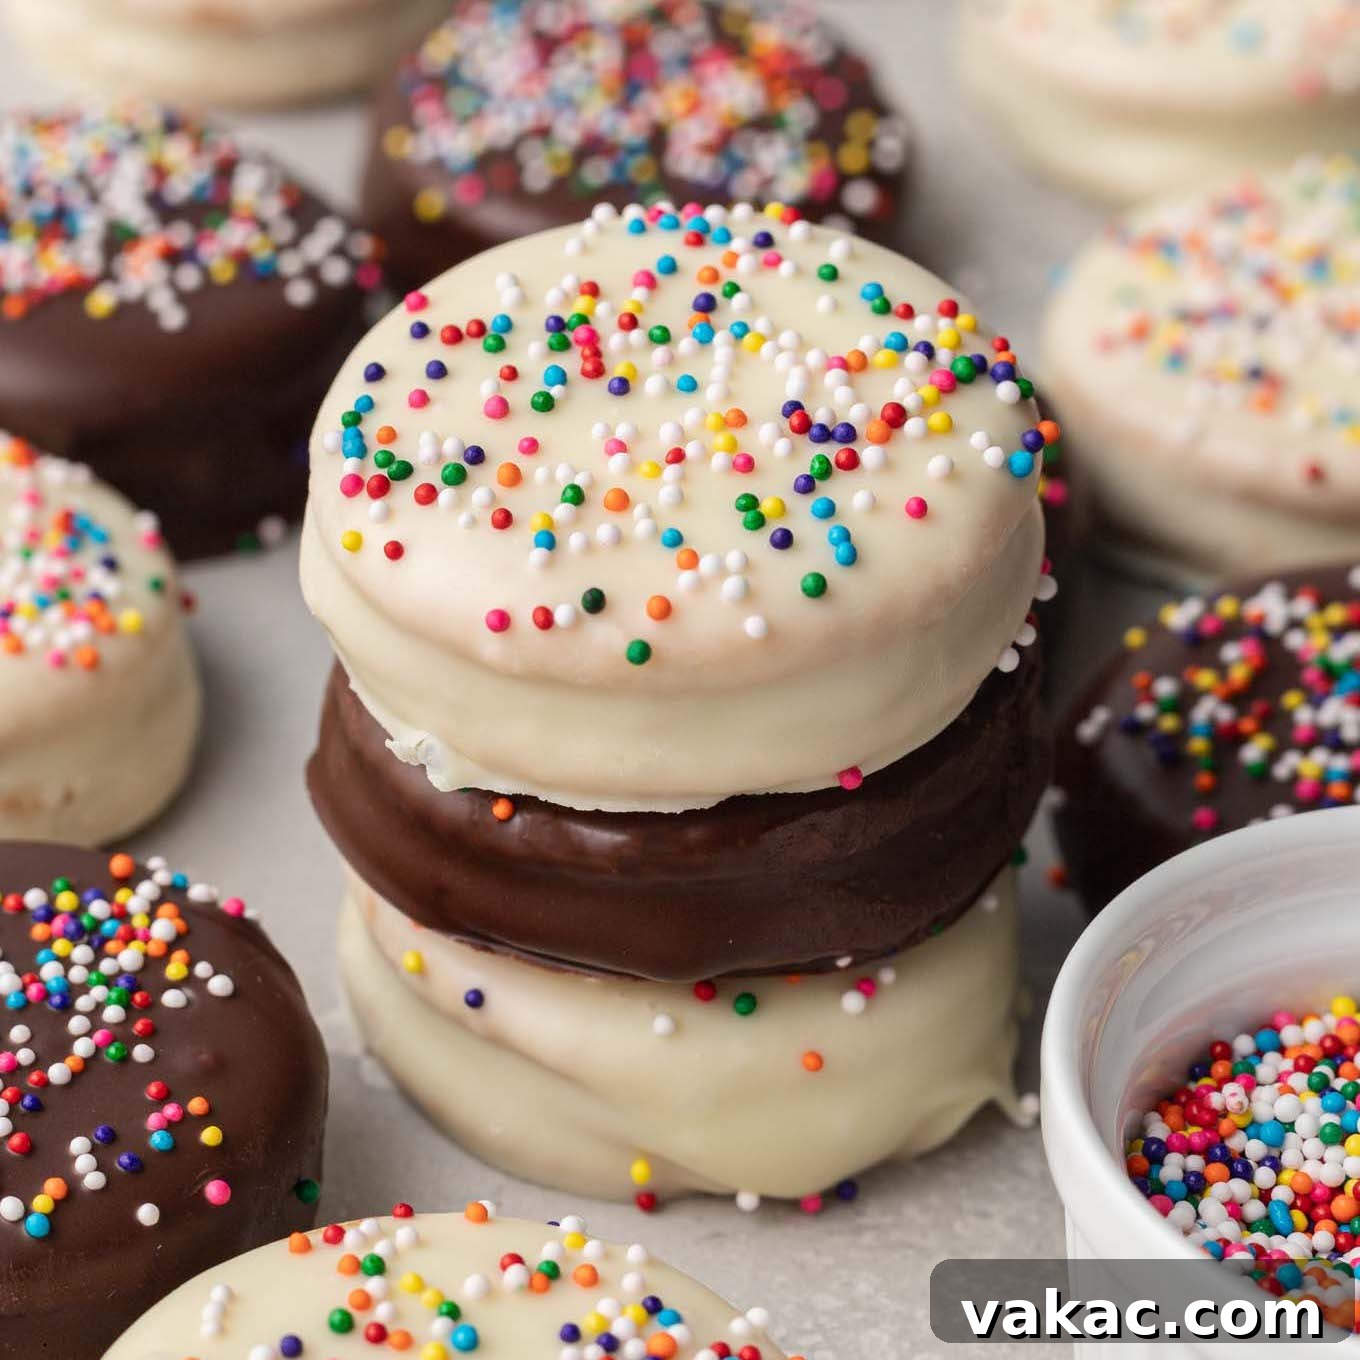
Welcome to the world of effortless indulgence! If you’re searching for a dessert that’s unbelievably easy to make, requires no baking, and delivers a perfect blend of sweet and salty flavors, then look no further than these incredible No-Bake Ritz Cookies. Imagine crispy, buttery Ritz crackers, generously filled with a creamy, sweet peanut butter mixture, then enrobed in a rich layer of melted chocolate. It sounds too good to be true, but this recipe is a testament to simple ingredients creating extraordinary results.

The magic of these Ritz cracker cookies lies in their unique combination of textures and tastes. The delicate saltiness and flakiness of the Ritz cracker perfectly balance the decadent sweetness of the peanut butter and chocolate. It’s a symphony of flavors that will surprise and delight your taste buds. This recipe is a fantastic choice for anyone, whether you’re a seasoned baker or a kitchen novice, thanks to its straightforward approach and minimal cleanup.
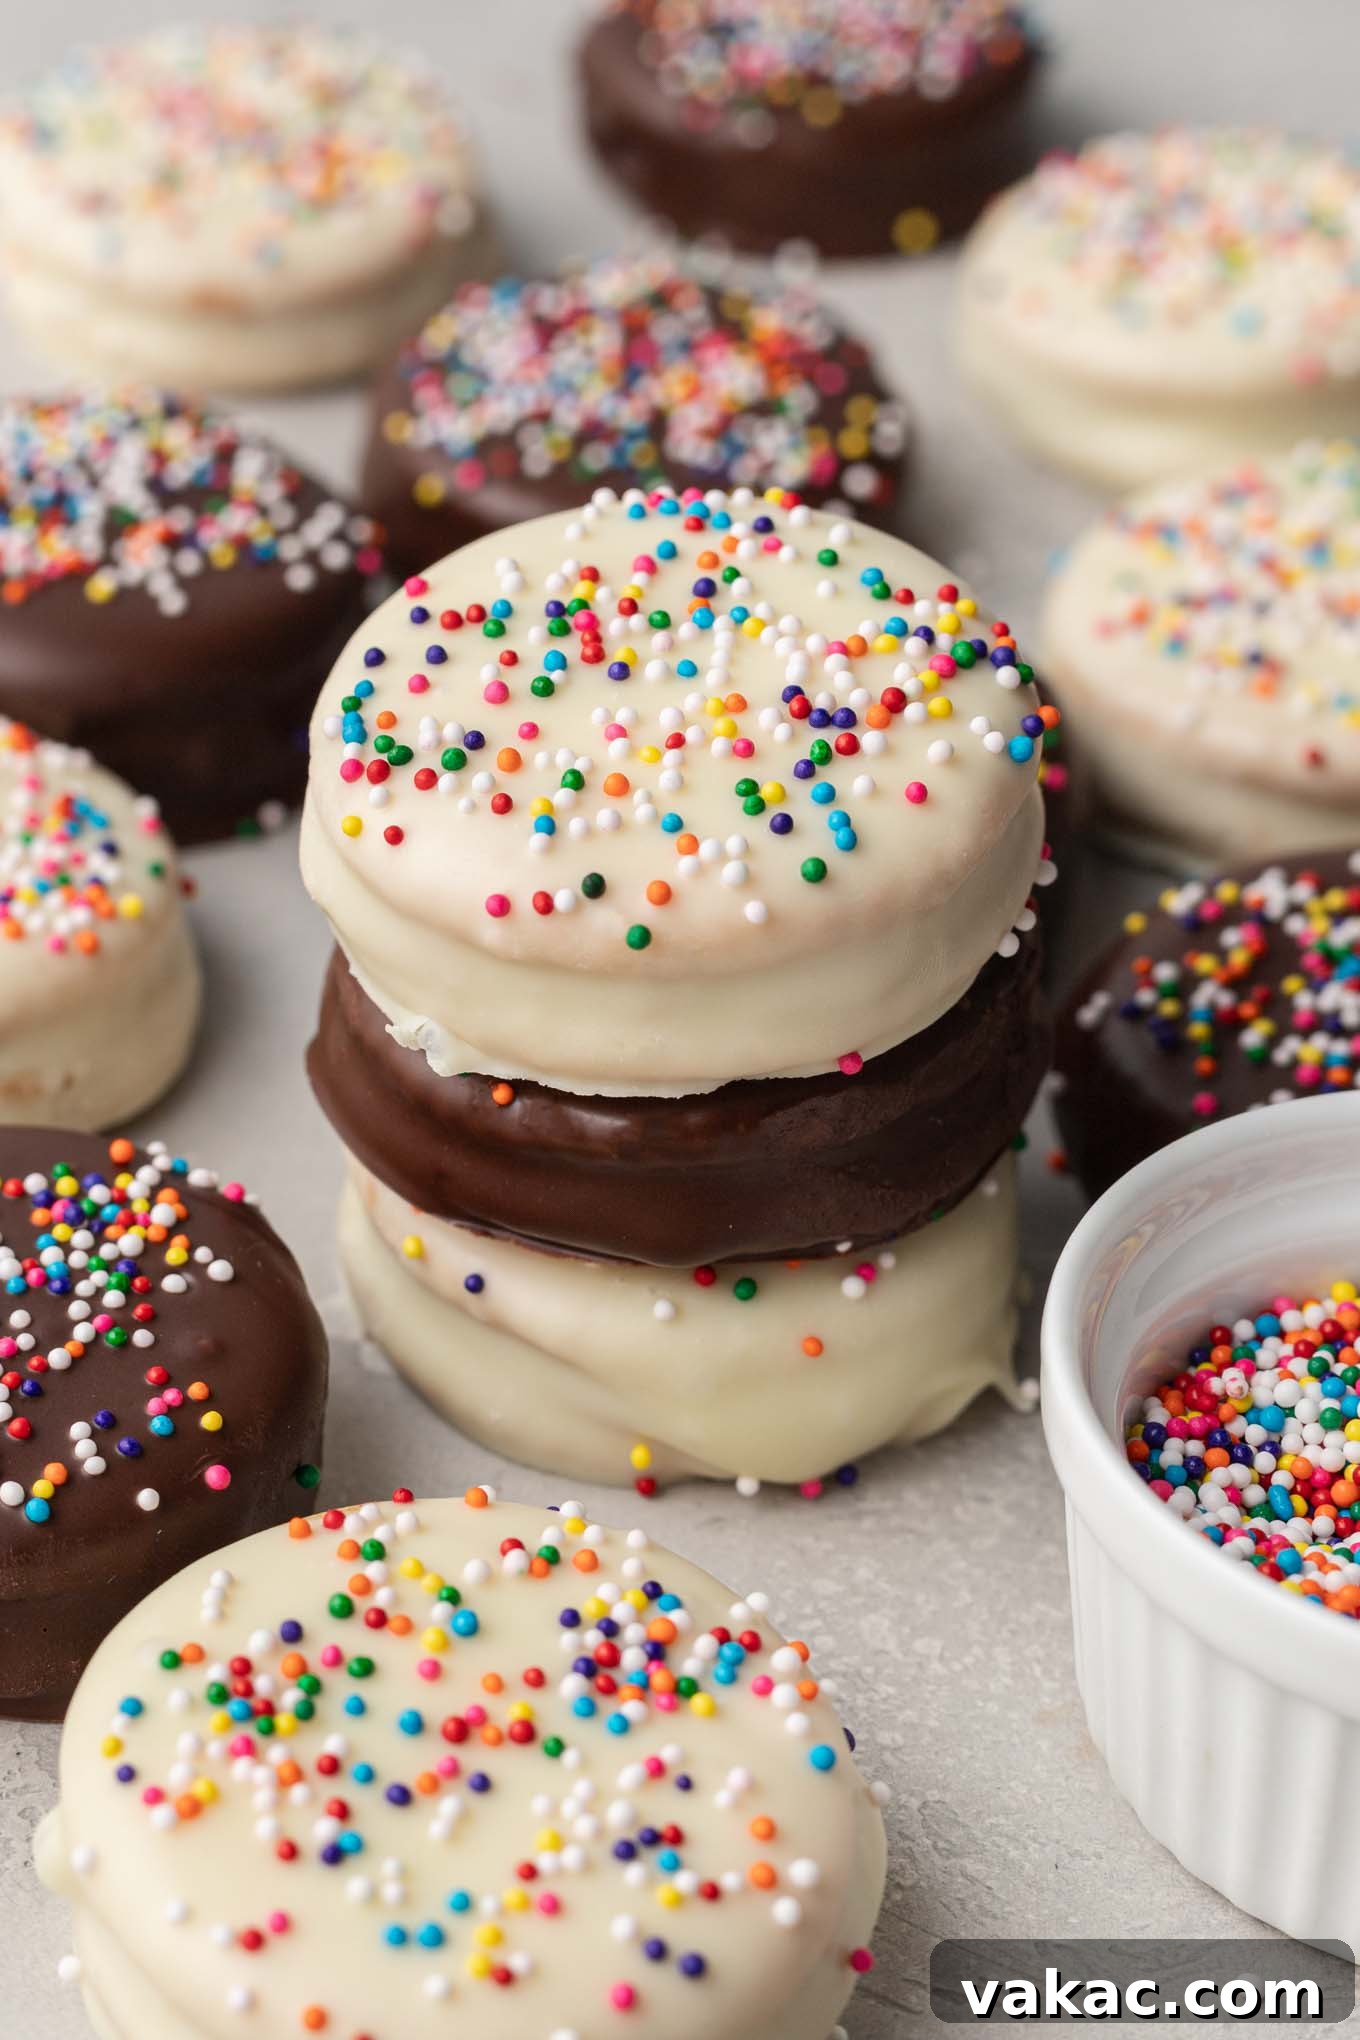
Beyond their irresistible taste, these cookies are incredibly versatile. While I love dressing them up with vibrant red and green sprinkles for festive occasions, they are a delightful treat any time of year. Think of them as your go-to dessert for last-minute gatherings, potlucks, holiday cookie exchanges, or simply a sweet reward after a long day. With just a handful of common ingredients, you can easily customize them to suit any preference, exploring different chocolates, nut butters, and toppings. They’re quick, impressive, and always a crowd-pleaser – you’ll rarely bring any leftovers home!
Essential Ingredients for Your No-Bake Ritz Cookies
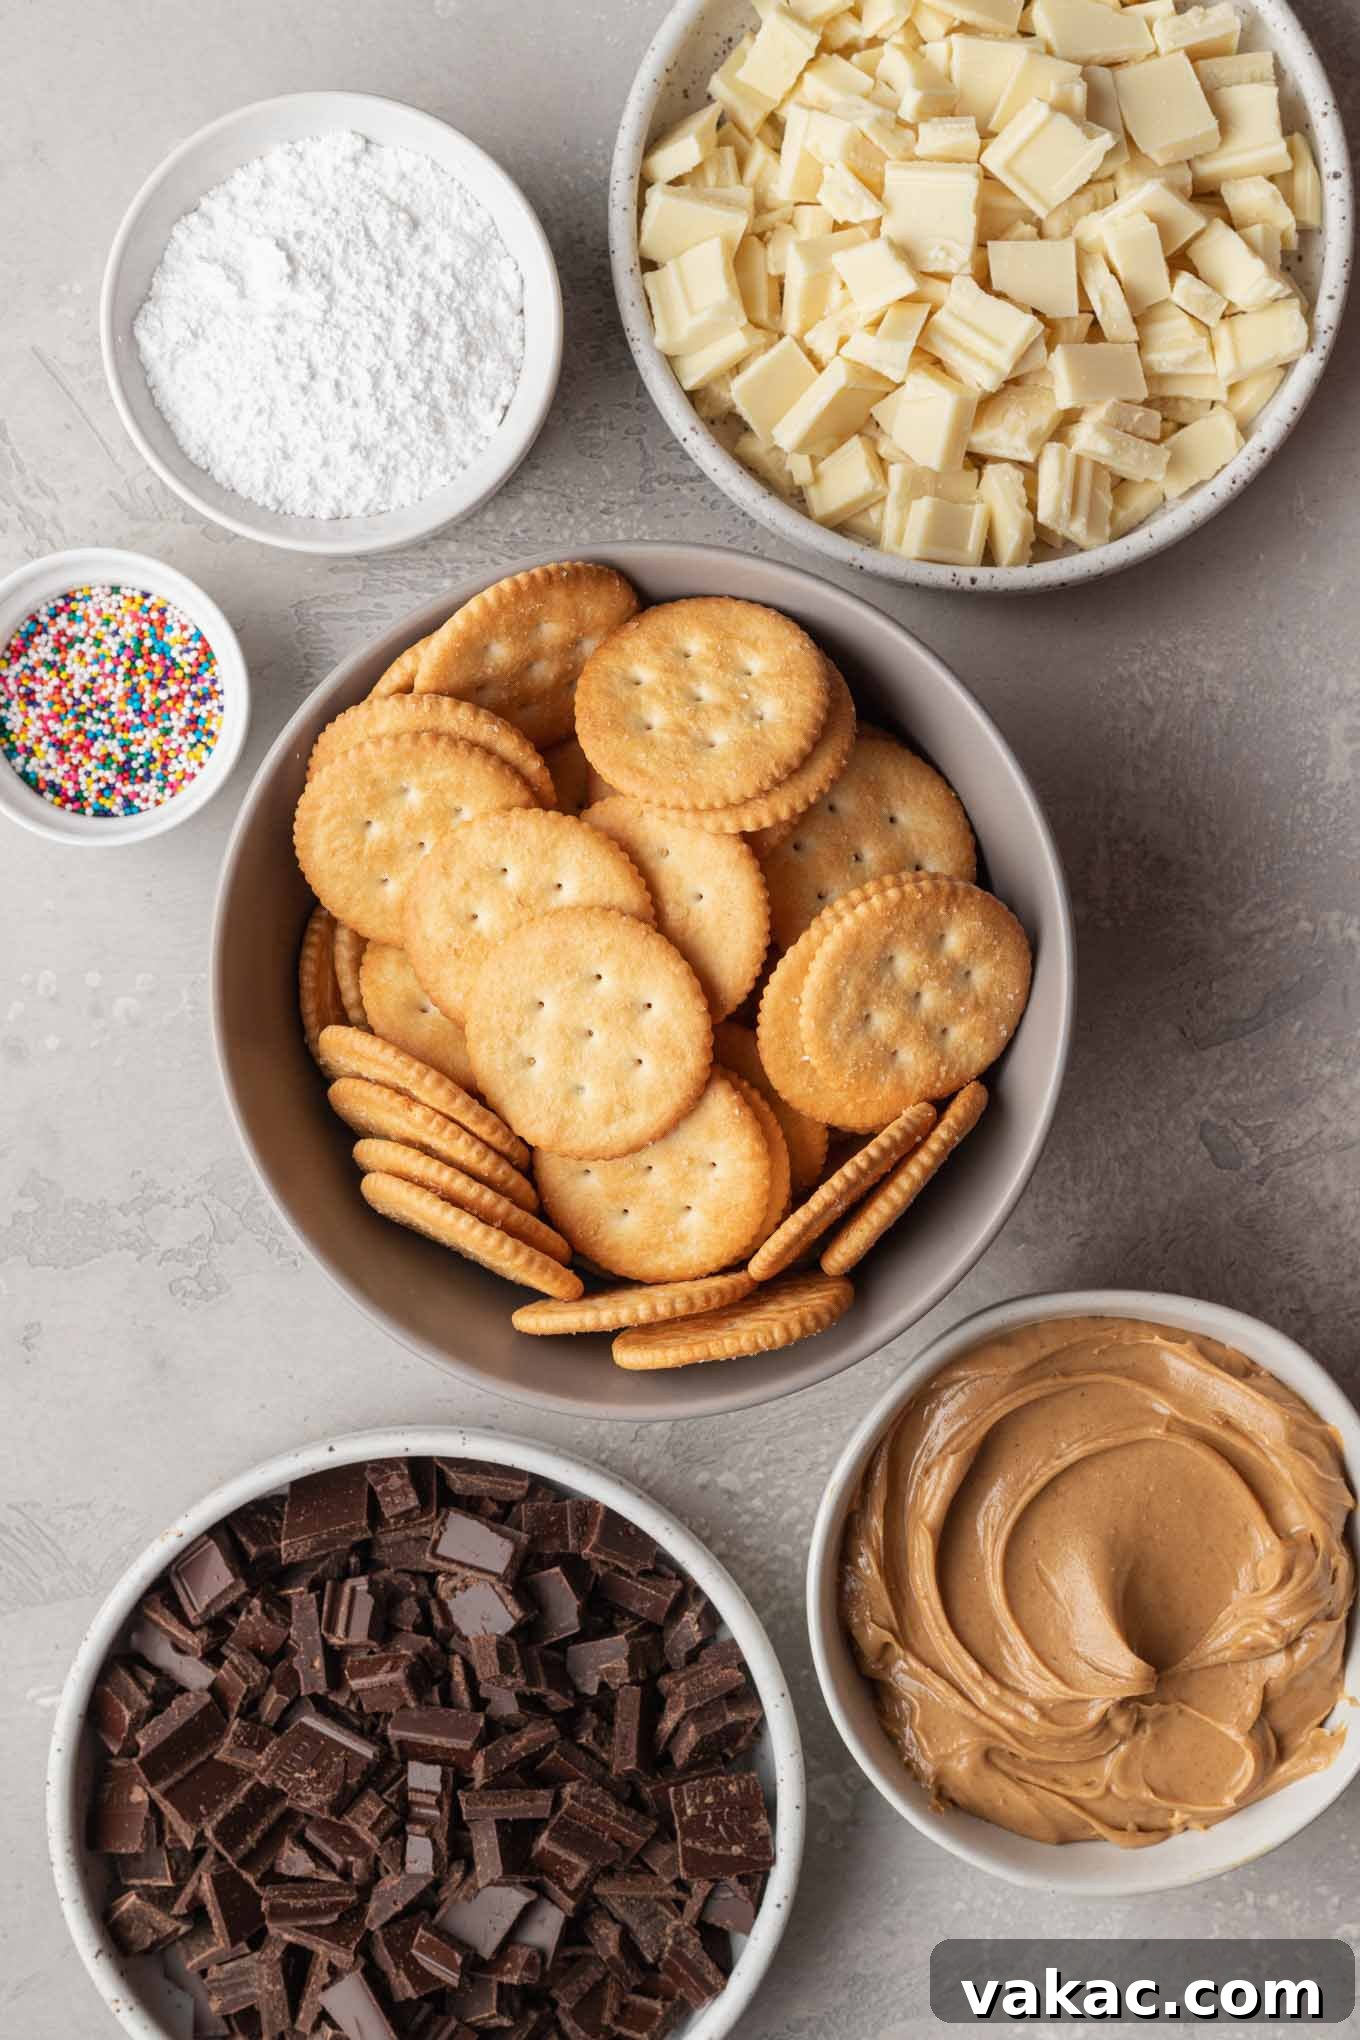
One of the many charms of these chocolate-covered Ritz cracker sandwiches is the simplicity of the ingredient list. You only need four core items, most of which you likely already have in your pantry. However, choosing the right type of each ingredient can make a significant difference in the final texture and flavor. Here’s a closer look at what you’ll need to create the classic version, along with some tips for optimal results:
- Ritz Crackers: These are the undeniable stars of our show! Their signature buttery, slightly salty, and crispy texture is crucial. You’ll need approximately 60 crackers, which will yield 30 finished cookies. Don’t underestimate the power of the Ritz; their unique flavor profile truly elevates this dessert.
- Creamy Peanut Butter: For the filling, consistency is key. I highly recommend using a smooth, no-stir peanut butter, such as Jif or Skippy. Natural peanut butters, while delicious, tend to separate and can be too oily, making the filling difficult to manage and less cohesive. A good, creamy peanut butter will create a rich, stable, and wonderfully flavorful center.
- Quality Chocolate: The coating is just as important as the filling. For the best melting and dipping experience, opt for high-quality chocolate bars, like those from Bakers or Ghirardelli, which are designed for melting. While chocolate chips can be used in a pinch, they often contain stabilizers that make them melt thicker and less smoothly. If you do use chocolate chips, you might need to add a teaspoon or two of coconut oil or vegetable shortening to thin the melted chocolate to an ideal dipping consistency. This will ensure a beautiful, even coat on your peanut butter Ritz cookies.
- Powdered Sugar (Confectioners’ Sugar): This ingredient is vital for creating a sweet, firm, and scoopable peanut butter filling. It not only adds sweetness but also thickens the peanut butter, preventing it from being too runny and ensuring it stays perfectly sandwiched between the crackers.
- Sprinkles (Optional): Sprinkles are a fantastic way to add a festive touch or a burst of color to your Ritz cookies. Choose colors that match the season or holiday you’re celebrating, or simply pick your favorite hues for an everyday treat. They adhere best when applied immediately after dipping the cookies in chocolate.
Step-by-Step Guide: How to Make No-Bake Ritz Cookies
Creating these delightful no-bake chocolate peanut butter Ritz crackers is incredibly simple and requires no oven time. Follow these easy steps for a batch of perfectly sweet and salty treats:
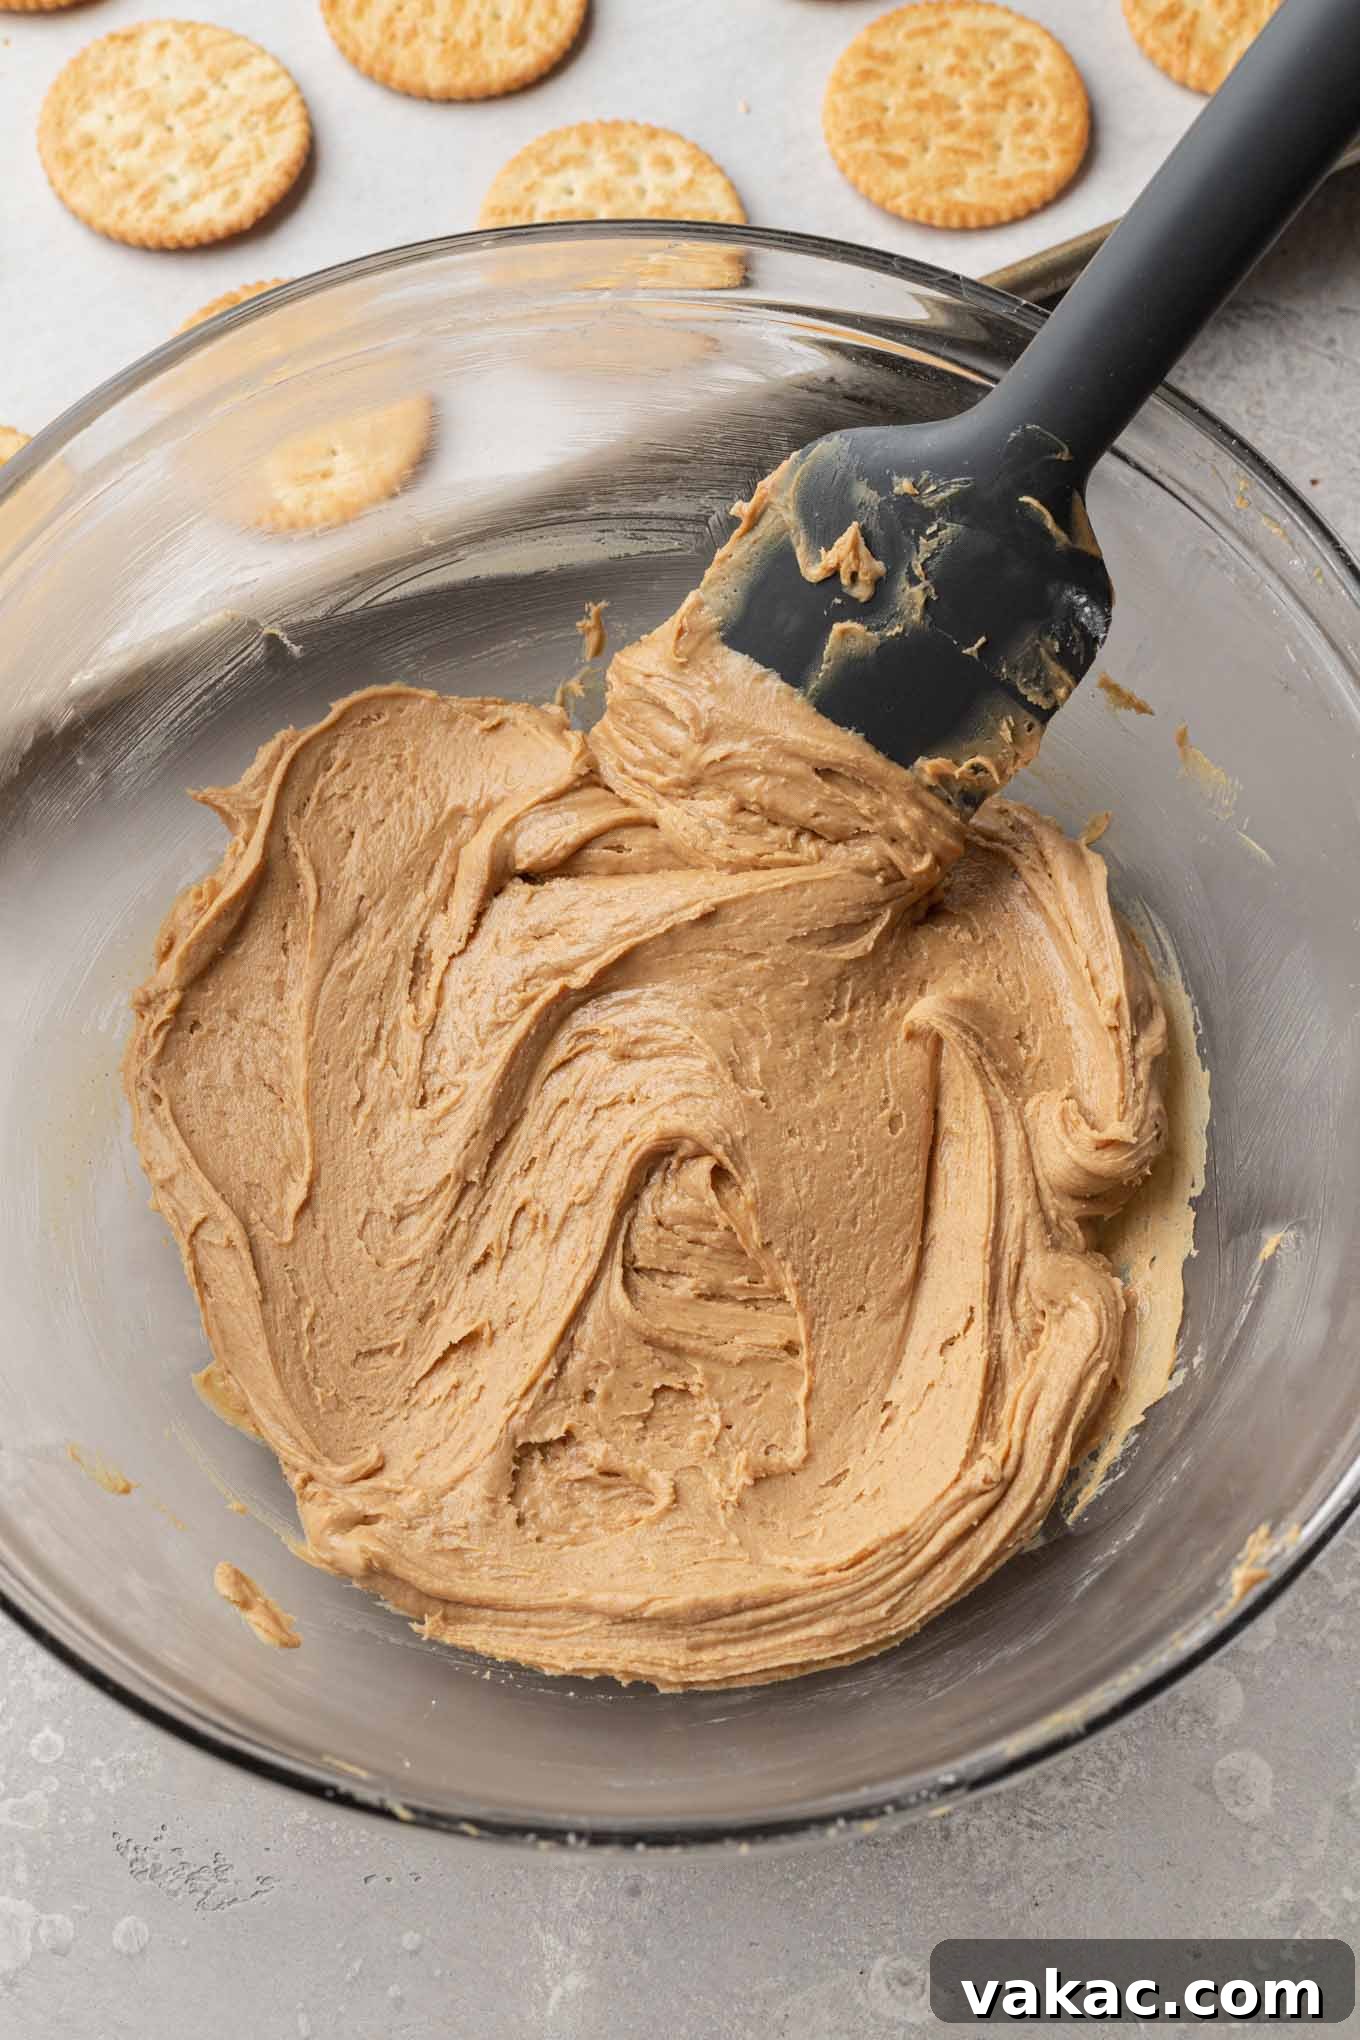
- Prepare the Peanut Butter Filling: In a medium-sized mixing bowl, combine the creamy peanut butter and powdered sugar. Stir them together thoroughly until the powdered sugar is fully incorporated and the mixture forms a smooth, thick, and consistent paste. A sturdy wooden spoon or a rubber spatula works perfectly for this task. Ensure there are no lumps of powdered sugar remaining.
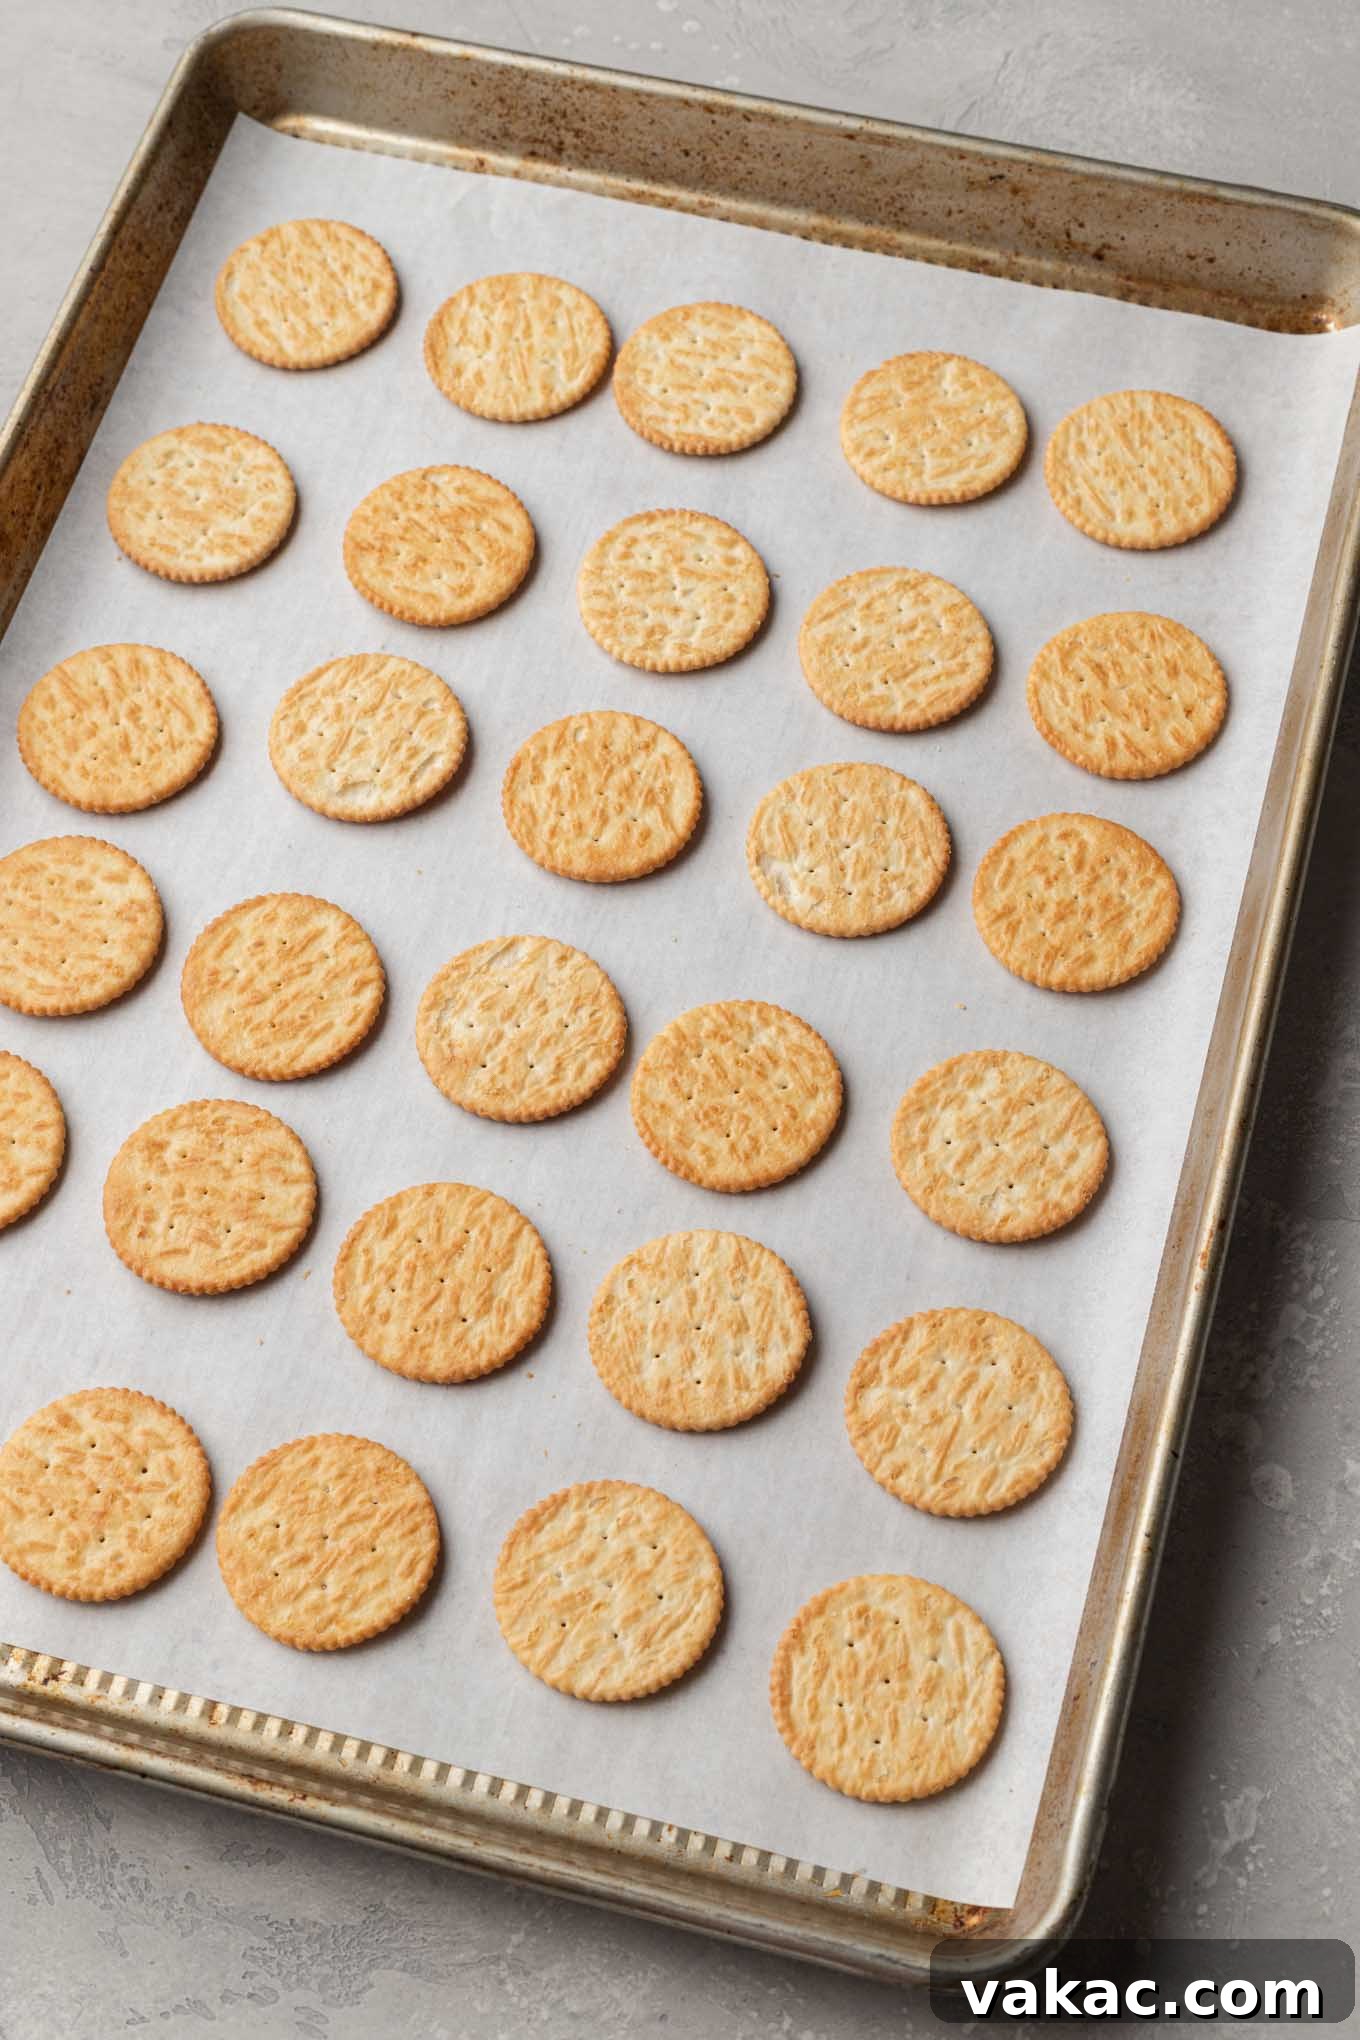
- Arrange the Crackers: Line a large baking sheet with parchment paper. This is a crucial step to prevent sticking and make cleanup a breeze. Arrange 30 Ritz crackers in a single layer on the prepared baking sheet, leaving a little space between each one. These will form the bottom half of your cookie sandwiches.
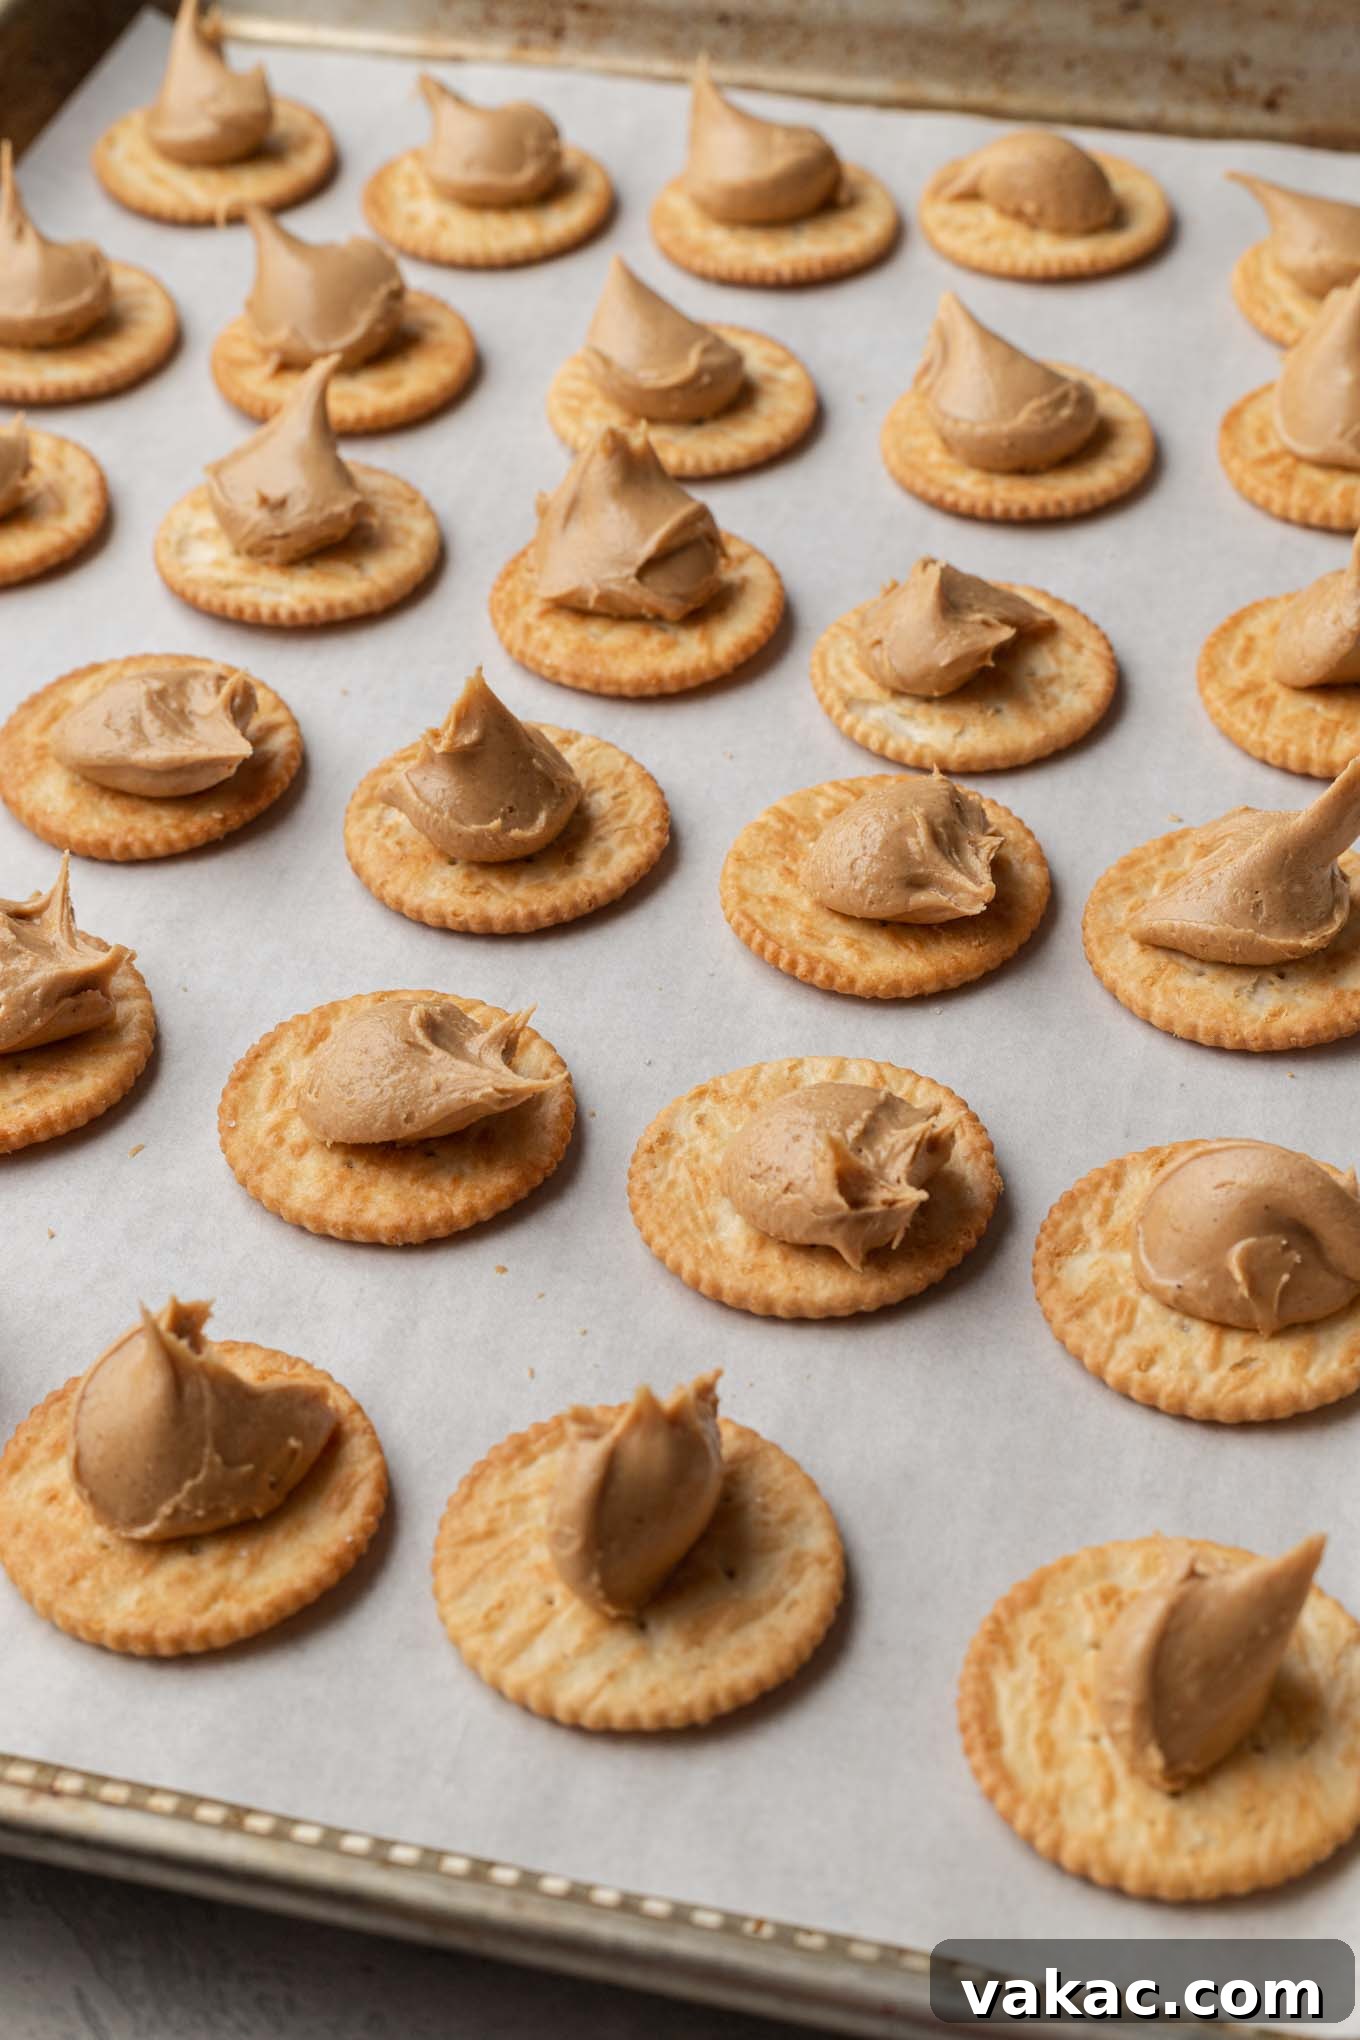
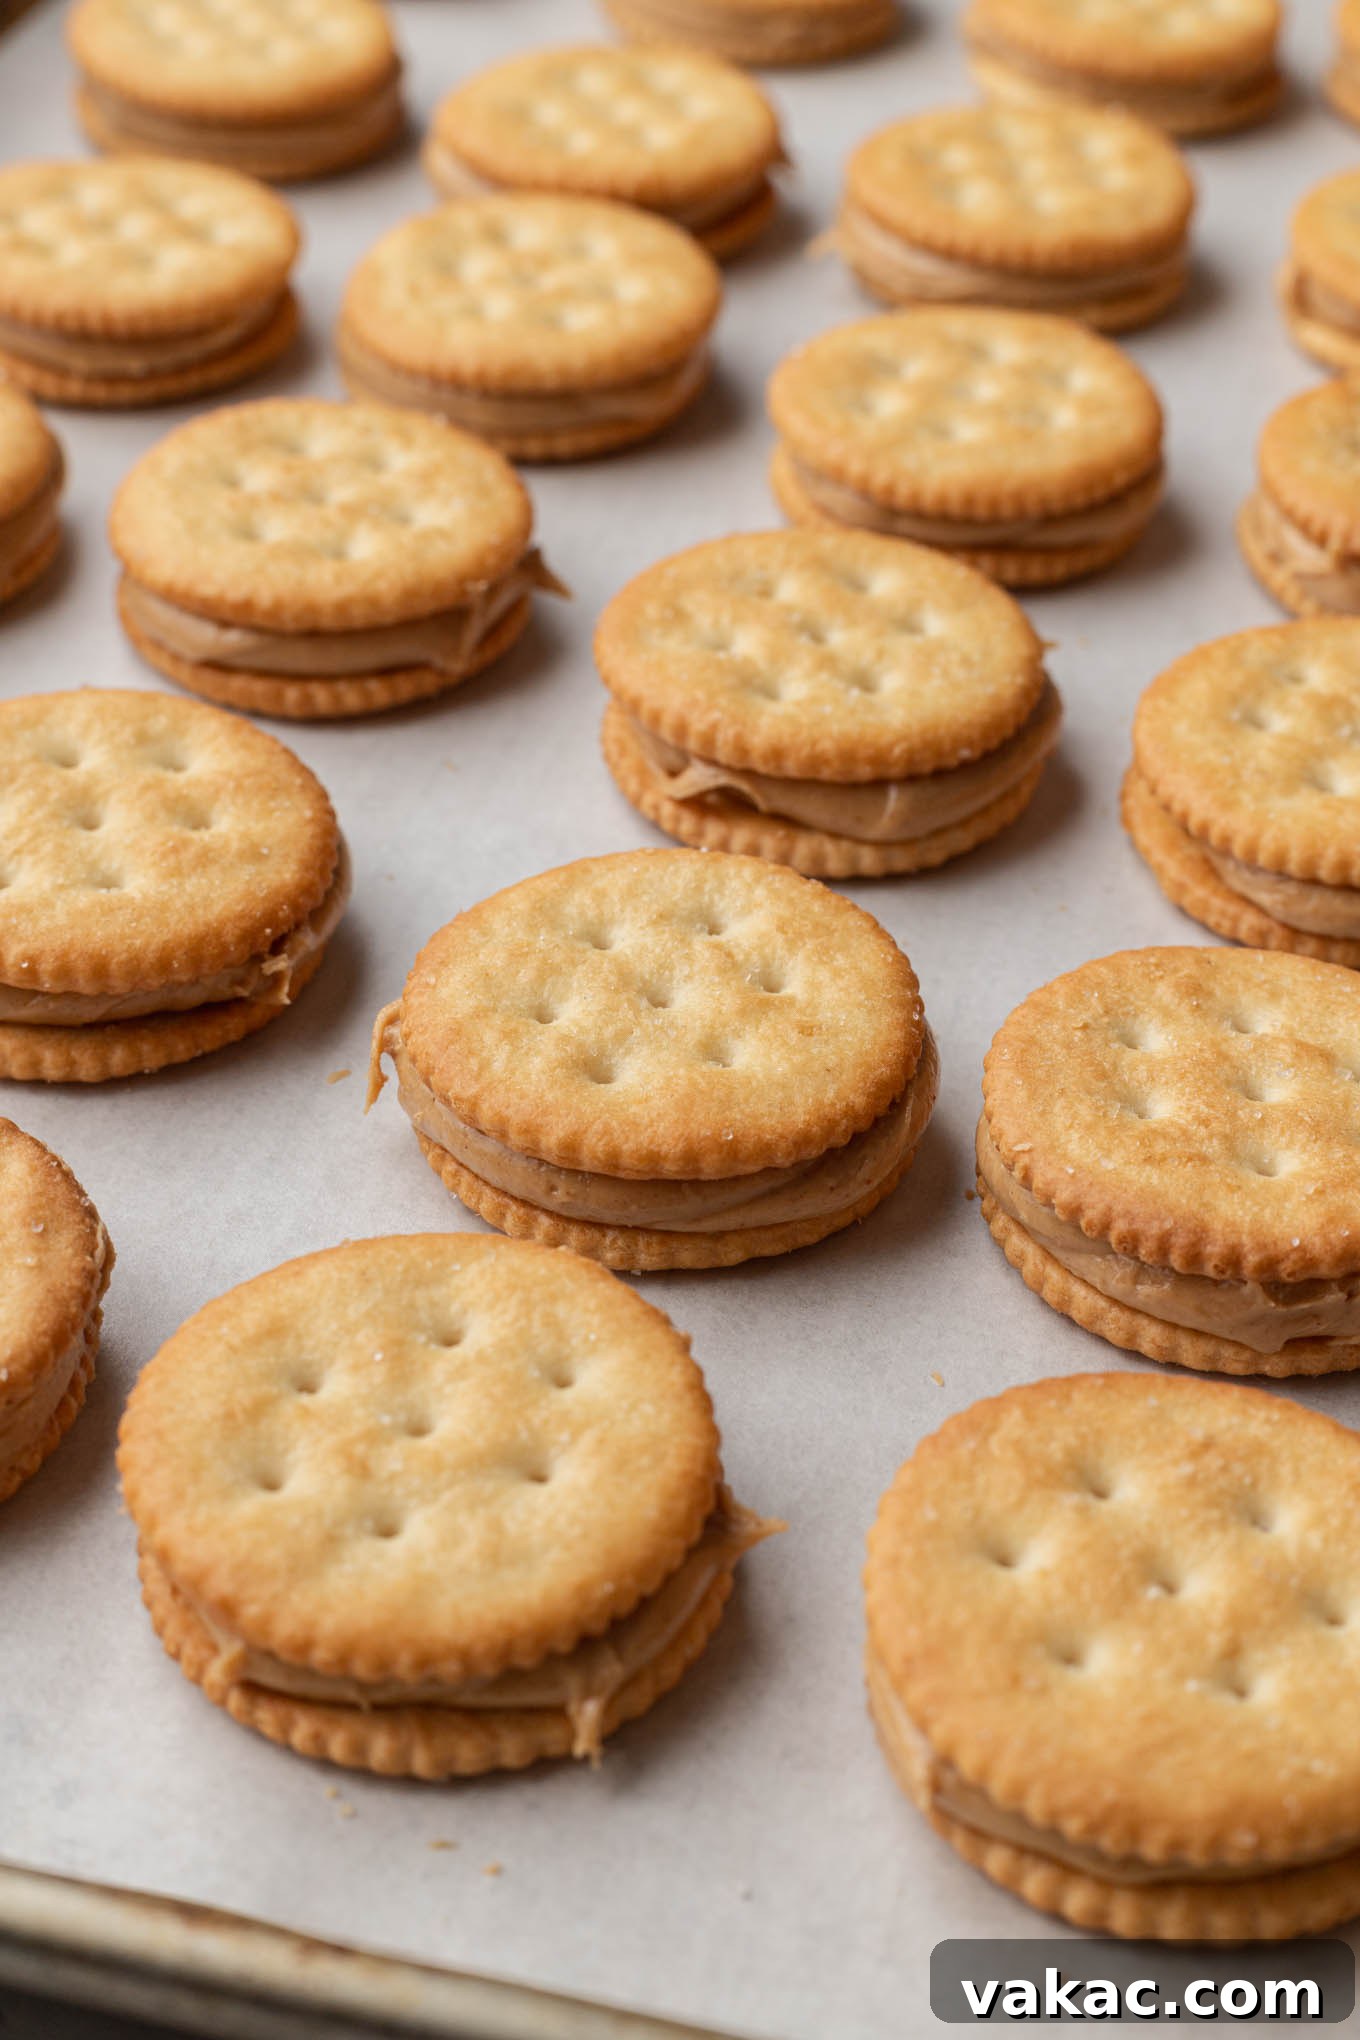
- Assemble the Sandwiches: Take approximately 2 teaspoons of the prepared peanut butter mixture and scoop it onto the center of each of the 30 crackers on the baking sheet. Then, carefully place another Ritz cracker on top of each peanut butter-dolloped cracker. Gently press down on the top cracker until the peanut butter filling spreads evenly to the edges of the crackers, creating a neat sandwich.
- Chill for Firmness: Once all your cracker sandwiches are assembled, place the entire baking sheet into the freezer for about 15 to 20 minutes. This chilling step is optional but highly recommended. It helps the peanut butter filling set and firms up the crackers, making them much easier to handle and dip smoothly into the melted chocolate without breaking or falling apart.
- Melt the Chocolate: While the cookies are chilling in the freezer, chop your chocolate bars into small, even pieces. Place the chopped chocolate in a heat-safe bowl. Microwave the chocolate in 30-second intervals, stirring well after each interval, until the chocolate is completely melted and smooth. Be careful not to overheat it, as this can cause the chocolate to seize. If you don’t have a microwave, you can use a double boiler on the stovetop.
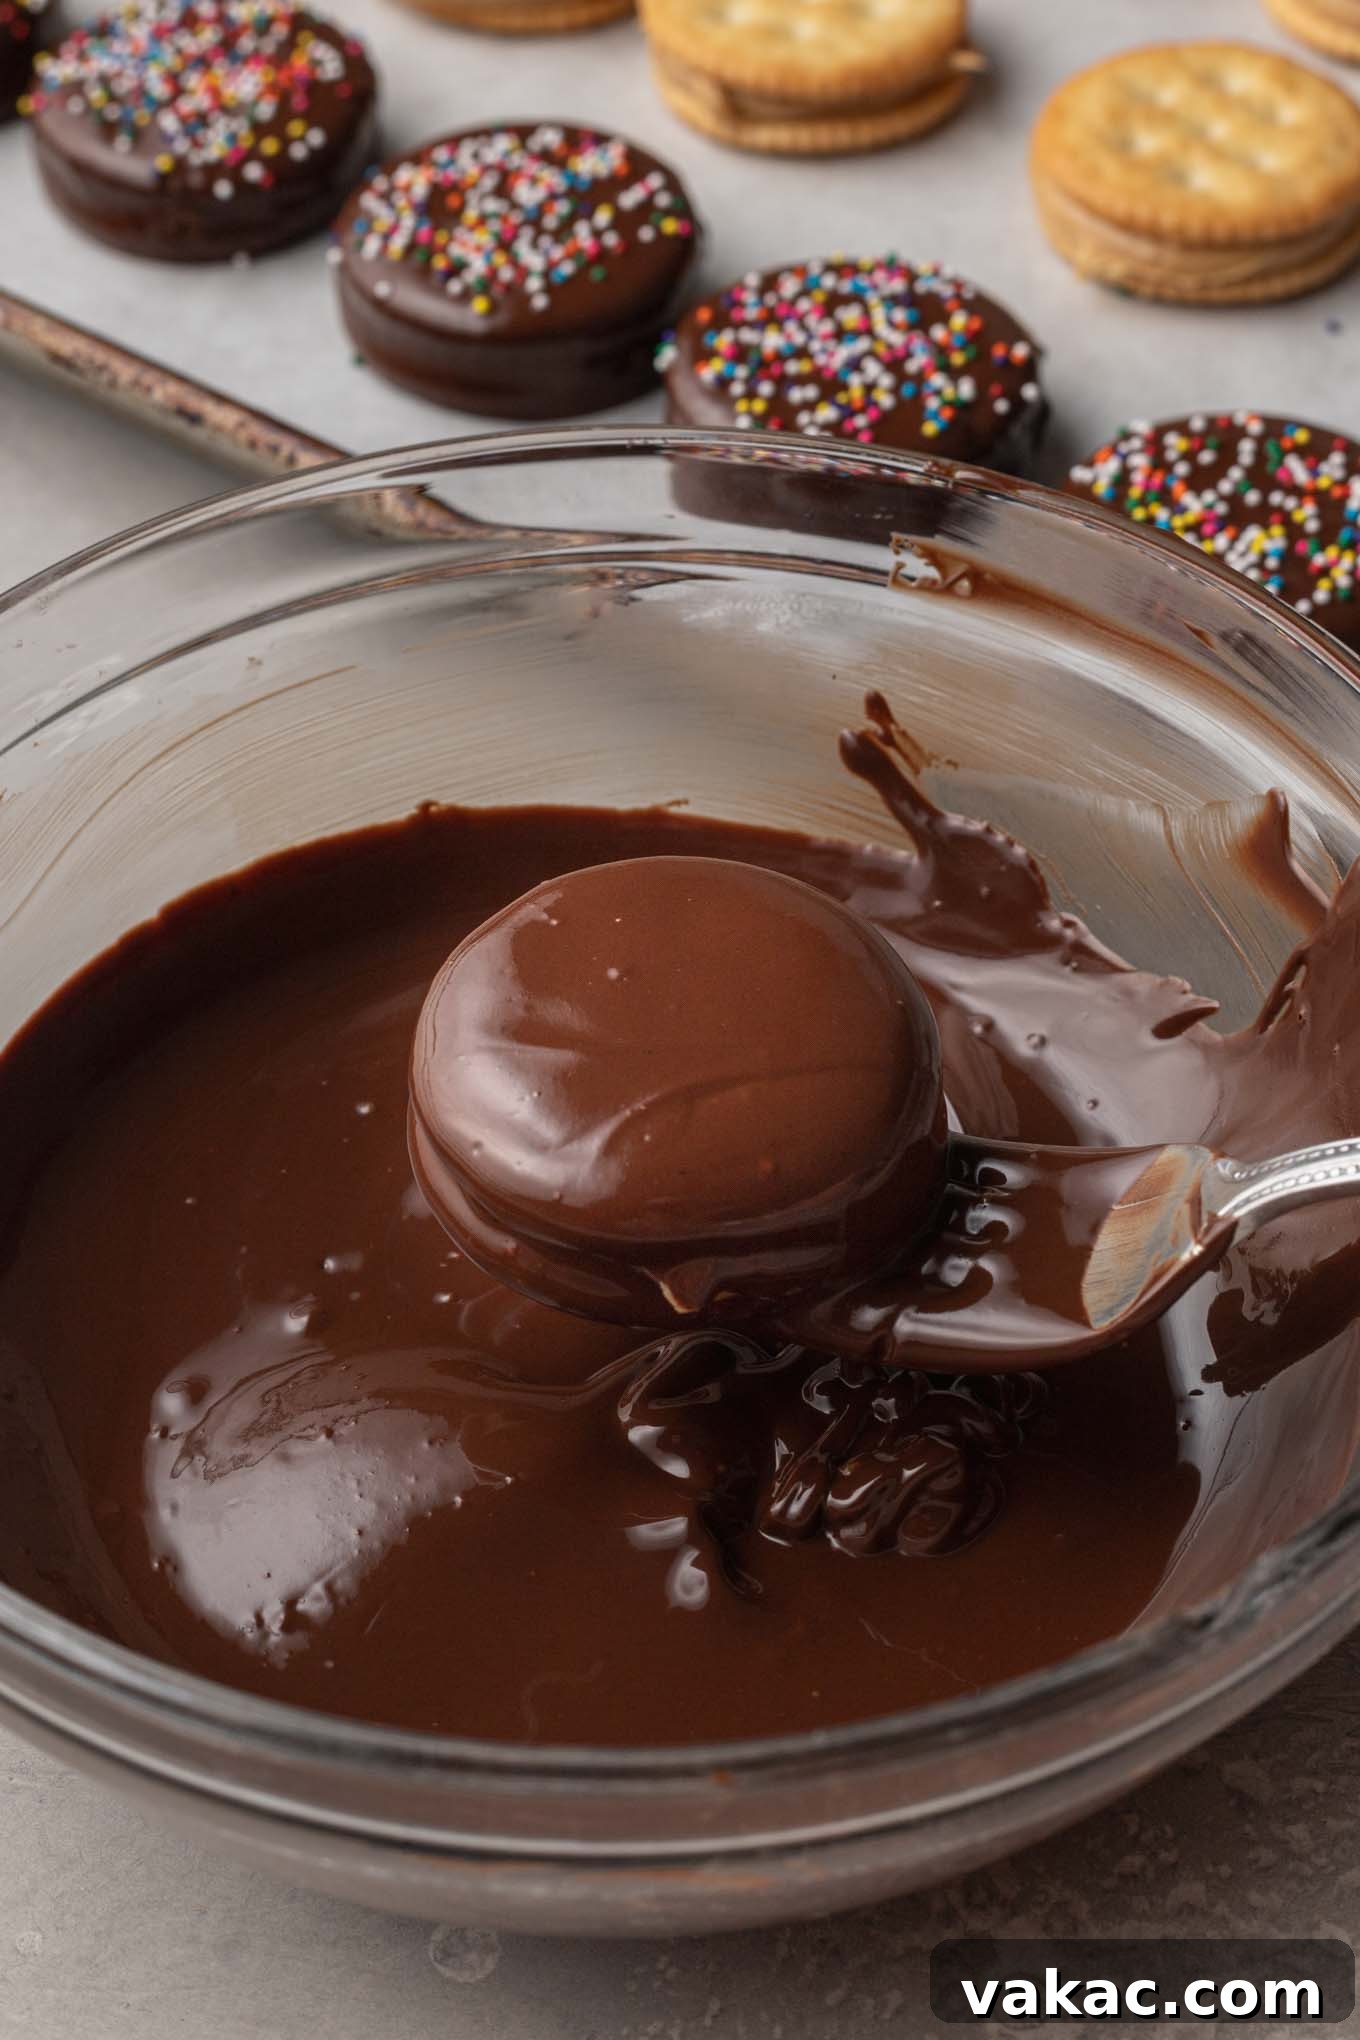
- Dip the Cookies: Line another clean baking sheet with fresh parchment paper. Take half of the frozen Ritz cookie sandwiches out of the freezer (leaving the other half chilled to prevent them from thawing too quickly). Using a fork, carefully submerge one cookie sandwich into the melted chocolate, ensuring it’s fully coated. Lift the cookie with the fork and gently tap the fork against the side of the bowl to allow any excess chocolate to drip off. This creates a thin, even coating.
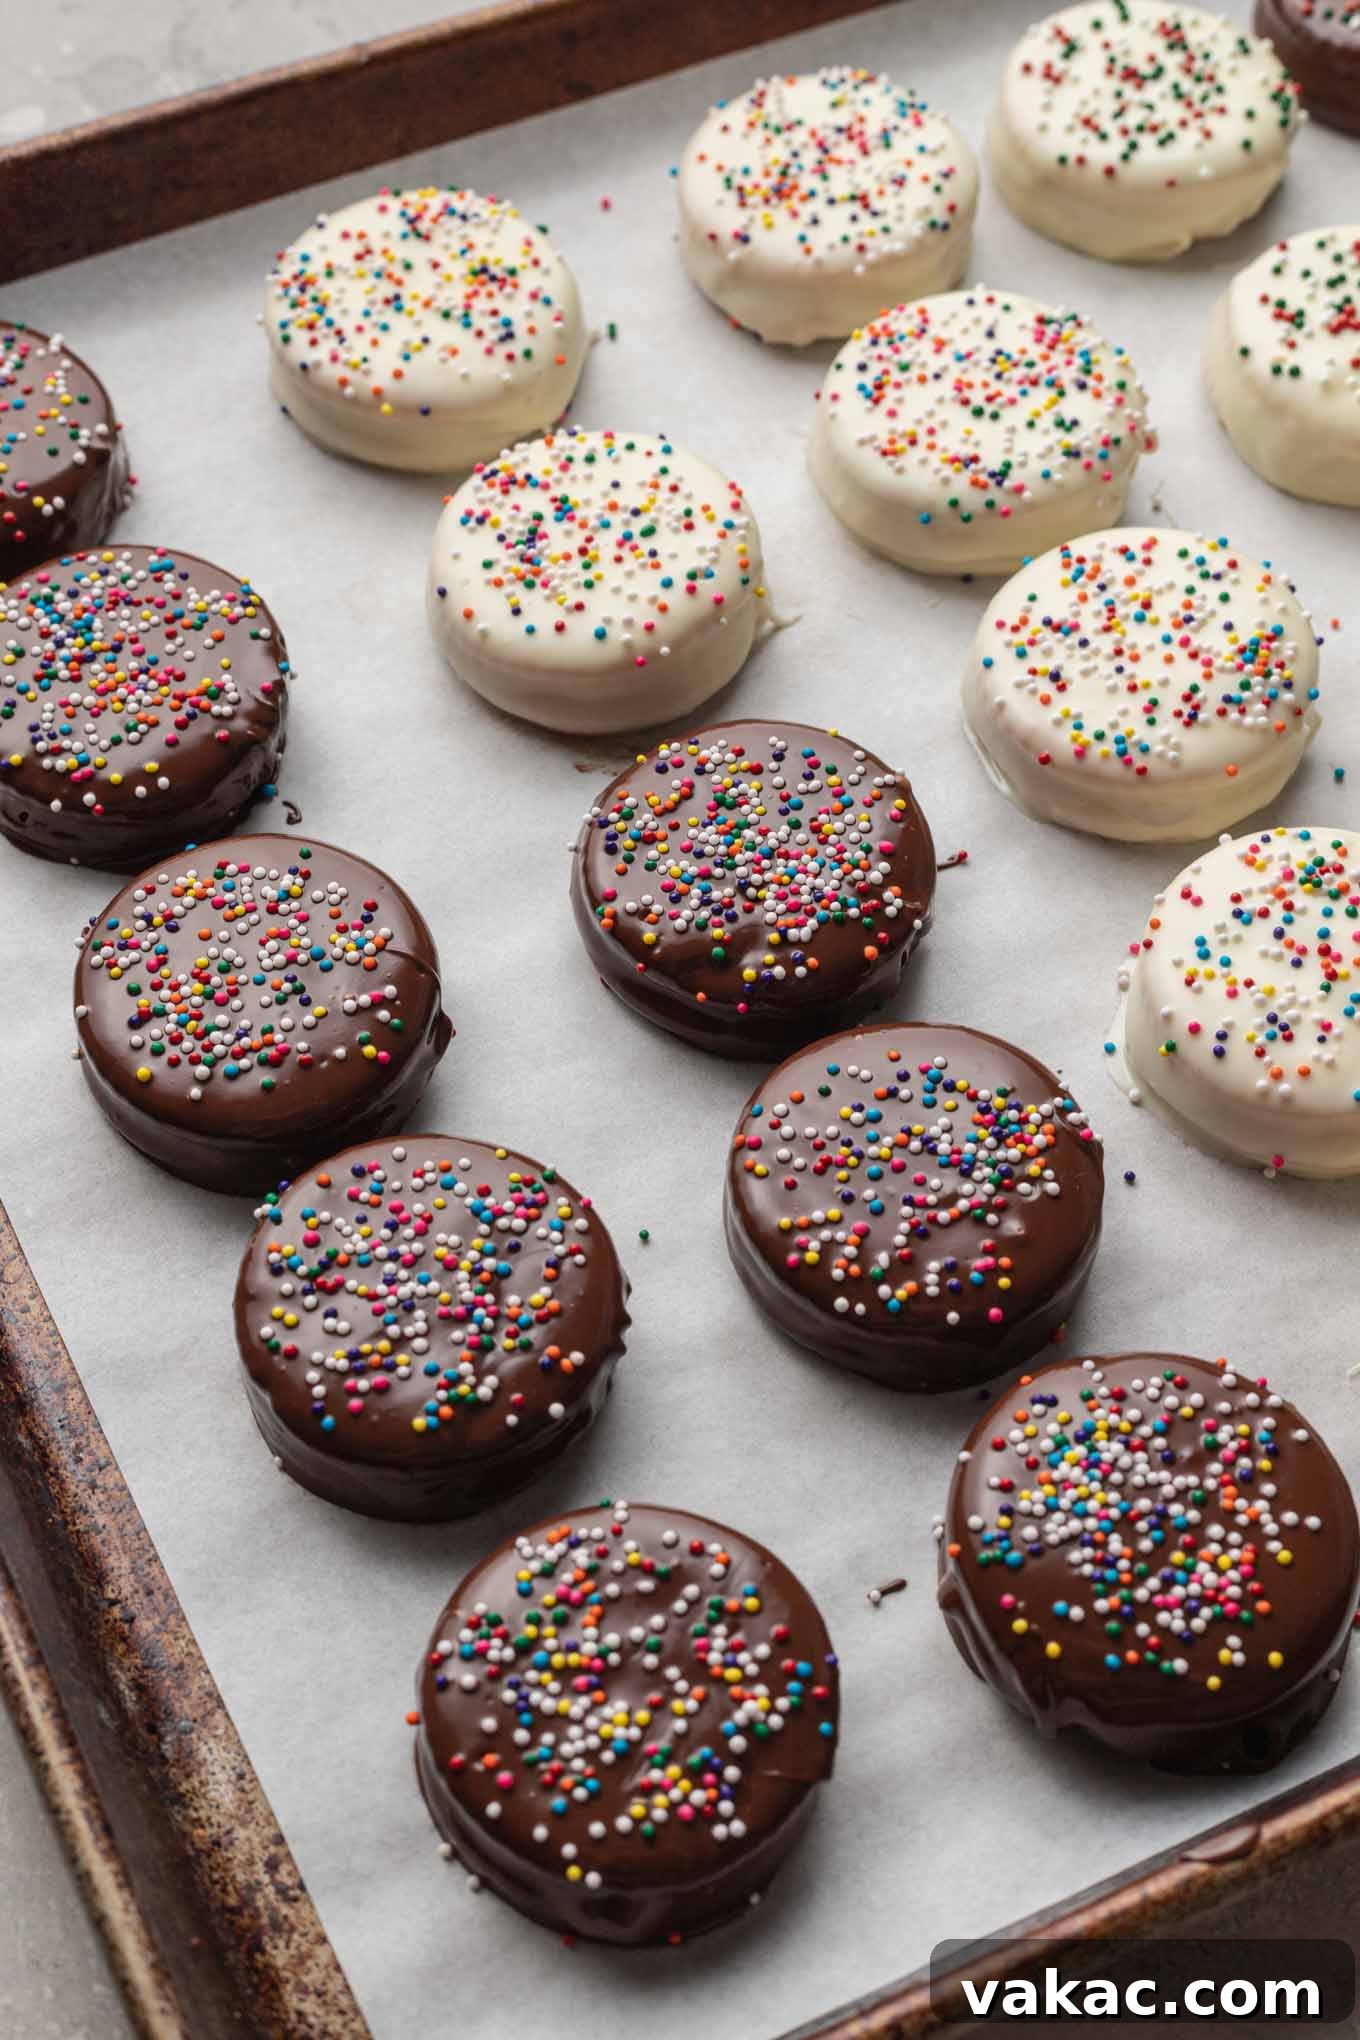
- Decorate and Chill: Use a toothpick to carefully slide the chocolate-coated cookie off the fork onto the prepared baking sheet. If you’re adding sprinkles, do so immediately after placing the cookie on the parchment paper, as the chocolate will begin to set quickly. Repeat this process with the remaining frozen cookies, working in batches to keep them firm. Once all cookies are dipped and decorated, transfer the baking sheet to the refrigerator to chill for 45 minutes to 1 hour, or until the chocolate coating is completely firm and set.

Delightful Recipe Variations and Customization Ideas
While the classic chocolate peanut butter Ritz cookie is undeniably delicious, this recipe is a fantastic canvas for creativity. Its simple nature makes it incredibly adaptable, allowing you to easily switch up flavors and toppings to suit any craving or occasion. Here are some of my favorite ways to customize these delightful no-bake treats:
- Explore Different Chocolates: Don’t limit yourself to just semi-sweet! Experiment with various types of chocolate for the coating. Milk chocolate offers a sweeter, creamier profile, while dark chocolate provides a more intense, sophisticated flavor that pairs beautifully with the salty cracker. White chocolate is another excellent option, offering a sweet, vanilla-like finish. For a visually appealing batch, try dipping some in white chocolate and others in dark or milk chocolate. You can even create marbled effects by swirling two types of melted chocolate together!
- Alternative Coatings: Beyond traditional chocolate, consider other sweet coatings. Melted butterscotch chips provide a warm, caramelized flavor, perfect for fall. Peanut butter chips can double down on the peanut butter goodness for an extra-nutty treat. Remember, when using baking chips (like butterscotch or peanut butter chips), they contain stabilizers, so you may need to add a teaspoon or two of coconut oil or vegetable shortening to achieve a smoother, more dip-friendly consistency.
- Creative Fillings: The peanut butter filling is fantastic as is, but you can certainly get creative!
- Marshmallow Swirl: For a delightful fluffernutter-inspired cookie, gently fold a tablespoon or two of marshmallow creme into your peanut butter filling.
- Caramel Center: Swap out the peanut butter entirely for soft, chewy caramel candies. Melt them down slightly to make them pliable, then sandwich them between the crackers.
- Nut Butter Variety: If peanut butter isn’t your favorite or you have allergies, try almond butter, cashew butter, or even sunflower seed butter for a different flavor profile. Just ensure they are creamy, no-stir varieties for the best results.
- Vibrant Color Play: If using white chocolate for the coating, you can easily add food coloring to create vibrant, custom-colored cookies. This is especially fun for themed parties, baby showers, or specific holidays (think red and green for Christmas, pastels for Easter, or team colors for game day).
- Diverse Toppings: Sprinkles are just the beginning!
- Chopped Nuts: Finely chopped peanuts, pecans, or almonds add a delightful crunch and nutty flavor.
- Shredded Coconut: Toasted or untoasted shredded coconut provides a tropical twist.
- Crushed Candies: Mini M&M’s, crushed peppermint candies, or even crushed Oreos can add texture and flavor.
- Sea Salt Flakes: For those who truly love the sweet and salty combination, a light sprinkle of flaky sea salt on top of the chocolate coating will enhance the flavors beautifully.
- Drizzles: After the main chocolate coating has set, you can drizzle a contrasting melted chocolate (e.g., white chocolate over dark chocolate) for an elegant finish.

Storage Instructions for Your No-Bake Delights
One of the best things about these easy no-bake cookies is how well they store, making them perfect for preparing ahead of time or enjoying throughout the week. Proper storage ensures they maintain their delicious taste and texture.
For short-term storage, you can safely keep your Ritz cookies at room temperature for up to one week. It’s essential to store them in an airtight container or a zip-top bag to prevent them from drying out or absorbing other odors. Placing a piece of parchment paper between layers of cookies can also help prevent them from sticking together, especially if your chocolate coating isn’t completely rock-hard.
These cookies also freeze exceptionally well, extending their shelf life significantly. When stored in an airtight container or a freezer bag, they will remain fresh for up to three months. To prevent them from clumping together in the freezer, always place a piece of parchment paper between each layer of cookies. When you’re ready to enjoy them, simply thaw them overnight in the refrigerator or for a few hours at room temperature. They taste just as fresh as the day they were made!
Expert Tips for Perfect No-Bake Ritz Cookies
Achieving cookie perfection with minimal effort is entirely possible with these 4-ingredient cookies. Here are some invaluable tips to ensure every batch is a success:
- Always Line Your Baking Sheets with Parchment Paper: This seemingly small step makes a huge difference. Parchment paper prevents your cookies from sticking to the baking sheet, ensuring easy removal and preventing any broken or messy treats. It also makes cleanup a breeze! Wax paper can also work in a pinch.
- Opt for No-Stir Creamy Peanut Butter: As mentioned in the ingredients section, the type of peanut butter is crucial. Natural peanut butters tend to be runnier and separate more easily, leading to an oily, less stable filling. Stick with traditional, creamy peanut butters like Jif or Skippy for the best texture and hold in your sandwiches. This ensures the peanut butter filling stays put and doesn’t seep out.
- Master the Chocolate Melting Process:
- Microwave Method: When microwaving chocolate, always use 30-second increments and stir thoroughly after each one. Chocolate retains its shape even when melted, so stirring is essential to check its consistency and prevent burning. Stop microwaving when there are still a few small lumps, and let the residual heat melt them as you stir.
- Stovetop Method (Double Boiler): If you don’t have a microwave, or prefer a more controlled melting process, use a double boiler. Place your chopped chocolate in a heat-proof bowl set over a saucepan filled with about an inch of simmering water. Ensure the bottom of the bowl does not touch the water. Stir continuously until the chocolate is smooth and melted. This gentle heat helps prevent scorching.
- Work in Batches for Dipping: To keep your Ritz cracker sandwiches firm and easy to handle, remove only half the batch from the freezer at a time for dipping. This prevents the cookies from defrosting and becoming too soft before they get their chocolate coat. A chilled cookie also helps the chocolate set faster.
- Use a Fork and Toothpick for Dipping: A fork is your best friend for submerging and lifting the cookies out of the melted chocolate, allowing excess to drip off easily. A toothpick can then be used to gently nudge the chocolate-covered cookie off the fork onto the parchment paper, minimizing smudges and ensuring a clean transfer.
- Apply Toppings Immediately: If you’re adding sprinkles, chopped nuts, or other toppings, do so right after dipping each cookie. Melted chocolate sets quickly, especially on a chilled cookie, so swift application ensures your decorations stick properly.
- Ensure Full Chill Time: Don’t rush the final chilling step in the refrigerator. Allowing the chocolate to fully harden (typically 45 minutes to an hour) ensures a stable, non-sticky coating that is pleasant to handle and eat.
- Consider the Climate: In very warm or humid environments, your chocolate coating might take longer to set, or may soften more quickly at room temperature. In such cases, storing the finished cookies in the refrigerator is highly recommended to maintain their structure.
By following these tips, you’ll consistently create beautifully coated, perfectly flavored sweet and salty chocolate peanut butter Ritz cookies that will impress everyone!
More Holiday & No-Bake Recipes to Try!
If you loved the ease and deliciousness of these No-Bake Ritz Cookies, you’ll surely enjoy exploring other quick and satisfying dessert recipes. Whether you’re looking for more holiday treats or simply crave another no-bake wonder, here are some fantastic options:
- Cranberry Bliss Bars
- Homemade Caramel Popcorn
- Easy Butter Cookies
- Pecan Pralines
- Chocolate Crinkle Cookies
No-Bake Ritz Crackers with Peanut Butter & Chocolate
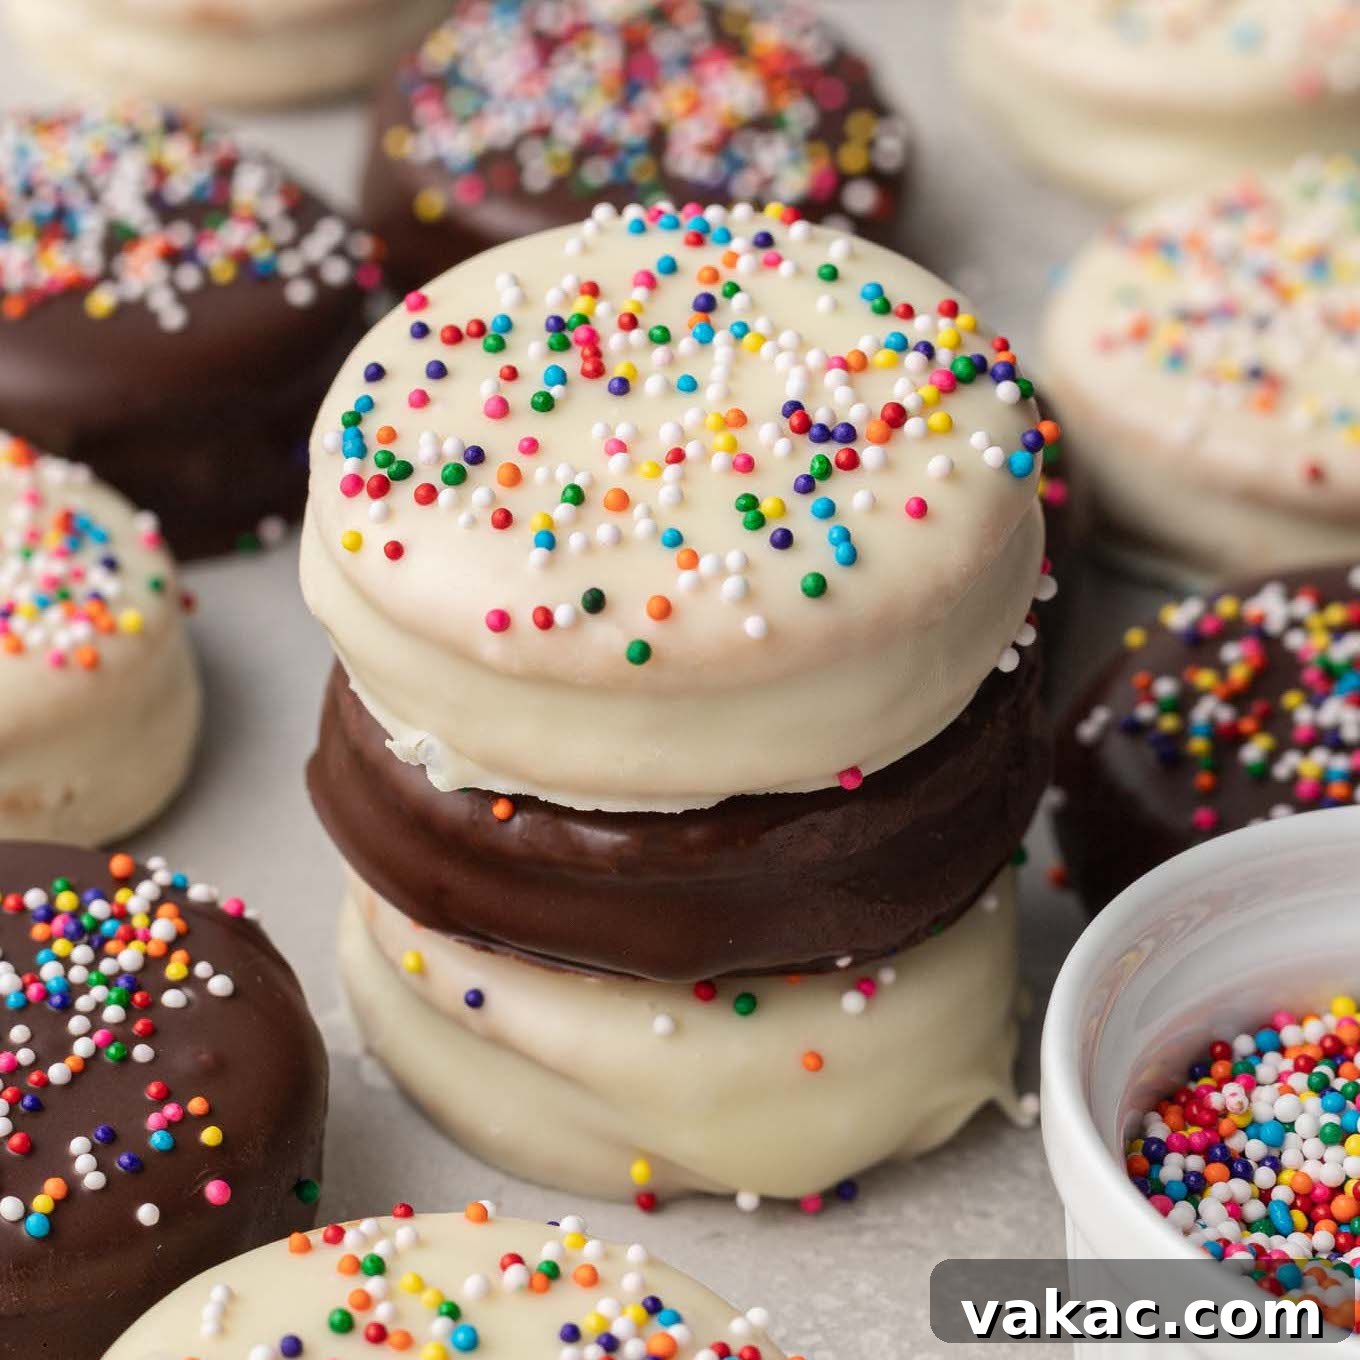
These delightful no-bake Ritz cookies are made with just four simple ingredients, offering an irresistible combination of sweet, salty, and rich chocolate-peanut butter flavor. They’re perfect for cookie exchanges, gifting, or a quick everyday treat!
Prep Time: 1 hour 15 mins
Chilling Time: 1 hour
Total Time: 2 hrs 15 mins
Ingredients
Servings: 30 cookies
- 1 cup creamy peanut butter (such as Jif or Skippy; 250 grams)
- ½ cup powdered sugar (60 grams)
- 60 Ritz crackers
- 16 ounces semi-sweet or white chocolate, roughly chopped (Bakers or Ghirardelli bars recommended)
- Optional: Sprinkles for topping
Instructions
- In a medium-sized mixing bowl, combine the peanut butter and powdered sugar. Stir until the powdered sugar is completely mixed into the peanut butter, forming a smooth, thick filling. Set aside.
- Line a large baking sheet with parchment paper. Arrange 30 Ritz crackers in a single layer on the prepared baking sheet.
- Scoop about 2 teaspoons of the peanut butter mixture onto the center of each cracker.
- Place another Ritz cracker on top of each filled cracker and gently press down until the peanut butter mixture reaches the edges.
- Transfer the baking sheet to the freezer for 15 to 20 minutes to firm up the cookies while you prepare the chocolate.
- In a heat-safe bowl, melt the chopped chocolate in 30-second intervals in the microwave, stirring well after each interval, until completely smooth. Alternatively, use a double boiler on the stovetop.
- Line a separate baking sheet with another piece of parchment paper. Remove half of the chilled cookies from the freezer.
- Using a fork, dip one cookie into the melted chocolate, ensuring it’s fully coated. Tap the fork gently on the side of the bowl to remove excess chocolate. Use a toothpick to help slide the coated cookie off the fork onto the prepared baking sheet. Immediately add sprinkles if desired. Repeat with the remaining frozen cookies, working in batches to keep them firm.
- Once all cookies are coated, transfer the baking sheet to the refrigerator to chill for 45 minutes to 1 hour, or until the chocolate has completely hardened.
Notes
Storage Instructions: Store cookies in an airtight container at room temperature or in the fridge for up to one week.
Freezing Instructions: Cookies can be frozen for up to 3 months. Store them in a large freezer bag with parchment paper between layers to prevent sticking. Thaw overnight in the fridge before serving.
Cuisine: American
Course: Dessert
Author: Danielle Rye