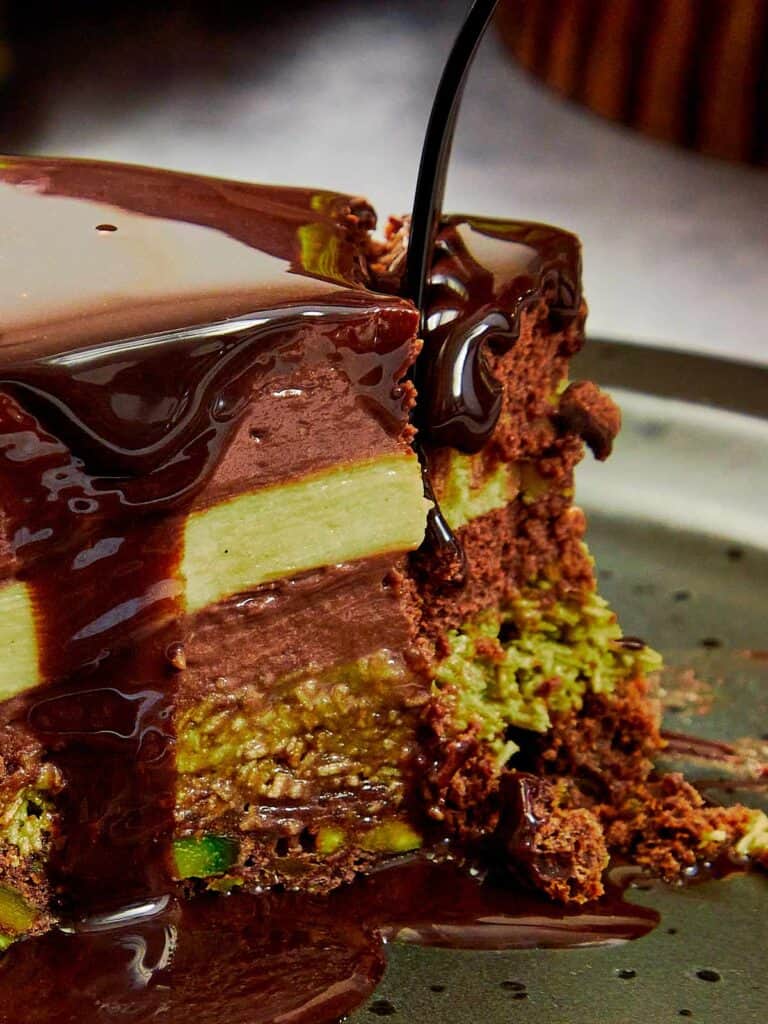
We're taking the viral Dubai Chocolate trend and turning it into the ultimate Christmas showstopper. We're talking about layers of gooey pistachio browniethat famous crunchy kadaïf (kataifi) fillingand a silky dark chocolate mousse that melts in your mouth. This is the Dubai chocolate cake recipe everyone will be asking you for!
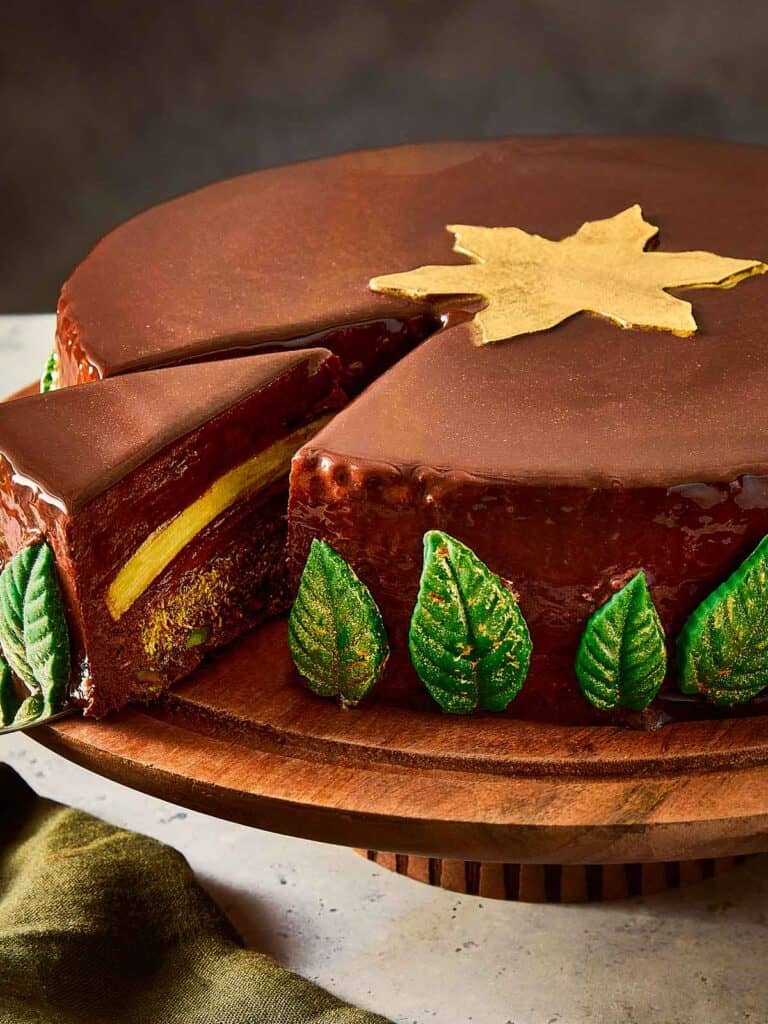
Why this looks hard, but is actually EASY!
We know, we know, entremets look intimidating. But you know we wouldn't leave you hanging! We've spent weeks perfecting this Christmas mousse cake to ensure the flavor is good and the steps are foolproof. We've broken this down into simple, manageable phases so you can look like a French pastry chef without the stress. It's rich, it's crunchy, and it's exactly what your holiday table needs. Trust us, if you can follow our simple dinner recipesyou can master this stunning dessert.
My essential baking toolkit
You will need a few specialty items for this cake, but they are great investment for any mousse cake or entremet.
- Main cake ring – Crucial for the shape and height! We use a 10 inch for the final assembly. We used the O'Creme Cake Ring Sturdy Stainless Steel Round Mousse Cake Ring Mold for Baking, Dessert Cake Decorating Pastry Rings 10 Inch Diameter x 3 Inch High.
- No ring? No panic! Use a 10 inch Springform Pan x 2.5-3 inch high (Cheesecake Pan). If the bottom is removable, take it out and just use the outer ring. Place it directly on your flat tray lined with plastic wrap. It works exactly the same way! If the bottom is stuck, line the entire inside (bottom and walls) with plastic wrap. Since we are freezing this cake solid, you can easily unclasp the latch and peel the plastic off once it's frozen. You might not get edges quite as sharp as a professional ring, but once you pour that mirror glaze over it, no one will know the difference! If you only have a 9 inch
- Pistachio Insert Ring – Used for the smaller, inner layer. We would recommend O'Creme Cake Ring Sturdy Stainless Steel Round Mousse Cake Ring Mold for Baking, Dessert Cake Decorating Pastry Rings 8 Inch Diameter x 1 1/2 Inch High.
- If you don't have this at home you can use a Standard 8-inch Round Cake Pan. You must line the inside of the pan with plastic wrap (cling film). Lay two long sheets of plastic wrap across the pan in a “+” shape. Push them into the corners and leave plenty of overhang. Pour the pistachio cream in and freeze. Once frozen solid, just pull the plastic wrap overhang to lift the disk right out! If you have a smaller springform pan, this works perfectly. Still line the bottom with plastic wrap so you can easily peel it off the frozen disk before placing it into the mousse.
- Silicone Baking Mat – Essential for non-stick baking of the brownie base and good for setting the chocolate decorations. You can pick up a set using this link Amazon Basics Silicone Rectangular Baking Mat.
- For the Decorations (optional) – we used this Leaf-shaped silicone mold for the outer cake borders but feel free to use any chocolate mouldings you may have in your home. For the main star in the centre we used a snowflake shaped cookie cutter and let's not forget the edible gold glitter spray used to decorate any cake! Be creative with your chocolate masterpiece and don't forget to take a photo and tag #cafedelites on facebook and instagram!
Technical support: The Gelatin Cheat Sheet and notes
This section is your safety net! Please read the notes on gelatin and chocolate before you begin.
Note: We are using standard Gold strength sheets. If using powdered gelatin, sprinkle it over 1 tbsp of cold water per teaspoon of gelatin to bloom before using.
What's In Dubai Christmas Cake?
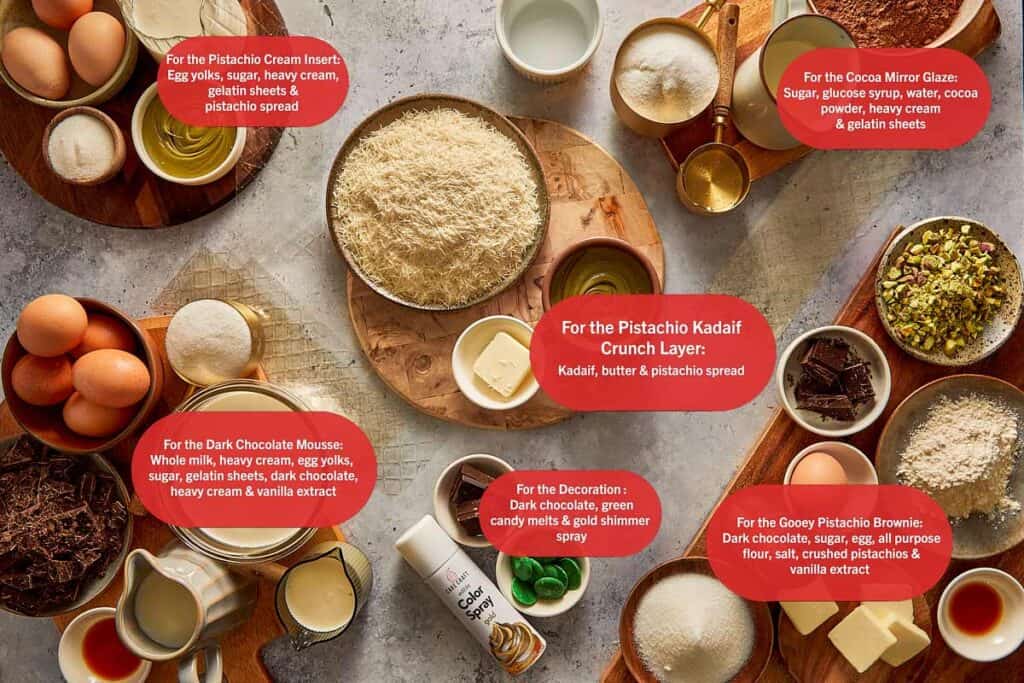
This cake relies on just a few key ingredients to do the heavy lifting. Since it's a mousse, the texture is everything. Here is what you need to know before you shop.
- The Dark Chocolate test
- test Since the mousse is mostly chocolate and cream do not use chocolate chips. Chips contain stabilizers that stop them from melting smoothly, which will give your mousse a grainy texture. Look for high-quality 70% Dark Baking Chocolate or Couverture chocolate (blocks or callets). Brands like Lindt Ghirardellior Callebaut are good. The bitterness of the 70% dark chocolate perfectly balances the sweetness of the pistachio cream. If you use milk chocolate, the cake will be way too sweet!
- Pistachio Spread There is a big difference between Pistachio Butter which is just ground nuts and Pistachio Cream/Spread. You want the Sweetened Pistachio Creamthink of it like the pistachio version of Nutella. It is thick, sweet, and creamy. We love Pistachio Papi spread, but it's mostly found in Australia. Many of the viral Dubai chocolates use the Pisti brand from Italy, but any Italian Pistachio Cream will work. This is what gives us that gooey, luxurious layer inside the crunch. We used this in our pistachio cream skillet cookie and it was so indulgent and gooey!
- Gold Gelatin Sheets You'll notice this recipe uses Gold Strength Gelatin Sheets sometimes called Leaf Gelatin (200 Bloom, which refers to the firmness of the gelatin). Sheets give a much cleaner, smoother texture than powder. They melt evenly and don't leave that gummy aftertaste that powder sometimes can. If you must use powder, check the technical support section above for the conversion, but for a special occasion like Christmas, the sheets are worth ordering!
- Kataifi (Kadaïf) Pastry – This is shredded phyllo dough. You will usually find it in the frozen section of Middle Eastern grocery stores or gourmet markets. It must be toasted in butter until deep golden brown. If you skip this or under-toast it, it will get soggy inside the cake. We want that crunch to last for days!
- Heavy Cream – Remember calories don't count around the holiday season, so please use full fat (at least 35%) whipping cream. Anything less won't whip up properly to hold the structure of the mousse, and your cake might collapse.
Note: Find the full list of ingredients and measurements in the Recipe Card.
On the stove
If you have the time We highly recommend spreading this over 3 days. Trust us, rushing an entremet is how mistakes happen! By breaking it up, you only have to do about 30–45 minutes of work per day. If you are short on time or just decided to make this last minute…we've been there!, you can pull this off in just over 24 hours.
But here is the hard truth: You cannot cheat the freezer. Physics is physics! The cake must be frozen solid to unmold, and it must thaw to be edible. Below we have stepped out the whole process across 3 days.
Day 1 – The Inserts
Pistachio Cream
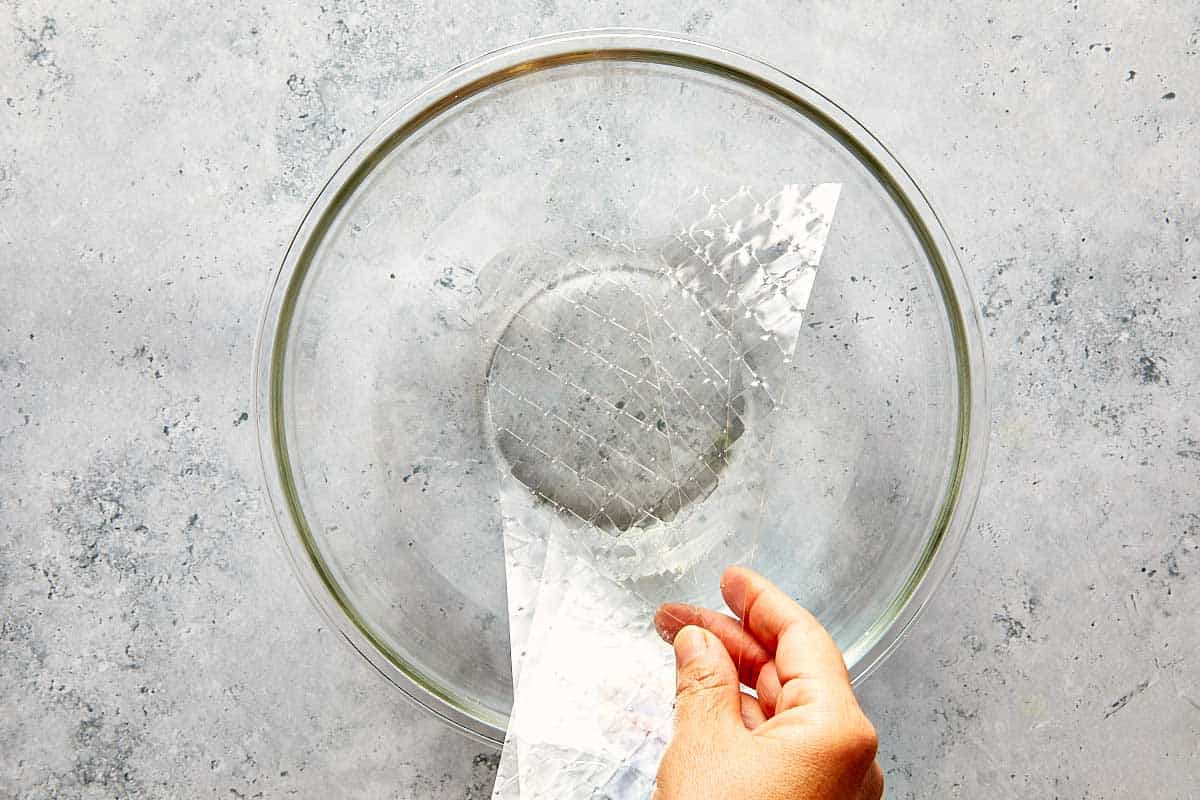
- Place your gelatin sheets in a bowl of cold water for 10 minutes to soften.
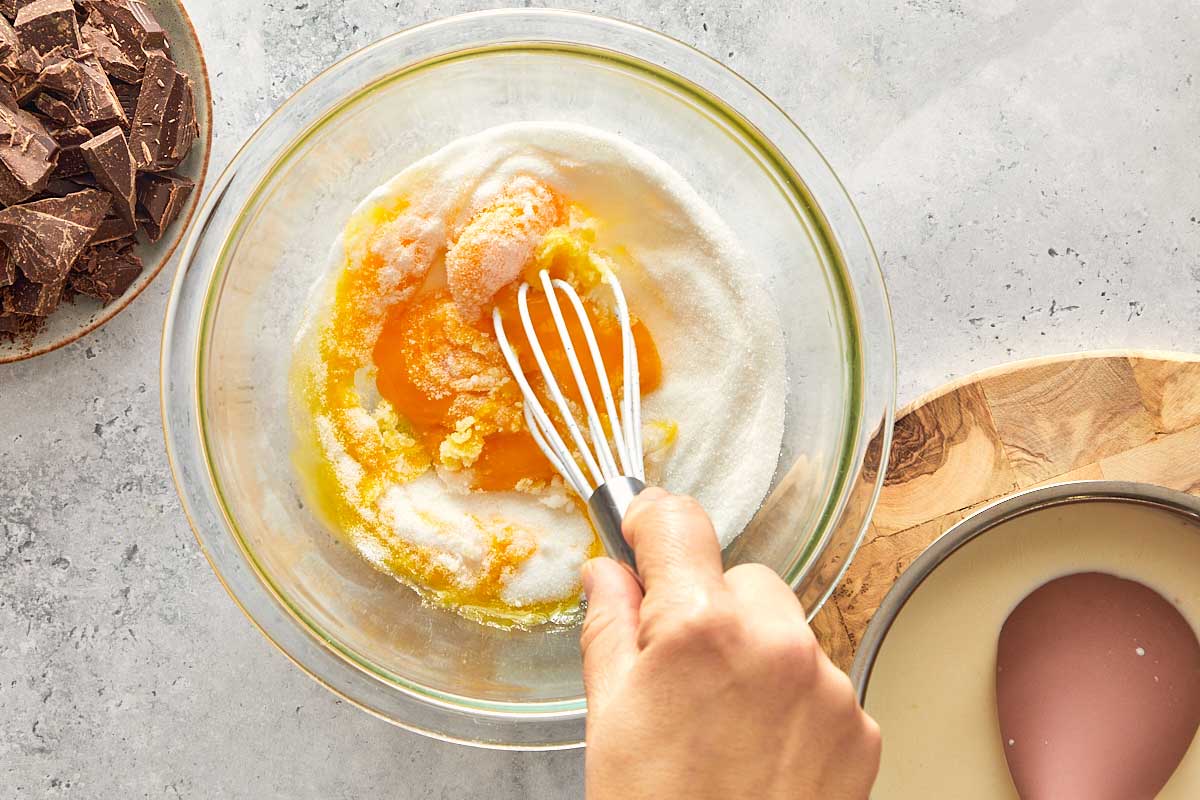
- In a mixing bowl, whisk the egg yolks and sugar together until they look slightly pale and smooth.
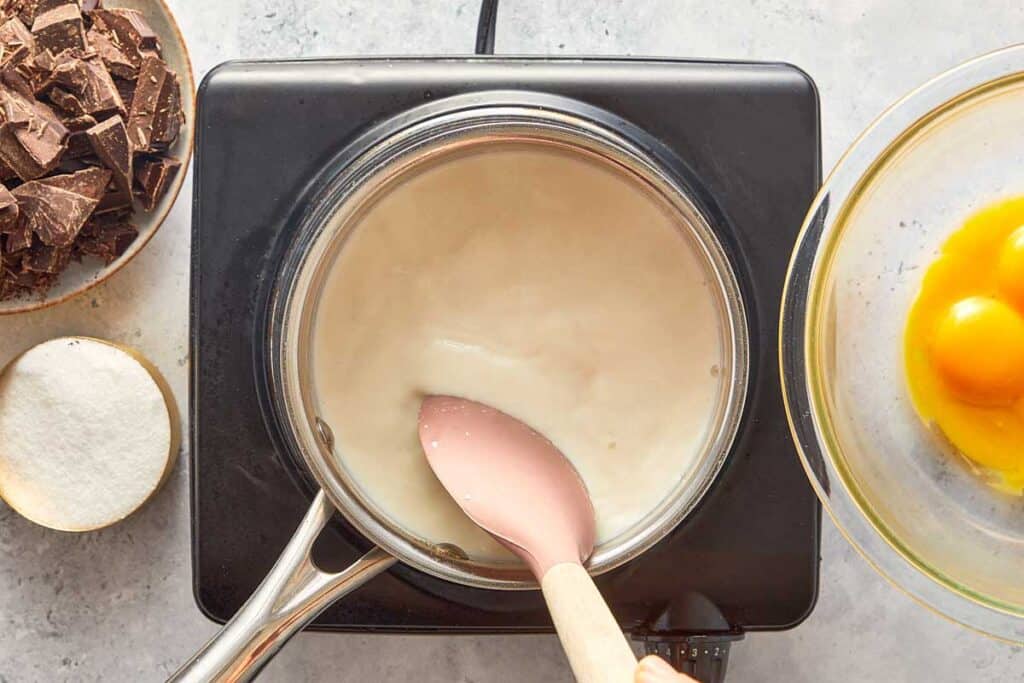
- Pour the heavy cream into a saucepan and heat until it starts steaming, take off heat and slowly pour the hot cream into your yolk mixture while whisking constantly (this stops the eggs from scrambling!). Stir until combined.
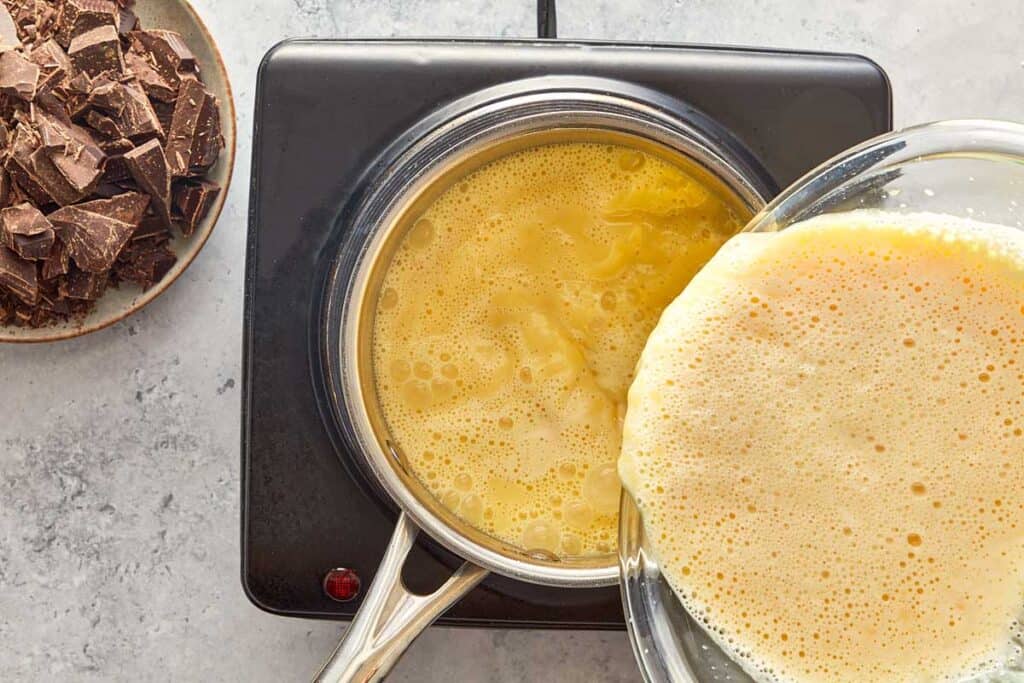
- Pour everything back into the saucepan. Cook over medium-low heat, stirring constantly with a spatula, until it thickens slightly and reaches 180–183°F (82–84°C).
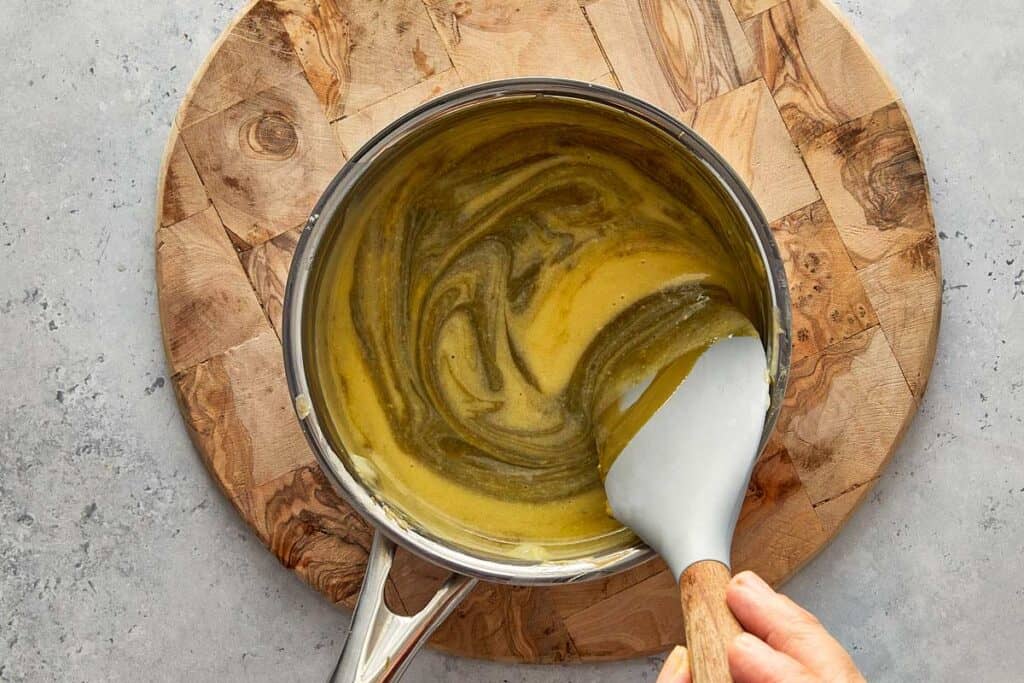
- Remove from heat. Squeeze the water out of the gelatin sheets and stir them in until dissolved. With a spatula mix in the pistachio spread until smooth.
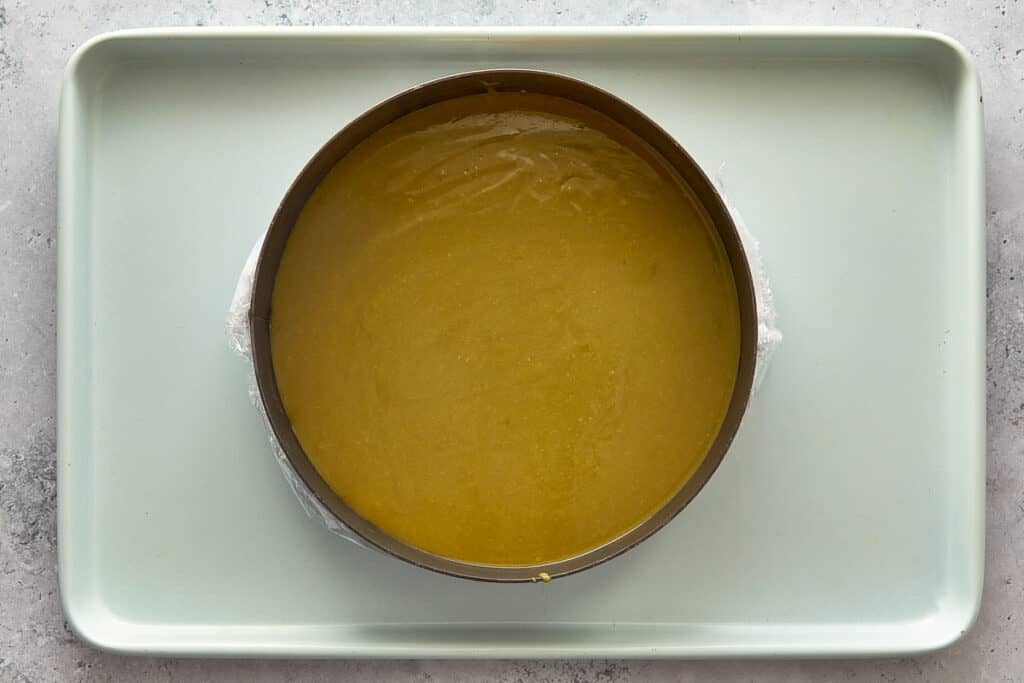
- Pour into a 20 cm (8-inch) ring mold lined with plastic wrap (or a silicone mold). Freeze for at least 3 hours until rock solid.
The Gooey Pistachio Brownie

- Preheat Set oven to 160°C (320°F).
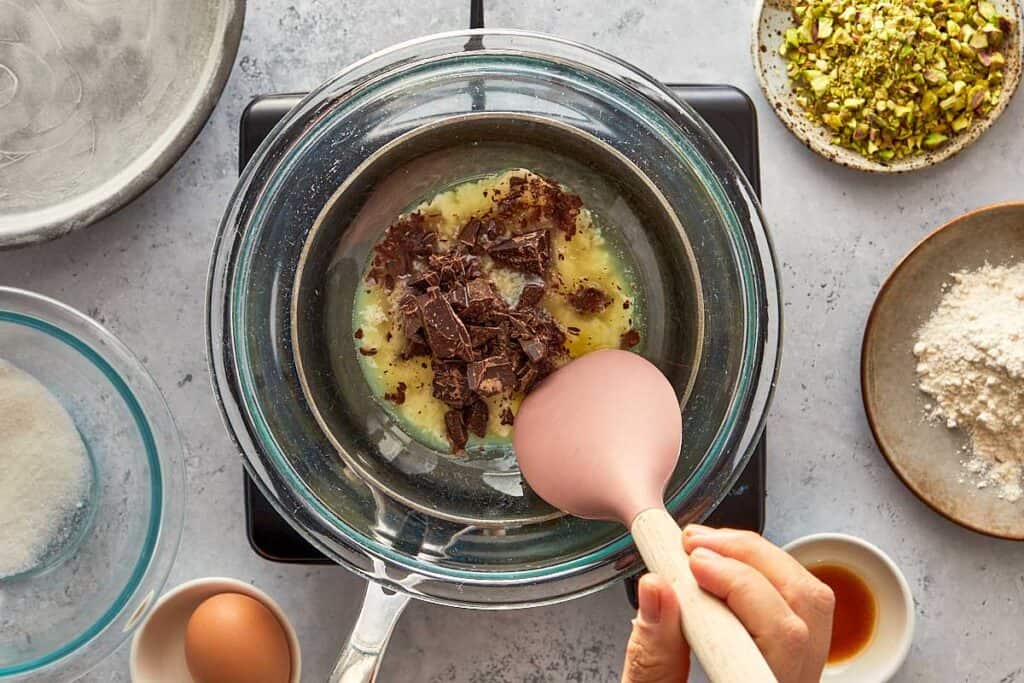
- Melt the butter and chocolate together (microwave in short bursts is easiest, otherwise use the double boiler method to slowly melt the chocolate and butter) and stir until smooth. In a separate bowl, whisk the egg and sugar until pale, then stir in the chocolate mixture.
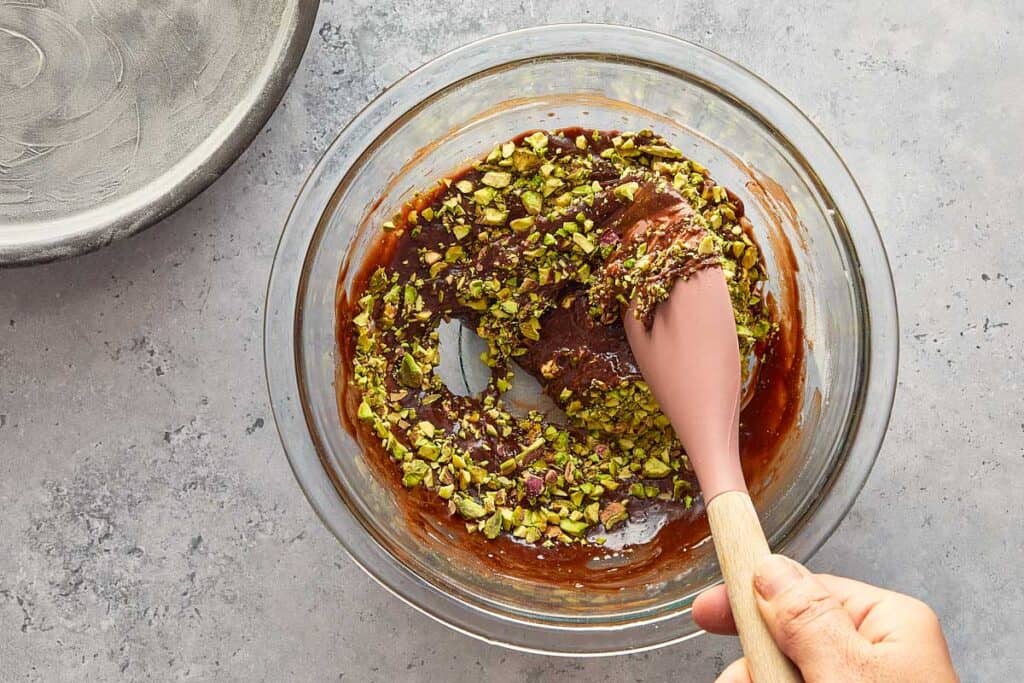
- Stir in the vanilla, flour, and salt until smooth, then fold in the crushed pistachios. This base is inspired by our famous Best Fudgy Cocoa Browniesbut we've tweaked it to be the good sturdy base for the mousse.
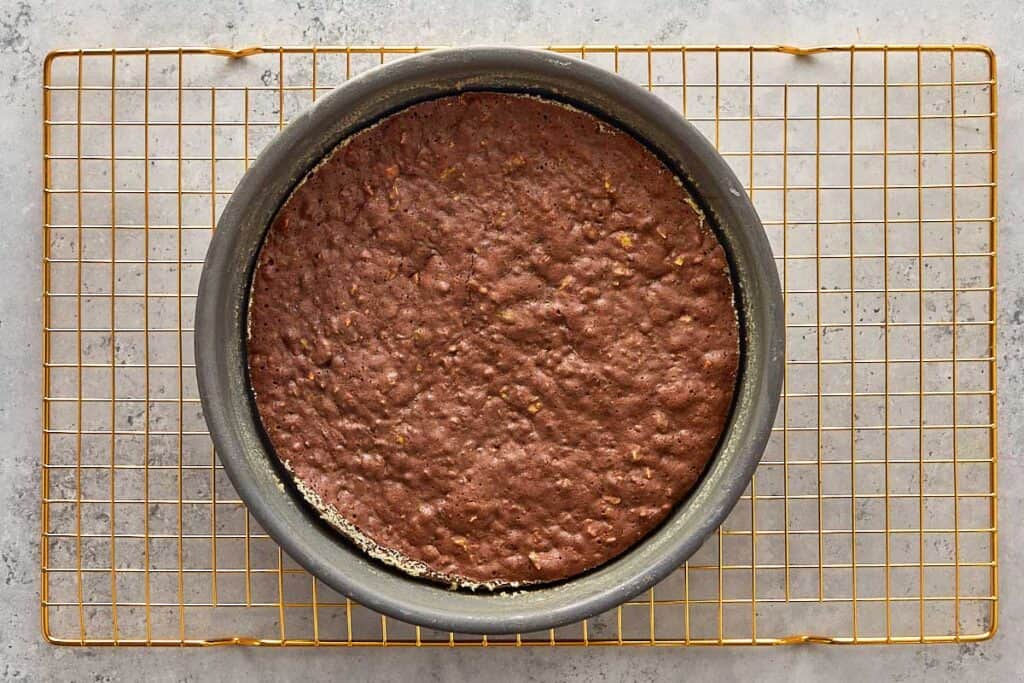
- Grease an 8-inch round cake pan and dust with flour, tapping out the excess. Pour into your pan and bake for 12 minutes. The center should still be slightly soft that's what makes it gooey! Let it cool completely on the bench.
The Crunchy Layer
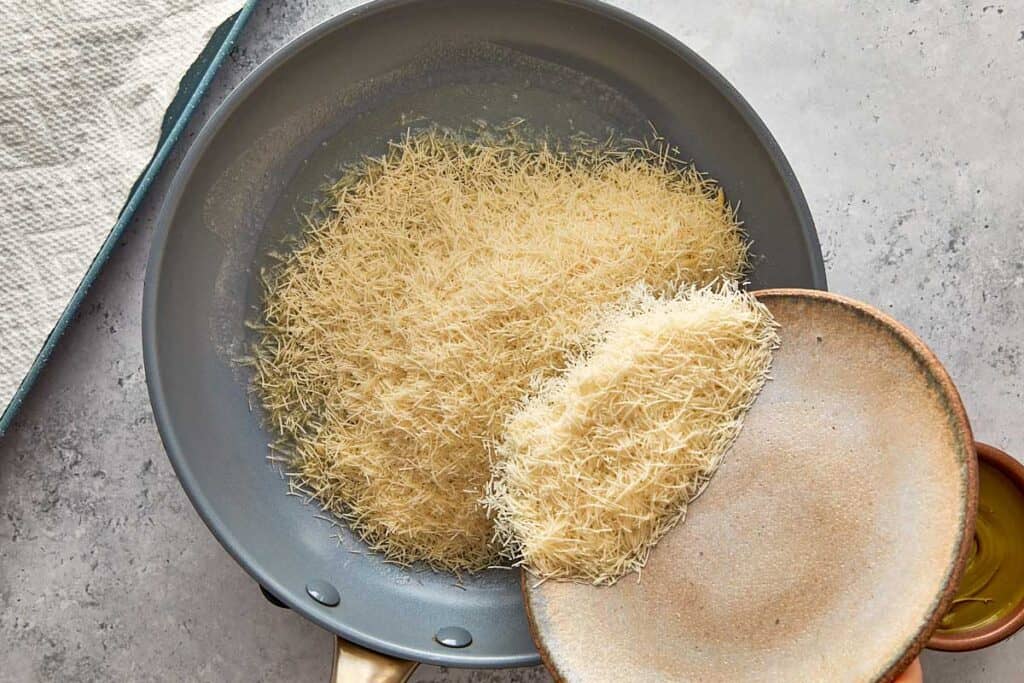
- Melt the butter in a large pan over medium heat. Add the kadaïf.
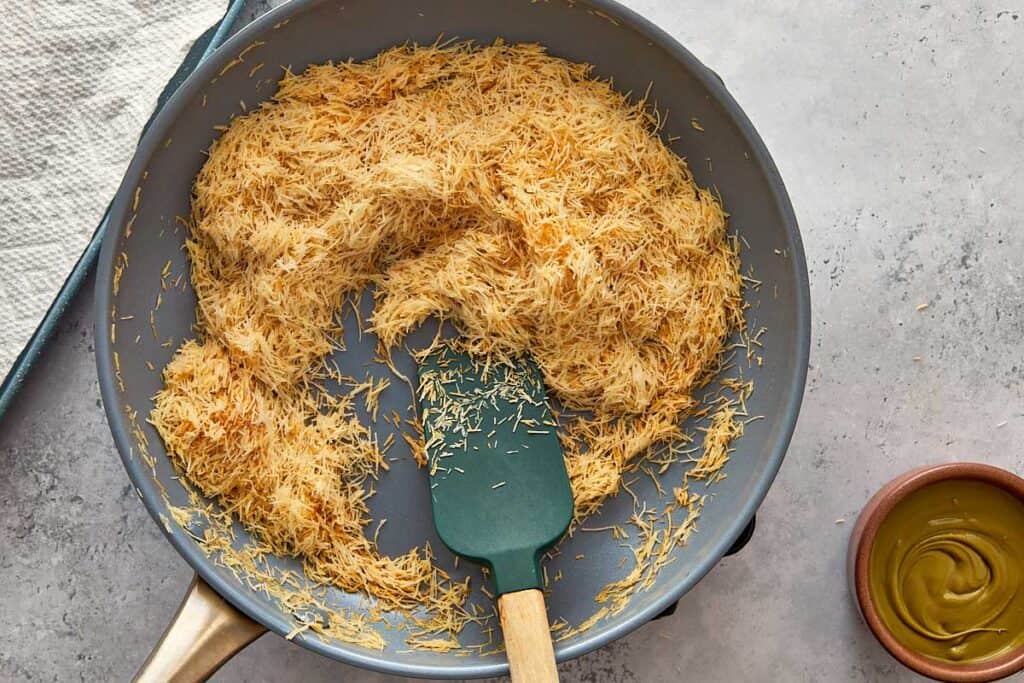
- Sauté for 5–7 minutes until it's golden and crispy, stirring constantly to not burn.
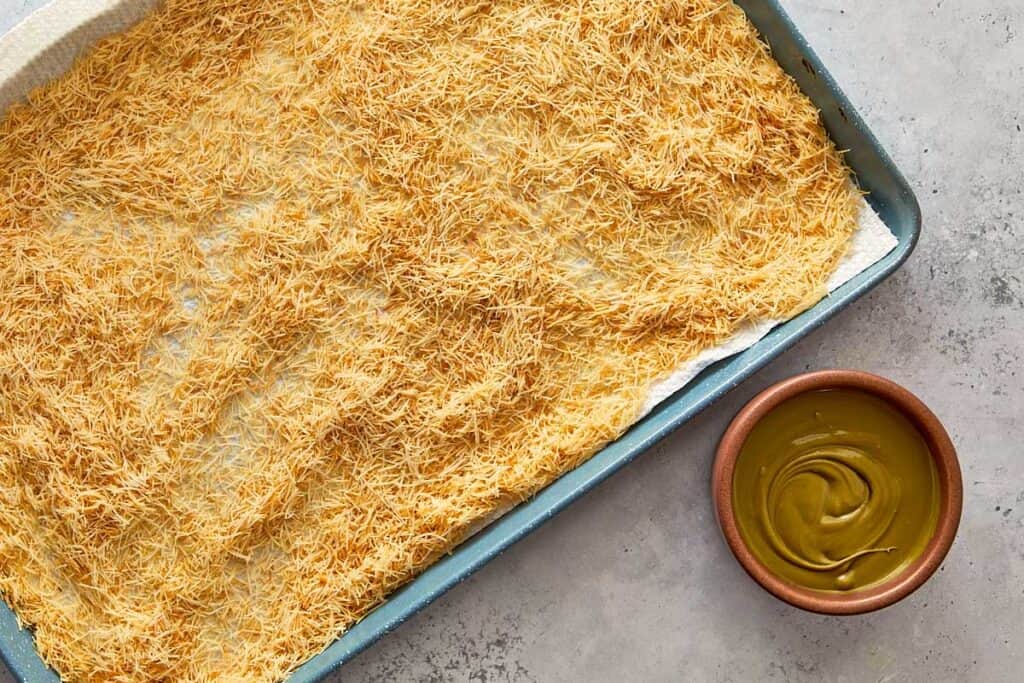
- Spread it on a paper towel to cool (don't skip this or it gets soggy). Once cool, mix it with the pistachio spread.
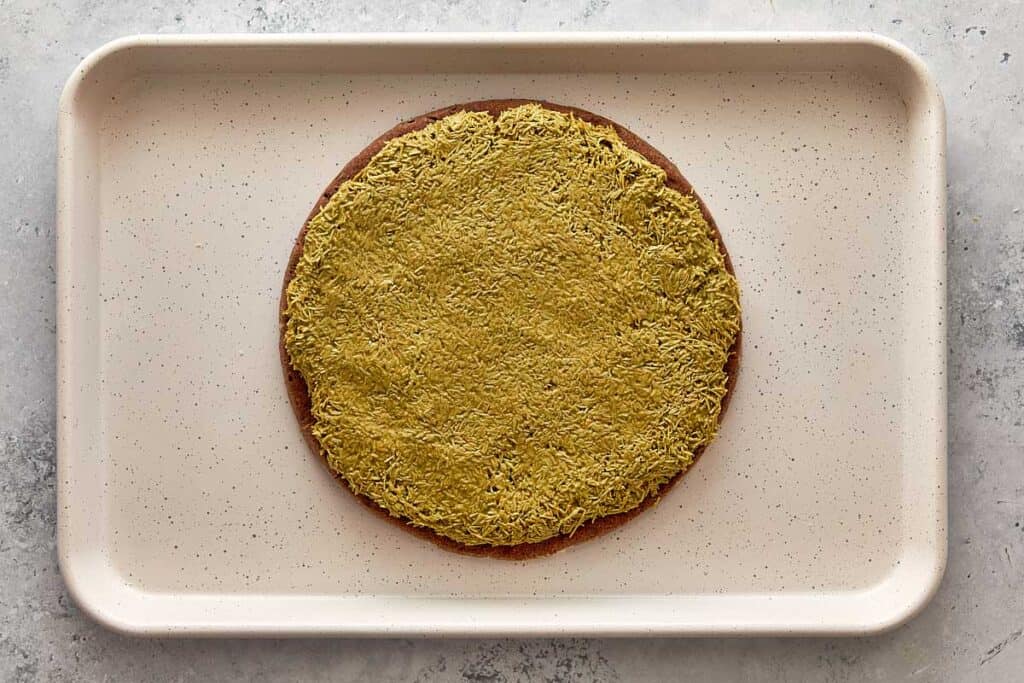
- Spread this mixture evenly over your cooled brownie. Press it down lightly to stick, then pop the whole thing in the fridge.
Day 2 The mousse and assembly
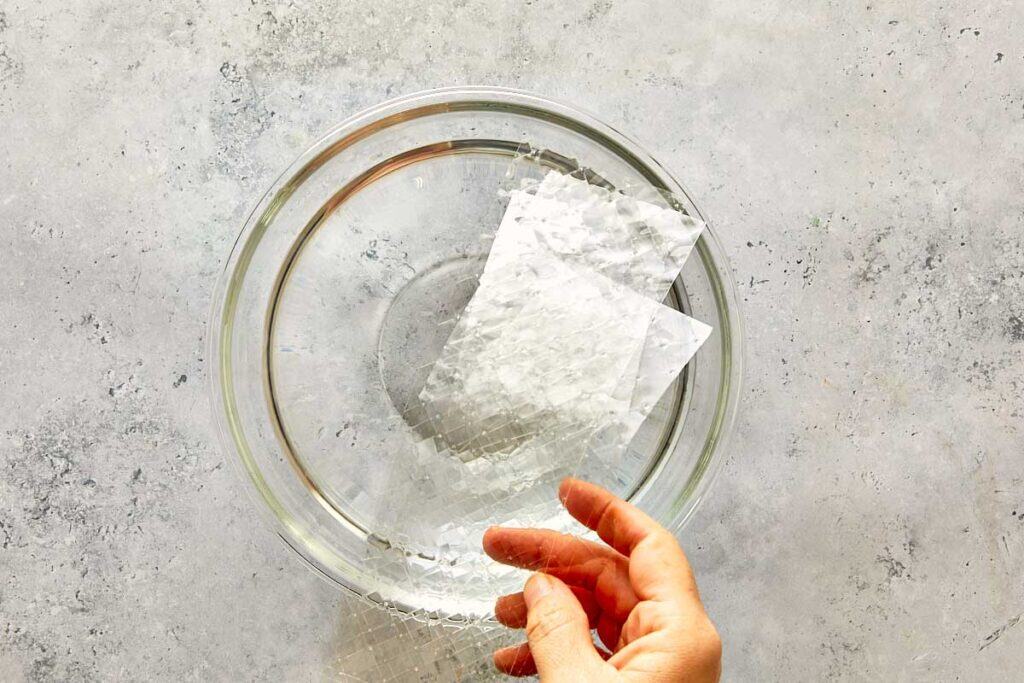
- Soak gelatin sheets in cold water for 10 minutes.
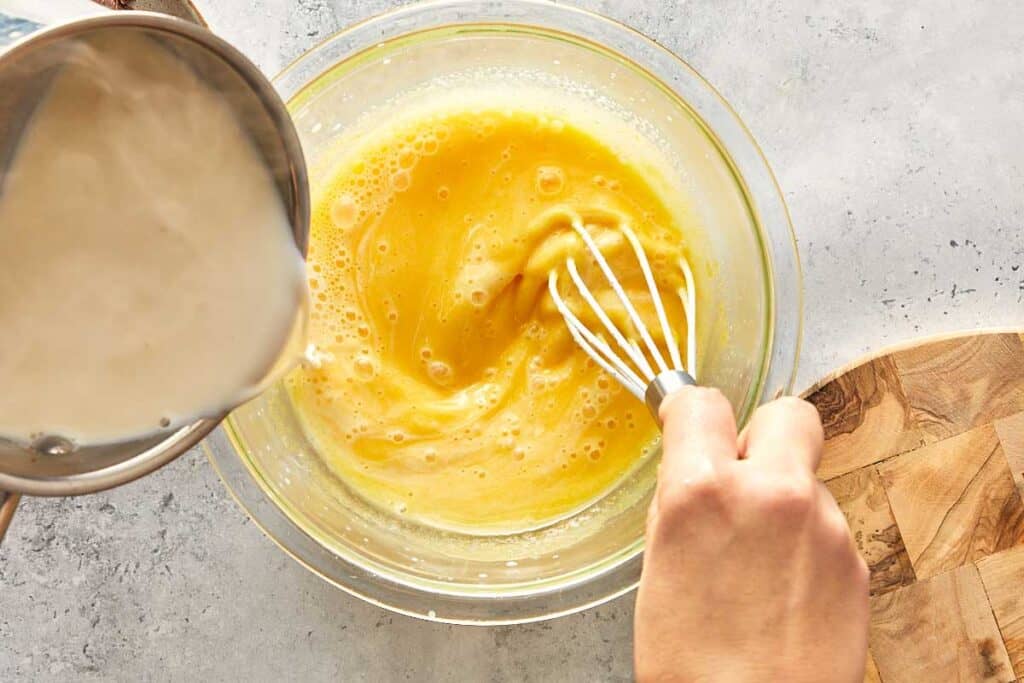
- Heat the milk, heavy cream (⅔ cups), and vanilla in a saucepan until hot. Whisk yolks and sugar in a bowl, then slowly pour in the hot milk while whisking.
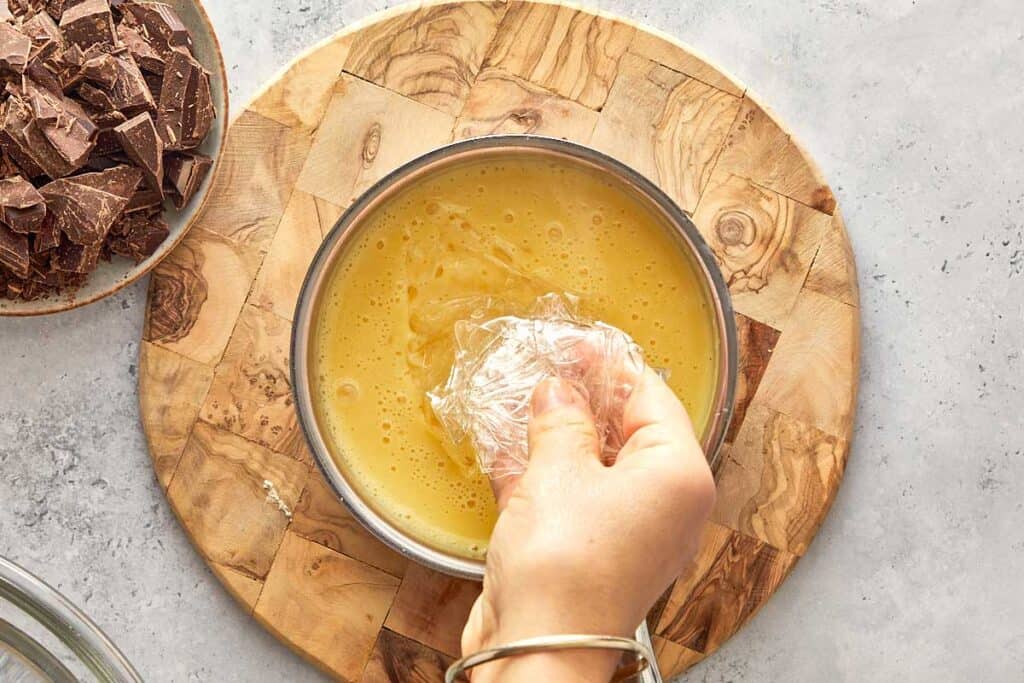
- Return to the stove and cook over medium heat to 180–183°F (82–84°C). Remove from heat and stir in the squeezed gelatin.
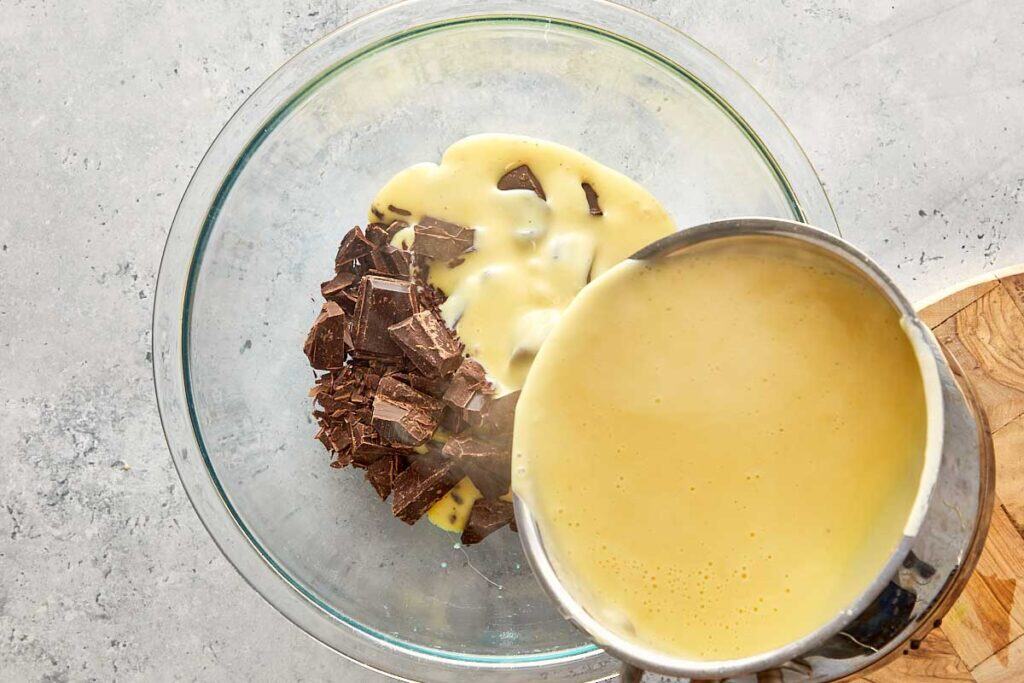
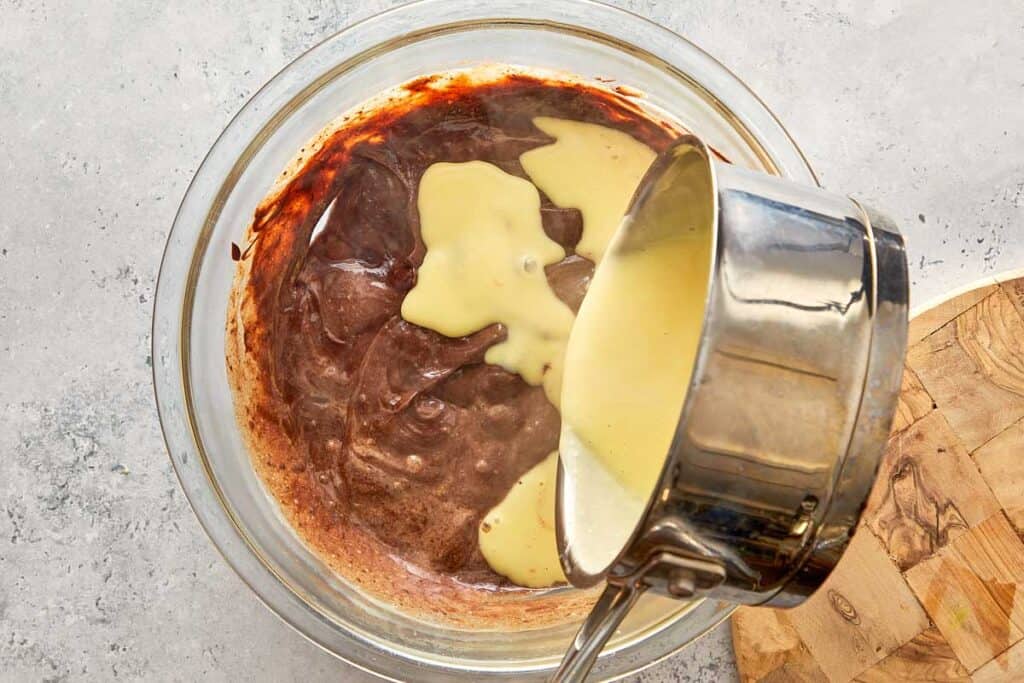
- Melt the chopped chocolate in stages in the microwave as to not burn. Pour this hot custard over your melted dark chocolate in three batches, stirring until glossy.
- THE CRITICAL STEP: Let this chocolate mixture cool to 95–104°F (35–40°C). If it's hotter, it will melt your cream; cooler, and it will get lumpy.
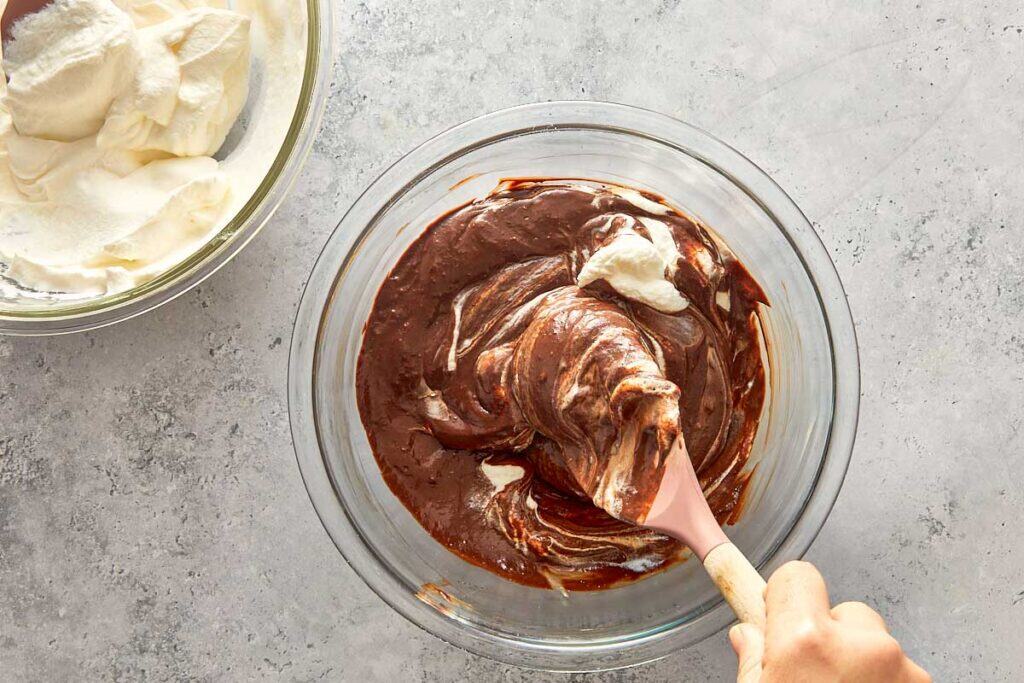
- Whip the remaining heavy cream (1 ⅓ cups) to soft peaks. Gently fold the cooled chocolate mix into the whipped cream in three batches. Keep it light and airy.
Assembly building upside down
We are building this upside down so the top is perfectly smooth.
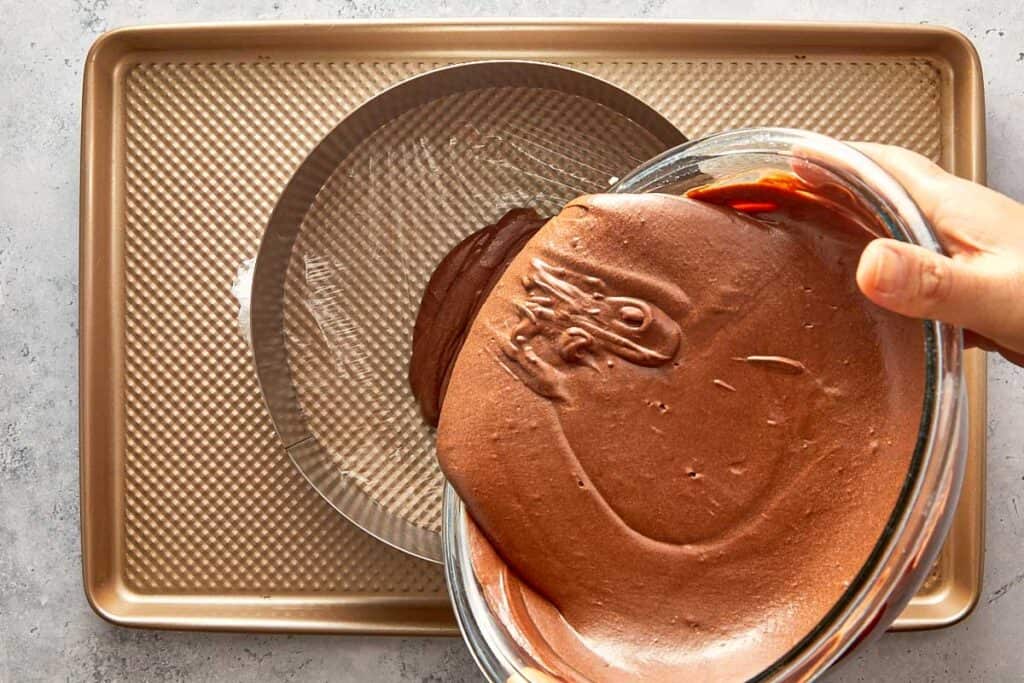
- Use a 10-inch ring mold and stretch plastic wrap tightly across the bottom.
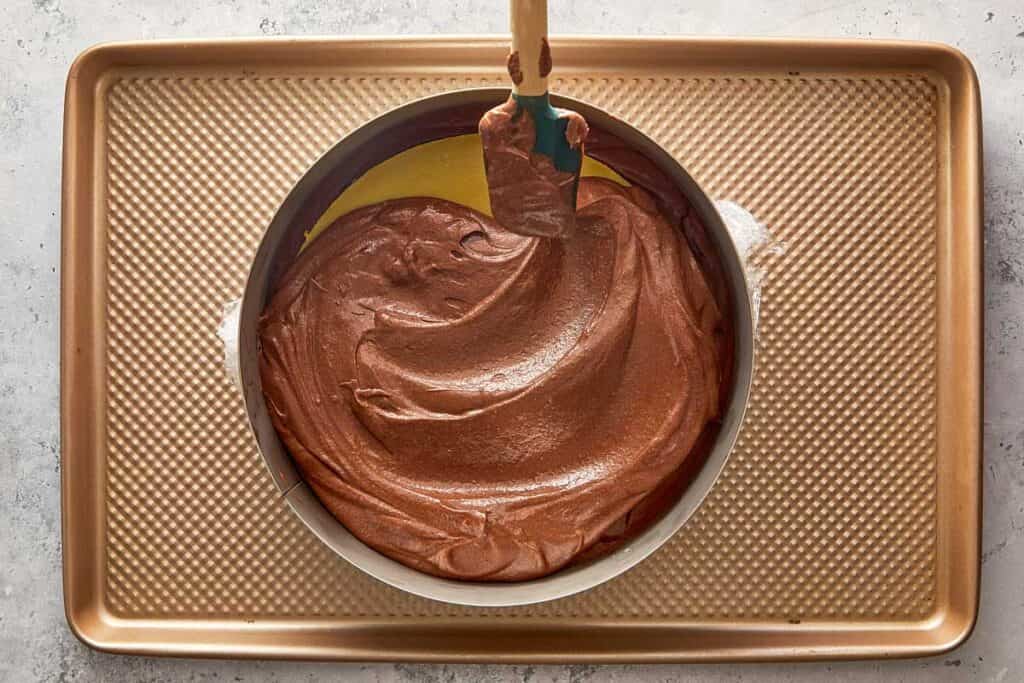
- Pour about ⅔ of the mousse into the mold. Tap it on the counter to remove air bubbles. Freeze for 10 minutes just to firm it up slightly.
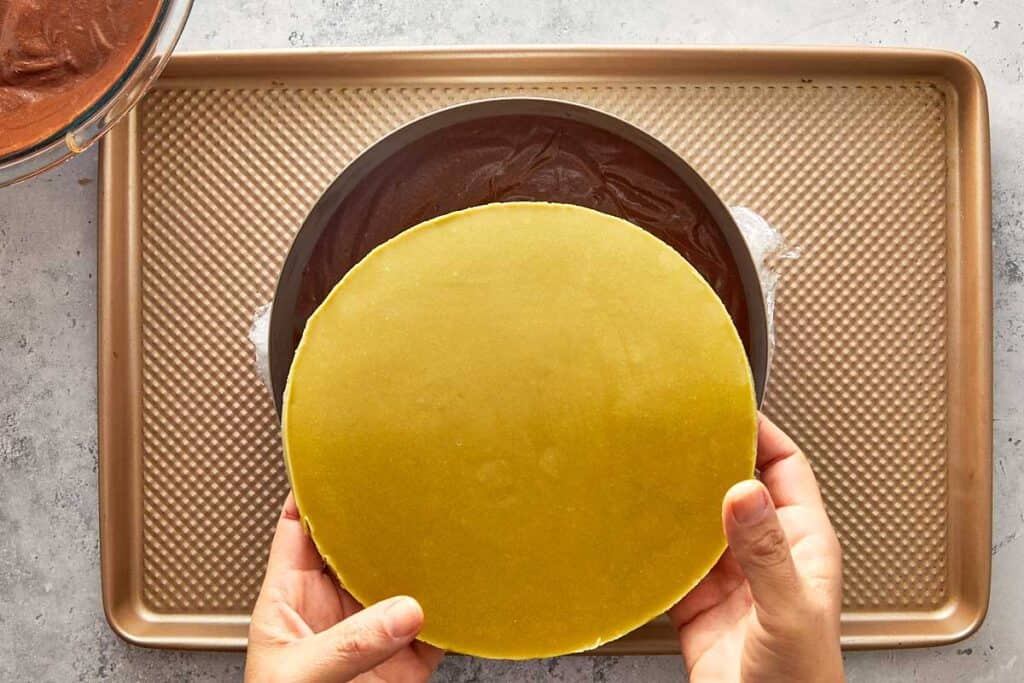
- Take the frozen pistachio disk (from Step 1) and place it in the center. Press lightly.
- Pour the rest of the mousse over the insert.
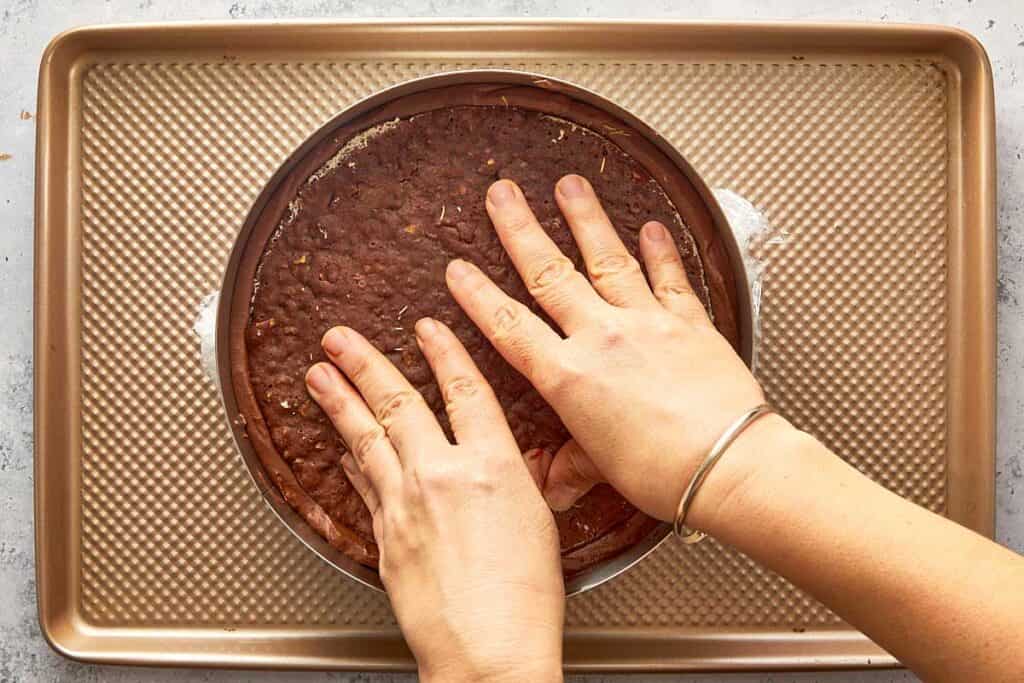
- Take your Brownie/Crunch layer. Place it crunch-side down onto the mousse. Press it gently until the mousse comes up the sides flush with the brownie.
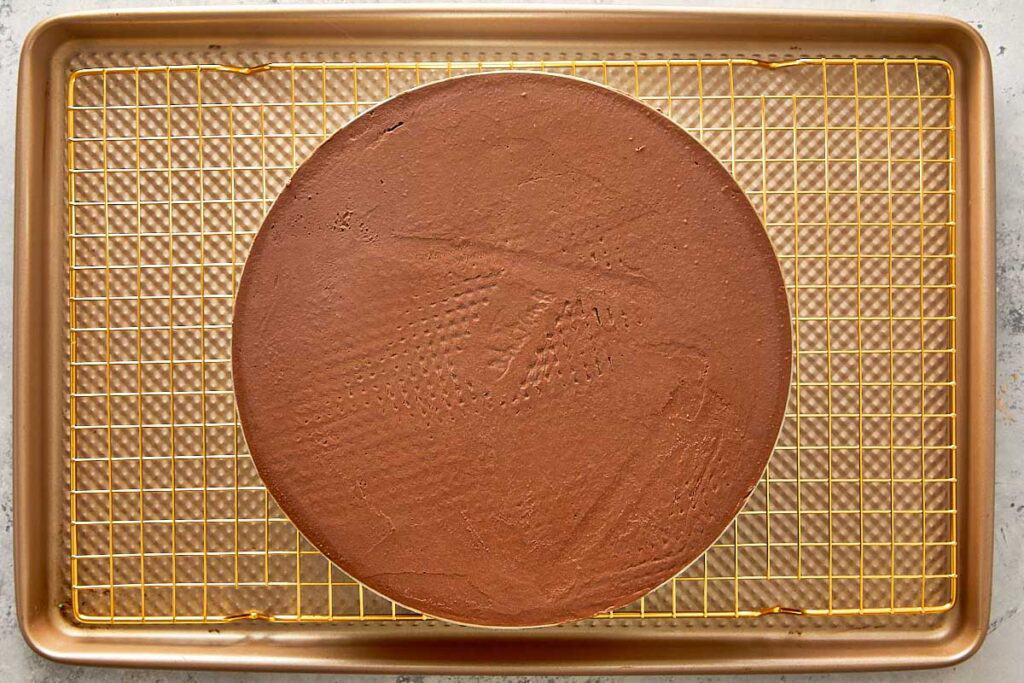
- Freeze the entire cake for at least 6 hours (overnight is best).
Day 3 The serving day – a reliable day
The mirror glaze
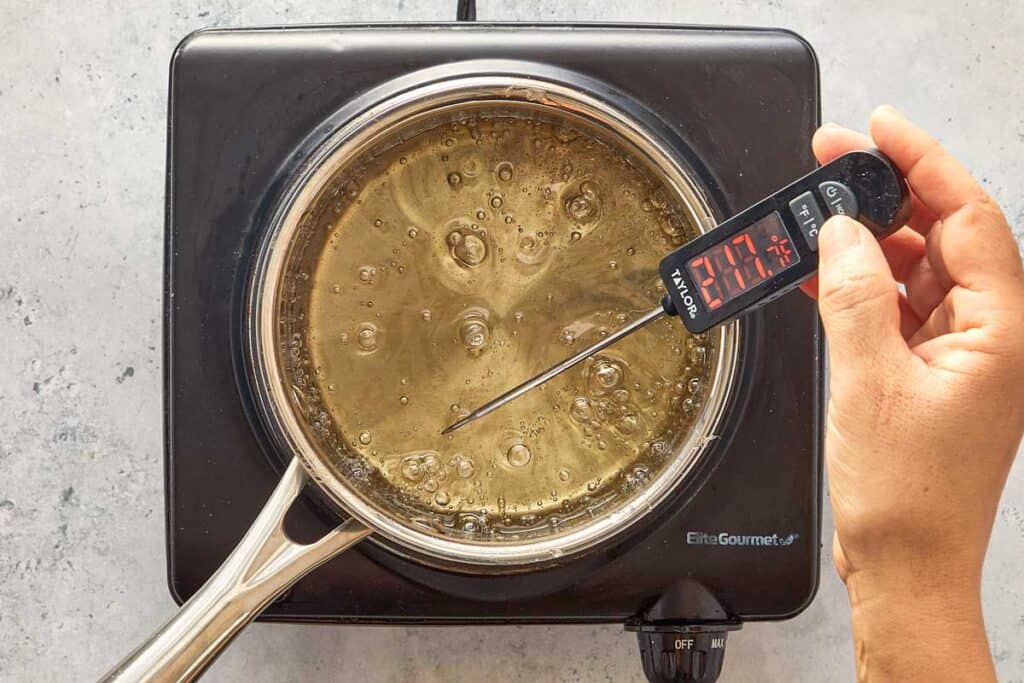
- Soak gelatin in cold water. Boil sugar, glucose, and water in a saucepan to exactly 103°C (217°F).
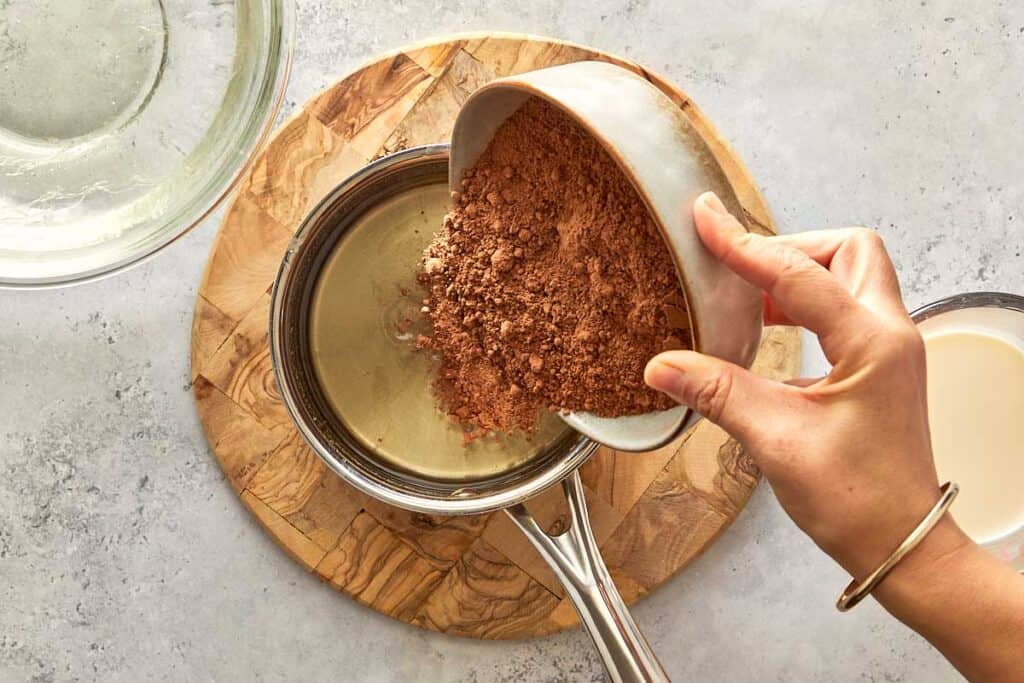
- Remove from heat, whisk in the cocoa powder, then stir in the warm cream (heated to 60°C) and the gelatin.
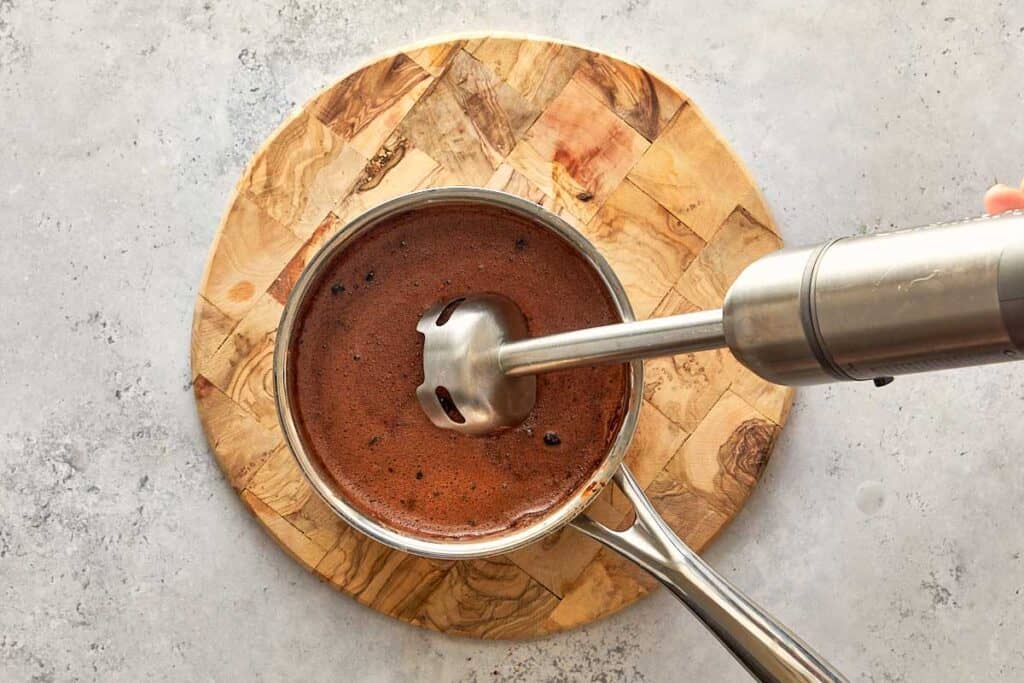
- Use a stick blender to smooth it out. Tip: Keep the blade fully submerged to avoid creating bubbles!
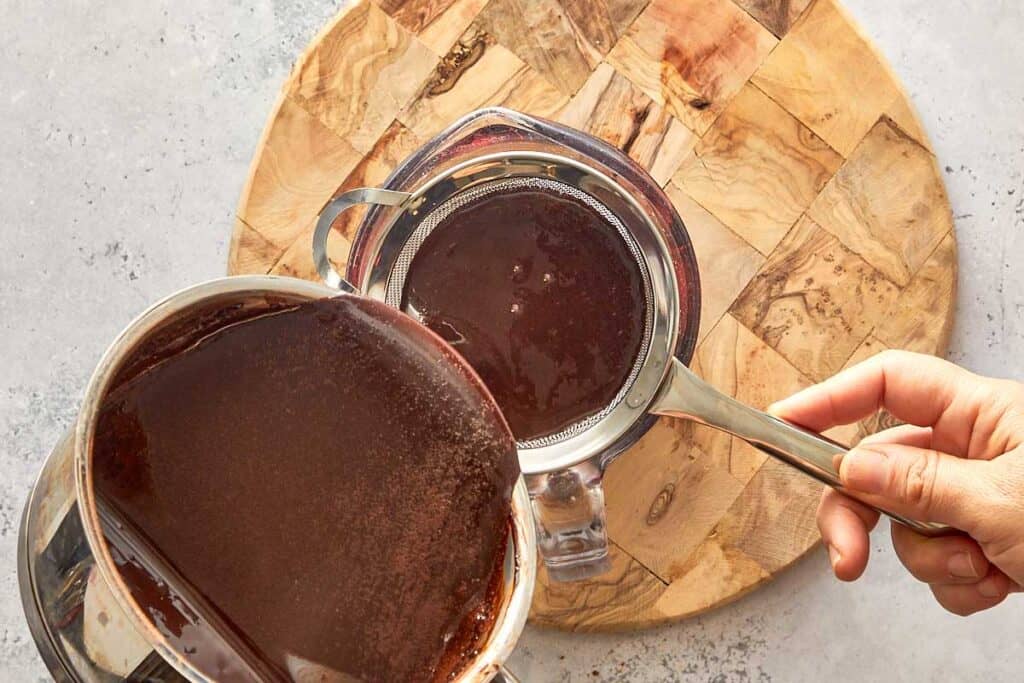
- Strain over a metal colander into a pouring jug and let the glaze cool to exactly 86°F (30°C)
Glaze
- Unmold your frozen cake and place it on a wire rack over a tray. Pour the 30°C glaze over the frozen cake in one confident motion.
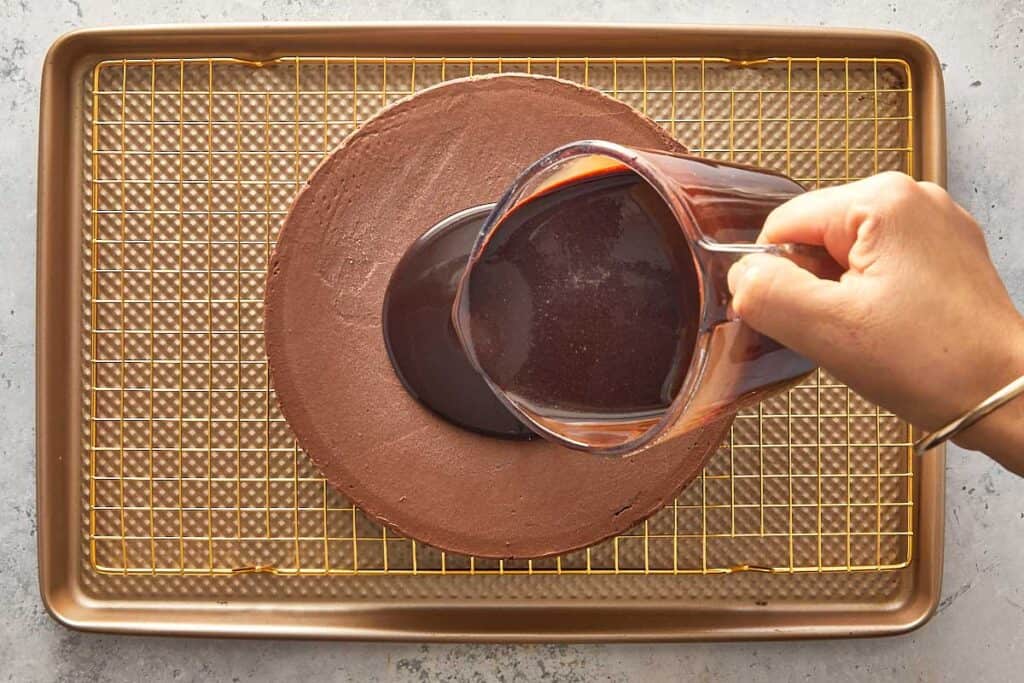
- Once the glaze stops dripping, transfer to a platter. Decorate with chocolate leaves and snowflakes (instructions below) and let it thaw in the fridge before serving.
Decorations
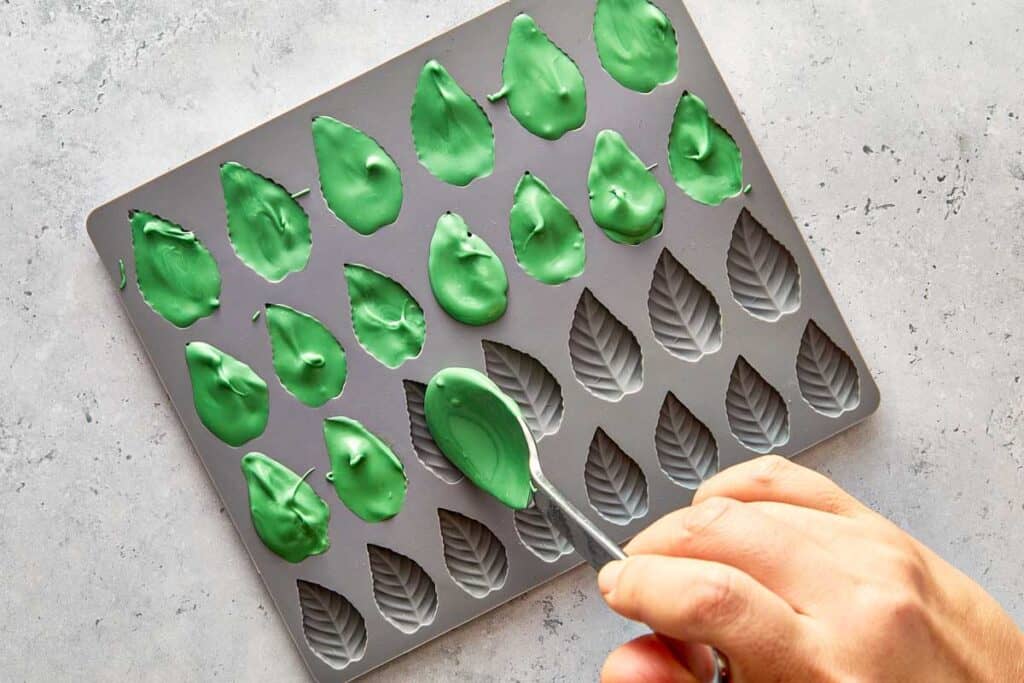
- Green Leaves: Melt green candy melts, pour into leaf molds, set in fridge.
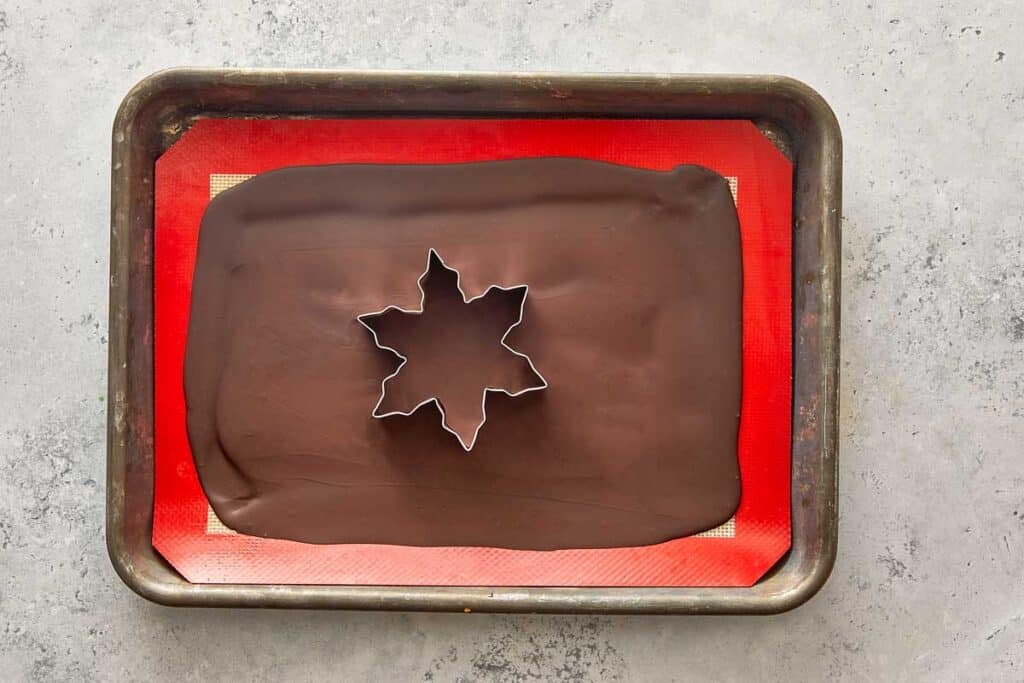
- Snowflake: Melt dark chocolate, spread thin on a silicon baking sheet, let firm up slightly, then cut with a snowflake cutter.
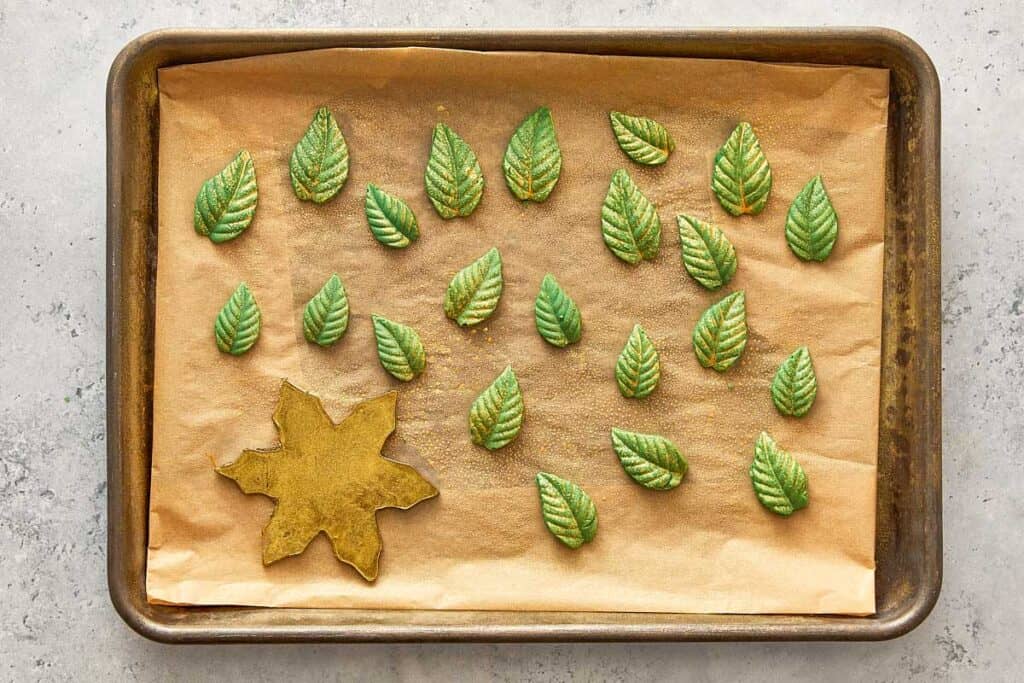
- Lay them out on a baking tray in the fridge to cool and then spray with edible gold glitter spray.
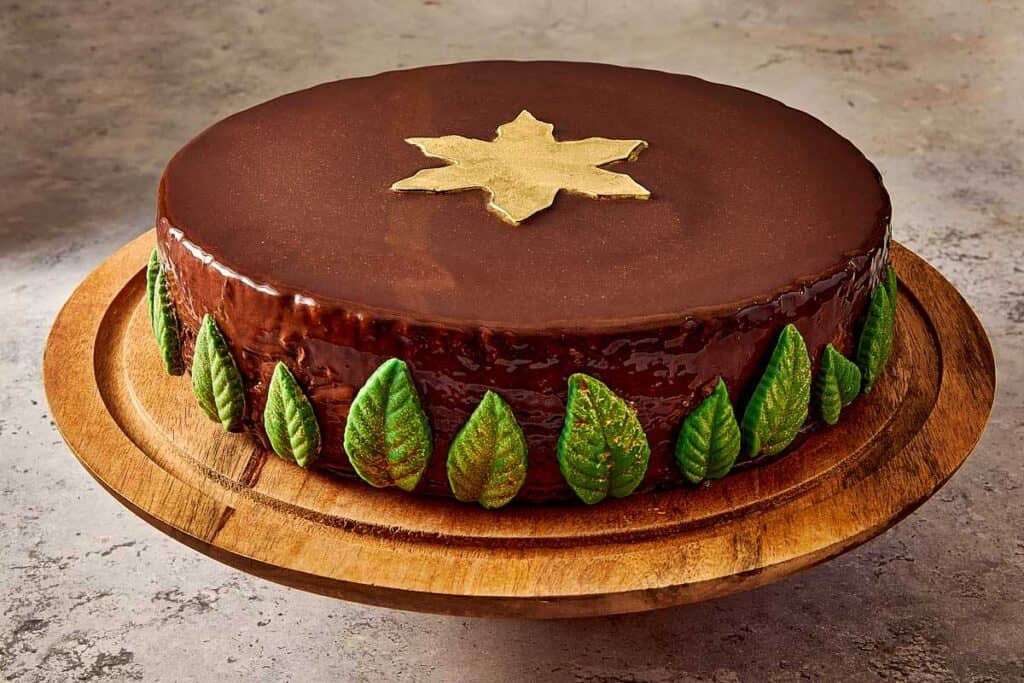
- Once the glaze stops dripping, transfer to a platter. Decorate with chocolate leaves and snowflakes (instructions below) and let it thaw in the fridge before serving.
If you are craving some more Chocolate Obsession we have you covered
The Original Fan Favorite: If you love the brownie layer in this, you have to try our Best Fudgy Cocoa Brownies. They are the chewiest, fudgiest brownies on the internet for a reason!
Keep it Simple: Want that chocolate fix but short on time? My Best Fudgy Chocolate Cake is a one-bowl wonder that never fails.
Mousse Lovers: If the mousse layer is your favorite part, you'll obsess over our 3-Ingredient Double Chocolate Mousse. It's fluffiness heaven.
Another Viral Hit: Love trendy desserts? My Basque Cheesecake is another “burnt” perfection recipe that took the world by storm.
The Holiday Classic: Looking for another showstopper? This Carrot Cake is always a massive hit at our Christmas table and we have a huge list of Christmas recipe ideas in our ultimate Christmas menu builder.
Recipe FAQ's
Can we make this cake ahead of time for Christmas?Yes! In fact, this cake is designed to be made ahead. You can complete the entire cake (up to the freezing step, before glazing) and keep it in the freezer for up to 1 month. Just wrap it tightly in plastic wrap to prevent freezer burn. Glaze it the morning you plan to serve it, or the night before!
We can't find Kataifi pastry anywhere! What can we use?If you can't find Kataifi check the frozen section of Middle Eastern grocers first! You can use shredded phyllo dough and toast it the same way. In a pinch, some readers have had success with crushed cornflakes or shredded wheat cereal mixed with the pistachio cream, though the texture won't be quite as authentic to the viral chocolate bar.
Help! My mousse has little chocolate lumps in it. What happened?This is a temperature issue. It happens if your melted chocolate base was too cold when you added the whipped cream. The chocolate shocked and set instantly into tiny grains. To prevent this, make sure your chocolate mixture is between 95–104°F (35–40°C) it should feel warm to the touch, not cool before you fold in the cream.
What you need
- 1½ sheets gelatin sheets gold strength
- 3 large egg yolks
- 2 tbsp sugar granulated
- 1 cup heavy cream
- ¼ cup Pistachio spread sweetened pistachio cream
- 4 tbsp butter unsalted
- ¼ cup dark baking chocolate 70% cocoa
- 1 large egg
- ¼ cup sugar granulated
- ½ tsp vanilla extract
- ¼ cup all purpose flour
- 1 pinch salt
- ⅓ cup pistachios crushed
- 1 tbsp butter unsalted
- 1½ cups kataifi pastry (Kadaïf) chopped roughly
- ½ cup pistachio spread sweetened
- 3 sheets gelatin sheets gold standard
- 1 ¼ cups dark baking chocolate 70% chopped
- 1 cup milk whole (full cream)
- ⅔ cup heavy cream 35% fat
- 1 tsp vanilla extract
- 5 large egg yolks
- ½ cup sugar granulated
- 1 ⅓ cups whipping cream cold for whipping
- 4 sheets gelatin sheets gold standard
- 1 cup sugar granulated
- ¼ cup glucose syrup
- 7 tbsp water
- ¾ cup unsweetened cocoa powder
- ¾ cup heavy cream
- 1 tbsp heavy cream
- 1 oz dark chocolate for snowflake
- 1 tbsp green candy melts for leaves
- 1 can gold shimmer spray
Method
- Place gelatin sheets in a bowl of cold water for 10 minutes to soften.
- In a medium mixing bowl, whisk the egg yolks and sugar together until they look slightly pale and smooth.
- Pour the heavy cream into a saucepan and heat over medium until it just starts steaming. Remove from heat.
- Slowly pour the hot cream into your yolk mixture while whisking constantly (don't stop whisking or the eggs will scramble!).
- Pour the mixture back into the saucepan. Cook over medium-low heat, stirring constantly with a rubber spatula, until it thickens slightly and reaches 180–183°F (82–84°C).
- Squeeze the excess water out of the softened gelatin sheets and stir them into the hot custard until dissolved. Add the pistachio spread and mix until smooth.
- Pour into an 8-inch ring mold lined with plastic wrap (or a silicone mold). Freeze for at least 3 hours until rock solid.
- Set oven to 320°F (160°C). Grease an 8-inch round cake pan and dust with flour, tapping out the excess.
- In a microwave-safe bowl, melt the butter (4 tbsp) and dark chocolate together in short bursts, stirring until smooth.
- In a separate bowl, whisk the egg and sugar until pale. Stir in the melted chocolate mixture.
- Stir in the vanilla, flour, and salt until just smooth, then fold in the crushed pistachios.
- Pour into your prepared pan and bake for 12 minutes. The center should still be slightly soft. Let it cool completely in the pan.
- Melt the butter (1 tbsp) in a pan over medium heat. Add the kadaïf and sauté for 5–7 minutes until golden and crispy. Stir constantly so it doesn't burn!
- Spread the toasted kadaïf on a paper towel to cool completely. Once cool, mix it in a bowl with the pistachio spread.
- Spread this crunch mixture evenly over your cooled brownie. Press it down lightly to stick, then place the brownie/crunch layer in the fridge to set.
- Soak gelatin sheets in cold water for 10 minutes. Place your chopped dark chocolate in a large heat-proof bowl.
- In a saucepan, heat the milk, heavy cream (⅔ cup), and vanilla until hot/steaming.
- Whisk yolks and sugar in a bowl. Slowly pour the hot milk mixture into the yolks while whisking to avoid scrambling the mixture.
- Return mixture to the stove and cook over medium heat to 180–183°F (82–84°C) stirring the whole time. Remove from heat and stir in the squeezed gelatin sheets.
- Melt the chopped dark chocolate in the microwave in short intervals until melted. Pour this hot custard over your the melted chocolate, mix until combined.
- Cool (CRITICAL STEP): Let this chocolate mixture cool to 95–104°F (35–40°C) on the counter.
- While it cools, whip the remaining heavy cream (1 ⅓ cups) to soft peaks. Gently fold the cooled chocolate mix into the whipped cream in three batches. Keep it airy!
- Prepare a 10-inch ring mold with plastic wrap stretched tight across the bottom.
- Pour about ⅔ of the mousse into the mold. Tap on counter to remove air bubbles. Freeze for 10 minutes to firm up slightly.
- Place the frozen Pistachio Insert (from the freezer) in the center. Press lightly.
- Pour the rest of the mousse over the insert.
- Take your Brownie/Crunch layer. Place it crunch-side down onto the mousse. Press gently until the mousse comes up the sides flush with the brownie.
- Freeze the entire cake for at least 6 hours (overnight is best).
- Soak gelatin in cold water.
- In a saucepan, bring the sugar, glucose syrup, and water to a boil. Cook until it reaches exactly 217°F (103°C). Remove from heat. Whisk in the cocoa powder until combined.
- In another small pot, heat heavy cream to 140℉ (60℃) and add in the squeezed (drained) gelatin sheets, once combined pour this mixture into the cocoa sugar mix in three stages, mixing gently the whole time.
- Use an immersion blender (stick blender) to smooth it out on a medium to low speed setting. Keep the blade submerged to avoid bubbles, until the glaze becomes smooth.
- Strain this mixture into a pouring jug using a metal colander. Let the glaze cool to exactly 86°F (30°C).
- Unmold your frozen cake and place it on a wire rack over a tray. Pour the glaze over the frozen cake in one confident motion.
- Once the glaze stops dripping, transfer to a platter. Thaw in the fridge before serving.
- For the Snowflake: Melt your 1 oz (30g) dark chocolate in the microwave in 20-second bursts, stirring in between until smooth.
- Pour the chocolate onto your silicone baking mat. Use an offset spatula (or the back of a spoon) to spread it out thinly, about the thickness of a credit card.
- Let the chocolate sit on the counter until it starts to set. You want it to reach a "leather" stage, where it looks matte and isn't wet, but isn't hard/snappy yet.
- Press your snowflake cutter gently into the chocolate. Do not try to lift them out yet! Just make the cuts.
- Place the entire mat in the fridge for 10 minutes to harden completely.
- Gently peel the silicone mat away from the chocolate shapes. They should pop right out.
- Place the snowflakes on a paper towel and spray them with the gold shimmer spray.
- For the chocolate leaves: Melt the 1 tbsp (15g) green candy melts in a small bowl.
- Spoon the melted candy into your leaf silicone mold. Tap the mold on the counter a few times to bring air bubbles to the surface.
- Place the mold in the fridge for 15 minutes.
- Pop the leaves out.
- Give them a light misting of gold shimmer spray (or brush with gold luster dust if you prefer a more subtle look).