
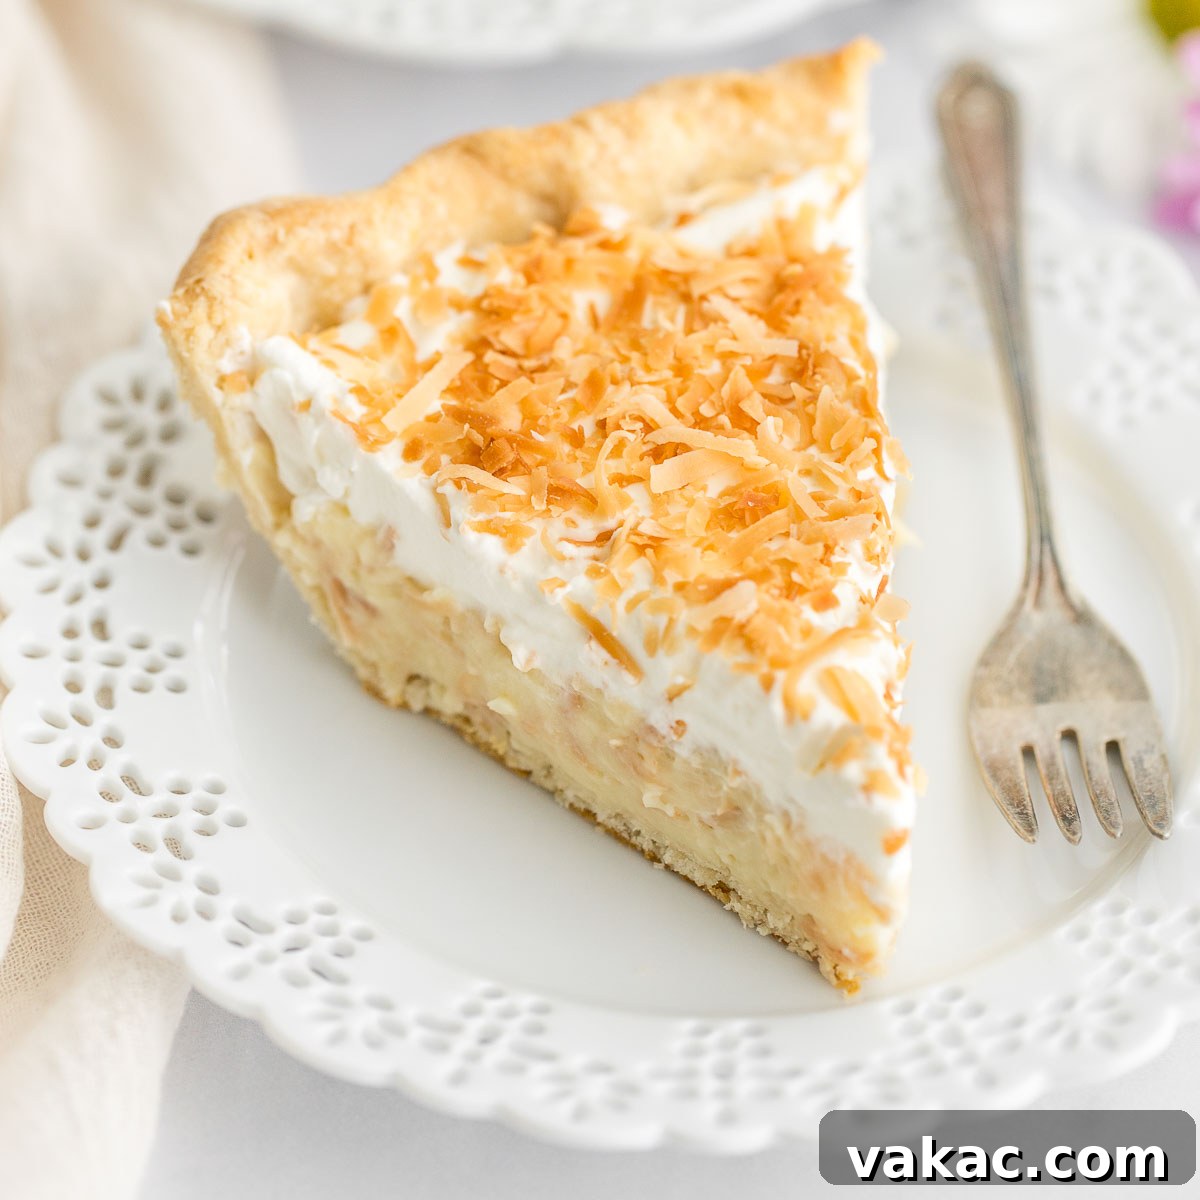
Welcome to the ultimate guide to crafting the most exquisite Homemade Coconut Cream Pie you’ll ever taste! Imagine a perfectly flaky, golden-brown pie crust cradling a rich, velvety coconut custard, generously crowned with fluffy whipped cream and a sprinkle of perfectly toasted coconut flakes. This isn’t just a dessert; it’s a tropical escape, a symphony of textures and flavors that will transport your taste buds to paradise with every decadent bite. Whether you’re a seasoned baker or just starting your culinary journey, this improved recipe promises a show-stopping pie that’s surprisingly easy to achieve. Get ready to impress your family and friends with a dessert that’s truly unforgettable.
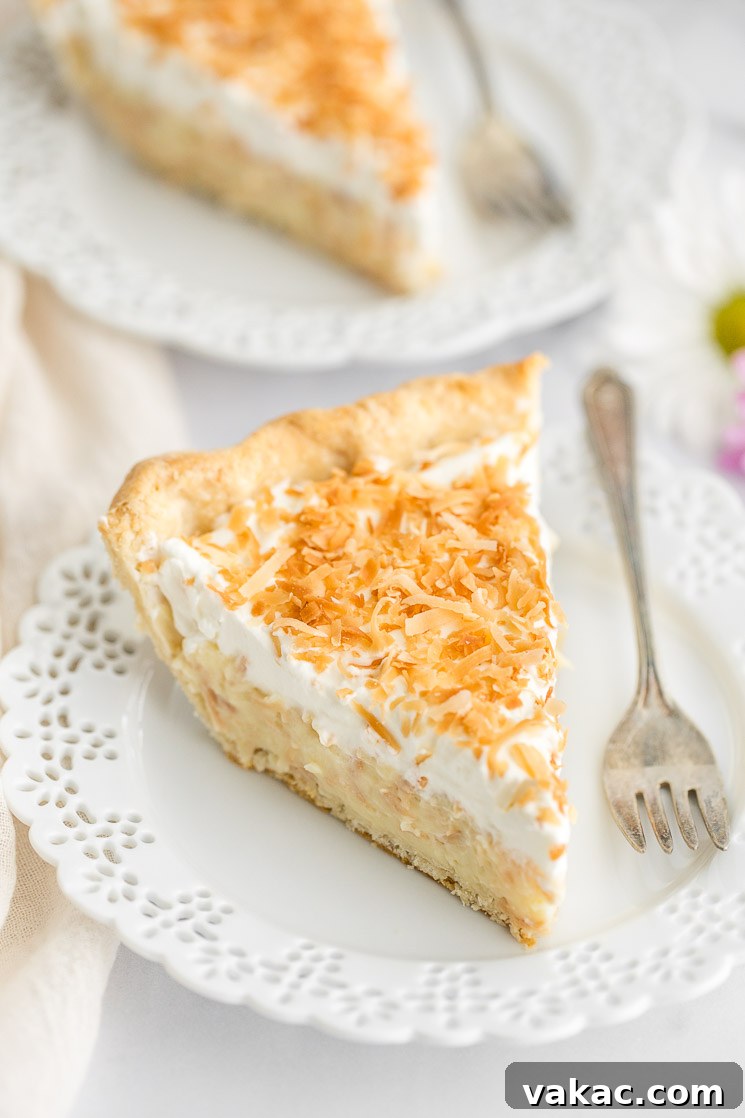
The Quest for the BEST Coconut Cream Pie: What Makes This Recipe Special
You might have tried coconut cream pie before, but this recipe stands out as truly the best, and here’s why. We’ve taken a beloved classic and refined it to perfection, building upon an original version shared in 2017. This isn’t just a minor tweak; it’s a comprehensive update designed to elevate every aspect of the pie. The primary focus was on achieving a filling that is not only incredibly thick and stable but also bursting with an intense, authentic coconut flavor that truly shines through. We’ve enhanced the instructions, added helpful step-by-step pictures, and incorporated essential baking tips to ensure your success, regardless of your baking experience.
The secret lies in a careful balance of ingredients and a precise cooking method that yields a custard so creamy and smooth, it melts in your mouth. By swapping whole eggs for just the yolks, we achieve an unparalleled richness and a luxuriously thick texture that holds its shape beautifully when sliced. Furthermore, a generous amount of toasted coconut is folded directly into the filling, infusing it with a deep, nutty sweetness that complements the creamy base. Topped with a mountain of freshly whipped cream and even more toasted coconut, this pie offers a delightful contrast of smooth and slightly chewy textures, making it an irresistible treat for any coconut lover. If you’re passionate about coconut, prepare to fall head over heels for this new and improved recipe – it’s a game-changer!
Mastering the Foundation: How to Blind Bake Your Pie Crust
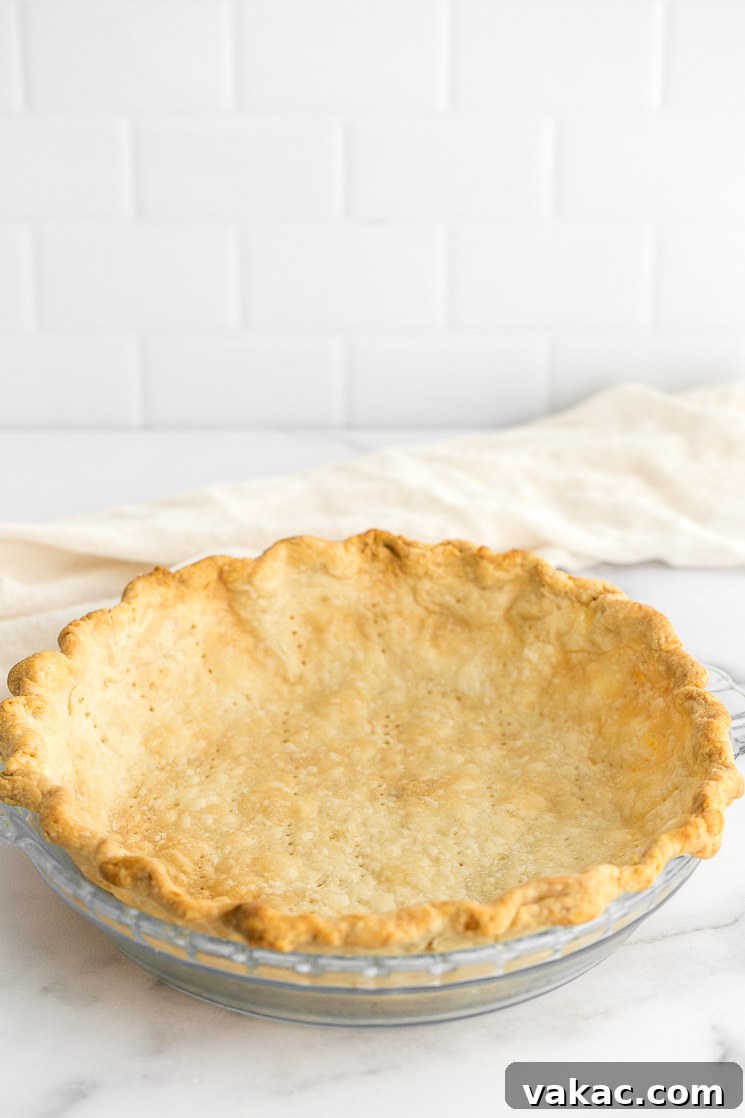
Every exceptional pie begins with an outstanding crust, and for a coconut cream pie, a perfectly blind-baked crust is non-negotiable. Since the luscious coconut filling is prepared on the stovetop and chilled without further baking, it’s crucial that your pie crust is fully cooked beforehand. This ensures a crisp, sturdy foundation that won’t become soggy under the weight of the creamy filling. Neglecting this step can lead to a disappointing, undercooked base, so take the time to get it right!
You have the flexibility to choose your crust: a convenient store-bought pie crust works wonderfully, or you can elevate your pie with a homemade pie crust recipe for an extra touch of artisanal quality. To make your baking day smoother, you can even pre-bake your pie crust up to one or two days in advance. Simply wrap it tightly once cooled and store it at room temperature. For a detailed guide on blind baking, refer to our comprehensive tutorial on how to blind bake a pie crust, but here’s a concise overview to get you started:
- Preheat Your Oven: Start by preheating your oven to a steady 400°F (204°C). This high initial temperature helps to set the crust quickly.
- Prepare the Dough: Roll out your preferred pie crust dough and carefully fit it into a standard 9- to 9.5-inch pie plate. Gently press it into the dish, ensuring it conforms to the contours without stretching. Trim any excess dough from the edges, leaving a small overhang, and then crimp or decorate the edges as desired.
- Chill for Stability: Transfer the pie plate to the refrigerator to chill for at least 15-20 minutes while your oven finishes preheating. This crucial step allows the gluten in the dough to relax, significantly preventing shrinkage during baking and helping the crust maintain its beautiful shape.
- Weight It Down: Once chilled, remove the crust from the refrigerator. Line the crust with a piece of parchment paper or aluminum foil, making sure it covers both the bottom and extends up the sides to support the edges. Fill the lined crust evenly with pie weights, dried beans, or uncooked rice. These weights prevent the crust from puffing up and ensure a flat bottom.
- Initial Bake with Weights: Bake the crust with the pie weights for 15 minutes. This sets the base structure.
- Remove Weights and Finish Baking: Carefully remove the pie weights and the parchment paper/foil. Using a fork, prick the bottom and sides of the crust a few times. This allows steam to escape, preventing large bubbles. Return the crust to the oven and bake for an additional 15-20 minutes, or until the crust is beautifully golden brown and fully cooked through. The exact time may vary slightly depending on your oven and crust thickness.
- Cool Completely: Once baked, remove the pie crust from the oven and allow it to cool completely on a wire rack before adding any filling. A warm crust can make the filling runny and affect its set.
Crafting the Irresistible Coconut Cream Pie Filling: Essential Ingredients
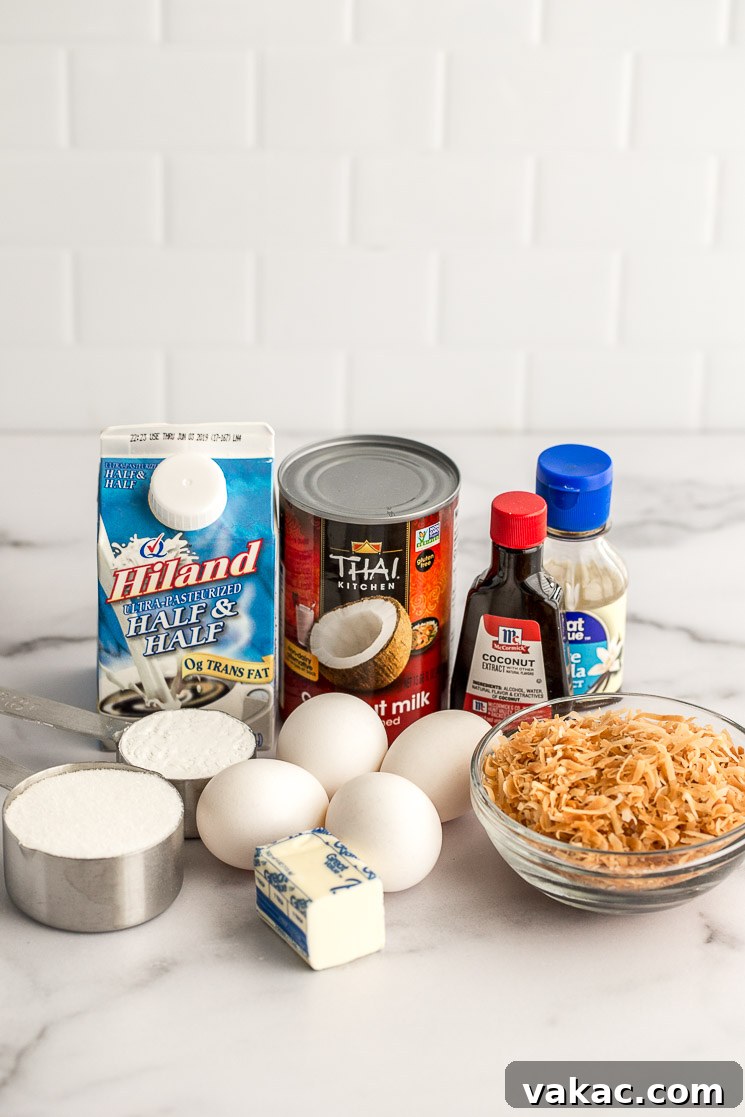
The heart of this incredible pie lies in its rich, creamy, and intensely flavorful coconut filling. Each ingredient plays a vital role in achieving that perfect balance of sweetness, texture, and tropical essence. For the filling, you’ll need granulated sugar, cornstarch, half and half, full-fat canned coconut milk, egg yolks, unsalted butter, vanilla extract, coconut extract, and, of course, a generous amount of toasted coconut. Let’s explore the contribution of each:
- Granulated Sugar: This recipe calls for just 1/2 cup of granulated sugar, which is the ideal amount to sweeten the pie without making it overly cloying. It allows the natural coconut flavor to shine brightly, creating a perfectly balanced sweetness that appeals to all palates.
- Cornstarch: A crucial thickening agent, cornstarch is what gives our coconut cream pie its luscious, spoonable consistency. It ensures the filling sets beautifully into a firm yet creamy custard that slices cleanly and holds its shape, preventing a runny mess.
- Half & Half: This dairy component contributes significantly to the filling’s creamy texture and rich mouthfeel. If half and half isn’t readily available, you can easily create your own substitute by combining equal parts heavy cream and whole milk. This blend provides just the right amount of fat and dairy richness without being overly heavy.
- Unsweetened Full-Fat Canned Coconut Milk: This is the secret weapon for amplifying the authentic coconut flavor! It’s imperative to use *unsweetened full-fat canned coconut milk* – not the refrigerated beverage kind, which is too thin. The rich creaminess and robust flavor of canned coconut milk are essential. Remember to shake the can very well before opening, and then whisk it thoroughly in a bowl before measuring, as the cream and water often separate during storage.
- Egg Yolks: A key upgrade from the original recipe, using only egg yolks instead of whole eggs is transformative. Egg yolks are natural emulsifiers and thickeners, contributing immensely to a thicker, richer, and more luxurious custard. They provide a beautiful golden hue and an incredibly smooth, silky texture that defines a truly premium cream pie.
- Unsalted Butter: Three tablespoons of unsalted butter are incorporated at the end of the cooking process. Butter adds another layer of richness, a silky sheen, and contributes to the overall smooth and melt-in-your-mouth texture of the filling. It enhances the flavor depth and gives the custard a polished finish.
- Pure Vanilla Extract & Coconut Extract: Pure vanilla extract provides a warm, comforting background note that enhances all the other flavors. Coconut extract, while optional, is highly recommended if you want to really intensify that tropical coconut punch. It boosts the natural flavor from the coconut milk and toasted coconut, making the pie undeniably coconut-forward.
- Toasted Sweetened Shredded Coconut: This ingredient is essential for both flavor and texture. Toasting the coconut brings out its deep, nutty aroma and adds a delightful chewiness to the creamy filling. Incorporating it directly into the custard means every bite is packed with unmistakable coconut goodness.
Step-by-Step Guide: How to Make Coconut Cream Pie Perfection
Creating this delightful coconut cream pie is a straightforward process, primarily divided into preparing the creamy filling, chilling it to perfection, and topping it with fluffy whipped cream. Follow these steps for a dessert that will earn rave reviews:
Preparing the Luscious Filling:
- Combine Dry Ingredients: In a medium-sized, heavy-bottomed saucepan, whisk together the granulated sugar and cornstarch until they are thoroughly combined and no lumps remain. This ensures even distribution of the thickening agent.
- Whisk Wet Ingredients Separately: In a separate large mixing bowl, whisk together the half and half, canned coconut milk (remember to shake and whisk it well first!), and the four large egg yolks. Whisk until the mixture is completely homogenous and pale yellow.
- Combine Wet and Dry: Slowly pour the wet ingredient mixture from the bowl into the saucepan containing the sugar and cornstarch. Whisk continuously as you pour to ensure everything is fully incorporated and smooth. This helps prevent lumps and ensures a silky custard.
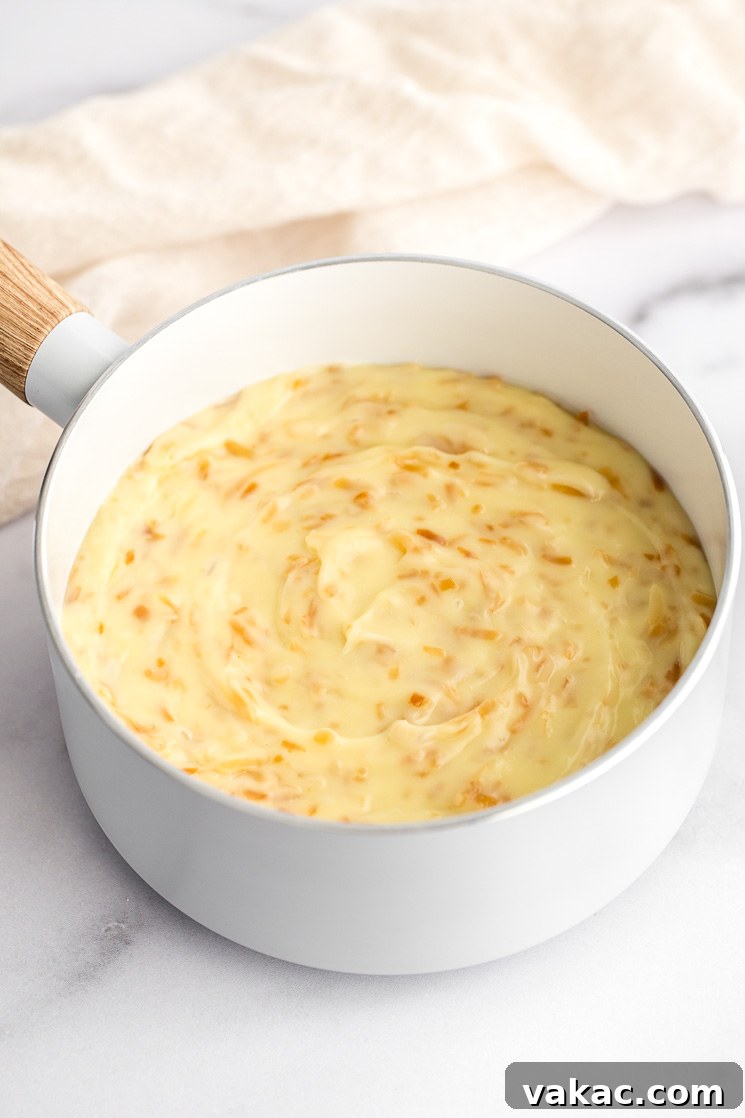
- Cook the Custard: Place the saucepan over medium heat. Bring the mixture to a full boil, stirring frequently and scraping the bottom and sides of the pan with a whisk to prevent scorching and ensure even cooking. Continuous stirring is key to a smooth, lump-free custard.
- Thicken and Boil: Once the mixture reaches a rolling boil, continue to boil and stir for exactly one minute. During this time, you’ll notice the filling thickening considerably. It should become quite thick and luscious.
- Remove from Heat and Finish: Immediately remove the saucepan from the heat. Stir in the unsalted butter, one tablespoon at a time, until each piece is fully melted and incorporated, adding to the richness and shine. Then, stir in the pure vanilla extract, optional coconut extract, and 1 cup of your beautifully toasted coconut. Mix until all components are evenly distributed.
- Cooling the Filling: Allow the hot filling to stand in the saucepan for about 30 minutes. To prevent a skin from forming on the surface, which can lead to lumps, cover the surface of the custard directly with plastic wrap. This means the plastic wrap should touch the entire surface of the warm filling.
Assembling and Chilling the Pie:
- Fill the Crust: After the 30-minute standing time, remove the plastic wrap and give the filling a gentle stir. Scoop the warm, thickened coconut filling into your pre-baked and completely cooled pie crust, spreading it out into an even layer with a spatula.
- Refrigerate for Firmness: Cover the filled pie tightly with a fresh piece of plastic wrap, again ensuring it touches the surface of the filling to prevent a skin. Transfer the pie to the refrigerator to chill for a minimum of 3 hours, or preferably overnight, until it is completely set and firm. This chilling time is crucial for the pie to hold its shape when sliced.
The Grand Finale: Whipped Cream Topping and Garnish:
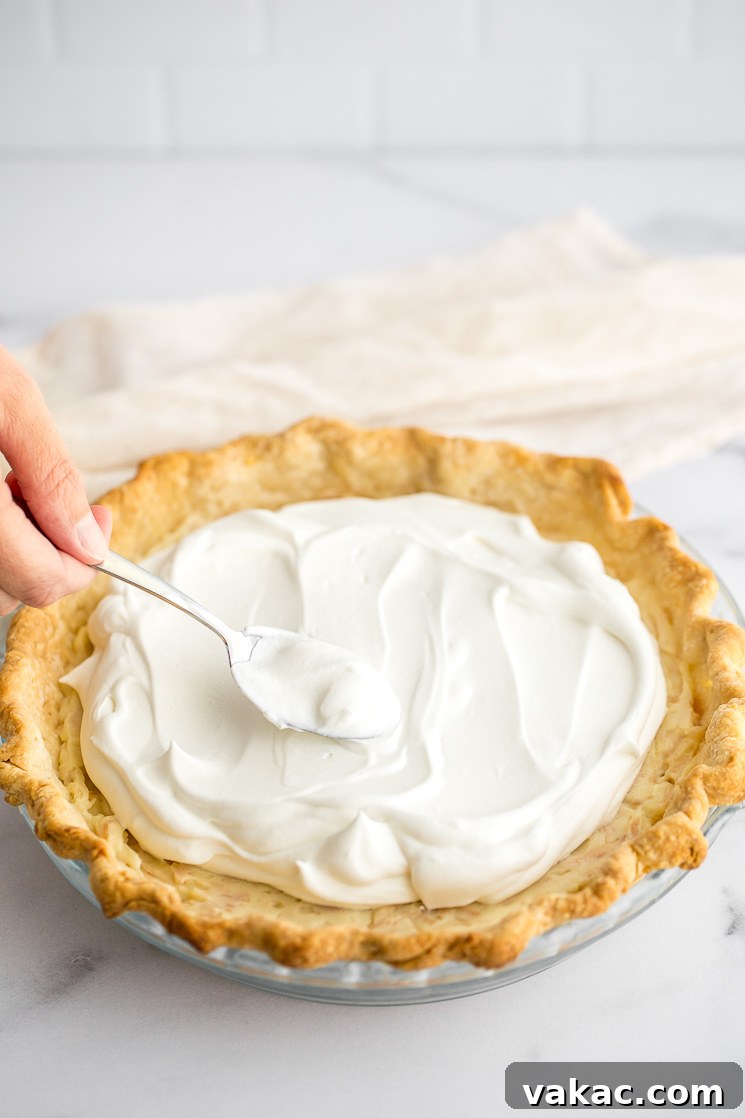
- Prepare Whipped Cream: Once your coconut pie is thoroughly chilled and firm, it’s time for the crowning glory – the whipped cream. For a truly fresh and decadent topping, we recommend using our homemade whipped cream recipe. For a topping that holds its shape beautifully for longer periods, consider using our stabilized whipped cream recipe.
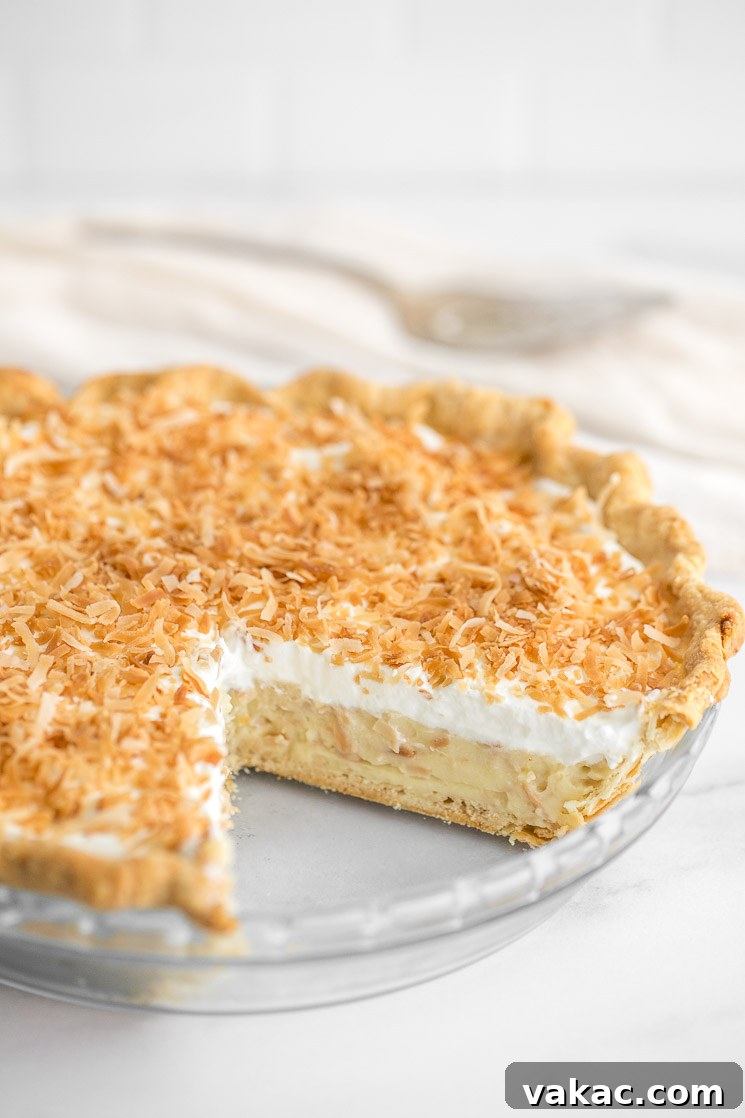
- Top and Serve: Spoon or pipe the freshly made whipped cream generously over the chilled coconut filling, spreading it into a delightful, cloud-like layer. Finish by sprinkling the remaining 1/2 cup of toasted coconut over the whipped cream for added flavor and visual appeal. At this point, you can slice the pie and serve it immediately, or keep it refrigerated until you’re ready to enjoy this magnificent dessert!
Storage Instructions for Your Perfect Pie
To ensure your homemade coconut cream pie remains fresh and delicious, proper storage is key. Leftover coconut cream pie, or a pie prepared in advance, should always be stored in the refrigerator. Cover the pie tightly with plastic wrap to prevent it from absorbing other odors in the fridge and to maintain its moisture. When properly covered and refrigerated, this pie will stay fresh and delightful for up to 4 days. While it’s tempting to enjoy it immediately, the flavors truly meld and deepen after a few hours in the cold, making for an even more exquisite experience.
Frequently Asked Questions: Can I Omit the Half and Half?
A common question we receive from readers, especially those with dairy allergies or dietary restrictions, is whether the half and half can be omitted or substituted in this recipe. While this recipe has been developed and tested specifically with half and half for optimal creaminess and texture, we understand the need for alternatives.
Although I have only personally made this recipe as written, based on the ingredient profile, it should be possible to replace the half and half with an additional cup of unsweetened full-fat canned coconut milk. This substitution would make the pie entirely dairy-free (assuming your pie crust is also dairy-free). Be aware that while the pie would still be creamy and flavorful, the texture might be slightly different, perhaps a touch less rich, but still delightful and satisfying for those avoiding dairy. Ensure to use the full-fat variety of canned coconut milk for the best results, as lighter versions may not provide enough richness or help the filling set properly.
Expert Baking Tips for Coconut Cream Pie Success
Achieving a truly spectacular coconut cream pie is easier than you think with a few insider tips. These pointers will help ensure your pie is perfect every time, from a flaky crust to a silky-smooth filling:
- Toast Your Coconut First: Before you even begin preparing the filling, it’s highly recommended to toast your shredded coconut. Toasting intensifies the coconut’s flavor, giving it a deeper, nuttier, and more aromatic profile. We offer a comprehensive tutorial here detailing three different methods for toasting coconut, so you can choose the one that best suits your comfort level and equipment. Cool the toasted coconut completely before incorporating it into the filling or using it as a garnish.
- Plan Ahead with Your Crust: To simplify your baking process, consider using a high-quality store-bought pie crust, which saves a significant amount of time and effort. Alternatively, if you prefer a homemade crust, you can prepare and blind bake it up to 1-2 days in advance. Once cooled, wrap it tightly and store it at room temperature until you’re ready to fill it. This allows you to break down the recipe into manageable steps.
- Choose the Right Coconut Milk: For the most authentic and rich coconut flavor, always use unsweetened full-fat canned coconut milk. Do NOT substitute with refrigerated coconut beverage (often found in cartons), as it’s too thin and will not provide the necessary fat and body for a thick, creamy filling. Canned coconut milk tends to separate, with the thick cream rising to the top. To ensure proper consistency, shake the can vigorously before opening, then pour it into a bowl and whisk thoroughly until the cream and liquid are fully combined before measuring.
- Incorporate Butter Gradually: When the filling is removed from the heat, add the unsalted butter one tablespoon at a time. Whisk each piece until it is fully melted and incorporated into the hot custard. This method ensures the butter emulsifies properly, adding richness and a beautiful glossy finish to your filling without making it greasy. Once the butter is in, stir in your vanilla and coconut extracts, followed by the toasted coconut.
- Chill Thoroughly for the Perfect Set: Patience is a virtue when it comes to setting cream pies. It is absolutely essential to allow your pie to chill in the refrigerator for a minimum of 3 hours, or ideally, overnight. This extended chilling time allows the cornstarch to fully activate and the custard to firm up completely. Adding whipped cream to a pie that isn’t fully set can result in a messy, unstable dessert. A perfectly chilled pie will slice cleanly and hold its shape beautifully.
More Irresistible Homemade Pie Recipes to Explore!
If you’ve fallen in love with the art of pie-making and are eager to expand your repertoire, we have a collection of equally delicious homemade pie recipes that are sure to delight. From classic fruit pies to other creamy concoctions, there’s a pie for every occasion and every craving. Explore these fantastic options:
- Homemade Cherry Pie: A timeless classic with a vibrant, fruity filling and a beautiful lattice top.
- Chocolate Cream Pie: Indulge in a rich, velvety chocolate custard topped with sweet whipped cream.
- Banana Cream Pie: Layers of fresh bananas, creamy vanilla custard, and whipped cream – a true comfort food.
- Classic Key Lime Pie: A zesty, tangy, and refreshing pie with a simple graham cracker crust.
- Lemon Pie: Bright and sunny, this pie features a sweet-tart lemon filling that’s utterly delightful.
Each of these recipes is crafted with clear instructions and helpful tips to guide you towards pie-making success. Happy baking!
Coconut Cream Pie
A homemade pie crust filled with a creamy coconut filling topped with whipped cream and toasted coconut. This is the BEST Coconut Cream Pie recipe!
Pin Recipe
Leave a Review
Ingredients
- 1 9-inch pre-baked pie crust, cooled completely
- 1/2 cup (100 grams) granulated sugar
- 1/4 cup (32 grams) cornstarch
- 1 cup (240ml) half and half
- 1 cup (240ml) unsweetened canned coconut milk
- 4 large egg yolks
- 3 tablespoons (45 grams) unsalted butter, cut into tablespoon-sized pieces
- 1 teaspoon pure vanilla extract
- 1/2 teaspoon coconut extract (optional)
- 1 and 1/2 cups (105 grams) toasted sweetened shredded coconut
For the whipped cream:
- 1 cup (240 ml) cold heavy whipping cream
- 1/4 cup (30 grams) powdered sugar
- 1 teaspoon pure vanilla extract
Instructions
- In a large saucepan, whisk together the sugar and cornstarch until well combined. Set aside.
- In a separate large mixing bowl, whisk together the half and half, coconut milk, and egg yolks until fully combined. Slowly pour the wet ingredients into the saucepan with the sugar and cornstarch mixture and whisk until fully combined.
- Place the saucepan over medium heat and bring to a boil, stirring continuously. Allow to boil for one minute; the mixture should be pretty thick at this point. Remove from the heat and stir in one tablespoon of butter at a time, then mix in the vanilla extract, coconut extract, and 1 cup of the toasted coconut (reserve the rest for the top).
- Cover with plastic wrap, placing the plastic wrap directly on the surface of the custard, and allow to stand in the saucepan for 30 minutes.
- Remove the plastic wrap, stir the filling, and scoop it into the prepared pie crust. Spread the filling out into one even layer. Cover tightly with plastic wrap and refrigerate the pie for 3 hours or until completely chilled and firm.
To make the whipped cream:
- In the bowl of a stand mixer fitted with the whisk attachment, or in a large mixing bowl using a hand-held mixer, add the heavy whipping cream, powdered sugar, and vanilla extract. Start mixing on low speed, then increase the speed to medium-high until stiff peaks form.
- Scoop the whipped cream onto the chilled filling and spread it out into one even layer. Top with the remaining 1/2 cup of toasted coconut. Cover tightly and refrigerate until ready to serve.
Notes
Storage instructions: Store leftover coconut cream pie in the refrigerator for up to 4 days, covered with plastic wrap.
Coconut Milk: Make sure to use unsweetened full-fat canned coconut milk in this recipe, not refrigerated coconut milk. Since canned coconut milk may separate, shake it well and mix it together in a bowl before measuring it out for this recipe.
Toasted Coconut: To toast coconut, you can spread it out on a large baking sheet and bake at 350°F (177°C) for about 10 minutes, stirring a few times, until the coconut is lightly browned. Remove from the oven and cool completely before adding to the filling or using as garnish.
Did you make this recipe?
Mention @livewellbakeoften on Instagram or tag #livewellbakeoften.
Adapted from Pillsbury