
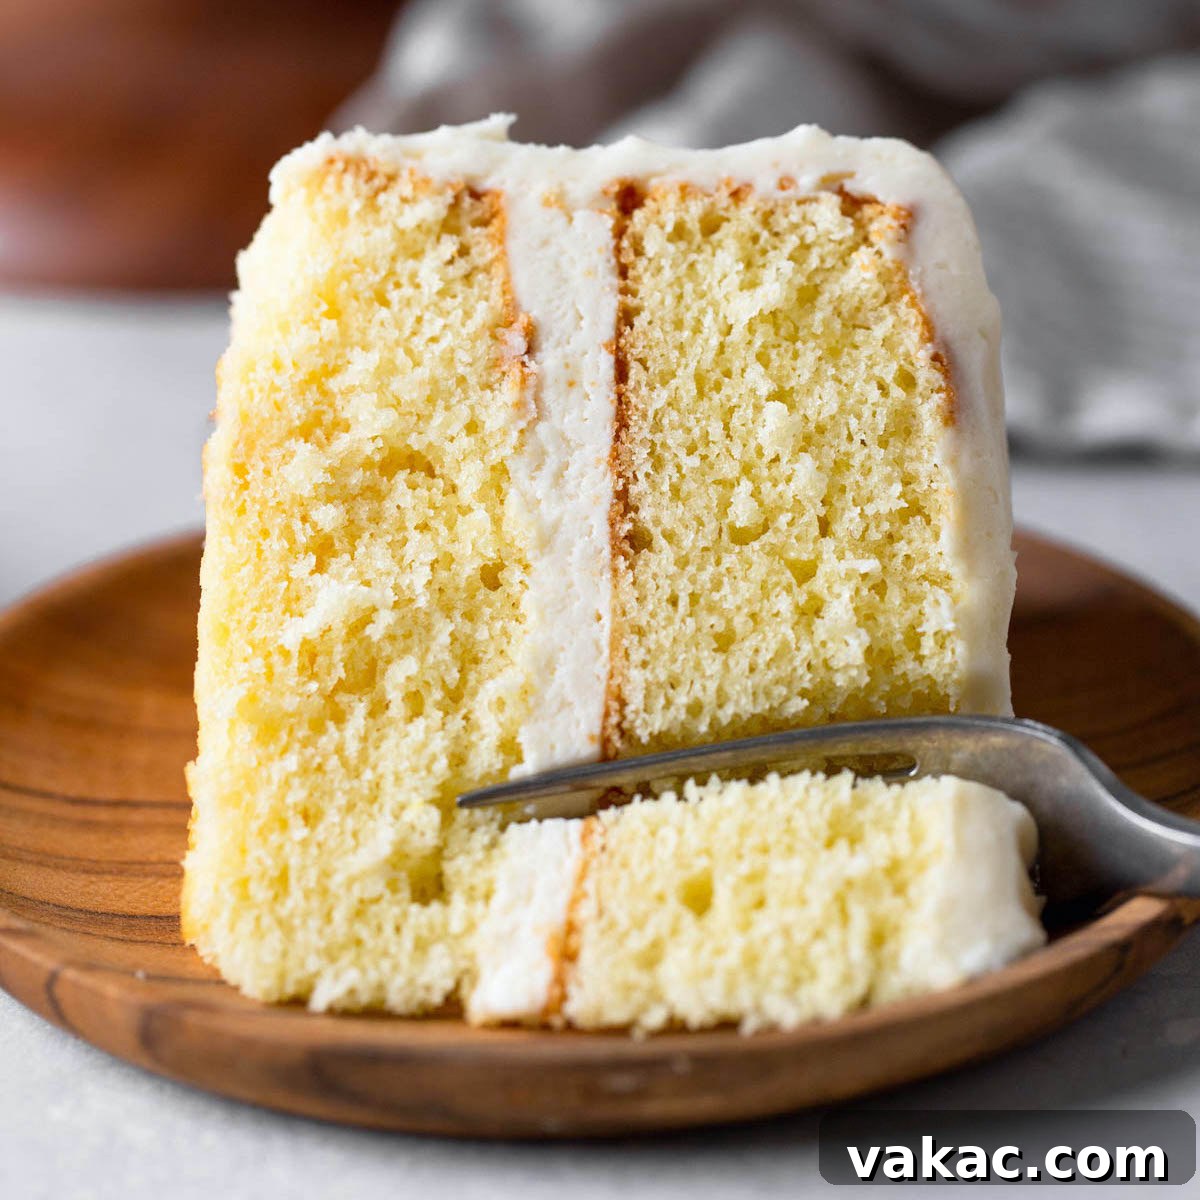
The Ultimate Fluffy & Moist Homemade Vanilla Cake with Rich Buttercream Frosting
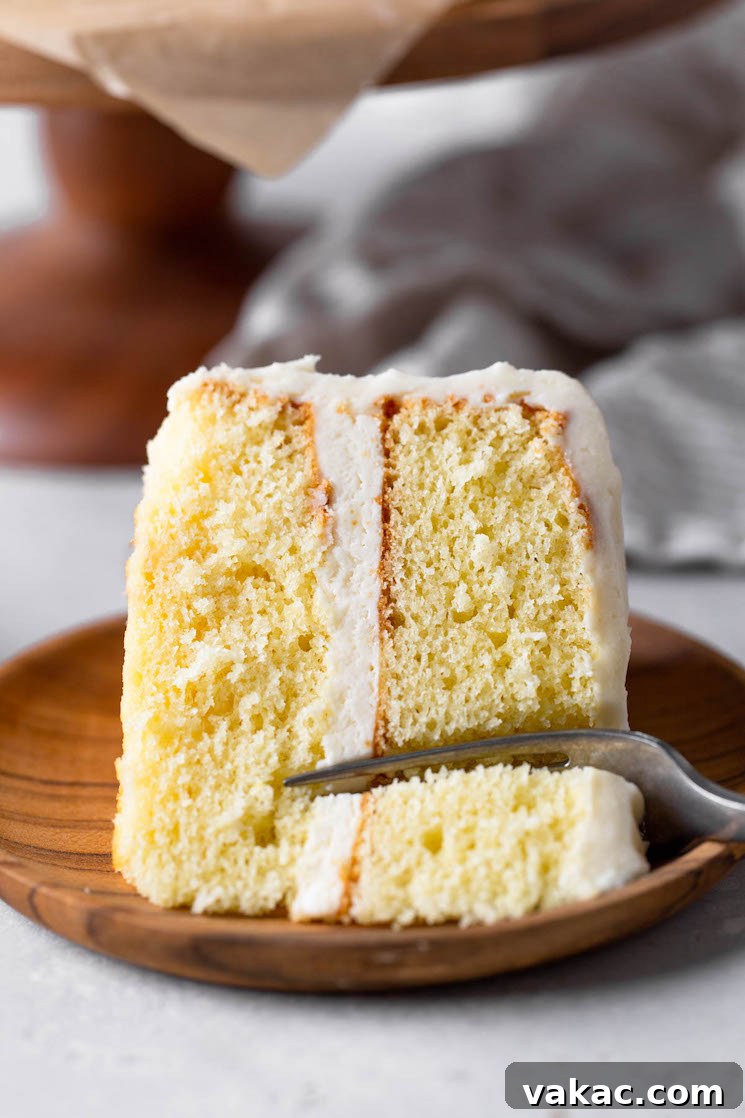
There’s an undeniable charm and timeless elegance to a classic vanilla cake. While decadent chocolate creations certainly have their place, the sheer versatility and comforting simplicity of a perfectly baked vanilla cake make it an indispensable recipe for every home baker. This isn’t just any vanilla cake recipe; it’s a meticulously crafted guide to achieving a cake that is exceptionally light, profoundly moist, and bursting with pure vanilla flavor, all crowned with a luxurious, smooth vanilla buttercream.
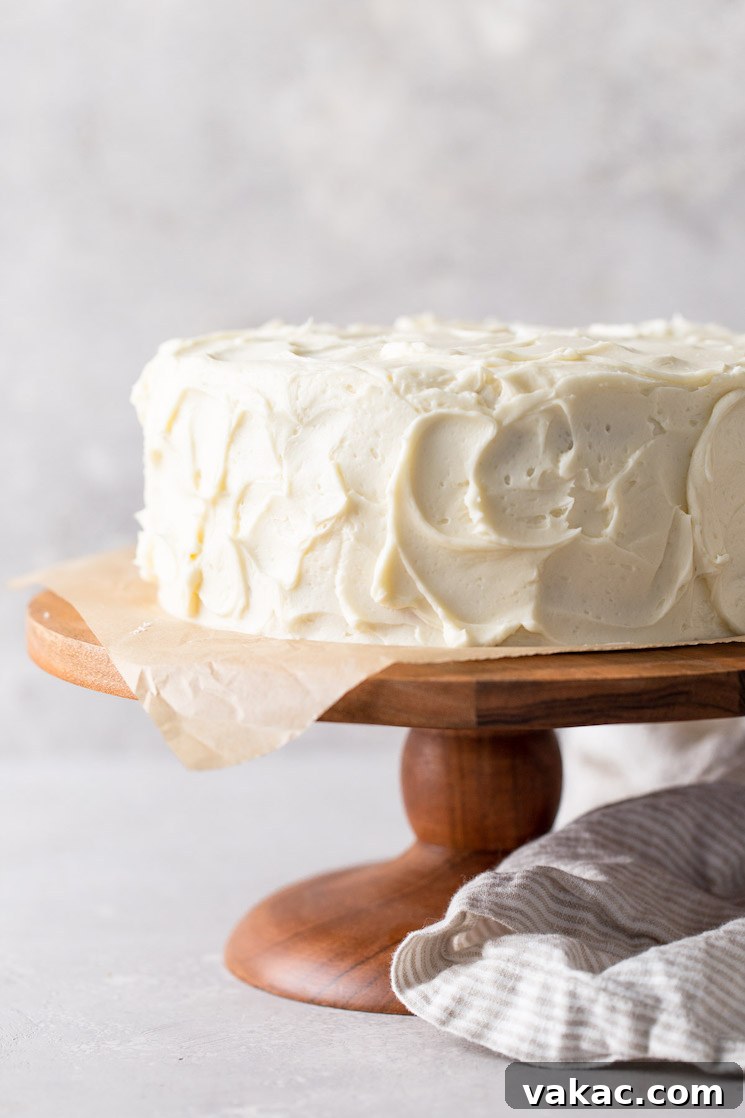
Imagine a cake that effortlessly adapts to any celebration – from a simple family gathering to an elaborate birthday party or a festive holiday spread. Our vanilla cake recipe offers this incredible flexibility. You can adorn it with vibrant seasonal sprinkles for holidays, or infuse the buttercream with a few drops of food coloring to perfectly match the theme of your event. But rest assured, this recipe is anything but boring. We’ve maximized the vanilla impact, ensuring every bite is a delightful experience that truly stands out from the crowd.
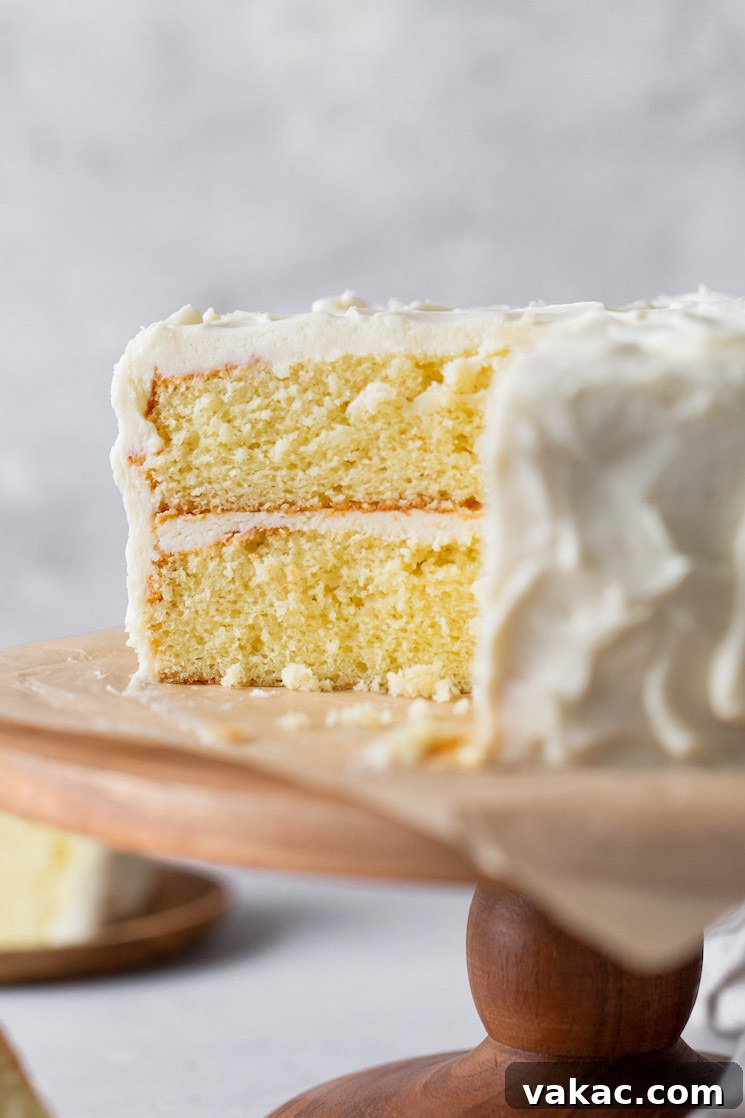
The secret lies in a generous amount of pure vanilla extract, incorporated into both the cake batter and the rich, velvety frosting. This dual application guarantees a consistent and intense vanilla essence throughout the entire dessert. Beyond just flavor, we’ve focused on texture. The thoughtful combination of delicate cake flour and tangy buttermilk yields cake layers that are unbelievably fluffy yet exquisitely moist, promising a tender crumb that melts in your mouth. Coupled with a clever technique that incorporates a touch of oil, this cake remains incredibly fresh and delicious for days, avoiding any dryness often associated with homemade cakes. This is the vanilla cake recipe you’ll return to again and again, guaranteed to impress with its classic appeal and superior taste.
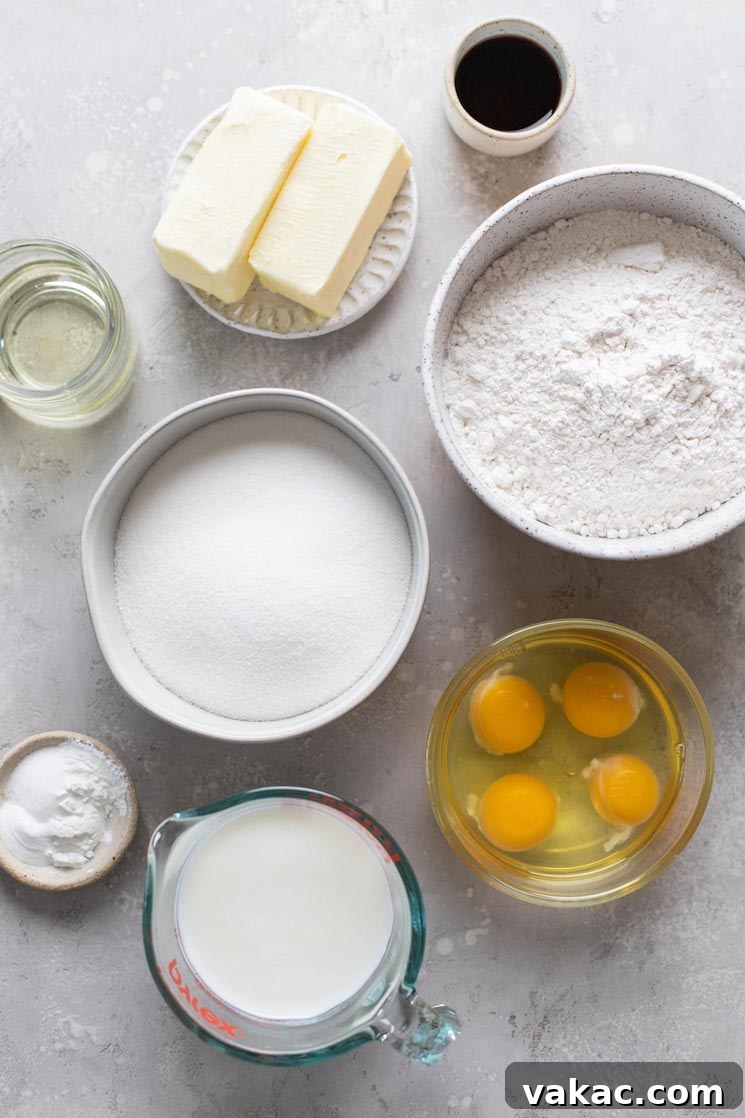
Essential Ingredients for the Perfect Fluffy Vanilla Cake and Decadent Buttercream
Crafting this exquisite vanilla cake and its accompanying buttercream requires a selection of common pantry staples. Many of these you likely have on hand already! A crucial tip for success: ensure all cold ingredients, especially butter, buttermilk, and eggs, are at room temperature before you begin. This helps them emulsify properly, creating a smoother, more stable batter and a more consistent cake texture that rises beautifully and stays moist.
- Cake Flour: The foundation of our exceptionally light and tender cake. Cake flour boasts a lower protein content than all-purpose flour, which means less gluten development. This results in a finer, softer crumb and a beautifully fluffy cake that almost melts in your mouth. If you don’t typically keep cake flour in your pantry, don’t worry! You can easily make your own substitute at home using all-purpose flour and cornstarch.
- Baking Powder & Baking Soda: These two powerful leavening agents are carefully balanced to give the cake its optimal rise and airy texture. Baking powder provides the initial lift, while baking soda reacts with the acidity in the buttermilk, creating additional carbon dioxide bubbles that contribute to an incredibly soft and tender crumb, perfectly complementing the rich vanilla flavor.
- Salt: A seemingly small but mighty ingredient, salt plays a vital role in enhancing the overall flavor profile. It not only balances the sweetness of both the cake and the frosting, preventing them from being cloyingly sweet, but also brilliantly amplifies the pure, aromatic vanilla flavor, making it truly pop on your palate.
- Buttermilk: Key to a remarkably moist and tender cake, buttermilk provides essential acidity that reacts with the baking soda, contributing significantly to the cake’s rise and overall softness. For optimal results, ensure your buttermilk is at a comfortable room temperature, ideally around 70°F (21°C), as this helps it incorporate smoothly into the batter. If buttermilk isn’t readily available, you can effortlessly create a simple homemade substitute using regular milk and lemon juice or white vinegar.
- Neutral Flavored Oil (Canola or Vegetable): Incorporating a small amount of neutral oil alongside butter is a game-changer for moisture retention. Oil remains liquid at room temperature, which keeps the cake incredibly moist and tender even after a few days, preventing it from drying out. This clever technique, which I perfected in recipes like my lemon blueberry bundt cake, ensures your vanilla cake stays delightfully fresh.
- Pure Vanilla Extract: This recipe truly celebrates vanilla, and we call for a generous tablespoon in both the cake batter AND the rich, creamy frosting – this is intentional and not a mistake! For the most authentic, robust, and aromatic flavor, always opt for high-quality pure vanilla extract over imitation varieties. The difference in taste is truly remarkable.
- Unsalted Butter: You’ll need a total of five sticks of unsalted butter for both the cake layers and the decadent vanilla buttercream frosting. Remember to allow the butter to soften on your countertop for at least an hour (or up to two) before you begin. Perfectly softened butter is crucial for proper creaming and achieving the correct texture in both the cake and the frosting.
- Granulated Sugar: Our primary sweetener for the cake batter, granulated sugar contributes sweetness without introducing any competing flavors, allowing the delicate and rich vanilla to shine as the star. It also helps to create that desired light and fluffy texture when creamed with butter.
- Large Eggs: Eggs are crucial for adding structure, binding the ingredients together, and contributing richness and moisture to the cake. They also help in the emulsification process, ensuring a smooth and homogenous batter. If you forget to bring your eggs to room temperature, a quick trick is to place them in a bowl of warm water for about 10 minutes before use.
- Powdered Sugar (Confectioners’ Sugar): Essential for creating a light, smooth, and fluffy vanilla frosting that has a melt-in-your-mouth texture. Powdered sugar dissolves quickly and thoroughly, producing a velvety consistency. Granulated sugar is far too coarse and will result in a grainy, unpleasant texture in your buttercream, so avoid substitutions here.
- Heavy Cream: This helps achieve the ideal consistency for the buttercream frosting, thinning it out just enough while maintaining its luxurious richness and stability. It also contributes to a wonderfully creamy mouthfeel. Regular milk can be used as an alternative if heavy cream isn’t available, though it may result in a slightly less rich frosting.
Baking This Classic Vanilla Cake: A Detailed Step-by-Step Guide
Creating this homemade vanilla cake is a delightful and rewarding process, meticulously broken down into three manageable stages: preparing the tender cake layers, whipping up the velvety vanilla buttercream, and finally, assembling your stunning masterpiece. Follow these detailed steps for a truly memorable baking experience and a cake that will be the highlight of any occasion.
Part 1: Crafting the Fluffy and Moist Cake Layers
- Prepare Your Pans: Begin by preheating your oven to 350°F (180°C). Prepare two 9-inch round cake pans by generously greasing them with nonstick cooking spray. For effortless removal and perfectly shaped cake layers, line the bottoms of the pans with parchment paper circles. Set these prepared pans aside.
- Combine Dry Ingredients: In a large mixing bowl, thoroughly whisk together the cake flour, baking powder, baking soda, and salt. Whisking ensures these ingredients are evenly distributed, which is crucial for a consistent rise. Set this dry ingredient mixture aside.
- Prepare Wet Ingredients: In a separate medium bowl or a large measuring cup, whisk together the room temperature buttermilk, neutral oil (canola or vegetable), and the first tablespoon of pure vanilla extract until fully combined. Set this wet ingredient mixture aside.
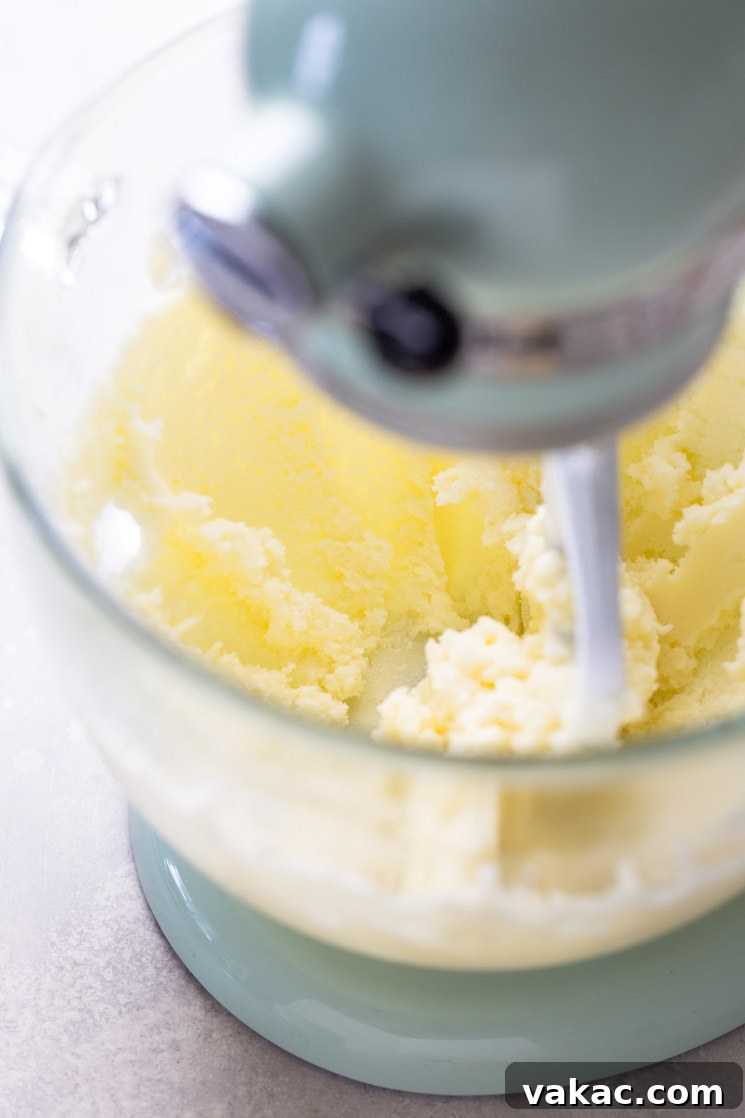
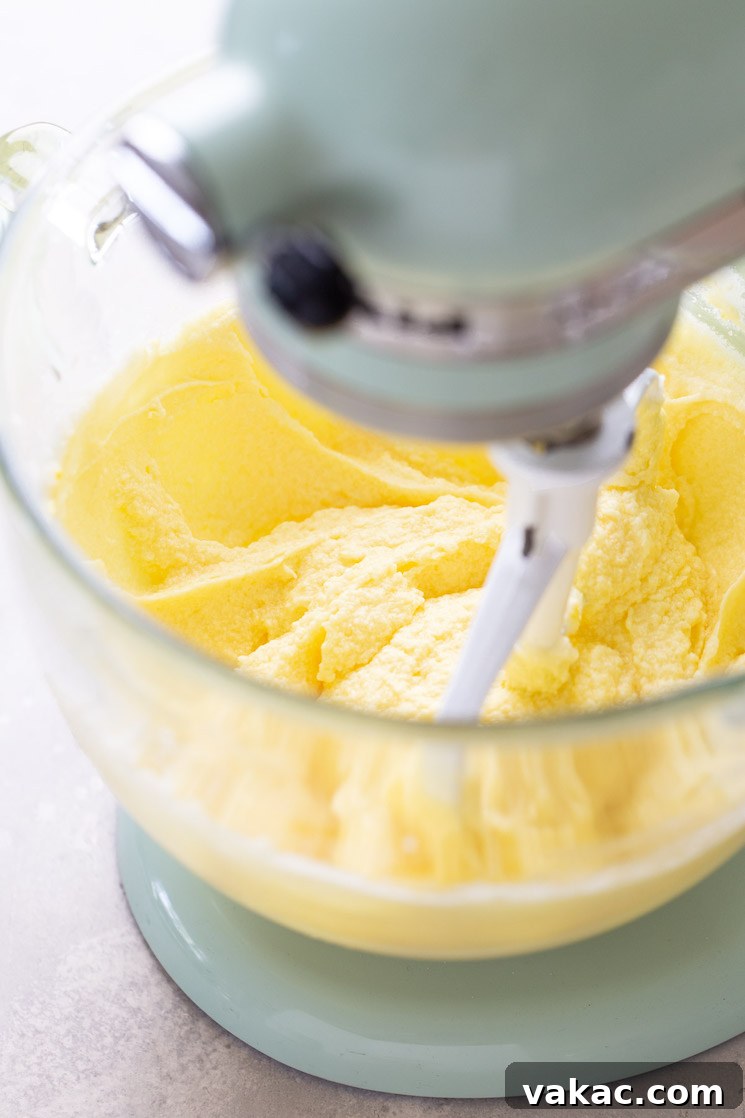
- Cream Butter and Sugar: Using a stand mixer fitted with the paddle attachment (or a large mixing bowl with a handheld electric mixer), beat the softened unsalted butter on low speed until it becomes smooth and creamy. Gradually and slowly add the granulated sugar to the butter, mixing until just combined.
- Aerate for Fluffiness: Once all the sugar has been incorporated, increase the mixer speed to medium and continue beating the butter and sugar mixture for a crucial 4 to 5 minutes. Do not rush or skip this step! This extensive creaming process incorporates a significant amount of air into the mixture, which is fundamental to achieving a supremely light, fluffy, and tender cake crumb. The mixture will become noticeably lighter in color and texture.
- Incorporate Eggs: With the mixer on low speed, add the large eggs one at a time, beating well after each addition until just combined. After adding each egg, remember to stop the mixer and scrape down the bottom and sides of the bowl with a rubber spatula. This ensures that all ingredients are fully incorporated and prevents any unmixed pockets of butter or sugar.
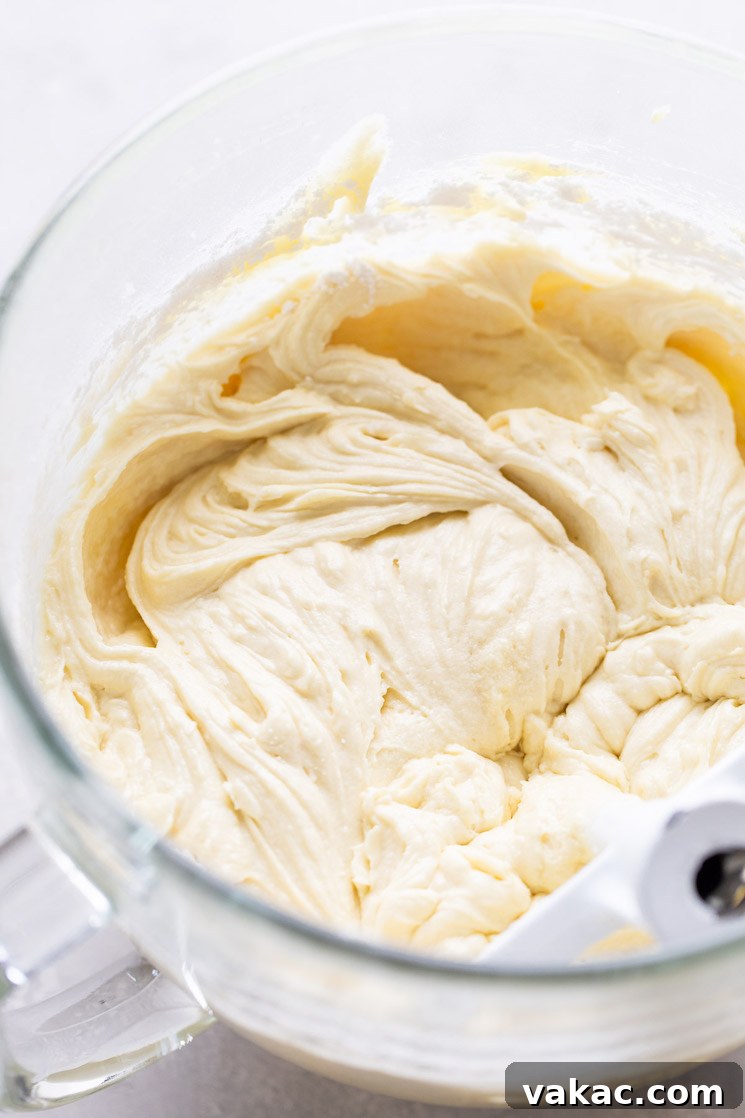
- Alternate Wet and Dry: Now, it’s time to combine the wet and dry ingredients. With the mixer on low speed, add the dry ingredient mixture to the butter mixture in three additions, alternating with the buttermilk mixture (always beginning and ending with the dry ingredients). Mix each addition only until it’s *just* combined. Overmixing the batter at this stage can overdevelop the gluten in the flour, leading to a tough, dense cake rather than a tender one.
- Final Mix: After adding all ingredients, give the bowl a final scrape with a rubber spatula to ensure everything is perfectly incorporated and no dry streaks or pockets remain at the bottom or sides of the bowl.
- Fill Cake Pans: Evenly divide the smooth vanilla cake batter between your two prepared 9-inch round cake pans. Gently spread the batter into an even layer using your spatula to ensure even baking.
- Bake and Cool: Bake the cake layers for 28 to 32 minutes, or until a wooden toothpick inserted into the center of the cakes comes out clean (no wet batter crumbs should cling to it). Once baked, remove the pans from the oven and let them cool in their pans on a wire rack for about 20 minutes. This allows the cakes to firm up slightly. After this initial cooling, carefully run a thin knife around the edges of the pans, then invert the cakes onto the wire rack to cool completely. It’s vital that the cakes are entirely cool before frosting to prevent the buttercream from melting.
Part 2: Whipping Up the Dreamy Vanilla Buttercream Frosting
While your cake layers are cooling to perfection, prepare the rich, smooth, and velvety vanilla buttercream frosting. This recipe is adapted from my classic homemade vanilla buttercream, scaled up to provide ample frosting for this two-layer cake, ensuring generous coverage and a beautiful finish.
- Beat the Butter: In the bowl of a stand mixer fitted with the paddle attachment (or a large mixing bowl with a handheld electric mixer), beat the softened unsalted butter on medium speed until it is completely smooth, creamy, and light in color, typically taking 2-3 minutes.
- Add Powdered Sugar Gradually: Gradually add the powdered sugar, one cup at a time, to the butter on low speed. Ensure you mix well after each addition to fully incorporate the sugar and prevent a cloud of powdered sugar from erupting in your kitchen.
- Achieve Perfect Consistency: Once all the powdered sugar is incorporated and the mixture is crumbly, add the heavy whipping cream (or milk), the second tablespoon of pure vanilla extract, and a tiny pinch of salt. Mix on low to medium speed until the frosting is fully combined, light, and wonderfully fluffy. Remember to scrape down the sides and bottom of the bowl periodically with a rubber spatula to ensure even mixing and a perfectly smooth, lump-free consistency. Beat for another minute or two on medium-high speed for extra fluffiness.
Part 3: Assembling Your Masterpiece Vanilla Cake
Once your cake layers are completely cooled and your frosting is whipped to perfection, it’s time for the exciting final step: assembling your stunning vanilla cake! This stage brings all your hard work together to create a truly impressive dessert.
- Level Cake Layers: For a professional-looking finish and easy stacking, I highly recommend leveling the tops of each cooled cake layer. Use a long serrated knife or a dedicated cake leveler to carefully trim any domed tops, creating flat, even surfaces. This makes the cake much easier to stack and results in a more polished, even appearance.
- First Layer of Frosting: Carefully place one of the leveled cake layers onto your chosen cake stand or serving plate. Spread a generous, even layer of vanilla buttercream frosting over the top, extending to the edges.
- Stack Second Layer: Gently place the second leveled cake layer directly on top of the first, aligning it as best you can to create a straight and stable cake.
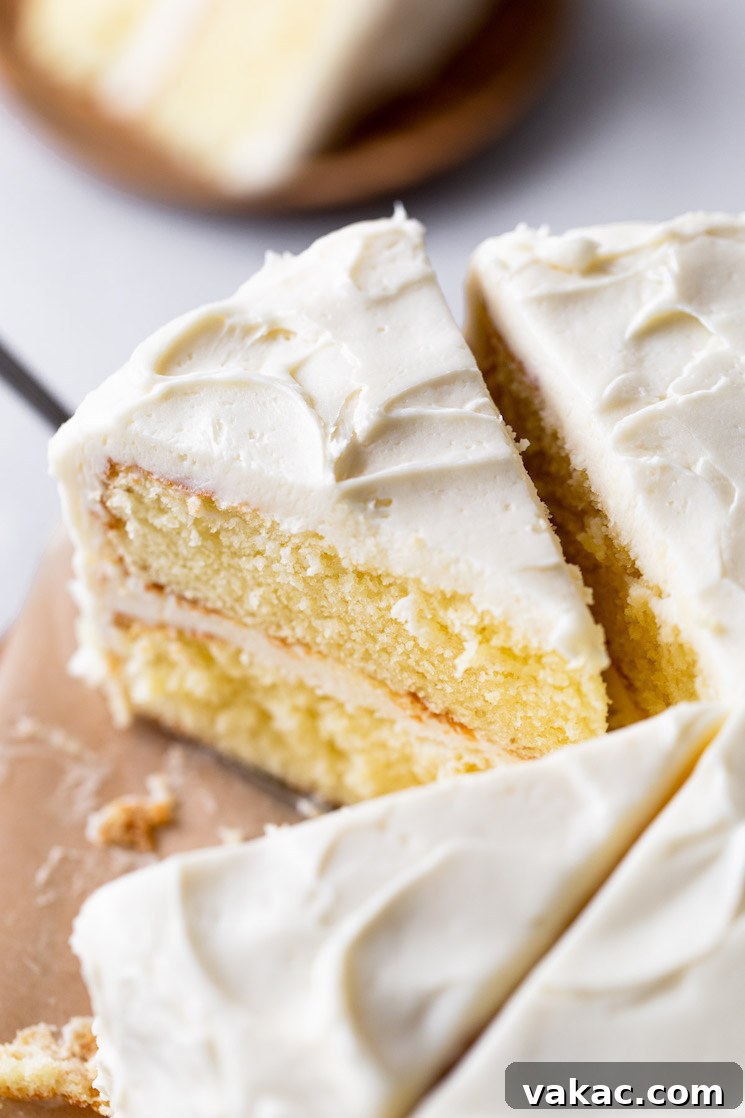
- Final Frosting: Using the remaining vanilla buttercream, generously frost the top and sides of the entire cake, smoothing it out for a beautiful, elegant finish. Don’t be afraid to apply a thick layer! For detailed guidance and advanced techniques on frosting and decorating, you can refer to my comprehensive post on how to decorate a cake for tips and tricks.
Frequently Asked Questions About Baking Your Vanilla Cake
We’ve gathered some common questions about adapting and preparing this vanilla cake recipe to help you achieve perfect results every time. These tips will broaden your baking possibilities and ensure success.
Can I Make This Vanilla Cake in a 9×13-inch Pan?
Absolutely! This versatile vanilla cake recipe can easily be adapted for a 9×13-inch baking pan, perfect for sheet cakes suitable for larger gatherings or potlucks. Simply grease your 9×13-inch pan thoroughly with nonstick cooking spray or line it with parchment paper for easy removal. Pour the prepared cake batter into the pan and spread it out evenly to ensure consistent baking. Bake at 350°F (180°C) for approximately 35 to 40 minutes, or until a wooden toothpick inserted into the center emerges clean, indicating it’s fully baked. Allow the cake to cool completely on a wire rack before generously frosting it with the rich vanilla buttercream.
Is It Possible to Make a Three-Layer Cake Instead of Two?
Yes, you can certainly transform this recipe into an elegant three-layer vanilla cake, which often adds a touch of sophistication. To do this, simply divide the prepared cake batter evenly among three 8-inch round cake pans. Be aware that using smaller pans will result in thinner layers and thus reduce the overall baking time. Adjust your baking time to approximately 23 to 28 minutes, or until the toothpick test confirms doneness for all layers. Ensure all layers are fully cooled on a wire rack before stacking and frosting to prevent the frosting from melting or the cake from shifting.
Can I Prepare the Vanilla Cake in Advance?
Preparation in advance is a fantastic way to manage your baking schedule and reduce stress on the day of your event! You can bake this vanilla cake from scratch one to two days ahead of time. Once baked and completely cooled, store the unfrosted cake layers (wrapped tightly in plastic wrap to prevent drying) or the fully frosted cake (in an airtight cake dome or container) at room temperature. It can also be stored in the refrigerator for up to 4 days. For longer storage, both the individual cake layers (wrapped tightly in plastic wrap and then foil) and the frosting (stored in an airtight container or a large freezer bag) can be frozen separately for up to three months. Thaw frozen components overnight in the refrigerator, then bring them to room temperature before assembling and frosting for the best texture and taste.
Can This Recipe Be Used to Make Vanilla Cupcakes?
Yes, this recipe is wonderfully adaptable for making delicious and crowd-pleasing vanilla cupcakes! This batch will yield approximately 30 to 32 standard-sized cupcakes. When filling your cupcake liners, aim to fill each about two-thirds of the way full to allow for proper rising without overflowing. Adjust the baking time to 16 to 20 minutes, or until a toothpick inserted into the center of a cupcake comes out clean. If you need fewer cupcakes, you can easily halve the recipe ingredients and baking quantities to make about 15-16 cupcakes.
Top Baking Tips for Your Best Homemade Vanilla Cake Ever
Achieving a truly outstanding vanilla cake involves more than just following the steps; it’s about understanding the nuances. Keep these expert baking tips in mind to ensure your homemade vanilla cake is nothing short of perfect every single time:
- Embrace Pure Vanilla Extract: Since vanilla is the undeniable star and namesake of this recipe, the quality of your vanilla extract is paramount. Always use pure vanilla extract for the most potent, authentic, and rich vanilla flavor. Imitation vanilla simply won’t deliver the same depth, complex aroma, or exquisite taste that makes this cake so special.
- Room Temperature Ingredients are Non-Negotiable: This might seem like a minor detail, but it’s one of the most crucial steps for baking success! Ensure all cold ingredients – especially butter, eggs, and buttermilk – are brought to true room temperature before you start mixing. Room temperature ingredients emulsify much better, creating a smoother, more uniform batter and a lighter, finer cake crumb. Plan ahead and set them out on your counter at least an hour (or even two) before you intend to begin baking.
- Don’t Skimp on Creaming Butter and Sugar: The creaming step is where much of the magic happens for a fluffy cake. Beating the softened butter and granulated sugar together for the full recommended 4 to 5 minutes at medium speed incorporates essential air, which acts as a natural leavening agent and contributes significantly to the cake’s light, airy, and tender texture. Resist the urge to shorten this step, as it directly impacts the final crumb of your cake!
- Measure Flour Correctly: For cake flour (or any flour), the proper way to measure is by spooning it lightly into your measuring cup and then leveling it off with a straight edge, like the back of a knife. Scooping directly from the bag can compact the flour, leading to too much flour in your recipe and resulting in a dry, dense, and heavy cake.
- Avoid Overmixing the Batter: Once you start adding the wet and dry ingredients alternately, mix only until they are just combined and no dry streaks of flour remain. Overmixing develops the gluten in the flour too much, which can result in a tough, chewy cake rather than the tender, delicate crumb we are aiming for. As soon as the ingredients are homogenous, stop mixing.
More Delectable Cake Recipes to Explore
If you’ve loved baking this classic vanilla cake and are eager to expand your baking repertoire, explore these other fantastic cake recipes from our collection. Each one promises to be a delightful culinary adventure:
- Cream Cheese Pound Cake
- Classic Chocolate Layer Cake
- Red Velvet Cake
- Pineapple Upside Down Cake
- Carrot Cake
Vanilla Cake Recipe
Rated 5 out of 5 stars by 10 ratings.
This homemade vanilla cake recipe isn’t short on vanilla flavor! There’s a tablespoon of vanilla extract in the cake itself and in the vanilla buttercream frosting. It’s the perfect cake for any occasion.
Prep Time: 45 mins
Cook Time: 30 mins
Total Time: 1 hr 15 mins
Servings: 10 slices
Pin Recipe
Ingredients
Vanilla Cake
- 3 cups (345 grams) cake flour (spooned & leveled)
- 2 teaspoons baking powder
- ½ teaspoon baking soda
- ½ teaspoon salt
- 1 cup (240 ml) buttermilk (room temperature)
- ¼ cup (60 ml) canola or vegetable oil
- 1 tablespoon pure vanilla extract
- 1 cup (2 sticks, or 230 grams) unsalted butter (softened)
- 2 cups (400 grams) granulated sugar
- 4 large eggs (room temperature)
Vanilla Frosting
- 1 ½ cups (3 sticks, or 340 grams) unsalted butter (softened)
- 4 ½ cups (540 grams) powdered sugar
- 3 to 4 tablespoons (45 ml) heavy whipping cream or milk
- 1 tablespoon pure vanilla extract
- Tiny pinch of salt
Instructions
To make the vanilla cake:
- Preheat the oven to 350°F (180°C). Spray two 9-inch round cake pans with nonstick cooking spray, line the bottom of the pans with parchment paper, and set aside.
- In a large mixing bowl, whisk the cake flour, baking powder, baking soda, and salt together until well combined. Set aside.
- In a large bowl or measuring cup, whisk the buttermilk, oil, and vanilla extract together until well combined. Set aside.
- In the bowl of a stand mixer fitted with the paddle attachment or in a large mixing bowl using a handheld mixer, beat the butter on low speed until smooth, then slowly mix in the granulated sugar.
- Once all of the sugar is added, increase to medium speed and continue mixing for another 4 to 5 minutes or until the mixture is light and fluffy.
- Mix in the eggs, one at a time, making sure to stop and scrape around the bottom and sides of the bowl after each egg.
- Add the dry ingredients in three additions alternating with the buttermilk mixture (begin and end with the dry ingredients) on low speed. Mix in each addition until just combined, making sure not to over mix the batter.
- Use a rubber spatula to scrape around the bottom and sides of the bowl to ensure that everything is well combined.
- Evenly divide the cake batter between the two prepared cake pans and spread it around into one even layer.
- Bake for 28 to 32 minutes or until a toothpick inserted into the center of the cakes comes out clean. Remove from the oven and allow to cool in the pans for about 20 minutes. Slide a knife around the outside of the cakes, then carefully remove the cakes from the pans, and transfer to a wire rack to cool completely.
To make the vanilla frosting:
- In the bowl of a stand mixer fitted with the paddle attachment or in a large mixing bowl using a handheld mixer, beat the butter on medium speed until smooth.
- Mix in the powdered sugar on low speed, one cup at a time, making sure to mix well after each addition.
- Add the heavy whipping cream, vanilla extract, and salt and mix on low-medium speed until fully combined, making sure to scrape down the sides of the bowl as needed.
To assemble the cake:
- Level the tops of each cake with a knife or cake leveler. Place one of the cakes on a cake stand, top with a layer of frosting, and smooth it out into one even layer. Place the second layer on top, then use the remaining frosting to frost the top and sides of the cake. If needed, you can refer to my post on how to decorate a cake.
Notes
- Storage Instructions: Store cake in an airtight container at room temperature for 2 to 3 days or in the refrigerator for 4 days.
- Freezing Instructions: Cake layers may be wrapped tightly and frozen for up to 3 months, thaw overnight in the refrigerator. Frosting can be stored in a large freezer bag and frozen for up to 3 months. Thaw overnight in the refrigerator and bring to room temperature before frosting the cake.
- Cake flour substitute: If you don’t have any on hand, you can use my homemade cake flour substitute here.
- To make a 9×13 cake: Grease a 9×13 pan with nonstick cooking spray, pour the batter into the pan, and spread it out into one even layer. Bake at 350°F (180°C) for 35 to 40 minutes or until a toothpick inserted into the center comes out clean.
- To make a three layer cake: Divide the batter between three 8-inch round cake pans. Adjust the baking time to 23 to 28 minutes.
- To make cupcakes: This recipe will make 30 to 32 cupcakes. Only fill each liner about ⅔ of the way full and bake for 16 to 20 minutes. If you prefer less cupcakes, you may cut the recipe in half.
Cuisine: American
Course: Dessert
Author: Danielle Rye
Did you make this recipe?
Mention @livewellbakeoften on Instagram or tag #livewellbakeoften.