
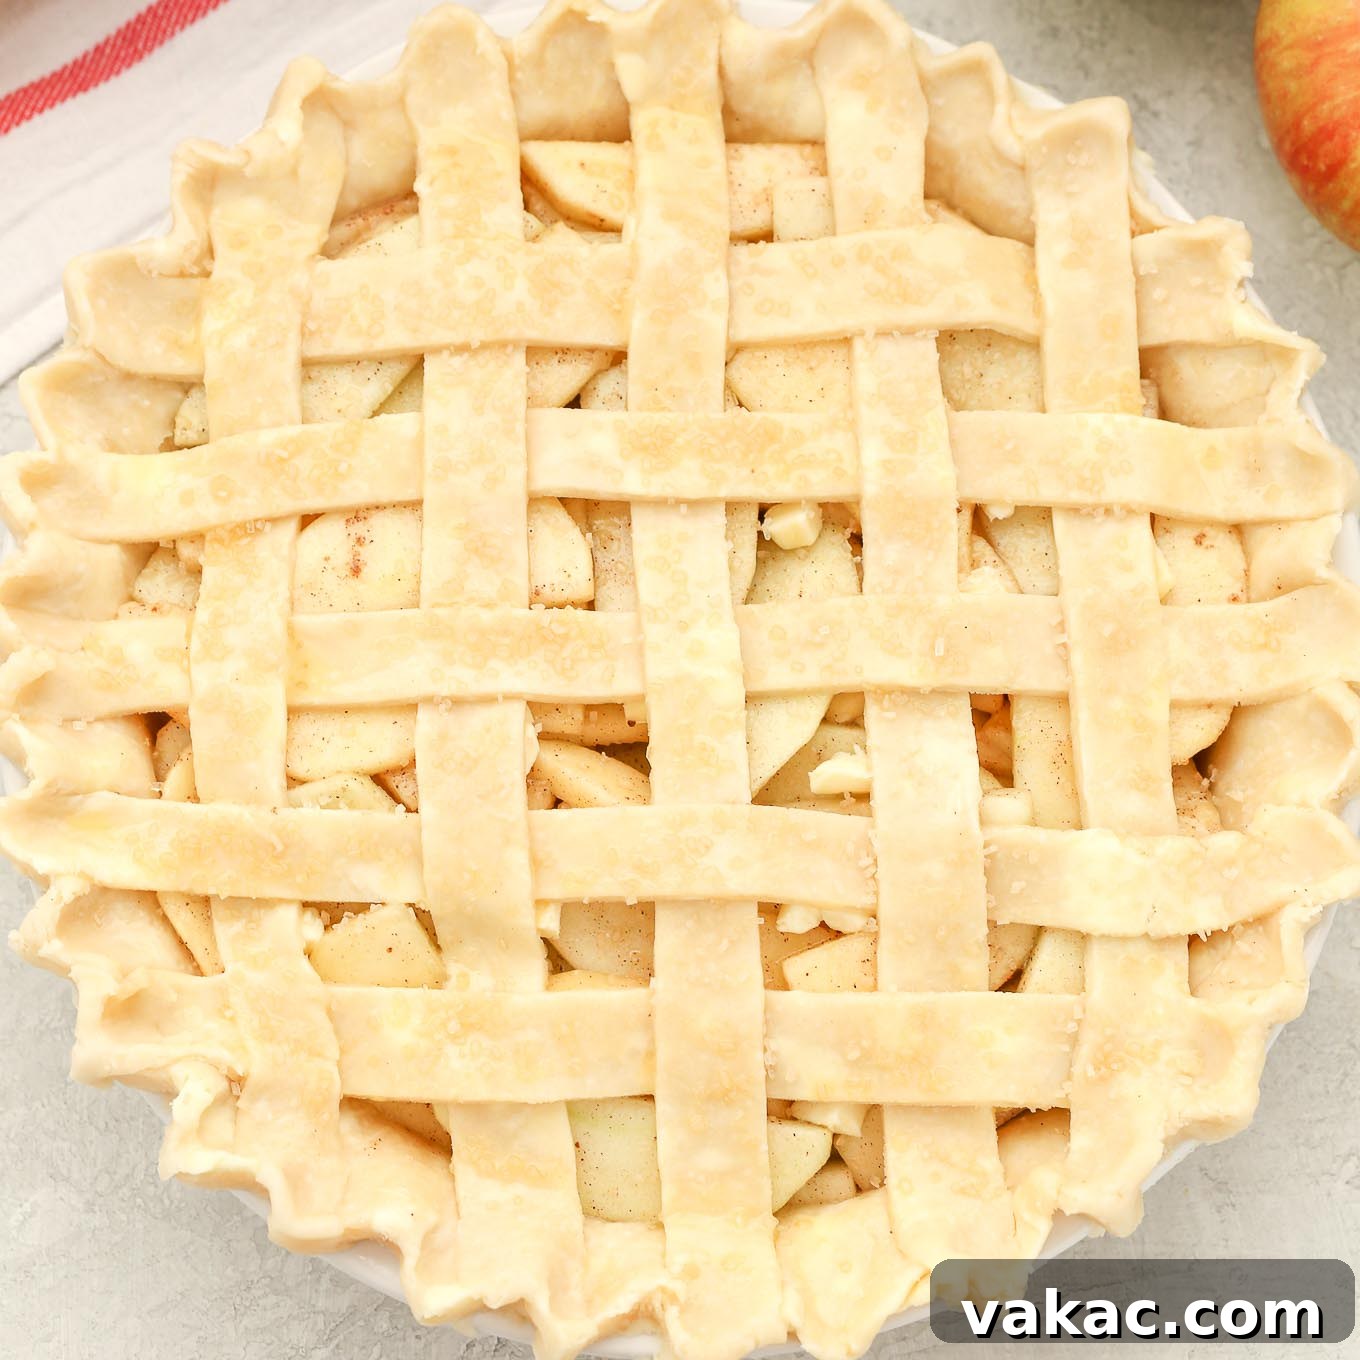
The Ultimate Guide to Crafting a Perfect Lattice Pie Crust: Easier Than You Think!
Transform your homemade pies into stunning culinary masterpieces with a beautiful lattice crust! This comprehensive, easy-to-follow guide will demystify the weaving process, proving that this elegant decorative touch is surprisingly simple to achieve for almost any pie. Get ready to impress everyone with your newfound baking prowess!
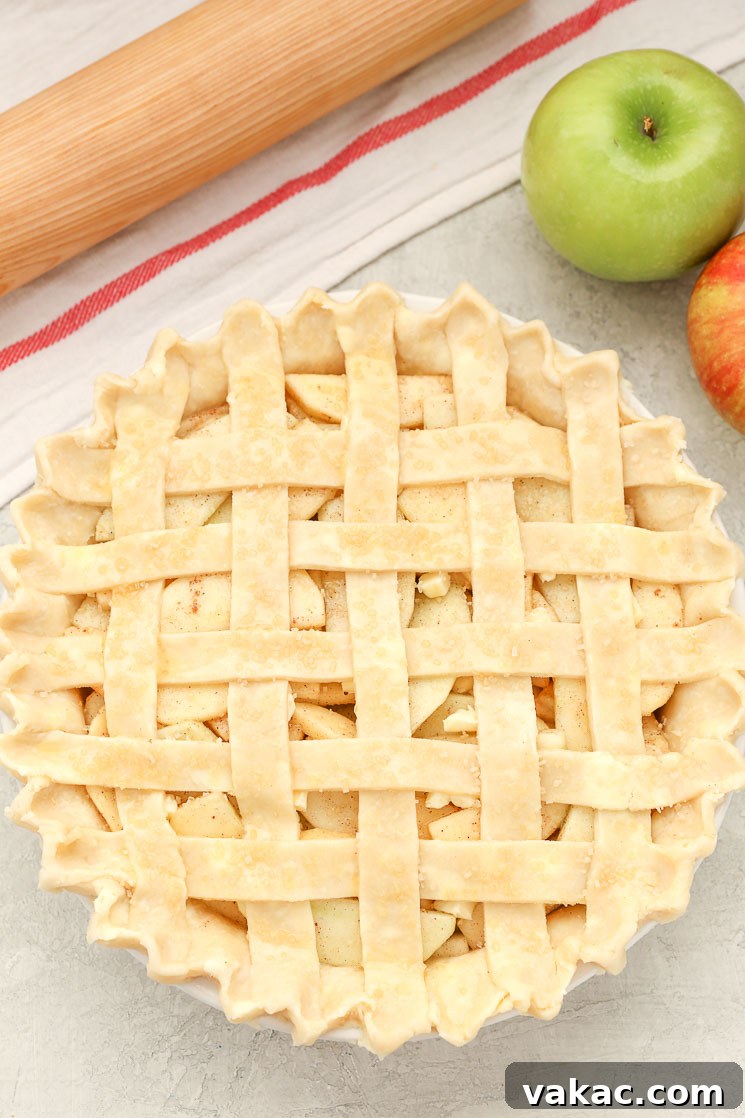
For many home bakers, the thought of creating a woven lattice topping on a pie can feel incredibly daunting. It conjures images of complex culinary school techniques, requiring immense patience and an artistic flair. I distinctly remember feeling intimidated by the intricate patterns, assuming it was a skill reserved for professional pastry chefs. However, after a few attempts in my own kitchen, I discovered a liberating truth: it’s actually not very difficult at all. In fact, it’s far easier and quicker than it looks, yet delivers an unparalleled “wow” factor to any dessert table.
Through some experimentation and a bit of trial and error, I honed a technique that makes weaving a lattice pie crust topping remarkably straightforward and efficient. With just a few simple steps, you can achieve a professional-looking finish in mere minutes. If you possess the basic skills of rolling out dough, cutting it into strips, and can follow clear instructions, then you are perfectly equipped to create this stunning pie topping with ease. This isn’t just a technique; it’s a secret weapon for elevating your baking, ensuring your pies stand out with minimal extra effort.
As festive seasons like Thanksgiving approach, or whenever you want to add a special touch to a humble homemade pie, a lattice crust is the perfect solution. It imparts an air of sophistication and craftsmanship that suggests hours of intricate work, when in reality, it’s a quick and enjoyable process. Your friends and family will undoubtedly be captivated by the beauty of your pie, and the ease with which you created it can be our little secret!
Why Choose a Lattice Pie Crust? Beyond Just Aesthetics
While the visual appeal of a lattice pie crust is undeniable, its benefits extend beyond mere decoration. A well-executed lattice crust offers several advantages that can actually improve your pie’s overall quality:
- Ventilation: The open weave allows steam from the filling to escape during baking. This prevents the top crust from becoming soggy, ensures a perfectly cooked filling, and helps achieve that desirable flaky texture. For juicy fruit pies, this ventilation is crucial.
- Even Baking: The open spaces ensure that the top crust bakes more evenly, preventing over-browning in some areas while others remain pale. It also allows the filling to caramelize slightly on top, enhancing flavor.
- Elegance and Tradition: A lattice crust is a timeless classic, evoking a sense of homemade goodness and culinary artistry. It instantly elevates a simple pie into a showstopper, perfect for special occasions or just to make an ordinary day a little more extraordinary.
- Perceived Skill: As mentioned, it looks far more complex than it is. Mastering this technique will make you feel like a seasoned baker and garner appreciative comments from anyone lucky enough to taste your pie.
Gather Your Essentials: Preparing for Success
To embark on your lattice pie crust journey, you’ll need a few basic ingredients and tools. The quality of your dough is paramount for a successful and beautiful weave.
Choosing Your Pie Dough: Homemade or Store-Bought?
The foundation of this topping is, of course, pie crust dough. You have two excellent options:
- Store-Bought Pie Crusts: For ultimate convenience, pre-made, store-bought pie crusts are a fantastic choice. They are readily available in most grocery stores and save a significant amount of time. Look for brands known for good quality and flakiness. This is a great way to ease into the lattice technique without the added step of making dough from scratch. Ensure you have at least two crusts – one for the bottom of your pie and one for the lattice topping.
- Homemade Pie Crust: If you’re feeling a bit more adventurous and want full control over the texture and flavor, making your own pie crust is incredibly rewarding. It often results in a richer, flakier crust that truly elevates your pie. I have a full step-by-step tutorial here for how to make pie crust, and I promise, it’s also simpler than many believe. Whichever you choose, ensure your dough is well-chilled before you begin, as cold dough is much easier to work with.
Essential Tools for Your Lattice
Beyond the dough, gather these simple tools:
- Rolling Pin: For evenly flattening your dough.
- Ruler: Crucial for cutting consistent, straight strips.
- Pastry Wheel or Sharp Knife: A pastry wheel with a plain or fluted edge can make quick, clean cuts. A sharp kitchen knife works just as well.
- Lightly Floured Surface: A clean countertop or pastry mat to prevent sticking.
Preparing Your Dough for Weaving
Proper dough preparation is key to a smooth weaving process and a beautiful final result.
Chilling and Rolling the Dough
Before you begin cutting, ensure your pie dough is adequately chilled. Cold dough is less sticky, holds its shape better, and is easier to handle without tearing. If you’re using store-bought dough, let it sit at room temperature for just a few minutes to make it pliable enough to roll without cracking, but not so warm that it becomes soft and sticky.
Lightly flour your work surface and your rolling pin. Take one disc of pie dough (this will be for your lattice) and roll it out into an even circle, roughly 1/8-inch thick. Aim for a diameter that is slightly larger than your pie plate to ensure you have enough length for your strips. Consistency in thickness is important here; uneven thickness can lead to uneven baking.
Cutting Perfect Pie Dough Strips
The success of your lattice largely depends on the uniformity of your dough strips. Aim for precision here!
I find that strips approximately 3/4-inch wide are perfect for a classic, elegant lattice pattern. This width is sturdy enough to handle without breaking but thin enough to create a delicate weave. While you can cut them slightly thicker, be mindful that overly thick strips might not weave as easily or create the desired aesthetic. You’ll typically need about 10 to 12 strips for a standard 9-inch pie. If your pie plate is larger, or if you prefer a tighter weave, you might need a couple more.
To cut the strips:
- Place your rolled-out dough on your lightly floured surface.
- Using a ruler as a guide, carefully cut parallel strips of dough with your pastry wheel or sharp knife. Aim for clean, straight lines.
- Gently transfer the cut strips to a parchment-lined baking sheet and place them in the refrigerator for 5-10 minutes. This will firm them up slightly, making them even easier to handle during the weaving process.
The Art of Weaving: Step-by-Step Lattice Creation
Now for the exciting part – the weaving! This process is methodical and simple once you understand the pattern. Remember, you’ll be working directly over your pie, which should already be filled with your desired fruit filling.
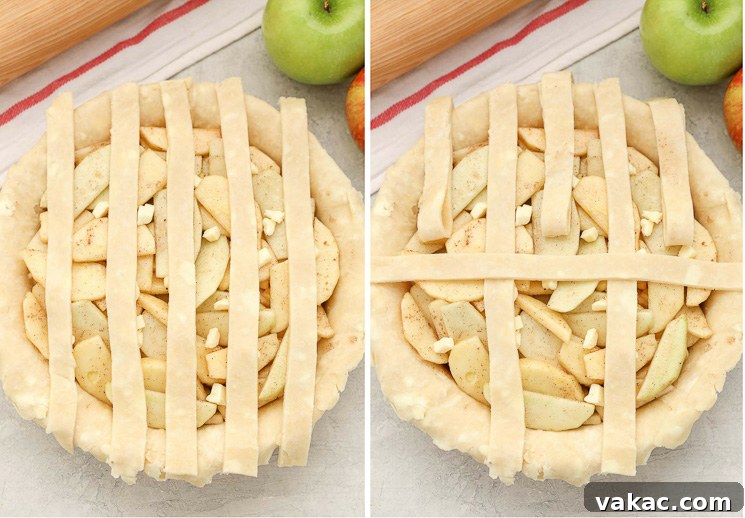
1. Laying the Vertical Foundation
Begin by carefully arranging five of your dough strips vertically across the top of your pie. Space them out as evenly as possible. You want them to cover the pie, reaching slightly over the edges. Think of these five strips as being numbered 1, 2, 3, 4, and 5 from left to right (or right to left, just be consistent).
2. Initiating the Weave: The First Horizontal Strip
This is where the weaving truly begins. Gently lift strips number 1, 3, and 5 (every other strip). Fold them back towards the edge of the pie, away from the center. Now, take one of your remaining dough strips and place it horizontally across the middle of the pie, perpendicular to the lifted strips. Position it carefully so it’s centered. I find starting in the middle helps ensure the subsequent horizontal strips are evenly spaced and the overall weave remains symmetrical.
Once the horizontal strip is in place, gently fold strips 1, 3, and 5 back down over the new horizontal strip. You’ve just completed the first weave!
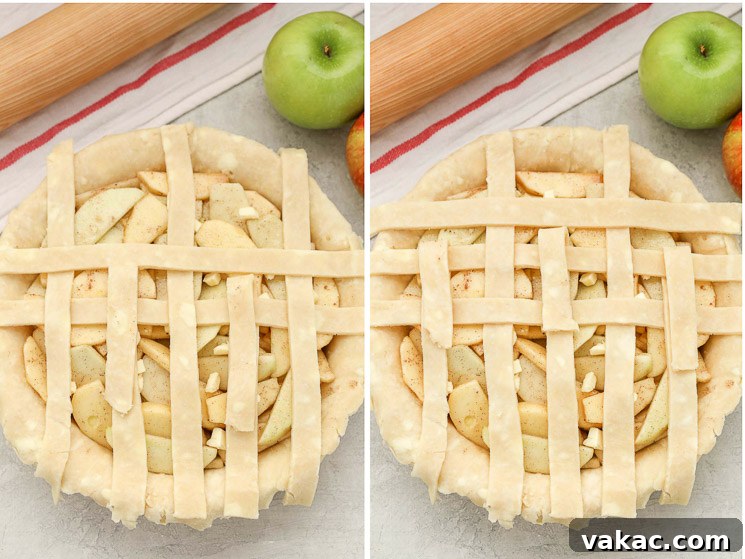
3. Completing the Upper Weave
You can choose to work from the middle outwards, either upwards or downwards first. For this tutorial, we’ll start by completing the top half of the pie.
- Second Horizontal Strip: Lift up strips 2 and 4 (the ones that were underneath the first horizontal strip). Place another strip of dough horizontally, parallel to the first, towards the top edge of the pie, leaving enough space for your final strip. Gently lay strips 2 and 4 back down over this new horizontal strip.
- Third Horizontal Strip: Now, lift strips 1, 3, and 5 back up again. Place your third horizontal strip of dough towards the very top edge of the pie. Once positioned, fold strips 1, 3, and 5 back down.
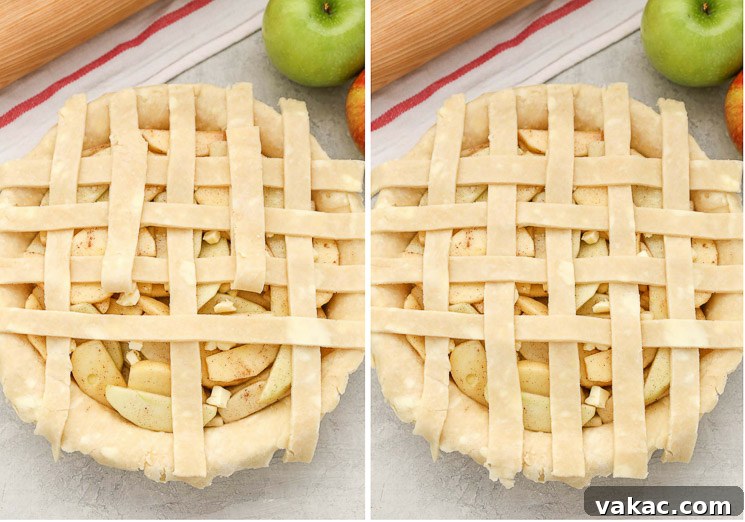
4. Mirroring the Weave for the Bottom Half
Once you’ve completed the upper portion of the pie’s lattice, you’ll repeat a similar process for the bottom half, ensuring a symmetrical and balanced weave.
- Fourth Horizontal Strip: Lift strips 2 and 4 (the alternate vertical strips) once more. Place another horizontal strip of dough underneath the initial middle strip, working towards the bottom edge of the pie. Then, gently lay strips 2 and 4 back down over it.
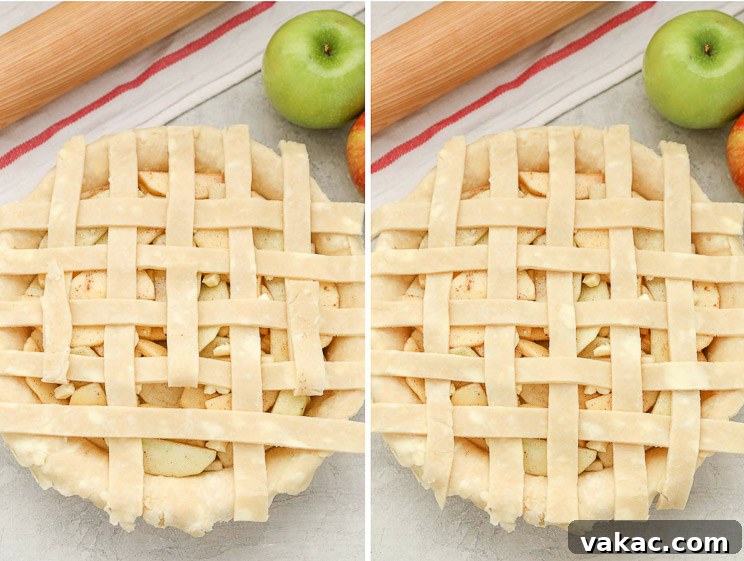
- Final Horizontal Strip: Finally, lift strips 1, 3, and 5 back up for the last time. Place your very last strip of dough horizontally towards the bottom-most edge of the pie. Once it’s perfectly positioned, lay strips 1, 3, and 5 back down.
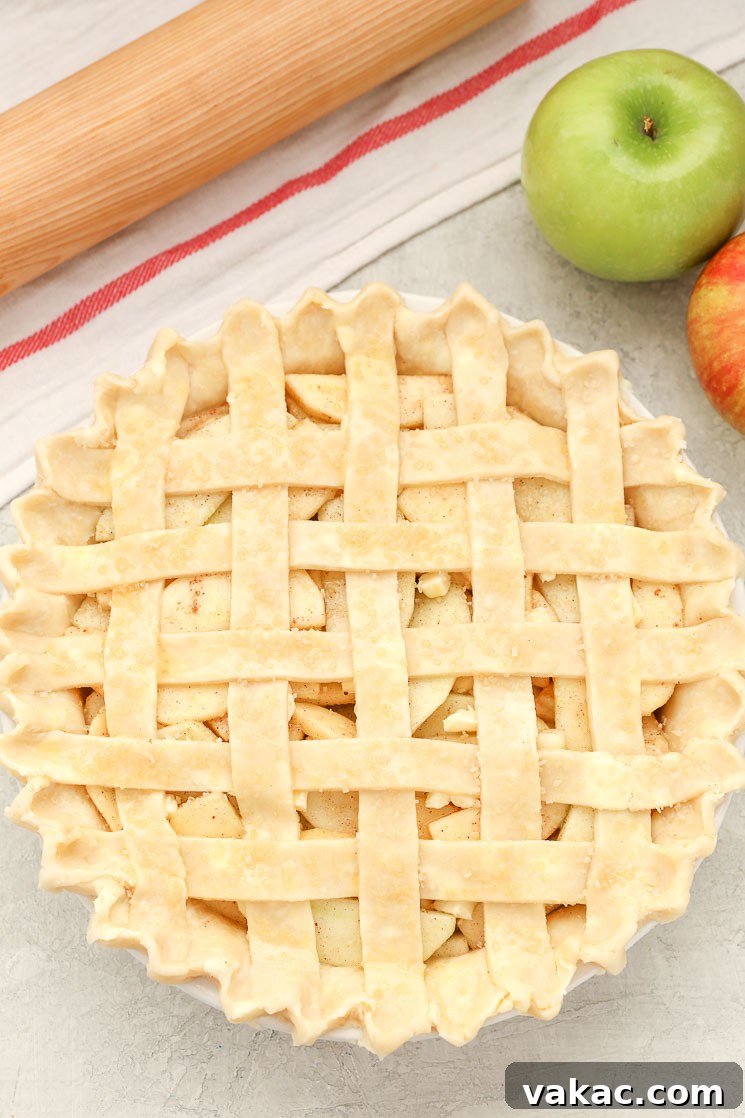
Congratulations! Your lattice weave is complete. Take a moment to admire your work. You’ll notice the beautiful over-and-under pattern emerging across the entire pie surface.
The Perfect Finish: Trimming and Decorating Your Edges
The final steps are crucial for giving your pie a polished, professional appearance and securely sealing your filling.
Trimming Excess Dough
Once your lattice is woven, you’ll have excess dough strips hanging over the edges of your pie plate. Use a sharp knife or kitchen scissors to carefully trim off this excess dough, leaving about a 1/2-inch overhang around the entire circumference of the pie. This excess will be folded under to create a neat edge.
Sealing and Decorating the Edges
Now, gently fold the trimmed overhang of dough under itself, creating a slightly thicker border around the pie. This will seal the lattice strips to the bottom crust and help prevent the filling from bubbling out.
There are several ways to decorate this edge:
- Finger Fluting: This is a classic method. Using your index finger and thumb, gently pinch and press the dough together, creating a beautiful wavy, crimped edge. You can use your other hand to support the back of the dough as you go.
- Fork Crimping: A simpler option is to use the tines of a fork to press down firmly all around the edge of the pie. This not only creates a decorative pattern but also helps to further secure the lattice to the bottom crust.
- Braided Edge: For an even more elaborate touch, you can take some of the trimmed excess dough, roll it into thin ropes, braid them, and then attach the braid around the edge of the pie with a little water or egg wash.
For the pie pictured, I used my index finger to create a delicate fluted edge, giving it a rustic yet refined look.
Optional Enhancements: Egg Wash and Sugar
To achieve that gorgeous, golden-brown sheen and an extra touch of sweetness, consider these optional but highly recommended steps:
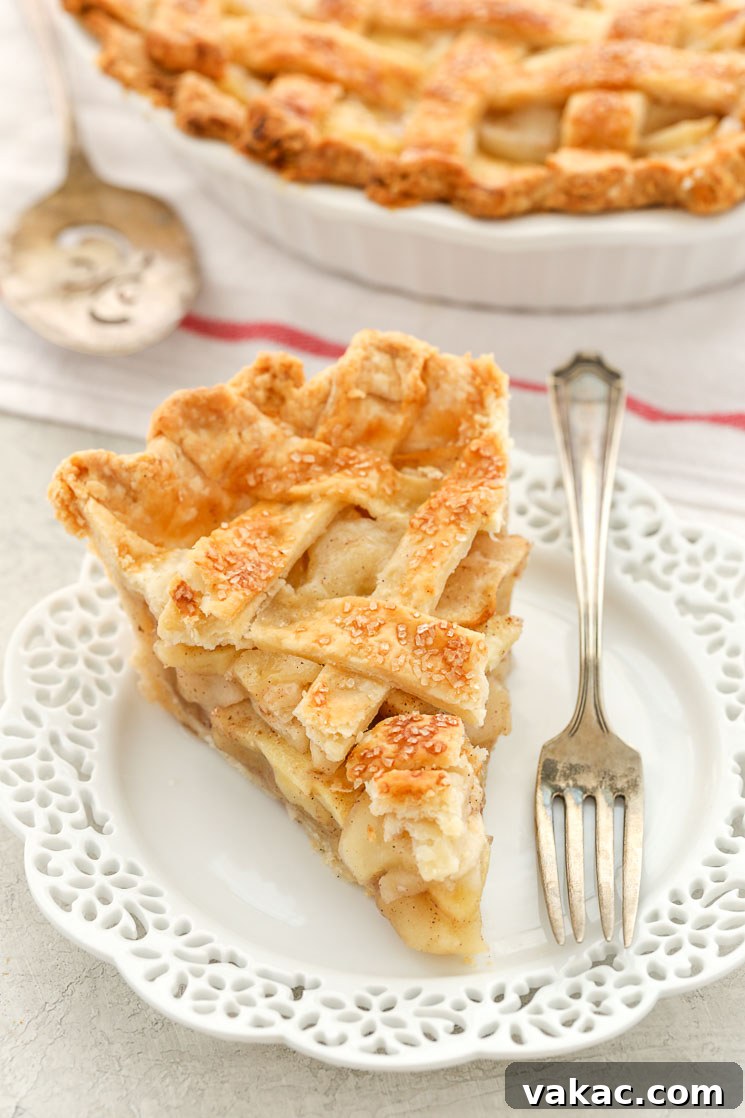
- Egg Wash: Whisk one egg with a tablespoon of water or milk. Lightly brush this mixture over the entire lattice crust and the crimped edges. The egg wash helps promote even browning and a beautiful glaze.
- Coarse Sugar: For added sparkle and a delightful textural crunch, sprinkle a little coarse sugar (like turbinado or demerara sugar) over the egg-washed crust. This is especially lovely on fruit pies.
Tips for a Flawless Lattice Pie Crust
To ensure your lattice pie crust turns out perfectly every time, keep these expert tips in mind:
- Keep Your Dough Cold: This is the golden rule for pie crusts. Cold dough is less prone to sticking, tearing, and shrinking. If at any point your dough becomes too warm and difficult to handle, simply pop it back into the refrigerator for 10-15 minutes to chill.
- Don’t Overwork the Dough: Handle the dough as little as possible. Overworking develops the gluten, leading to a tough crust rather than a tender, flaky one.
- Use a Lightly Floured Surface: While rolling, use just enough flour to prevent sticking. Too much flour can make the dough dry and prone to cracking, and excess flour on the finished crust can taste powdery. Brush off any excess flour before weaving.
- Be Gentle and Patient: The weaving process isn’t a race. Take your time, especially when lifting and folding the strips. If a strip tears slightly, you can often gently press it back together with your fingers.
- Practice Makes Perfect: Don’t be discouraged if your first attempt isn’t flawless. Each pie you make will improve your technique and confidence. The beauty of baking is the continuous learning and delicious rewards!
- Consider Your Filling: A lattice crust is particularly well-suited for fruit fillings that release a lot of steam, such as apple, cherry, peach, or berry pies. The open weave allows moisture to escape, preventing a soggy bottom crust.
Beyond the Basic: Creative Lattice Variations
Once you’ve mastered the basic lattice, feel free to experiment with variations to add even more personalized flair to your pies:
- Vary Strip Widths: Instead of uniform strips, try alternating wide and narrow strips for a different visual texture.
- Braided Strips: Before weaving, braid some of your dough strips for a more intricate look. You can use braided strips as your vertical or horizontal elements, or even just around the edge.
- Cut-Out Shapes: Use small cookie cutters (like stars, leaves, or tiny hearts) to cut out shapes from some of your strips before weaving. This adds a playful touch.
- Diagonal Weave: Instead of starting with vertical strips directly, you can lay them diagonally across the pie for a diamond-shaped lattice.
Your Masterpiece Awaits!
You now possess all the knowledge and steps to create a stunning lattice pie crust. What once seemed intimidating is now an achievable, enjoyable baking technique that will undoubtedly elevate your pies from delicious to absolutely magnificent. The satisfaction of pulling a beautifully woven pie from the oven is unmatched.
Speaking of delicious pies, I’ll be sharing a fantastic apple pie recipe with you very soon! It will provide the perfect excuse to put your new lattice weaving skills into practice and create a truly unforgettable dessert. Happy baking!