
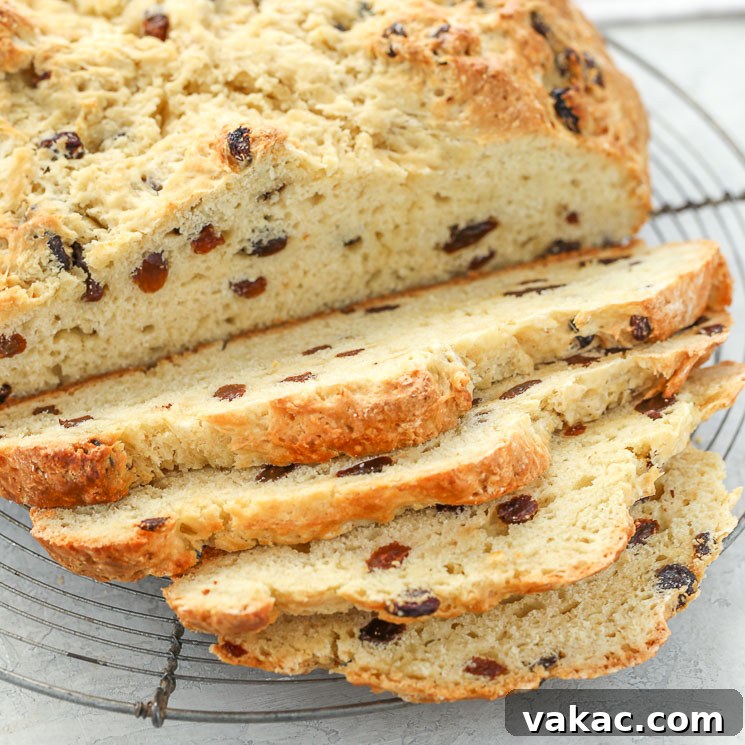
This Irish Soda Bread with Raisins is a truly delightful experience – incredibly easy to make, boasting a beautifully crispy crust, and a wonderfully dense yet tender interior. It’s the perfect treat for St. Patrick’s Day or a comforting addition to any meal throughout the year.
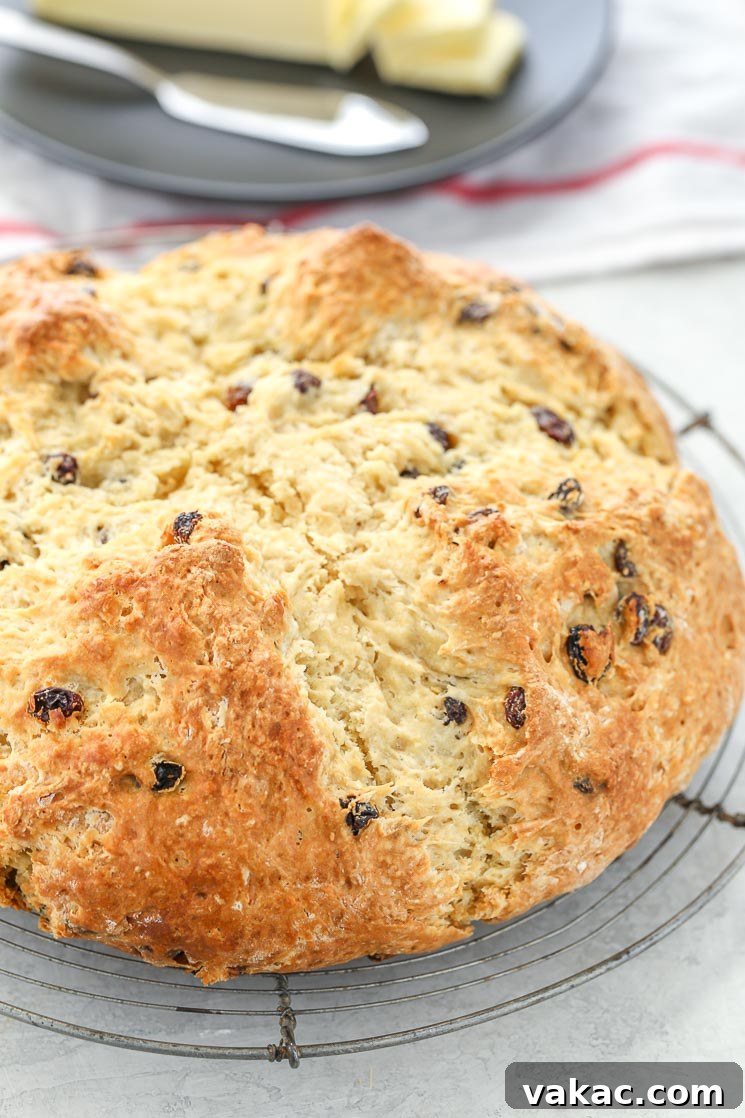
Have you ever experienced the simple pleasure of Irish Soda Bread? If so, you already know its uniquely satisfying charm. But if you haven’t, prepare yourself for a truly delicious revelation! This classic bread is a staple in Irish homes, known for its rustic appeal and comforting flavor, making it a beloved choice for generations. Often associated with St. Patrick’s Day, its ease of preparation makes it a fantastic addition to your kitchen year-round.
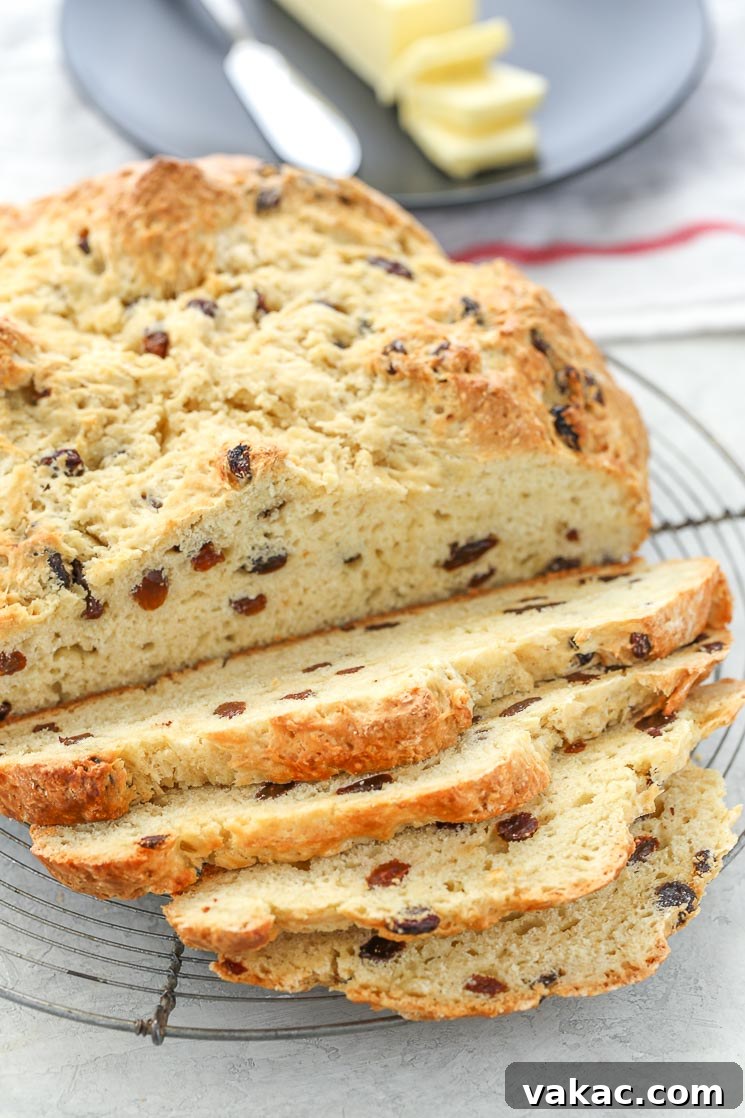
Our easy Irish Soda Bread recipe delivers a delightful contrast: a crisp, golden-brown exterior gives way to a dense yet remarkably soft crumb. The taste is subtly sweet, often compared to a comforting biscuit, making it an ideal accompaniment for breakfast, brunch, or even alongside a hearty dinner. What makes Irish Soda Bread so wonderfully approachable is that it’s a “quick bread” – meaning there’s absolutely no yeast required. Instead of waiting for lengthy rising times, baking soda acts as the star leavening agent, reacting with the buttermilk to create a beautifully risen loaf as it bakes in the oven. This ingenious method means you can whip up the dough in a mere 10-15 minutes, allowing you to enjoy fresh, warm bread in just over an hour. You can choose to keep this bread plain for a traditional touch, or enhance it with the classic addition of raisins or dried currants for a touch of sweetness and texture.
The Enduring Appeal of Irish Soda Bread
Irish Soda Bread is more than just a recipe; it’s a piece of culinary history. Its origins can be traced back to the early 19th century in Ireland, a time when bicarbonate of soda (baking soda) was introduced and became a practical leavening agent. Unlike yeast breads which required strong, expensive flours and complex techniques, soda bread could be made with the readily available soft wheat flour and minimal effort. It became a daily staple for many Irish families, often baked in a bastible pot over an open fire. The iconic “X” cut into the top of the loaf wasn’t just decorative; it was traditionally believed to ward off evil, but also served the practical purpose of allowing the bread to bake more evenly and break into four pieces for serving. This rich history, combined with its simple ingredients and straightforward process, ensures its continued popularity today.
Why You’ll Fall in Love with This Easy Recipe
There are countless reasons why this particular Irish Soda Bread recipe will become a treasured favorite in your baking repertoire:
- Effortlessly Simple: With no yeast or complex kneading required, it’s perfect for beginner bakers or anyone looking for a quick and rewarding bread-making experience.
- Minimal Prep Time: The dough comes together in under 15 minutes, meaning you can have fresh, homemade bread on the table faster than you might imagine.
- Crisp Exterior, Tender Interior: The unique texture of this bread offers a satisfying crunch from its crust, perfectly complementing the soft, dense crumb within.
- Versatile & Adaptable: Enjoy it plain, slathered with butter or jam, or customize it with your favorite mix-ins like raisins, currants, or even caraway seeds.
- Nostalgic Comfort: There’s something inherently comforting and homey about a freshly baked loaf of Irish Soda Bread, making it ideal for any occasion.
- Perfect for Any Occasion: While it shines on St. Patrick’s Day, this bread is equally fantastic for a cozy breakfast, a hearty soup accompaniment, or a delightful afternoon tea treat.
Essential Ingredients for Your Irish Soda Bread
Creating this delicious Irish Soda Bread requires just eight humble ingredients, each playing a crucial role in achieving its signature flavor and texture. Here’s a closer look at what you’ll need to bake the best Irish soda bread:
- All-Purpose Flour: The foundation of our bread. It’s absolutely essential to measure your flour correctly. Always spoon the flour into your measuring cup and then level it off with the back of a knife. Scooping directly from the bag can compact the flour, leading to too much being added, which results in a dense and dry loaf. Accuracy here ensures a tender crumb.
- Granulated Sugar: While Irish soda bread isn’t meant to be overly sweet, a touch of granulated sugar provides subtle flavor enhancement, promotes a beautiful golden-brown crust, and contributes to the bread’s tender texture. It balances the tanginess of the buttermilk beautifully.
- Baking Soda: This is the star ingredient and the primary leavening agent in our quick bread. When combined with the acidity of the buttermilk, baking soda produces carbon dioxide bubbles, which cause the bread to rise rapidly and achieve its light, open texture. Just 1 teaspoon is enough to create the perfect lift without leaving any metallic aftertaste.
- Salt: A crucial flavor enhancer, salt not only seasons the dough but also balances the sweetness of the sugar and prevents the bread from tasting bland. It brings all the other flavors into harmony.
- Cold Unsalted Butter: Cut into small cubes, cold butter is vital for the bread’s texture. Similar to scones or biscuits, incorporating cold butter into the dry ingredients creates small pockets of fat. As the bread bakes, these butter pieces melt, releasing steam and creating tender, slightly flaky layers within the dense crumb. If the butter is too warm, it will fully incorporate into the flour, resulting in a tougher, less desirable texture.
- Raisins: My personal preference for adding a burst of sweet, chewy flavor. Raisins are a traditional addition to many Irish soda bread recipes, offering a delightful contrast to the bread’s rustic nature. However, if you’re not a fan, you can easily substitute them with dried currants for a slightly tarter taste, or omit them altogether for a plain loaf.
- Buttermilk: The critical acidic component that reacts with the baking soda to create leavening. Buttermilk also contributes to the bread’s tender crumb and slightly tangy flavor. If you don’t typically keep buttermilk on hand, don’t worry! You can easily make your own buttermilk substitute in about 5 minutes by adding 1 tablespoon of lemon juice or white vinegar to a liquid measuring cup, then filling it with regular milk (dairy or non-dairy) to the 1 ½ cup mark. Let it sit for 5-10 minutes until it slightly curdles.
- Large Egg: The egg acts as a binder, helping to hold all the ingredients together and providing additional structure to the dough. It also contributes to the richness and a slightly more golden hue of the crust.
Crafting Your Perfect Loaf: Step-by-Step Instructions
Making this Irish Soda Bread with raisins is a simple and rewarding process. Follow these steps carefully to achieve a perfect loaf every time:
- Preheat Oven & Prepare Baking Sheet: Begin by preheating your oven to a steady 375°F (190°C). This ensures the oven is at the correct temperature when your bread is ready to bake, which is crucial for proper rising. Line a large baking sheet with parchment paper or a silicone baking mat. This prevents sticking and makes for easy cleanup. Set it aside.
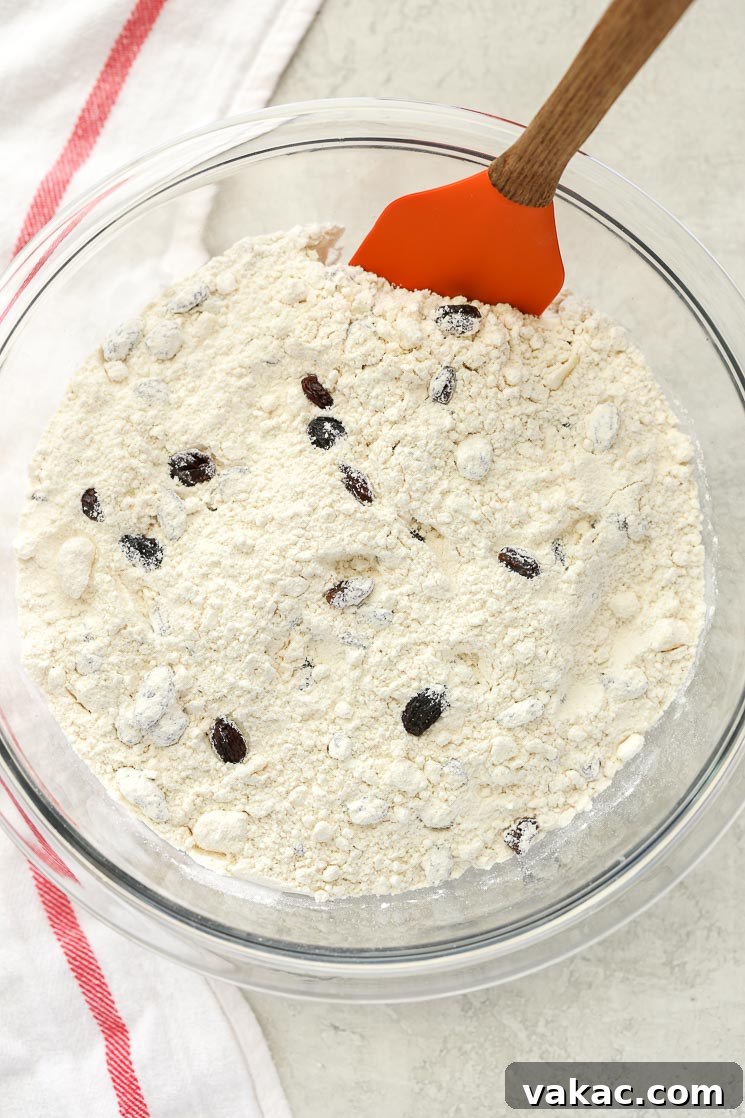
- Combine Dry Ingredients: In a spacious large mixing bowl, whisk together the all-purpose flour, granulated sugar, baking soda, and salt. Whisking ensures that these dry ingredients are thoroughly combined and evenly distributed, particularly the baking soda, which needs to be spread throughout for consistent leavening.
- Incorporate Cold Butter: Add the cold, cubed butter to the dry ingredients. Using a pastry cutter, two forks, or even your fingertips, cut the butter into the flour mixture. Work quickly to prevent the butter from warming up too much. Continue until the mixture resembles coarse meal with small, pea-sized crumbs. These little pockets of butter are what create the tender, slightly flaky texture in the finished bread.
- Add Your Mix-Ins: Now is the time to stir in your chosen mix-ins. If using raisins, gently fold them into the flour and butter mixture until they are evenly distributed. This ensures every slice has a delightful burst of sweetness. If you prefer, you can swap the raisins for dried currants, or even add a tablespoon of caraway seeds for a more savory, traditional Irish flavor.
- Whisk Wet Ingredients: In a separate, medium-sized mixing bowl, whisk together the buttermilk and the large egg until they are fully combined and appear homogenous. Remember that homemade buttermilk (milk + acid) can sometimes be a bit thinner than store-bought buttermilk, so if you’ve made your own, keep this in mind, though the specified quantity should work perfectly.
- Combine Wet and Dry: Pour the wet ingredients into the dry ingredient mixture. With a wooden spoon or spatula, gently stir the dough together until it just begins to come together. The key here is to avoid overmixing. The dough will be quite sticky and shaggy at this stage, and that’s perfectly normal and desired. Overmixing will develop the gluten too much, resulting in a tough, chewy bread instead of the tender crumb we’re aiming for.
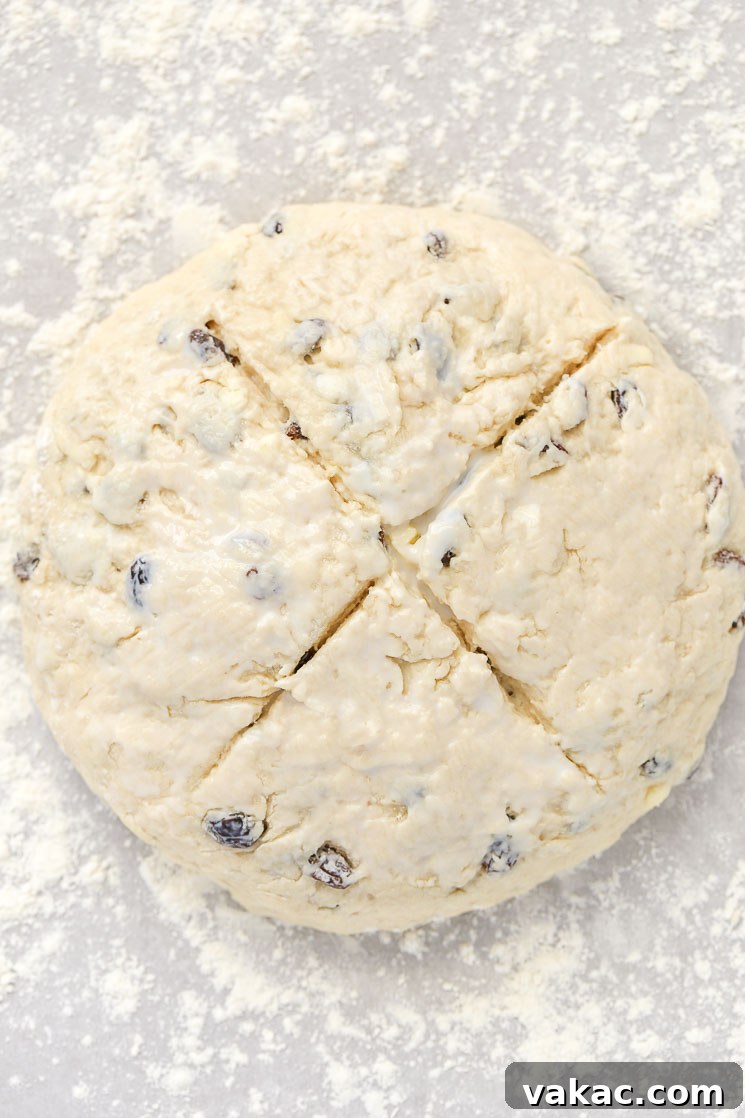
- Knead and Shape: Lightly flour a clean, flat work surface. Turn the sticky dough out onto the floured surface. Sprinkle a little flour on top of the dough and lightly flour your hands. Gently knead the dough only a few times – just enough to bring it together into a cohesive ball. You should aim for about 8-10 light kneads. If the dough is still too sticky to handle, add a tiny bit more flour, but be conservative. Form the dough into a round loaf, approximately 7 inches in diameter.
- Score the Loaf: Carefully transfer the formed dough ball to your prepared baking sheet. Using a sharp knife or a pastry scraper, cut a deep “X” into the center of the top of the bread, extending almost to the edges and about half an inch deep. This scoring serves both practical and traditional purposes: it helps the bread expand and split evenly as it bakes, creating a beautiful rustic appearance, and ensures the center cooks thoroughly.
- Optional Buttermilk Wash: For an extra golden-brown, slightly richer crust, you can lightly brush the top of the scored loaf with a small amount of additional buttermilk before placing it in the oven. This step is not required but adds a lovely finish.
- Bake to Perfection: Place the baking sheet with your soda bread into the preheated oven. Bake for approximately 45-60 minutes. The baking time can vary slightly depending on your oven. You’ll know the bread is done when the top is beautifully golden brown, and a wooden skewer or toothpick inserted into the very center of the loaf comes out clean. If you have an instant-read thermometer, the internal temperature should reach about 200-210°F (93-99°C).
- Cool and Serve: Once baked, remove the bread from the oven and transfer it to a wire cooling rack. Allow the bread to cool for at least 15-20 minutes before attempting to slice it. This cooling period is essential as it allows the internal structure of the bread to set and the flavors to fully develop. Slicing too early can result in a gummy texture. Once cooled, slice generously and enjoy!
Delightful Serving Suggestions
Irish Soda Bread is incredibly versatile and pairs wonderfully with a variety of meals and occasions. Here are some suggestions to enjoy your freshly baked loaf:
- Classic & Simple: The most traditional way is simply sliced warm, slathered generously with butter, especially a good quality Irish butter.
- Sweet Accompaniments: Spread with your favorite jam, marmalade, or honey for a delightful breakfast or afternoon tea treat.
- Savory Pairings: Its hearty texture makes it an excellent companion to soups, stews, and chilis. Dip a slice into a bowl of Irish stew for an authentic experience.
- Cheese Board Addition: Serve alongside a selection of cheeses, particularly sharp cheddars or creamy goat cheese, for a rustic appetizer.
- Breakfast Bliss: Enjoy toasted with eggs and bacon, or as part of a larger brunch spread.
- With Coffee or Tea: A warm slice of soda bread is the perfect partner to a hot cup of coffee or a comforting mug of tea.
Expert Baking Tips for a Flawless Loaf
Even though Irish Soda Bread is famously easy, a few key tips can elevate your baking experience and ensure a perfect result every single time:
- Measure Flour Accurately: This cannot be stressed enough. Always use the “spoon and level” method. Stir your flour in its container, then spoon it lightly into your dry measuring cup, and finally, level it off with the back of a straight edge or knife. Scooping directly can add up to 25% too much flour, leading to a dry, dense, and crumbly bread.
- Keep Butter Cold: The secret to a tender, slightly flaky crumb lies in cold butter. Ensure your butter is straight from the refrigerator and cut into small cubes. Incorporate it quickly into the dry ingredients so it doesn’t melt before baking. This mimics the technique used for perfect biscuits and scones.
- Do Not Overmix the Dough: This is arguably the most crucial tip for any quick bread. Once the wet ingredients are added to the dry, mix only until everything is just combined. A shaggy, slightly lumpy dough is what you’re looking for. Overmixing develops the gluten in the flour, resulting in a tough, chewy, and less tender bread.
- Flour Your Surface (But Don’t Overdo It): When turning out the sticky dough, flour your work surface and your hands. This prevents sticking and makes the brief kneading process manageable. However, avoid adding excessive amounts of flour to the dough itself, as this can dry it out. Add just enough to handle it without it adhering completely to your hands or surface.
- Don’t Forget the “X”: The deep cut on top of the loaf isn’t just for tradition; it allows the bread to expand properly during baking, preventing it from cracking in unpredictable ways and ensuring a more even cook throughout the dense interior.
- Homemade Buttermilk is Easy: If you don’t have buttermilk, making your own substitute takes minutes. Just remember that homemade buttermilk might be slightly thinner than store-bought, but it will still provide the necessary acidity for the baking soda reaction.
- Customize to Your Liking: While raisins are classic, feel free to experiment. Dried currants offer a tart contrast, orange or lemon zest adds brightness, and caraway seeds provide a traditional, savory depth. You can even add a handful of chopped nuts for extra crunch.
Storage and Freezing Instructions
To ensure your delicious Irish Soda Bread stays fresh and enjoyable, follow these storage and freezing guidelines:
- Room Temperature Storage: Any leftover bread should be wrapped tightly in plastic wrap or aluminum foil to prevent it from drying out. Store it at room temperature on your counter for up to 3-4 days. For best results, place it in an airtight container once wrapped.
- Freezing for Later: Irish Soda Bread freezes beautifully! Once completely cooled, wrap the entire loaf or individual slices tightly in plastic wrap, then place them in a heavy-duty freezer bag or wrap again in aluminum foil. It can be frozen for up to 3 months without loss of quality.
- Thawing and Reheating: To thaw, simply transfer the frozen bread to the refrigerator overnight. Once thawed, bring it to room temperature before serving. For a warm, “freshly baked” experience, you can gently reheat slices in a toaster oven or the microwave for a few seconds. A whole loaf can be briefly warmed in a preheated oven (around 300°F/150°C) until heated through.
Frequently Asked Questions About Irish Soda Bread
Here are answers to some common questions you might have when making Irish Soda Bread:
Q: Can I make Irish Soda Bread without raisins?
A: Absolutely! While raisins are a popular and traditional addition, you can easily omit them for a plain loaf. Alternatively, you can swap them out for other dried fruits like dried currants, or add a handful of chopped walnuts or pecans, or even a tablespoon of citrus zest for a different flavor profile.
Q: What if I don’t have buttermilk?
A: No problem! You can quickly make a homemade buttermilk substitute. For every 1 cup of buttermilk, simply add 1 tablespoon of lemon juice or white vinegar to a liquid measuring cup, then fill the rest of the way with regular milk (dairy or non-dairy). Let it sit for 5-10 minutes until it slightly curdles. This creates the necessary acidity to react with the baking soda.
Q: Why is my soda bread dense or tough?
A: The most common culprits for dense or tough soda bread are overmixing the dough and adding too much flour. Overmixing develops the gluten, making the bread chewy instead of tender. Too much flour (often from incorrectly measuring) dries out the dough and prevents it from rising properly. Ensure you mix just until combined and measure flour using the spoon-and-level method.
Q: Is Irish Soda Bread supposed to be sweet?
A: Traditionally, Irish Soda Bread is a rustic, savory bread, sometimes with only a hint of sweetness from the flour itself or a tiny amount of sugar. Recipes with raisins or currants tend to be slightly sweeter. This particular recipe has a small amount of sugar to enhance the flavor without making it overly sweet, keeping it versatile for both savory and sweet accompaniments.
Q: Can I use self-rising flour for Irish Soda Bread?
A: It’s generally not recommended to substitute self-rising flour directly into a recipe designed for all-purpose flour, baking soda, and salt. Self-rising flour already contains leavening agents and salt, and using it in this recipe would likely result in an imbalance, potentially leading to over-rising and a strange texture or flavor. Stick to all-purpose flour for the best results in this recipe.
Ingredients
- 4 and 1/4 cups (535 grams) all-purpose flour (spooned & leveled)
- 1/4 cup (50 grams) granulated sugar
- 1 teaspoon baking soda
- 1 teaspoon salt
- 1/4 cup (60 grams) cold unsalted butter (cubed into smaller pieces)
- 1 cup (160 grams) raisins (or dried currants)
- 1 and 1/2 cups (360 ml) buttermilk
- 1 large egg
Instructions
- Preheat oven to 375°F (190°C). Line a large baking sheet with parchment paper or a silicone baking mat and set aside.
- In a large mixing bowl, whisk together the flour, sugar, baking soda, and salt until well combined. Add the cold cubed butter and cut it into the dry ingredients with a pastry cutter or fork until you have small pea-sized crumbs. Stir in the raisins and set aside.
- In a separate mixing bowl, whisk together the buttermilk and egg until fully combined. Pour the mixture into the dry ingredients and gently stir the dough together until just combined. The dough will be a little sticky, this is okay.
- Turn the dough out on a floured surface, flour the top of the dough and your hands, then knead the dough together a few times adding more flour as needed until you can form it into a ball that’s about 7-inches in diameter.
- Cut an ‘X’ into the top of the bread and brush with a little extra buttermilk if desired.
- Bake at 375°F (190°C) for 45-60 minutes or until the top of the bread is browned and a toothpick inserted into the center of the bread comes out clean. Remove from the oven and allow the bread to cool for 15-20 minutes before slicing into it.
Notes
Storage instructions: Leftover bread may be wrapped tightly and stored at room temperature for 3-4 days.
Freezing instructions: Bread will freeze well for up to 3 months. Thaw overnight in the refrigerator and bring to room temperature before serving.
Adapted from Food Network.
More Easy Bread Recipes to Try!
If you loved making this Irish Soda Bread, you’re in for a treat with these other easy and delicious bread recipes that are perfect for home bakers of all skill levels:
- Classic Zucchini Bread: A moist and flavorful quick bread that’s perfect for using up garden zucchini or simply enjoying a comforting slice.
- Blueberry Lemon Bread with Lemon Glaze: Bright, zesty, and bursting with fresh blueberries, topped with a sweet lemon glaze for an irresistible breakfast or dessert.
- Whole Wheat Banana Bread: A healthier twist on a classic favorite, this banana bread is packed with flavor and wholesome goodness.
- Homemade Cornbread: A simple, rustic cornbread recipe that’s perfect as a side dish for chili, soups, or barbecues.
- Beer Bread: Incredibly easy to make with just a few ingredients, this savory bread offers a unique flavor from your favorite brew.
Conclusion
We hope this comprehensive guide inspires you to bake a delicious loaf of Irish Soda Bread with Raisins. Its simplicity, delightful texture, and comforting flavor make it a truly special recipe that’s perfect for sharing with family and friends. Whether you’re celebrating St. Patrick’s Day or simply craving a homemade treat, this recipe promises a rewarding baking experience and a truly satisfying result. So gather your ingredients, follow these steps, and enjoy the wonderful aroma and taste of freshly baked Irish Soda Bread. Don’t forget to share your creations and tag us on social media!