
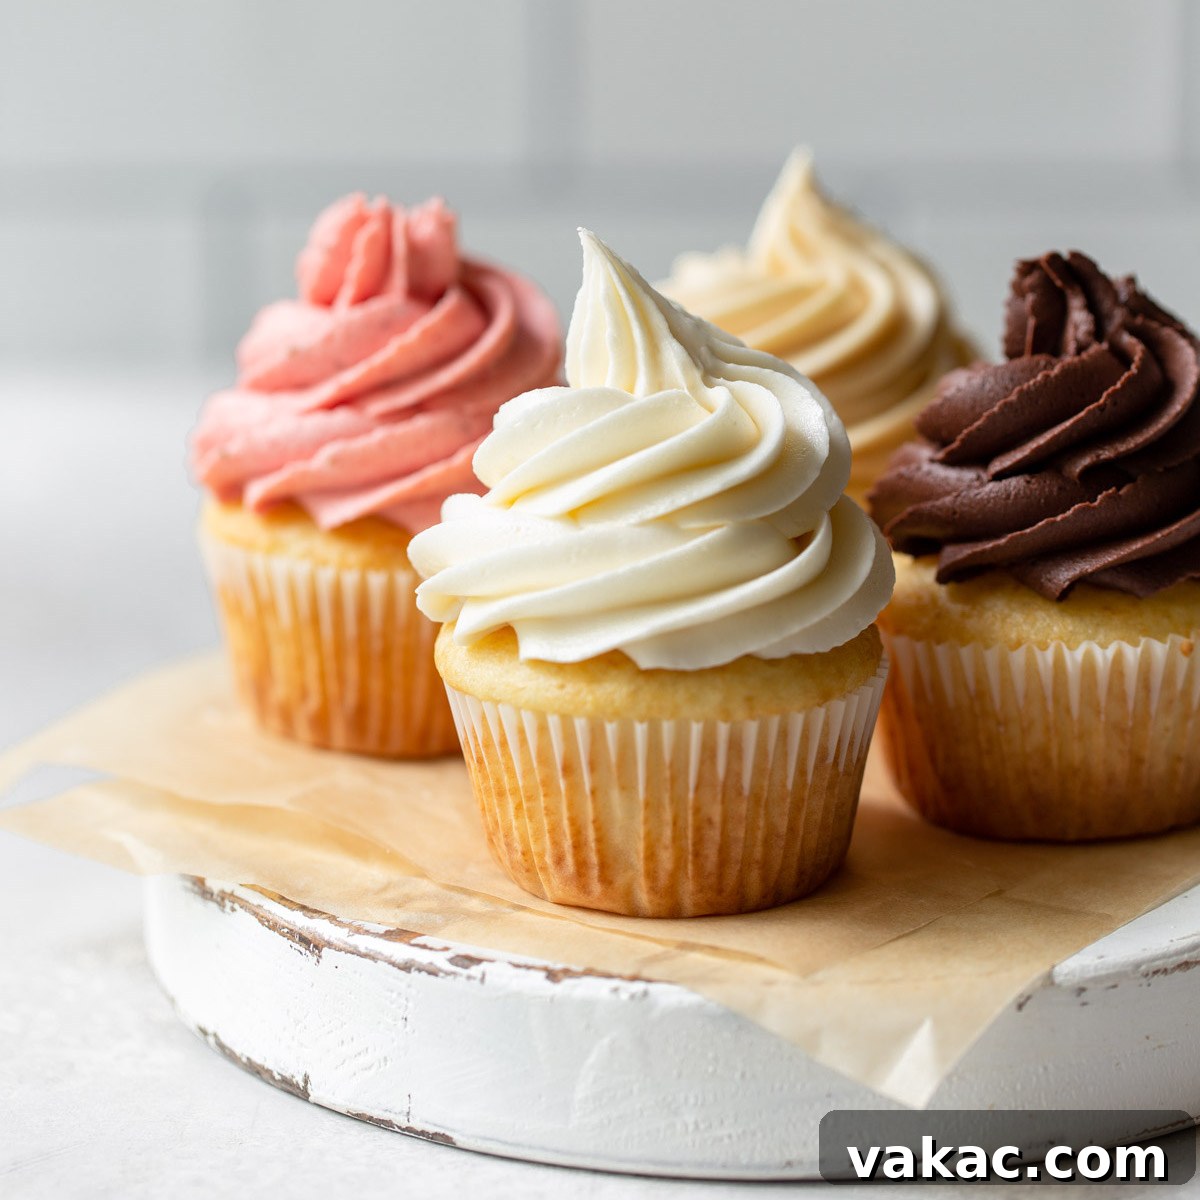
Welcome to the definitive guide on creating the most delicious, smooth, and perfectly pipeable buttercream frosting. Whether you’re a seasoned baker or just starting your culinary journey, this easy tutorial will equip you with everything you need to master homemade buttercream. Forget store-bought alternatives; once you discover how simple and rewarding it is to make your own from scratch, you’ll never look back! This isn’t just a recipe; it’s a foundational technique that opens up a world of flavor possibilities for your cakes, cupcakes, and other delightful desserts.
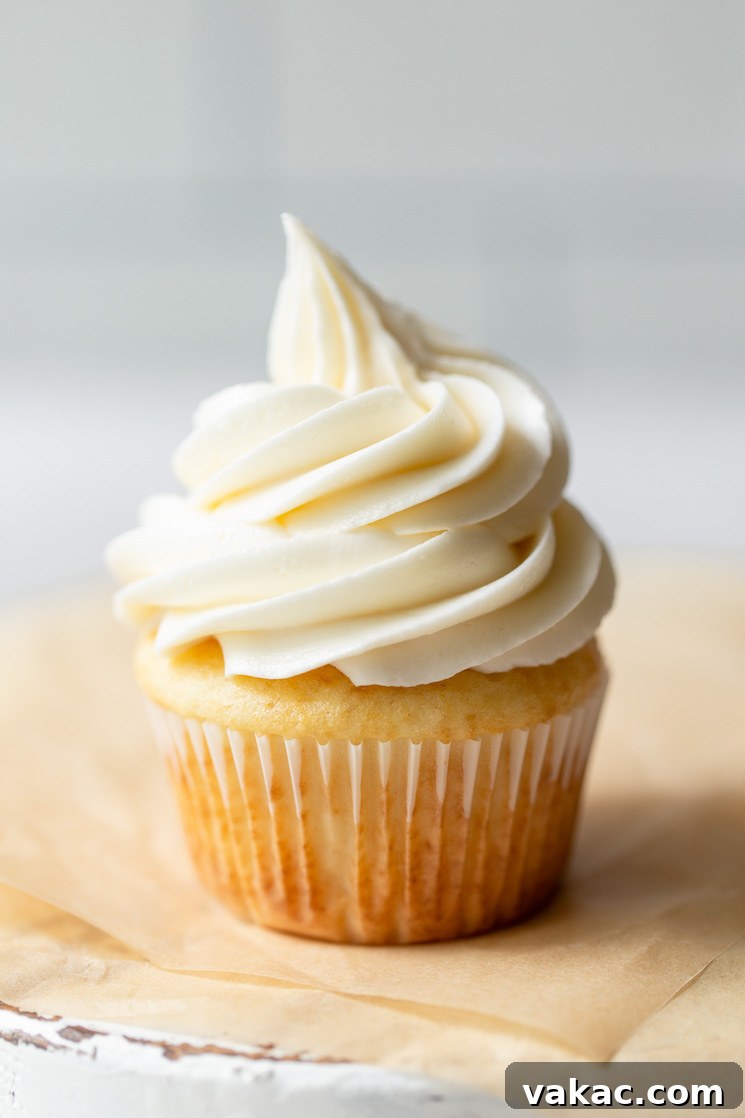
Unlock the Secret to Perfect Homemade Buttercream Frosting
Today’s focus is all about demystifying buttercream frosting, transforming it from an intimidating baking challenge into an effortless kitchen accomplishment. This comprehensive guide, a significantly updated version of a recipe first shared in 2017, provides enhanced instructions and invaluable insights. We’re diving deep into every aspect, ensuring you gain the confidence and skills to consistently produce the best buttercream frosting imaginable.
Our goal is to create a velvety smooth, rich, and stable frosting that holds its shape beautifully for piping and spreading. Beyond its incredible texture and taste, this buttercream serves as an exceptional blank canvas for an array of delightful flavor variations. The culinary possibilities are truly endless, and to get you started, we’ve included four fantastic flavor transformations, guaranteed to inspire your inner pastry chef.
Why Choose Homemade Buttercream?
Opting for homemade buttercream over store-bought alternatives offers a multitude of benefits that elevate your baking experience. Firstly, the taste difference is profound. Freshly made buttercream boasts a richer, more authentic flavor profile that store-bought versions simply cannot replicate due to artificial ingredients and preservatives. Secondly, you gain complete control over the ingredients, allowing you to select high-quality butter, adjust sweetness levels, and avoid unwanted additives, making it a healthier and more customizable option.
Furthermore, crafting your own buttercream is often more cost-effective in the long run, especially if you bake frequently. The simple ingredients are readily available and economical. Lastly, there’s an immense sense of satisfaction that comes from creating something so delicious from scratch. Knowing exactly what goes into your frosting ensures a superior product that impresses both visually and gastronomically. This recipe is designed to be incredibly forgiving and easy, proving that gourmet results are well within reach for every home baker.
Essential Ingredients for Your Velvety Buttercream
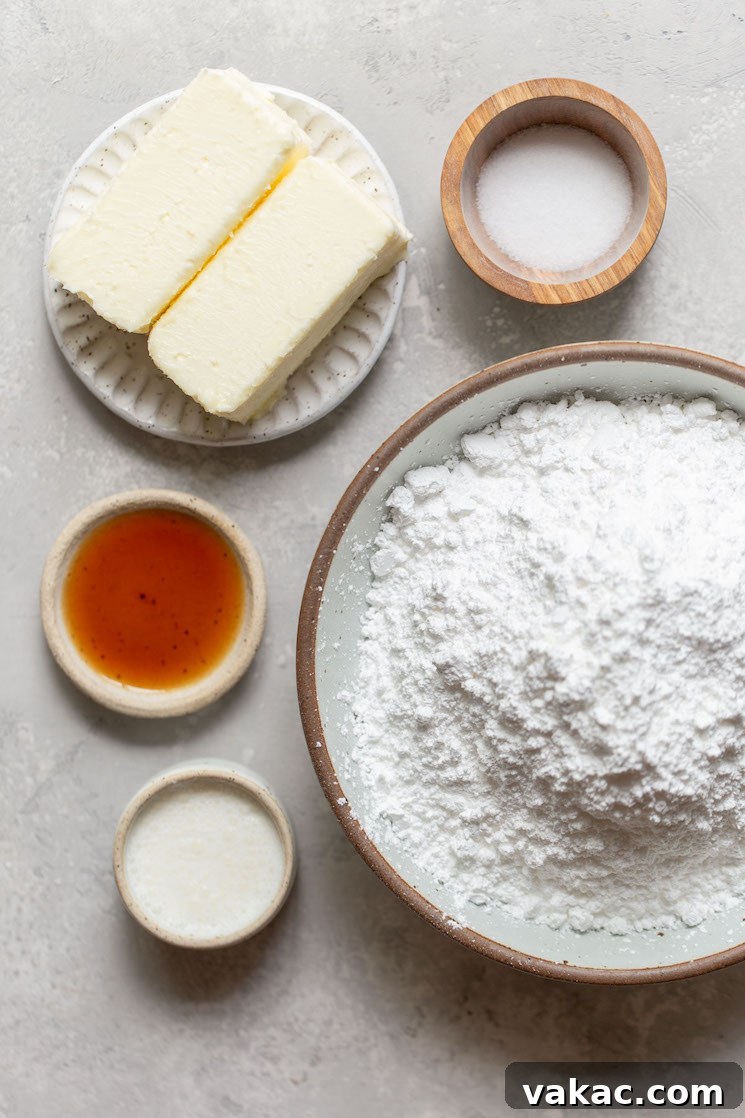
Crafting this incredibly easy buttercream frosting requires just five fundamental ingredients. Each plays a crucial role in achieving the perfect balance of flavor, sweetness, and consistency. Let’s take a closer look at what you’ll need and why each component is important:
- Unsalted Butter: This is the backbone of your buttercream. I exclusively use unsalted butter in my recipes to maintain precise control over the overall saltiness. The salt content can vary significantly between different brands of salted butter, leading to unpredictable results. Crucially, ensure your butter is at perfect room temperature – not melted, but soft enough to easily indent with your finger. This allows it to cream beautifully, incorporating air for a light and fluffy frosting. Always use real butter; margarine or butter substitutes will not yield the same rich flavor or stable texture. You’ll need two sticks, equivalent to 1 cup or 230 grams.
- Powdered Sugar: Also known as confectioners’ sugar or icing sugar, this finely milled sugar is essential for both sweetening and thickening the frosting to a pipeable consistency. While sifting powdered sugar beforehand is often recommended to prevent lumps and achieve an ultra-smooth texture, it’s a step I frequently skip when I’m short on time, and the results are still fantastic. However, if you desire the absolute silkiest buttercream, a quick sift is worth the extra minute.
- Heavy Cream: Heavy cream or heavy whipping cream is preferred for this recipe as it contributes significantly to the frosting’s luxurious richness and creamy texture. It helps to achieve that desired light and fluffy consistency. While you can substitute milk (whole milk works best), be aware that the frosting may not be quite as rich or thick. Adjust the amount gradually to reach your preferred consistency.
- Pure Vanilla Extract: A touch of vanilla extract adds a classic, warm, and inviting flavor to your buttercream. For the most superior taste, I highly recommend using pure vanilla extract. Its complex notes truly enhance the overall sweetness. Don’t be afraid to experiment with other extracts like almond, lemon, peppermint, or even rum to create unique flavor profiles tailored to your specific dessert.
- Salt: A tiny pinch of salt might seem insignificant, but it’s a critical component. Salt acts as a flavor enhancer, expertly balancing out the sweetness of the powdered sugar. It prevents the frosting from tasting cloyingly sweet and brings out the subtle complexities of the other ingredients. You only need a very small amount, typically a tiny pinch of fine table salt.
Essential Equipment for Perfect Buttercream
While the ingredients are key, having the right tools can make the process even smoother:
- Electric Mixer: A stand mixer fitted with the paddle attachment is ideal for convenience, allowing you to multi-task. However, a good quality handheld electric mixer works just as effectively. The key is consistent, powerful mixing to aerate the butter and fully combine ingredients.
- Large Mixing Bowl: Essential for preventing powdered sugar clouds! Choose a bowl large enough to accommodate all ingredients and vigorous mixing.
- Rubber Spatula: Indispensable for scraping down the sides of the bowl frequently, ensuring all ingredients are thoroughly incorporated and preventing lumps.
- Measuring Cups and Spoons: Accurate measurements are important for consistent results, though buttercream is forgiving enough for slight adjustments in liquid/sugar for consistency.
Step-by-Step Guide: How to Make Buttercream Frosting
Making homemade buttercream is surprisingly straightforward, and with these detailed steps, you’ll achieve perfect results every time. Follow along to create a frosting that’s ideal for decorating any dessert.
Step 1: Prepare Your Butter
The first and most crucial step is to ensure your butter is at the correct temperature. Set your two sticks (1 cup / 230 grams) of unsalted butter out on the counter at least 30-60 minutes before you plan to bake, allowing it to reach a soft, room temperature consistency. The butter should be pliable enough to easily make an indentation with your finger, but not greasy or melted. Properly softened butter is essential for a smooth, creamy frosting that doesn’t separate or become lumpy. If you’re in a hurry, you can carefully microwave it in short 5-10 second bursts, flipping it between each, until softened.
Step 2: Cream the Butter
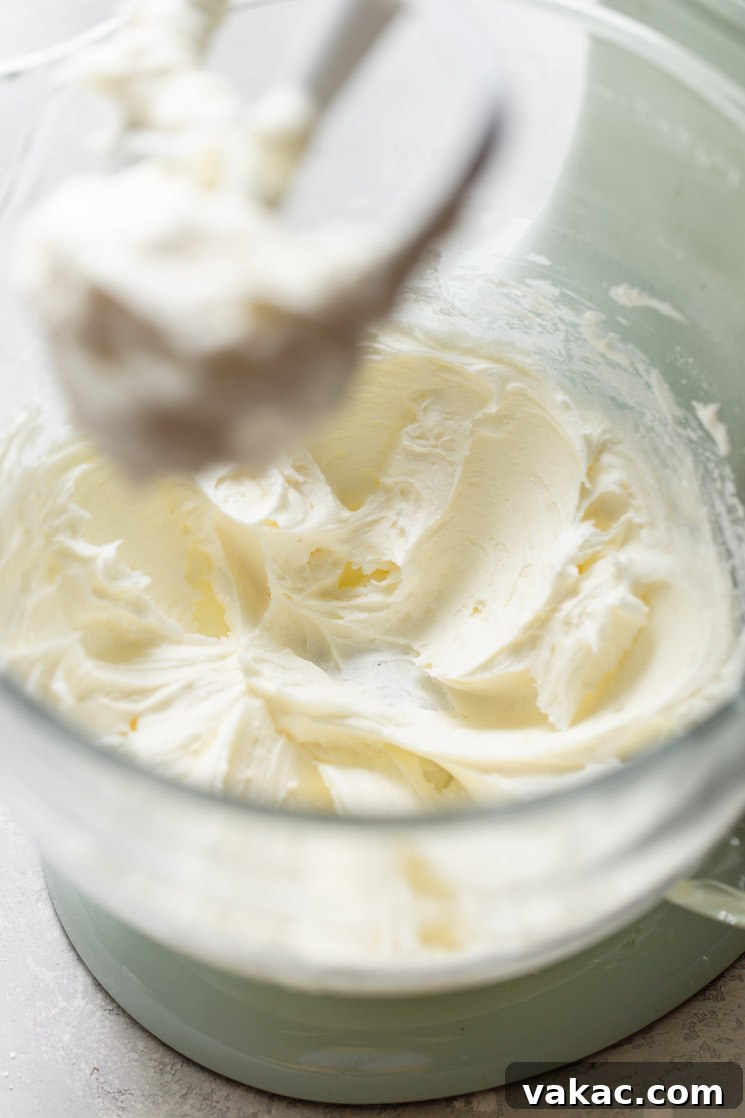
Place the softened butter into the bowl of your stand mixer fitted with the paddle attachment (or a large mixing bowl if using a handheld mixer). Begin beating the butter on medium speed for about 1 to 2 minutes. Your goal here is to lighten the butter’s color slightly and make it exceptionally smooth and creamy. This initial creaming process also incorporates air, which is vital for a light and fluffy buttercream. Scrape down the sides of the bowl occasionally to ensure even mixing.
Step 3: Gradually Incorporate Powdered Sugar
With the mixer on its lowest speed, begin adding the powdered sugar, one cup at a time. This low speed is key to preventing a “sugar cloud” from engulfing your kitchen! Once each cup is mostly incorporated, you can increase the speed to medium. Continue adding the powdered sugar in this manner until all 3 cups (360 grams) have been added and combined. Mix for an additional 1-2 minutes on medium speed until the mixture is thick and crumbly, or has formed a stiff paste with the butter. Remember, sifting the sugar beforehand (as discussed earlier) will yield the smoothest results, but it’s not strictly necessary for a delicious outcome.
Step 4: Add Liquids and Flavor
Now it’s time to introduce the heavy cream, vanilla extract, and that essential pinch of salt. Start with 2 tablespoons of heavy cream, along with the vanilla and salt. Begin mixing on low speed to combine, then gradually increase to medium speed. Continue beating for another 2-3 minutes. During this stage, the frosting will transform from a stiff mixture into a creamy, spreadable consistency. If you find the frosting is too thick, add the remaining tablespoon of heavy cream gradually, mixing after each addition until you reach your desired consistency. Don’t forget to stop and scrape down the sides and bottom of the bowl frequently to ensure all ingredients are fully incorporated and there are no hidden streaks of unmixed butter or sugar.
Step 5: Beat Until Light and Fluffy
Once all ingredients are combined, increase the mixer speed to medium-high and beat the frosting for an additional 2-3 minutes. This final whipping step is crucial for incorporating more air, making your buttercream incredibly light, fluffy, and perfectly pipeable. You’ll notice the color lighten further, and the texture will become truly luxurious. At this point, your homemade buttercream frosting is ready to be used immediately! Whether you’re piping intricate designs onto cupcakes or spreading a smooth layer onto a cake, it’s perfect. If not using right away, store it as directed below.
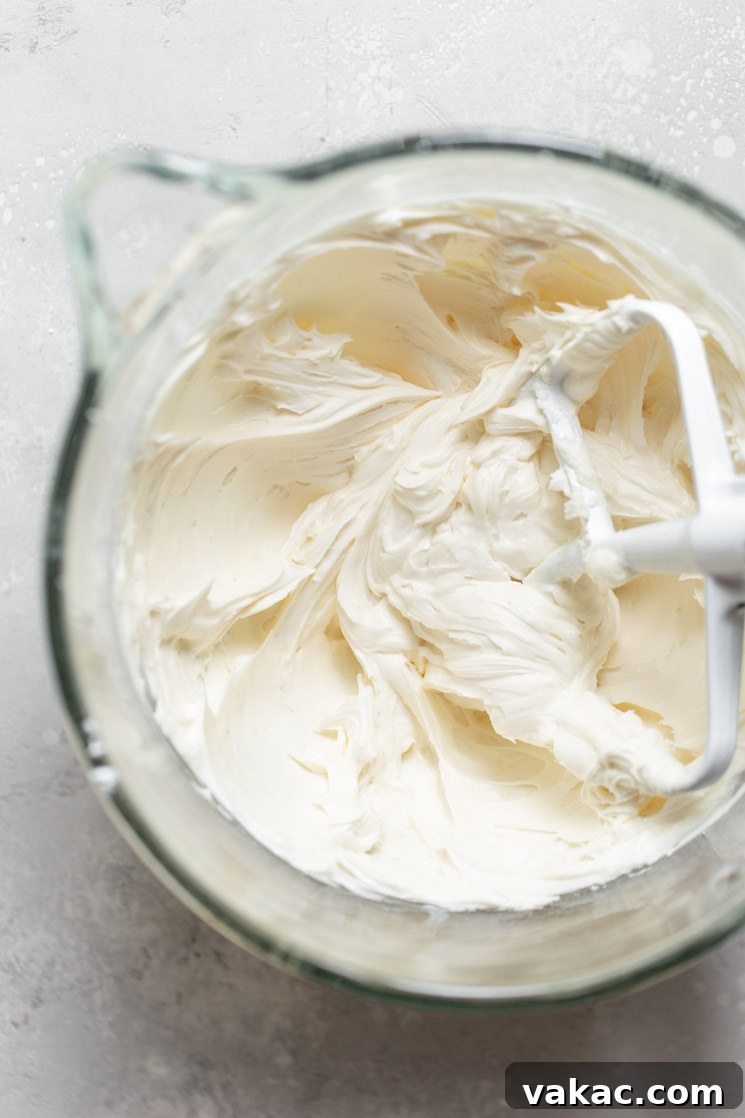
Troubleshooting Common Buttercream Issues
- Frosting is Too Stiff: If your buttercream feels too dense or stiff, add heavy cream (or milk) one teaspoon at a time, beating well after each addition until it reaches your desired consistency.
- Frosting is Too Thin: If your frosting is too runny, gradually add more powdered sugar, one tablespoon at a time, beating until it thickens.
- Frosting is Grainy: This usually happens if the powdered sugar wasn’t fully dissolved or sifted. Continue beating on medium-high speed for another few minutes; sometimes, prolonged mixing can help dissolve stubborn sugar particles.
- Frosting is Greasy/Separated: This can occur if your butter was too warm or if the frosting got too warm during mixing. Try placing the bowl in the refrigerator for 10-15 minutes to chill slightly, then re-beat on medium speed. The cooler temperature often helps it come back together.
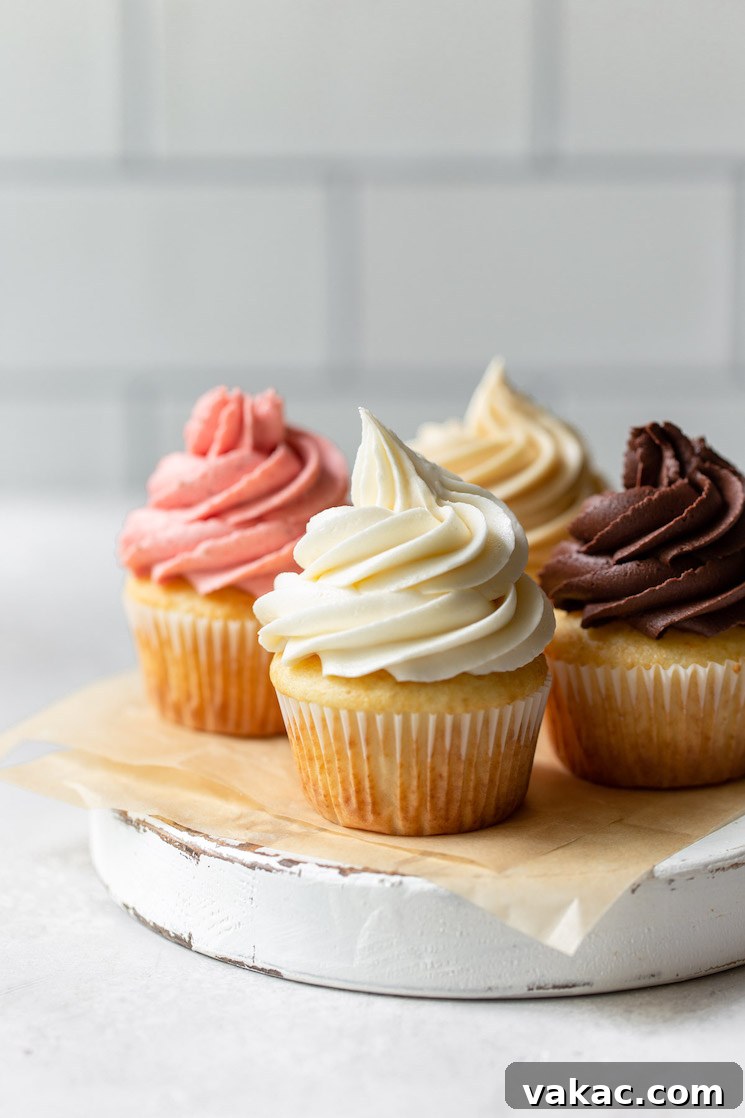
Exciting Flavor Variations for Your Buttercream
One of the most exciting aspects of this buttercream recipe is its incredible versatility. It forms a perfect neutral base that can be easily transformed into a myriad of delicious flavors. While the possibilities are truly limitless, here are four popular variations to inspire your baking creativity:
- Classic Vanilla Bean Buttercream: For an intensely vanilla-flavored buttercream, elevate the base recipe by adding an additional teaspoon of pure vanilla extract. For an even more gourmet touch, consider scraping the seeds from half a vanilla bean directly into the frosting during the final mixing stage. This will add beautiful flecks of vanilla and a deeper, more aromatic flavor.
- Rich Chocolate Buttercream: To create a decadent chocolate frosting, sift 1/2 cup (40 grams) of unsweetened cocoa powder directly into the finished buttercream base. Mix until thoroughly combined. If the frosting becomes too thick, add 1 to 2 extra tablespoons of heavy cream, a little at a time, to achieve a smoother, creamier consistency. For those who prefer a sweeter chocolate experience, incorporate an additional 1/2 to 1 cup (60 to 120 grams) of powdered sugar, adjusting to taste.
- Luscious Caramel Buttercream: Transform your buttercream into a caramel dream by mixing in 1/3 to 1/2 cup of your favorite caramel sauce. You can use either homemade caramel for a truly artisanal touch or a high-quality store-bought version for convenience. For a popular salted caramel frosting, simply use salted caramel sauce and omit the pinch of salt from the original recipe to avoid over-salting.
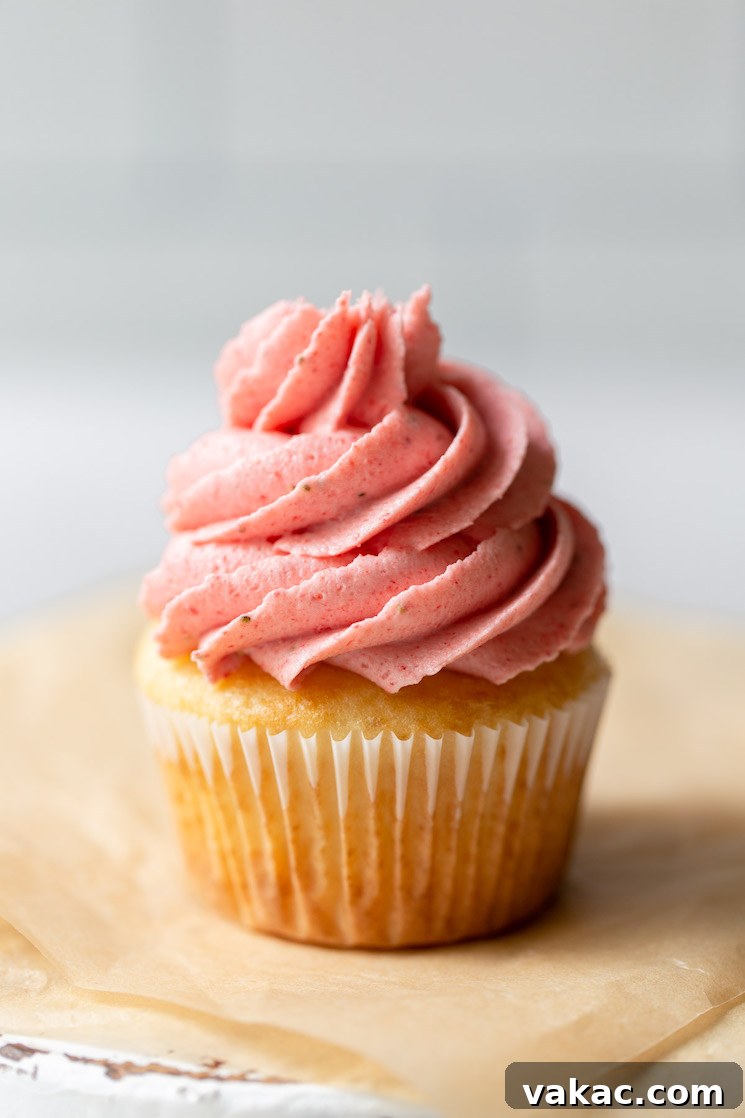
- Fresh Strawberry Buttercream: For a vibrant, fruit-flavored frosting without adding excess moisture, freeze-dried strawberries are your secret weapon. Place a 1-ounce bag of freeze-dried strawberries into a blender or food processor and process until they are crushed into a fine powder. Mix this strawberry powder into the buttercream base until it’s evenly distributed and beautifully pink. This method delivers an intense strawberry flavor and a lovely natural color. Other freeze-dried fruits like raspberries or blueberries can be used similarly.
- Zesty Lemon Buttercream: For a bright and tangy flavor, add 1-2 tablespoons of fresh lemon zest and 1 tablespoon of fresh lemon juice to the buttercream during the final mixing stage. Adjust the amount of juice to achieve your desired tartness and consistency.
- Cream Cheese Style Buttercream: While not a true cream cheese frosting, you can mimic its tang by adding 4 ounces (half a block) of softened cream cheese to your butter at the initial creaming stage. Proceed with the recipe as normal, adjusting powdered sugar and cream for consistency. This creates a slightly less sweet and wonderfully tangy frosting.
Storage & Freezing Instructions for Buttercream Frosting
Proper storage is key to enjoying your homemade buttercream at its best. This recipe is wonderfully stable and can be prepared in advance, making your baking schedule much more flexible.
Refrigerator Storage (1-2 Days):
If you plan to use your buttercream within one to two days, it can be easily stored in the refrigerator. Transfer the frosting to an airtight container, ensuring it’s sealed tightly to prevent it from absorbing any odors from your fridge. While refrigeration isn’t strictly necessary for short periods, it helps the frosting stay fresh longer, especially in warmer environments. When you’re ready to use it, remove the container from the refrigerator and allow it to come to room temperature (this can take 1-2 hours depending on ambient temperature). Once at room temperature, give it a good whip with your electric mixer (stand or handheld) for a minute or two. This will bring back its light, fluffy, and creamy texture, making it perfect for frosting cupcakes or a cake.
Freezer Storage (Up to 3 Months):
For longer storage, buttercream freezes exceptionally well for up to three months. Place the frosting in a freezer-safe, airtight container or a heavy-duty freezer bag, pressing out as much air as possible. When you’re ready to use it, transfer the frozen buttercream to the refrigerator to thaw overnight. Once thawed, bring it to room temperature on the counter. Before using, it’s crucial to give it a thorough re-mix with an electric mixer. This process helps to restore its smooth consistency and eliminate any stiffness or separation that might have occurred during freezing and thawing.
Expert Baking Tips for Buttercream Success
Elevate your buttercream game with these insider tips, ensuring every batch you make is a masterpiece:
- Coloring Your Frosting: If you wish to add food coloring, gel food colorings are highly recommended over liquid ones. Gel colors are concentrated, so you only need a small amount to achieve vibrant hues, and they won’t thin out the frosting’s consistency. Liquid food coloring can make your buttercream runny if too much is added. Start with a tiny drop of gel color and gradually add more until you reach your desired shade, mixing well after each addition.
- Yield and Scaling: This recipe typically yields about 2 ½ cups of frosting, which is usually enough to generously frost a batch of 12 to 14 standard-sized cupcakes. It’s also sufficient for frosting a 9×13 inch sheet cake or providing a light coat for an 8 or 9-inch two-layer cake. If you’re planning on elaborate piping or decorating a larger multi-layer cake, I recommend multiplying the recipe by 1.5 or even doubling it to ensure you have plenty of frosting. Conversely, for a smaller batch, the recipe can easily be halved.
- Achieving the Perfect Piping Consistency: For intricate piping work, a slightly stiffer buttercream is often preferred. If your frosting feels too soft, add a tablespoon or two of extra powdered sugar and beat it in until it reaches the desired firmness. For smooth spreading, a slightly softer consistency is ideal. If it’s too stiff, add a teaspoon of heavy cream at a time until it’s perfectly spreadable.
- Avoiding Air Bubbles: After mixing, if your buttercream has a lot of small air bubbles, switch to the paddle attachment (if you used a whisk) and mix on the lowest speed for 5-10 minutes. This slow mixing helps to push out air, resulting in a super smooth, dense frosting perfect for smooth finishes or sharp edges on cakes.
- Ideal Working Temperature: Buttercream is sensitive to temperature. If your kitchen is very warm, your frosting may soften too quickly, making it difficult to pipe or spread. If this happens, pop the bowl into the refrigerator for 10-15 minutes to firm it up slightly, then give it a quick re-whip. Conversely, if your kitchen is too cold, the frosting might be too stiff; allow it to warm up slightly at room temperature before working with it.
Delicious Ways To Use This Versatile Buttercream Frosting
This easy homemade buttercream isn’t just a simple frosting; it’s a versatile culinary tool that pairs beautifully with a wide array of baked goods. Here are some of my favorite ways to utilize this delectable frosting, transforming ordinary desserts into extraordinary treats:
- Classic Cupcake Topping: The most obvious and perhaps most beloved use! This buttercream pipes beautifully onto cupcakes, holding its shape for swirls, rosettes, or simple domes. It’s perfect for enhancing flavors like:
- Rich Chocolate Cupcakes
- Fluffy Vanilla Cupcakes
- Zesty Lemon Cupcakes
- Pair it with Pumpkin Cupcakes (especially the spiced buttercream variation!)
- Elegant Cake Decorating: From simple smooth layers to elaborate piping, this buttercream is stable and easy to work with for decorating all kinds of cakes. Use it for filling between cake layers, crumb coating, and the final decorative finish. Its smooth texture allows for sharp edges and beautiful designs.
- Cookie Sandwiches and Fillings: Spread a generous layer of this buttercream between two homemade cookies (like shortbread, chocolate chip, or even macarons) to create delightful cookie sandwiches. It also makes a fantastic filling for whoopie pies or even homemade donuts.
- Brownie and Bar Topping: Take your brownies and dessert bars to the next level with a swirl of this fluffy buttercream. A simple layer can add extra moisture and flavor, turning a simple treat into a gourmet experience.
- Savory Pairings (Yes, Really!): While less common, certain savory applications can benefit from a very lightly sweetened or flavored buttercream. For example, a cream cheese-style buttercream with chives could be a fun topping for corn bread muffins, though this is definitely for the adventurous baker!
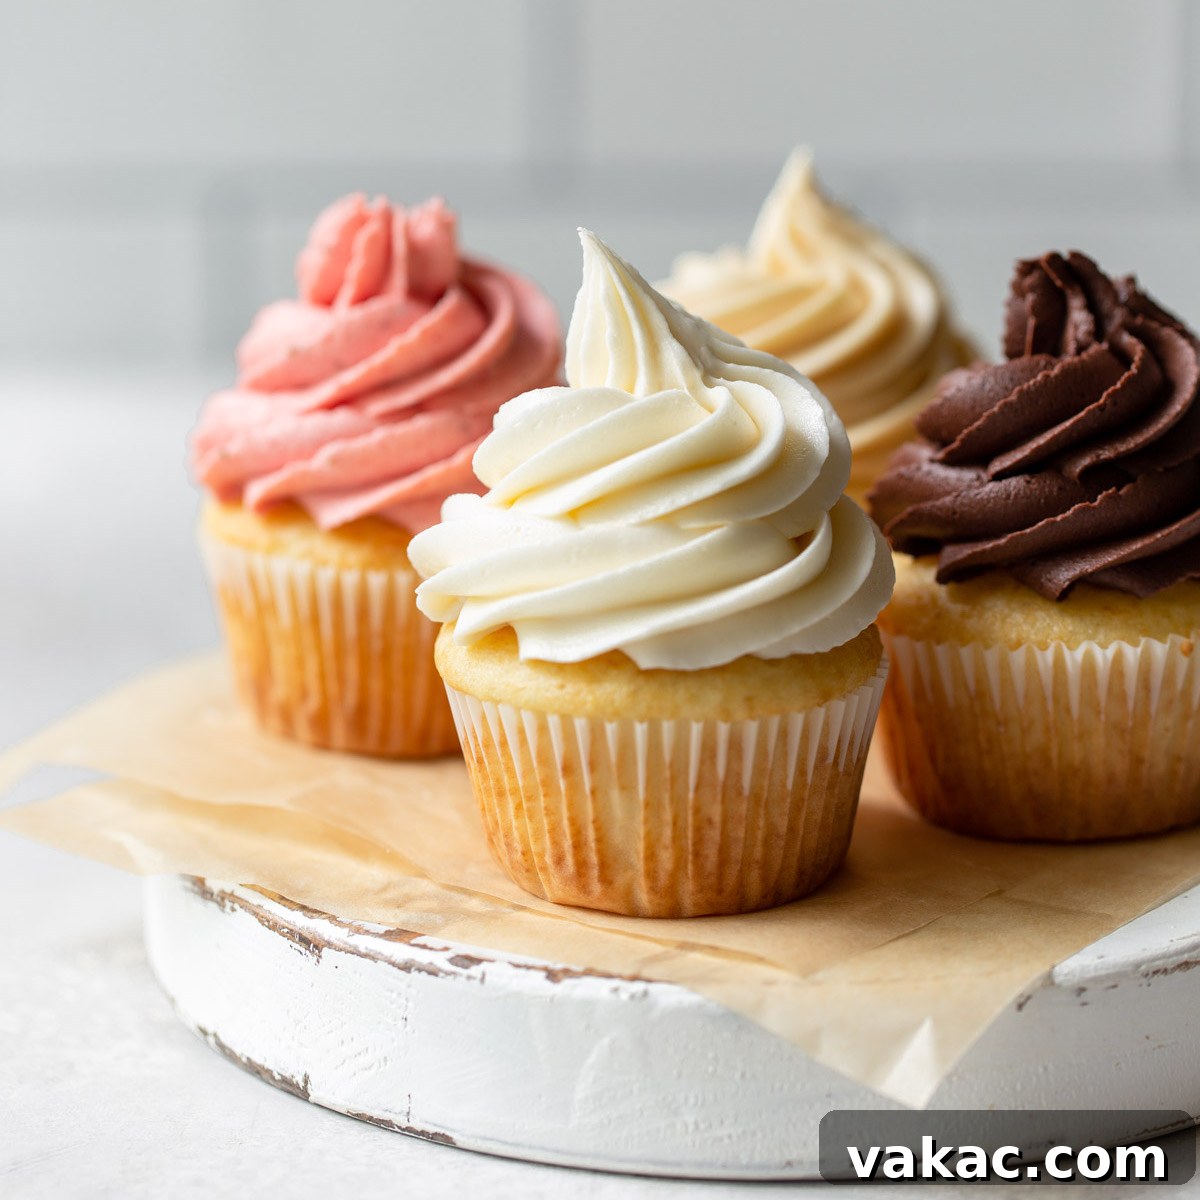
How To Make Buttercream Frosting
Learn how to make buttercream frosting with this easy tutorial. This is the BEST recipe for homemade buttercream, it pipes perfectly, and makes a great base for other frosting flavors too!
Ingredients
- 1 cup (230 grams) unsalted butter (softened)
- 3 cups (360 grams) powdered sugar
- 2-3 tablespoons (30 to 45 ml) heavy cream or heavy whipping cream
- 1 teaspoon pure vanilla extract
- Tiny pinch of salt
Instructions
- In the bowl of a stand mixer fitted with the paddle attachment or in a large mixing bowl using a handheld mixer, beat the butter until smooth and light, about 1-2 minutes.
- Gradually add the powdered sugar, one cup at a time, mixing on low speed to incorporate, then increasing to medium speed until fully combined. Continue mixing for 1 to 2 minutes.
- Add 2 tablespoons of heavy cream, vanilla extract, and a tiny pinch of salt. Mix on medium speed until everything is well combined and creamy. Scrape down the sides of the bowl as needed. If the frosting is too thick, add the remaining tablespoon of heavy cream gradually, mixing until desired consistency is reached.
- Increase mixer speed to medium-high and beat for an additional 2-3 minutes until the frosting is light, fluffy, and smooth.
- Use the frosting immediately to pipe onto cupcakes or frost a cake. Alternatively, cover tightly and refrigerate until you are ready to use it.
Notes
Storage Instructions: Frosting can be made 1 to 2 days in advance. Cover tightly and transfer to the refrigerator. Remove from the refrigerator and bring to room temperature before frosting cupcakes/cakes, then re-whip until fluffy.
Freezing Instructions: Frosting will freeze well for up to 3 months. Thaw overnight in the refrigerator, then bring to room temperature and re-whip well before frosting cupcakes/cakes.
Heavy Cream: You may replace the heavy cream with milk (whole milk is best), but keep in mind that the frosting won’t be quite as rich or creamy.
Recipe Variations:
- Vanilla: For an enhanced vanilla flavor, add an additional teaspoon of pure vanilla extract.
- Chocolate: Sift 1/2 cup (40 grams) of unsweetened cocoa powder and mix it into the frosting base until well combined. Add 1 to 2 extra tablespoons of heavy cream if needed for a smoother, creamier frosting. For a sweeter frosting, mix in an additional 1/2 to 1 cup (60 to 120 grams) of powdered sugar.
- Caramel: Mix in 1/3 to 1/2 cup of homemade or store-bought caramel sauce. For a salted caramel frosting, use salted caramel and omit the salt in the main recipe.
- Strawberry: Add a 1-ounce bag of freeze-dried strawberries to a blender or food processor and process until the berries are crushed into a fine powder. Mix the freeze-dried strawberry powder into the frosting base until well combined.