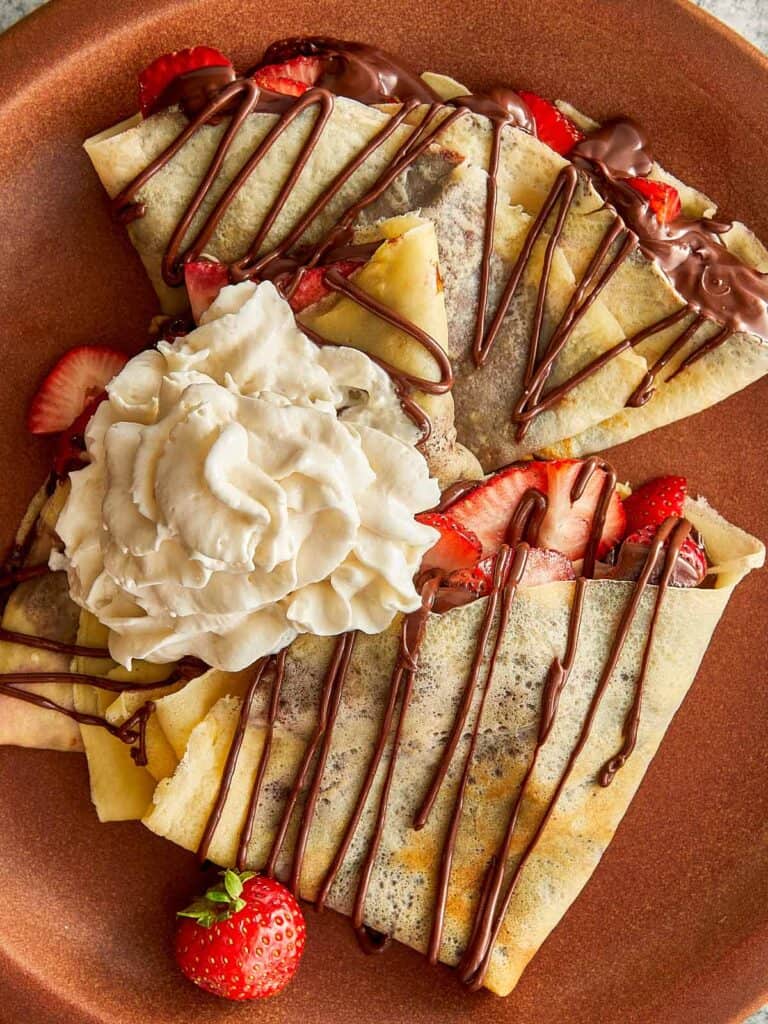
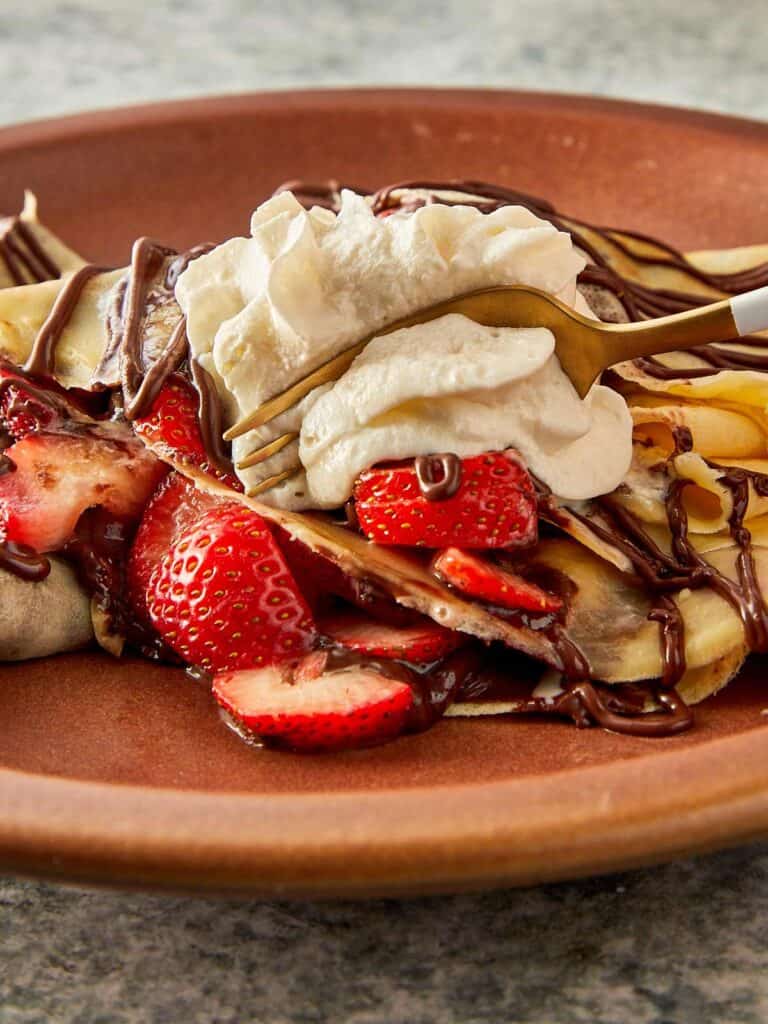
Let's be honest, nothing says 'we love you' quite like warm Nutella melting over fresh strawberries wrapped in a buttery, paper thin crepe.
These Authentic French Nutella Strawberry Crepes are the real deal. Developed specifically for Vakac by our resident French expert, Chef Tom, this recipe brings the Paris bistro experience straight to your kitchen.
Unlike the rubbery, quick mix versions you might find elsewhere, this batter is authentic. It uses warm milk brown butterand a splash of dark rum and orange blossom water. It's good for a romantic Valentine's Day breakfast or a lazy weekend treat.
If you love authentic breakfasts like our Best French Toastyou are going to be obsessed with these.
Why This Recipe Is Different
Chef Tom didn't just throw ingredients together, he engineered this batter for the good texture.
- We swap some flour for cornstarch to lower the gluten content. This creates meltingly tender crepes with crispy lace edges. It's miles better than the chewy texture of standard recipes.
- Warm Milk vs. Cold Milk: Most recipes shock melted butter with cold milk, causing clumps. We warm them together to create a smooth emulsion instantly. Once cooked, these crepes are good for classic fillings like Nutella and strawberries or something playful like a fresh strawberry chocolate salsa on the side.
Ingredients You Need
Chef Tom has selected these ingredients specifically to recreate the exact flavor profile of a Parisian street stall. Here is the breakdown of why they matter and where to find the tricky ones.
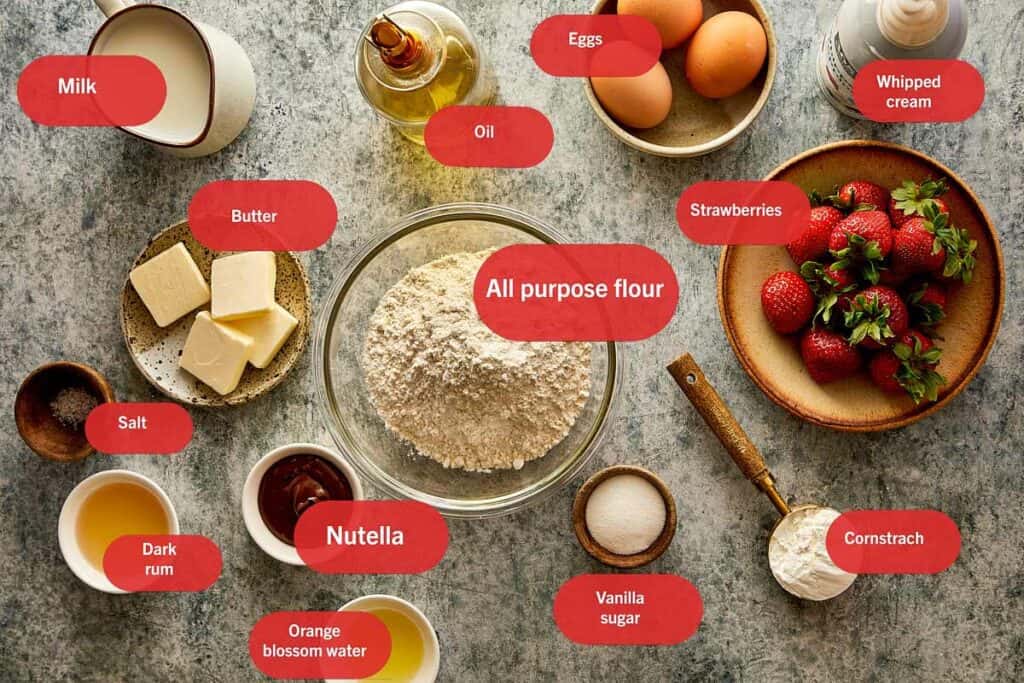
Orange Blossom Water:
- What it is: Distilled from the petals of bitter orange trees, this is the distinct floral scent you smell walking past a French bakery. It adds a subtle, sophisticated perfume that lifts the heavy Nutella flavor.
- Where to find it: You can often find this in the international or Middle Eastern aisle of major supermarkets (it is often cheaper there than in the baking aisle!). It is also a staple in liquor stores (cocktail mixers) or easily available on Amazon via this link.
- Can't find it? Don't panic. a reliable substitute is 1 tsp of vanilla bean paste mixed with ½ tsp of freshly grated orange zest. It won't be exactly the same, but it will still be good.
Dark Rum:
- We use Dark Rum (like Negrita or a standard dark baking rum) rather than white rum. Dark rum has molasses and caramel notes that pair perfectly with brown butter.
- Substitute: If you are cooking for kids or don't drink alcohol, you can swap this for extra vanilla extract, though the alcohol does cook off!
Whipped Cream:
- The Authentic Choice: Crème Chantilly In France, we don't just use plain whipped cream, we use Crème Chantilly. The difference is the sweetness and vanilla. How to make it: Beat 1 cup of cold heavy whipping cream (35% fat) with 1 tbsp of powdered sugar and 1 tsp of vanilla bean paste. Whip it to soft peaks where the cream flops over slightly when you lift the whisk. This soft texture blends perfectly with the warm Nutella.
- The “we Need Breakfast Now” Choice No judgment here! If you are rushing to get breakfast on the table, a high-quality canned whipped cream, spray cream, works just fine. Just look for brands that list Cream as the first ingredient, rather than Vegetable Oil or Water, to avoid that artificial aftertaste.
Strawberries:
- Fresh strawberries are a non negotiable here. They will taste so good with the sweet Nutella. If you have any left over, use them up in our fluffy greek yogurt pancakes with berries.
Nutella:
- Yes that good hazelnut spread we can't go without… make sure to check out our best Nutella day recipes here!
For a full list of ingredients check out the recipe card.
Swaps
- The Whipped Cream Lighter Choice: Greek Yogurt Cloud Cream If you want to cut the calories without losing the creaminess, this is our favorite hack. The tang of the yogurt cuts through the sweetness of the Nutella perfectly. Whip ½ cup of heavy cream until stiff. In a separate bowl, stir ½ cup of thick Greek Yogurt with 1 tsp of honey. Gently fold the yogurt into the whipped cream. You get the volume and fluffiness of cream, but with half the fat and a boost of protein.
- The Healthy Nutella Hack (Homemade Hazelnut Spread) Store bought hazelnut spreads are often 50% sugar. Try this high protein, lower sugar version instead. You need 1 cup roasted hazelnuts (skinned), 2 tbsp cocoa powder, 1 tbsp maple syrup, 1 tsp vanilla, pinch of salt, and a splash of almond milk. Blitz the hazelnuts in a high speed blender until they turn into butter (be patient!). Add the cocoa, syrup, vanilla, and salt. Pulse while slowly adding almond milk until you reach your desired consistency. You get the authentic roasted hazelnut flavor with natural fats and zero refined palm oil.
Equipment Essentials
While you can use a standard non-stick pan, if you want to churn out crepes like a French street vendor, Chef Tom highly recommends investing in the right tools.
1. The Electric Crepe MakerIn our video we used an Electric Crepe Maker on Amazon. We highly recommend the Nutrichef Electric Crepe Maker & Griddle Cooktop – Nonstick 12 Inch Aluminum Hot Plate with LED Indicator Lights & Adjustable Temperature Control – Wooden Spatula & Batter Spreader Included
- Why it's better than a pan: A frying pan has high sides that block your wrist when you try to spread the batter. A crepe maker is completely flat, giving you 360-degree freedom to spin your tool. Plus, the thermostat keeps the heat perfectly consistent. No more burning the third crepe because the pan got too hot!
2. The Wooden Rozell (Batter Spreader) Most electric machines come with one, but if not, make sure you get a T-shaped Wooden Rozell.
- Why Wood? Metal tears the batter and plastic can melt or drag. Wood, when soaked in water, glides effortlessly over the batter without sticking.
3. The Long Spatula. You need a long, thin spatula (offset spatulas work great) to slide under the crepe. It needs to be long enough to reach the middle of the crepe to support it during the flip.
On the stove
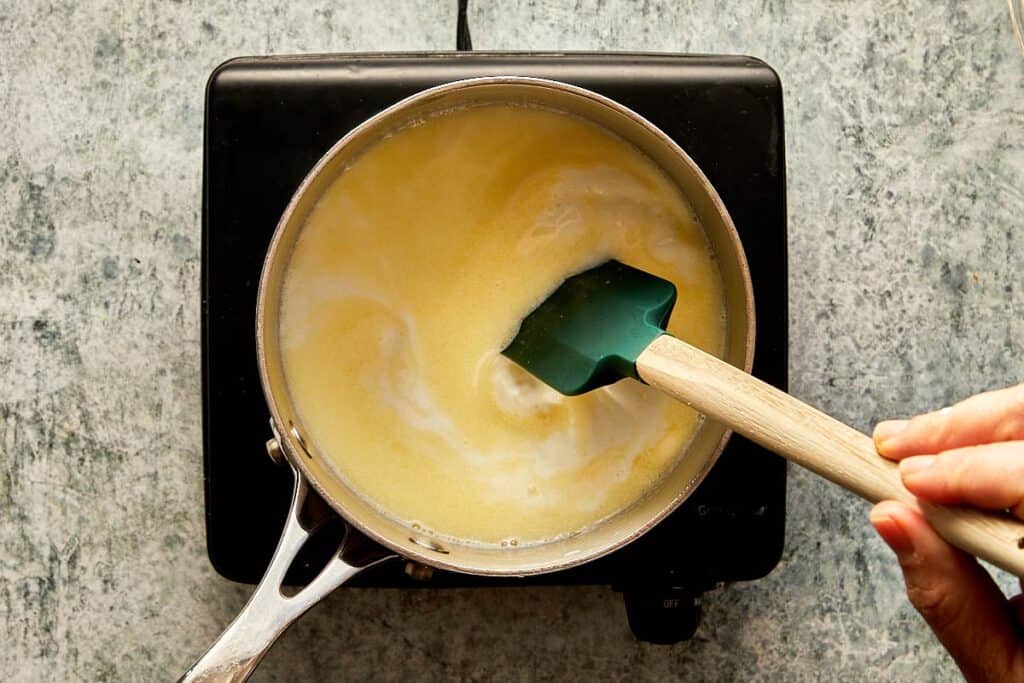
- Pour the whole milk into a small saucepan and add the unsalted butter.Place the saucepan over low-medium heat. Watch closely, you only want to warm it until the butter has just melted. Do not let it boil. Remove the saucepan from the heat immediately. Let it sit for a few minutes. Crucial: If this mixture is boiling hot, it will scramble the eggs later. It should be warm to the touch, not hot.
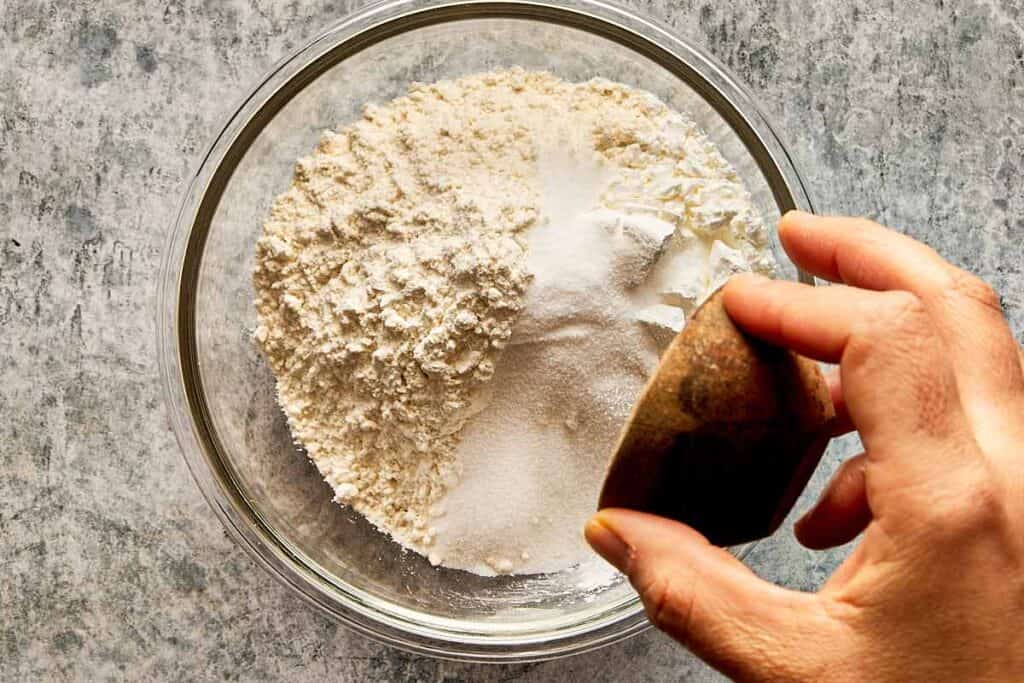
- While the liquids cool, grab a large mixing bowl. Add the flour cornstarch vanilla sugarand salt.Use a whisk to mix the dry ingredients thoroughly, then use the bottom of a measuring cup or your hand to make a “well” (a hollow dip) in the center of the flour mixture.
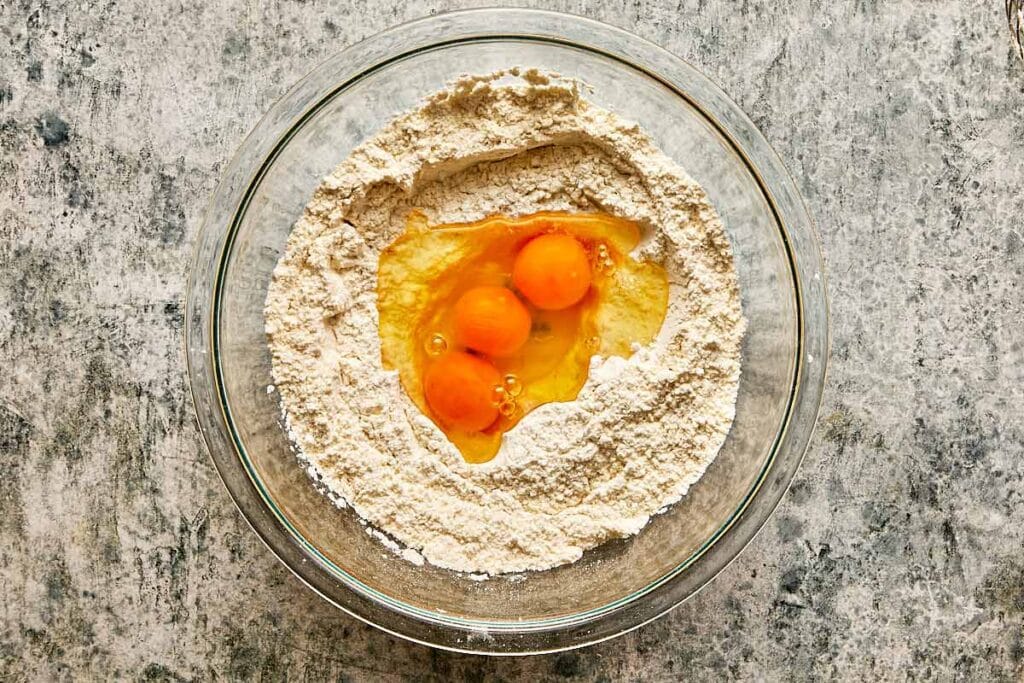
- Crack the eggs directly into that center well.
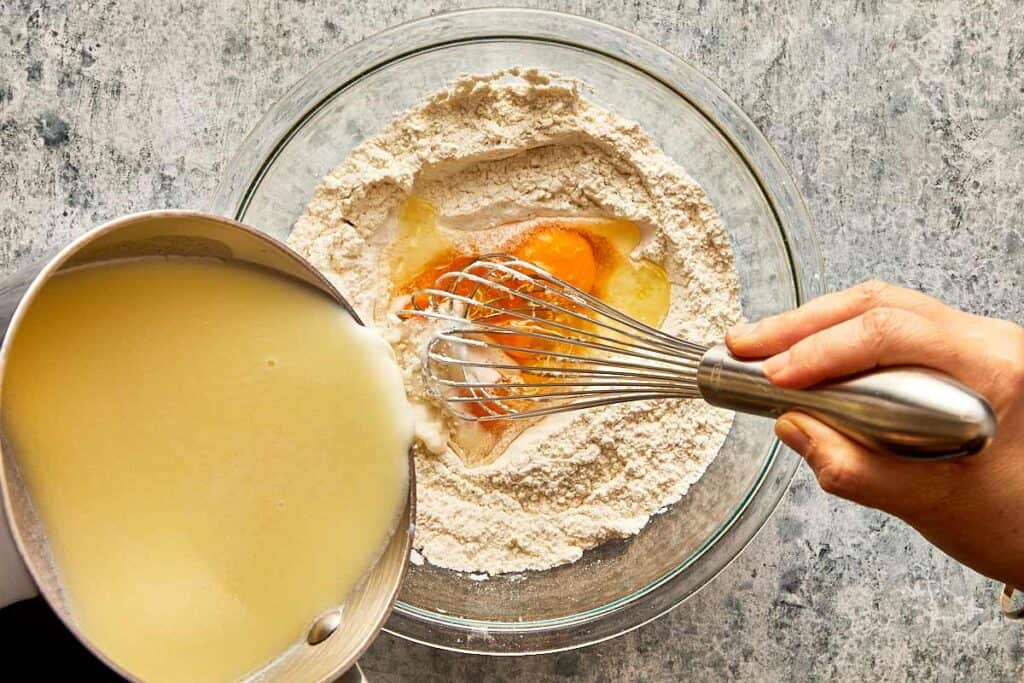
- Start whisking only in the center, breaking up the yolks and mixing them with a tiny bit of the surrounding flour. Slowly stream the warm milk and butter mixture into the center while whisking continuously.
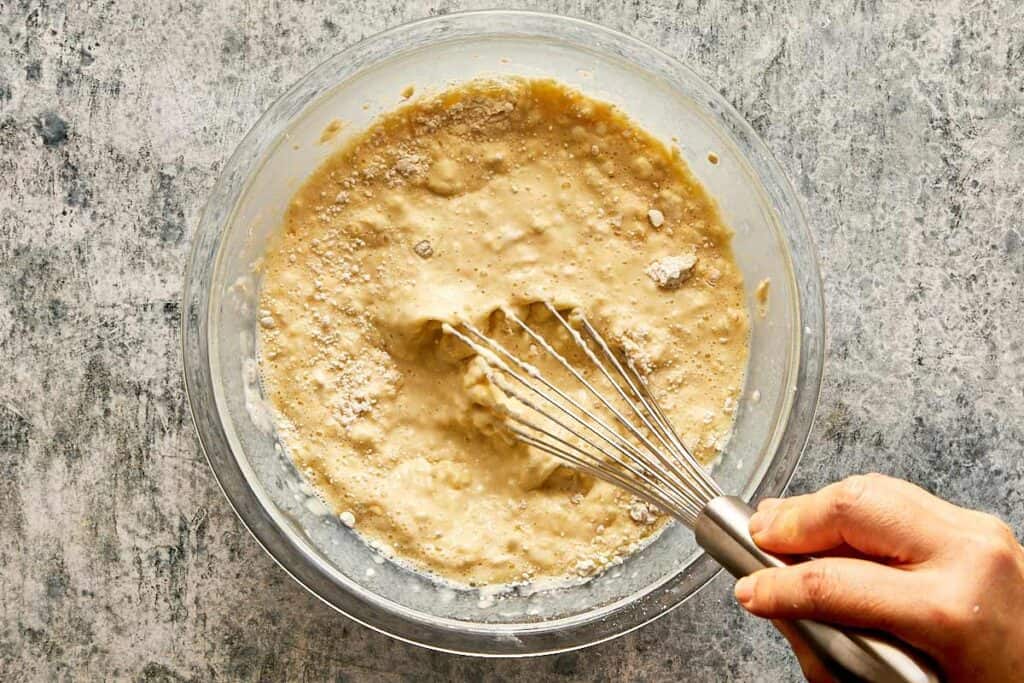
- As you pour, gradually widen your whisking circle to pull in more flour from the sides. This technique prevents lumps better than dumping everything in at once.
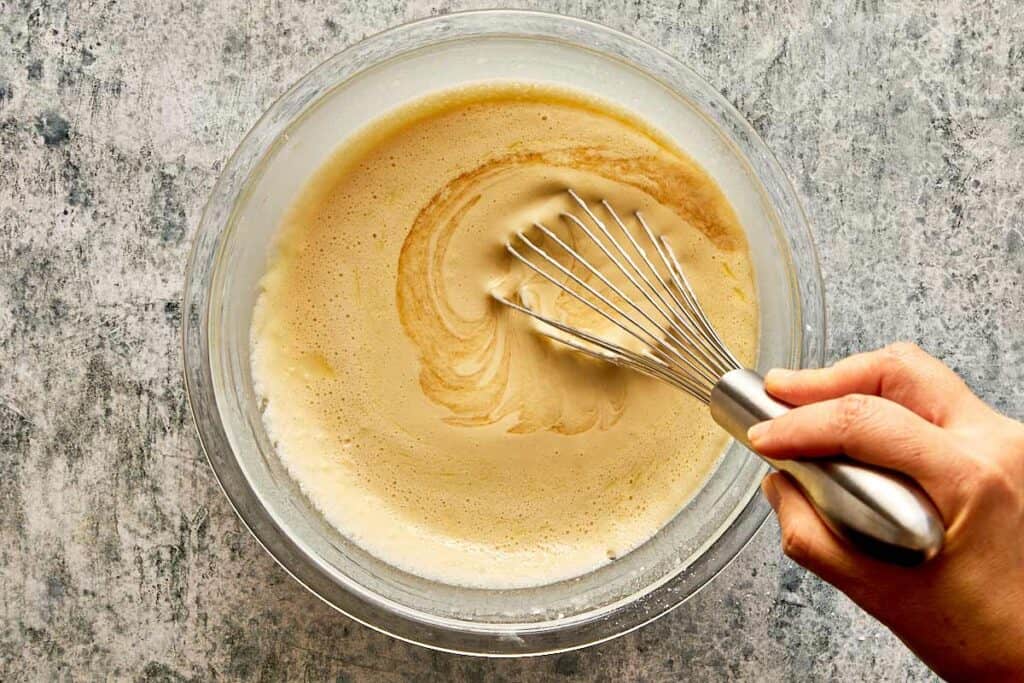
- Once smooth, pour in the dark rum and orange blossom water. Whisk one last time to fully incorporate.
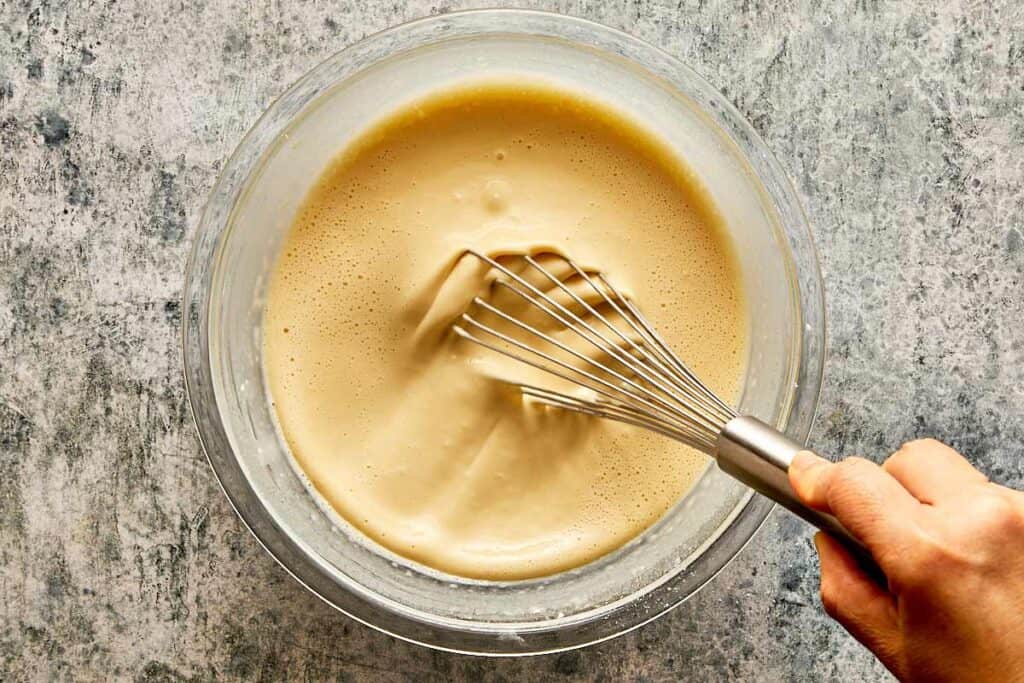
- Cover the bowl with plastic wrap. Place it in the fridge to rest. This allows the flour to hydrate and the gluten to relax (goodbye, rubbery crepes!).

- While the batter rests, fill a tall jar or container with cold water. Place your wooden crepe spreader (rozell) inside. It must be soaking wet before it touches the batter.
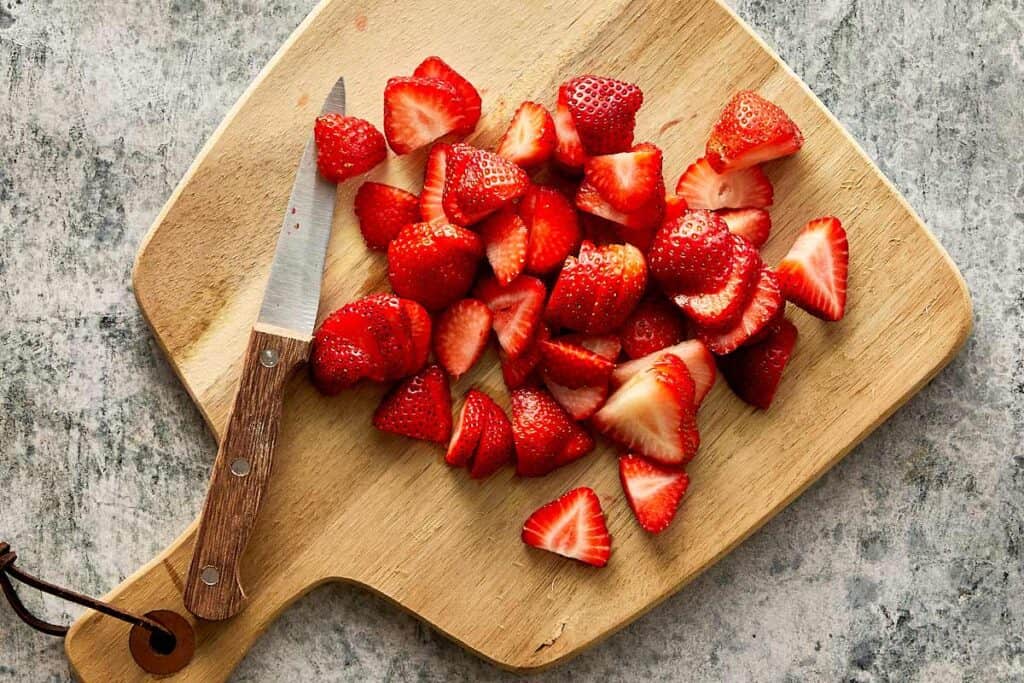
- Slice your strawberries now and have your Nutella jar open with a spoon ready. Things move fast once cooking starts!
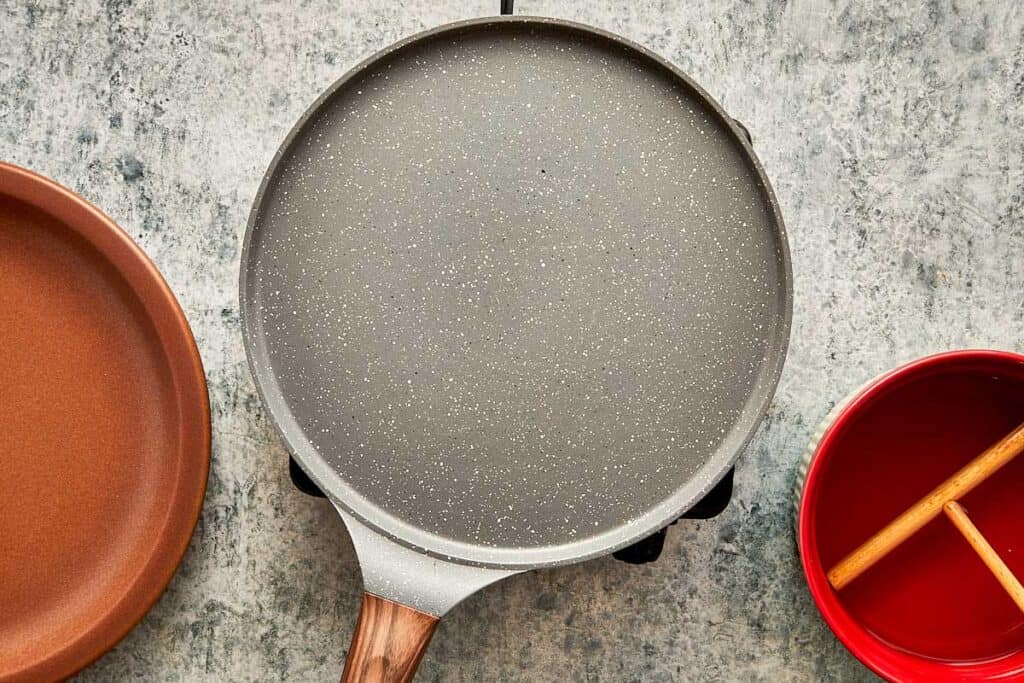
- Place your crepe pan over medium-high heat. Let it heat up for a few minutes to ensure even distribution. Flick a tiny drop of water onto the pan. If it sizzles and evaporates immediately, you are ready. If it sits there, it's too cold. Dip a folded paper towel into your cooking oil and wipe the pan. You want a sheen, not a pool of oil.
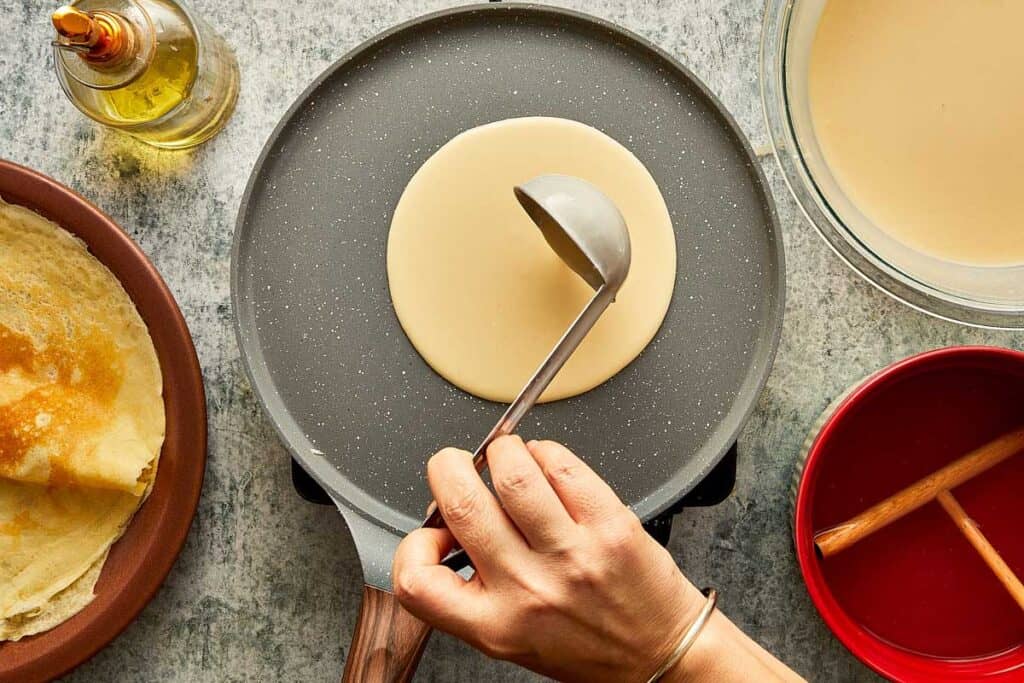
- Take the batter out of the fridge. The flour will have settled at the bottom, so give it a vigorous whisk to make it uniform again. Pour a ladle of batter into the center of the pan.
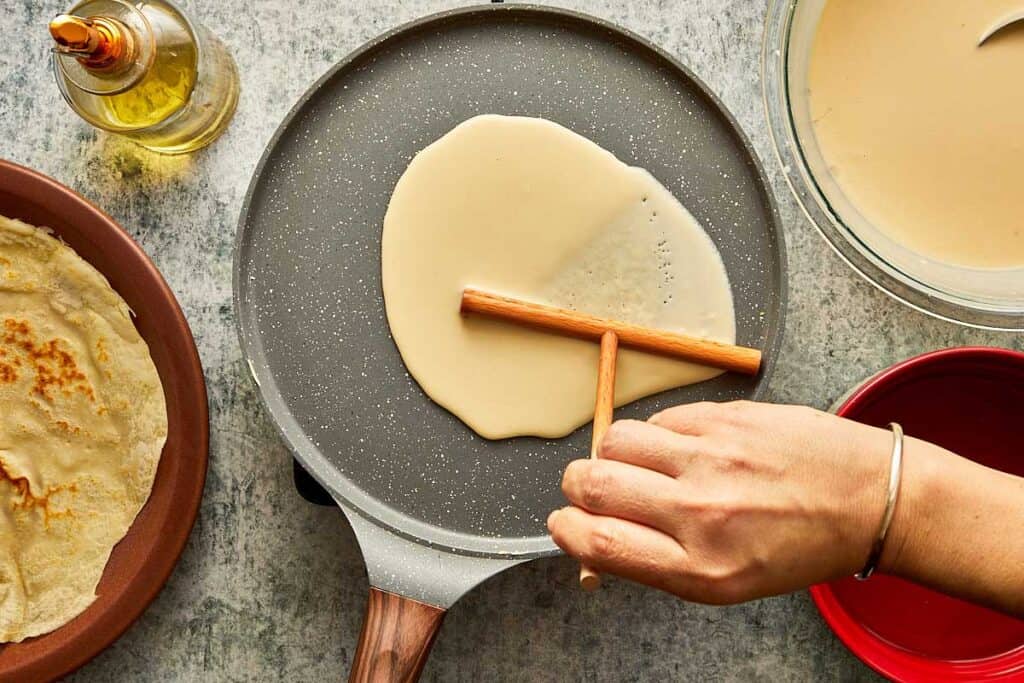
- Immediately take the wet rozell (shake off excess water) and place it gently on the batter.
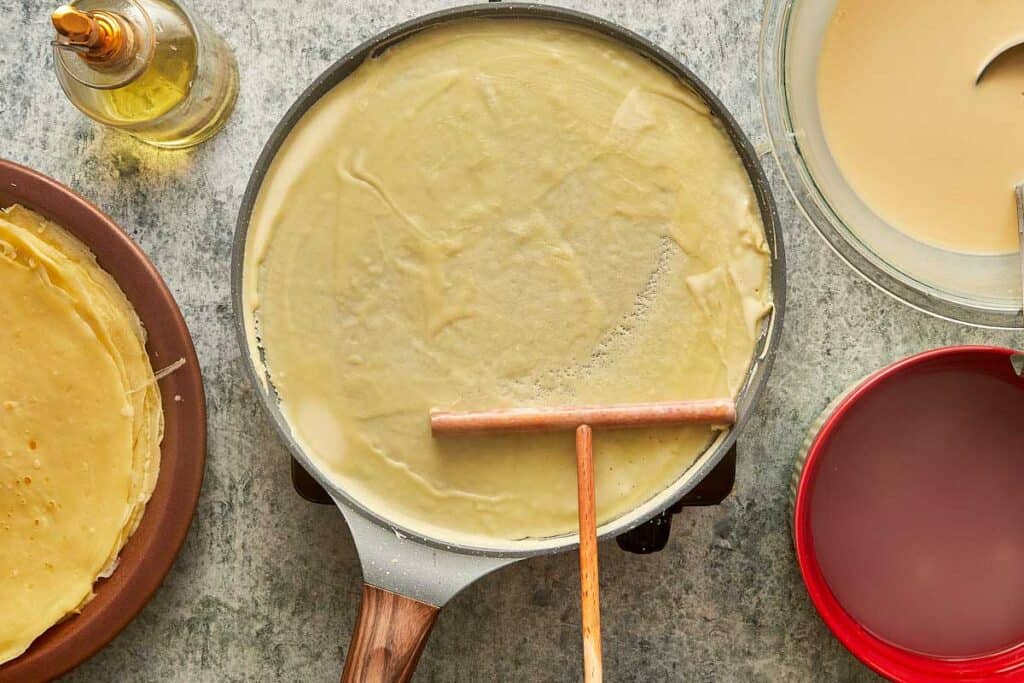
- Spin it in a circular motion (no pressure!) to spread the batter to the edges. Cook until the edges look dry and lacey.
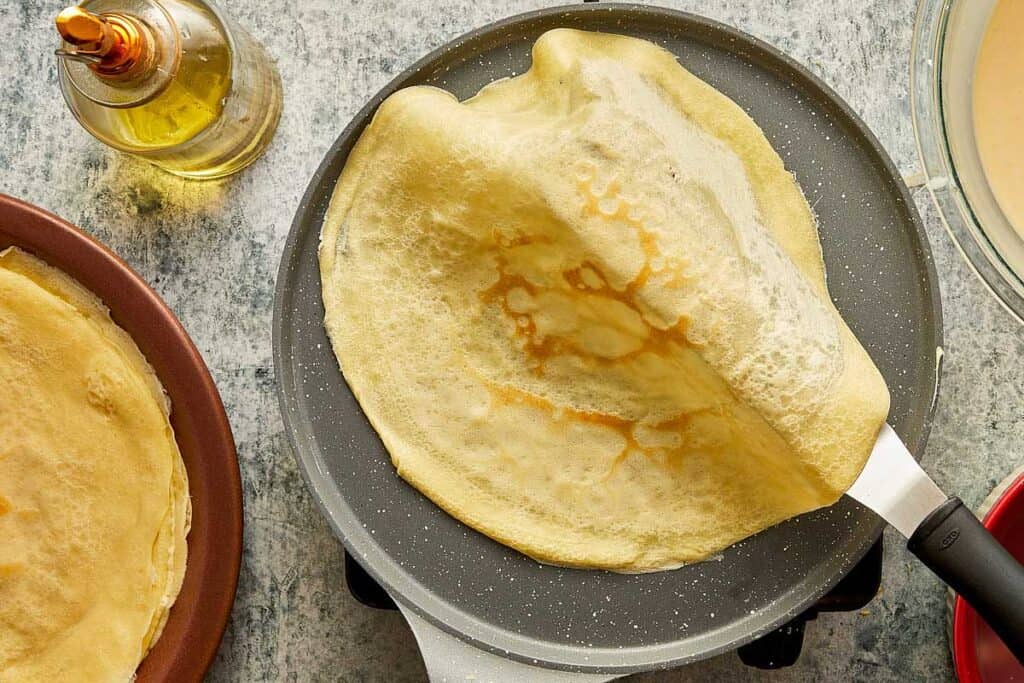
- Slide a spatula under and flip. Cook the other side briefly.
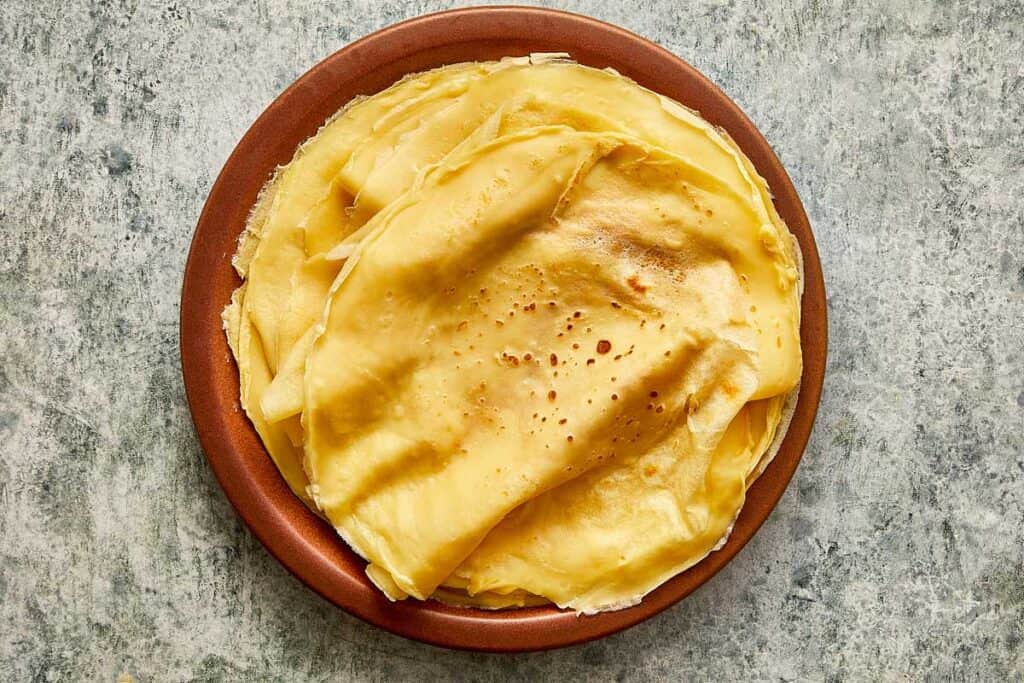
- Slide onto a plate and immediately cover with a clean tea towel to keep it soft while you cook the rest.
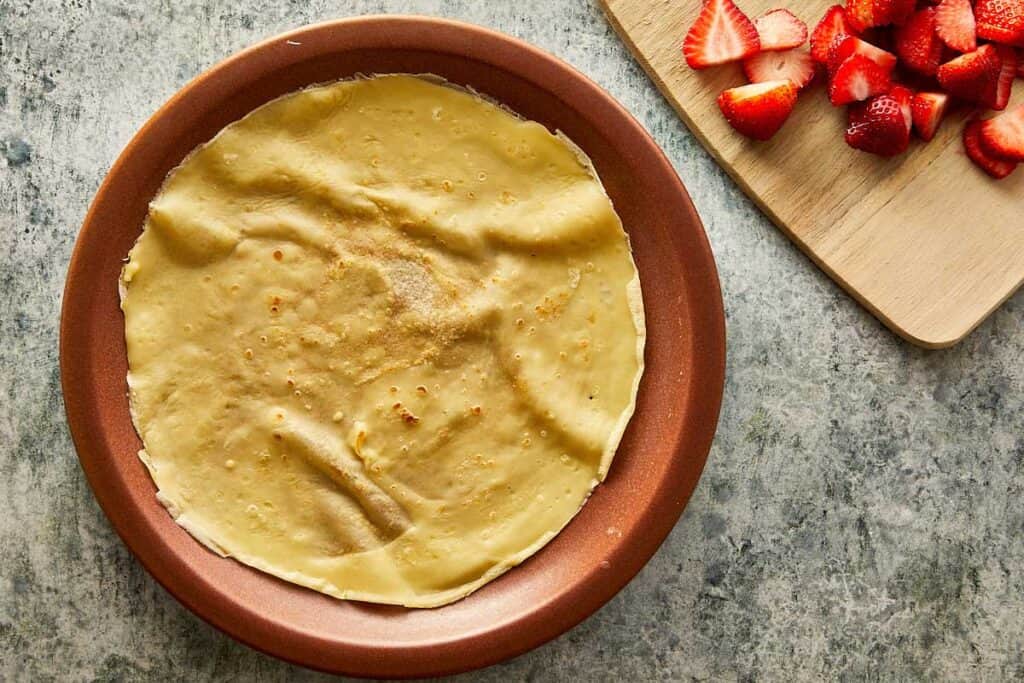
- Now to fill the crepe. Lay your warm crepe flat on a plate.
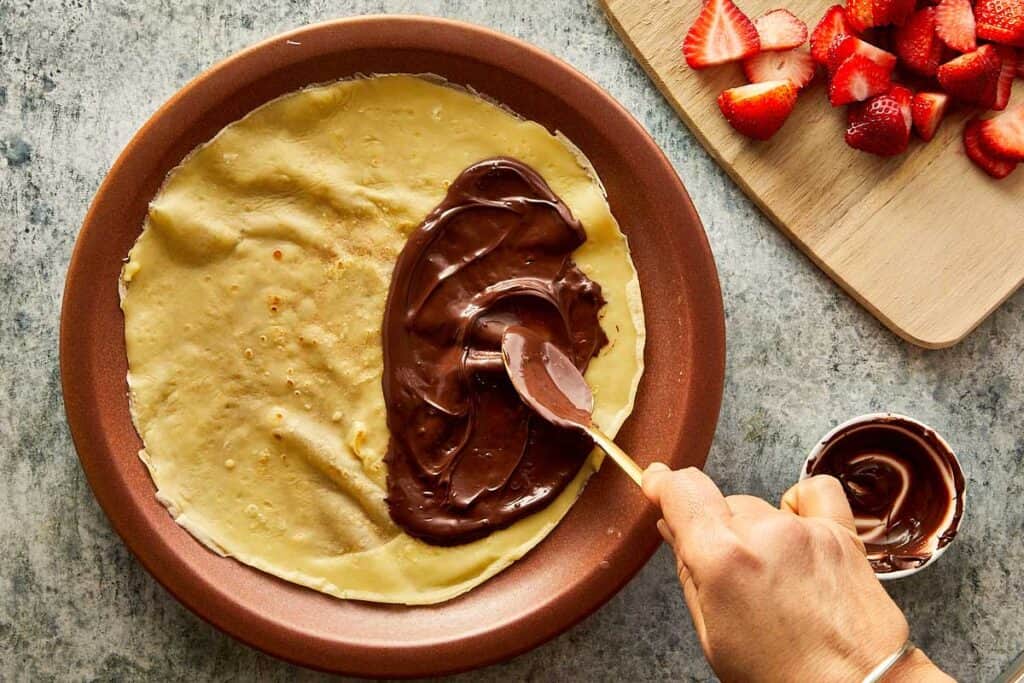
- Take a generous spoonful of Nutella and spread it over only one half of the circle. This ensures every bite has chocolate without it oozing out the sides too early.
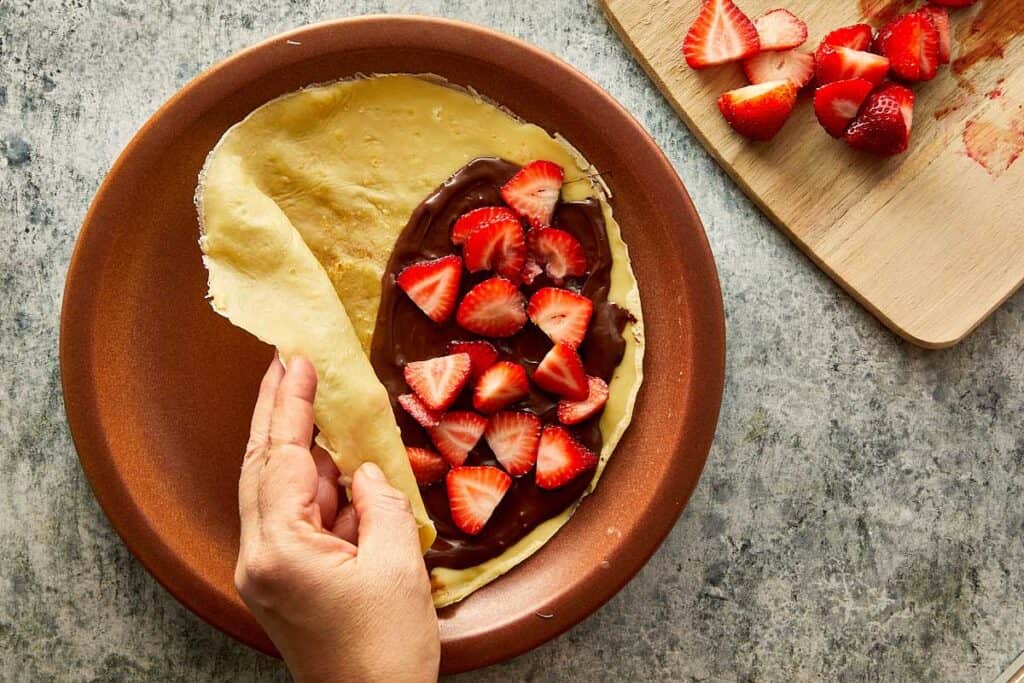
- Arrange your sliced strawberries on top of the Nutella layer. Chef's Tip: Keep the slices thin and flat so the crepe folds neatly without tearing. Pick up the empty half of the crepe and fold it over the filled half. You should now have a semi-circle (half moon) shape, with the filling tucked safely inside.
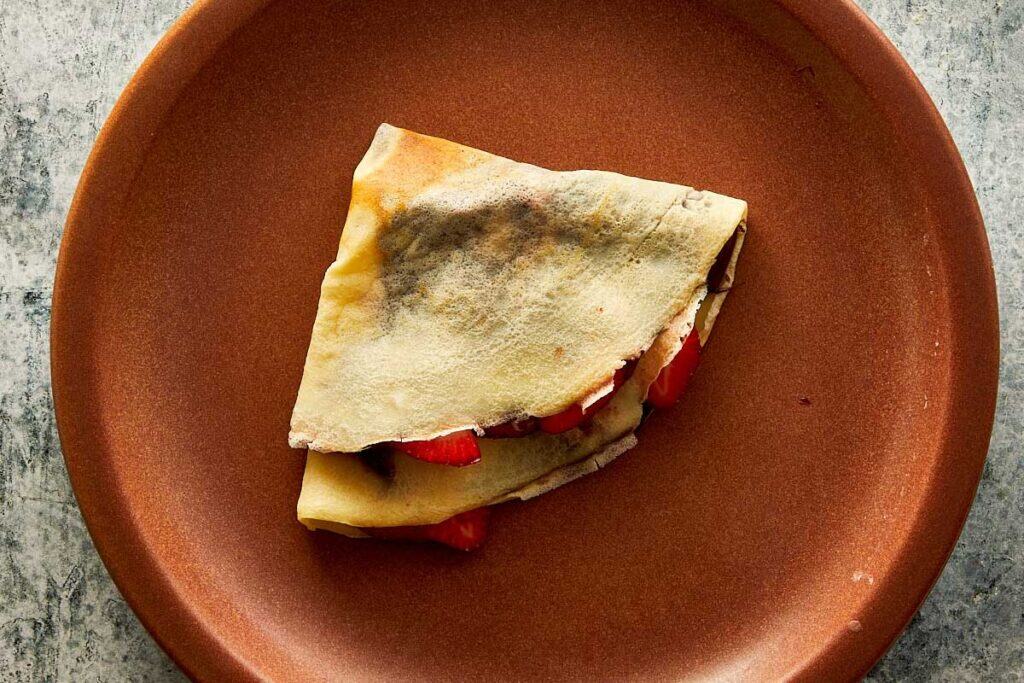
- Now, fold that semi-circle in half again, bringing one corner over to the other. You will end up with a neat, layered triangle shape (like a pizza slice).
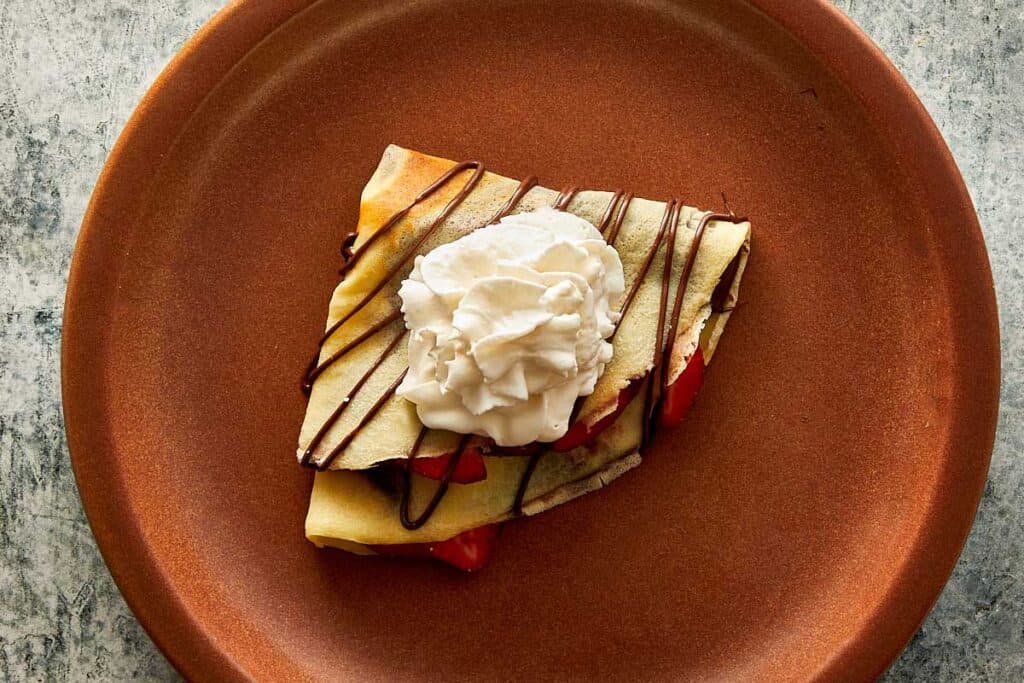
- Arrange two or three crepes slightly overlapping on the plate. Top with a dollop of whipped creama drizzle of extra melted Nutella, and a dusting of powdered sugar for that restaurant quality finish.
Mastering the Rozell
The T-shaped wooden tool (the rozell) can be intimidating, but it is the secret to paper-thin crepes. Here is Chef Tom's cheat sheet for success:
- This is the #1 mistake beginners make. You must keep your wooden rozell soaking in a container of water between every single crepe. If the wood is dry, the batter sticks to it and tears. If it's wet, it glides.
- Don't push down! The weight of the tool is enough. Think of it as spreading cream, not scraping toast. You want to glide over the top of the batter.
- Place the tool in the center of the batter. gently rotate your wrist in a circular motion (like a compass drawing a circle), pushing the batter outward towards the edges of the pan.
- If the pan is too cool, the batter slides around and won't spread. If it's too hot, it sets before you can spread it. Aim for medium-high heat where a drop of water sizzles and evaporates immediately.
Kitchen tip
The First Crepe Rule: The first crepe is almost always a “chef's snack.” It seasons the pan. Don't stress if it looks messy!
Heat Control: If the pan is too hot, the batter sets before you can spread it. If it's too cool, it slides around. Aim for medium-high.
Make Ahead and Storage
You can make this batter up to 24 hours in advance. The flavor actually improves as the rum infuses!
- To Freeze: Stack cooked crepes with parchment paper between them and freeze for up to 2 months.
- To Reheat: A quick 15 seconds in the microwave or a warm pan works wonders.
Planning a full savory brunch spread? These go great alongside eggs benedict.
The FAQ's
Why are our crepes rubbery instead of tender?This usually happens for two reasons. First, you likely skipped the 30 minute resting time. Resting allows the gluten strands in the flour to relax; if you cook immediately, they tighten up and become chewy. Second, you might have over whisked the batter once the flour was added. Our addition of cornstarch specifically helps prevent this, ensuring a meltingly tender texture every time.
Why does the batter tear when we use the wooden spreader (rozell)?The number one culprit is a dry tool. If your wooden rozell is dry, it will pull and drag the batter. You must keep the tool soaking in a jar of water between every single crepe. Shake off the excess drips, but ensure the wood is damp before it touches the hot batter. It should glide, not drag.
Can we make the batter the night before?Absolutely, and Chef Tom actually recommends it! Making the batter 24 hours in advance allows the flavors of the dark rum and orange blossom water to fully infuse into the milk. The result is a much deeper, more aromatic flavor. Just remember to give the batter a vigorous whisk before cooking, as the flour will settle at the bottom of the bowl overnight.
What you need
- 2 cups whole milk
- 4 tbsp Unsalted Butter
- 1 ⅔ cups all purpose flour
- ¼ cup cornstarch
- 2 tbsp vanilla sugar
- 1 pinch salt
- 3 large Eggs
- 2 tsp dark rum
- 1 tsp orange blossom water see post above for alternative
- 1 tbsp cooking oil for greasing the pan
- 1/2 tbsp Nutella per crepe, plus extra melted to drizzle
- 2 cups fresh strawberries sliced
- 1 optional Whipped cream canned (or fresh see post above)
Method
- Warm the Milk & Butter In a saucepan, combine the milk and butter. Gently heat until the butter is completely melted and the mixture is warm to the touch (do not let it boil). Remove from heat and let it cool slightly for a minute so it doesn't scramble the eggs.
- Combine Dry Ingredients In a large mixing bowl, whisk together the flour, cornstarch, vanilla sugar, and salt.
- Crack the eggs into the center of the flour mixture. Begin whisking gently, breaking the yolks, while gradually pouring in the warm milk and butter mixture. Whisk continuously until the batter is smooth and lump-free.
- Pour in the dark rum and orange blossom water. Whisk again until fully incorporated.
- Cover the bowl and place the batter in the fridge to rest for at least 30 minutes. (This relaxes the gluten for tender crepes).
- While the batter rests, prepare a container or jar filled with water. Place your crepe spreading tool (rozell) inside the water so it is wet and ready to use. Slice your strawberries.
- Heat a 10-inch crepe pan over medium-high heat. Lightly grease the surface with a paper towel dipped in the cooking oil.
- Give the batter a quick whisk (flour settles during resting). Pour a ladleful of batter into the center of the hot pan. Immediately use the wet rozell to spread the batter in a circular motion to coat the pan evenly.
- Dip the rozell back into the water between every crepe.
- Cook for about 1 minute until the underside is golden and the edges lift slightly. Flip the crepe and cook for another 30 seconds on the other side. Transfer to a plate. Repeat until all batter is used.
- Spread Nutella over one half of a warm crepe. Top with sliced strawberries. Fold into a triangle or roll up. Top with whipped cream and a drizzle of melted Nutella.