
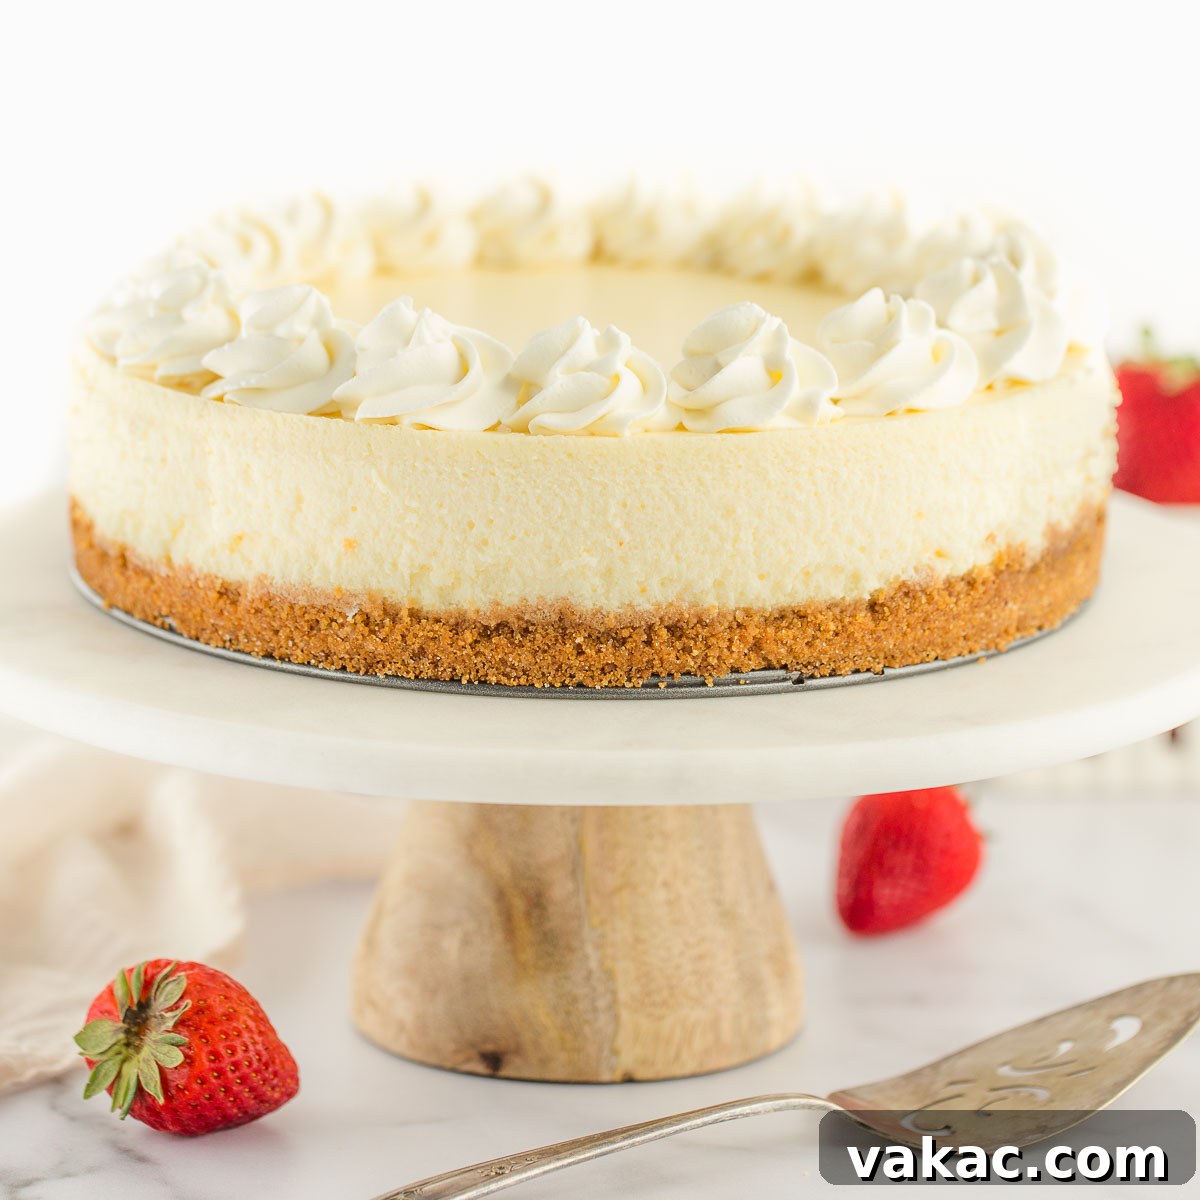
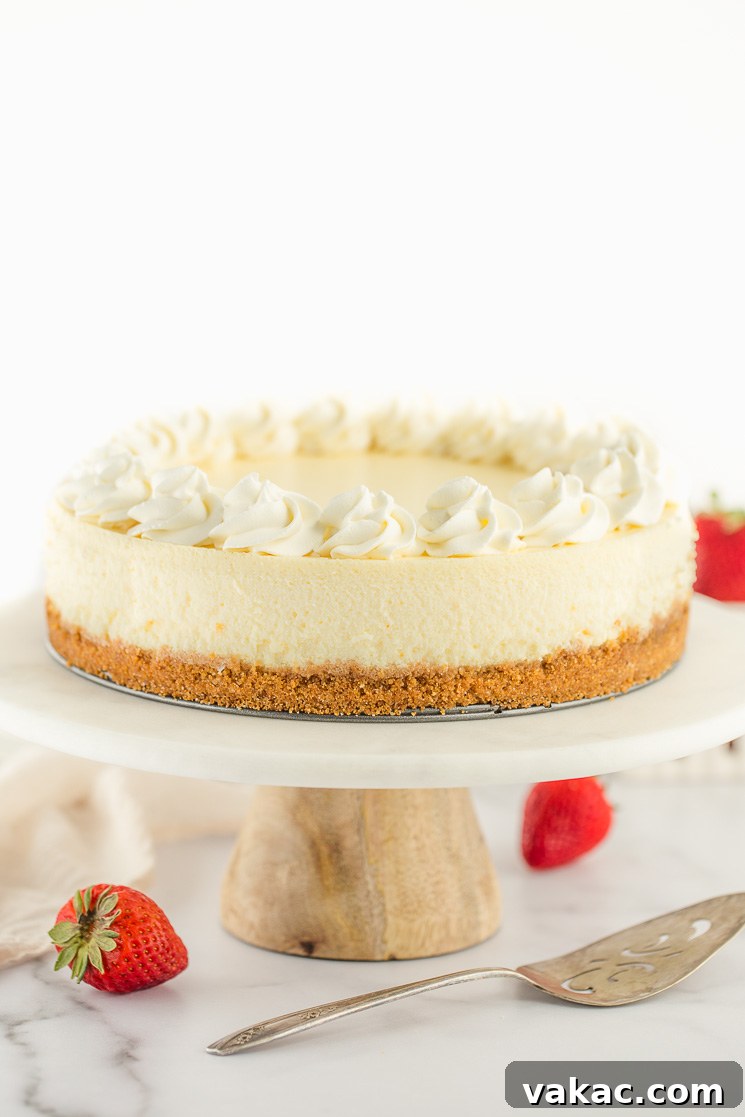
Welcome, fellow dessert enthusiasts, to the ultimate guide to crafting a truly magnificent Classic Cheesecake! If you, like me, find yourself constantly drawn to the rich, creamy allure of a perfect cheesecake, you understand that it’s more than just a dessert—it’s an experience. For years, this delightful treat has been my go-to choice for celebrations, often taking precedence over traditional birthday cakes. There’s something undeniably special about a homemade cheesecake, and today, I’m thrilled to share my absolute favorite recipe with you.
This isn’t just any cheesecake recipe; it’s a meticulously developed method for achieving an incredibly smooth, luxuriously creamy, and utterly delicious cheesecake every single time. Many find the idea of making cheesecake from scratch intimidating, fearing cracks, dense textures, or a soggy crust. I promise you, with the detailed tips and techniques I’ve gathered over countless batches, you’ll overcome any apprehension and bake with confidence. From perfecting the homemade graham cracker crust to mastering the water bath and preventing those dreaded cracks, this comprehensive guide covers everything you need to know. Plus, I’ve included a variety of irresistible topping options, allowing you to customize your creation and make this classic cheesecake uniquely yours!
The Foundation: Crafting the Perfect Graham Cracker Crust
Every exceptional cheesecake begins with a flawless crust, and a homemade graham cracker crust is the quintessential base for this classic dessert. It provides a delightful buttery crunch that perfectly complements the smooth, creamy filling. If you’re new to making crusts from scratch, don’t worry—it’s incredibly straightforward!
Here’s how we’ll build our golden-brown foundation:
- Crush Your Graham Crackers: The first step is to achieve fine graham cracker crumbs. You can do this easily in a food processor, pulsing until no large pieces remain. Alternatively, place the crackers in a large zip-top bag and crush them with a rolling pin. If you’re looking to save a little time, pre-crushed graham cracker crumbs are also a perfectly acceptable shortcut.
- Sweeten the Crumbs: Next, combine your crushed graham cracker crumbs with granulated sugar. This adds a touch of sweetness that balances the rich butter and cracker flavor. Stir them together until they are thoroughly mixed.
- Incorporate Melted Butter: Pour in the melted unsalted butter. The butter acts as the binding agent, holding the crumbs together. Mix thoroughly until all the graham cracker crumbs are evenly moistened. You might find it easiest and most effective to use your hands for this step, ensuring every crumb is coated. The mixture should resemble wet sand.
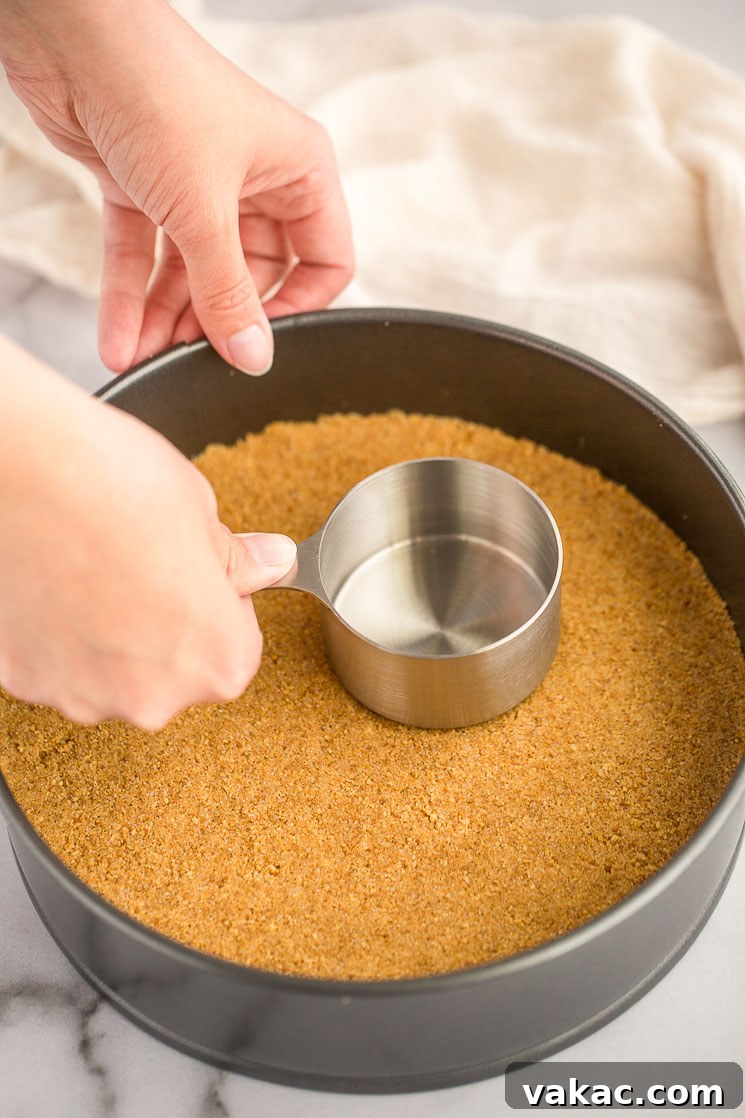
- Press into a Springform Pan: Transfer the moistened crumbs into a 9-inch springform pan. This type of pan is crucial for easily releasing your finished cheesecake. Use the bottom of a measuring cup or a flat-bottomed glass to firmly and evenly press the mixture into the bottom of the pan and slightly up the sides. A well-compacted crust is essential to prevent crumbling when sliced.
- Pre-Bake for Crispness: Bake the crust in a preheated oven for about 10 minutes. This crucial step helps to set the crust, making it beautifully crisp and preventing it from becoming soggy once the filling is added. After baking, remove it from the oven and set it aside to cool slightly while you prepare the cheesecake filling.
The Heart of the Cheesecake: Key Ingredients for the Filling
Once your crust is pre-baked and cooling, it’s time to focus on the star of the show: the incredibly smooth and creamy cheesecake filling. The quality of your ingredients and their preparation are paramount here. Be sure to gather everything and bring them to room temperature for the best results.
- Cream Cheese (32 ounces / four 8-ounce blocks): This is, without a doubt, the most critical component. For that signature rich, tangy, and dense texture, you MUST use full-fat, brick-style cream cheese. Avoid cream cheese spreads in tubs or low-fat versions, as they contain added water and stabilizers that can compromise the texture and flavor of your cheesecake. Ensure your cream cheese is completely softened to room temperature before you begin mixing. This prevents lumps and ensures a smooth, uniform batter. If you need a quick trick to soften cream cheese, gently unwrap the blocks and microwave them on low power for 10-15 seconds, or submerge the foil-wrapped blocks in warm water for 15-20 minutes.
- Sour Cream (1 cup / 230 grams): Often overlooked, sour cream plays a vital role. It contributes a delicate tang that cuts through the richness of the cream cheese, preventing the cheesecake from being overly sweet. More importantly, it adds moisture and fat, resulting in an even creamier, silkier texture. As with the cream cheese, opt for full-fat sour cream at room temperature for optimal blending and consistency.
- Granulated Sugar (1 cup / 200 grams): The granulated sugar sweetens the cheesecake to perfection while allowing the characteristic tang of the cream cheese and sour cream to shine through. This amount strikes the ideal balance, ensuring it’s not too sweet but perfectly decadent.
- Pure Vanilla Extract (2 teaspoons): High-quality pure vanilla extract is essential for adding a warm, aromatic depth to the cheesecake. It elevates the overall flavor profile, creating a truly classic taste. Don’t skimp on this!
- Large Eggs (4): Eggs are crucial for binding the filling and providing structure to the cheesecake as it bakes. For the best results and to prevent cracks, it’s vital that your eggs are at room temperature. Cold eggs can cause the batter to seize and become lumpy. I recommend lightly beating all four eggs in a separate small bowl before incorporating them into the mixture. This ensures they are evenly distributed without overmixing the batter, which can introduce too much air and lead to cracks.
Mixing Mastery: Preparing the Velvety Cheesecake Filling
The secret to a crack-free and incredibly smooth cheesecake lies in the mixing technique. Patience and a gentle hand are your best friends here. You’re aiming for a perfectly emulsified mixture, not an aerated soufflé!
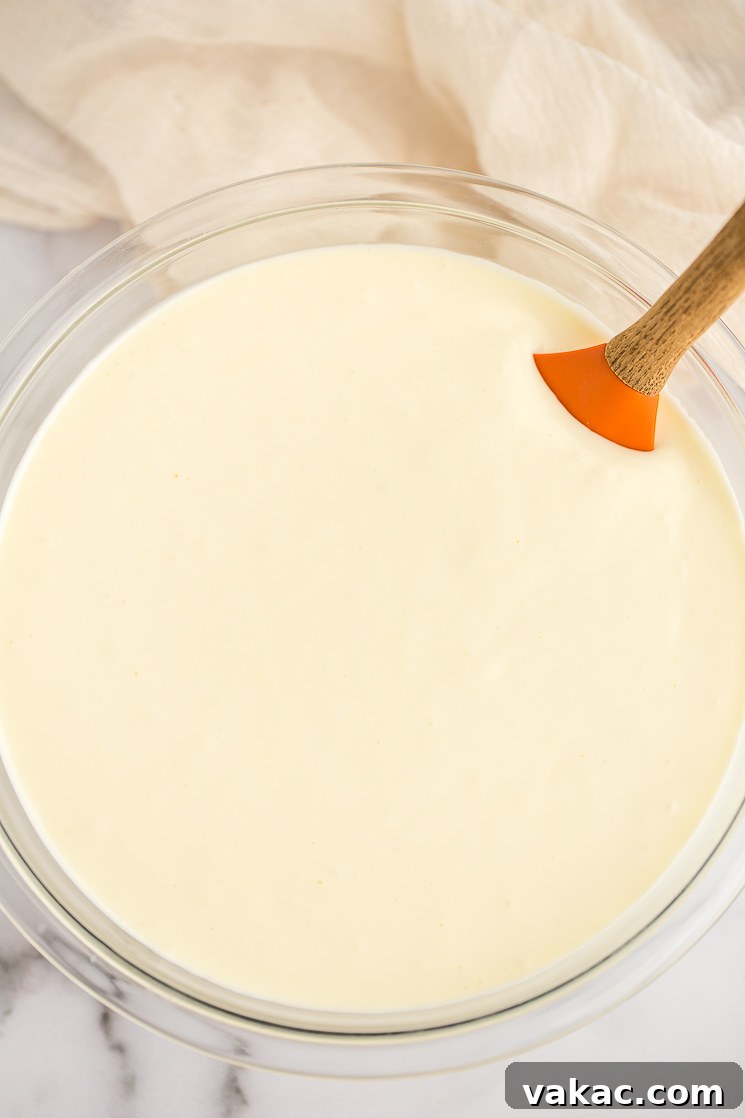
- Start with Cream Cheese: In the bowl of a stand mixer fitted with the paddle attachment (or using a large mixing bowl with a handheld mixer), begin by beating the room temperature cream cheese on low-medium speed. Beat until it’s entirely smooth and free of any lumps. This can take a few minutes, so be patient.
- Incorporate Sour Cream: Add the room temperature sour cream to the cream cheese mixture. Continue to mix on low speed until it is just combined and smooth. Be sure to stop and scrape down the sides and bottom of the bowl with a rubber spatula frequently. This ensures all ingredients are fully incorporated and prevents unmixed pockets.
- Add Sugar and Vanilla: Next, mix in the granulated sugar and pure vanilla extract on low speed until they are fully combined. Again, scrape down the bowl to ensure a uniform batter.
- Gentle Egg Incorporation: This is a critical step for preventing cracks. Instead of adding eggs one at a time and mixing vigorously, which can incorporate too much air, lightly beat your four room temperature eggs in a separate small bowl first. Then, pour the beaten eggs into the cheesecake mixture and mix on the lowest speed possible, just until they are combined. As soon as you no longer see streaks of egg yolk, stop mixing. Overmixing at this stage is the primary culprit behind cracks.
- Final Scrape and Check: After adding the eggs, use a rubber spatula to gently fold the filling a few times by hand. This ensures that any unmixed ingredients at the bottom or sides of the bowl are fully incorporated without introducing excess air. Your filling should now be wonderfully smooth and uniform.
The Essential Water Bath: Ensuring a Crack-Free, Even Bake
If you’ve ever wondered how to achieve that perfectly smooth, uncracked surface on a cheesecake, the answer lies in the water bath (also known as a “bain-marie”). This step is non-negotiable for a truly professional-looking and perfectly textured cheesecake. So, why exactly is a water bath so crucial?
A water bath serves several vital functions:
- Adds Moisture to the Oven: The steam created by the hot water in the roasting pan adds moisture to the oven environment. This prevents the cheesecake from drying out, which is a common cause of cracking.
- Ensures Even, Gentle Baking: Water conducts heat more gently and evenly than air. By surrounding the springform pan with hot water, the cheesecake bakes slowly and uniformly from all sides, preventing the edges from cooking faster than the center and reducing the likelihood of a sudden expansion and contraction that leads to cracks.
- Promotes Creamy Texture: The moist, gentle heat of the water bath helps the cheesecake to set into a silky, custardy texture, rather than a dry, crumbly one.
Here’s precisely how to prepare your pan for the water bath to ensure no water leaks into your precious cheesecake:
- Pre-boil Water: Before you even start the filling, put a large pot of water on the stove to boil. You’ll need about 1 inch of boiling water for your roasting pan.
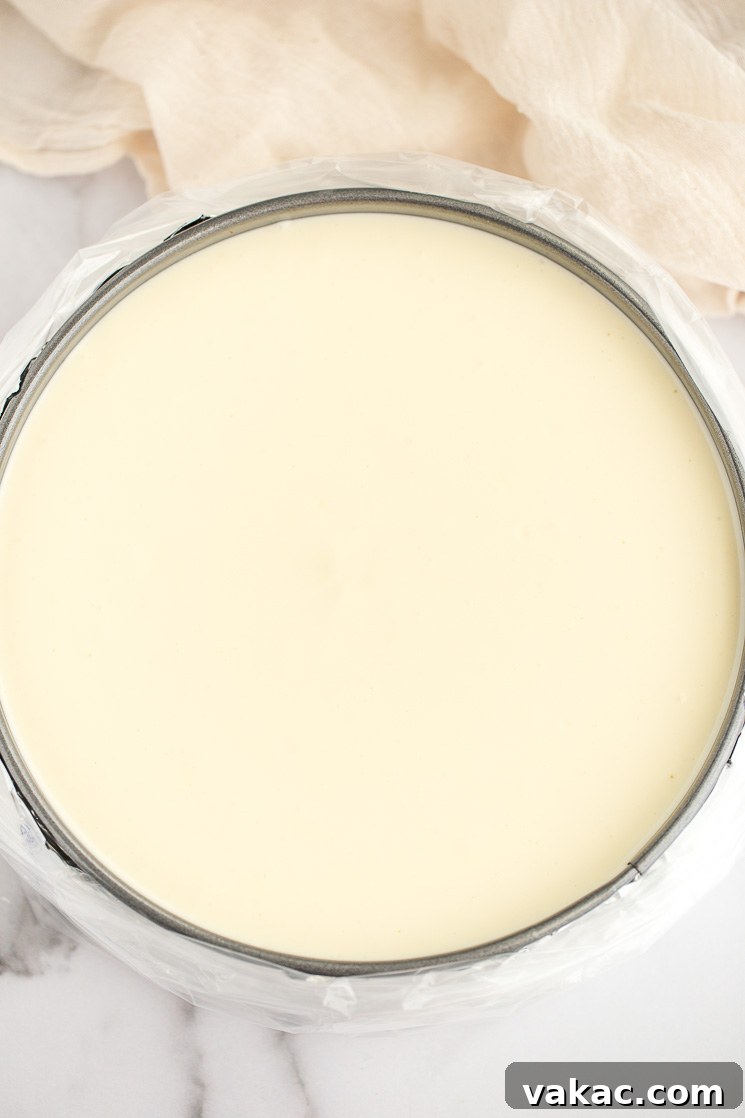
- Wrap the Springform Pan in Foil: Take several large sheets of heavy-duty aluminum foil and wrap the bottom and sides of your springform pan tightly. Overlap the sheets and crimp them together to create a watertight seal extending several inches up the sides of the pan. This is your first line of defense against leaks.
- Place in an Oven Bag (Extra Reassurance): For ultimate peace of mind, place the foil-wrapped springform pan into a large oven roasting bag. This acts as an extra layer of protection, providing reassurance that no water will seep into your crust.
- Fold Down the Oven Bag: Fold the excess material of the oven bag down the sides of the pan. The goal is to keep the plastic away from the cheesecake filling itself, as shown in the accompanying image.
- Pour in the Filling: Carefully pour your prepared cheesecake filling into the crust-lined and securely wrapped springform pan. Use an offset spatula or the back of a spoon to gently smooth out the top into an even layer.
- Remove Air Bubbles: Gently tap the pan on the counter a couple of times. This helps any trapped air bubbles rise to the surface. Use a toothpick or skewer to gently pop any large air bubbles you see. Removing these pockets of air further contributes to a smooth, crack-free surface.
- Prepare Roasting Pan: Place the wrapped springform pan into a larger roasting pan.
- Add Boiling Water: Carefully pour the boiling water you prepared earlier into the roasting pan, around the springform pan, until it reaches about 1 inch up the sides of the springform pan. Be careful not to splash water into the cheesecake filling itself.
Baking to Perfection and the Art of Gradual Cooling
With your cheesecake nestled in its water bath, it’s ready for the oven. Baking and cooling are two distinct but equally critical phases for achieving that coveted perfect texture and pristine surface.
Baking the Cheesecake:
Carefully transfer the roasting pan containing the water bath and cheesecake to your preheated oven. Bake at 325°F (163°C) for approximately 60-65 minutes. The baking time can vary slightly depending on your oven, so it’s important to know the signs of doneness:
- Set Edges: The outer 1-2 inches of the cheesecake should appear set and firm.
- Slightly Jiggly Center: The very center (about a 3-inch circle) should still have a slight wobble when you gently shake the pan. It shouldn’t be liquid, but it shouldn’t be completely firm either. This “jiggle” indicates that the cheesecake is cooked through but not overbaked, which would lead to a dry texture and potential cracks. Remember, the cheesecake will continue to cook as it cools.
The Gradual Cooling Process:
Once the cheesecake reaches the desired doneness, resist the urge to pull it out immediately. Sudden temperature changes are a primary cause of cracks. Instead, employ this gentle cooling method:
- Turn Off the Oven: With the cheesecake still in the oven, simply turn off the heat.
- Crack the Oven Door: Leave the cheesecake inside the warm oven, but crack the oven door slightly (you can use a wooden spoon to keep it ajar). This allows the cheesecake to cool down very slowly and gradually. This slow transition prevents thermal shock, which can cause the cheesecake to contract too quickly and crack.
- One Hour in the Oven: Let the cheesecake sit in the gradually cooling oven for a full hour. This allows it to finish baking gently and begin its cooling process in a controlled environment.
- Room Temperature Cooling: After an hour, carefully remove the cheesecake from the oven and the water bath. Transfer it to a wire rack to cool completely at room temperature. This can take several hours.
- Refrigeration for Setting: Once the cheesecake has cooled completely to room temperature, cover it tightly with plastic wrap and transfer it to the refrigerator. This chilling period is absolutely crucial for the cheesecake to fully set, firm up, and develop its optimal dense, creamy texture. It needs at least 5-6 hours, but for the best results, I highly recommend letting it chill overnight.
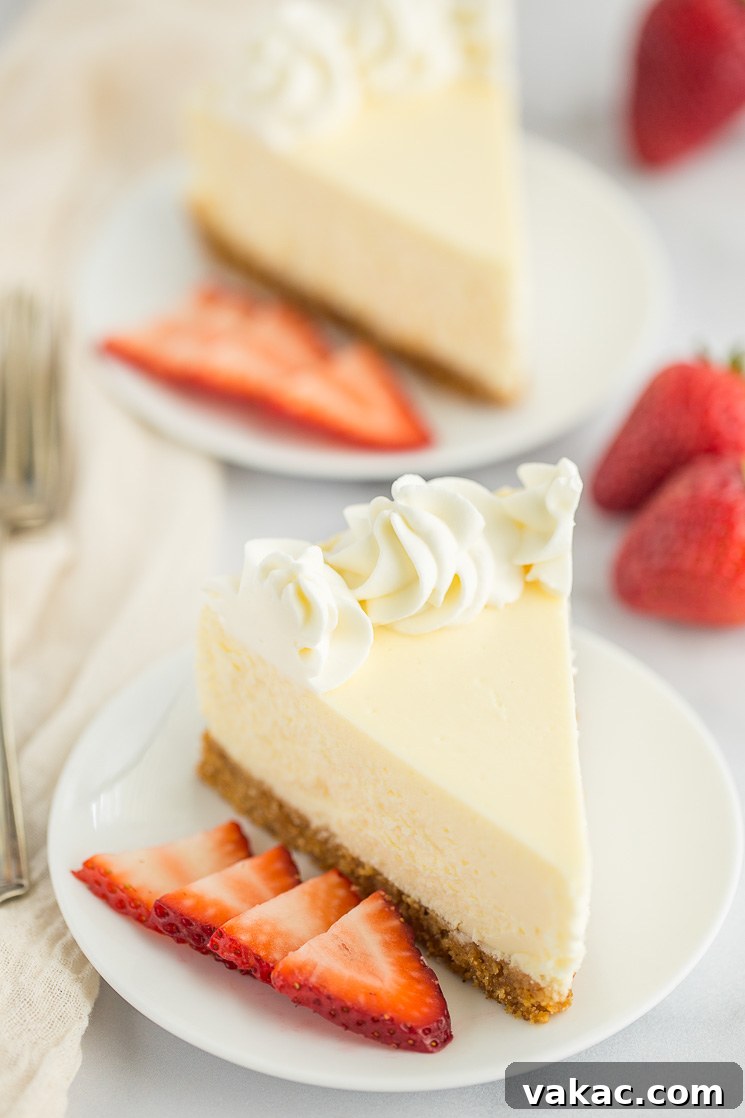
- Release and Serve: When ready to serve, run a thin, sharp knife around the perimeter of the cheesecake to loosen it from the springform pan. Carefully unclip and remove the sides of the pan. Slice into pieces (wiping your knife with warm water between slices for clean cuts), serve, and savor every exquisite bite!
Preventing the Unwanted: How to Avoid Cheesecake Cracks
There are few things more disheartening than pulling a beautiful cheesecake out of the oven only to find a large crack marring its perfect surface. While a cracked cheesecake still tastes delicious, achieving that pristine look is part of the baking triumph. Here’s a deeper dive into the key strategies to avoid unnecessary cracks:
- Mindful Egg Mixing is Paramount: As discussed in the filling section, overmixing the eggs is the most common culprit. When you beat eggs too vigorously or incorporate them too early, you introduce excessive air into the batter. This air creates bubbles that expand during baking and then collapse as the cheesecake cools, leading to tears and cracks. The solution? Lightly beat your eggs in a separate bowl first, then fold them into the finished batter on the lowest speed, mixing just until combined. Stop as soon as the egg is incorporated.
- Embrace the Water Bath: This isn’t just a suggestion; it’s a fundamental technique for crack prevention. The consistent, moist heat of a water bath prevents the cheesecake from drying out and baking too quickly, allowing it to cook evenly and expand gently. Without it, the outer edges often bake faster and contract, while the center is still cooking, causing stress and cracks.
- Do Not Overbake: Overbaking is another major cause of cracks. A cheesecake that bakes too long will lose moisture and become tough, leading to fissures as it cools and shrinks. Pay close attention to the doneness cues: the edges should be set, but the center should still have a slight jiggle. Remember, residual heat will continue to cook the cheesecake once it’s out of direct oven heat.
- Avoid Sudden Temperature Changes: Cheesecakes are delicate and sensitive to abrupt shifts in temperature. Pulling a hot cheesecake directly from the oven into a cool kitchen can cause it to contract rapidly and crack. This is why the gradual cooling process—first in the turned-off oven with the door cracked, then at room temperature—is so vital. It allows the cheesecake to slowly adjust to cooler temperatures, minimizing stress on its structure.
- Room Temperature Ingredients: Ensuring all your dairy ingredients (cream cheese, sour cream, eggs) are at room temperature is crucial for a smooth batter. Cold ingredients won’t mix evenly with warmer ones, leading to lumps and requiring more mixing, which in turn introduces more air. A smooth, homogenous batter is less prone to cracking.
Elevate Your Creation: Delicious Topping Options
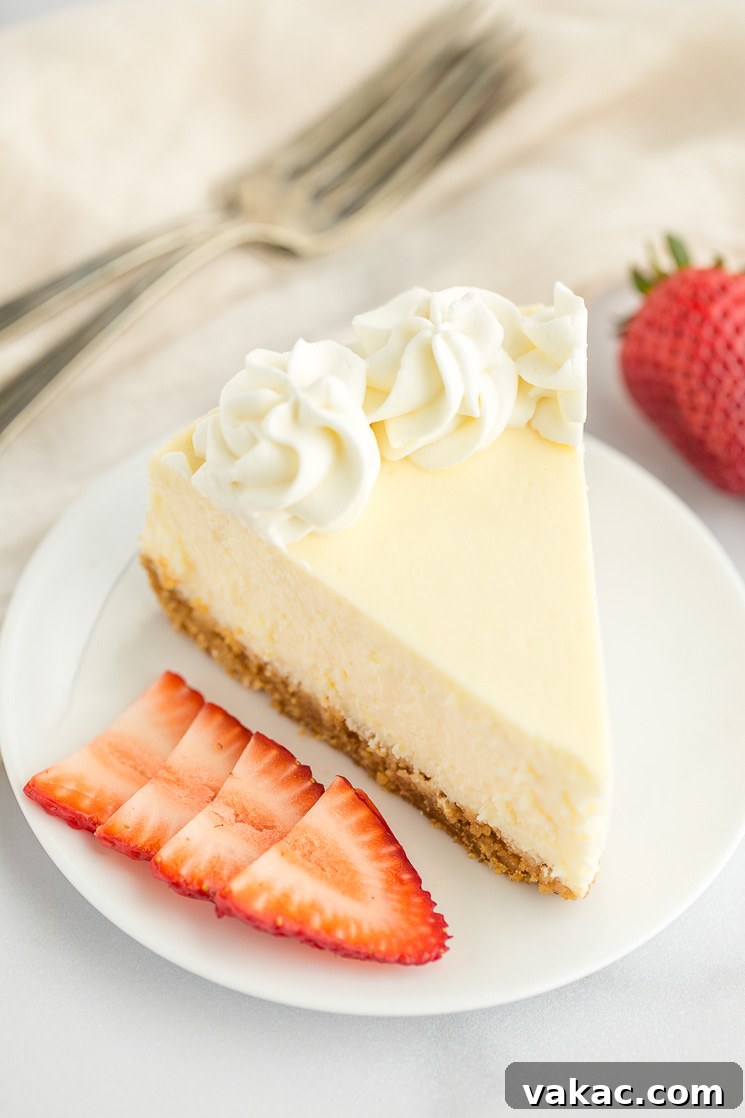
While a classic cheesecake is utterly delightful on its own, adding a topping can transform it into an even more decadent and personalized dessert. The possibilities are truly endless, allowing you to match your cheesecake to any occasion or craving. Here are some of my favorite options:
- Homemade Strawberry Sauce: A vibrant, sweet, and slightly tart strawberry sauce is a timeless pairing. Its fresh fruitiness beautifully complements the rich, creamy cheesecake.
- Bright Lemon Curd: For those who love a zesty counterpoint, a tangy lemon curd adds a wonderful burst of citrus flavor and a silky smooth texture that contrasts delightfully with the cheesecake.
- Decadent Chocolate Ganache: A rich chocolate ganache provides a luxurious and indulgent topping, perfect for chocolate lovers. A 1:1 ratio of chocolate to cream works perfectly for a pourable, yet thick, ganache.
- Sweet & Salty Salted Caramel Sauce: The irresistible combination of sweet and salty in a luscious caramel sauce adds a sophisticated and deeply satisfying flavor profile.
- Fluffy Homemade Whipped Cream: Simple yet elegant, a dollop of freshly made whipped cream provides a light, airy contrast to the dense cheesecake, enhancing its creaminess.
- Luscious Blueberry Sauce: Similar to strawberry, a homemade blueberry sauce offers a delightful burst of fruity sweetness and a beautiful purple hue.
- Stabilized Whipped Cream: If you need your whipped cream topping to hold its shape for several days, stabilized whipped cream is the perfect choice. It maintains its structure without weeping, ideal for make-ahead desserts.
Expert Baking Tips for Cheesecake Success
Beyond the step-by-step instructions, these additional tips and insights will help you achieve cheesecake perfection every single time:
- Room Temperature Ingredients are Non-Negotiable: I cannot stress this enough. Ensure your cream cheese, sour cream, and eggs are all at room temperature. This is key to achieving a perfectly smooth, lump-free batter without overmixing.
- Don’t Overmix the Batter: Especially after adding the eggs. Overmixing introduces air, which expands during baking and then collapses, leading to cracks. Mix on low speed, and only until just combined.
- Tap and Pop for Smoothness: After pouring the filling into the crust, gently tap the springform pan on the counter a few times. This helps any hidden air bubbles rise to the surface. Use a toothpick or skewer to gently pop any visible large air bubbles before baking.
- The Water Bath is Your Best Friend: Seriously, don’t skip this step! It provides the moist, even heat necessary for a perfectly creamy and crack-free cheesecake.
- Know Your Oven’s Quirks: Oven temperatures can vary. Investing in an inexpensive oven thermometer can help ensure your oven is truly at 325°F (163°C).
- Avoid Opening the Oven Door: Resist the temptation to peek during the first 45-50 minutes of baking. Sudden drops in temperature can cause the cheesecake to sink or crack.
- Check for Doneness Accurately: Look for set edges and a slightly jiggly center. When in doubt, it’s better to slightly underbake than overbake. The cheesecake will continue to set as it cools.
- Patience During Cooling is Key: The gradual cooling process, first in the oven and then at room temperature, is crucial to prevent cracks caused by thermal shock. Allow ample time for cooling and refrigeration; overnight chilling yields the best texture.
- Clean Slices: For perfectly clean slices, dip a sharp, thin knife into hot water, wipe it clean, then make your cut. Repeat for each slice.
- Storage: Store any leftover cheesecake in an airtight container in the refrigerator for up to 4 days.
- Freezing Instructions: Cheesecake freezes beautifully! Wrap individual slices or the entire cooled cheesecake tightly in plastic wrap, then again in aluminum foil, and place in a freezer-safe bag or container. It will keep for up to 3 months. Thaw overnight in the refrigerator before serving.
Following these tips will not only help you prevent common cheesecake pitfalls but also empower you to create a dessert that will impress everyone who tries it. Enjoy the process, and get ready to indulge in the most delicious classic cheesecake you’ve ever made!
Classic Cheesecake Recipe
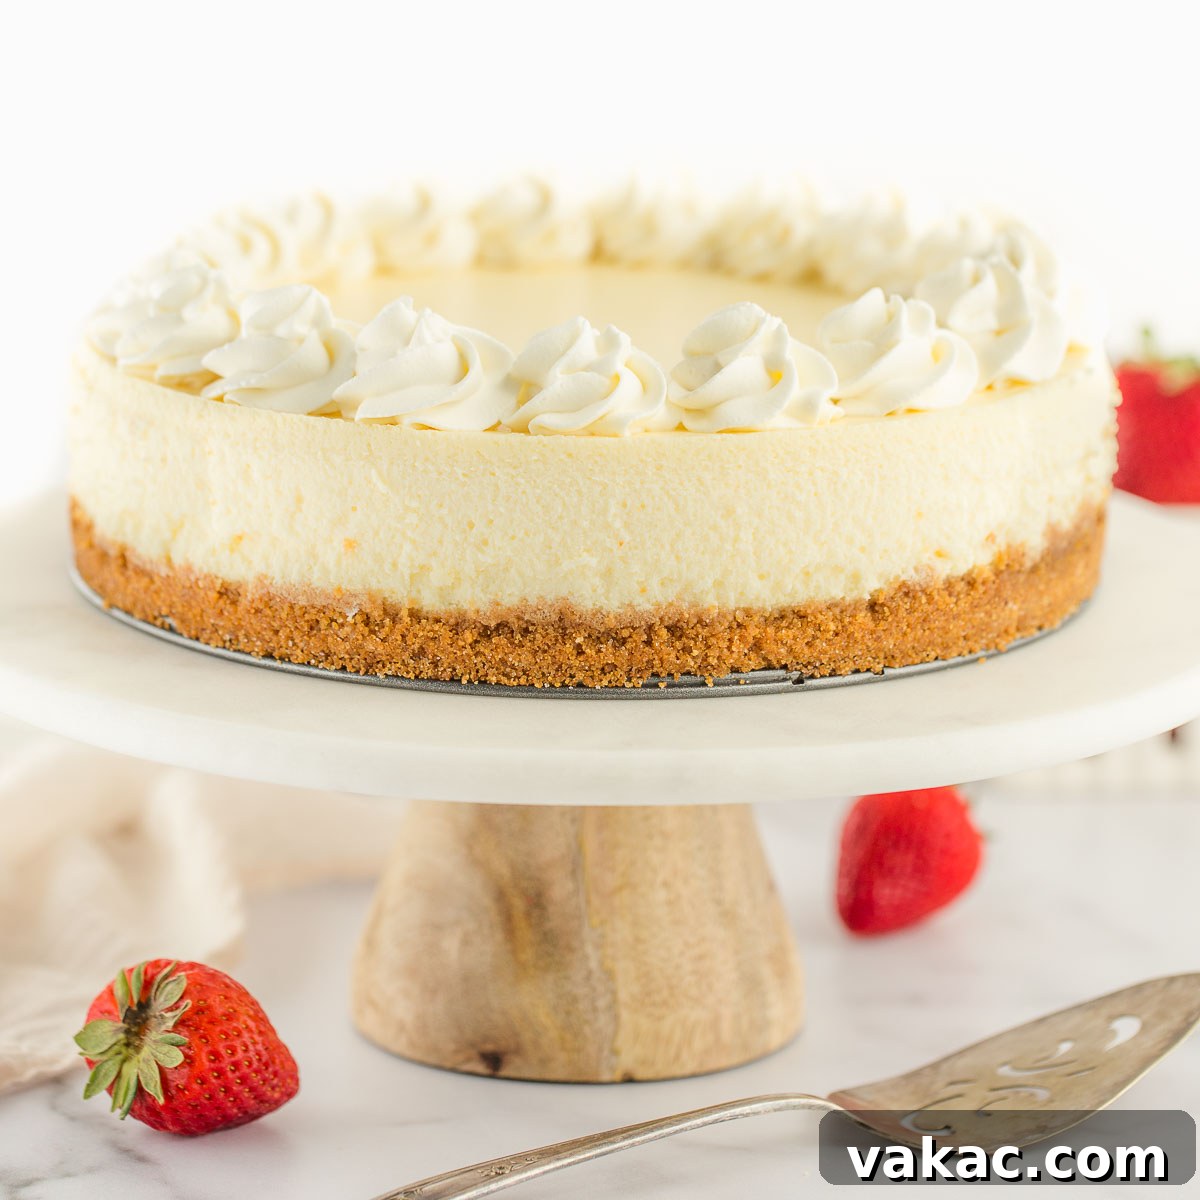
This Classic Cheesecake Recipe is smooth, creamy, and topped on a homemade graham cracker crust. Includes helpful tips to get the perfect cheesecake!
Prep Time: 40 mins
Cook Time: 1 hr 5 mins
Total Time: 1 hr 40 mins
Ingredients
Servings: 10 slices
For the graham cracker crust:
- 1 and 1/2 cups (180 grams) crushed graham cracker crumbs
- 1/3 cup (65 grams) granulated sugar
- 5 tablespoons (70 grams) unsalted butter, melted
For the cheesecake filling:
- 32 ounces brick-style cream cheese softened to room temperature
- 1 cup (230 grams) full-fat sour cream room temperature
- 1 cup (200 grams) granulated sugar
- 2 teaspoons pure vanilla extract
- 4 large eggs room temperature
Instructions
To make the graham cracker crust:
- Preheat oven to 325°F (163°C). Combine the crushed graham cracker crumbs and granulated sugar in a medium-sized mixing bowl and stir until well combined. Add the melted butter and mix until all of the crumbs are moistened.
- Scoop the mixture into a 9-inch springform pan and firmly press it down into one even layer. Bake at 325°F (163°C) for 10 minutes, then remove from the oven and set aside to cool slightly while you make the filling.
To make the cheesecake filling:
- Set a large pot of water to boil for the water bath before getting started with the filling.
- In the bowl of a stand mixer fitted with the paddle attachment, or in a large mixing bowl using a handheld mixer, beat the cream cheese on low-medium speed until smooth. Add the sour cream and mix until fully combined, stopping to scrape down the sides of the bowl as needed. Then add the granulated sugar and pure vanilla extract and mix until well combined.
- In a separate small mixing bowl, lightly beat the eggs. Add the beaten eggs to the mixing bowl with the cheesecake filling and mix on low speed until just combined. Use a rubber spatula to turn the filling a few times to make sure everything is fully mixed together. Set aside.
- Wrap the springform pan with the pre-baked graham cracker crust in aluminum foil, then place into a large oven bag. Fold the oven bag down the sides of the springform pan.
- Pour the cheesecake filling into the springform pan and smooth it out into one even layer. Tap the pan on the counter a couple of times to bring any air bubbles to the top, then use a toothpick or skewer to remove any large air bubbles and smooth them out.
- Add the boiling water you started before the filling to a large roasting pan until it is about 1-inch deep. Carefully place the wrapped springform pan into the roasting pan.
- Transfer the roasting pan with the cheesecake to the oven and bake at 325°F (163°C) for 60-65 minutes or until the edges of the cheesecake are set and the center is still slightly jiggly. Turn the oven off, crack the oven door slightly, and allow the cheesecake to cool in the warm oven for 1 hour.
- After the cheesecake has cooled for 1 hour in the oven, remove it from the oven and transfer to a wire rack to cool completely. Once cooled, cover tightly and transfer to the refrigerator to chill for 5-6 hours or overnight. Run a thin knife around the outside of the cheesecake to loosen it from the pan, carefully release the springform pan, then slice into pieces, serve, and enjoy!
Notes
Room temperature ingredients: Before getting started, make sure the cream cheese, sour cream, and eggs are at room temperature.
Graham cracker crumbs: 1 and 1/2 cups of graham cracker crumbs is equal to about 11-12 full-sheets of graham crackers.
Cream cheese: Make sure to use full-fat cream cheese bricks, not the cream cheese spread in a tub.
Store leftover cheesecake in an airtight container in the refrigerator for up to 4 days.
Freezing instructions: This cheesecake will freeze well for up to 3 months. Wrap tightly and store in a large freezer bag or container. Thaw overnight in the refrigerator.
Cuisine: American
Course: Dessert
Author: Danielle Rye
Did you make this recipe? Mention @livewellbakeoften on Instagram or tag #livewellbakeoften.